
Blog, Dressmaking, Guides
Sewing Patterns Shirt Guide for Better-Fit Garments
You've found a shirt pattern with the collar you want and the right sort of sleeves. Then the fabric you bought drapes differently from the picture, the shoulder seems to sit in the wrong place, and the paper size doesn't match the size you usually buy. That's a familiar dressmaking puzzle, and it's why a good shirt depends on more than choosing a pattern by its picture.
Treat the pattern, fit, fabric and intended use as connected decisions. A crisp cotton shirt for regular wear calls for different choices from a loose camp shirt, a fluid blouse or a stretch T-shirt. Start with the garment you want to wear and the fabric that can make it work, then refine the fit with a toile.
Why the Right Shirt Pattern Matters
A sewer chooses a neat button-up pattern for a work shirt, then cuts it in soft, slippery fabric because the colour is just right. The collar won't hold its shape as expected, the front shifts while being stitched, and a fit that seemed straightforward on paper is awkward to judge in a loose silhouette. None of those problems means the sewer chose badly. The project asks the pattern and fabric to do different things.
A shirt pattern is a set of related decisions. Silhouette and ease determine whether the garment sits close to the body or leaves room for movement. Fabric behaviour affects how a collar, cuff and placket hold their shape. Construction details influence what you'll need to sew, while intended use helps decide whether you want a sturdy everyday shirt, a floaty blouse or a casual layer.
It helps to think in shirt families. A button-up often has a structured front opening and collar; a T-shirt relies on a pattern designed for stretch; a blouse may use a softer fabric and more shaping; and a camp shirt often has a relaxed fit with a collar and front facing that still need careful assembly. Change the collar, sleeve or placket and you can change the shirt's character, even when the basic outline stays similar.
Paper patterns have a long place in British home sewing. The Lady's Economical Assistant included full-sized patterns readers could trace in 1808, English shops advertised paper patterns by the 1830s, and Weldon's began distributing and selling patterns through a magazine in 1879, milestones described in this history of sewing patterns. For shirt-makers, repeatable pieces made it possible to cut complex parts, such as sleeves, collars and plackets, consistently.
Start with the relationship: decide what you want the shirt to do and how the fabric will behave. Treat the pattern's printed size as a starting point, not a promise of fit.
Understanding Shirt Pattern Anatomy
Read a shirt pattern as a construction map. Each piece answers a question: what covers the body, how does the neckline finish, where does the sleeve join, and how are the openings closed? Identifying those jobs before cutting makes it easier to spot when a piece is missing or a marking has been overlooked.
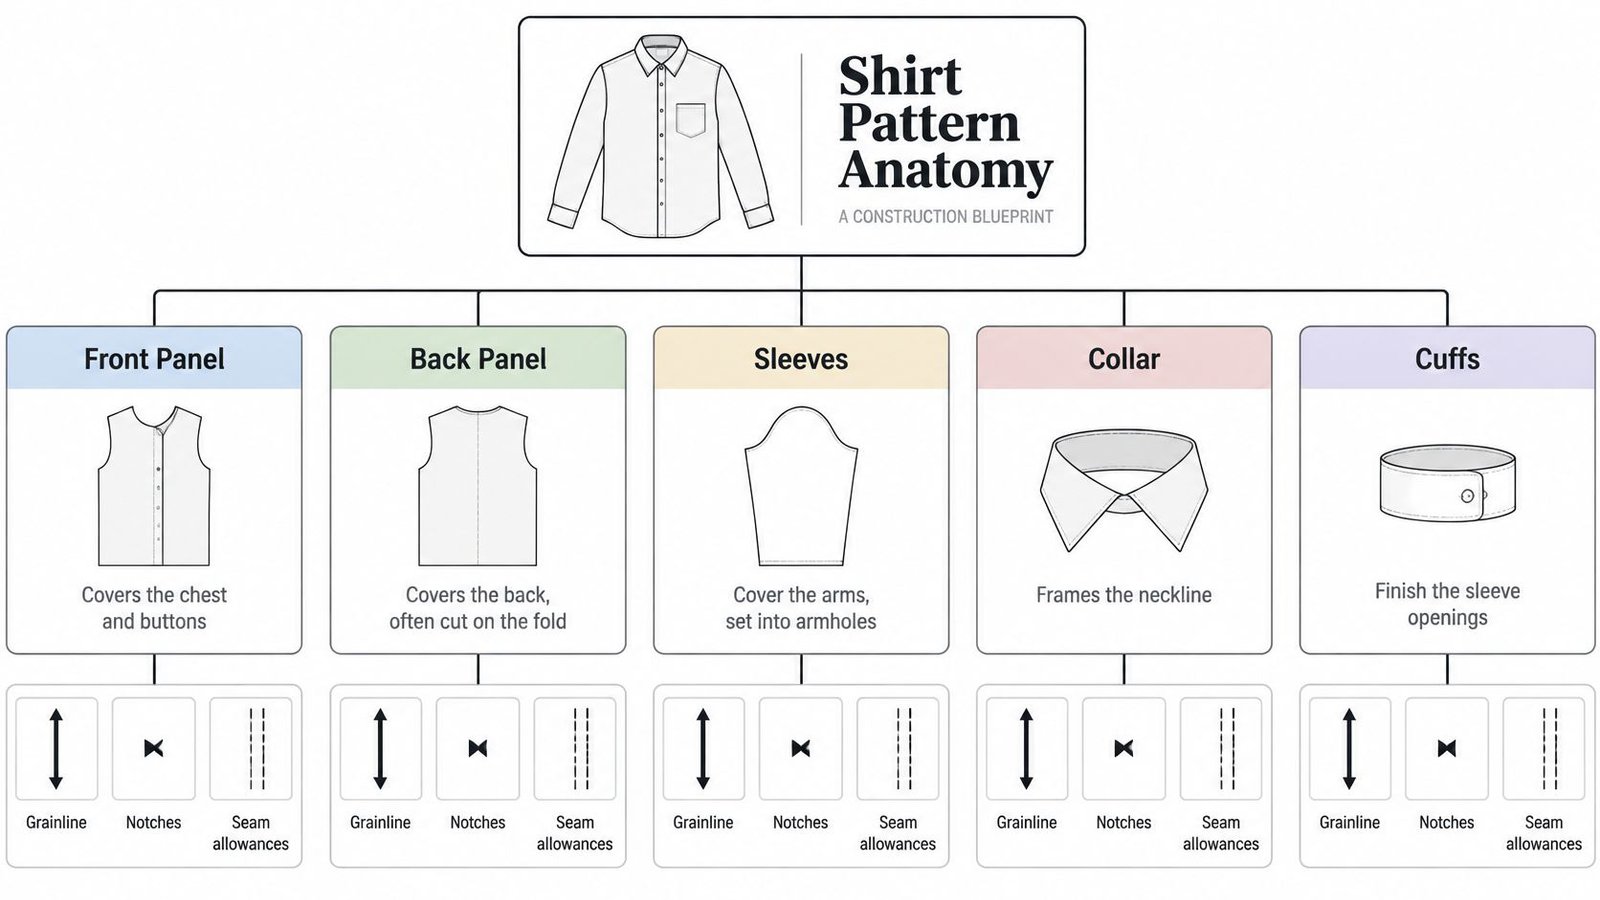
Find the pieces and their markings
The front panels cover the chest and may include the button opening or placket. The back panel covers the back and is often cut on a fold, which means its centre edge sits against a folded fabric edge. Sleeves fit into the armholes; a collar frames the neckline; and cuffs finish the sleeve openings. A yoke, when included, joins sections across the upper back or shoulder area.
Look for the grainline, usually shown as an arrow. It tells you how to align the piece on the fabric. Notches are small marks that help match adjoining pieces, such as the sleeve and armhole. The seam allowance is the fabric between the stitching line and the cut edge, unless the pattern instructions say that it isn't included. A fold line shows where fabric should be folded or pressed, rather than cut as a separate edge.
Trace the size and view you plan to make onto pattern paper, preserving its notches, grainline and other markings. If several sizes share a sheet, you may need to follow one size at the shoulder and another at the waist or hip. Don't assume every section has to be cut to the same size; compare the pattern's finished measurements with the shape you want.
Follow how pieces meet
Before cutting, match the paper pieces at the seams and check that their notches agree. Pinning pieces together at the shoulder or sleeve joins can help you picture how the flat shapes form a garment. Interchangeable collars or sleeves are useful only when the pattern instructions confirm they fit the same neckline or armhole.
The opening at the centre front is a good example of construction changing the whole pattern. Before the 1800s, shirts generally used a simple T-shaped front opening so they could be pulled over the head. The centre-front placket emerged during the 19th century and became a defining feature of contemporary shirts, as the Victoria and Albert Museum's shirt guide explains. That opening isn't just decoration: its pieces and folds need to be prepared accurately for the buttons to sit neatly.
Compare Four Main Shirt Pattern Types
The word “shirt” can describe garments with very different construction needs. A woven button-up, a stretch T-shirt, a soft blouse and a camp shirt may all cover the torso, but they don't ask the fabric or the maker to do the same work.
| Pattern type | Typical character | Fit and ease | Construction focus | Fabric pairing direction |
|---|---|---|---|---|
| Button-up | A classic front opening, often with a collar and cuffs | From neat and close to comfortably relaxed | Placket, collar, sleeve insertion, cuffs and buttonholes | Stable woven cotton, such as poplin, for a crisp everyday shirt |
| T-shirt | A pullover top with a simple neckline and sleeves | Often designed to use stretch for movement and fit | Stretch seams, neckband and tidy hems | Jersey intended for a T-shirt pattern |
| Blouse | A softer shirt-style top, sometimes with shaping or gathers | May skim the body or fall loosely | Darts or gathers, fine seams and neckline finishing | Fluid viscose or a suitable Tencel blend |
| Camp shirt | A relaxed casual shirt, often with a collar and front facing | Usually easy through the body, depending on the design | Collar, facing, pockets and clean front edges | Stable cotton or linen for a more straightforward first version |
A cotton poplin button-up can be a practical regular-wear project if you want a shirt that keeps a crisp outline. Its placket and collar require care, but stable fabric can be easier to control than a fabric that shifts as you sew. The fitting question is whether the pattern gives enough room across the shoulders and upper arms without adding more fullness than you want through the body.
A stretch cotton T-shirt uses a different set of assumptions. A pattern made for jersey may rely on the fabric's stretch, so substituting woven cotton can leave the garment too tight or prevent it from being pulled on comfortably. The neckline also needs finishing suited to stretch, rather than a woven shirt's placket and collar construction.
A viscose blouse can fall softly and show shaping, but fluid fabric may shift under the presser foot and can make small fit differences more noticeable. A camp shirt often looks simple, yet the collar and front facing need accurate pressing and stitching to lie flat. Rather than deciding by a pattern's difficulty label alone, ask which techniques you're ready to practise and which fabric you can handle confidently.
Choose a Pattern for Fit Fabric and Use
Choose the pattern and fabric as a pair, then judge whether the construction fits your experience and the shirt's intended use. A pattern that suits your plans may still need alterations, but it's a sounder starting point than choosing by the envelope image alone.
Ask what the garment needs to do
For regular wear, a crisp poplin shirt can be useful if you want defined collars and cuffs and a fabric that feels structured. If you prefer a fluid blouse, look for a pattern whose instructions and design suit soft woven fabric. For a relaxed summer camp shirt, stable cotton can make cutting and pressing more manageable. A T-shirt should start with a pattern intended for jersey, not a woven button-up pattern modified by guesswork.
Next, picture the finished fit. A close-fitting shirt, a classic shirt with room to move and an oversized layer need different amounts of ease. Ease is the difference between your body measurements and the finished garment measurements. A shirt can be designed to feel comfortable without being oversized, while an intentionally loose style may leave more room through the chest, sleeves and body.
“Easy” doesn't always mean fewer pieces. It can mean that the pattern uses familiar techniques and a fabric that stays where you put it.
Check the details before buying
Look at the collar, cuff, sleeve and front-opening options in the pattern description and instructions. A pattern may offer several views, but that doesn't mean every collar works with every front or every sleeve fits every armhole. Check which variations are designed to work together and whether the instructions explain the version you want to sew.
Think about care and future wear, too. If you want a shirt you can launder and wear often, consider whether the fabric and construction seem suited to that routine. UK-focused beginner guidance commonly points makers towards body charts, grading between sizes and making toiles, but it rarely settles which alteration to tackle first when several measurements interact, a gap reflected in beginner pattern guidance. Choosing a coherent pattern-and-fabric combination makes that fitting work easier to assess.
Measure Size and Alter With a Toile
Pattern sizes don't necessarily match the sizes you buy on the high street. Start with the pattern company's own chart and the finished garment measurements, then compare them with your body and with the fit you want. Measuring the bust alone won't tell you whether a shirt's shoulders, sleeves, back length and overall ease will work.
Record your bust, waist, shoulder width, biceps and back length. Note the finished length you prefer, too, and measure a shirt you already like if it has a similar purpose and silhouette. That gives you a reference for the garment itself, rather than relying on a size label.
Choose a starting size, then test it
The UK government's textile-apparel reference table gives a woven shirt or blouse a 72 cm chest, 27.5 cm collar, 38 cm collar-seam-to-cuff length and 41 cm collar-seam-to-bottom-hem length. It lists a 66 cm chest for a knitted garment, a useful reminder that a woven shirt and a jersey top don't share the same sizing assumptions. Use those reference dimensions as a comparison technique, not as a universal fit target: the government textile-apparel guidance also distinguishes between knitted and woven garments.
Make a low-cost toile from inexpensive fabric with a similar structure to your intended cloth. It doesn't need every button, pocket or finished edge. Include the areas that affect fit, such as the shoulders, sleeves and body, and mark the stitching lines and centre front so you can see whether the garment hangs straight.
Try the toile over the sort of layer you'll wear underneath. Pin excess fabric where the shirt feels too loose, and mark areas that pull, gape or restrict movement. Check the width before changing length; look at the shoulder position before adding details; assess the sleeve head and upper arm before adjusting cuff length.
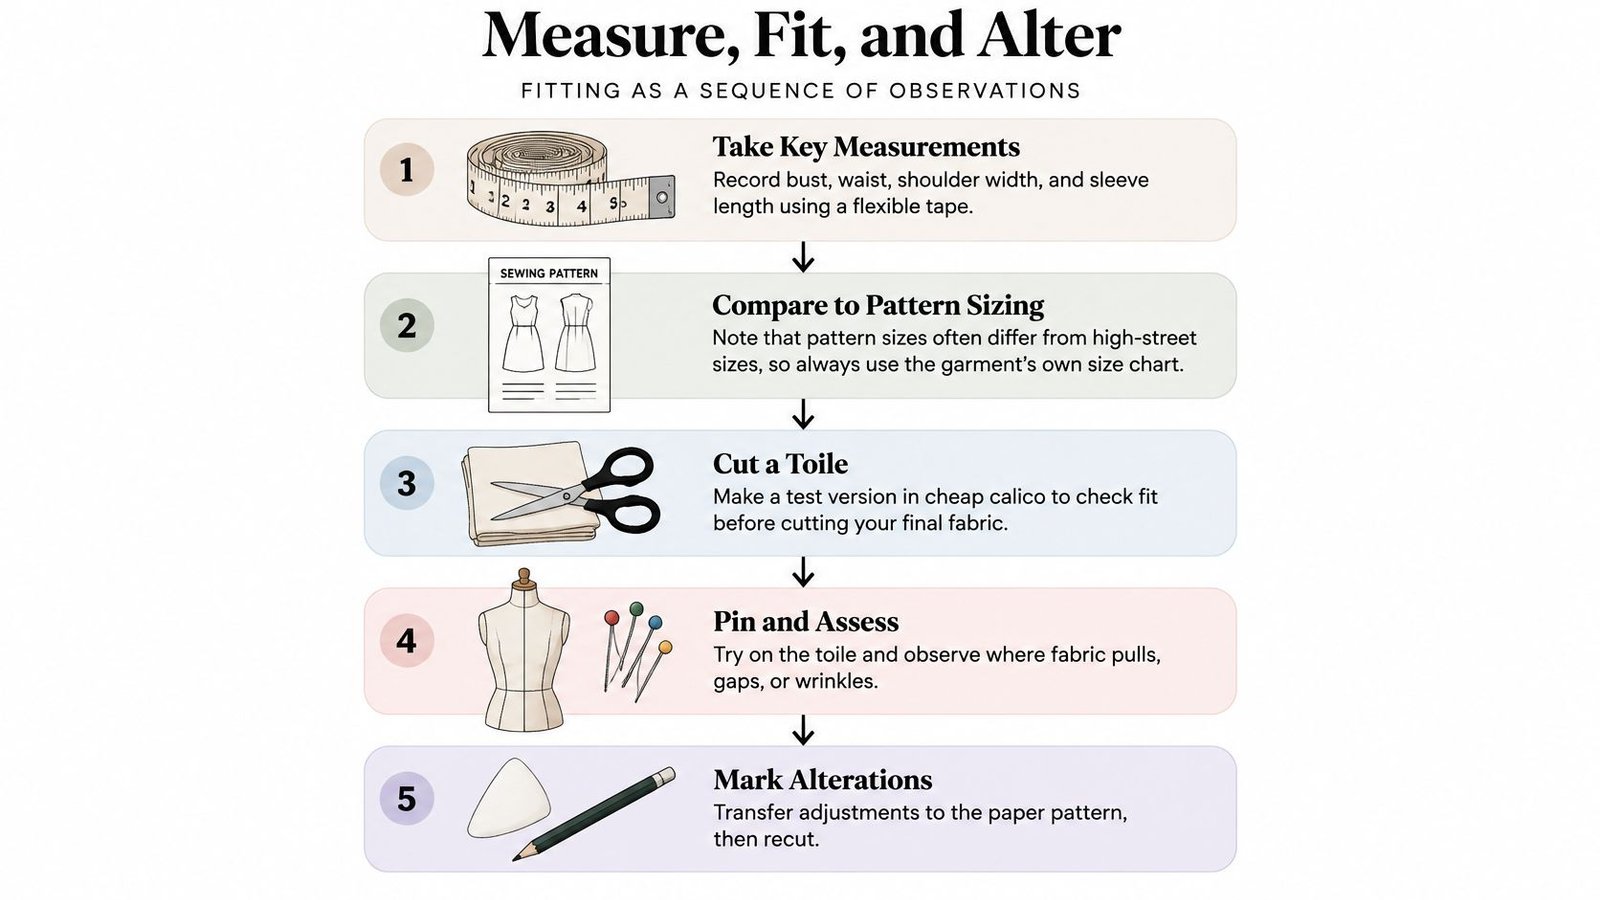
Alter in a useful order
A prominent shoulder may need a change to the shoulder slope or width, but check where the seam sits before redrawing it. If the upper arm feels tight, add room through the sleeve rather than automatically sizing up the whole shirt. For a rounded back that pulls across the shoulder blades, assess whether the back needs more length or width across that area. If your bust and hip measurements point to different pattern sizes, you can blend between sizes along the side seam while keeping the centre front and other joins aligned.
These are starting points, not automatic fixes. An oversized shirt may have intentional shoulder drop, while a fitted design needs a closer reading of the shoulder and armhole. Make one alteration at a time, transfer it to the paper pattern, then test again so you can tell which change helped.
Pair Patterns with the Right Fabric
Fabric gives a shirt its movement, weight and surface. A stable woven cotton can support a crisp shape, while fluid viscose may follow the body more closely and reveal how the garment is shaped. Stretch jersey behaves differently from both, so begin with a pattern intended for the fabric structure you've chosen.
For a button-up, cotton poplin can suit a defined collar and placket. Linen can make a relaxed shirt with a different texture and drape, while denim may create a more substantial garment that needs a pattern and machine setup able to handle its weight. Viscose and Tencel blends can suit a softer blouse, though their movement may make accurate cutting and stitching more demanding. These are directions to test, not fixed rules: cloths within the same broad family can still behave differently.
A T-shirt pattern designed for jersey is usually a more sensible match for stretch fabric than a woven shirt pattern. A woven shirt typically needs wearing ease because the cloth doesn't stretch like jersey; a knitted garment may rely on stretch for movement. Government reference measurements show that difference in the chest dimensions for woven and knitted garments, as described above.
Prepare cloth before you cut
Wash fabric first when appropriate for its care instructions, especially if you're uncertain whether it may change after laundering. If you're using a directional print or checks and stripes, plan how the design will meet at the centre front, pocket, yoke and collar. Those matching choices can affect fabric use, so follow the pattern's layout and your own cloth width to calculate what you need rather than guessing a quantity.
Lay each pattern piece flat and align its grainline parallel to the selvedge. Scottish Qualifications Authority guidance explains that this alignment helps a garment hang correctly and reduces twisting during stitching in its fashion and textiles guidance. Use a ruler or tape measure at several points along the grainline before pinning or weighting the paper; a piece that looks straight at one end can still angle away further down.
Test an unfamiliar cloth on a scrap before cutting the shirt. Check whether it shifts, stretches or marks easily, and how it responds to pressing. If you're comparing a toile with a finished shirt, fasten the garment, smooth it flat and compare corresponding points such as the chest, collar and length rather than relying only on the label.
Sew and Finish the Shirt With Control
Accurate preparation makes the construction stages easier to manage. Once the fabric is ready, lay out the pattern pieces, confirm the grainlines, then cut carefully and transfer the notches, button positions and other markings. Keep left and right pieces organised so you don't accidentally pair mismatched parts.
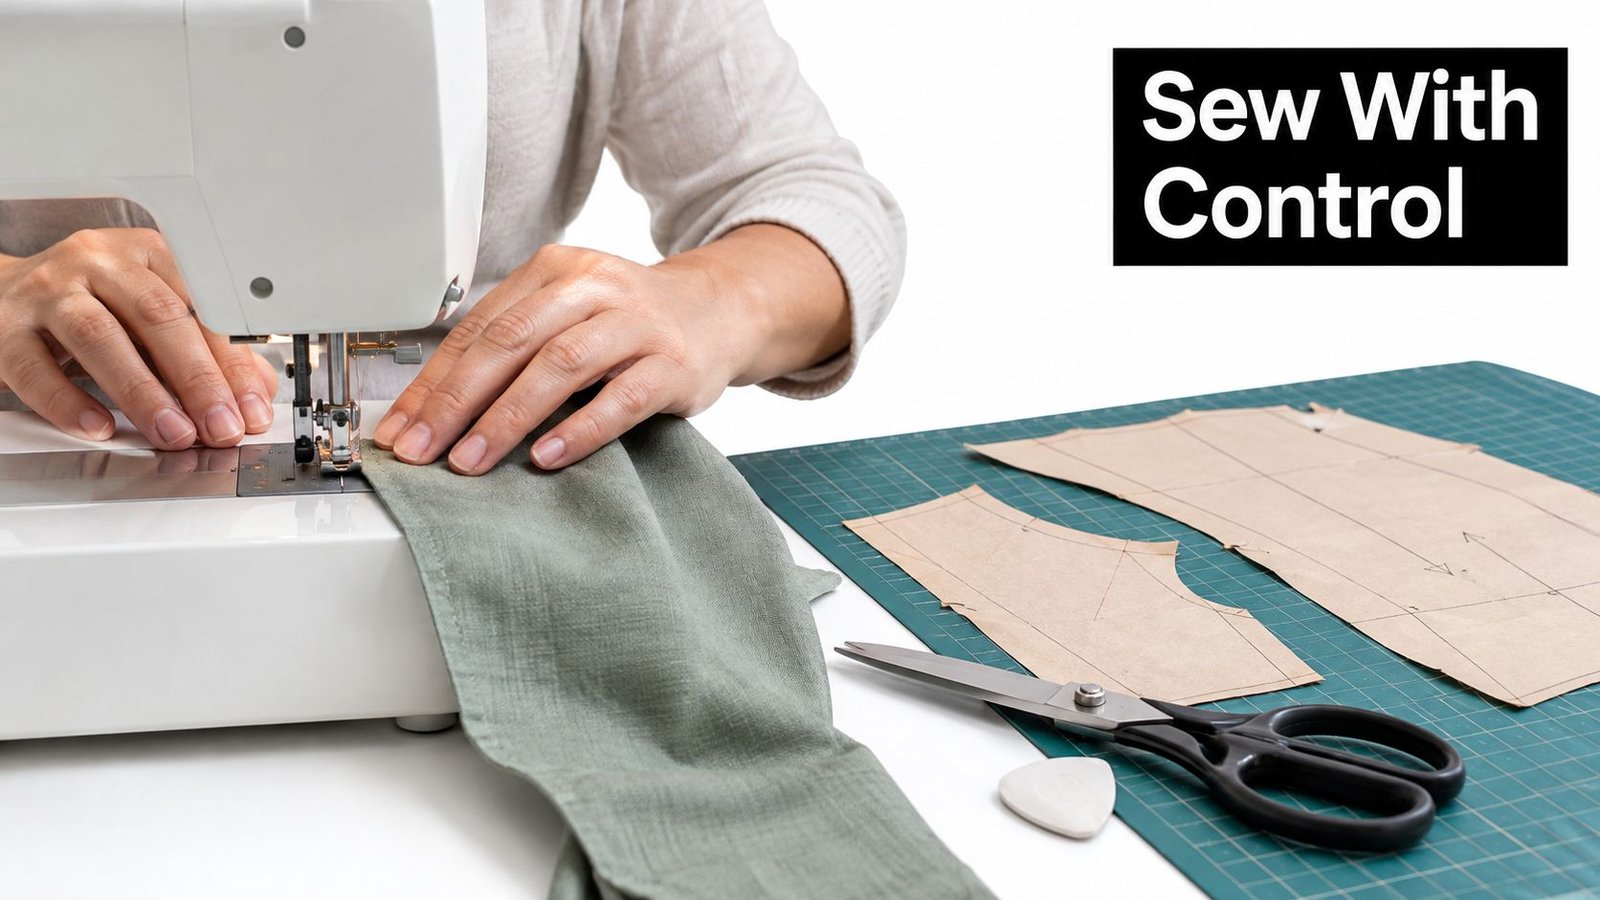
Sew in stages and press as you go
Follow the pattern's assembly order, especially where a yoke or placket changes which seams are accessible. For tricky joins, such as a collar, sleeve head or yoke, cross-pin the matching marks first and add a line of tacking if the fabric wants to shift. Tacking is temporary stitching that lets you check the placement before committing to a permanent seam.
Use the machine's seam-allowance guide to keep stitching consistent, and practise threading, filling the bobbin and adjusting the stitch before beginning. Brief reverse stitching at the start and end of a seam helps secure it. Press each seam as you go, using an iron temperature suited to the fabric. Pressing helps shape folds and keeps seam allowances flat; it's part of construction, not just a final cosmetic step.
UK textile-technology guidance includes cross-pinning, tacking, machine stitching, hemming and pressing among shirt-making skills, along with correct machine threading, bobbin filling, stitch adjustment and safe use in its textile technology assessment guidance.
A collar that wrinkles may have shifted while being attached. Unpick the affected section if needed, align the markings again and press the collar pieces before trying the seam once more. If the hem waves, check that you haven't stretched the fabric while stitching, then press and reassess before shortening or trimming anything.
Watch this demonstration after you've considered how you'll control the fabric and press each stage.
Finish details with the garment in mind
Attach the collar and cuffs according to the pattern instructions, then check that the collar points sit evenly and the sleeve openings feel comfortable. Make a test buttonhole on a scrap of the same fabric, including any interfacing you've used. Check the button size against the opening before sewing the buttonholes and placing the buttons.
Finish raw edges as the pattern directs, and fold the hem evenly before stitching. If a seam looks wavy, stop and inspect the fabric feed and stitching rather than trying to flatten it by pressing alone. A final press can sharpen the collar, settle seam allowances and tidy the hem, but it can't compensate for an uneven seam.
Test Your Setup Before Full Construction
A small test seam can save you from discovering a machine problem halfway through a collar or placket. Use scraps of your actual fabric, including any layers or interfacing that will be sewn together. Try different stitch lengths, thread tensions and presser-foot settings where your machine allows, then compare the results rather than assuming one setting will suit every cloth.
Inspect both sides. Look for skipped stitches, puckering, thread breakage, seam slippage and an unbalanced stitch. If the fabric gathers, the needle thread or presser-foot pressure may need attention; if stitches skip, check the needle and threading before moving on. Make one adjustment at a time so you can see what changes.
Treat the test as a practical check
Lightweight viscose may shift or pucker, a slippery blend may feed unevenly, dense denim may need a suitable needle and machine setup, and stretch jersey may need a stitch that can move with the fabric. Your scrap test helps you choose settings for the cloth in front of you, not for an imaginary average fabric.
Manchester Metropolitan University research assessed fabric sewability through mechanical and physical properties, using a lockstitch machine to test settings that could help identify suitable conditions for different materials in its research on fabric sewability. For home sewing, the useful lesson is simple: test the actual fabric and inspect the seam before cutting or assembling the full garment.
Before you finish, check that the pattern suits the fabric, the toile gives the intended ease, and the grainline is aligned. Confirm that the machine makes an even seam, the collar and placket sit neatly, the hem is level and the buttons work comfortably. Consider whether the fabric and construction will be practical to care for and repair, too. A well-planned shirt isn't only one that looks right on the table; it's one you'll want to wear and can maintain.
For your next shirt, browse More Sewing for fabrics, haberdashery, sewing kits and practical project supplies, including cottons, viscose and Tencel blends, jerseys and denims. Order fabric swatches to compare texture and drape, or visit the Worthing shop for sewing machine servicing and repairs as you plan a garment you'll wear and care for.
