
Blog, Dressmaking
Velvet Black Ribbon: A Practical Guide for Sewing Projects
You're halfway through a dress or hat project when you reach for black trim, then spot three reels that look almost identical. One feels plush, one has a firmer backing, and one shines under the light. Choosing by colour alone can leave you with ribbon that slips on a neckline, crushes under the iron, or transfers dye onto pale cloth.
Velvet black ribbon is easier to choose when you look beyond its colour. Check the pile, fibre and backing, then match the ribbon to its job. Test an offcut before sewing, and handle the pile in a way that keeps it from flattening.
Understanding Velvet Black Ribbon and Why It Matters
Velvet describes a pile construction, not a fibre. Its raised surface gives the ribbon a soft, light-absorbing look, but the backing and pile determine how it bends, holds a crease and responds to pressure. A smooth satin ribbon reflects light and can slide against fabric; grosgrain's crosswise ribs give it a firmer, more defined edge. Velvet sits differently from both: it can add depth and softness, but pressure can flatten the pile or leave a mark.
If you're choosing among reels mid-project, start by touching the surface and checking the reverse. A short, close pile usually lies neatly as a narrow neckline accent. A deeper pile makes a fuller bow, but can feel bulky at a small seam or turn. Gently curve a short length around your fingers. If it springs back without a hard crease, it may suit a soft bow; if it holds a sharp fold, it can work for structured trim, though a pressed crease may be difficult to remove.
The distinction matters in historically inspired sewing, too. Victorian mourning dress followed staged etiquette, rather than treating every black fabric as interchangeable. The Victoria and Albert Museum records that silk and velvet were considered too shiny for the earliest mourning stage, but permitted in the final stage under court rules. A restrained black velvet band on a late-Victorian-inspired cuff or bonnet is therefore more historically specific than using it as an all-purpose mourning trim. For another example of colour carrying meaning in formal dress, Grad Store's guide to what PhD hood colours mean explains how academic regalia uses colour to communicate distinctions.
Practical rule: Decide what the ribbon must do before deciding how plush it should look. A trim that sits flat on a collar may be the wrong choice for a large bow.
Try the ribbon against the actual garment fabric, not just on the reel. A black velvet ribbon can look rich against matte cotton or crepe, while a highly reflective backing or pronounced pile may feel too heavy on a delicate blouse. The best choice is the one that fits the project's structure as well as its appearance.
Choosing the Right Fibre, Pile, and Width
Read the fibre declaration before you buy. Velvet is not a fibre name, and a listing that says only “velvet ribbon” doesn't tell you whether the pile and backing are silk, cotton, polyester, viscose or a blend. Fibre affects how the ribbon responds to heat, moisture and wear. A polyester pile may tolerate handling differently from a natural-fibre backing; a blend can combine useful properties, but it still needs testing before pressing or washing.
Look at the back as carefully as the front. If the pile and backing differ, their behaviour can differ too: one may resist fraying while the other stretches or creases. Under UK textile-labelling rules, ribbons are within scope, and fibre composition must be stated in English using permitted fibre names and weight percentages in descending order. Velvet-like textiles have additional provisions, so don't infer fibre content from the surface or assume that a label saying “velvet” describes the whole construction.
Match the dimensions to the job
Pile height and width work together. A short pile is usually easier to handle in narrow garment trim, while deep pile gives a fuller effect in bows and millinery. Wider ribbon can cover more surface, but it may also add bulk at a seam or feel stiff where the garment needs to move.
| Width | Best fibre choice | Typical project |
|---|---|---|
| 6 mm picot | A stable, fine construction suited to the garment fabric | Narrow accent on a collar or small accessory |
| Narrow trim | A low-profile pile with a backing that lies flat | Neckline, cuff or bonnet detail |
| Medium width | A supple construction that folds without a hard crease | Hair bow, bag detail or hat band |
| 50 mm sash | A substantial ribbon with a backing that supports its width | Statement bow or decorative sash |
Treat the table as a starting point, not a substitute for a sample. A wide ribbon with a deep pile may overwhelm a small collar, while a narrower ribbon can look more refined when paired with lace or matte fabric. If you're comparing formalwear trim, a guide to how to choose choir stoles offers useful context on matching a textile accessory to the garment it accompanies.
Before ordering, check the stated composition, backing, width and care information. Fibre disclosure tells you what the material contains; it doesn't certify performance or promise that the ribbon is washable. If those details aren't clear, ask the seller or order a sample before committing to a full length.
Sewing Velvet Black Ribbon Into Garments and Trims
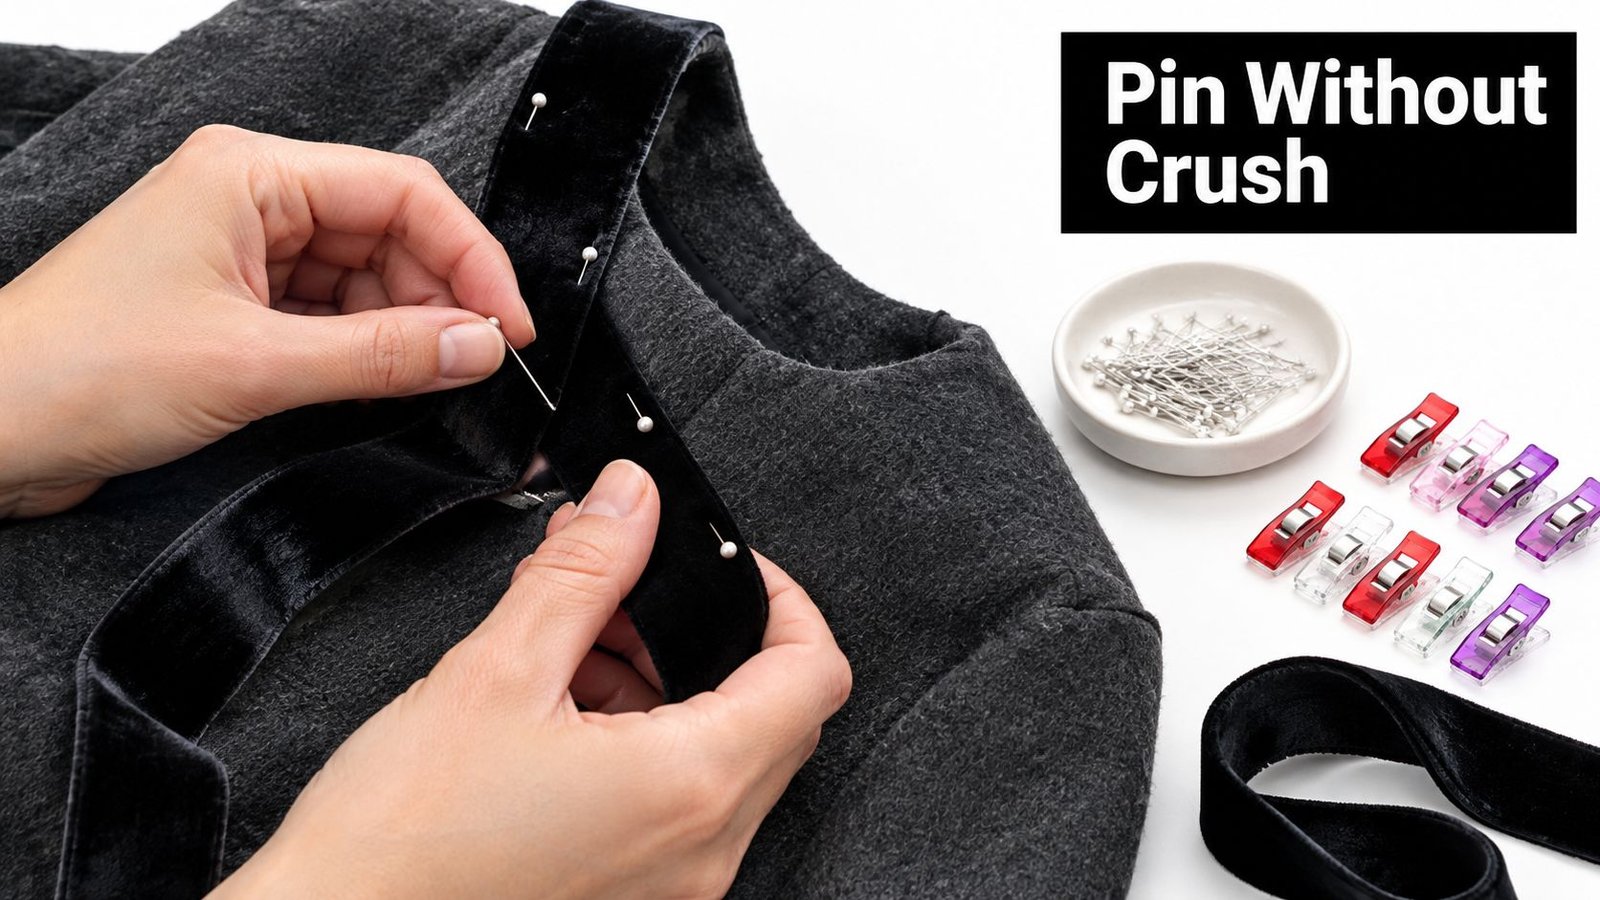
Velvet pile shifts under pressure, so use fine silk pins or Wonder Clips rather than driving a thick pin through the centre of a visible section. Place pins within the seam allowance where possible. For a V-neckline binding, pin the ribbon at short intervals around the curve, checking that the pile faces consistently and the edge doesn't creep away from the garment.
Cut with sharp dressmaking shears in one clean pass. Repeated snipping can leave an uneven edge or disturb the pile. If the ribbon has a direction to its nap, keep all pieces facing the same way. That's especially noticeable on a pair of cuffs or two collar points, where opposite pile directions can make the black appear to differ in shade.
A walking foot helps feed the garment and ribbon evenly. If you don't have one, place a strip of tissue paper over the pile and stitch through it, then tear the tissue away gently. Use a stitch length that secures the trim without perforating it unnecessarily, and test it on an offcut first. Polyester thread is a practical choice for a strong seam; cotton thread gives a softer, more matte look when the stitching might show.
Make the placement work
For a fitted bodice, a waist tie should be anchored securely at the side seams rather than attached only at the centre back. On a cuff, keep the seam join at the underarm where it's less visible. A narrow velvet edge on a collar can frame the shape without making it feel bulky, while a self-fabric bow benefits from a ribbon that folds smoothly and doesn't retain a hard crease.
To finish a raw end, fold it under and stitch it down for a garment that will be handled or laundered according to its care requirements. A tiny dab of fabric glue can hold an end on a non-structural piece, such as a decorative bow on a keepsake, but it's not a substitute for stitching on a waist tie or cuff. Avoid applying glue where it may seep through the pile and form a shiny, stiff patch.
The video below provides another visual reference for handling ribbon during a sewing project.
When easing velvet around a curve, work in small sections and distribute the fullness rather than stretching the ribbon. Stitch slowly, pause to smooth the next section, and check the reverse before you reach the end. A rippled neckline is usually harder to fix than a seam that took a little longer to sew.
Styling and Placement Ideas Beyond the Garment
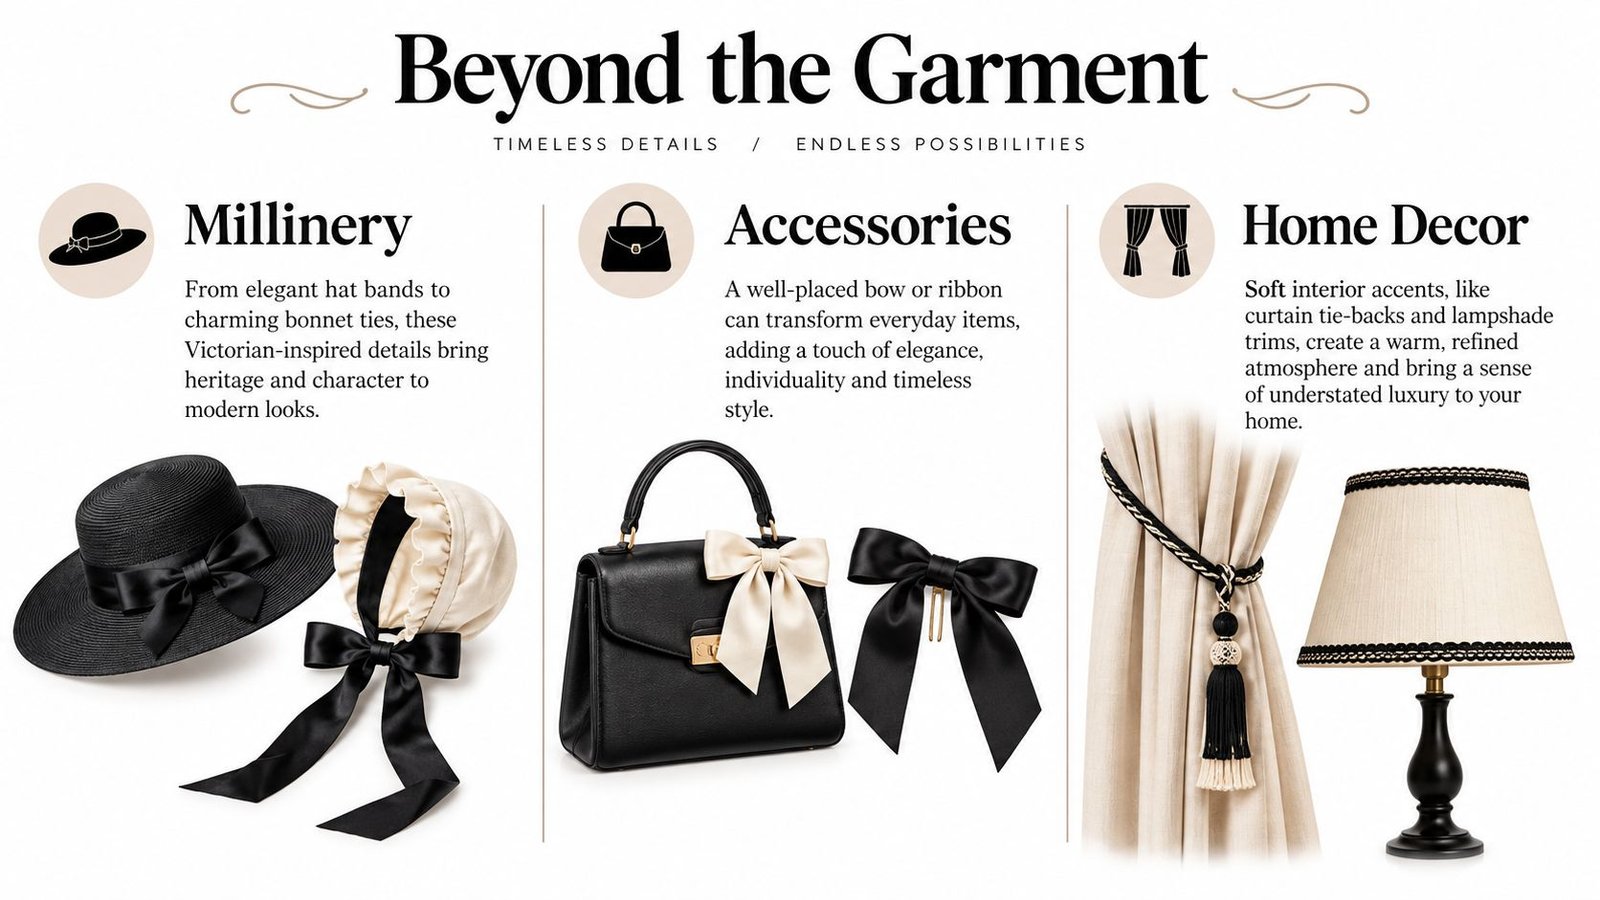
On a hat, velvet black ribbon can define the crown without adding a hard, glossy line. A narrow band around a felt hat reads polished; a bonnet tie can frame the face, but should be soft enough to knot without leaving a permanent crease. For a Victorian-inspired collar, pair it with matte black cotton or crepe, then add restrained lace or jet beads if the design calls for a richer, period-influenced finish.
A wider ribbon is tempting for a dramatic bow, yet a narrow band often looks more elegant on a small accessory because it doesn't swallow the shape. On a handbag, use a short length as a removable bow rather than a load-bearing handle: velvet can crush where it's repeatedly gripped, and its pile isn't a substitute for a sturdy strap. A hair bow benefits from a backing that holds its shape, while a watch strap needs a smooth, durable construction that can tolerate regular contact. Don't choose velvet for a high-friction job because the colour and texture suit the design.
Use texture, not just contrast
For gift wrapping or stationery, tie a narrow piece around a keepsake box or use it as a removable journal closure. The soft surface provides contrast against uncoated paper, and a small bow can be untied without damaging the package. Victorian court mourning rules also extended to stationery: black borders appeared on cards and correspondence, and decorative ribbons used with stationery were required to be black, as documented by the London Museum's collection entry for court mourning stationery.
At home, a velvet ribbon can dress a wreath or provide a soft accent on a lampshade trim, provided it's kept away from heat and isn't asked to bear weight. It may be the wrong choice for a curtain tie-back that's pulled tight every day, where friction and repeated tension can flatten the pile. For formal regalia, a black honour cord is a different kind of accessory, and Graduation Attire's black honor cord gives a relevant example of black being used in a structured ceremonial setting.
Testing Colour Fastness Before You Commit
Deep black dye can transfer onto pale fabric even when a reel looks even and well finished. Test an offcut before using velvet black ribbon beside cotton lawn, bridalwear, skin-contact trim or a light-coloured lining. A quick look at the surface can't tell you how the dye will behave under rubbing, moisture or perspiration.
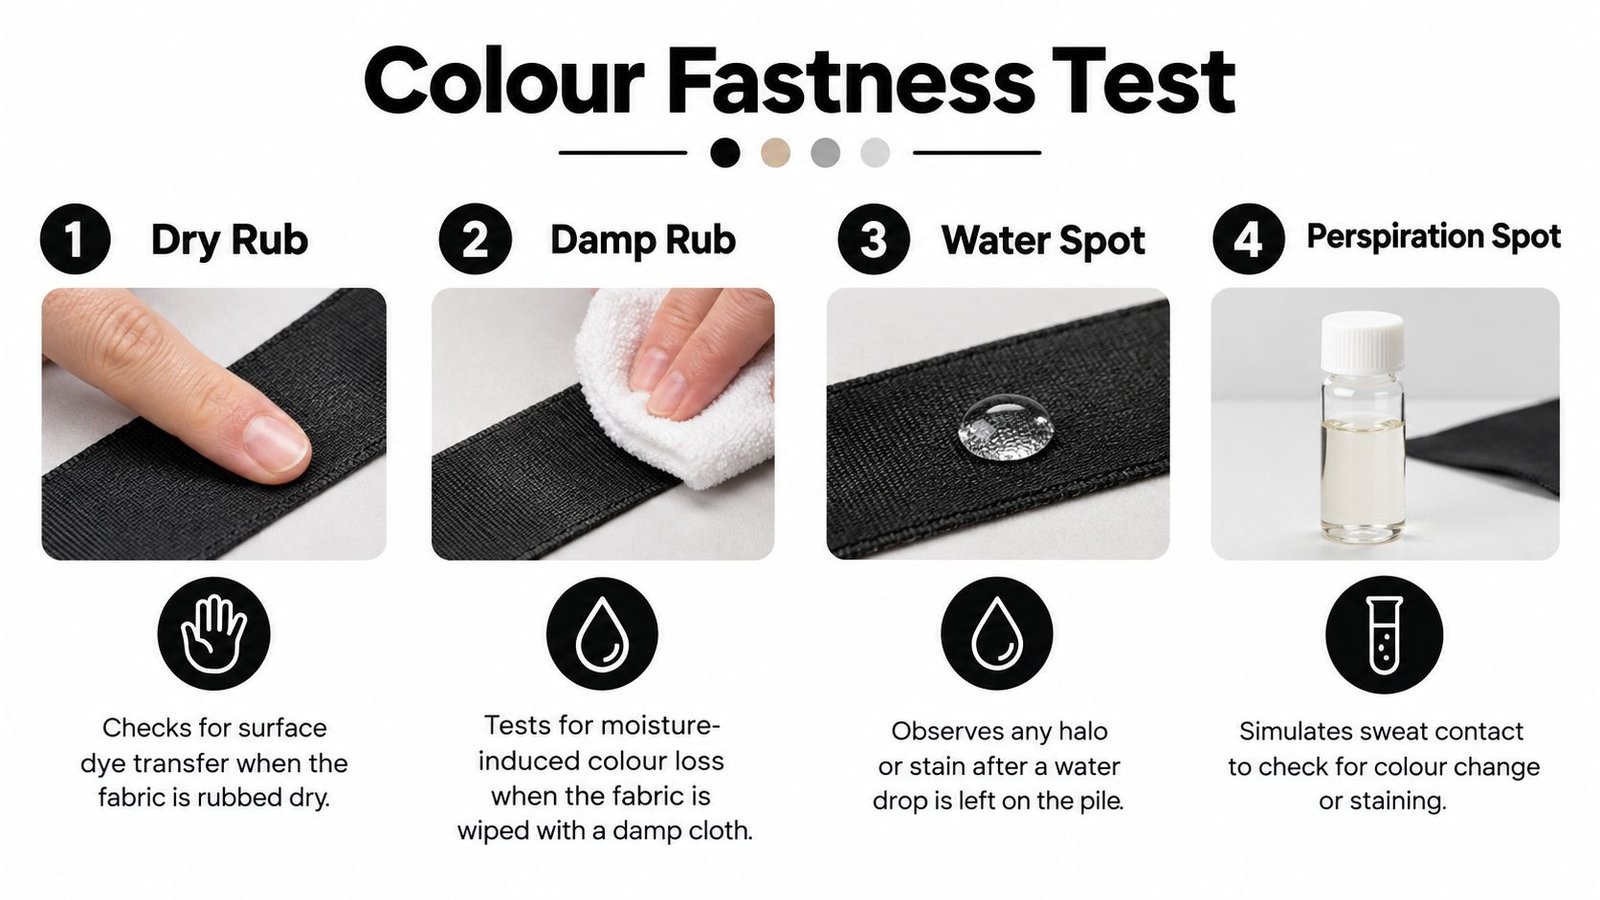
Start with a representative offcut from the reel or dye lot. For a simple workshop check, place it against a clean, standard adjacent white textile and rub under dry conditions. Repeat with the white textile dampened. The dry check is useful for a ribbon layered against pale cotton; the damp check matters more where the ribbon will touch skin, such as a hat band or neck tie.
Next, expose separate samples to water and perspiration simulant, then check both for shade change and staining on the white textile. This helps assess risks for summer garments and other pieces that may encounter sweat. Don't test the only usable length, and don't assume a result from one reel applies to another batch.
Use recognised methods for a more formal check
SATRA identifies EN ISO 105-X12:2016 for rubbing, EN ISO 105-E01:2013 for water and EN ISO 105-E04:2013 for perspiration testing. Each method assesses colour change and staining, with results compared using the Grey Scale. For controlled quality checks, use the relevant method rather than treating a casual rub test as a formal rating.
For a practical decision, compare the tested white cloth and ribbon against the Grey Scale and record whether there's no visible staining, slight staining or clear transfer. Also inspect the pile for a water halo or a changed shade. Approve the ribbon only if its result suits the project: a slight mark may be unacceptable beside a white bridal bodice, even if it's less noticeable on a dark hat.
Don't rely on appearance alone. Fibre, construction and dyestuff application affect fastness, so performance can vary between batches. A single dry-rub check won't reveal every risk.
Caring For, Pressing, and Reusing Velvet Black Ribbon
The pile's main vulnerabilities are crushing, moisture and heat. Brush away loose dust with a soft clothes brush, following the direction of the pile rather than scrubbing across it. If you find a small mark, test cool water on an offcut first, then blot the spot with a lint-free cloth. Don't soak the ribbon or rub it hard: water and friction can leave the pile lying in a different direction.
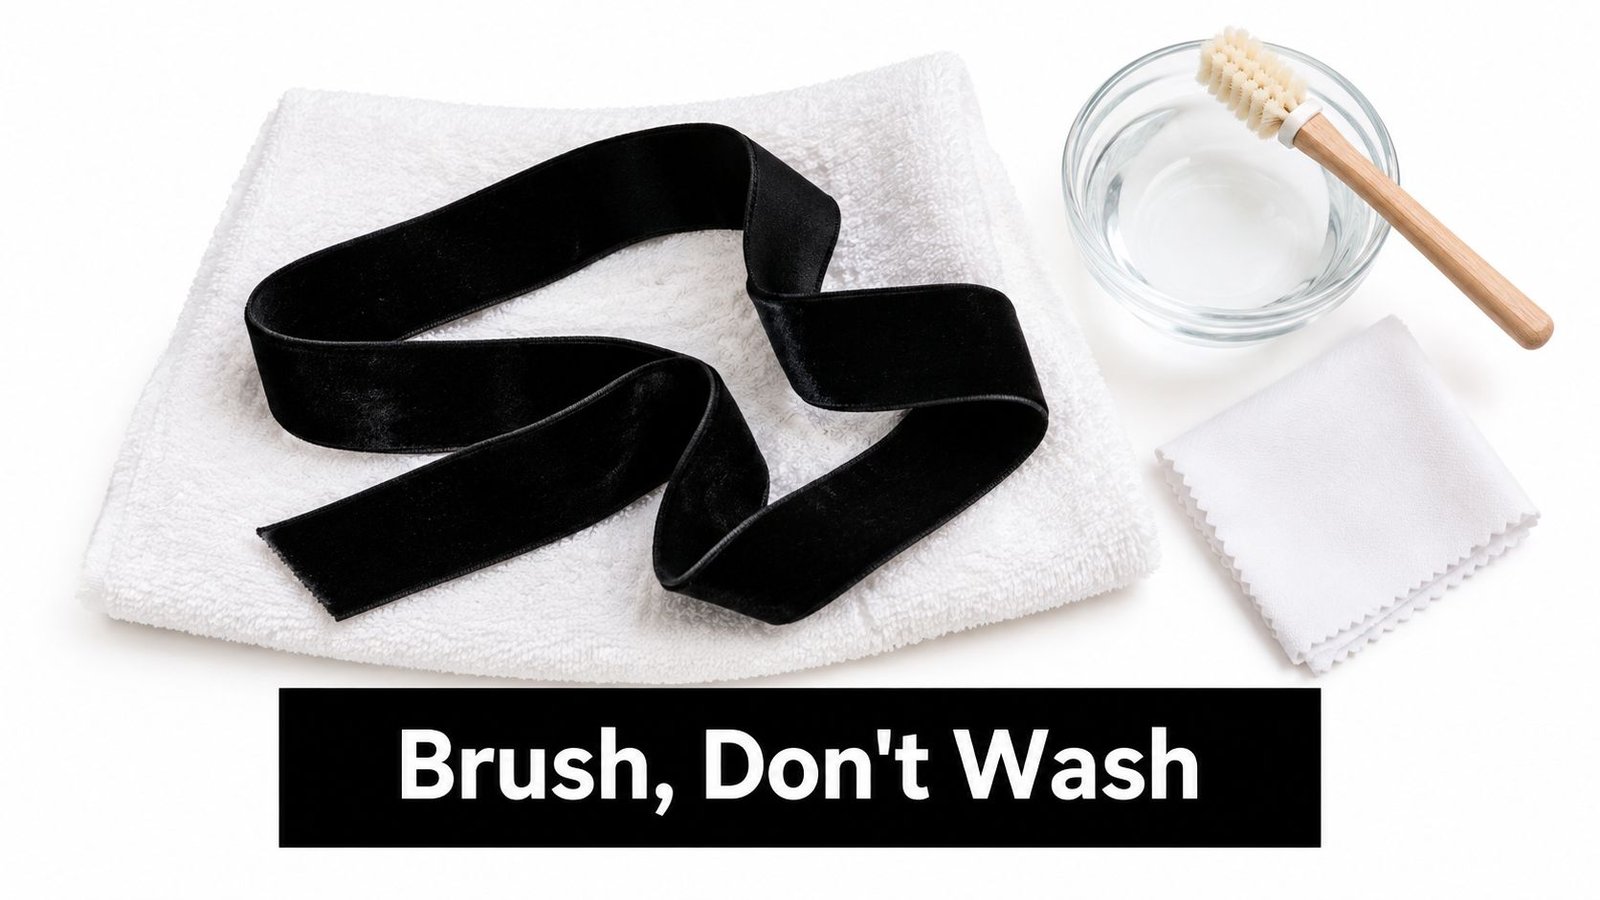
Use this decision rule before cleaning: if the ribbon only has loose dust, brush it; if the mark is local, test spot-cleaning on an offcut; if it needs a full wash, check that the fibre and backing permit it before proceeding. Museum textile guidance advises against washing collection textiles and recommends stable relative humidity between 45% and 65%; this is a useful reminder of how sensitive pile fabrics can be to moisture and handling, not a universal home-care specification for every ribbon.
Press without flattening the pile
Avoid pressing directly with a hot iron. If the ribbon needs shaping, test a scrap, use low heat and a press cloth, and avoid dragging the iron. A needle board can support the pile while you press the reverse; use steam cautiously because moisture and pressure together can leave marks. For a bow or seam that only needs settling, finger-press first and keep the iron away unless the material's care information supports it.
Store long lengths rolled around a card or tube, not folded sharply beneath other supplies. Keep the roll away from direct sunlight to limit fading, and avoid storing it where heavy items press on the surface. If the ribbon has been sewn into a worn garment, remove it carefully, replace only the damaged section where practical, and save clean offcuts for visible mending, label ties, stacked bows or bag details. Repair and reuse keeps useful trim in circulation instead of treating every worn garment as disposable.
Your Velvet Black Ribbon Checklist and Next Steps
Before cutting into the project fabric, save this checklist:
- Choose by construction: Check fibre, backing, pile and width, then match them to the garment or accessory.
- Test the colour: Use an offcut for dry and damp rubbing, then check water or perspiration exposure where the placement calls for it.
- Protect the pile: Pin within the seam allowance, cut cleanly and use a walking foot or tissue paper to control feeding.
- Place it purposefully: Use velvet where its softness adds value, not where constant friction or tension will crush it.
- Store it rolled: Keep the pile clear of pressure and direct sunlight.
This week, order a sample card or ask for a swatch if the fibre and backing aren't clear from the listing. Then audit your ribbon stash: unroll any velvet lengths stored under weight, check for flattened folds, and set aside an offcut for a colour-transfer test before your next pale-fabric project.
For velvet ribbon projects, More Sewing offers haberdashery, fabric sample swatches and sewing guidance alongside fabrics and ready-to-sew kits. Visit More Sewing to browse supplies for your next garment, accessory or repair.
