
Blog, Dressmaking, Guides
Working with Ostrich Feather Trim: A Practical Guide
You've finished the shawl, pinned up the party dress or found the perfect felt hat, but it still needs something. Ostrich feather trim looks like the answer until you start wondering how to hide the tape, whether the black dye will mark your lining, and what the seller means by ethically sourced.
Why Ostrich Feather Trim Deserves a Considered Approach
Ostrich feather trim is a construction material, not just a finishing flourish. Before buying, decide where its supporting base will sit, which way the feathers should fall and how you'll clean the finished piece. A dramatic stage collar and a soft bridal neckline need different foundations, even when the trim looks similar in a product photograph.
Start with the buying decision. Ask whether the seller can identify the material, explain its treatment and provide meaningful sourcing information. If those answers are missing, don't let a lovely colour persuade you to overlook them.
The fitting stage is where you can judge the feather line against the whole garment.
Think beyond the fluffy edge
Britain has a substantial history of processing this material. Ostrich feathers became a major fashion and manufacturing input in the late nineteenth and early twentieth centuries, with London handling imports largely from British-controlled South Africa; in 1913, ostrich feathers accounted for about £2,500,000 of total British feather imports worth £3,529,000, roughly 71%, according to the Victoria and Albert Museum's feather-trade account.
That history involved sorting, dyeing and making accessories, not merely attaching raw plumage to clothing. Take the same considered approach at home: choose the format, assess the usable material, prepare a supported attachment and test the finish.
Practical rule: Judge the base as carefully as the feathers. It's the part you'll sew, conceal and rely on during wear.
For a neckline, pin the trim onto the actual garment before committing. Check it while sitting, turning and moving your arms, rather than judging only its appearance on a hanger.
Choosing the Right Form of Trim for Your Project
Buy by construction and intended use, not fluffiness alone. Ask for a close photograph of the reverse, because an attractive feather face can conceal a bulky cord, uneven tape or an attachment line that won't suit your garment.
For shopping purposes, distinguish a rounded boa from a directional fringe. A boa can give a collar volume, whereas fringe mounted on tape offers a clearer sewing line for a hem. Loose plumes give you greater control over direction, but you'll have to build their support yourself.
Matching ostrich trim formats to common UK sewing projects
| Trim format | Best for | Watch-outs |
|---|---|---|
| Strung boa | Full collars, cuffs and detachable wraps | Check bulk at joins and how the central construction can be secured |
| Fringe pre-mounted on tape | Necklines, garment hems and shawl edges | Make sure the tape can be hidden without shortening the visible feathers |
| Loose plumes | Hats, fascinators and theatrical headpieces | Allow time for grading, pairing and mounting |
| Curled feather strands | Decorative shawl borders and costume accents | Check curl consistency and the seller's care instructions |
| Padded marabou-style pieces | Rounded decorative edging | Treat the description as an appearance, not proof of species or composition |
Check the sample against the fabric
Compare barb density, plume length, shaft alignment, colour and base construction across the sample, not just at its fullest point. Hold it against contrasting paper to reveal sparse sections, then drape it over the intended fabric to assess the combined weight.
For a cream evening wrap, favour a sample whose supporting tape disappears into the edge treatment. For a stage cuff, a fuller construction may be useful, provided it doesn't obstruct the hand or catch on fastenings.
When planning formal or ceremonial clothing, Gradshop's guide to materials used in academic gowns offers a separate reference for considering the underlying garment fabric. It isn't a feather specification, but it's useful context when the foundation matters as much as the decoration.
Don't assume that doubling the trim will improve it. First fold a sample back on itself and assess the extra bulk, movement and visibility of the base.
Receiving, Grading and Storing Trim Safely
Keep a new delivery separate from your fabric stash until you've checked its paperwork and condition. Clean-looking isn't the same as documented treatment, and a quick shake over the cutting table isn't an acceptance procedure.
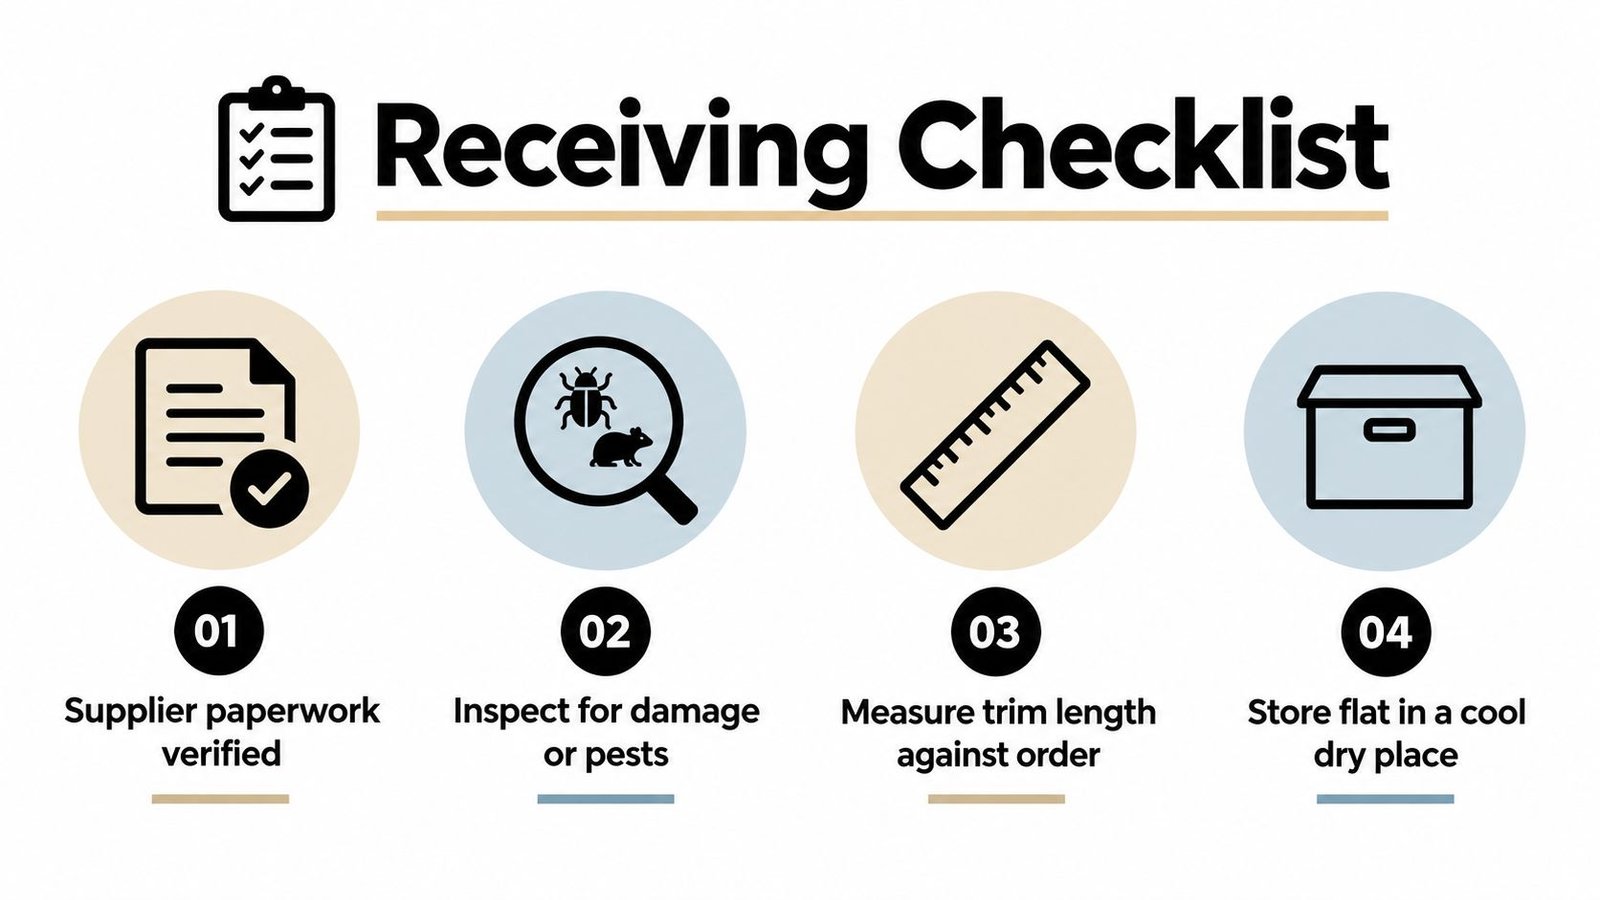
Use this receiving checklist before cutting or distributing the trim.
Check treatment before appearance
The UK statutory feather-treatment text specifies restrictions on untreated feather imports and treatment routes including steam for 30 minutes, machine washing followed by 48°C heat treatment for at least two weeks, 20 kGy irradiation, or 74°C heat treatment for at least 30 minutes. Treat these as supplier-processing requirements, not instructions for making an undocumented parcel acceptable in your kitchen; confirm current requirements with the relevant authority before importing.
- Verify the paperwork: Request treatment confirmation, establishment details, permitted Category 3 material confirmation where applicable, and a batch reference.
- Inspect in isolation: Look for insects, organic residue, dampness, broken quills and suspicious odour. Stop handling suspect stock and contact the supplier.
- Check the order: Compare the delivered colour, construction and usable length with the invoice.
- Keep records together: File the supplier declaration, invoice, batch identification and any import documents under the same stock reference.
Grade before cutting
Lay accepted trim on a clean surface and group sections by feather length, density, colour, curvature and shaft strength. For a matching pair of cuffs, allocate both lengths together rather than using the fullest section first and discovering that the remainder looks noticeably thinner.
Record the visible base width and any sparse or damaged areas. Measure usable trim after excluding unsuitable sections, not merely the length delivered.
Store only completely dry material. For received stock, use clean, sealed protective packaging; avoid trapping residual moisture inside it. Support long lengths flat or loosely rolled around a broad former, without folding the quills, and keep the identifying label with every divided piece.
Preparing and Attaching Ostrich Feather Trim
Sew the supporting base, not the delicate feather fibres. Prepare a sacrificial sample using the same fabric, backing, thread and attachment method as the garment, then assess it before working on the finished piece.
Use the application illustration as a construction overview, with an important heat precaution.
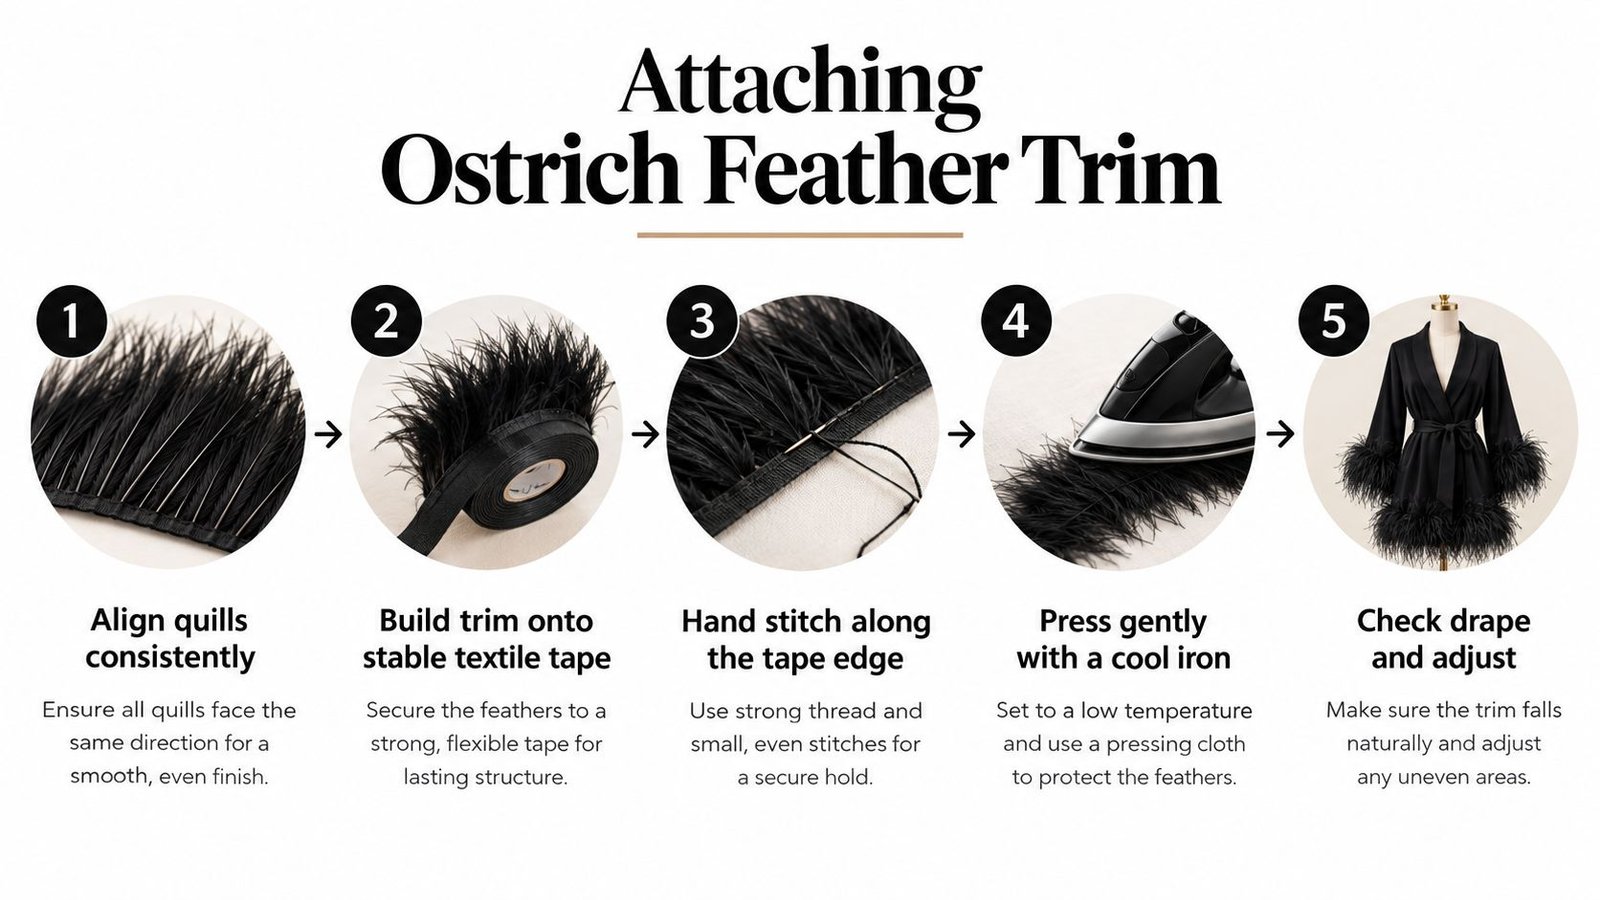
The pressing symbol should not be read as permission to iron the feathers. Press the garment foundation before attachment; any later heat treatment needs supplier approval and a successful offcut test.
Build support before sewing
UK trade descriptions recognise sorting, stringing, washing, dyeing, curling, finishing, sewing, twisting and mounting as feather-working processes. A concrete example of structural assembly appears in the University of Cambridge's account of historical feather dress: a headdress used 32 long ostrich feathers sewn into 16 plumes, with gold spangles individually stitched to their spines.
For loose feathers, take the useful principle rather than copying the entire object. Align the quills, arrange balanced bundles and secure their stems onto supporting tape before attaching that tape to clothing.
- Test the assembly: Check shedding, pull-out, seam slippage, dye transfer, brushing direction and response to any proposed steaming.
- Keep fibres clear: Use loose temporary tacking to hold the feathers away from the stitch line. Remove it carefully afterwards.
- Anchor stress points: Reinforce the base at ends, joins and corners without repeatedly piercing a brittle shaft.
Hand sewing a shawl collar
Finish and press the collar first, then tack the trim tape beneath its edge with the feathers falling outwards. Use small fell stitches through the tape and supported collar layer, keeping the stitches hidden from the face.
Turn the tape ends under where its construction allows, and secure them separately. A loose end shouldn't depend on the main sewing line alone.
Machining fringe onto jersey
Check whether the hem must stretch to pass over the wearer. If the trim base won't accommodate that movement, change the placement or make the decoration detachable rather than forcing an incompatible edge.
On a suitable stable hem, use a ballpoint needle, test the stitch on scraps and feed without stretching the jersey. Keep the feathers out from under the presser foot.
For another visual reference while planning the application, the following video can sit alongside your sample work.
For costume-only decoration, test a flexible textile adhesive on scraps before using it. Glue-only attachment sacrifices easy removal; a small amount used for positioning plus stitches through the support is a more repairable option.
Project Ideas That Show Off the Trim
Choose a project that gives you access to the attachment line. A beautifully concealed base is no help if you have to dismantle the lining whenever a section needs attention.
These accessories show different ways to balance a soft feather edge with a defined foundation.
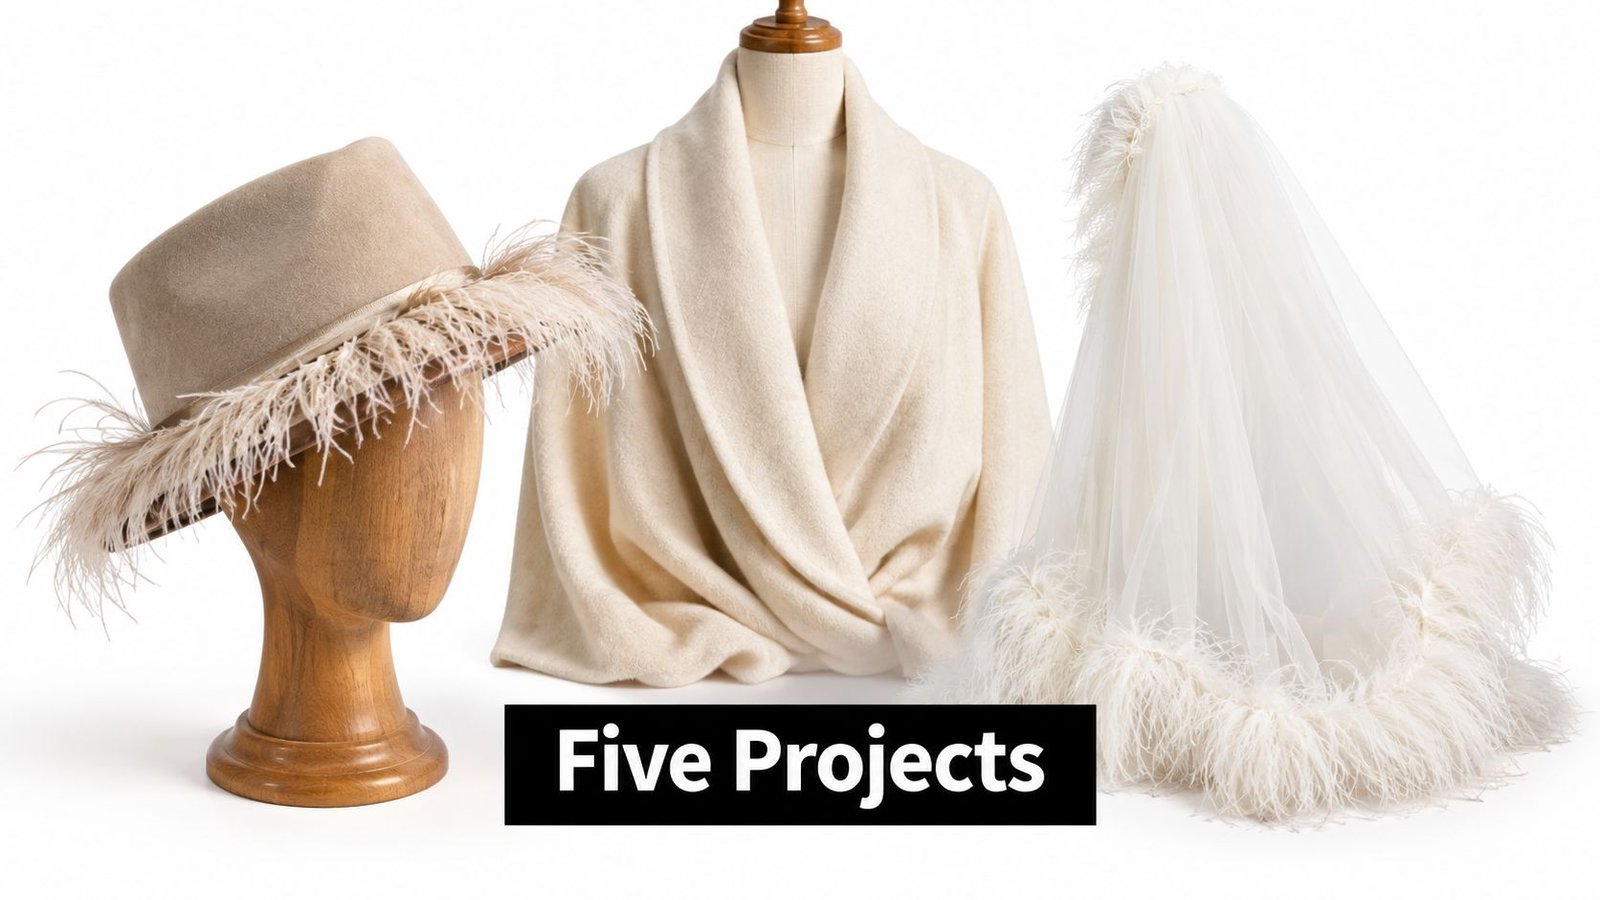
Soft edges for a shawl or veil
- Draped shawl collar: Choose taped fringe and position its base beneath a faced border. Fell-stitch it by hand and strengthen the ends where the shawl crosses or fastens. This suits a confident beginner, but allow unhurried time for fitting the drape before sewing.
- Bridal veil: Try a sparse plume treatment on a supported edge sample before committing to the full veil. Secure the support with fine hand stitches, not a heavy glue line on unsupported net. Treat this as delicate, intermediate work and leave time for a hanging trial.
Structured millinery
A hat in the Victoria and Albert Museum collection combines nylon net, satin, ostrich feathers and a grosgrain hat-band, with a dense blue-and-white feather arrangement around the brim. It's a useful model for combining decoration with supporting materials.
For a felt hat, mount loose plumes onto a separate grosgrain band, with net beneath the arrangement where extra support is needed. Stitch through the band and secure the feather stems, then conceal internal work with the lining or a neat covering strip. This is a patient intermediate project, with positioning likely to take longer than the final attachment.
A theatrical headpiece needs a different fitting test. Group plumes into balanced arrangements on millinery tape, attach them to a firm foundation and check the headpiece while the wearer turns and bends. Allow a separate fitting session; confident hand sewing and access to the internal anchors matter more than speed.
Start with the silhouette you want, then add only enough feather material to achieve it.
For a beginner's clutch or removable cuff, use taped fringe on a separate fabric band. Sew the tape securely, finish the band's ends and attach it to the accessory with accessible stitches or suitable fastenings. It's the shortest, most manageable trial here, although sample testing still belongs in the job.
Ethics, Sourcing and the UK Legal Picture
Farmed doesn't mean cruelty-free. Nor does a statement that feathers can be removed without killing establish what happens to birds throughout a particular production system.
Britain's Importation of Plumage Act was passed in 1921 after a prolonged campaign. The permitted schedule included ostrich and eider-duck feathers, with the distinction for farmed ostriches discussed in the parliamentary record of the plumage legislation.
That historical distinction isn't an ethical guarantee. Reporting on feather sourcing cites 2023 research by Collective Fashion Justice concluding that all examined ostrich-feather production systems ultimately kill the birds.
Ask what the description actually means
- Farmed: Describes the production setting, not the bird's lifetime welfare or eventual fate.
- Collected: Needs an explanation of how collection happens and evidence connecting that process to your batch.
- Slaughter-derived: Identifies an association with slaughter rather than avoiding it.
- Vintage: Describes an older item, not necessarily a documented origin.
- Synthetic: Avoids animal feathers, but still needs assessment for composition, durability and care.
Request the supplier country, farm or processor disclosure, animal-welfare policy and chain-of-custody records. A vague reassurance or an attractive photograph can't substitute for those details.
Separate purchase from import
Buying from a UK stockist and importing your own parcel aren't the same transaction. Species, origin and destination matter, so check Species+ and APHA requirements before ordering internationally; the government's CITES import suspensions and negative opinions information is relevant to that enquiry.
If the supplier can't answer your questions, choose another material. Reclaimed trim may avoid a new purchase of feathers but can leave provenance gaps; synthetic fringe or fabric-based embellishments can be more straightforward choices for a washable costume. None needs to be presented as universally sustainable to be a sensible option.
Care, Storage and Troubleshooting
Plan cleaning around the whole garment, including its dye, lining, support tape and attachment. Don't assume that a feather-safe method will also suit a silk facing, glued decoration or structured hat foundation.
For light surface grooming, support the quill and ease the fibres into their natural direction with a very soft toothbrush. A pet slicker needs particular caution: test it on an offcut and stop if it catches or pulls fibres. Never rake through a mounted plume.
Deal with problems before wearing
- Persistent shedding: Check whether loose fibres are coming from the feather or whether stems are slipping out of the base. Reinforce a failing attachment, but replace a section that continues to break down.
- Dye transfer: Isolate the trim from pale fabric immediately. Test an offcut against a white cloth under the conditions you intend to use; don't try to rescue an attached black fringe by washing it over a cream lining.
- Flattened feathers: Try gentle grooming first. If the supplier permits steam, test indirect steam on an offcut without touching it with the iron, then let it dry unsupported by pressure.
Don't chase more volume with more heat. Stop when the sample shows an unwanted change.
For finished pieces, use a roomy, breathable storage box in a dry cupboard, without compressing the feather edge. An enclosed silica-gel sachet can help manage moisture, but it isn't a remedy for damp storage or wet trim.
Practical care questions
What paperwork should stay with vintage trim? Keep the purchase receipt, seller details, photographs and any provenance or species information. GOV.UK guidance on trading CITES-listed specimens through UK ports and airports explains that permits or certificates may be needed for listed specimens, including parts and items made from them, with documents presented to customs; dyeing or mounting feathers doesn't automatically exempt them.
Can feathers be washed at home? Only follow a supplier-approved method after testing. Domestic washing isn't a substitute for import-treatment documentation.
When should a piece go to a cleaner? Consult a cleaner experienced with feather-trimmed garments when the care instructions require it or the combined materials make home cleaning uncertain. Explain every adhesive, support and detachable component before handing it over.
More Sewing offers fabrics, haberdashery and sewing essentials to help you build a sound foundation for decorative projects. Visit More Sewing to choose your garment fabric and supporting supplies, and ask about sample swatches before matching them to your chosen trim.
