
Interlock is a double-knit weft fabric made by intermeshing two rows of knitted loops, so it usually looks similar on both sides. In a comparative test, plain interlock measured 185.86 g/m², compared with 130.12 g/m² for 1×1 rib, which shows why it often feels fuller and more substantial on the cutting table.
You may be standing in front of a fabric shelf with a suspiciously thick knit in your hands, wondering whether it will behave like the jersey you've sewn before. Turn it over, stretch it gently, and you'll notice the useful difference: both surfaces are smooth, the cut edge generally lies flatter, and the fabric has enough body to make a T-shirt or child's garment feel reassuringly stable.
That stability does not make interlock suitable for every pattern. Fibre content, loop density, stretch recovery, and laundering all change the result. The safest habit is simple: understand the loop structure, test a swatch, then choose your needle, stitch, and pattern layout from what the fabric does.
Understanding What Interlock Fabric Really Is
Suppose you've chosen a pattern for a T-shirt, dress or pair of comfortable leggings. The bolt beside the lightweight single jersey looks familiar, but this fabric feels denser and less floppy. That's the moment to recognise interlock, a double-knit weft fabric made by intermeshing two rows of knitted loops.
The two knitted layers support one another. As a result, interlock has a smoother, more stable surface than single jersey, and the face and reverse commonly appear similar. The structure also reduces the strong edge curling often associated with lighter jersey fabrics. BBC Bitesize describes knitted fabrics as interlocking loops and distinguishes weft knitting from warp knitting.
What you'll notice while handling it
On the cutting table, interlock usually feels soft but not flimsy. It tends to offer:
- More body: The fabric can provide useful coverage for tops, dresses and children's clothes.
- A calmer cut edge: It generally doesn't roll up as dramatically as unstable jersey.
- A balanced surface: Either side may look usable, so mark the intended right side before cutting.
- Moderate stretch: It can move with the body without behaving like highly elastic rib.
That combination explains why sewists reach for interlock for T-shirts, loungewear, children's clothing, dresses and other comfortable garments. Its double-knit construction gives a little more forgiveness when you're matching seams or attaching a hem than a very lightweight knit might offer.
The same smooth, practical qualities matter beyond dressmaking. If you're comparing tactile fabrics for home textiles or relaxed clothing, a curated waffle bathrobe collection offers a useful contrast in surface texture. Interlock itself is much flatter and more compact, but the comparison helps you identify whether your project needs a smooth inner and outer face or a deliberately textured one.
How Interlock Is Built From Two Layers of Loops
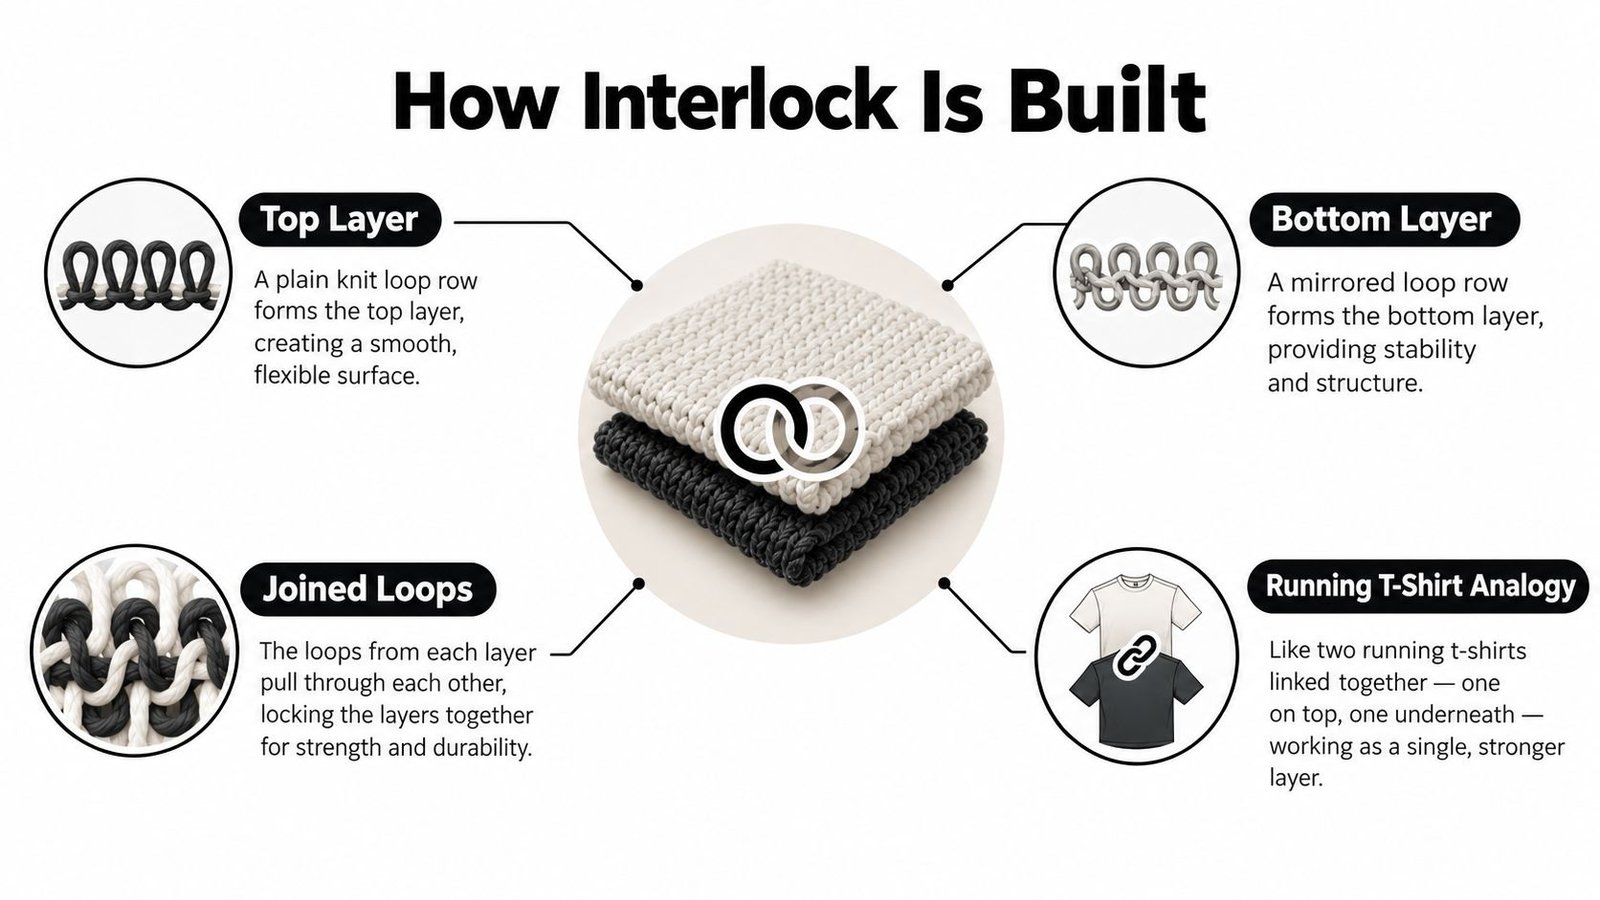
A T-shirt made from two thin jersey layers is a useful way to visualise interlock. The fabric is knitted as one structure, not assembled from two finished pieces. Loops formed on two opposing needle beds intermesh, creating a double-knit fabric in which each layer supports the other.
That loop arrangement affects what you feel at the cutting table. Single jersey usually has a more obvious face and reverse, while interlock tends to look and feel similar on both sides. The supported structure generally gives it more body, a flatter surface and better resistance to edge curling.
Courses, wales and stitch length
Knitted fabric has a useful grid. Courses are the horizontal rows of loops, and wales are the vertical columns. In weft knitting, one yarn travels across the fabric to form successive courses. Warp knitting uses separate yarns to create vertically interlocking loops. UK cotton-knitting guidance explains the relationship between courses, wales, stitch length and fabric behaviour.
Stitch length changes that grid. Shorter loops place more courses and wales into a given area, usually producing a heavier, firmer cloth. Longer loops can make the fabric more open and may contribute to greater lengthwise shrinkage. Two fabrics sold as interlock can therefore behave differently, even when their fibre content is similar. Yarn type, machine gauge, finishing and relaxation also affect the final handle.
Run your swatch protocol before committing a pattern to this cloth.
As you handle the fabric, look for the direction of the wales and courses. The wale direction usually runs along the fabric length, while courses run from selvedge to selvedge. Those directions help you place pattern pieces consistently and assess whether the fabric's stretch and recovery suit the garment. A stable-looking surface still needs testing, because loop length and finishing can change how it responds after washing.
Comparing Interlock With Jersey and Rib Knits
The most useful comparison is often with fabric you already know. Single jersey is lighter and more fluid, while rib is designed to expand and contract readily. Interlock sits between those behaviours in many dressmaking situations, offering more stability than jersey without the pronounced elastic action of rib.
A comparative study using British testing procedures measured plain interlock at 185.86 g/m² and 1×1 rib at 130.12 g/m², making the interlock approximately 43% higher in areal density under those tested construction conditions. The comparative textile study reports the measured areal densities and differences in stiffness, stitch density and bursting strength.
| Property | Interlock | Single Jersey | 1×1 Rib |
|---|---|---|---|
| Surface | Usually similar on both sides | Clearer face and reverse | Vertical rib texture |
| Body | Fuller and more stable | Often lighter and softer | Can be compact but highly expandable |
| Stretch | Moderate, construction-dependent | Variable, often comfortable | Pronounced crosswise stretch |
| Edge curling | Generally reduced | More likely, especially in lighter weights | Usually restrained by the rib structure |
| Drape | Smooth with some body | Often fluid | More clingy and elastic |
| Useful projects | T-shirts, dresses, children's garments and loungewear | Lightweight tops and flowing garments | Neckbands, cuffs, close-fitting garments |
Ask what the garment needs
Choose interlock when you want opacity, a smoother double-sided finish and a little structure. It can be a good match for a child's top that needs to survive movement, or for a simple dress where you don't want the fabric to twist and curl while you sew.
Choose single jersey when fluid drape and a lighter feel matter more than a calm cut edge. Choose rib when the garment depends on substantial expansion and recovery, such as a close-fitting cuff or a very stretchy neckband.
The table is a guide, not a fabric law. GSM is construction-specific. A fibre blend with elastane may stretch much further than a similar-weight cotton interlock, while a viscose-rich version may drape more and need closer recovery testing. Judge the sample in your hands rather than choosing by thickness alone.
Practical rule: If you need the garment to move easily, test crosswise stretch. If you need it to keep its shape, test recovery. Those are related properties, but they aren't the same thing.
Testing a Swatch Before You Cut
Before cutting an interlock garment, test the actual fabric. A small sample can reveal a neckline that will grow, knees that may bag, or a garment that changes size after washing. A remnant from another bolt is not a reliable substitute, because knitting tension, fibre blend and finishing can differ.
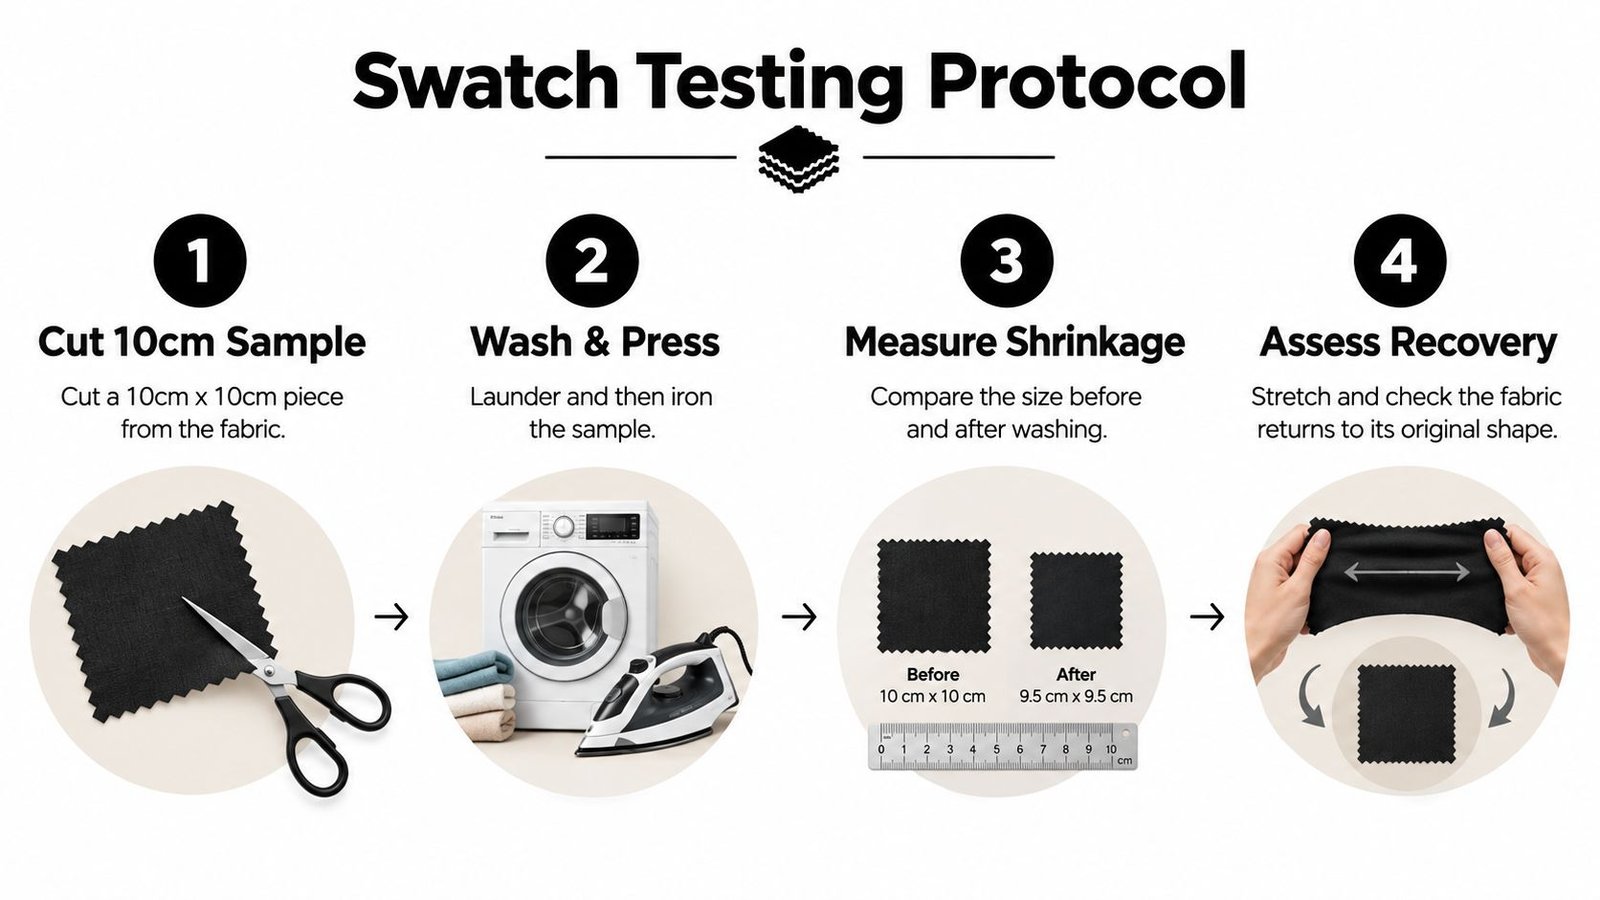
A repeatable four-part routine
- Cut and mark a sample. Cut a 10 cm square from the fabric you plan to sew. Mark the lengthwise and crosswise directions, then identify the side you will use as the right side.
- Wash and dry it properly. Follow the temperature, detergent and drying method intended for the finished garment. Press it gently if pressing will form part of your usual care routine.
- Measure stretch and shrinkage. Record the square's original dimensions, then measure it again after washing and drying. Pull it comfortably in both directions and record how far it travels without forcing the loops.
- Check recovery and seam distortion. Stretch the sample, release it, wait one minute, and measure how closely it returns to its starting size. Sew two layers together, stretch across the seam, and look for rippling, popped stitches or a warped edge.
Stretch describes how far the fabric moves. Recovery describes how well it returns. Those properties work together, but generous stretch does not guarantee good recovery. Poor recovery can leave a neckline loose or make worn areas look baggy.
For example, if a washed sample loses 5 mm from 100 mm in one direction, it has 5% shrinkage in that direction. Adjust the pattern or allow for the change before cutting a close-fitting garment. Record the result with the fabric details so you can repeat the decision later.
A heavier interlock is not automatically more durable. Fibre quality, resistance to pilling, laundering and recovery can matter more than weight alone. Use the swatch to judge the fabric's actual behaviour, not its label or thickness.
Choosing the Right Fibre Blend for Your Project
The word “interlock” tells you about the knit structure, not the complete personality of the fabric. Cotton, polyester, viscose, wool and elastane can all change its warmth, drape, recovery, care needs and likely lifespan.
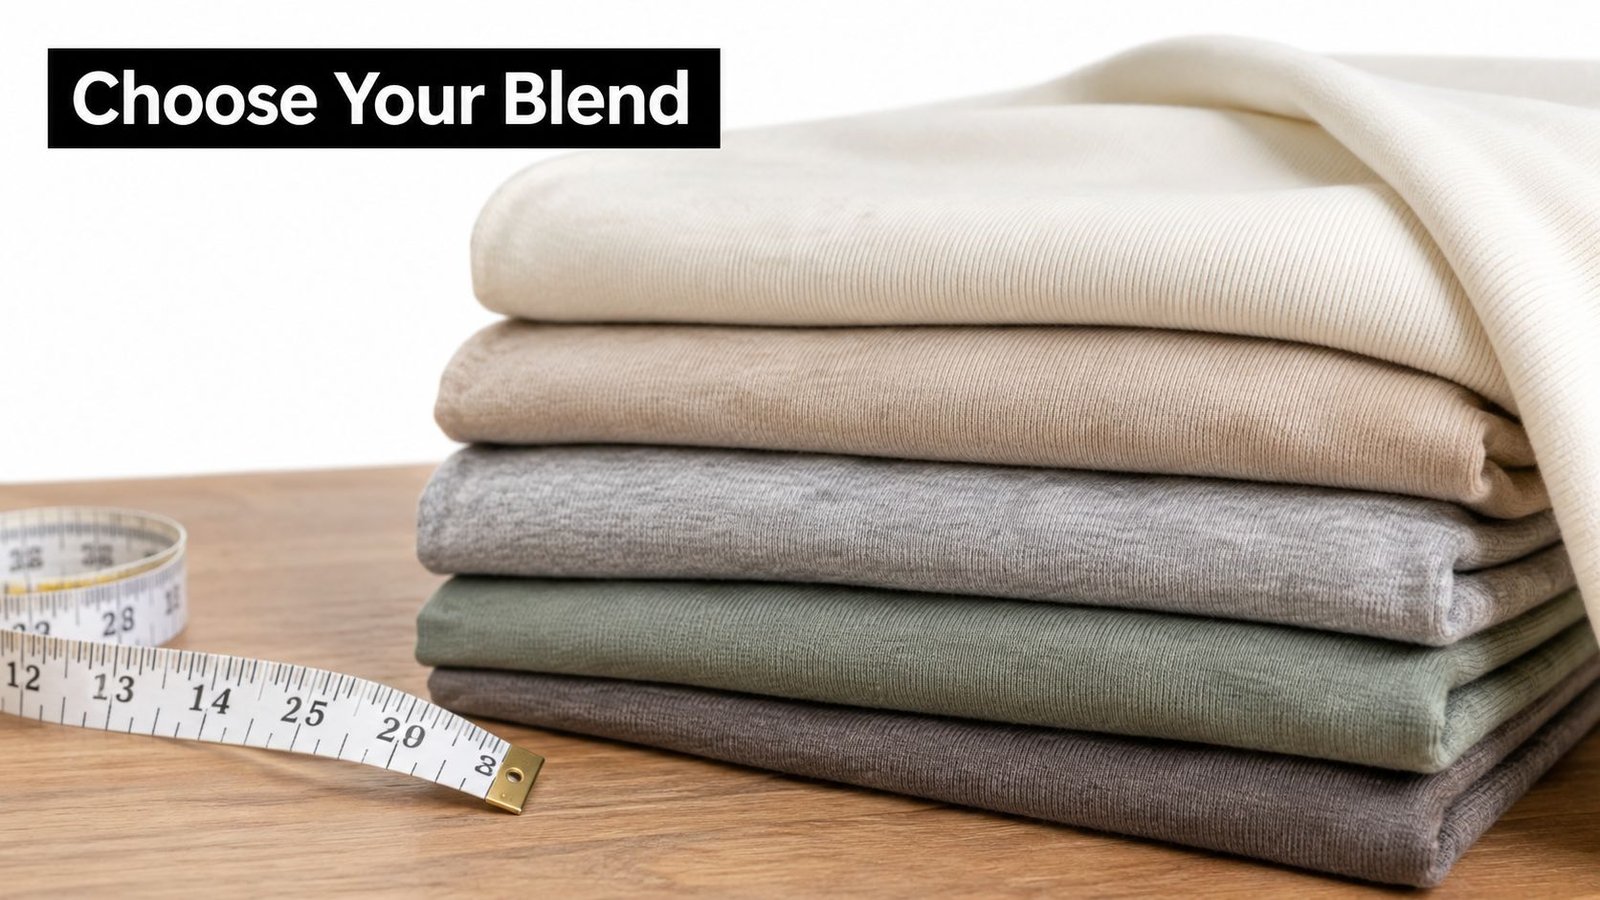
Cotton interlock is often a comfortable choice for everyday T-shirts, baby garments and children's clothing. It has a familiar hand and can feel breathable against the skin, but it may shrink if you skip prewashing. For sensitive-skin projects, compare fibre descriptions carefully rather than assuming every cotton knit feels identical. A useful general discussion of natural fibres for babies appears in this guide to the softest fabric for baby clothes.
Polyester interlock can suit sports tops, uniforms and garments exposed to repeated friction. It may hold colour and resist some forms of wear, but examine the surface for pilling and consider whether the fabric feels comfortable against the skin. Polyester can also raise questions about fossil feedstocks and fibre shedding, so performance alone shouldn't decide the purchase.
Viscose or Tencel blends usually bring softer drape to the double-knit structure. They can be attractive for dresses and relaxed tops, but test for growth during wear and after laundering. A fabric that looks beautifully fluid on the bolt may lengthen under its own weight.
Wool interlock can make warm base layers, tops and lightweight dresses. Check the care label before cutting, and test for felting, shrinkage and skin comfort with a washed sample.
Elastane blends can improve stretch and recovery, which is helpful for fitted tops, leggings and neckbands. The percentage alone doesn't predict the finished result, so pull the actual sample and test its return. Elastane can also complicate fibre-to-fibre recycling at the end of a garment's life.
A short video can help you visualise how fabric structure affects handling before you start cutting:
Choose by the job. For a soft child's top, prioritise comfort and wash behaviour. For activewear, prioritise recovery and abrasion resistance. For a dress, prioritise drape and growth control. Avoid treating a fibre label as a complete performance guarantee.
Sewing Interlock on a Domestic Machine
Start with the needle, not the stitch menu. A sharp universal needle can pierce knitted loops, while a ballpoint or stretch needle is designed to move between them more gently. Test the needle size on two layers of the actual interlock before sewing the garment.
Make a short sample containing the same layers you'll join. Test the thread, stitch length, tension and seam width, then pull the fabric across the seam. The stitching should extend with the fabric rather than snapping or standing rigidly on the surface.
Build a seam that can move
A narrow zigzag or the machine's stretch stitch usually gives a domestic-machine seam enough flexibility for moderate movement. Keep the sample beside you while adjusting settings. If the lightweight section puckers, slightly loosening tension and increasing stitch length may help, but change one variable at a time.
Independent UK sewing guidance recommends testing two layers of the actual fabric and checking the needle, thread, stitch length and tension. The same guidance explains that loops underneath commonly indicate insufficient needle-thread tension, while loops on top can indicate a bobbin-tension problem.
For thicker interlock, a walking foot can reduce shifting as the layers feed through the machine. An overlocker is useful for efficient seam finishing, but it isn't essential. A standard machine with a suitable stretch stitch can construct a successful garment.
Finish hems without fighting the knit
A twin needle can create a flexible, coverstitch-style hem on a standard machine. Test the width, tension and thread path on a scrap first. If the fabric tunnels between the two rows of stitching, adjust the setup before approaching the garment.
Stabilise shoulder seams with clear elastic or narrow tape if the fabric stretches during wear. Press gently rather than dragging the iron across the knit, because stretching a seam while pressing can introduce distortion that remains after cooling.
A First Interlock Project for Beginners
Choose a simple T-shirt or pull-on top with moderate ease and uncomplicated seams. Interlock's extra body makes it generally easier to cut and hem than many unstable jersey fabrics, and it normally doesn't curl strongly at the cut edge. This sewist's guide covers practical handling, needle choice and hemming methods for interlock.
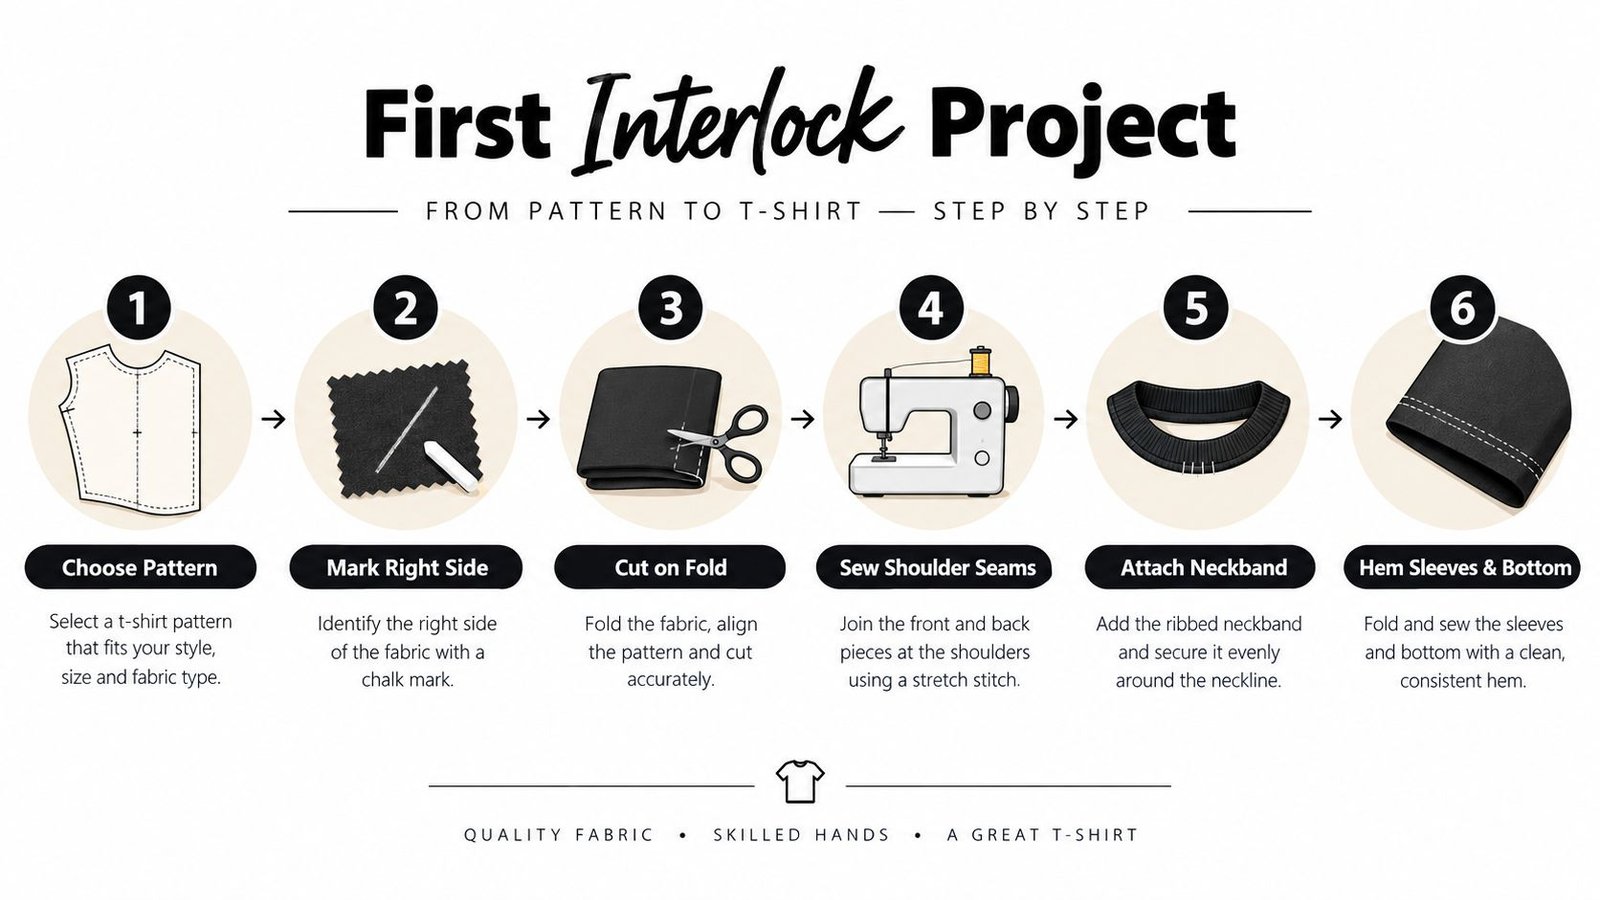
Begin by marking the right side clearly. Both faces may look similar, so use a removable chalk mark or a small paper label. Lay the pattern so the useful crosswise stretch runs around the body, then cut after completing your washed-swatch checks.
Sew the shoulder seams with a narrow stretch stitch and stabilise them with clear elastic or narrow tape. Attach the neckband without stretching the garment neckline, then test the hem on a scrap with a twin needle. Finish the sleeve and lower hems only after checking that the fabric feeds evenly.
Work in this order: choose the pattern, mark the fabric, cut, sew shoulders, attach the neckband, then hem. Keep the first version simple enough that you can concentrate on handling the knit rather than solving construction problems at every seam.
Caring for Interlock Garments and Buying With Confidence
Good care starts before purchase. Ask for a swatch, check the exact fibre percentages, look at the fabric's GSM where provided, and confirm which side you'll use when both faces appear similar. If recovery matters, don't rely on the word “stretchy”. Test how the fabric returns after being pulled.
For everyday care, wash at 30 degrees with similar colours, avoid tumble drying where possible to limit shrinkage, and reshape the garment while damp. Follow the supplier's care label when it differs, especially for wool or delicate blends.
Keep this buying routine
- Order a swatch: Wash it, measure it and test its recovery.
- Check the blend: Look for elastane when fit retention matters, and consider how blended fibres affect future recycling.
- Inspect the surface: Rub a sample gently and look for early signs of fuzzing or pilling.
- Match fabric to pattern: Use stable interlock for garments needing body, and choose a drapier blend when fluid movement is central.
- Save offcuts: Keep them for neckline tests, repairs and future tension checks.
The wider waste context makes those habits practical, not merely tidy. At least 1.0 million tonnes of textiles entered residual waste in England in 2023 to 2024, with around 77% sent to energy-from-waste facilities and 8% to landfill, according to recent UK textile waste reporting. A successful, repairable garment that fits well and survives its care routine is a better result than a heavier fabric chosen without testing.
Browse More Sewing for interlocks, jerseys, haberdashery and sewing kits suited to practical dressmaking projects. Order a fabric sample, prepare your swatch routine and choose the tools that will help you turn a stable knit into a garment you'll want to wear and repair.
