
You've opened a children's sewing kit, spread the contents across the kitchen table and realised the needle won't go through the fabric. Your child wants to start immediately, but you're wondering which tools they can manage and how closely you need to watch.
The best sewing supplies for kids aren't necessarily the biggest collection or the most colourful box. They're tools that suit your child's hand control, the project they want to make and the supervision you can provide. Start small, and introduce sharper tools through demonstrated skills rather than birthdays alone.
Sewing Kit Checklist by Age Band
| Age band | Core supplies | Machine stage | Supervision |
|---|---|---|---|
| Under 5 | Wooden embroidery hoop, open-weave hessian, thick wool, blunt plastic needle | None | Continuous adult hands-on |
| 5-7 | Embroidery hoop, felt, thick yarn, blunt tapestry needle, child-safe scissors | None | Adult alongside |
| 8-10 | Cotton scraps, hand needle with eye, pins with plastic heads, threader | Supervised straight stitch after instruction | Adult in the room, machine instruction first |
| 11-13 | Cotton lawn or jersey, fabric scissors, unpicker, tape measure | Machine with speed control, basic seams | Regular check-ins and a shared set-up routine |
| 14-16 | Interfacing, simple pattern, rotary cutter with guard, pins and marking chalk | Independent machine work | Adult checks set-up before first project |
These age bands are starting guides, not permissions. A skilled seven-year-old might manage the hand tools listed for the next band, while a nervous ten-year-old may prefer the earlier materials. Machine manufacturers' age restrictions still apply, regardless of hand-sewing ability.
What changes as a child progresses
For under-fives, the adult manages the equipment and helps guide the activity. The child's task is to explore passing wool through fabric, not to complete a tidy object independently. Keep needles and wool under your control between turns.
For ages five to seven, introduce a blunt tapestry needle only if it passes through the chosen material without pushing hard. Some felt needs adult-prepared holes. Child-safe scissors should cut the felt, rather than fold it between the blades.
For ages eight to ten, choose a hand needle with an eye large enough for the thread. Plastic-headed pins are easier to spot, but they're still sharp: teach the child to return each pin to a pincushion immediately.
Older learners can begin measuring, unpicking and understanding fabric behaviour. Cotton lawn needs careful handling because it's fine; jersey adds stretch, so neither has to replace a familiar stable cotton immediately. Keep fabric scissors out of reach between supervised sessions.
Teenagers can tackle interfacing and patterns once they can follow markings and manage seams. A guarded rotary cutter requires its own demonstration, a cutting mat and safe hand positioning. Independent machine work doesn't automatically mean independent cutting.
Readiness check: Can the child hold the tool, control its direction and stop when asked? Use that test within every band.
Primary pupils in England receive approximately five hours of textiles education annually, according to the Textiles Skills Centre's 2024 report. A home kit can therefore provide valuable practice between classroom opportunities, without needing to resemble a fully equipped sewing room.
Hand-Sewing Tools That Stay Safe for Small Hands
A child needs a tool that works without requiring unnecessary force. A blunt needle that won't penetrate the material isn't a successful safety choice: change the fabric, prepare holes or choose a better-matched needle.
Match the needle to the opening
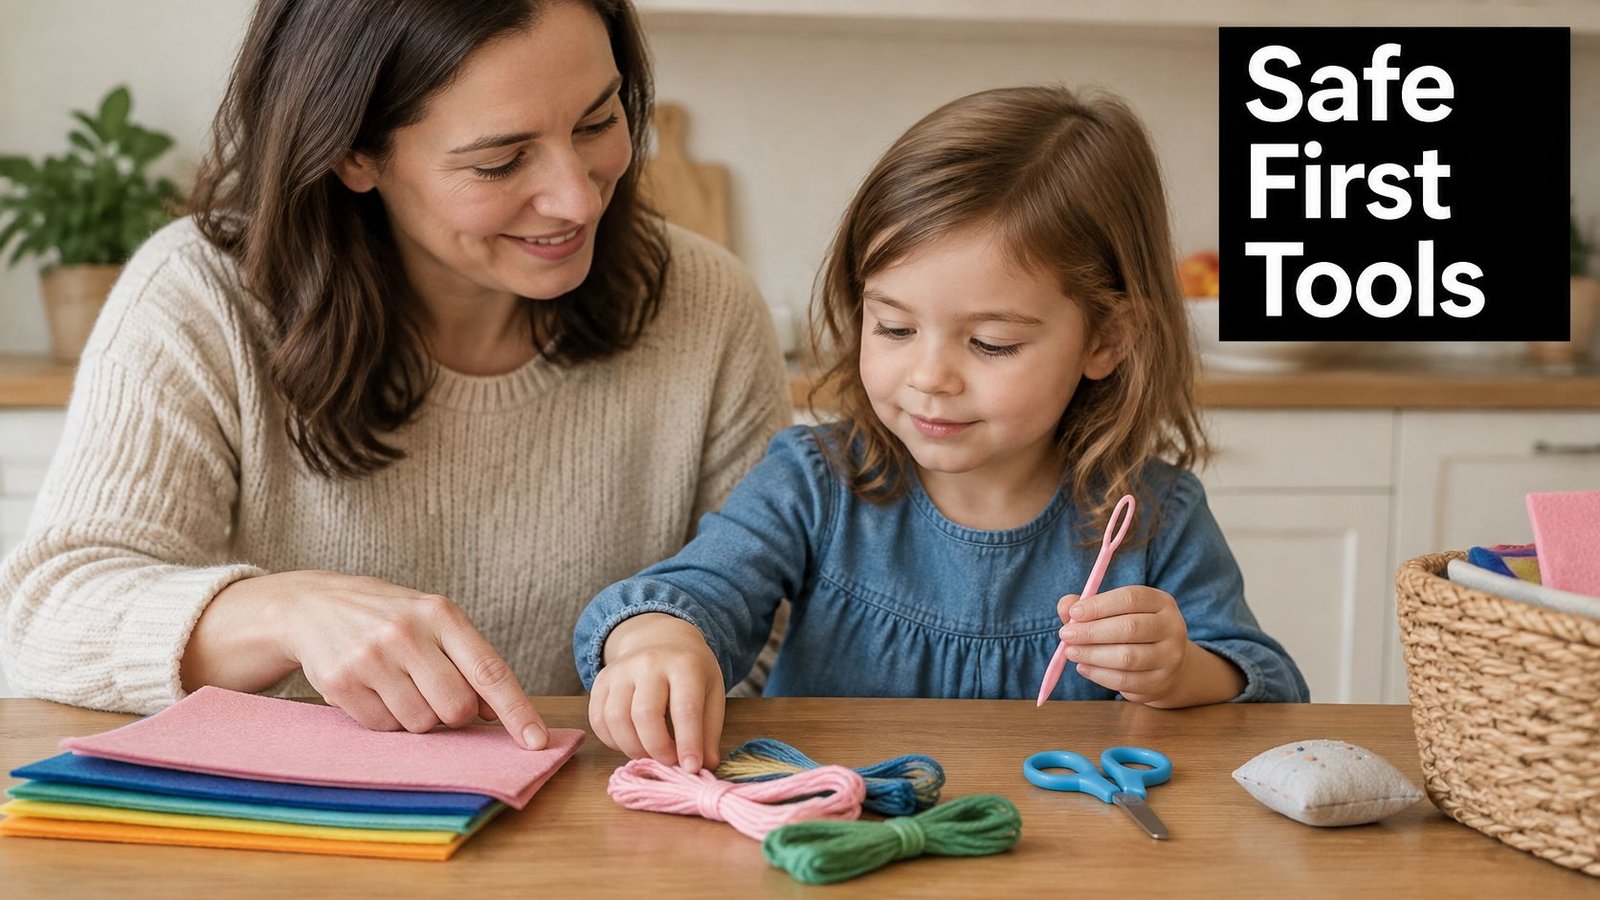
A blunt plastic needle is a useful early choice with open-weave hessian. A large-eye tapestry needle can offer a more functional next step when the child can direct it carefully. Neither should need a hard shove.
The Froebelian classroom project And sew it begins paired wooden embroidery hoops, hessian, wool and plastic needles for children aged approximately five to six. Its small classroom setting offers a practical example, not proof that every child will develop at the same pace.
The hessian's openings give the needle an obvious route. A wooden embroidery hoop holds the fabric taut, allowing the child to hold the frame with one hand and stitch with the other. Tighten it enough to prevent sagging, but check for rough edges.
- Wool or thick yarn: Choose a smooth strand that fits through the eye without separating. Fluffy yarn can snag and obscure the stitch.
- Threader: Use a compatible threader when lining up yarn and needle becomes the obstacle. Keep delicate wire threaders under adult control.
- Scissors: Try child-safe scissors on the actual material before offering them. Keep adult fabric shears on a high, preferably secured shelf.
Demonstrate the movement
For example, a five-year-old making a hessian bookmark can begin with a running-stitch line. Slowly demonstrate the needle going down through an opening, coming up nearby and pulling the wool through without gathering the fabric.
Let the child copy the movement before adding a design. Move to smaller needles and tighter fabrics only after reliable needle control over several sessions.
A useful tool should make the task manageable, not merely look child-friendly.
Fabrics and Threads Suited to Each Stage
| Fabric | Best for | Why it suits children | Watch for |
|---|---|---|---|
| Felt | First hand-sewing projects | Doesn't fray; suitable grades accept a blunt needle | Can stretch; use firm, not tight, stitches |
| Quilting-weight cotton scraps | Simple seams, patchwork, pencil cases | Forgiving, economical and holds a crease | Fraying on raw edges |
| Hessian, open weave | Running stitch and embroidery | Large holes make needle placement easier | Coarse feel; stitches can slip |
| Jersey | Older children, stretch projects | Soft and comfortable | Needs a ballpoint needle; stretches while sewing |
| Denim | Practice seams for older children | Strong; introduces thick-fabric control | Heavy on a child's machine; may need a larger needle |
| Remnants or deadstock | Low-cost practice and small projects | Small pieces suit small items | Check fibre content and fabric structure |
Choose fabric for the stitch, not just the print. Felt avoids fraying, but dense felt can resist a blunt needle. Cotton scraps are a dependable starting point for machine seams because the child isn't also trying to control stretch.
Jersey needs a ballpoint needle and suitable machine settings. Save it until the learner can guide fabric without pulling. With denim, check the machine manual's fabric limits and avoid bulky intersections of folded seams.
Keep preparation small
Craft reporting collected by Lecia W. Phinney identifies time and material cost among barriers to family crafting, and describes small projects suited to 20-30-minute sessions. Remnants, pre-cut pieces and a limited colour palette make that approach easier to organise.
For example, an adult could prepare cotton rectangles for a fold-over pencil case and allow about 25 minutes for a confident learner's assembly session. That's a hypothetical sewing window, not a promise for measuring, cutting and learning the machine from scratch.
- Hand-sewing thread: Pick smooth, thick yarn or thread that passes freely through the needle and fabric. Wind unused lengths securely rather than leaving loose tangles.
- Machine thread: Start with standard polyester or cotton sewing thread suitable for the machine. Keep a spare reel so an empty spool doesn't end the activity.
- Test fabric: Reserve an offcut of each new material. Check stitch length and tension there before cutting or sewing the project pieces.
Safety Checks and Supervised Machine Setup
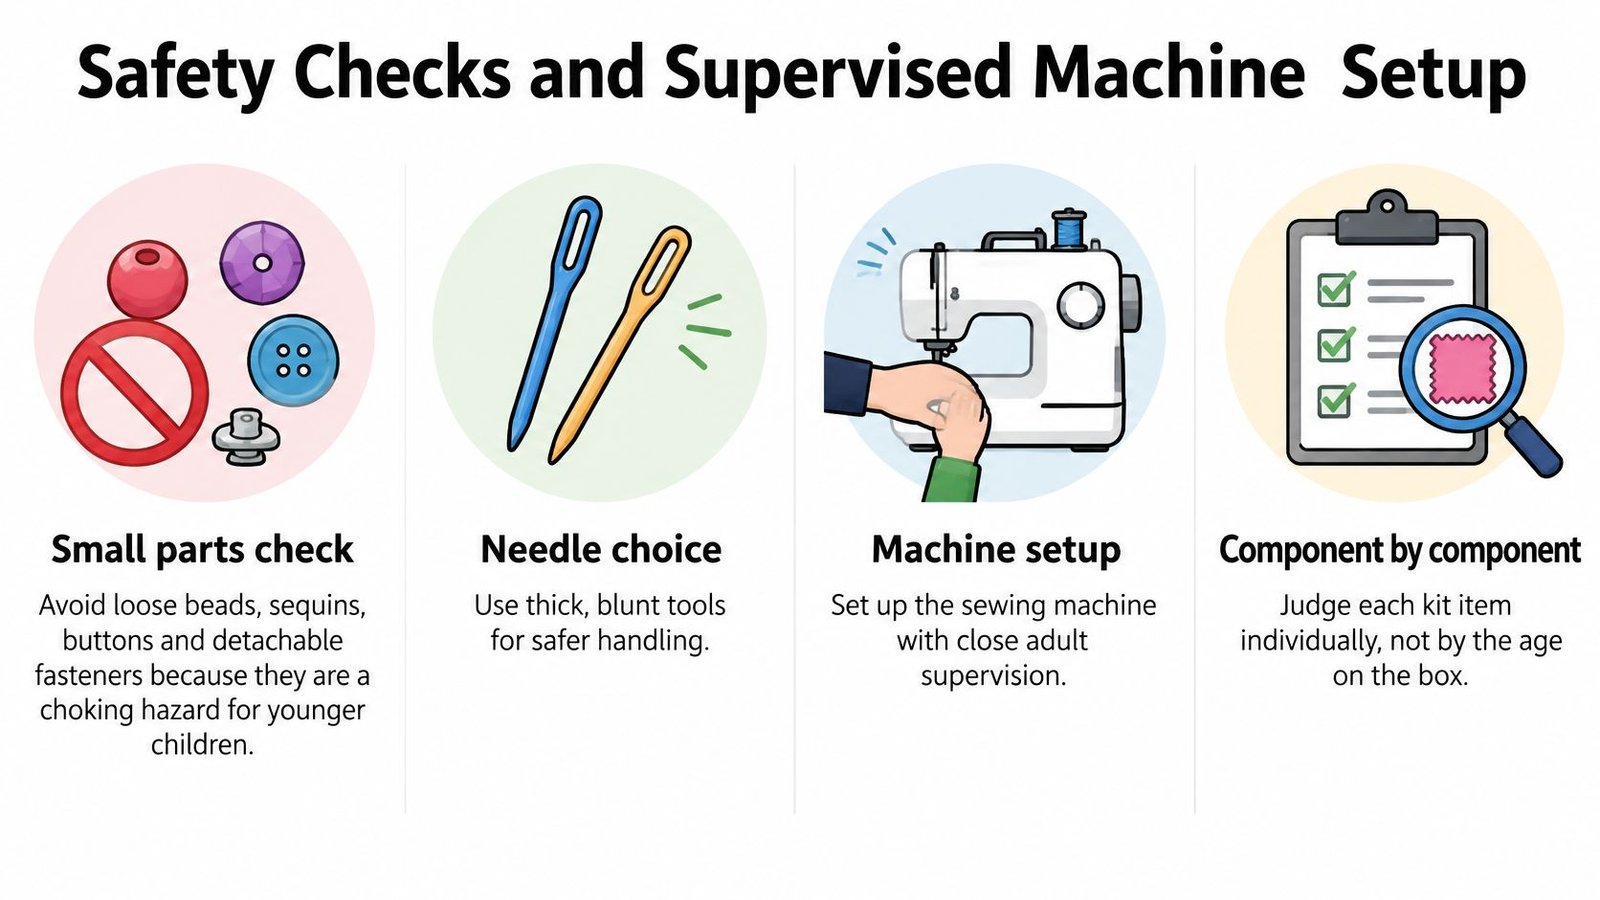
A child can manage a project's stitches while an adult handles the parts that are too small or sharp. Choose supplies by the child's skills and the supervision available, not by age on a box alone. Leave transparent monofilament out of children's sewing sessions; manageable yarn or ordinary sewing thread is easier to handle.
Check the kit before setting up
The Toys (Safety) Regulations 2011 require relevant safety information to be clearly legible in English, with appropriate warnings for toys that may be dangerous for children under 36 months. Treat a warning as a prompt to check the actual contents, not as proof that a kit suits every older child.
Use this checklist before a session:
- Lay out the components. Check needles, threaders and decorations for damage, sharp broken edges or parts that could come loose.
- Set aside unsuitable pieces. Keep small or detachable items in a closed container beyond children's reach. Adapt the project to the child's current skills rather than asking them to manage a hazard.
- Prepare the workspace. Put the machine on a stable table and adjust the seat so the child can face it comfortably. Keep other children clear of the machine.
- Check the machine. Secure trailing cables and check that the needle is undamaged and correctly fitted. Store spare needles safely.
- Demonstrate with the machine unplugged. Show how to thread it, where to place hands and how to use the start-stop controls.
- Practise slowly. Lower the presser foot, choose straight stitch and try a few lines on scrap. Keep hands away from the needle and moving parts.
- Stop before adjustments. Switch off and unplug before changing thread, removing fabric or clearing a jam.
For a four-year-old, an adult could replace a selection of buttons with felt shapes and stitch them down, keeping loose glass beads out of the project. The child can take part without being asked to handle small pieces.
Supervision isn't an age label
The Design and Technology Association's safety guidance advises a documented risk assessment, demonstration and close supervision, including continuous one-to-one support for very young children. If one child is operating a machine, another child should not touch it.
Some children's machine manuals specify eight years and above, with instruction or supervision. Follow the minimum age and conditions in the manual for the particular machine. A child who meets the stated age still needs an adult to judge whether they can follow instructions, control the pedal and keep their hands clear. Introduce powered sewing only when the machine's instructions permit it, with continuous one-to-one supervision for a younger learner where permitted.
For an eight-year-old's first practice, try ten minutes of slow straight lines, then pause and look at where the stitches became uneven. Ask the child to show when they would release the pedal and move their hands away. A confident answer is one sign they are ready for another short turn.
Inclusive Sewing for Busy and Mixed-Ability Families
A successful session doesn't have to end with a polished object. A child who completes a short stitched line, recognises their own work and wants another turn has a useful starting point.
Prepare the task, not an elaborate craft station. Put the required fabric, threaded needle and visual example on a tray. Leave unrelated supplies packed away so choosing materials doesn't consume the child's attention.
Adjust the task to the learner
For a child with limited hand strength, offer wider-weave hessian and thicker yarn before asking for tighter stitches. A larger hoop may provide a more comfortable grip, although it shouldn't be so large that reaching across it becomes tiring.
Children with fine-motor difficulties or neurodivergent needs won't all benefit from the same changes. Offer textured fabrics to explore, but accept that a coarse surface may be uncomfortable. A simple visual step card can replace a long spoken explanation.
- Time: Prepare cutting beforehand and define a small finish point, such as completing the outline rather than decorating the whole piece.
- Budget: Use remnants and deadstock with a restrained palette, perhaps three chosen colours. Reuse suitable buttons and cord only in projects where the learner can safely manage them.
- Motivation: Let the child choose the colour or stitch route. Offer repair, sports, gaming and useful household projects alongside decorative ones.
Make stopping part of success
For example, a seven-year-old with limited hand strength could make a running-stitch patch on wide-weave hessian during a planned twenty-minute session. Show a visible timer, agree where the needle will be stored and stop when the timer ends, even if the patch isn't finished.
Don't interpret reluctance as lack of ability. The child may dislike the fabric's feel, struggle to see the thread against it or need a clearer demonstration.
Choose for the next session: Will this supply help this child complete the next manageable task?
Present sewing as a practical skill for every child. Invite boys and girls to the same projects, and let individual interests determine the design rather than assuming who will enjoy which fabric.
Starter Projects and Your First Step This Week
| Project | Suited to | Time | Main supplies |
|---|---|---|---|
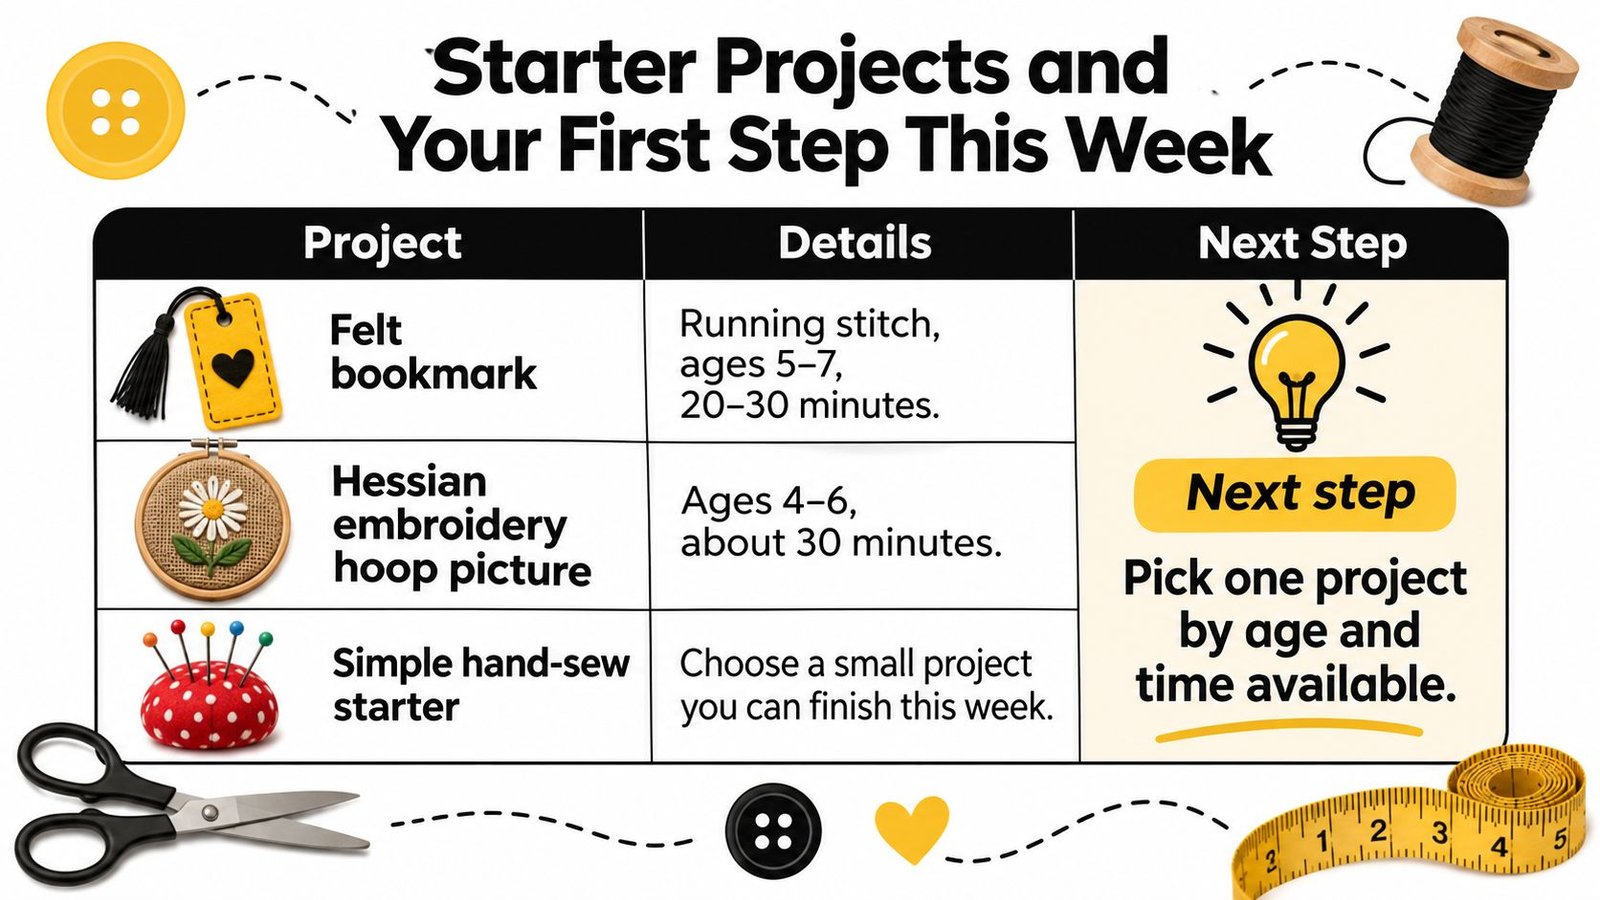
| Felt bookmark with running stitch | Ages 5-7 | 20-30 minutes | Felt, thick yarn, blunt tapestry needle |
| Hessian embroidery hoop picture | Ages 4-6 | About 30 minutes | Hessian, wool, wooden hoop, blunt needle |
| Cotton pencil case from scraps | Ages 8-10 | 45-60 minutes | Cotton scraps, fold-over flap, machine with supervision |
| Drawstring bag from a cotton remnant | Ages 9-12 | About 60 minutes | Cotton remnant, cotton cord, safety pin, machine with supervision |
Treat these as suggested project-planning ranges, not deadlines or guarantees of readiness. Split machine projects into shorter sessions if concentration fades, and keep drawstring cord under adult control.
Give the project a simple learning cycle
The Wensum Trust's textiles teaching scheme connects designing, making and evaluating with safe machine use and threading. Apply that approach without turning home sewing into a formal lesson:
- Choose and sketch. Draw the item and mark which edges need joining.
- Practise threading. Use adult guidance for a hand needle or an unplugged machine.
- Test the stitch. Sew a sample and adjust the spacing or tension before beginning the item.
- Make in manageable stages. Join the pieces, then add finishing details.
- Inspect together. Look at seams, edges and fastenings. Ask what worked and what the child would change.
The same cycle suits running stitch, backstitch or attaching a button when small parts are appropriate. Wobbly first stitches belong on practice fabric, where the child can experiment without worrying about spoiling their chosen material.
For a useful project that introduces neat edges, InchBug's kid-friendly handkerchief guide offers another idea to explore together. Choose it when the child is ready to handle folding and edge stitching.
Make a small commitment this week
Pick the age band and write down its supervision needs. Gather only the fabric and thread for the chosen project, plus spare thread and test fabric, then arrange a supervised first session before any machine use.
Check confidence before adding complexity: can the child thread with appropriate support, sew a straight practice line and stop safely when asked? If not, repeat the sample-stitch stage with a simpler task rather than buying more equipment.
We sell dressmaking sewing kits and list sewing classes in our shop, so you can explore a ready-made project or ask about suitable tuition for your child. We also service and repair sewing machines in-house, a practical option before a first lesson on an unfamiliar machine. Visit More Sewing to choose supplies for a manageable first project and discuss the support you need.
