
You've put the thread through the needle, slipped the fabric under the foot and pressed the pedal. The machine starts, but underneath your fabric there's a tangle of loops. It's tempting to turn the tension dial straight away, yet the cause could be a missed thread guide, a reversed bobbin or a needle that doesn't suit the thread.
Learning how to thread a sewing machine means treating thread, needle, bobbin and tension as one system. Start with compatible materials, follow the threading path carefully, then prove the setup on a scrap seam before your garment goes anywhere near the needle.
Choose the Right Thread and Needle First
Choosing thread by colour alone can leave you with a perfect match that won't sew cleanly. Check the thread's construction and intended use first, then choose a needle that accommodates it without making unnecessarily large holes.
Thread and needle pairings by fabric
| Fabric | Thread | Needle | Note |
|---|---|---|---|
| Fine woven cotton, cotton lawn, voile | Fine polyester all-purpose | 70/10 or 75/11 | Fine thread keeps seams soft and flat |
| Medium cotton, poplin, quilting cotton | Standard polyester or cotton all-purpose | 80/12 | Cotton thread suits natural fibres that are pressed hot |
| Jersey and stretch knits | Polyester with stretch | 75/11 ballpoint or stretch needle | Use a stretch stitch so seams don't pop |
| Medium denim and canvas | Heavy-duty polyester | 90/14 or 100/16 | A heavier thread needs a larger eye; check the needle packet |
| Silk and delicate synthetics | Fine polyester or silk thread | Fine Microtex needle approved for the fabric | Start with light tension and a short stitch, then check for puckering |
| Leather or vinyl | Polyester or nylon bonded, where machine-compatible | 90/14 leather point for leather; manufacturer-recommended point for vinyl | Use a leather needle for leather; don't assume its cutting point suits vinyl |
These are starting combinations to test, not permission to put any heavy thread through a domestic machine. Check its manual and the needle packet, particularly for bonded thread and thicker materials.
The UK Trade Tariff classification defines sewing thread as multiple, folded or cabled yarn dressed for sewing, with a final Z twist. In practical terms, buy genuine machine-sewing thread rather than substituting knitting yarn or decorative cord.
Choose a pair, then prove it
Polyester all-purpose thread is a useful starting choice for general woven garments and seams that need some give. Cotton suits projects where natural-fibre compatibility and heat tolerance matter. Elastic and textured threads belong to particular stitch techniques, not ordinary threading experiments.
For example, try fine polyester with a 75/11 needle on cotton lawn, rather than using the heavy-duty thread bought for denim. For medium denim, a 90/14 needle may be a suitable starting point, but the thread must still pass freely through its eye. A thick thread rubbing through a small eye can fray even when the tension is sensible.
Before committing:
- Match the fibre to the fabric and seam's purpose.
- Confirm it's sewing thread, with compatible upper and bobbin weights.
- Prepare a scrap seam using the intended layers, needle, stitch and presser-foot pressure.
- Press and flex the sample, then inspect both sides.
Practical rule: Choose one plausible thread-and-needle pair first. Don't change the thread, needle and tension together, or you won't know which change helped.
Safety Check and Threading Sequence
A domestic lockstitch machine joins an upper thread to a lower, bobbin thread. The upper thread travels through guides and a tension system; the bobbin thread follows its own controlled route beneath the needle plate. Missing either route can spoil the seam, even if thread passes through the needle.
Keep your machine's manual beside you. Spool positions, needle directions and bobbin arrangements aren't identical across models, so a familiar-looking machine may still need a different sequence.
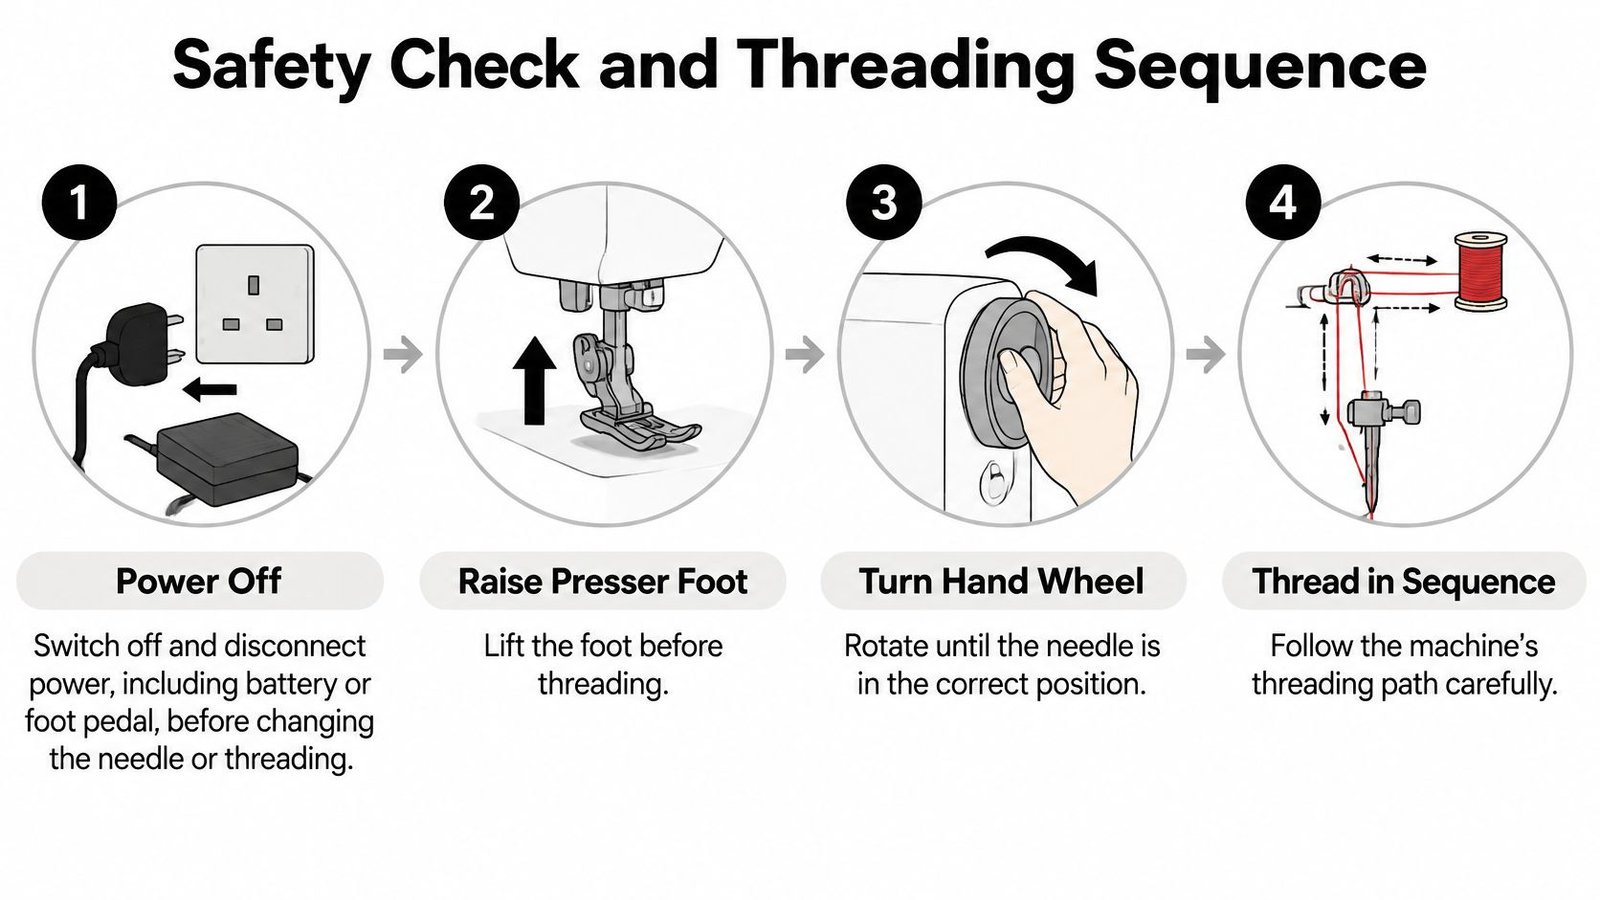
Use this visual reminder before putting your hands near the needle.
Prepare the machine safely
Switch off and disconnect the power. Unplug the machine, remove batteries if fitted, and disconnect a detachable foot controller before changing the needle or threading. The Hobbycraft sewing-machine safety manual specifically requires power, including batteries, to be disconnected for these tasks. Taking your foot off the pedal doesn't isolate the machine.
Raise the presser foot. This releases the upper tension discs so the thread can settle between them. If you thread with the foot down, the strand may ride outside the discs and remain uncontrolled, regardless of the dial setting.
Bring the needle to its highest position. Turn the hand wheel in the direction specified by your manual until the needle and take-up lever are correctly positioned for threading. Don't force the wheel backwards to reach the position more quickly.
If you're fitting a needle, push it fully into its clamp in the specified orientation and tighten the clamp securely. A needle sitting slightly too low can cause problems that look like poor threading.
Follow the upper thread path
Position the spool correctly. Fit the spool on its pin, adding the appropriate spool cap where required. Check that thread unwinds smoothly rather than catching beneath the spool or around the pin. A snag here can imitate excessive tension further down the path.
Follow every guide in order. The Hobbycraft HC100s instruction manual routes thread through the pre-tension spring, between the silver tension discs, up through the take-up lever and finally through the needle-threading arrangement. Your machine may hide the discs inside a slot, but the thread still needs to enter that tension mechanism.
Catch the take-up lever and lower guides. Look rather than guessing that the thread has seated. A missed take-up lever can leave loose thread beneath the fabric because the machine can't recover the upper thread properly during each stitch.
Thread the needle in its required direction. Many domestic machines thread front to back, but some use a side-to-side route. Use the built-in threader only with a compatible needle and thread; don't force its hook through an eye that's too small.
A useful check is to follow the thread with your finger from spool to needle. If it crosses an unexpected projection or bypasses a guide near the needle clamp, correct the route before proceeding.
Load the bobbin without guessing
Wind an appropriate bobbin. Use the exact bobbin type specified for the machine and follow its winding procedure, reconnecting power only while operating the winder. Keep loose thread ends clear, then switch off and disconnect again before loading. Don't use a similar-looking bobbin merely because it fits into the opening.
Seat it in the correct direction. Follow the bobbin diagram and draw the thread into the designated slot and tension spring. Some machines route lower thread through guides and between washers behind a tension screw; that arrangement isn't universal. Don't copy it onto a drop-in system or turn the bobbin screw during ordinary setup.
Bring up the lower thread where required. Hold the needle thread lightly and turn the hand wheel through a complete needle movement. As the upper thread catches the lower thread, lift the loop gently and draw both tails under and behind the presser foot. Quick-set bobbins may use a different starting procedure.
With threading complete, gently compare the upper thread's movement with the foot raised and lowered. You should feel more resistance with the foot down. If there's no difference, check its seating rather than immediately increasing the dial.
Reconnect power only when you're ready to sew. On scrap, lower the presser foot and guide the fabric lightly while the feed dogs move it. Never tug it through, because that can bend or break the needle.
Your first stitches should form a regular line without a bundle underneath, violent pulling or unusual noise. If they don't, stop, switch off and check the upper path and bobbin seating before continuing.
Set Tension with a Scrap Test
Start with your machine's recommended basic setting. The Hobbycraft HD17 instruction manual gives upper tension 4 as its baseline, while warning that no single setting suits every fabric and stitch function. Treat that as a starting point for a compatible machine, not a universal rule.
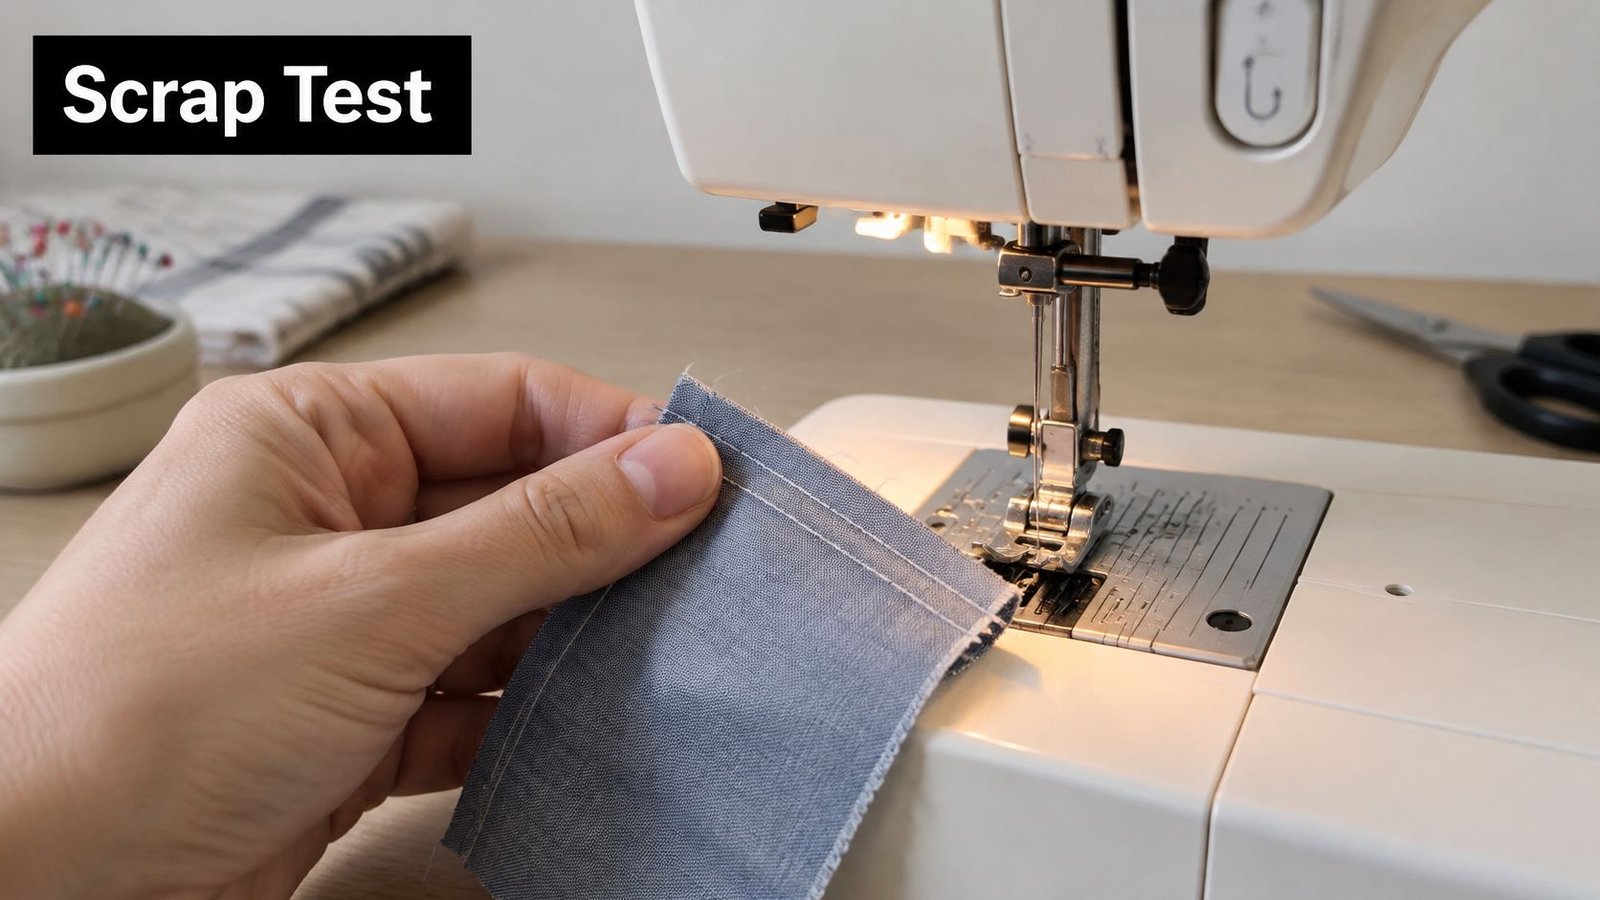
Keep your fingers clear and let the fabric feed naturally during the test.
Read the seam before adjusting
Fold a scrap of the project fabric to reproduce the actual seam layers. For example, sew a 10 cm test line on a folded offcut, using the project thread and stitch, then stop and inspect both faces. Include interfacing if it'll be present in the finished seam.
Balanced lockstitch tension places the thread interlock between the fabric layers. You shouldn't see loose loops or the bobbin thread repeatedly pulled onto the upper surface. Lightweight woven fabric, jersey and dense denim won't necessarily behave alike, even with the same thread.
Tension symptoms and adjustments
| Symptom | Adjustment |
|---|---|
| Loops on the underside | After confirming correct threading, raise upper tension by one number and retest |
| Bobbin thread visible on the top surface | Lower upper tension by one number and retest |
| Lock visible on the top surface, even stitches | Check bobbin seating before changing anything; a lock genuinely sitting on top isn't balanced |
| Puckering on fine fabric | Lower tension first, then separately trial a shorter stitch on the same fabric |
| Loose loops on top of thick fabric | Confirm needle size and bobbin threading first; raise tension gradually only if the upper thread is demonstrably loose |
The table gives trial adjustments, not diagnoses from appearance alone. In particular, loose loops on top can indicate a lower-thread problem, so increasing upper tension without checking the bobbin may make matters worse.
This demonstration provides another way to follow the adjustment process.
Change one thing, sew again, then compare. A different needle, heavier thread and tighter dial used together give you no clear answer about what worked.
For fine fabric, don't assume shorter stitches always cure puckering. Excessive tension, unsuitable thread and too many needle penetrations can all spoil the result, so assess each trial separately.
Press the successful sample as you'll press the garment, then flex it gently. Start the seam only when the sample lies acceptably flat and remains secure without obvious looping or thread strain.
Why Stitches Skip and Thread Keeps Breaking
Skipped stitches on every seam call for a needle check before a tension adjustment. A bent, blunt or incorrectly fitted needle may fail to form a stitch reliably. Skipping only on jersey suggests a different problem, often the needle point's suitability for that knit.
Thread breakage needs its own diagnosis. Thread that snaps at the eye may be too heavy for it, while thread that catches after a needle has broken may be rubbing against a burr on the plate or hook.
Match the fault to the next action
Skipped stitches and thread breaks: causes and fixes
| Symptom | Likely cause | Fix |
|---|---|---|
| Skipped stitches on every seam | Needle bent, blunt or fitted incorrectly | Fit a new needle matched to the fabric, with the flat side to the back where the manual specifies |
| Skipped stitches only on knits | Needle point wrong for stretch fabric | Switch to a ballpoint or stretch needle |
| Thread breaks at the needle eye | Thread too heavy for the eye or eye damaged | Use finer thread or replace the needle |
| Thread breaks in the middle of a seam | Possible burr on the needle plate or hook | Stop sewing and have the plate and hook checked by a repairer |
| Skipping after a long session | Possible lint caught in the hook area | Clean the bobbin case and accessible hook area with the brush supplied |
| Skipping only at high speed | Speed unsuitable for the thread and fabric | Slow down and test at low speed on scrap |
| Thread shreds or fluffs | Rough thread or worn needle groove | Replace the thread and needle, testing each change separately |
| Skipping after a knock or drop | Possible hook-timing misalignment | Stop and book a service before further sewing |
Say you pulled a stubborn denim seam through and the machine then began skipping. Replace the potentially bent needle rather than increasing tension to compensate. Likewise, a needle inserted with its flat side facing forwards will be wrong on machines that require it facing backwards, but always confirm your model's orientation.
Know when adjustment becomes repair
The Health and Safety Executive's textile machinery standards guidance identifies BS EN ISO 10821:2005+A1:2009 for industrial sewing machines, units and systems, covering hazards including needles, noise, heat, ergonomics and electricity. That industrial scope isn't a domestic repair instruction, but power isolation and competent repair remain sensible boundaries for home troubleshooting.
Before touching a dial, run these checks:
- Isolate power before cleaning or accessing the needle and hook area.
- Inspect accessible parts, including the presser foot, feed dogs, handwheel and electrical lead.
- Confirm the basics, including needle fit, thread compatibility and unobstructed threading.
- Stop for damage, abnormal heat, electrical faults or suspected timing trouble.
Don't keep sewing through repeated breakage. A tension dial can't remove a burr, straighten a needle or restore hook timing.
Test Your Threading, Then Decide Whether to Service
Use the scrap seam as your acceptance check before each project, not merely as a rescue measure after something goes wrong. A setup that worked for a cotton skirt still needs testing before you start a jersey top or a denim waistband.
Look for these signs before moving to the garment.
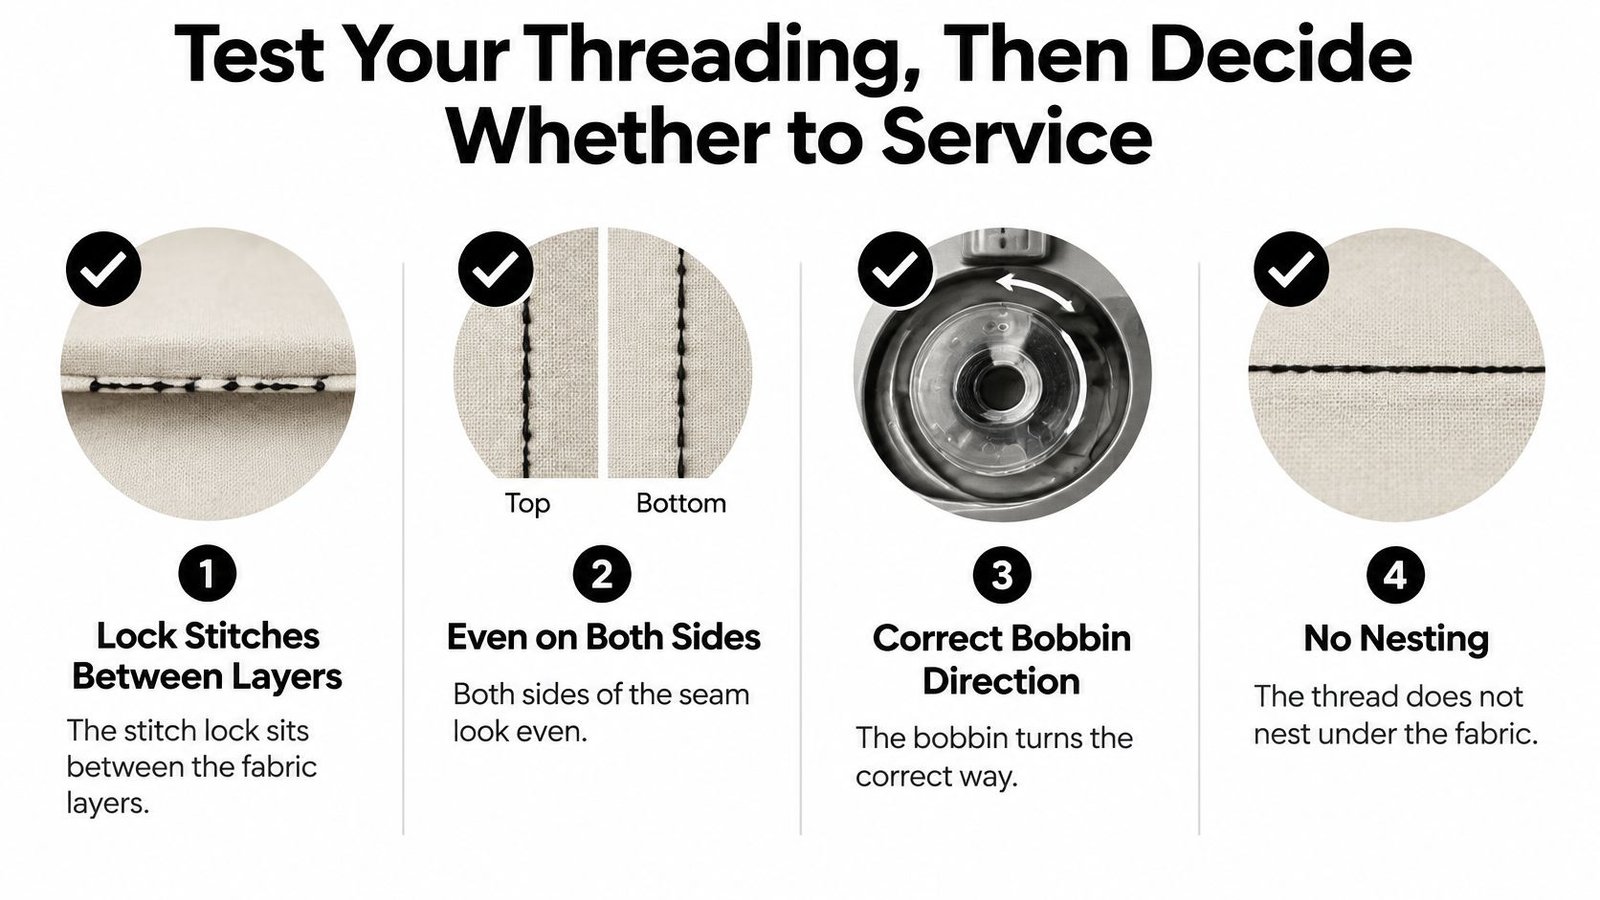
- Lock between the layers. The interlock isn't sitting visibly on either face.
- Even stitching on both sides. There are no unexplained gaps, loose sections or tight patches.
- Correct bobbin direction. Its movement agrees with the machine's loading diagram.
- No nesting underneath. The seam starts and continues without a bundle of loose thread.
Keep sewing or stop for help
If the seam is clean after fitting a suitable new needle, using fresh thread and cleaning the accessible hook area, keep sewing. Record the successful combination rather than continuing to adjust a machine that's now behaving properly.
If skipping or breakage continues after those checks, stop trying to compensate with larger tension changes. A machine that's been knocked or dropped, developed unusual noise or repeatedly catches thread needs checking before further use.
A useful service sample shows the actual fault. Keep the failed seam rather than unpicking it, and note whether the problem happens at the start, over thick intersections or throughout the stitching.
Bring the machine, the needle that failed and a sample of the fabric so the repairer can test the same combination. Include the thread you used if possible, and keep the suspect needle safely contained rather than loose in the accessory tray. For your next project, write the working tension number on the successful scrap and keep it with a note of the thread and needle.
We service and repair sewing machines in-house at More Sewing, including machines that continue to skip stitches or break thread after careful setup. Visit More Sewing or call 01903 442373 to discuss a check, and bring your fabric sample and failed needle so we can assess the combination you're using.
