
Blog, Dressmaking, Guides
How to Sew a Bubble Hem: Measure, Gather and Finish
You've cut a skirt from the size on the envelope, gathered the hem beautifully, and then tried it on to find the bubble sits too high, pulls at one side, or barely balloons at all. That isn't usually a sewing failure. It's a circumference problem you built in before the first stitch. Learning how to sew a bubble hem well means controlling two measurements, the outer layer and the smaller inner ring it joins to, and adjusting your method for the fabric in your hands.
Measurements to Take Before You Cut
A maker who drafts from a UK size label alone is gambling. The first major British women's sizing survey took place in 1952, and the British Standards Institution later issued BS 3666 in 1982, covering numbered women's sizes from 8 to 32, but those standards weren't compulsory, so two garments with the same label can measure differently at bust, waist or hip, as The Independent's history of UK clothes sizing explains. Measure the wearer, not the label.
What to record
| Measurement | How to take it | Why it matters |
|---|---|---|
| Waist or high-hip circumference | Tape snugly at the narrowest point or the hip line | Sets the opening the bubble hem attaches to |
| Finished outer length | Measure from the waist to the hemline, in the shoes you will wear | Decides how much outer fabric you cut |
| Outer hem circumference | Measure the lower edge of the outer layer | Must be larger than the inner ring to create fullness |
| Inner hem circumference | Measure the facing or lining ring | Smaller value gives a stronger balloon effect |
| Hem allowance | Use the pattern value | Typically 1.5 cm unless the pattern says otherwise |
| Facing depth | Sketch on paper, then test on a toile | Controls how far the bubble stands out from the garment |
| Fabric shrinkage | Wash and dry a swatch to the care label | Keeps outer and inner layers in proportion after washing |
The 1.5 cm figure above comes from standard UK pattern guidance, which specifies a 1.5 cm seam allowance unless the pattern states otherwise, as set out in the Simplicity guide to understanding paper patterns. Use your pattern's value if it differs, and write it down rather than remembering it.
How small changes alter the silhouette
Work through an example on paper first. Say your outer hem measures the same as your inner ring. You'll get no bubble at all, just a tucked-under hem. Now imagine, as a test, an outer layer cut 10 cm longer than the finished length. That extra length has to go somewhere, so it balloons outward. Reduce the inner ring by, say, 4 cm in the same test and the balloon tightens and stands out more.
Practical rule: More outer length means more volume. A smaller inner circumference means a stronger balloon. Change one at a time on a toile so you know which adjustment did what.
Copy the table into a notebook and fill every row before drafting. I'd make a quick muslin or toile from old sheeting at this stage, even just for the hem area. Ten minutes testing proportions costs far less than unpicking gathers from your final fabric later.
How to Sew a Bubble Hem Step by Step
The outer hem circumference must be larger than the inner lining or facing circumference so the excess can gather into the rounded shape, and Sew Magazine's dressmaking techniques guide recommends two rows of long gathering stitches, pulling the bobbin threads evenly, plus short easing stitches where extra fabric sits at a fold. That guide also advises checking the hem lies straight before securing it. Everything below builds on that principle.
Preparing and gathering
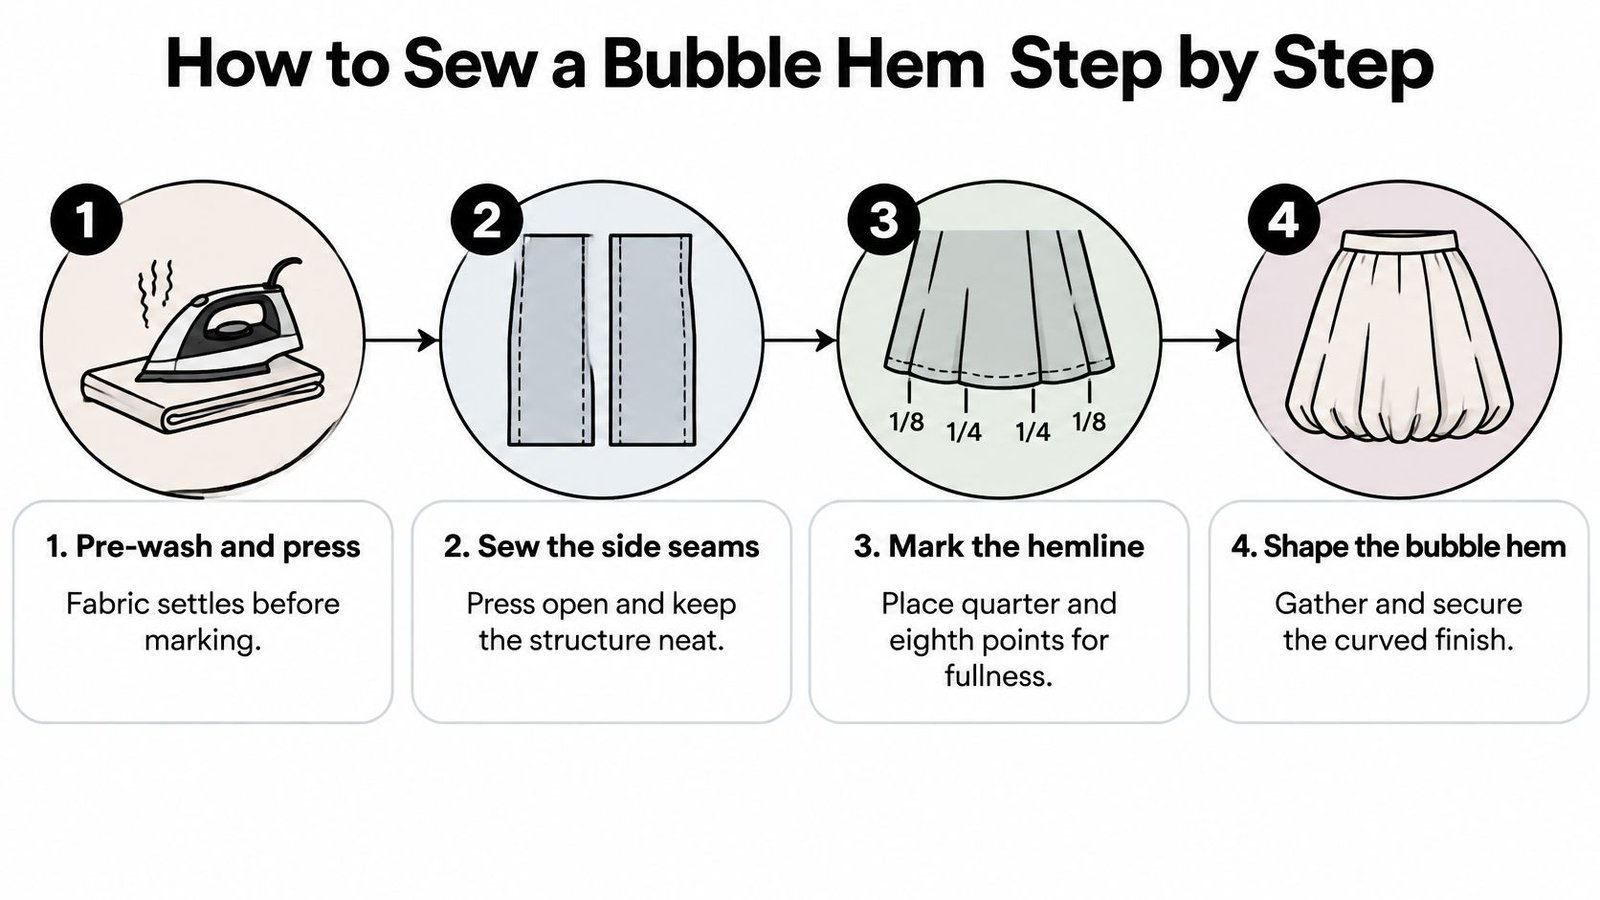
- Pre-wash and press both layers. Fabric that hasn't settled will shrink unevenly after construction and distort your proportions. Press on the correct heat for the fibre.
- Sew the side seams and press them open. Mark the hemline at quarter and eighth points with chalk or notches. These marks are your map for distributing fullness, so don't rely on the cut edge alone.
- Sew two rows of the longest stitch near the lower raw edge of the outer layer, about 1.5 cm from the edge as your pattern directs. Leave long thread tails, then pull the bobbin threads gently and evenly. The common slip is yanking one side and snapping a thread.
- Join the facing into a ring and finish its lower raw edge with an overlocker or narrow zigzag. A fraying facing edge will work loose inside the bubble where you can't reach it.
- Pin facing to outer hem, right sides together. Match quarter marks first, then eighths, easing the fullness evenly between each pair of pins. If one section looks crowded, fix it now, not after stitching.
Before the next step, choose your fabric and needle using the table in the fabric section below. The needle and stitch you pick there decide whether this seam puckers, stretches or sits flat.
Joining, turning and finishing
- Stitch slowly with a consistent seam allowance. Use short easing stitches where fabric sits at a fold or over a side seam. Speed is where gathers shift and pleats form.
- Press the seam towards the facing, turn the facing inside, and baste it in place. Basting feels slow, but it stops slippery layers creeping under the foot.
- Turn the garment right side out and inspect. Hang it up or try it on. You're checking that fullness is even all the way round before anything becomes permanent.
- Topstitch or slip-stitch the facing, then steam press gently. Hover the iron and use steam rather than weight. Pressing hard flattens the very volume you've just created.
The hem must lie flat at the seam and round in the body before you topstitch. If it twists or ripples at this stage, topstitching will only lock the fault in.
A healthy bubble looks deliberate. The fullness reads evenly from every angle, the hemline sits level, and the balloon is visible but controlled, not sagging on one side or straining at the seam. If yours meets that description on the body, in the shoes you'll wear, you're done.
Choosing Fabric and Needles for a Bubble Hem
A bubble hem is a controlled circumference problem: the outer layer carries extra length, the inner layer is shorter, and the fabric decides how evenly that difference settles. Crisp wovens spread the fullness into stable folds. Knits stretch as you handle them, so the difference migrates and the bubble goes soft or lopsided.
Jersey stretches more than cotton. Let the feed dogs move it, keep its weight supported on the table, and use a stretch stitch or narrow zigzag. Choose a ballpoint or stretch needle; a Universal can work on stable knits, but skip it on anything that snags or ladders easily.
| Fabric | Behaviour when gathered | Needle | Stitch and handling |
|---|---|---|---|
| Lawn or poplin | Stable, holds a crisp bubble | Universal 70/10 or 80/12 | Straight stitch, press after each step |
| Medium cotton or viscose | Holds volume but slips and frays | Universal 90/14 | Baste the inner hem first, pin less |
| Denim or heavy drill | Stable but bulky at the seam | Universal 100/18 | Pre-wash, sew slowly, press seams open |
| Cotton jersey or French terry | Stretches when pulled, soft bubble | Ballpoint or stretch needle | Narrow zigzag or stretch stitch, support the weight |
| Tencel or viscose jersey | Drapes well but distorts easily | Ballpoint or stretch needle, 80/12 | Stretch stitch, test a sample first |
Reading the table in practice
For a first attempt, I'd start with lawn or poplin. The gathers stay where you put them, the seam presses crisply, and mistakes show up early enough to correct. It's the easiest fabric on which to learn the circumference relationship, because the extra length you built in stays visible as even folds rather than stretching away.
Slippery fabrics solve the same circumference differently. Say you're making a viscose midi skirt: the layers slide against each other under the presser foot and your quarter marks drift apart. Baste the inner hem first, try a walking foot, and consider a light stabiliser on the seam allowance. Pinning harder won't solve slippage.
Denim holds a firm bubble but punishes bulk. Grade the seam allowances, press seams open, and sew slowly over side seams so the needle doesn't deflect. With jersey or French terry, expect a softer, less sculptural result, and check the seam allowance often, since stretched fabric shrinks back and eats into the fullness you measured.
Fixing Puckers, Lumps and Wavy Hems
Most bubble hem faults trace back to the circumference relationship rather than the stitching itself. Reduce the inner ring too far, or force too much outer fabric into a short ring, and the excess has nowhere to go, so it ripples. When you correct the fit, The Sewing Directory's fitting guidance recommends small seam adjustments of about 1 cm per seam, since larger changes can distort the garment shell. That limit matters twice over here, because a bubble hem has two circumferences pulling against each other, and a big change to one throws the other out.
| Symptom | Likely cause | Fix |
|---|---|---|
| Uneven ripples around the hem | Inner circumference reduced too much | Unpick the affected section and re-ease in smaller sections |
| Lumps at the quarter marks | Gathers not distributed evenly | Re-mark eighths and redistribute the fullness before pinning |
| Wavy knit edge | Hem stretched while sewing | Re-stitch with a stretch stitch, keep the fabric weight supported |
| Puckering at tight curves | Seam allowance not clipped | Clip short of the stitching line, then press |
| Bubble collapses after washing | Outer and inner layers shrank differently | Pre-wash both layers, then sample and wash again |
| Bubble too bulky | Outer length too long for the fabric weight | Shorten the outer layer or switch to a lighter fabric |
Working through a fix
Start by measuring, not unpicking. Run a tape around both circumferences and write the two numbers down. The difference between them is the fullness you have to distribute, and dividing it by eight tells you roughly how much extra fabric each section should carry. Ease each section separately. Gathering the whole hem in one pass concentrates the fullness wherever the thread happens to slide, which is how lumps end up parked at the quarter marks.
If ripples sit in one area, unpick only that section, re-mark the eighths within it, and re-ease. Unpicking the entire hem wastes the sections that were right and gives you a second chance to get them wrong.
On tight curves, clip or notch the seam allowance up to but not through the stitching line. Clipping through weakens the seam and leaves visible points on the right side. For a wavy knit edge, re-stitch with a stretch-compatible stitch and stop pulling the hem towards you as you sew. That dragging hand is usually the whole problem.
Keep corrections small and reversible. Adjust the inner ring a little, baste, turn right side out, and look again. A dramatic tightening feels decisive and almost always overshoots, because a centimetre off the circumference moves more fabric than it looks like it should.
Turning an Existing Hem into a Bubble Hem
You don't need a new garment. A bubble hem works well as an alteration, and converting something you already own means the fabric has been washed, so its behaviour is known. A reversible alteration is a low-risk way in.
Mark your new hemline on the garment while it's flat, and check it against the length you can afford to lose.
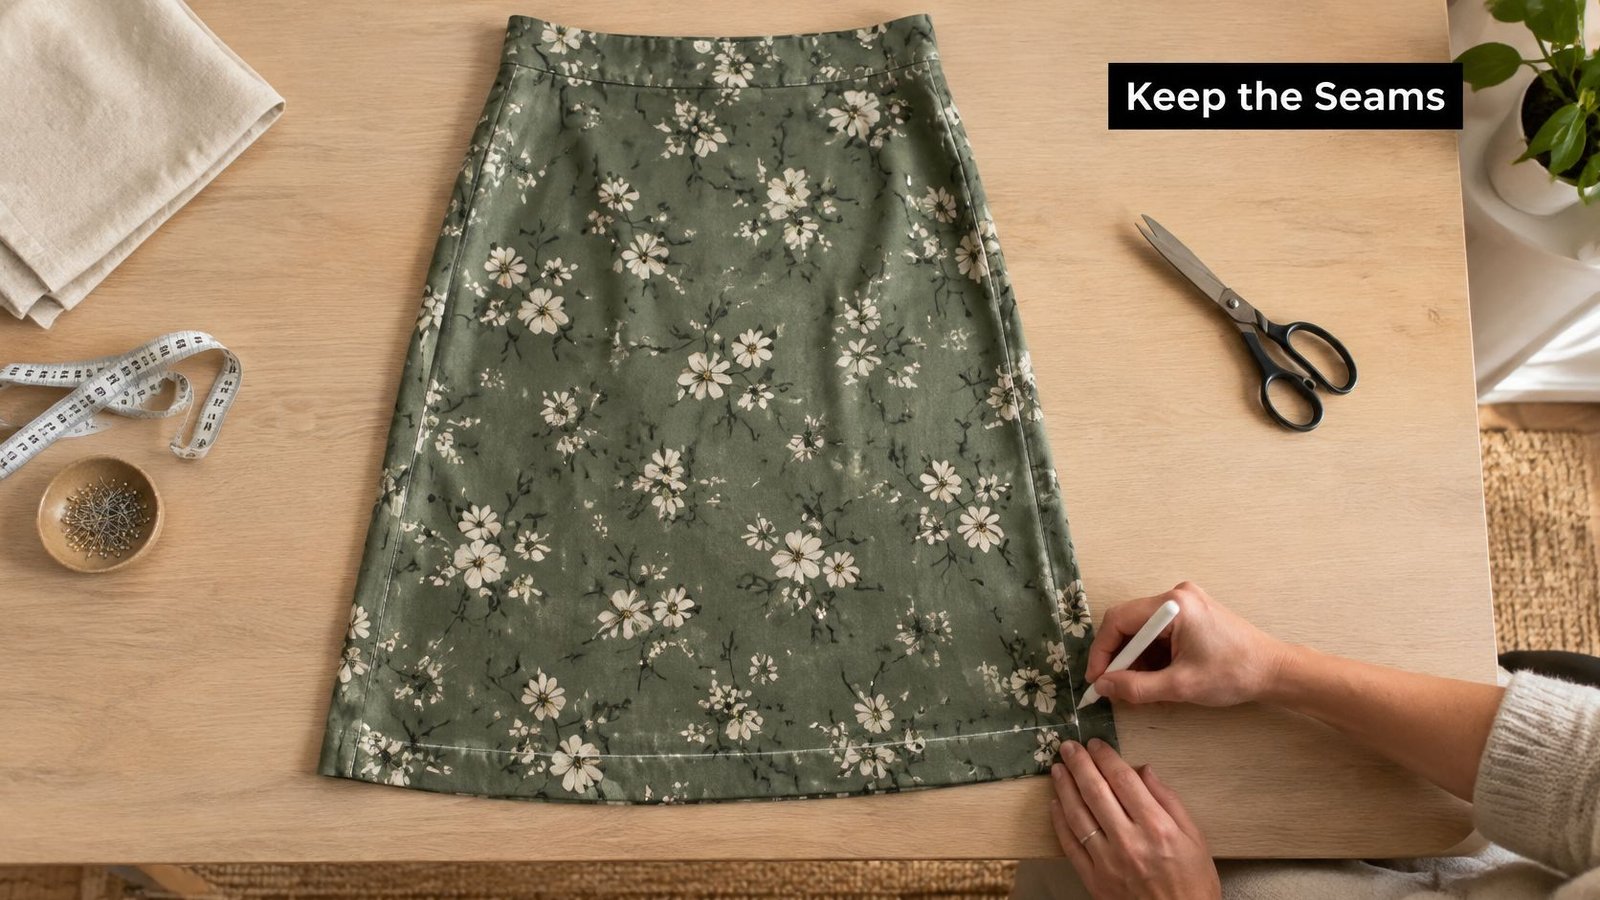
Take a straight-hem viscose midi skirt as the example. Unpick the original hem carefully and keep its allowance intact, because that allowance is your route back if you change your mind. Press out the old crease, then check the length carefully. The bubble costs length: the outer layer must end up longer than the finished hem, so a skirt that's already borderline short won't survive the conversion.
Measure the existing hem circumference, then cut a facing ring smaller than it, ideally from leftover fabric or a remnant, which keeps offcuts out of the bin. That circumference gap is what controls the shape. A small difference gives a gentle roll at the hem, while a larger one pushes the outer layer into a fuller balloon. Attach the ring with the same quarter-mark easing method you'd use on a new garment. If the skirt is lined and the lining circumference differs, build the bubble on the outer layer first, check the silhouette, then fit and catch the lining to the facing afterwards. Wrestling both layers at once invites twisting.
Watch the construction worked through on a real garment before you unpick yours.
Baste first and try the skirt on. Check the hem sits evenly all round, since one tight quarter will drag the whole bubble off balance. If the proportions disappoint, remove the basting, re-press the original allowance, and re-hem it as it was. A tested alteration on fabric you know is safer than a fresh cut in fabric you don't.
Test a Sample Before You Cut the Final Garment
A bubble hem succeeds or fails on the difference between two circumferences, and no pattern envelope can tell you how your fabric will handle that difference. A small sample can. Cut one from the same cloth you plan to use, and the cost stays low because fabric at More Sewing is priced per half metre. With over 50 years of tailoring and dressmaking experience behind the advice in our shop, we'd recommend this step before any final cut.
The sample sequence
- Cut your test fabric and pre-wash it exactly as you'll wash the finished garment. Press it once dry.
- Sew a test bubble using the same fabric, needle, thread and construction order as the final piece. Stock up from a haberdashery range that covers needles and pins, interfacing, Vilene, threads, binding and tapes, elastic, zips and sewing patterns so the test matches the build.
- Turn it right side out and check the hem lies straight at the seam and round in the body. Compare each quarter against the next, then measure both circumferences and note the difference that produced the shape.
- Wash and dry the sample, then inspect the bubble, seam and gathers again. A bubble that survives washing will survive wearing.
- Decide. If it holds, cut the final garment. If it doesn't, adjust the inner circumference by a small, reversible amount and sample again.
Say your viscose sample slips at the seam and one quarter ends up fuller than the rest. That's the sample doing its job. Baste the inner hem first on the next test, and the fault disappears before it ever reaches your skirt. If the finished bubble sits flat, widen the gap between outer and inner. If it looks pinched, narrow it.
One rule: Test before you cut. No sample, no final fabric.
Ready to try a sample bubble before committing your best fabric? Visit More Sewing for dressmaking fabrics sold per half metre, plus the needles, interfacing, threads and patterns you need to test your proportions properly. Start with a stable cotton, prove the shape on a toile, and cut your final garment with confidence.
