
Blog, Dressmaking
Sewing Pattern Dungarees: A Beginner’s Step-by-Step Guide
You've washed the denim, cut the pattern pieces out on the kitchen table, and got as far as the instruction that says attach the bib to the trouser front. That's usually where the doubt sets in, and it isn't because the sewing is beyond you. It's because nothing on the instruction sheet tells you whether the thing will fit when it's finished.
Dungarees have a reputation as an easy project because they look like rectangles with straps. The pattern is simple. The difficulty lies elsewhere: the fit through the rise and the bib, and the hardware, where four layers of denim meet a 40 mm clip and a domestic machine threatens to skip.
That gap is worth naming. A 2025 Good Housekeeping survey of more than 2,000 UK respondents found only 27% could operate a sewing machine confidently, while 89% could sew on a button and 71% could repair a fallen hem (Country Living UK). Those who buy a sewing pattern for dungarees can already mend things. What they can't yet do is predict how a garment will behave before it exists.
Everything below is built around that: fit first, fastenings second, stitching order third. Get those in that order and your first pair gets worn rather than folded into the cupboard next to the toile.
Picking a Pattern and Fabric That Suit Your First Pair
Choose a relaxed dungaree pattern with a loose leg and a wide bib for your first pair. It's the style that forgives the errors you're going to make, and a centimetre of extra ease in a baggy leg is invisible, while the same centimetre in a shaped bib is a gap you'll stare at all summer.
Three styles, three different fitting jobs
A relaxed dungaree hangs from the shoulders rather than gripping the body, so small hip and waist errors disappear into the ease. The bib is usually rectangular, which means no curved facing to wrestle and no shaped seams to match. This is the one to start with.
A fitted version with a shaped bib and crossback straps is a different job. The crossback pulls the bib flat against the chest, so every error in the rise and the bib height shows up as a diagonal wrinkle across the front. Expect two toiles, not one, and plan for the second.
A children's pattern scaled up looks like a shortcut and rarely is. Fewer pockets and simpler seams, yes, but children's dungarees have a short rise and a short bib, and you'll redraft both before the waistband sits where it should. The Victoria and Albert Museum defines dungarees as trousers with a chest bib and shoulder straps and records that they began as working clothes for men and boys before becoming popular among younger children from about 1920 (V&A collections). That history is the reason the children's draft looks so adaptable: bib, straps, waistband, pockets and roomy legs carry across adult and children's sizing with very few changes.
Count the pieces on the instruction sheet before you buy. Ten to fourteen pattern pieces is a sensible first pair. A fly front, five or more pockets and a lined bib each cost hours, and none of them improves the fit. The Hey Day dungaree pattern shows what useful extras look like instead: tie straps that don't need undoing to get the garment on, buttonholes or loops for the fastening, five pockets, legs worn long or rolled, ten sizes from XXS to 7XL, and every version sewable on a regular machine.
The fabric decides how the afternoon goes
Medium-weight denim gives the workwear look and holds a bib's shape without interfacing doing all the work. Cotton drill and canvas cut and press more easily under a domestic foot. Corduroy makes a soft winter pair, but the wale has to run the same way on every piece, which eats fabric fast. Yarn-dyed linen suits warm weather, creases within an hour and needs a lining at the bib so it doesn't stretch out of shape by lunchtime.
| Fabric | Typical weight | Handling for a beginner | Best use |
|---|---|---|---|
| Denim, 8-11 oz | Medium to heavy | Firm, needs a denim needle and a steady feed | Everyday workwear dungarees |
| Cotton drill | Medium | Smooth, easy to press and cut | A structured first pair |
| Cotton canvas | Medium to heavy | Stiff, hard on needles, presses slowly | Sturdy garden or workshop pair |
| Corduroy | Medium | Nap or wale must run one way, can slip | Soft winter pair |
| Yarn-dyed linen | Light to medium | Creases and frays, needs lining at the bib | Warm-weather version |
| Stretch denim | Medium | Distorts when cut | Not recommended for a first pair |
Before you cut anything, fold a double layer of your shortlisted fabric where the bib will sit and press it. If it springs back and lies flat, it will behave as a bib. If it stays creased or ripples along the fold, it will fight the facing for the whole project.
If machine confidence is the bigger question, simple stitching projects from Pinwheel Crafts make a decent warm-up before you commit to a bib, four straps and a set of clips.
Sizing From Body Measurements Rather Than Labels
Ready-to-wear labels mislead by accident. A UK 14 from one shop and a UK 14 from another can differ by several centimetres at the hip, because each brand grades to its own fit model, and none of those models is you. Patterns do a smaller version of the same thing. Treat the printed number as a starting point and the tape measure as the decision.
Take the tape measure in the right order
Stand relaxed with your feet together and keep the tape level all the way round. Don't pull it tight enough to leave a mark. For a lower-body garment the hip is the measurement that picks your size, and The Sewing Directory recommends comparing height, chest or bust, waist and hip against the pattern chart, treating the hip as the key starting measurement for trousers and shorts (The Sewing Directory).
| Measurement | How to take it | What to compare on the pattern |
|---|---|---|
| Hip | Fullest point, tape level, feet together | Hip seam line plus ease; main size selector |
| Waist | Natural waist, relaxed, not pulled in | Waistband line; blend down from hip if needed |
| Inside leg | Crotch to ankle bone, in trousers | Leg length, plus hem allowance |
| Rise | Seat to waist, seated on a firm chair | Crotch depth from waist seam to crotch point |
| Bib height | Waist to where the bib top should sit | Bib top edge; check the straps follow |
| Strap length | Shoulder point over to waist at the back | Strap piece length; adjust later if needed |
| Layering ease | Thickest jumper worn underneath | Extra hip and chest width, about 2-4 cm |
Then measure the paper. Run the tape from seam line to seam line on the pattern piece, ignoring the seam allowance printed outside it, and compare that circumference with your body figure. The gap between the two is your ease, and it appears on no envelope.
Say your hip measures 96 cm and your waist 74 cm, and the pattern's hip line totals 104 cm. That 8 cm is the ease, comfortable for a relaxed dungaree and too generous for a fitted one. Cut the hip size, then blend down to the waist only at the side seam, drawing one gentle curve from hip notch to waist notch. Don't reshape the centre front or the crotch to narrow the waist.
Pattern sizes behave as bands rather than single figures. Your measurement sits somewhere inside the band either side of a size's centre point, so being a centimetre off centre is normal and needs no alteration at all. Sitting at the very edge of the band is the signal to choose the size whose centre is closer to you and add the difference at the side seams. A genuine mismatch at the crotch or the bib means the size is wrong for your body, and no amount of blending will rescue it.
Notions and Tools to Gather Before You Cut
Nothing stalls a bib like discovering at step seven that you own two clips and need six. Buy the whole list before you cut, in one order if you can, so the project never sits unfinished on the table waiting for a delivery.
Needles before thread
The needle matters more than the thread. A 90/14 denim needle handles medium denim and a 100/16 takes rigid fabric or the multi-layer junctions at the bib and straps. Change it the moment you get a skipped stitch rather than adjusting tension and hoping. A walking foot pays for itself at the bib, because it feeds every layer at the same rate instead of letting the top one slide forward. Set a stitch length around 3 to 3.5 mm for topstitching, and lengthen it on heavy cloth only where the feed stays even.
A UK pattern specification for the Harlene dungarees gives a realistic shopping baseline: medium-weight wovens from 8 to 11 oz denim through cotton canvas, cotton drill, corduroy and yarn-dyed linen, plus two 40 mm dungaree clips, two 40 mm adjustable sliders, six 15 mm hammer-on or sew-on buttons and 0.5 metre of lining for the pocket, fly and waist facing (Fabric Godmother).
| Item | Specification | Why you need it | Substitute if missing |
|---|---|---|---|
| Denim needle | 90/14 for medium denim, 100/16 for heavy | Prevents skipped stitches and breaks | New universal needle, sew slower |
| Walking foot | Fits your machine | Feeds multiple layers at the bib | Slow down and hold layers even |
| Dungaree clips | 40 mm, two needed | Fastens bib to straps | Sew-on buttons with buttonholes |
| Adjustable sliders | 40 mm, two needed | Strap length control | Fixed-length straps with buttons |
| Sew-on buttons | 15 mm, six needed | Bib and waist closures | Hammer-on rivets |
| Lining | About 0.5 metre | Pocket bags, fly and waist facing | Lightweight cotton from your stash |
| Fusible interfacing | 6 cm strip | Stabilises pocket tops and strap ends | Iron-on hem tape strip |
| Bias binding | Matching or contrast | Encloses curved pocket edges | Bought bias tape or self-cut strips |
| Topstitch thread | Polyester, contrast colour | Visible seams | Standard thread in a longer stitch |
Buy the hardware before you cut. Clips and sliders in odd sizes are the one thing you can't substitute from the stash at nine in the evening.
We stock Vilene interfacing, bias binding, denim needles and threads in the haberdashery range at More Sewing, so the list above is one order rather than four separate trips.
Adjusting the Pattern Before You Touch Fabric
Cut the calico before you alter the paper. A toile costs an afternoon and removes the guesswork entirely: you put it on, sit down, reach for the kettle, then chalk where it pulls. Altering a paper pattern you haven't tested is just moving a line and hoping it lands in the right place.
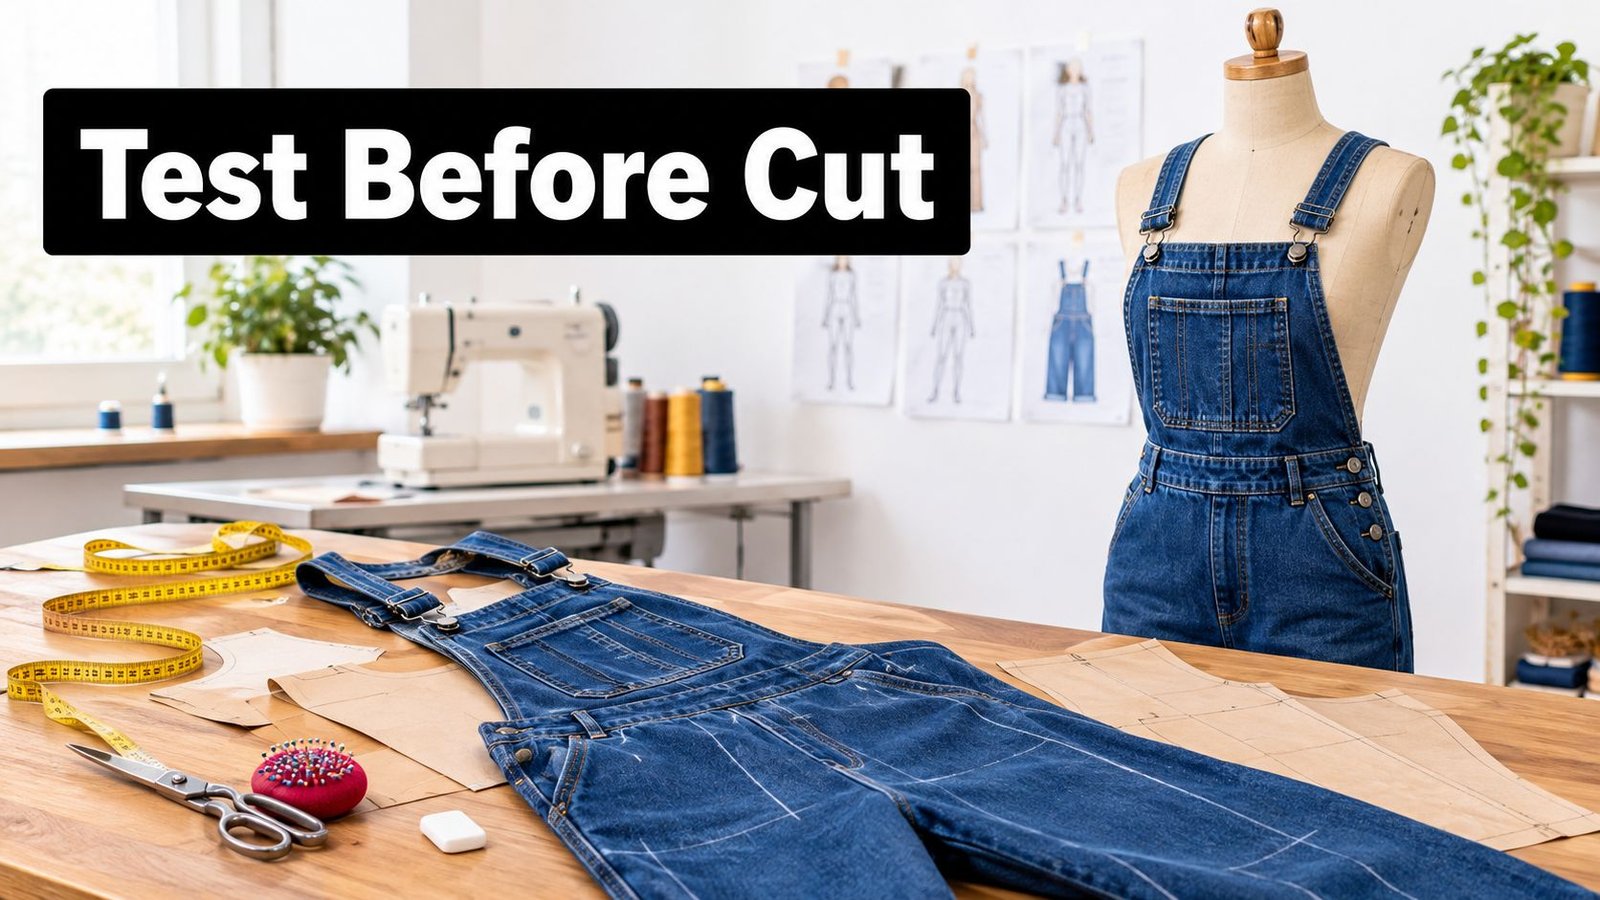
Sew the toile in calico or cheap lightweight denim, not in the good stuff. Calico has enough body to show a crotch that pulls and enough drape to show a bib that gapes, and it costs a fraction of a metre of rigid denim.
The five alterations that fix almost everything
Most first-pair problems come from five places, and each has a number attached to it.
- Leg width. Take in or let out 2 to 3 cm at the side seam and never at the inside leg, keeping the crotch curve the same shape while you do it.
- Crotch depth. When the toile pulls as you sit, lengthen the rise 1 to 2 cm at the top of the crotch curve. When it bags, shorten it by the same amount. This is the alteration beginners skip and then blame the fabric for.
- Bib height. Pin the bib top where you want it before you commit: raise or lower the whole bib until the top edge sits comfortably without tugging the straps.
- Strap length. Straps that slide off the shoulder are usually 1 to 2 cm too long. Shorten them at the back where the buttons or sliders sit, so you're not unpicking topstitching.
- Hip-to-waist balance. Blend between sizes at the side seam in one curve and leave the centre front and centre back alone.
For a drafting reference, the Stitch Sisters' simplified version makes the back 1 inch wider than the front and uses a strap strip of 4 inches by 60 inches, pieced when the fabric is narrower or shorter. It also marks a side opening 6 inches in from the side seam with a 10 to 12 inch drop and a 2 inch line drawn at a right angle before the curve is shaped (Stitch Sisters). Those proportions work as a sanity check even if you're using a commercial pattern.
If you'd rather watch the assembly order before you sew the first seam, this walkthrough runs from cut pieces through to a finished bib and straps.
A bib that gapes at the sides is almost never a bib that's too wide. It's a waist that's too large, pulling the bib away from the body, so take in the centre back seam a centimetre at a time and try it on between passes. Whatever you change, change the front and back by the same amount, or the side seams won't match and you'll spend the afternoon easing one into the other.
Mark it on the paper. Transfer every alteration to the pattern in a contrasting pen before you cut the denim. The toile is disposable; the corrected pattern is the thing you'll use again.
How to Cut and Assemble Dungarees Step by Step
The Scottish Qualifications Authority's fashion and textile instructions for children's dungarees split the job into separate stages, treating the bib, straps, pocket edges and crotch as subassemblies rather than one continuous seam, and the order is what stops bulky junctions distorting everything sewn after them (SQA fashion and textile technology).
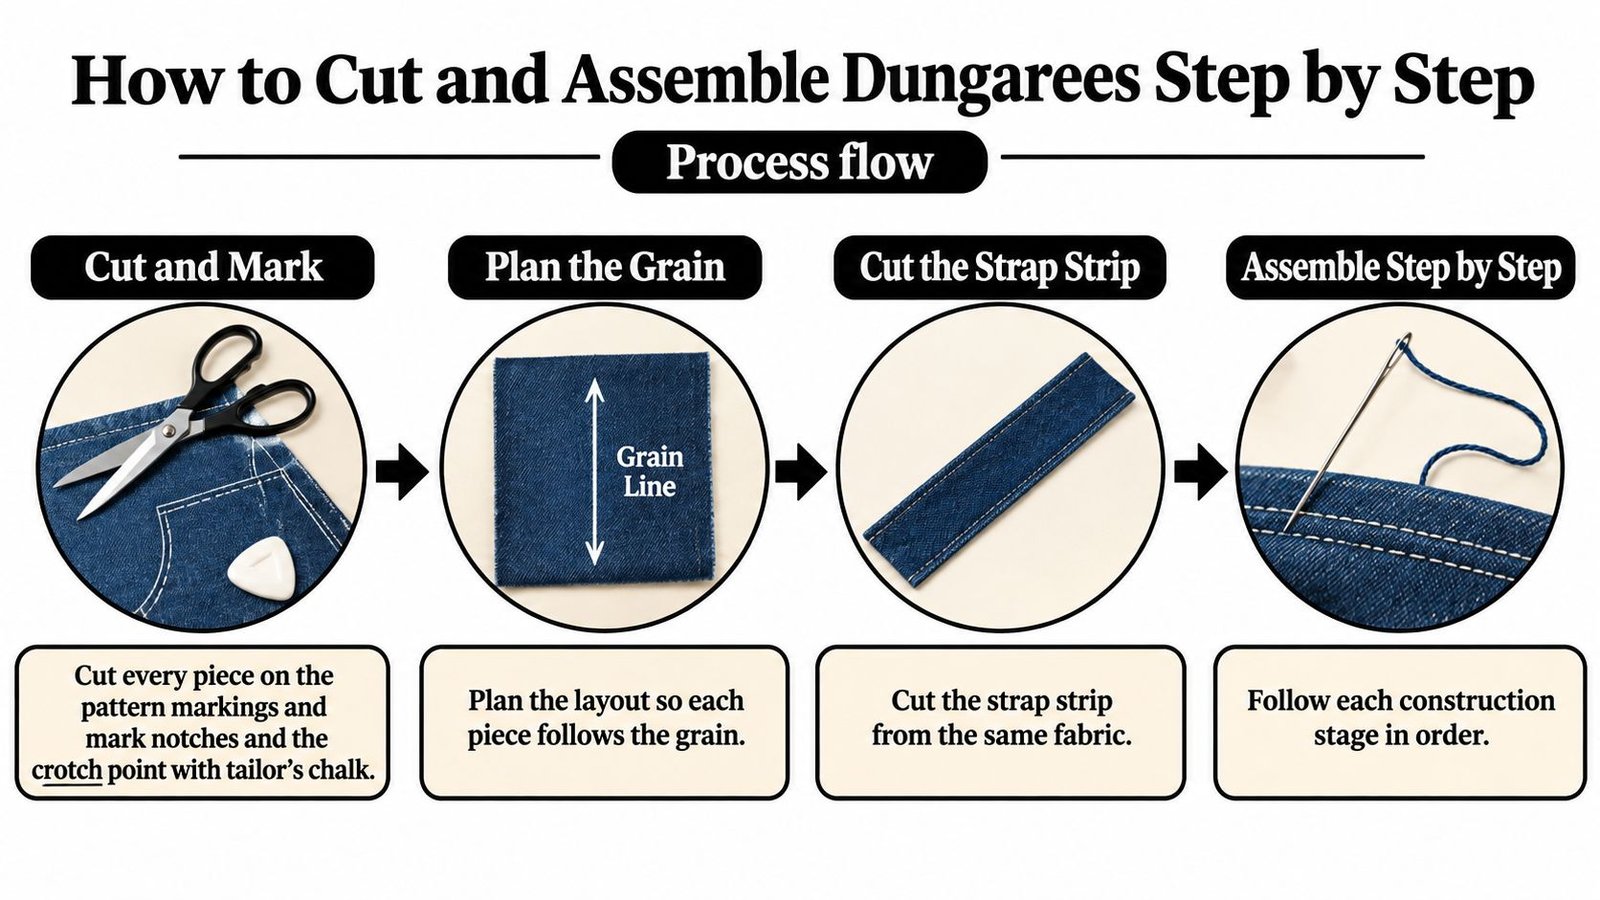
- Cut and mark. Cut every piece on the pattern markings and mark notches and the crotch point in tailor's chalk. A rotary cutter starter set for quilters, with a mat and a fresh blade, cuts denim and corduroy cleanly and keeps the long strap strip straight.
- Test on a scrap. Sew one seam and one buttonhole on scrap fabric with the needle, thread and seam finish you plan to use. This single step prevents most of the unripping.
- Plan the grain. Lay out so every piece follows its grain line, and cut the strap strip from the same fabric. If your width is short, piece the strip rather than shortening it.
- Fuse the stress zones. Press interfacing behind the pocket tops and the strap ends before anything is assembled.
- Bind and press the pockets. Bias-bind the curved pocket edges, then stitch and press the pocket tops 2 cm from the upper edge and set them aside flat.
- Join the legs. Sew the inside-leg seams first, so each flatter subassembly is pressed before it goes near the crotch.
- Sew the centre seam. Match front to back from centre front through the crotch curve, then finish the raw edge with pinking shears, an overlocker or a zigzag stitch.
- Attach the bib and facings. Stay-stitch the bib curves, clip and trim the allowances, and match the bib centre to the trouser centre before you stitch.
- Straps and closures last. Attach the straps and underlaps, press the whole garment, then cut buttonholes or fit poppers and rivets so you can check strap length on the wearer first.
The sequence at a glance, with the four decisions that keep a first pair on track:
Pressing between stages does more for the finished look than any topstitching tip. Bulk assembled warm and flat behaves; bulk assembled in one go distorts, and no amount of steam afterwards will pull it back into line.
Fitting Fixes and Finishing Tips That Make Them Last
The first problem you'll meet isn't at the machine. It's the pull across the crotch that shows up after an hour of wearing, and it comes from crotch length rather than from the seam you think you sewed badly.
| Symptom | Likely cause | Fix |
|---|---|---|
| Pulling across the crotch | Crotch seam too short | Lengthen the crotch on the toile by 1-2 cm |
| Bib gaps at the sides | Waist too large | Take in the centre back seam, not the bib |
| Straps slip off shoulders | Straps too long or set too wide | Shorten 1-2 cm and move the attachment inward |
| Puckered pocket tops | Unfused edge or stretched fabric | Fuse the strip and press before topstitching |
| Seams slip at pocket and strap corners | Long stitch, no reinforcement | Bar-tack or backstitch 1 cm at each corner |
| Needle breaks at bib junctions | Too many layers, wrong needle | 100/16 denim needle, walking foot, sew slowly |
| Hem wavy after wear | Uneven hem allowance | Mark and press an even hem before final stitching |
Treat fit as a tolerance rather than a look. Research using UK apparel sizing systems reports a 5 cm grading interval for bust, waist and hip, with each size sitting at a central measurement inside a ±2.5 cm tolerance, and the same guidance references BS EN ISO 13935-2 for seam strength, with indicative light-sewing and heavy-sewing test loads of 12 kg and 18 kg (Scientific Reports). Those are laboratory benchmarks, not rules for your kitchen table, but they explain why stress points deserve reinforcement: bar-tack the pocket corners, strap attachments and crotch ends, because they open first.
You don't need an overlocker to finish a pair. Zigzag or overcast every seam allowance, press it open, then topstitch 3 to 4 mm from the seam so the allowance stays flat through washing. A longer stitch on heavy denim is fine only where the machine feeds consistently; where it doesn't, shorten the stitch and slow down.
The hour test. Wear the dungarees for an hour before you call them finished, then recheck the crotch pull and the strap position. Wearing finds faults that the mirror misses.
Keeping them wearable is the point of all that reinforcement. WRAP's 2025 research found that repairing clothing displaces new purchases at a rate of 82.2%, four new items for every five repairs, as reported by the National Lottery Community Fund (The National Lottery Community Fund). A pair you can adjust and mend earns its making time.
Confirm the Fit and Start Your First Pair
A calico toile earns its place before you cut denim. Wear it, sit, bend forward and squat. Check for crotch strain, straps slipping off your shoulders, or a bib that rides too high. Mark each fault on the toile, then transfer the changes to the paper pattern while you can still match each wrinkle to how it felt.
For the finished pair, choose a medium-weight fabric and one pocket style. Allow extra fabric for a needle and stitch test, so you can check how your machine handles the cloth without cutting into a pattern piece.
Judge the fit in motion:
- The bib sits level across your chest, without gaping at the sides.
- The straps stay put through a full day without needing repeated adjustment.
- The crotch feels comfortable when you sit, bend and climb stairs.
A comfortable pair matters more than perfect topstitching. Keep a short notebook of your measurements and pattern changes. That gives you a corrected starting point for your next pair, whether you stick with medium-weight fabric or move on to rigid denim.
Browse calico, denim, interfacing and haberdashery at More Sewing. Order a metre of calico alongside your denim, then sew and fit the test pair before cutting into your finished fabric.
