
Dressmaking
How to Sew Baby and Toddler Bibs: A Complete Guide
You're probably at the point where the pile of stained shop-bought bibs is getting annoying, or you've got a baby shower to prepare for and want something useful rather than another random cute thing. Bibs look simple until you try to find one that's the right size, soft enough at the neck, tough enough for daily washing, and not so flimsy that it gives up after a few meals. Sewing your own solves those problems, and it lets you make something that fits the child in front of you.
A well-made bib is a small project with a surprisingly big payoff. You control the fabric, the coverage, the fastener, and the finish, so you can make something for pure dribble, messy meals, or both. If you're already gathering baby-care basics, a practical newborn care guide can sit nicely alongside your sewing notes, especially if you're making gifts for a family that likes useful over decorative.
Why Homemade Bibs Are Worth the Effort
The first time a parent watches a third outfit get changed before lunch, the appeal of making bibs at home becomes obvious. Shop-bought options often fail in the same boring ways, they're too stiff at the neck, too tiny across the chest, or they start fraying after repeated washing. A handmade bib gives you the chance to fix those flaws before they start.
A bib is basically three decisions in one. You're choosing how much fabric sits around the neck, how far down the front the bib falls, and how it closes. That sounds minor, but small changes make a huge difference in comfort and usefulness. A narrow bib might be fine for a drooler, while a wider one makes more sense at mealtimes when food ends up everywhere.
The shape matters more than the decoration
Most good bibs fall into one of three families, and each one solves a different problem. A standard bib gives dependable chest coverage. A drool bib sits higher and smaller, which works well when you're trying to keep clothing dry rather than catch a full meal. A bandana bib looks neat, but its pointed front is best for light to moderate dribble rather than serious mess.
Practical rule: make the bib for the mess you actually have, not the bib you wish you had. A pretty shape won't matter if the neckline gaps or the front finishes too high.
That's where homemade wins. You can adjust the neck curve, add a layer, or lengthen the front without waiting for a manufacturer to notice what parents already know. Bib-making also works well as a quick project for using up scraps, but it still rewards careful technique. A sloppy neckline or a weak fastening shows up fast.
If you've ever handled old industrial bib-overall styles, the logic will feel familiar. The word itself developed from bib overalls, with early overalls appearing in the late 1890s and the modern bib-front version commonly traced to 1911, when Harry David Lee introduced bib overalls with a chest bib and shoulder straps, part of a broader workwear tradition that shaped utility clothing and, later, everyday sewing choices. That practical origin is exactly why bibs still make sense as a home project today, they're simple, functional, and easy to adapt.
Choosing Fabrics That Actually Survive the Wash
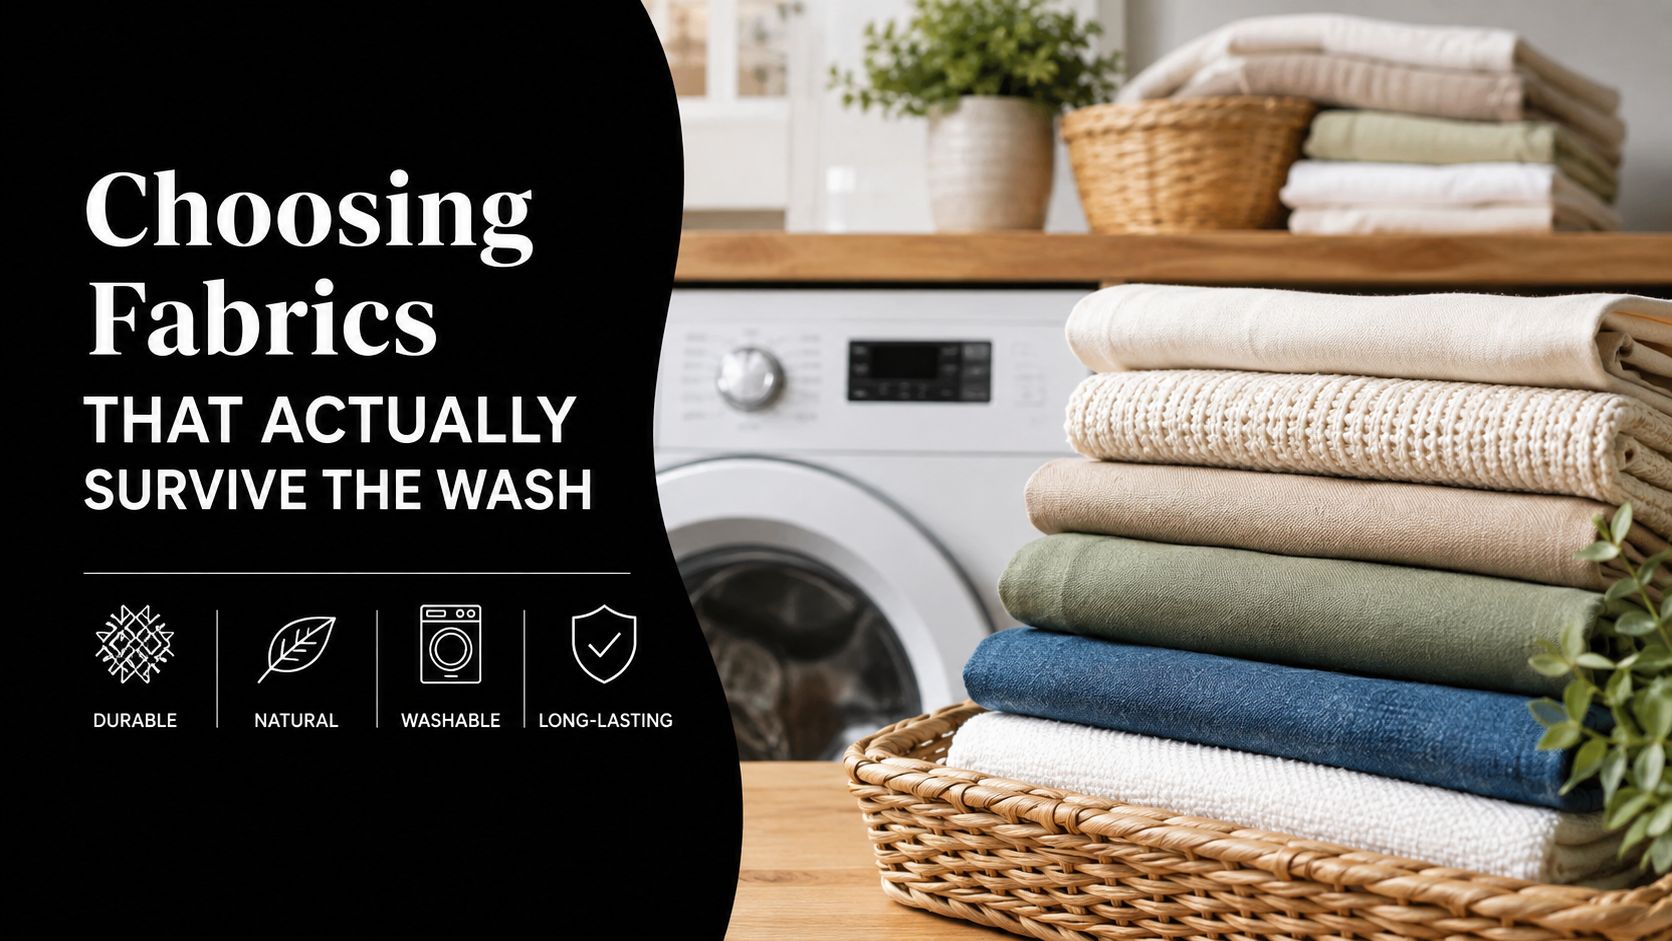
The fabric you choose decides whether your bibs become favourites or landfill. I've seen beautiful shapes ruined by limp cloth, and sensible patterns made useless by fabric that puckers, pills, or leaks through the second the bib gets wet. For everyday baby bibs, the best result usually comes from pairing a stable outer layer with a backing that can stand up to washing and feeding mess.
What works on the front
Quilting cotton is a safe starting point because it's stable, easy to cut, and easy to press. It's not always the most absorbent, though, so if you want a bib for heavy drool or meal spills, it often needs help from a second layer. Jersey can feel softer around the neck, but it stretches, which means you need to handle it carefully or it warps during sewing. French terry is a strong option when you want a bit more absorbency without making the bib bulky.
For the back, flannel can be excellent if you pre-wash it properly. It adds softness and a little grip, but it shrinks more than many people expect, so skipping the wash means your finished bib may twist after the first laundry cycle. If you're making a three-layer bib, a middle absorbent layer can help, but keep it thin enough that the bib still lies flat under a chin and doesn't become a stiff slab.
Useful habit: rub a corner of the fabric with a damp white cloth before cutting. If colour transfers, it's not worth trusting in a bib that will be washed constantly.
What to avoid
Anything that pills early, feels scratchy at the neck, or bleeds dye is a bad bet. Avoid fabrics that look lovely on the roll but collapse after a little friction, because bibs get rubbed by clothing, hands, highchair straps, and repeated laundering. Also avoid making every layer heavy just because you can. More thickness doesn't automatically mean better performance, it can make turning, topstitching, and fastening much harder.
If you're sourcing in the UK, use swatches where possible and test a small square first. Wash it, dry it, and press it. If it curls, distorts, or looks tired after that test, don't cut the rest of your bibs from it. I'd rather use a slightly plainer fabric that behaves well than a gorgeous one that turns stubborn on the machine.
For a practical comparison, adult care bibs are often built with a 33 cm x 45.5 cm single-use format using 2 layers of embossed cellulose plus 1 waterproof polyethylene layer, which shows the same principle at work, the front absorbs, the back protects, and the overall size needs to match the user's posture and coverage needs. That logic carries straight into baby bibs, even though the construction is different. The goal is always the same, absorb what you can, block what you can't.
The history of bib materials also reflects practicality. Workwear bibs developed alongside stronger textiles and better closures, and by 1927 Harry David Lee had introduced a hook-less fastener and button-less overalls. That kind of ongoing refinement is a good reminder that bibs improve when the details do.
Drafting Your Own Bib Pattern for Any Age
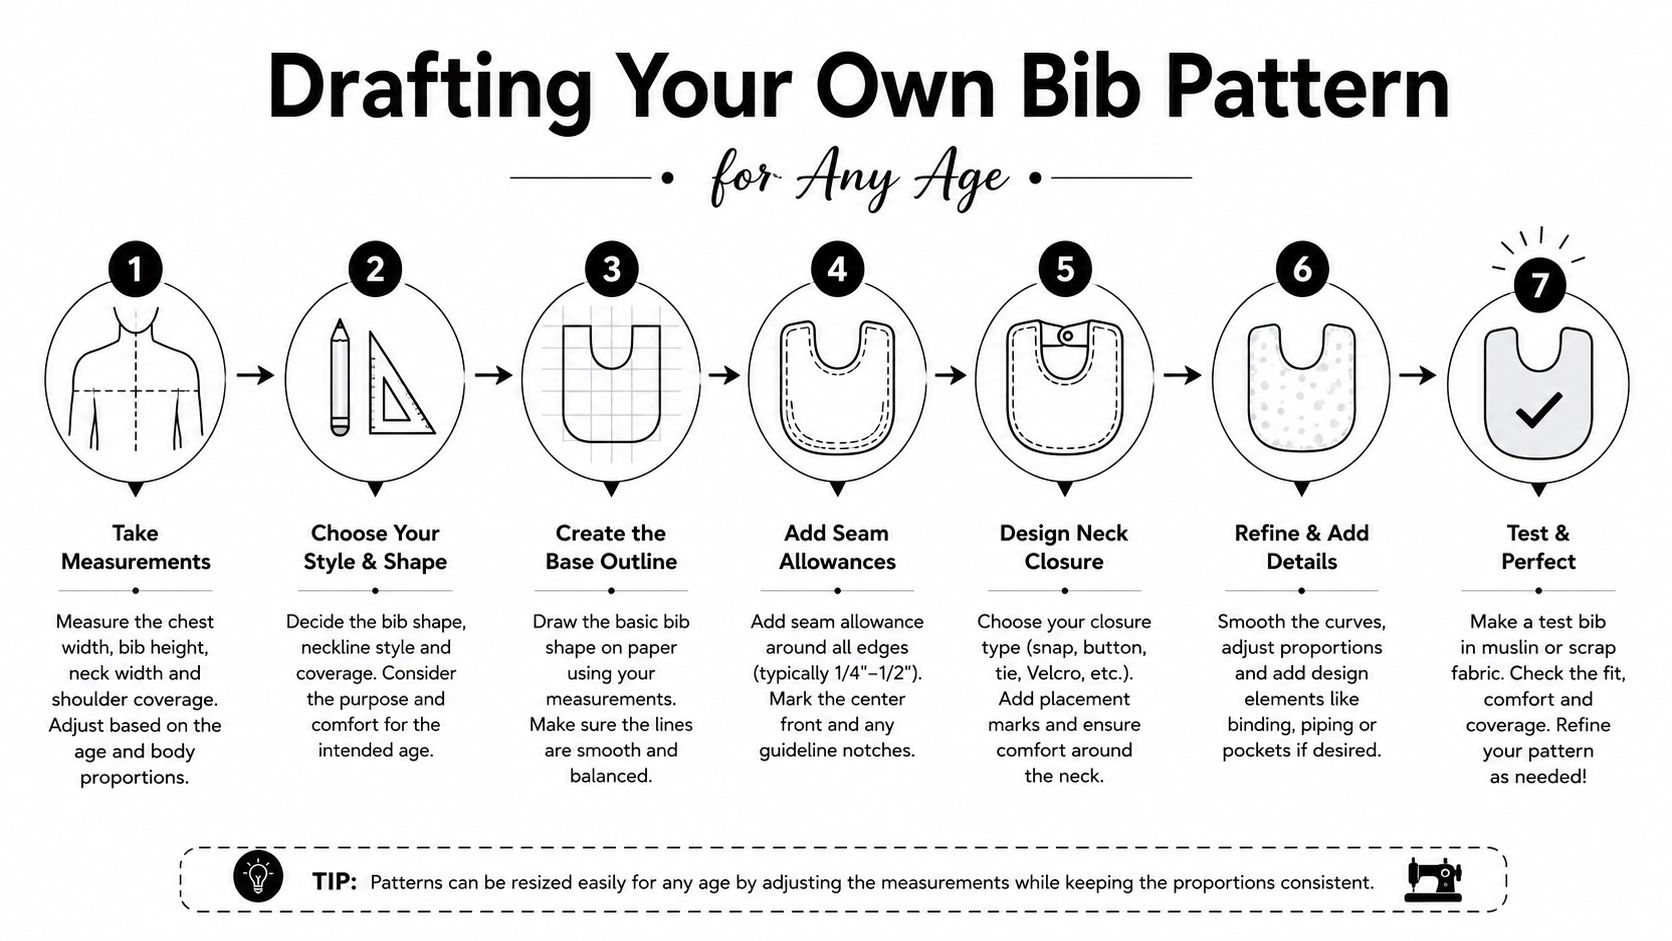
A homemade bib doesn't need a commercial pattern. It needs a pattern that fits the child, the fastener, and the way the bib will be worn. The easiest way to start is with a simple paper template that you can reuse and adjust, rather than buying a new pattern every time a child grows.
Start with the neck and shoulder line
Measure the child's neck loosely, then add enough room for comfort and fastener overlap. For a newborn or very small baby, a narrow neck curve and short front panel usually work best. For toddlers, increase both width and length so the bib reaches past the chest and doesn't ride up at the shoulders.
A rectangular bib is the quickest draft. Draw a rectangle, round the top corners, and curve the neckline inward so it sits flat instead of gaping. A contoured bib is better if you want it to hug the shoulders slightly more closely. A bandana bib starts from a triangle, but the same principle still applies, the neck opening must be shallow enough to sit neatly without pulling.
Make the first version in cheap cloth
Before cutting into your chosen fabric, make a test bib in calico or an old sheet. That trial version tells you whether the neck opening is too tight, whether the front is too short, and whether the bib sits where you want it when the child moves. It also shows whether your fastener placement is realistic.
A pattern that looks perfect flat on the table can still fail once it's worn. The neckline has to match the body, not the paper.
Keep allowances consistent
Add seam allowance only once, and add it everywhere. A lot of homemade bib problems come from drafting the outline and then forgetting that the finished bib will be smaller after stitching and turning. Mark your seam allowance clearly on the template, especially around the curves, because that's where careless measuring makes the biggest difference.
For mealtime bibs, draft longer front coverage. For drool bibs, shorten the body and focus on comfort at the neck. If the bib is for a child with reduced dexterity or a caregiver who needs faster dressing, make the neck opening larger and use a closure that's easy to close with one hand. The same base draft can support all of those choices.
If you're ever unsure, remember that UK technical sizing for adult bibs uses practical coverage first, with formats like 33 cm x 45 cm or 38 cm x 45 cm chosen for how they protect clothing in use. That same mindset applies here, your template should serve the job, not the other way round.
Sewing Techniques That Prevent Common Failures
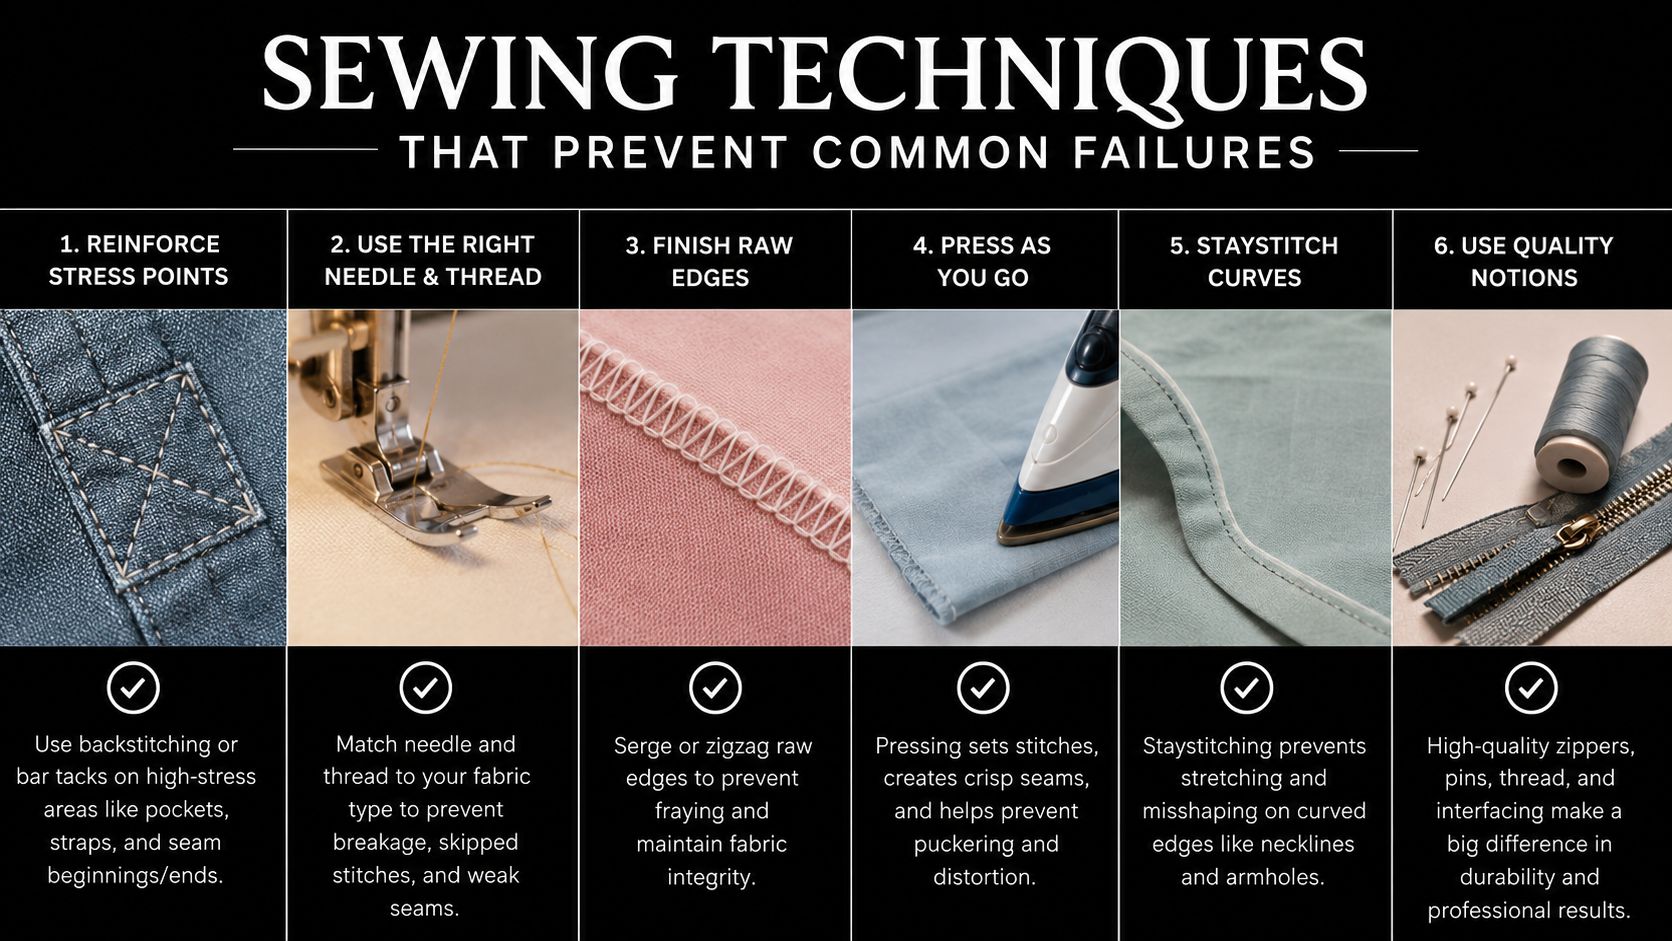
Most bibs fail at the sewing stage, not the design stage. The usual culprits are shifting layers, sloppy curves, and too much bulk at the neckline. If you get those under control, the bib starts looking handmade in the best sense, clean, sturdy, and meant to be used.
Layering and stitching without distortion
Cut your pieces accurately, then stack them with the most stable fabric on top and the least stable layer underneath if you're working with mixed materials. Pin or clip the neckline first, then work outward to the edges so the curves stay aligned. For slippery fabrics, more pins are better than fewer. I'd rather remove extra pins than fix a stretched neckline later.
Use a stitch length that keeps the seam secure without perforating the fabric like postage. On most bibs, a medium straight stitch works well, but if the fabric is stretchy, a narrow zigzag or stretch stitch can help the seam move with the cloth. The key is consistency. Uneven tension causes the top layer to ripple, especially around the neck curve and corners.
Clipping, turning, and topstitching
Once you've sewn the perimeter, clip the curves carefully so the seam can spread when you turn the bib right side out. On inward curves, small snips relieve pressure. On corners, trim the seam allowance before turning so the point doesn't bunch up. If the bib is multi-layered, grade the seam allowances so one layer doesn't make a ridge that shows through.
Topstitching does two jobs. It flattens the edge and gives the bib a finished look. Sew slowly around the neckline and use your fingers to nudge the seam allowance away from the edge as you go. If you rush this part, the stitching wanders and the bib ends up with a wavy border.
Practical rule: if the curve wants to fight you, stop, finger-press, and re-pin. Forcing it through the machine usually makes the finish worse, not better.
Fixing the annoying problems
A bib that puckers at the neck usually has either too much bulk or too much tension. Loosen the tension slightly and check that your seam allowances are clipped enough to lie flat. If the layers shift while sewing, baste them first or reduce the pressure on the presser foot. For stubborn binding that refuses to sit neatly, press the strip thoroughly before sewing and fold it with even width all the way along.
Thread bunching is usually a machine issue, not a bib issue. Re-thread the top path, check the bobbin, and test on scraps before you blame the pattern. Sewing bibs is repetitive work, so tiny setup problems repeat quickly. Solve them once and the next several bibs go faster.
Finishing Options and Fastener Choices
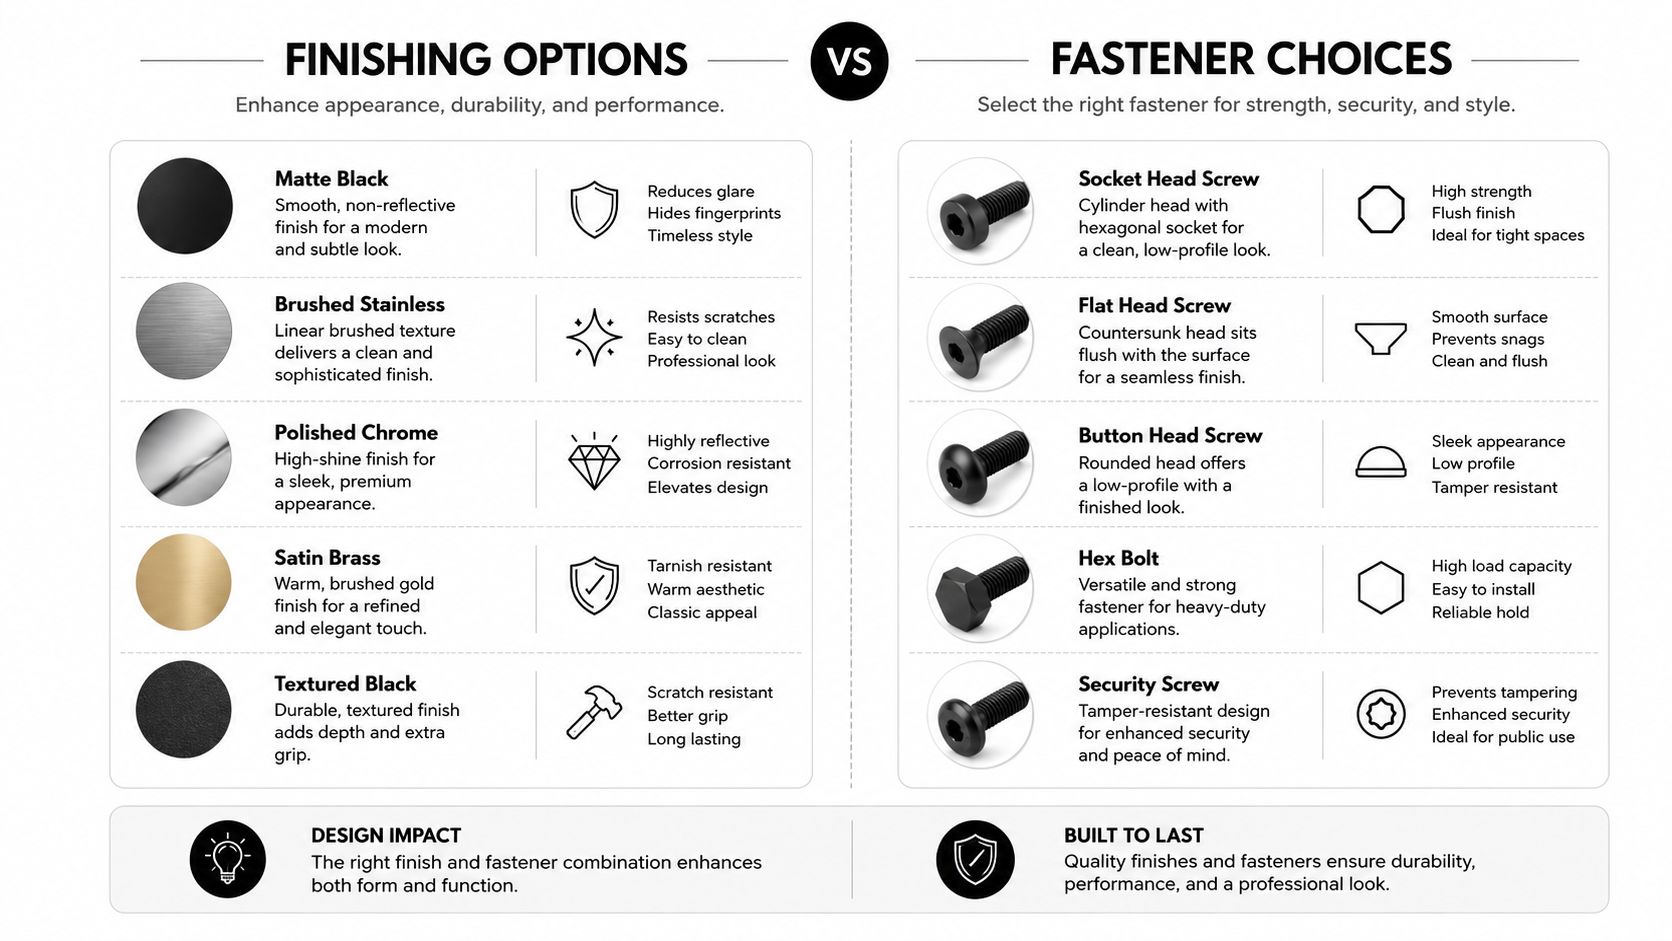
The finish decides whether a bib feels polished or homemade in the wrong way. It also affects wash life, because a weak edge starts curling long before the fabric itself is worn out. The main choice is between bias binding, fold-over elastic, and self-fabric facings, and each one behaves differently.
Which edge finish makes sense
Bias binding is the strongest all-round option if you want a neat edge on a curved bib. It takes a little practice because the strip wants to stretch or ripple on the curve, but once you learn to feed it gently, it gives a clean, durable border. Fold-over elastic is faster and softer at the edge, which makes sense for bibs that sit near the skin and need a bit of give. Self-fabric facing can look tidy, but on bibs it often feels bulky and can twist if the fabric is thick.
For most baby bibs, I reach for binding or elastic rather than facing. A bib gets washed a lot, handled a lot, and tugged by small hands, so the finish has to stay neat without becoming stiff. If the bib is for a child who mouths everything, keep the finish smooth and avoid anything scratchy at the neck.
Fasteners that hold up
Snaps are usually the best closure for baby bibs because they're low-profile and don't scratch. A hand tool works fine for small batches if you take your time, while a press machine speeds things up when you're making several bibs at once. Hook-and-loop tape is convenient, but it can stiffen after washing and may feel harsh if the bib sits against delicate skin. Buttons are secure, yet they're less convenient on a wriggly baby and take longer to attach properly.
If you want to compare ready-made options before sewing your own, it helps to study a well-made commercial bib such as the premium baby bibs at NINI and LOLI. Looking at how the closure sits, how wide the front panel is, and how the neckline is shaped can tell you more than a dozen vague tutorials.
Best test: open and close the fastening ten times before you call a bib finished. If it already feels awkward, it'll be worse after a few laundry cycles.
For UK sewing, use hardware sized for babywear and keep everything soft against the skin. The goal is a closure that stays put, washes well, and doesn't pull the fabric out of shape. That's the difference between a bib that gets worn and one that sits in a drawer.
Variations, Sizing Adjustments, and Long-Term Care
Once the basic bib works, the useful variations start to matter. Small changes decide whether a bib gets used every day or ends up forgotten in a drawer. Reversible bibs make good use of two coordinating fabrics, pocket bibs catch dropped food more effectively, and drool bibs work best when they stay light, soft, and comfortable enough for all-day wear.
Adjusting the bib for the child
Premature babies need a gentler scale, with a smaller neck opening and much less front bulk. Larger toddlers usually need more width across the chest, plus a longer front so the bib catches mess instead of sitting above it. For children with specific needs, the neck shape matters as much as the fabric, because a bib that looks fine on paper can still bother sensitive skin if the curve is too tight or the fastening sits in the wrong place.
If you're making for a child with low dexterity, choose closures that are easier to handle and add visible contrast between the bib, the fastener, and the garment underneath. UK advice on accessibility often misses practical sewing details like this, even though global vision-impairment figures show the need is real, with at least 2.2 billion people living with near or distance impairment and at least 1 billion of those cases preventable or unaddressed according to the WHO blindness and visual impairment fact sheet. The same accessibility thinking helps with bibs for older adults too, especially where feeding aids need to be easy to identify and secure.
Caring for bibs so they keep their shape
Wash bibs with the rest of the child's laundry, but do not assume every fabric likes the same treatment. Heavier washing can be fine for sturdy cotton bibs, yet anything with elastic, decorative trim, or mixed fibres needs a bit more care. Stain treatment matters too, especially with tomato, fruit puree, and oily food, because repeated harsh scrubbing can damage the fabric before the bib itself wears out.
Reusable bibs are often treated as the greener answer, but the better question is how long they last and how they are laundered. A bib that survives many washes and keeps its shape is a better investment than one that looks sustainable but shrinks, twists, or gets replaced quickly. That lifecycle view is the one worth using when you decide whether to make a batch in one fabric or mix and match finishes.
Batch sewing helps here. Cut several bibs at once, chain-piece what you can, and keep your closures in one container so you are not hunting for snaps halfway through. A small label box, a tray for pattern pieces, and a separate pile for pre-washed fabric save time every single session. Handmade bibs work best when the system is simple enough that you will use it again.
