
Blog, Dressmaking
How to Sew Curved Seams Without Puckering or Pulling
You're halfway through a sleeve or bodice, the two curved edges are pinned together, and tiny puckers are already appearing before the machine has taken a stitch. It's tempting to add more pins, pull the fabric into submission, and hope pressing will rescue the seam. Usually, that makes the distortion harder to remove.
Learning how to sew curved seams starts with treating the fabric, not the curve alone, as the problem. Cotton lawn, viscose, denim and jersey each respond differently to easing, stabilising, clipping and pressing. Once you can read what the cloth is trying to do, a curved armhole, neckline or princess seam becomes a controlled construction job rather than a wrestling match.
Why Curved Seams Behave Differently
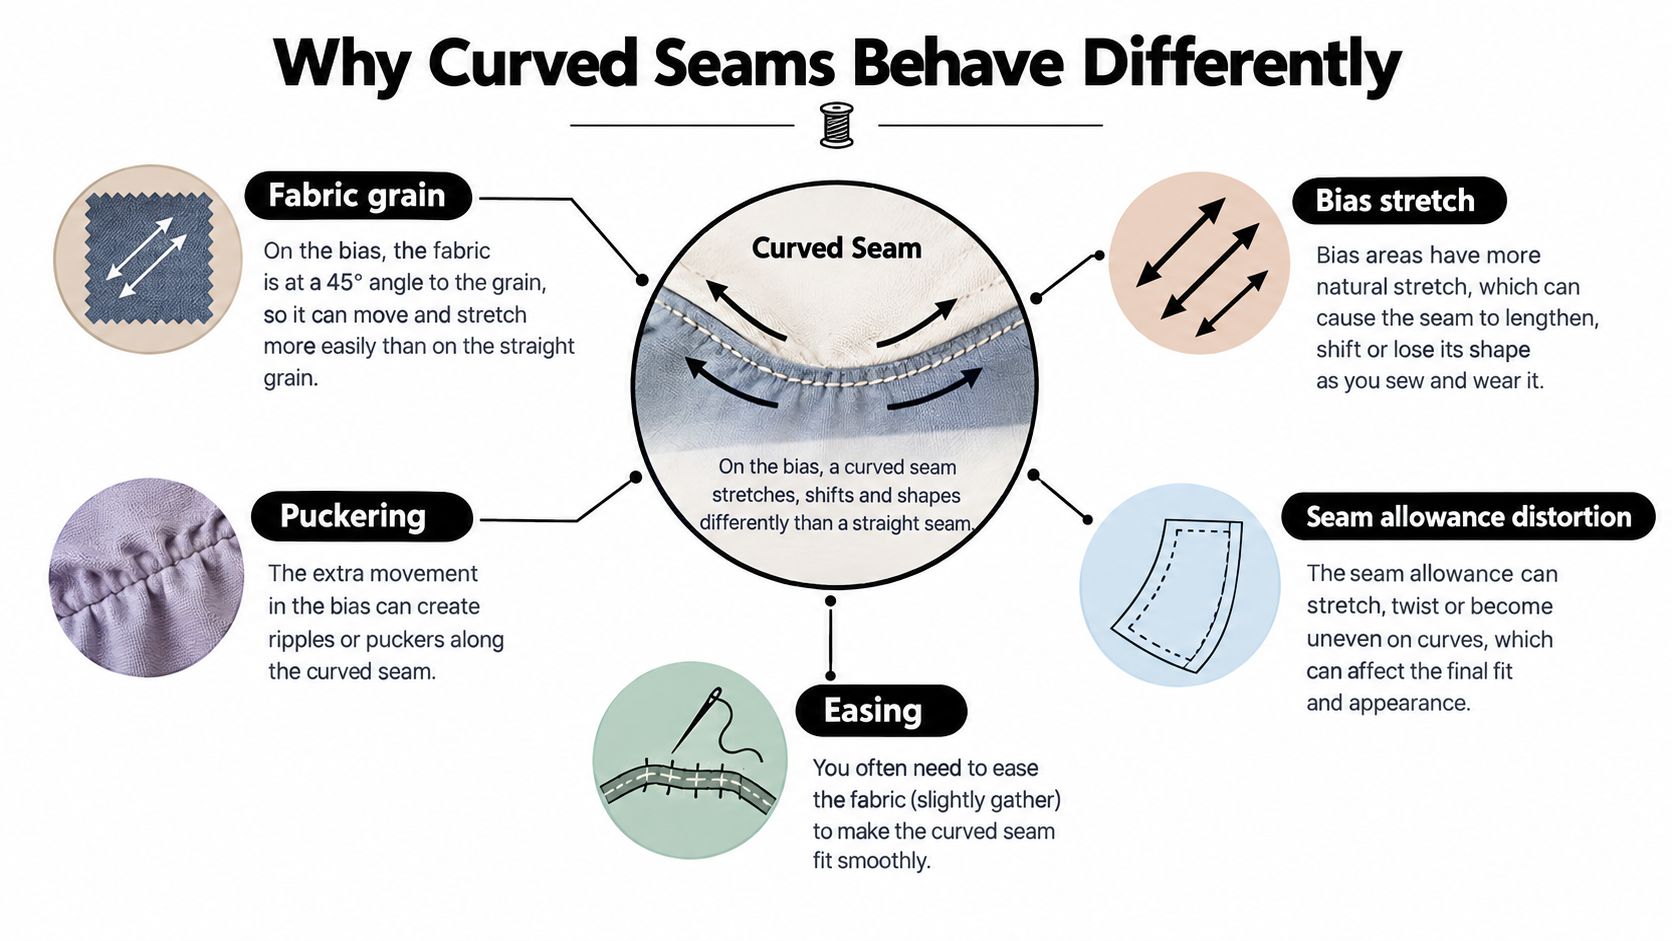
A straight seam is comparatively forgiving. The fabric edges meet along a consistent path, and the feed dogs can move the layers forward without constantly changing direction. A curve asks more of the cloth because the outer edge travels further than the inner edge, yet both edges must become one stitched line.
That difference in length is the source of most curved-seam trouble. The longer edge needs to settle into the shorter one, while the seam allowance must spread, shrink or rotate around the shape. If the excess has nowhere to go, it becomes a pucker. If you pull the layers to make them match, the result is often a drag line or a stretched edge.
The curve has two different jobs
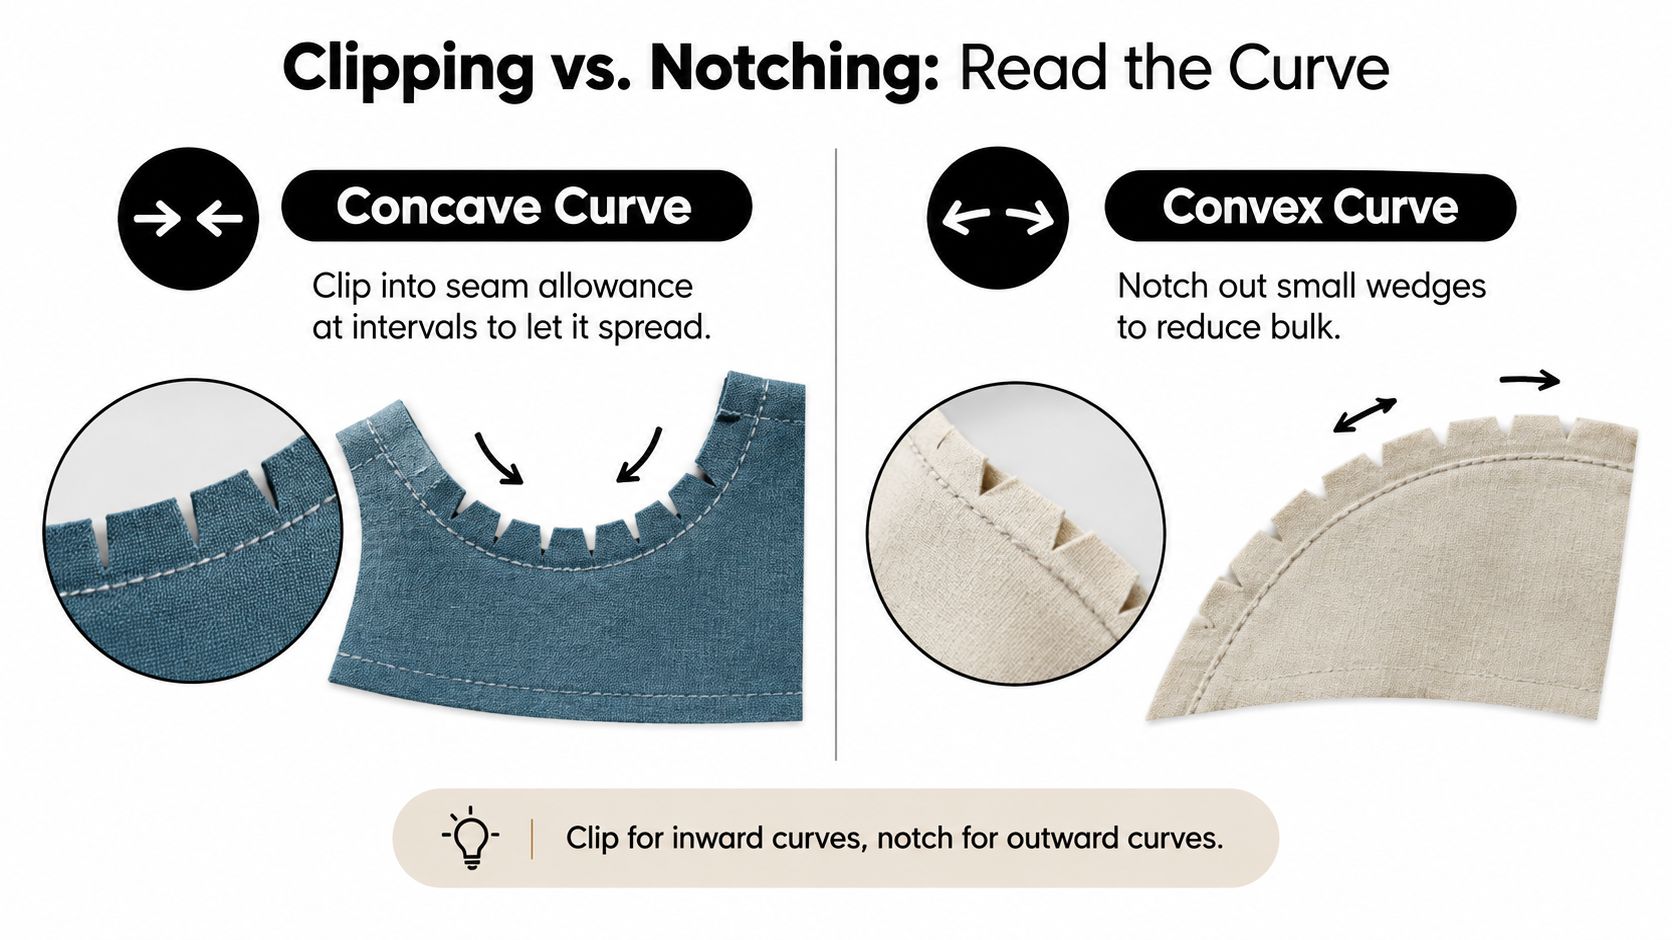
On a concave curve, such as a neckline that scoops towards the body, the seam allowance needs to open out. Small clips let it spread so the finished edge can turn without pulling.
On a convex curve, such as the top of a sleeve cap, the seam allowance carries excess fabric around the outside. Notches remove small wedges and reduce the bulk that would otherwise force the seam to wrinkle.
Workshop observation: If the seam looks wrong before stitching, the machine isn't the main culprit. The fabric edges aren't being allowed to accommodate their different lengths.
Grain direction adds another layer. A curve crossing the bias can stretch while you handle it, especially in lightweight or fluid cloth. A shaped panel over the bust, waist or hip may look accurate on the pattern table but become longer or softer once lifted and pinned.
The practical response is mechanical. Stabilise an edge that wants to stretch, ease an edge that has extra length, release the seam allowance with clips or notches, then shape the finished seam over a pressing ham. Every technique in this guide answers the same question: where will the fabric go when two unequal edges are joined?
Tools and Preparation Before You Stitch
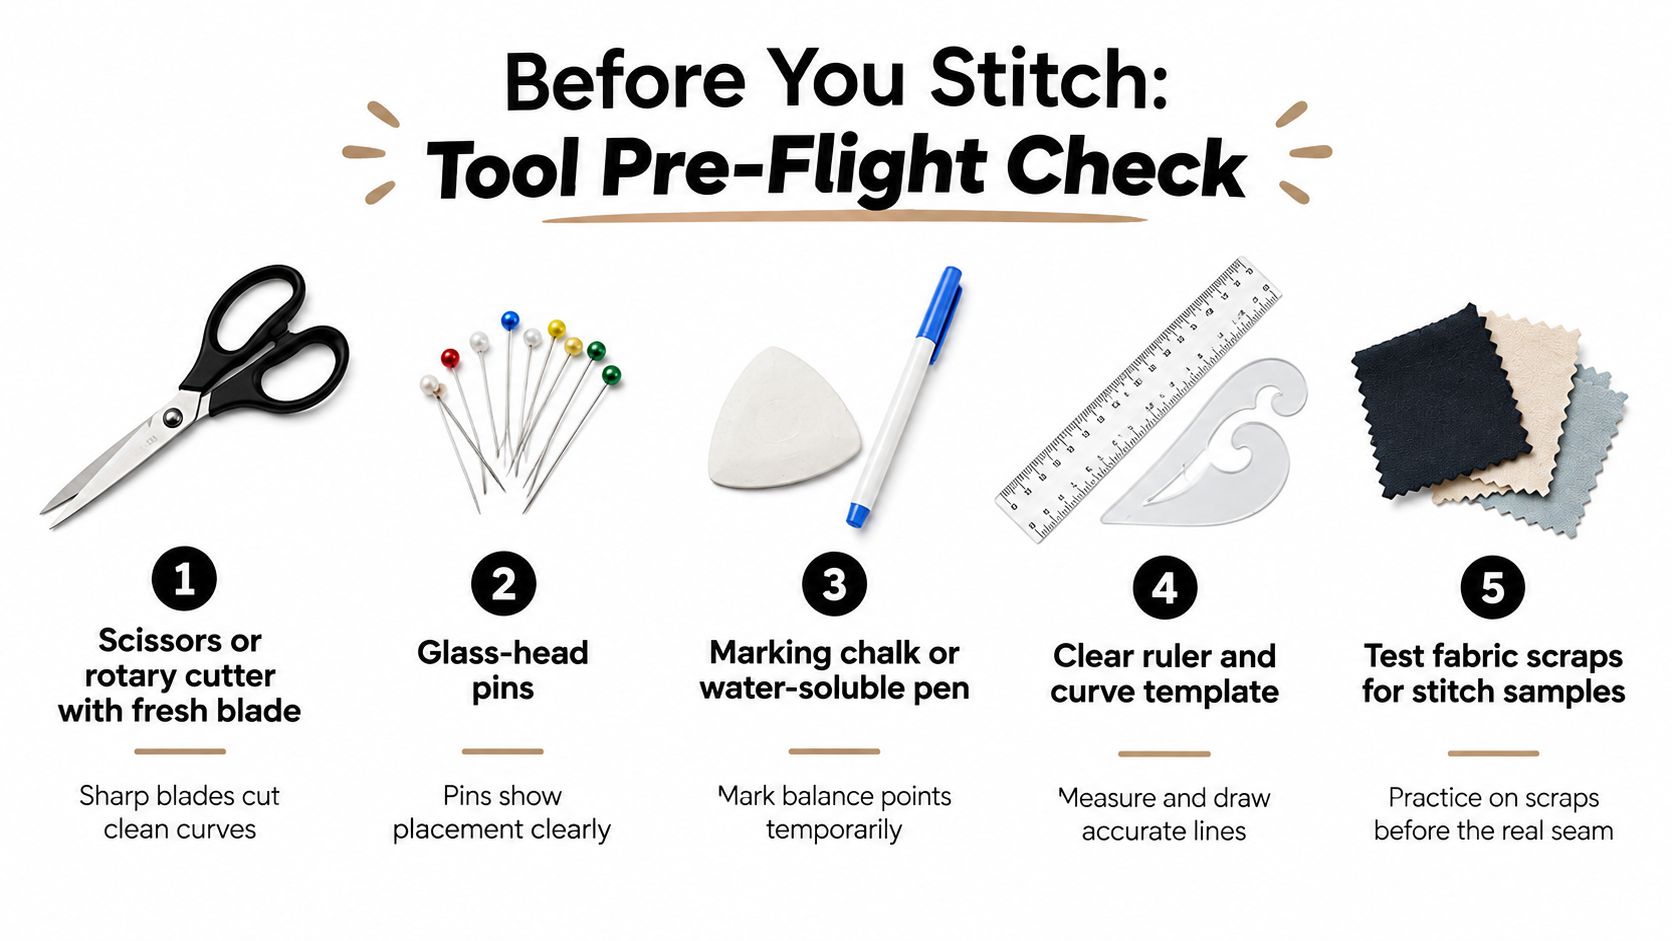
Set up the cutting table before sitting at the machine. You'll want sharp fabric scissors or a rotary cutter with a fresh blade, fine tailor's chalk or a water-soluble pen, small clipping scissors, glass-head pins, a clear ruler, a curve template, a curved tailor's ham, a pressing cloth and a seam ripper.
A fresh 70/10 or 80/12 universal needle is useful when the existing needle has already worked through heavy cloth or several projects. A stiletto can help guide a reluctant edge beneath the presser foot, but use it beside the needle, never in its path. The point is to guide the fabric, not push it towards the stitching mechanism.
Prepare the edge, not just the pattern
Transfer every notch and balance mark with chalk while the pieces are flat. Those marks tell you where the curve changes relationship, particularly on sleeve caps, princess seams and shaped panels. Check that the seam allowance is consistent before pinning. UK sewing guidance commonly uses a 10 mm seam allowance for French seams on curves, then trims the excess to about 3 mm, as shown in this curved French-seam tutorial from By Hand London.
Staystitch the curved edge at 3 mm inside the seamline if the fabric is liable to stretch during handling. Keep the stitching within the final seam allowance so it won't show, and avoid stretching the edge as you sew. Press the curve flat before joining it. This removes handling ripples and lets you see whether the pattern pieces match.
Run this check before the machine starts:
- Marks: Notches and balance points are visible.
- Cutting: The edge is smooth rather than chopped or stretched.
- Needle: The current needle suits the cloth and isn't damaged.
- Pressing: The ham, sleeve board and pressing cloth are ready.
- Test piece: A scrap is available for checking stitch formation and handling.
This short demonstration is useful if you want to watch the hand position and fabric control before trying the seam yourself.
Pinning, Easing and Stitching the Curve
Begin with the two ends of the curve and match the balance marks before adding intermediate pins. This establishes the relationship between the pieces instead of allowing one layer to drift gradually out of position. Pin perpendicular to the edge, with the heads facing away from the presser foot so you can remove each pin before it reaches the needle.
For extreme curves, place pins every 2–3 cm, a spacing recommended in this UK tutorial on French seams. Wider, gentler curves need less support, while a tight princess seam or armhole benefits from more frequent control.
The outer curve will often have a little more length than the inner one. Don't stretch the shorter piece to meet it. Instead, lift the top layer slightly between pins and ease the fullness into the seam allowance with your fingertips. The fabric should settle smoothly under the foot. If a small pucker forms ahead of the needle, stop and redistribute it rather than sewing over it.
A short stitch helps you steer. On tight curves, try around 2 mm, then keep the needle down whenever you need to pivot. Raise the presser foot a fraction, rotate the fabric around the needle, lower the foot and continue. This is much cleaner than forcing the work around the bend or backstitching repeatedly inside the curve.
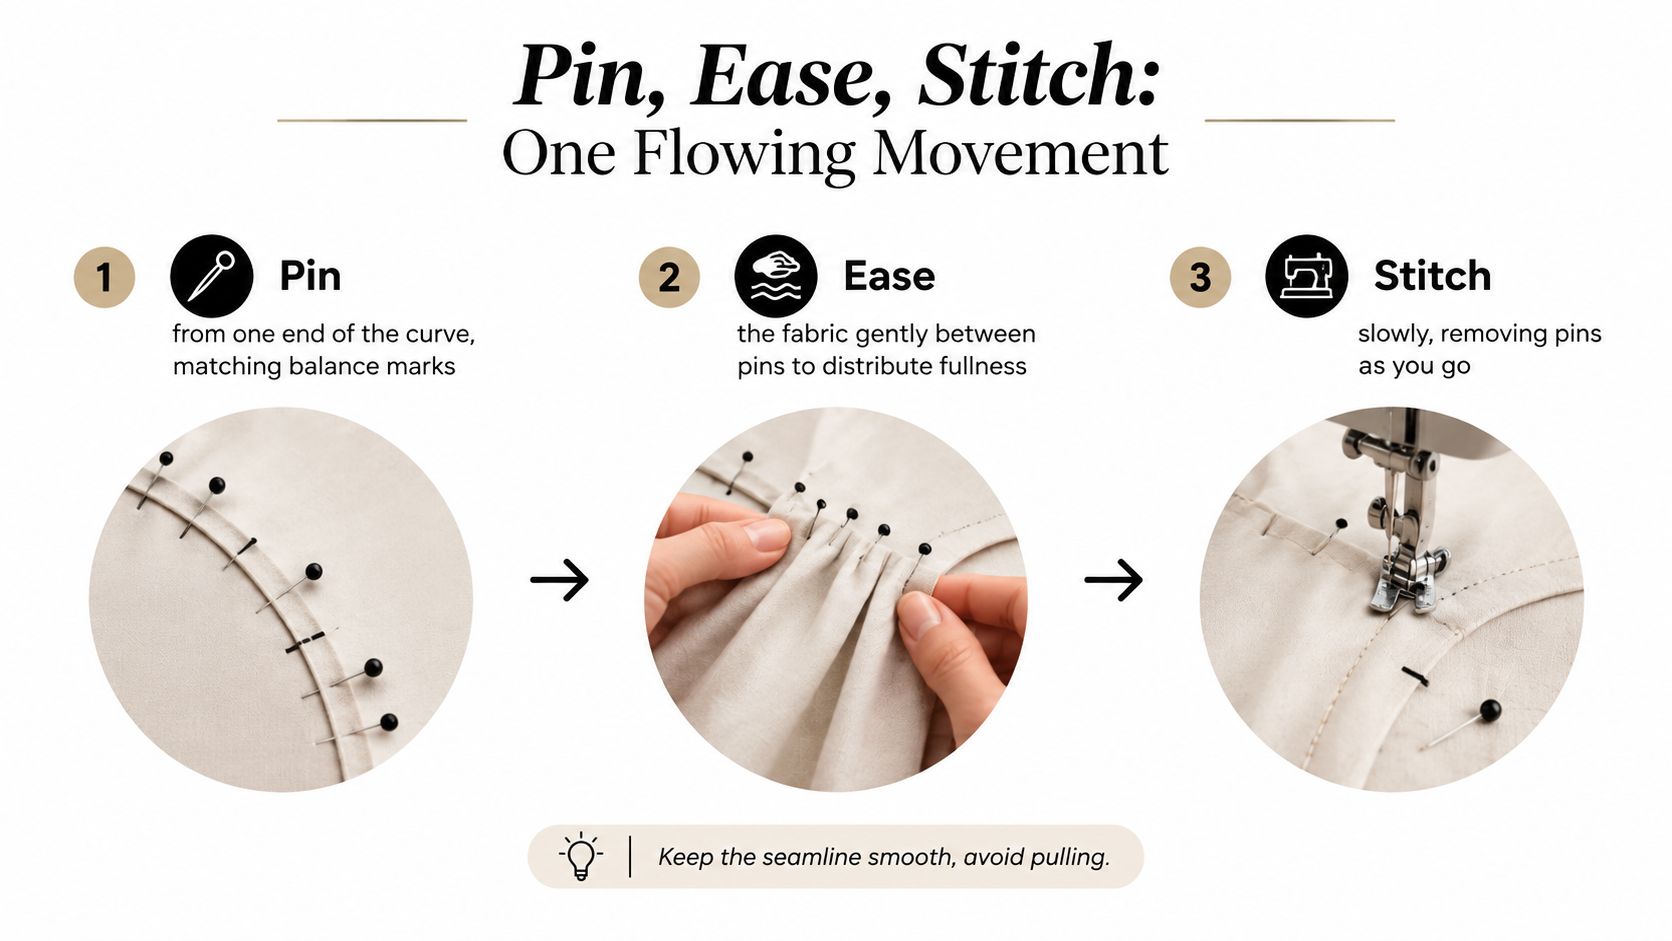
Keep both hands close to the work, but don't pull behind or in front of the needle. Let the machine feed the layers while your hands align the seamline. A stiletto can settle a small fold into the allowance, and pins should come out as you sew, not after the seam is complete.
Slippery viscose, very drapey rayon and bias-prone pieces are good candidates for hand-basting. A line of loose hand stitches takes time, but it lets you confirm the curve before committing to machine stitching. If the basting looks smooth, the machine seam has a much better chance of following it.
Clipping and Notching the Seam Allowance
Read the direction of the curve before reaching for the scissors. A concave, inward curve needs clips because the allowance must spread. A convex, outward curve needs notches because the allowance must lose excess width and reduce bulk.
The most important safety margin is beside the stitching. One UK sewing school advises leaving 2 mm of fabric next to the stitching line when clipping or notching, and recommends closer notches as the curve becomes tighter in its guidance on curved seams. Cut nearly to the seamline, but never through it. A snip that reaches the stitches can weaken the seam or allow it to pop when turned.
Match the cut to the radius
On a gentle inward S-curve, shallow clips around every 2 cm may be enough. On a sharper neckline or princess curve, use deeper, more frequent clips, stopping at the 2 mm buffer. A UK sewing directory also describes clipping or notching at even intervals after stitching so the seam allowance can open and lie flat when turned, as explained in its curved-seam guide.
For an outward curve, remove small triangular wedges rather than cutting straight slits. The closer the curve becomes to a tight radius, the more relief the allowance needs. On thick denim or canvas, shallow wedges may leave too much bulk. Take another narrow wedge only if the first cut hasn't allowed the allowance to spread, and keep the cuts staggered between layers where possible.
Use single notches and double notches as matching signals, not as extra decoration. They help identify which piece belongs where, particularly when several curved panels look similar. Clip the under layer less aggressively if it is hidden inside a facing or enclosed finish. Removing the same amount from every layer can weaken the construction unnecessarily.
Clipping and notching aren't interchangeable. If an inward curve is notched, you remove fabric where the allowance needs to spread. If an outward curve is merely clipped, the remaining bulk can still stack up. The finished seam tells you whether the cut was suited to the geometry: it should turn without ridges, tension or a scalloped edge.
Matching Technique to Different Fabrics
The same curved armhole on a sleeveless bodice can need four different treatments. Cotton lawn behaves neatly and accepts fine pins. Viscose creeps. Denim resists folding because its seam allowance has weight. Jersey stretches when you handle it and needs a stitch that can move with the garment.
The useful test is physical rather than theoretical. Hold the fabric up, scrunch it gently in your hand, then release it. If it springs back, stabilise it. If it collapses and shifts, reduce handling. If it feels dense and reluctant to turn, plan the finish and pressing before you stitch.
| Fabric | Pin Density & Needle | Stitch Setting | Clip / Notch Approach | Pressing Tip |
|---|---|---|---|---|
| Cotton lawn | Fine pins, sharp universal needle | Short straight stitch | Small, shallow relief cuts | Press over a ham with a cloth |
| Viscose | Close pinning, universal needle suited to light cloth | Short, controlled straight stitch | Clip conservatively and stabilise first | Use a ham and avoid dragging the edge |
| Denim | Strong pins or clips, needle suited to heavier fabric | Longer straight stitch | Use stronger wedges where bulk remains | Press in stages and flatten bulky areas carefully |
| Jersey | Fewer sharp pins or clips, ballpoint or stretch needle | Narrow zigzag or another stretch-safe setting | Keep clips shallow so the edge retains movement | Press lightly without stretching |
For cotton lawn, use only the easing the pattern requires. Fine pins and a short straight stitch keep the armhole accurate, and the fabric usually responds well to a light press.
Viscose and rayon deserve a calmer approach. Stay tape or light starch on the seam allowance can reduce creep, while a walking foot can help the layers move together. Don't keep lifting the piece to inspect it. Each lift gives a fluid edge another opportunity to stretch.
Denim and canvas need room for bulk. Stronger clips or wedges can help the allowance turn, while a hammer can flatten a thick notch area after pressing, with a protective surface beneath the work. Keep the hammer away from delicate finishes and use controlled taps rather than force.
Jersey needs the opposite instinct. A narrow zigzag or twin needle preserves movement, and shallow clips prevent the seam allowance from becoming a ladder of weak cuts. For a broader perspective on handling cloth, colour, texture and construction, a flexible art and design study can help develop the material awareness that makes these decisions more intuitive.
Common Curved Seam Mistakes and Quick Fixes
A curve that pulls at its peak usually hasn't been eased. The common reaction is to add pins and force the longer edge into place. Try steaming the longer edge gently to help it settle before stitching, then distribute the fullness by hand. On the dress form, the seam should feel smooth rather than tight across the curve.
Puckering along an outward curve often means the allowance still has too much bulk. Pressing harder won't replace a missing notch. Add a small triangular notch at sensible intervals, checking that you preserve the buffer beside the stitching, then press again over the ham.
Pressing rule: Shape the seam over the form it will occupy. A flat iron can flatten the cloth, but it can't recreate a rounded garment contour.
Missed clips on an inward neckline produce a seam that refuses to turn smoothly. Make the cuts closer together where the curve tightens, then press the allowance open before turning the edge. Don't slash randomly. Follow the radius and stop short of the stitches.
Lazy pressing creates a different problem. If you press a sleeve cap flat on a straight ironing board, you may erase the shape you worked to sew. Use a tailor's ham or sleeve board and lift the iron rather than dragging it across the curve.
Backstitching at every tight point adds hard little lumps inside the allowance. Keep the seam continuous, pivot with the needle down, and secure the seam at its ends instead.
Finally, easing isn't a substitute for pattern correction. If the difference between the two edges is more than 1.5 cm across the curve, treat it as a dart or pattern-fitting issue rather than adding more pins. A correctly drafted curve sits naturally on the form. A badly matched one only becomes more crowded when you force it.
Finishing, Pressing and Your Next Curved Seam
When the seam leaves the machine, trim the allowances to a consistent 6 mm where the finish requires a narrow edge. Grade heavier layers so the cut edges don't sit directly on top of one another, then press the allowances open while they're still slightly warm from stitching. Work over a ham, not a flat board, so the curve keeps its shape.
For necklines and armholes, understitching is the quiet finishing step that stops a facing rolling out. Stitch close to the seamline on the facing side, catching the seam allowances and facing together. The stitching draws the facing inward, leaving the garment edge clean without creating a visible ridge from the outside.
French seams can work on gentle curves when the allowance is controlled, but very tight curves may become bulky. One useful alternative described in this guidance on clipping and notching is to trim narrowly and use steam and careful rolling at the edge rather than automatically clipping every curve. Fabric weight and garment position should decide the finish.
Use this workshop rhythm on the next project:
- Prepare: Mark balance points, check the allowance, staystitch a vulnerable edge and press it flat.
- Join: Pin the ends first, ease without pulling and pivot with the needle down.
- Release: Clip inward curves or notch outward curves, always protecting the stitching.
- Shape: Press over a ham or sleeve board, then understitch facings where needed.
- Assess: Turn the seam right side out before deciding whether it needs more trimming or pressing.
More Sewing kits and fabric bundles give you a practical way to test the same curve in cotton lawn, viscose and jersey rather than assuming one method will suit every cloth.
Visit More Sewing to choose fabrics, haberdashery or a ready-to-sew kit for practising curved seams with the right material in hand. Select a cotton lawn, viscose or jersey project, make a small test seam first, and use the result to refine your clipping, easing and pressing before cutting into the final garment.
