
Dressmaking, Fabric
How to Sew with Silk Fabric for Flawless Results
That slippery length of silk on your table probably looks beautiful right up until you try to fold it, pin it, or feed the first seam under the presser foot. Then it shifts off grain, shines with every fingerprint, and threatens to vanish into the needle plate the moment you touch the pedal. Most beginners don't struggle because they lack patience. They struggle because silk punishes rough handling and rewards setup.
Silk is worth that effort. To produce 1 kilogram of pure silk fabric, approximately 3,000 silkworms must consume 104 kilograms of mulberry leaves, which is part of why the cloth feels precious before you've even made the first cut, as noted in Wikipedia's silk overview. Treat it like any ordinary woven and it will misbehave. Treat it like a fabric that wants support, precision, and calm handling, and it becomes much easier to sew.
Introduction to Sewing With Silk Fabric
The first silk project usually goes the same way. A sewist chooses a simple cami or blouse, assumes a sharp needle and careful stitching will be enough, and then spends an afternoon unpicking puckered seams. The fabric slides, the cut edges fluff, and the hem looks wavier than planned.
That doesn't mean silk is only for advanced dressmakers. It means the method matters more than the pattern.
What makes silk different
Silk combines slip, drape, and delicacy in a way that exposes every rushed choice. A bulky pin can leave a mark. A heavy-handed iron can flatten shine into a scar. Even the start of a seam needs planning, because lightweight silk often tries to dive into the machine opening.
Practical rule: If a technique feels forceful, it's usually the wrong technique for silk.
Silk also responds better to restraint than to correction. Instead of pinning more, use fewer but finer pins, or weights. Instead of stretching a seam into place, let the machine feed the fabric evenly. Instead of blasting with heat, press gently.
The mindset that helps
When people ask how to sew with silk fabric, the answer begins with preparation before sewing. Slow down the preparation, reduce friction, and test everything on scraps. That includes the needle, the stitch length, and the iron.
A good silk project rarely feels fast at the beginning. It feels controlled. Then, once the fabric is stabilised and the machine is behaving, the sewing itself becomes far less dramatic.
Choosing the Right Silk for Your Project
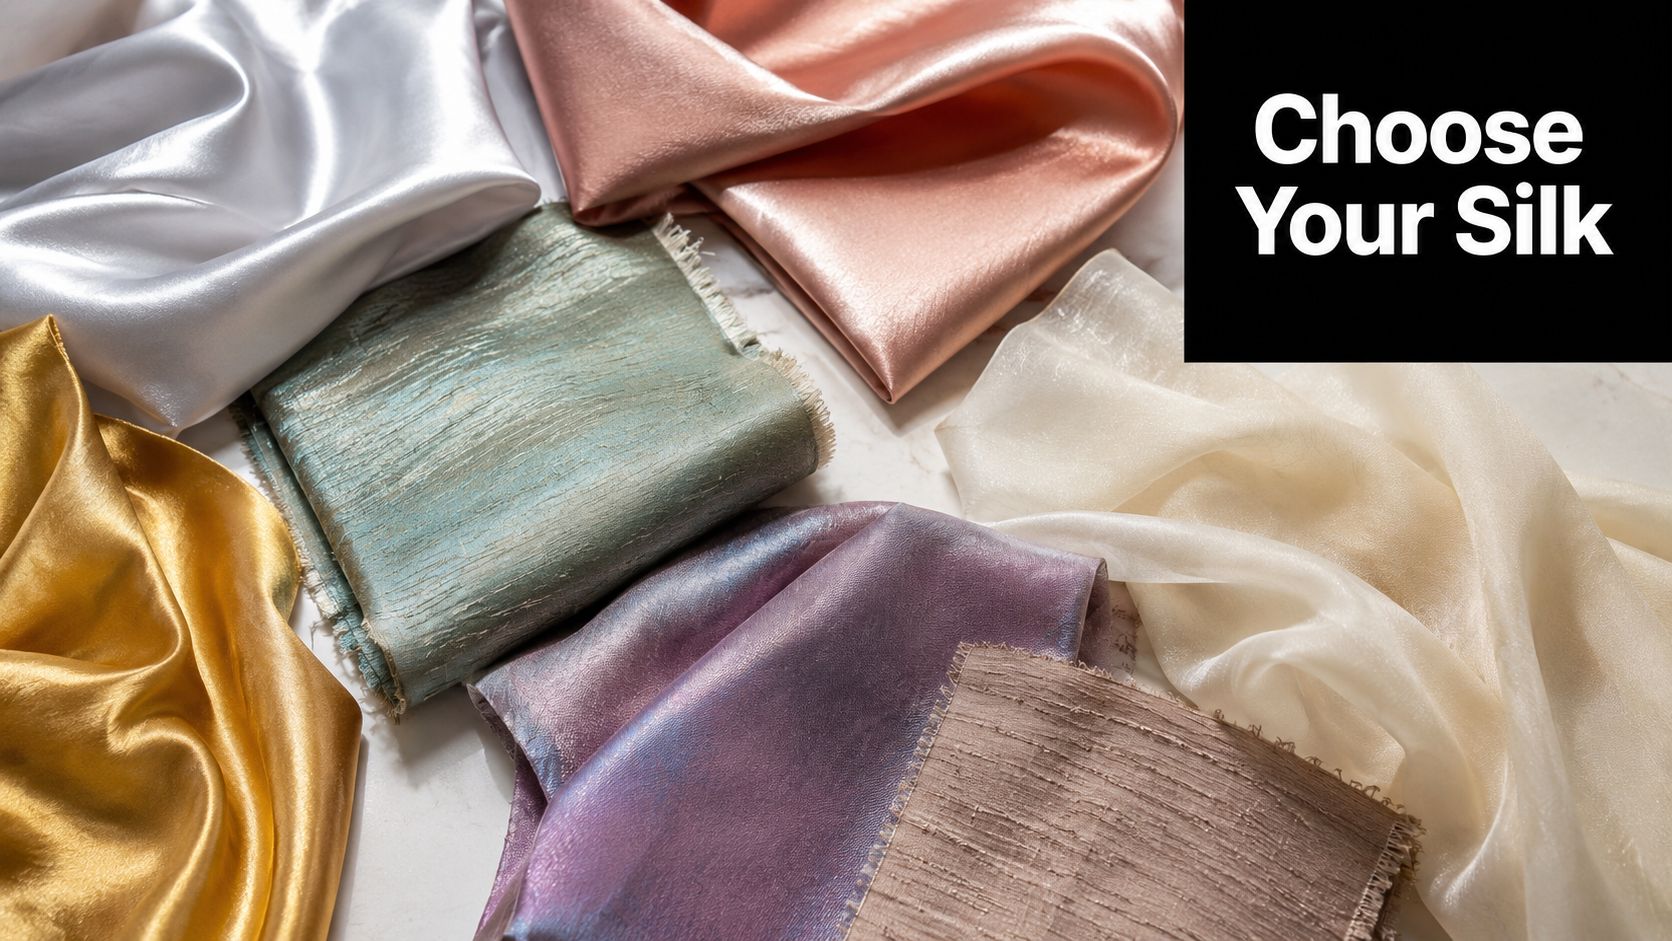
A lot of silk frustration starts before the first cut. The fabric looked right in the shop or on a deadstock listing, but once it meets the pattern, the pairing fights you. A glossy satin chosen for a shirt dress can collapse at the collar and cuff. A crisp dupioni picked for a bias slip will stand away from the body instead of falling cleanly.
Match drape to the pattern
Start with how the garment needs to behave, then choose the silk.
- Charmeuse for fluid shapes. It suits camisoles, soft blouses, slips, and bias skirts where the fabric is meant to skim and move. It also shows every ripple, pin mark, and dragging stitch, so it rewards careful handling.
- Crepe de chine for a first silk garment. It still has drape, but it usually grips the feed dogs a bit better than very glossy satin weaves. For many home sewists, it is the easiest balance between softness and control.
- Dupioni for structure. It works for shell tops, simple jackets, occasion separates, and styles that need body. The slubs are part of the look, but they also mean seam lines and topstitching need a clean, deliberate finish.
This choice matters more with limited-edition or ex-designer deadstock. You may only have enough for one attempt, and sometimes not enough for generous facings, recuts, or layout mistakes. In those cases, I prefer a pattern with straightforward pieces, clear grainlines, and no fussy reworking once cut.
Buy for behaviour, not just colour
Colour sells silk quickly. Behaviour decides whether you enjoy sewing it.
Before buying, check a few practical points:
- Does the pattern need fluidity or body? Cowls, bias cuts, and soft gathers need drape. Collars, tie belts, and shaped shells often need more support.
- How much fraying can the project tolerate? Some silks shed threads at the cut edge almost immediately, which affects seam allowance choices.
- Will you need a lining or layering? Lightweight silks can be lovely on the bolt and far too transparent in daylight.
- Will the surface show every mark? Plain silk satin is unforgiving. A crepe texture or print can hide minor stitching wobble far better.
One honest rule helps here. A silk that is pleasant to wear is not always pleasant to sew.
Deadstock silk needs a stricter plan
Deadstock is where many home dressmakers find the most interesting silks. It is also where the usual advice to "just buy extra" often falls apart. If the fabric came from a short run, a sample book, or a designer surplus roll, there may be no second chance if a front bodice shifts off grain or a sleeve needs recutting.
Choose simpler styles for precious lengths. Avoid patterns that depend on perfect symmetry from a directional print unless you have enough fabric to match it properly. If the silk has a strong sheen difference between nap directions, check every pattern piece before committing, because a blouse can look mismatched even when the colour is the same.
Store it well before cutting
Silk changes while it sits in the sewing room. In many UK homes, damp air, folded storage, and long delays between buying and sewing can leave fabric limp, creased, or slightly distorted by the time it reaches the table. That shows up later as edges that will not lie flat or pieces that seem to shift for no obvious reason.
Keep silk clean, dry, and out of direct light. For deadstock or limited-edition lengths, I prefer to refold it around tissue or store it rolled if space allows, especially for silk satin and lighter crepes that hold fold lines. Good storage will not make silk easier than cotton, but it gives you a fair start.
Preparing and Cutting Silk Fabric
Cutting day is where a good length of silk can turn expensive very quickly. One slip at the iron or one dragged edge from the shears, and a limited deadstock piece may have no replacement yardage waiting online.
Pre-treat with the end use in mind
Some silks can be handwashed. Some cannot. Printed deadstock, silk with a dressed finish, and anything with a rich surface sheen should always be tested first on a scrap or a corner, because washing can dull the finish, shift the handle, or leave tide marks.
If the finished garment will be dry cleaned, I usually skip a full wash and give the fabric a careful press instead. If it is a washable silk for a blouse or camisole, a gentle handwash in cool to lukewarm water helps reveal shrinkage and shows whether the dye is stable before the pattern goes anywhere near it.
Drying needs just as much care. Do not wring silk. Roll it in a towel, support the weight, and dry it flat or over a wide airer so the wet fabric does not stretch itself out of shape.
Test the iron before you touch the main piece
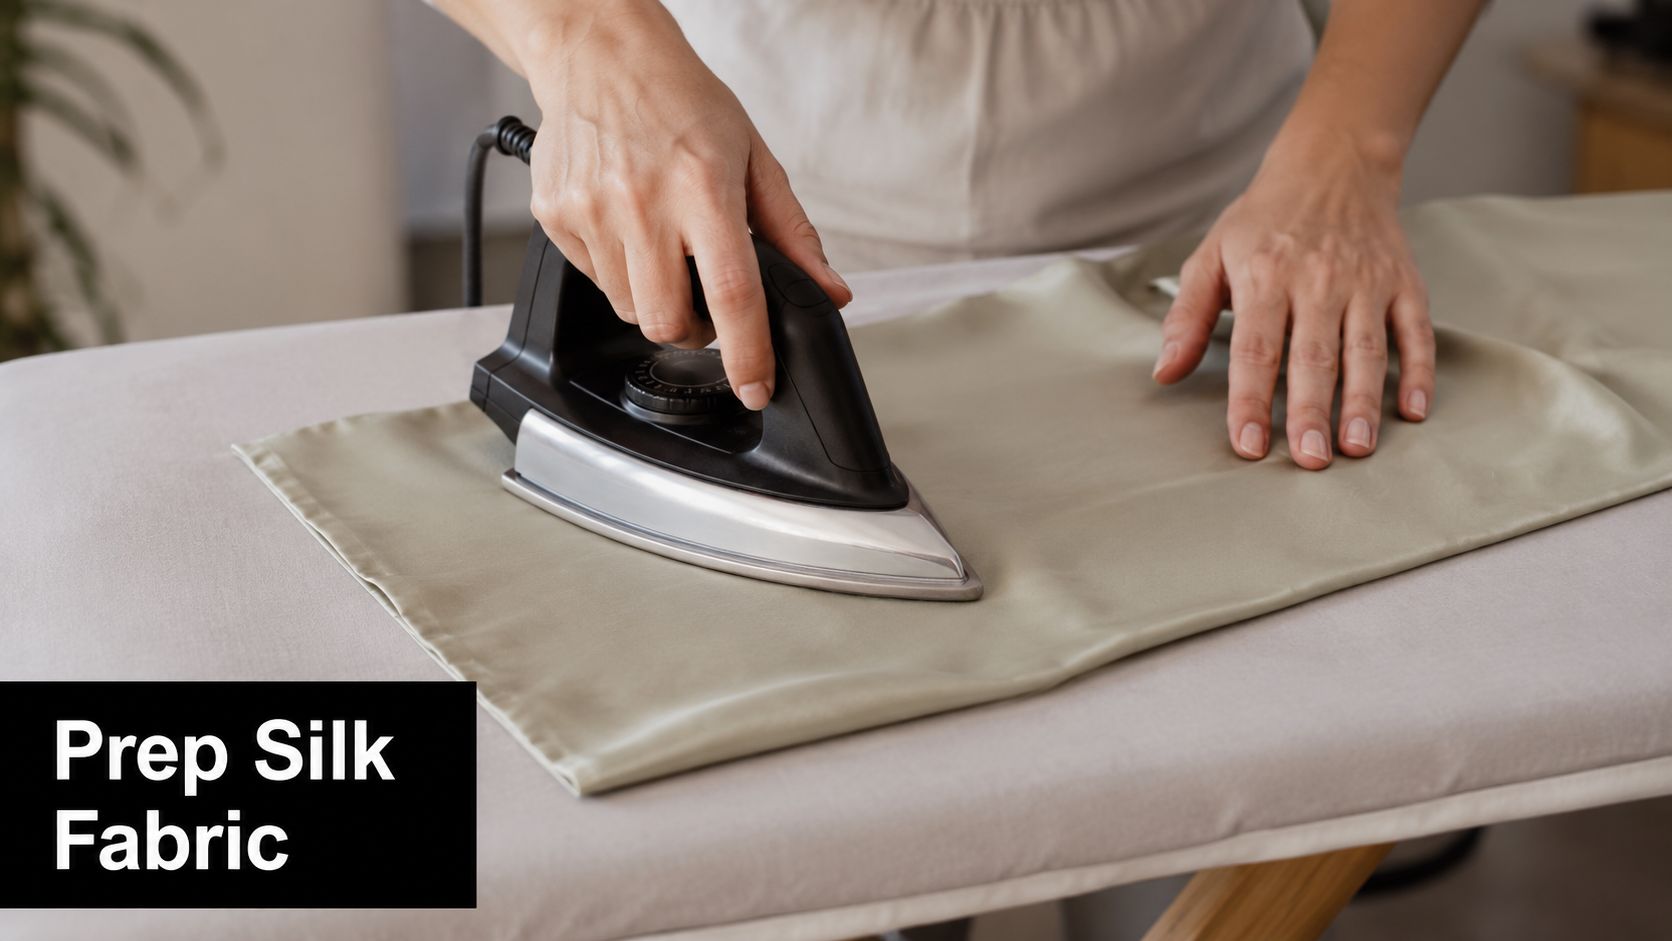
Silk often reacts more to moisture than to heat. In many UK homes, hard water can spot silk, especially satin, charmeuse, and darker colours. Test on the wrong side first, with the exact press cloth and iron setting you plan to use.
A dry press is often safer than steam. A silk organza press cloth helps because you can still see the fabric underneath, and it reduces the risk of shine or accidental scorching. Press up and down. Do not slide the iron around and hope the grain stays put.
If a scrap marks easily, change the method at once. Use less heat, less moisture, and more patience.
Set up the cutting surface before you unfold the pattern
Silk cuts best when the table is doing some of the work. A large flat surface matters more here than speed. If part of the fabric hangs off the edge while you align another section, the weight pulls the grain off and the pattern piece ends up longer on one side than the other.
For very slippery silk, I often use one of two home sewing hacks. Lay the fabric over a cotton sheet or an old flannel-backed tablecloth to add grip, or place tissue paper underneath so the silk glides less while you position the pattern. Both are simple, cheap, and particularly helpful with short-run or limited-edition silk where a recut may not be possible.
Pattern weights are usually better than lots of pins. Fine silk shifts under pin pressure, and heavy pinning can lift the fabric just enough to spoil accuracy. A rotary cutter is often the cleanest option for long edges and bias pieces, but only if the blade is fresh. A dull blade snags.
A practical setup looks like this:
- Square the fabric first. Check that the crosswise ends are straight before laying out pattern pieces.
- Let the silk rest flat. Smooth it gently with your hands and give it a minute to settle.
- Cut in a single layer if accuracy matters. This takes longer, but it prevents the lower layer creeping out of line.
- Use weights close to the cutting line. That keeps the pattern from lifting as the cutter passes.
- Recheck grain between pieces. Slippery silk can shift after every cut.
Bias pieces need even more restraint. Once they are laid out, handle them as little as possible. Lifting, turning, and recutting small sections is how necklines and skirt panels gradually stretch.
A useful visual demonstration can help if you're learning how silk behaves during pressing and handling:
Press for accuracy after cutting
Do not try to flatten everything aggressively before cutting, then ignore it afterwards. Silk benefits from light, controlled pressing at both stages. Once each piece is cut, I like to lay it flat and give only the areas that need it a gentle press so the shape is clear before marking and sewing.
Let each section cool on the board before moving it. Warm silk can shift while it is still soft, and that small movement is enough to throw off a dart, collar, or narrow strap later.
Stabilising and Marking Silk
Silk doesn't just need accuracy. It needs support. The goal is to stop the fabric moving before movement turns into misaligned seams, chewed seam starts, and markings that vanish at the wrong moment.
Stabilise at the seam start
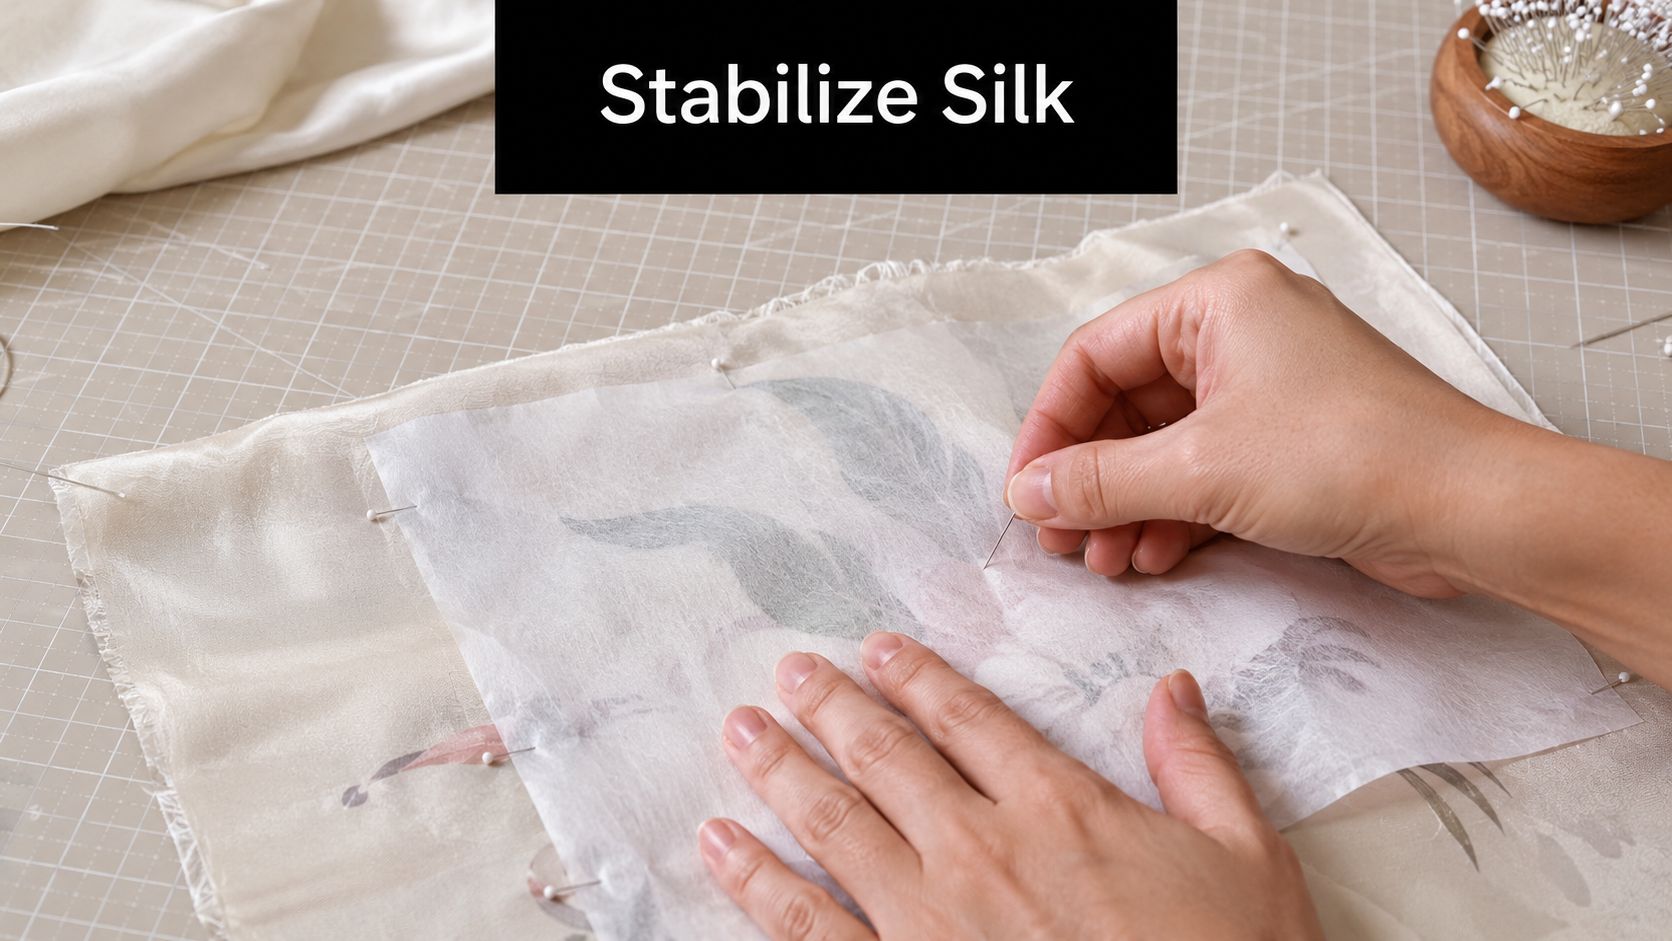
The first few stitches are often the messiest on silk. The fabric can dip into the throat plate before the feed dogs properly catch it. Two simple fixes work well: sandwich the fabric between tissue paper at the seam's start, or place masking tape over the throat plate hole while leaving the feed dog clear, as shown in this YouTube silk sewing demonstration.
Tissue is especially useful on curved or narrow seams. It supports the cloth without adding bulk, and it tears away afterwards. Masking tape is handy when the machine repeatedly tries to swallow very fine silk at the first stitch.
Underlining and support
Not every silk needs underlining, but some garments improve immediately with it. A simple skirt in a slippery print, for example, often hangs better if each piece is lightly supported during handling. You're not trying to stiffen the garment. You're trying to stop the fabric from shifting while you sew.
Use support selectively:
- Tissue paper for temporary control. Good during stitching and on delicate seam starts.
- Lightweight interfacing where structure matters. Useful on collars, facings, cuffs, and button areas.
- Staystitching on vulnerable edges. Necklines and bias edges benefit from being secured early.
Mark in ways that survive the process
Silk reveals rough marking tools immediately. Tailor's tacks are slow, but they're dependable for darts, pleats, and fine details. Chalk pencil can work on some matte silks, though it needs a gentle hand. Water-erasable pens are convenient, but only if you've tested them first on a scrap and know how the fabric reacts.
Mark the minimum you need. The more handling silk gets, the more chances it has to move.
For small projects, I often mark only the critical points: darts, notches, pocket placement, and fold lines. On a silk skirt or blouse, that's usually enough to keep the construction accurate without overworking the fabric.
Selecting Machines Needles and Threads
Machine setup matters more with silk than with sturdier wovens. If your needle is slightly too large or your stitch is slightly too long, the fabric tells you immediately through puckering, skipped stitches, or tiny pulls along the seam.
Start with the right stitch length
The basic rule is straightforward. Medium-weight silks need a 2 to 2.5 mm stitch, while lightweight silks need 1.5 to 2 mm to maintain the seam and reduce puckering, according to Seamwork's guide to sewing with silk.
For very fine silk, shorter stitches usually look cleaner and hold the seam more securely. If the stitches are too long, the seam can look loose and slightly rippled. If they're too tiny on a less delicate silk, unpicking becomes miserable. Test first.
Use a fine sharp needle
A Microtex 60 or 70 is the safest starting point for silk because it pierces cleanly rather than punching a rougher hole. Many sewists also have success with a 60/8 Microtex for very lightweight silk. Universal needles are more likely to snag or leave visible damage on delicate weaves.
Thread choice depends on the project. Fine polyester thread is practical for many home dressmaking jobs because it's consistent and easy to source. Silk thread can be lovely for hand finishing and some finer work, but the main point is to avoid heavy thread that overpowers the fabric.
| Silk Weight | Needle Size | Thread Type | Stitch Length |
|---|---|---|---|
| Lightweight silk | Microtex 60/8 or 60 | Fine polyester or silk thread | 1.5 to 2 mm |
| Medium-weight silk | Microtex 70 | Fine polyester or silk thread | 2 to 2.5 mm |
Small settings make a big difference
If the machine still fights you, look beyond the needle. Reduce presser foot pressure if your machine allows it. A straight-stitch plate or straight-stitch foot can also help support narrow seams on delicate silk.
If you're comparing machines or trying to understand what adjustments are available on different models, this overview of Monogram machine features and costs is a useful starting point because it helps you think about control features, not just brand names.
Finishing Seams Edges and Hems
Silk looks best when the inside is nearly as neat as the outside. Raw edges fray fast, and messy seam finishes can show through on lighter colours or fluid garments. For these reasons, clean construction pays off.
French seams for most lightweight silk
For blouses, camisoles, and simple dresses, French seams are often the best first choice. Sew wrong sides together at 0.5 cm, trim to 2 to 3 mm, then fold right sides together and sew again at 0.7 cm to enclose the raw edge, as described in this French seam guide.
That method works because it tucks the fraying edge neatly inside the seam without adding much bulk.
A practical blouse example helps:
- Join the side seams wrong sides together with the narrow first pass.
- Trim carefully and evenly. Uneven trimming shows later.
- Press the seam gently to one side, then fold right sides together.
- Sew the second pass and press again with a lifting motion.
If the trimmed edge isn't even, the final French seam won't look crisp. Precision matters more than speed here.
When to choose another finish
French seams aren't right for every area. Curves, armholes, and very bulky intersections may need a different approach. In those spots, a narrow overlocked finish, hand overcasting, or a clean bias-bound edge can be more practical.
Good seam finishing choices depend on the garment:
- French seams suit straight or gently curved seams on lightweight garments.
- Bias binding works well where you want a visible couture-style interior.
- Narrow machine finishes help on seams that would become too thick if enclosed twice.
Hems that keep the drape
A rolled hem is often the cleanest finish for lightweight silk, especially on scarves, ruffles, and blouses. The aim is a hem that supports the edge without making it stiff. If you use a narrow hem foot, practise on scraps first. Some silks feed beautifully through it, and some insist on twisting.
For a hand-worked narrow hem, fold a tiny edge, press lightly, stitch close, trim if needed, then roll again. It takes longer, but on difficult silk it can look better than forcing the fabric through a foot that isn't cooperating.
The hem should disappear into the garment, not pull it out of shape.
Expert Tips and Troubleshooting Silk Sewing
Most silk problems come from friction, moisture, or too much force. If a seam puckers, shorten the stitch or recheck the needle. If the fabric shines after pressing, use a proper pressing cloth and reduce heat. If the start of the seam keeps jamming, go back to tissue support rather than trying to sew faster.
Pressing technique matters as much as machine setup. Lift and lower the iron instead of pushing it across the fabric. On lightweight silk, avoid backstitching if it causes bunching at the seam ends. Leave thread tails, stitch a few threads forward, and secure them neatly by hand if needed.
A few habits prevent most disasters:
- Test on scraps from the same fabric. Not a substitute fabric. The actual silk.
- Handle less. Repeated lifting, repinning, and re-pressing usually makes silk worse, not better.
- Store leftovers carefully. Deadstock silk scraps are worth keeping flat, clean, and dry for facings, bindings, or future repairs.
The cleanest silk sewing rarely comes from advanced tricks. It comes from refusing to rush the awkward bits.
Once you understand how to sew with silk fabric, it stops feeling unpredictable. It still demands care, but it becomes a series of small, manageable decisions rather than one long wrestling match.
If you're ready to try silk for yourself, More Sewing is a strong place to start for quality dressmaking fabrics, useful tools, and project-friendly supplies. It's especially helpful if you want swatches, haberdashery, or an interesting deadstock piece that deserves careful sewing rather than guesswork.
