
You've cut out your blouse or dress, sat down at the machine, and within minutes the edge has vanished into the needle plate, the seam is rippling, and tiny threads are escaping everywhere. That's the usual chiffon experience when the setup is even slightly off.
The good news is that chiffon isn't impossible. It's very unforgiving. If you treat it like cotton, it fights back. If you build in stability from the start, use the right needle and stitch settings, and choose seam finishes that suit a sheer fabric, it becomes much more manageable.
The key to how to sew with chiffon without it fraying or puckering is understanding why the fabric misbehaves. Chiffon is light, mobile, and loosely woven enough that cutting, feeding, stitching, and pressing all affect the final result. Every stage matters. A neat finish at the hem starts at the cutting table. A flat seam often depends on the needle and stitch length before the first line of sewing even begins.
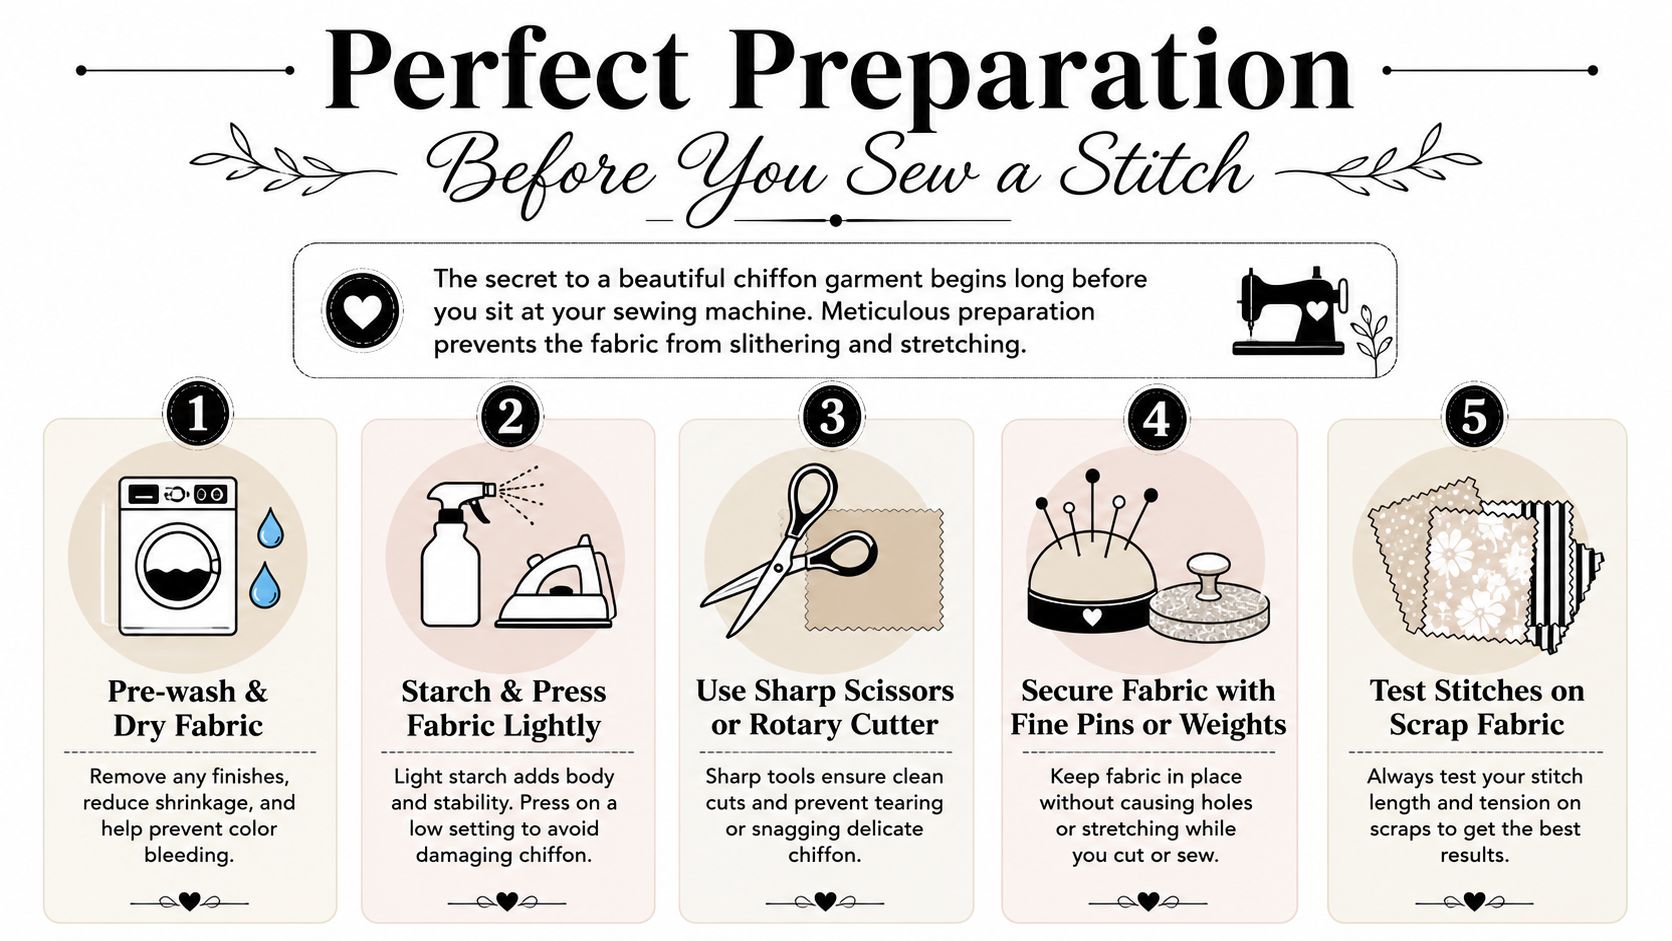
Perfect Preparation Before You Sew a Stitch
The point where chiffon usually goes wrong is the cutting table, not the machine. A panel cut slightly off grain, a neckline stretched while pinning, or a marked line pressed too hard into the cloth can leave you chasing ripples and frayed edges for the rest of the project.
Good preparation prevents that. Chiffon has very little tolerance for rough handling, and once it shifts or distorts, it rarely settles back neatly. The goal is to keep the fabric flat, supported, and as undisturbed as possible from the moment it comes onto the table.
Stabilise the fabric before cutting
Temporary support makes chiffon far easier to control. Tissue paper is a reliable choice because it adds grip and reduces drag against the table without changing the fabric permanently. If the cloth slides the moment you smooth it out, put tissue underneath before you even reach for the pattern.
This works because the fabric is no longer moving against a slick surface with every small touch. You get a cleaner cut, the grain stays truer, and delicate edges are less likely to distort before they are sewn.
I use spray starch more selectively. A light mist can help on polyester chiffon when cutting straight edges or simple shapes, but it changes the hand of the fabric. That matters. If you are sewing a soft cowl, bias panel, or anything that depends on fluid drape, too much starch can give a false sense of control at the cutting stage and disappointment later when the fabric softens again.
A simple rule helps here. If the chiffon will not lie still, stabilise it first. Accuracy matters more than speed.
Cut for accuracy, not speed
Single-layer cutting is usually the safer choice with chiffon. Folded layers look quicker, but they tend to creep apart, and that leaves you with mirrored pieces that are not quite the same shape. On a woven this fine, a small mismatch is often visible at the seam.
A rotary cutter usually gives better results than shears because it cuts straight down into the mat instead of lifting the fabric as it closes. That downward action matters on floaty cloth. Less lift means less distortion. Keep a fresh blade in reserve, because chiffon shows every drag mark from a tired edge.
Pattern weights are often better than pinning across the body of the fabric. Pins can pucker the surface, shift the layer underneath, or leave tiny disturbances that show on sheer cloth. Use fine pins only where you need real precision, such as within seam allowances or on a narrow point.
A dependable cutting setup includes:
- One layer at a time: easier to keep on grain
- Pattern weights: steadier than heavy pinning
- A sharp rotary blade: cleaner edges with less drag
- Minimal movement: rotate the mat or walk around the table instead of pulling the fabric
That last point saves many projects. Pulling a cut piece across the table can stretch it before you have sewn a single seam.
Mark lightly and test early
Heavy chalk, hard tracing wheels, and repeated unpicking all leave their mark on chiffon. Use the lightest marking method that you can still see. Tailor's tacks are slow, but on very sheer or delicate fabric they are often the safest option. Small clips in the seam allowance can also help, provided the seam finish will enclose them.
Test on your actual offcuts before you begin assembly. Silk chiffon, polyester chiffon, and georgette-like synthetics can look similar in the shop and behave quite differently under the iron, blade, and presser foot. A few minutes of testing tells you far more than guesswork.
Check the things that cause trouble later:
- Whether the cut edge frays quickly
- Whether the fabric needs tissue support to stay flat
- How it responds to a light press
- Whether your chosen hem treatment stays soft or turns stiff
That small trial run is part of the workflow, not an optional extra. With chiffon, careful preparation is often what separates a blouse that looks professionally made from one that puckers at every seam.
Your Essential Toolkit and Machine Settings
A lot of chiffon trouble starts before the seam finish ever comes into play. The machine leaves tiny pulls, the layers creep apart, or the fabric ripples because the setup is too heavy-handed for such a light cloth.
That is why I treat needle, thread, and machine settings as part of the sewing method, not an afterthought. Chiffon behaves best when the machine makes a small, clean hole and moves the fabric with as little pressure as possible.
Start with the right needle and thread
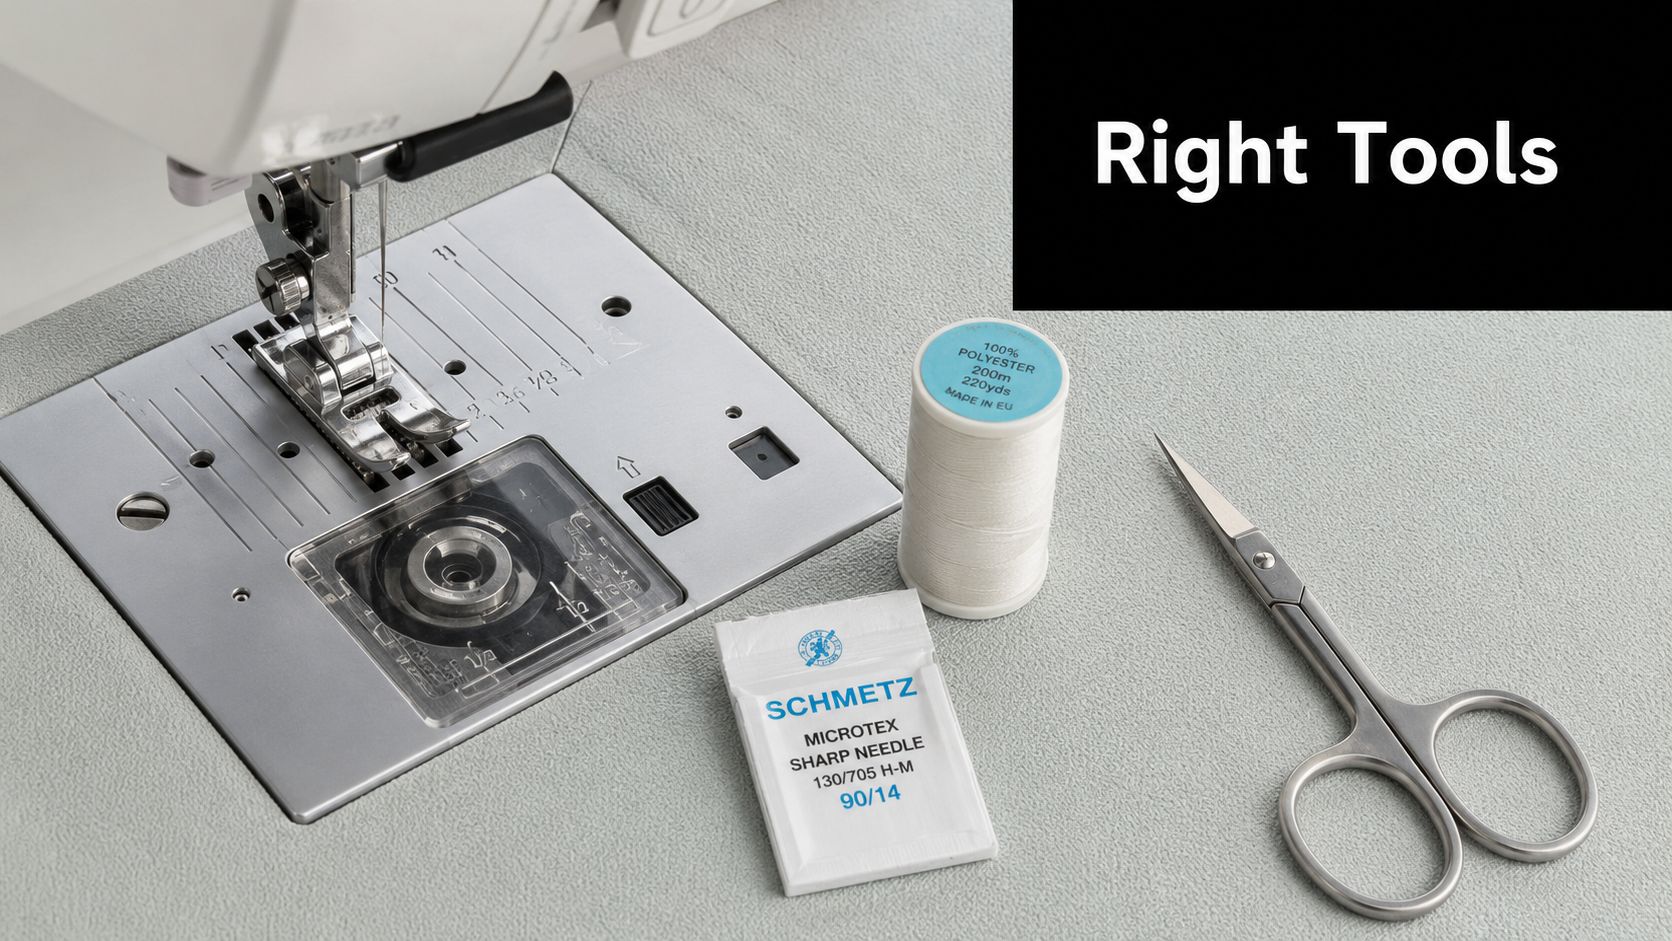
Chiffon usually responds best to a fine, sharp needle. For most UK home sewers, a microtex 60/8 or 70/10 is the first place to start. The sharper point slips between threads more cleanly than a larger universal needle, which helps prevent visible snags and the slightly roughed-up seam line that can show on sheer fabric.
If the fabric is especially airy or loosely woven, start smaller. If it is a slightly firmer polyester chiffon, a 70/10 may give better stitch formation. That is the trade-off. Finer needles are gentler on the cloth, but they can be less forgiving if the thread is poor or the machine is overdue for a new needle.
Thread matters just as much. Use a fine, smooth polyester thread rather than a thick all-purpose spool with a fuzzy finish. Chiffon does not hide bulk. Heavy thread can make a seam ridge show through from the right side, especially on pale colours and soft gathers.
A useful baseline is the needle and stitch guidance in this practical chiffon guide. Treat it as a starting point, then adjust according to the actual fabric in front of you.
Set the machine for a light touch
For stitch length, short usually works better than long. A range of about 1.5 to 2mm is a sensible starting point for chiffon on a domestic machine. Shorter stitches spread the strain across the seam more evenly. Longer stitches can let the fabric draw up between each entry point, which is one common cause of that faintly gathered, wavy look.
Presser foot pressure matters too. If your machine lets you reduce it, do so. Too much downward pressure can stretch the top layer as it feeds, while the lower layer moves at a different rate against the feed dogs. The result looks like bad tension, but the underlying issue is uneven feeding.
Start slightly in from the raw edge when possible, especially on narrow seam allowances. Chiffon can get pushed into the needle plate if the first stitch lands right on the edge.
Try this checklist before sewing your garment pieces:
| Tool or setting | What works well | What usually causes trouble |
|---|---|---|
| Needle | Microtex 60/8 or 70/10 | Large universal needle |
| Stitch length | 1.5 to 2mm, adjusted on a test scrap | Long stitches on very light chiffon |
| Presser foot pressure | Reduced if your machine allows | Full pressure on slippery layers |
| Thread | Fine polyester | Thick or fluffy thread |
| Seam start | A little in from the cut edge | Starting on the extreme edge |
Balanced tension still matters, but on chiffon it is only one part of the picture. A perfectly balanced machine can still pucker delicate fabric if the needle is too thick or the foot is pressing too hard.
Use scraps to tune the machine
Test on offcuts folded exactly as the actual seam will be sewn. One layer may behave beautifully, then pucker as soon as two layers are under the foot.
Check the sample in good light and run your fingers over it. If the seam feels ridged, the thread may be too heavy. If it looks wavy but relaxes when you lift it, feeding pressure is often the culprit. If you see a row of obvious punctures, change the needle before doing anything else.
Look for these clues:
- Tiny ridges or tunnelling: the stitch is stressing the fabric
- A wavy seam line: the layers stretched as they fed
- Visible needle holes: the needle is too large or too blunt
- Skipped stitches: often a worn needle, sometimes a mismatch between needle and thread
This is a good point to watch the technique in motion:
A few minutes spent adjusting the machine saves far more time than unpicking chiffon later. Once the setup is right, the fabric stops feeling temperamental and starts behaving predictably.
Sewing Beautiful Seams That Prevent Fraying
You cut chiffon cleanly, line up the edges, and sew what looks like an ordinary seam. Then the edge starts shedding, the stitching shows through, and the inside looks untidy before the garment is even finished. Chiffon behaves that way because the cloth is open, light, and quick to distort. The finish has to control both the raw edge and the fabric itself.
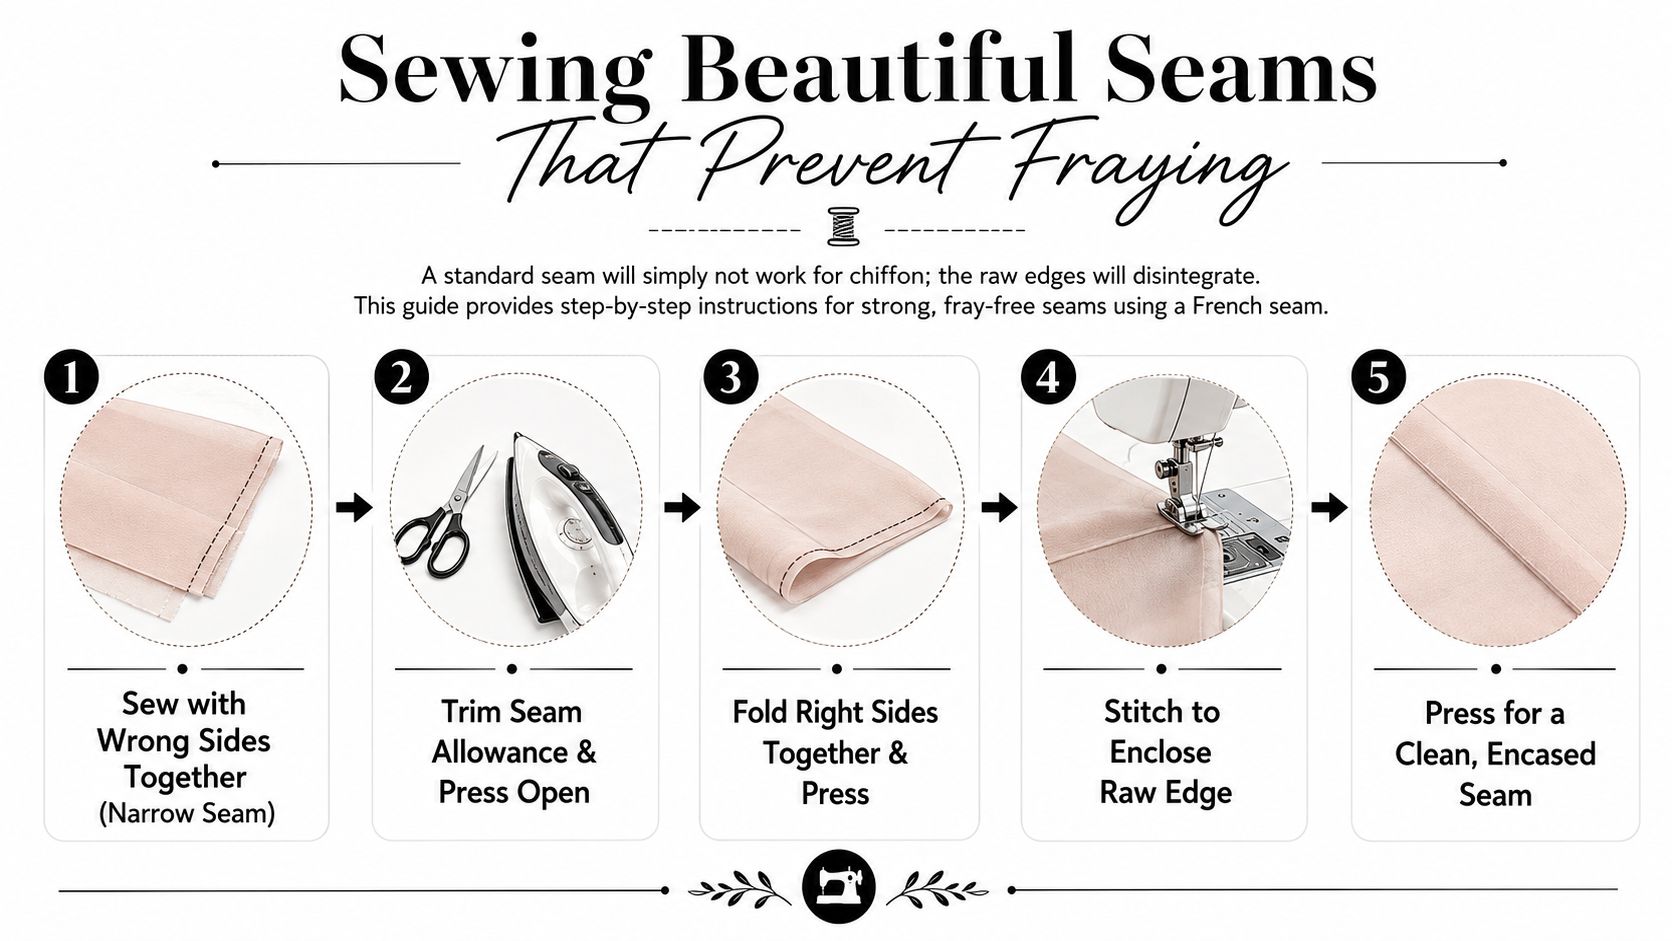
A French seam does that better than most other finishes on straight or gently curved chiffon seams. It encloses the cut edge completely, keeps the inside neat on a sheer garment, and avoids the heavier look of an overlocked edge. On blouses, overlays, scarves, and nightwear, it is usually the cleanest option.
Sew the first pass narrowly
Start with the fabric wrong sides together. That feels unusual if you mostly sew standard seams, but it is what allows the second pass to wrap the raw edge neatly.
Keep the first seam narrow and consistent. About 0.5cm, or roughly 1/4 inch, works well for many home sewing patterns, especially if you plan to trim any stray threads before the second pass. The reason is simple. A narrow first seam leaves enough room to turn and enclose the edge without building a thick ridge that shows through the chiffon.
If the pattern already gives a more generous seam allowance, you can still sew a French seam successfully. A wider allowance gives more handling room, which some sewers prefer on slippery fabric, but it also means more trimming and more chance of bulk if the seam crosses another seam. On chiffon, neatness matters more than width.
Sew slowly. Keep the fabric supported so it does not drop off the table and pull the seam off line. If one layer creeps ahead of the other, the second row of stitching will not fully catch the raw edge, and that is when the little whiskers start appearing inside the garment.
Press, trim, and fold before the second pass
The quality of a French seam is decided between the two rows of stitching.
Trim any unevenness from the first pass, but do not trim so close that the seam becomes fragile. Then press the seam flat first, and after that press it to one side so the fold sits right on the stitched line. This order helps the thread settle into the fabric before you ask chiffon to turn sharply.
Next, fold the fabric so the right sides are together, with the first seam enclosed at the edge, and press again. If the fold is not crisp and even, the second seam will wander. On opaque cotton you might get away with that. On chiffon, you will see it.
A good French seam should look controlled rather than tight. The inside forms a fine, narrow ridge. The outside stays smooth, with no raw edge shadowing through.
Chiffon responds to accurate handling. If the fold is uneven before the second pass, correct it then rather than hoping the stitching will pull it into place.
Sew the second pass without adding bulk
The second line of stitching encloses the raw edge, so it needs enough depth to cover the trimmed first seam cleanly. Stitch close enough to make a slender finish, but not so close that loose fibres escape. On a sheer blouse or dress, that balance is what keeps the seam neat after wear and washing.
This is also the stage where puckering can creep in. If you pull the fabric taut to keep the fold in place, the seam can ripple. Guide it. Do not stretch it. Let the feed dogs move the fabric while your hands keep the fold aligned.
For long side seams, I often stop halfway, lower the needle, and check the enclosed edge with my fingertips before continuing. It takes seconds and saves unpicking later.
Finish seam ends gently
Heavy backstitching can spoil a fine chiffon seam. It creates a dense knot of thread in one small spot, and that extra thread is often enough to make the end of the seam pucker or look chewed.
Cleaner options work better here:
- Leave thread tails and tie them by hand. This takes longer, but it keeps the seam end flat.
- Use a few very short locking stitches. This can secure the seam with less bulk than a full backstitch.
- Start slightly in from the edge when the seam allows it. That gives the machine a more stable place to form stitches.
The best choice depends on where the seam sits. A shoulder seam hidden by facing or binding gives you more flexibility. A visible seam in a sheer sleeve needs the tidiest possible finish.
When a French seam is not the best option
French seams are excellent on many chiffon garments, but not on every seam in every pattern. Tight curves, corners, zip openings, and places where several seam allowances meet can become stiff or awkward if you try to enclose everything this way.
In those spots, use a finish that keeps the shape clean with less bulk. A very fine zigzag can work on some internal seams. A narrow turned-and-stitched finish may suit others. The right choice depends on what the seam needs to do. Preventing fraying matters, but so does preserving drape.
For most straight chiffon seams, though, the French seam remains the standard because it solves the fraying problem at the source. No raw edge is left exposed.
Mastering Delicate Hems on Floaty Fabrics
You usually notice a poor chiffon hem the moment the garment hangs up. The edge looks ropey, the skirt kicks out instead of falling straight, or a faint ripple runs all the way round. Nearly every one of those problems comes from the same place. Too much bulk, too much handling, or trying to force a method that does not suit the shape of the hem.
Chiffon behaves best with the smallest hem that will still hold securely. That is why narrow hems work. They reduce weight at the edge, so the fabric can drop softly instead of fighting against a thick fold. For home sewing, the two methods that consistently give the best result are a rolled hem foot and a manual narrow hem. One is quicker once it is feeding properly. The other gives more control on awkward shapes.
Using a rolled hem foot
A rolled hem foot suits chiffon best on long, fairly even edges such as scarves, simple skirt hems, sleeve frills, and soft flounces. Once it starts cleanly, it can produce a fine, professional-looking edge with very little visible bulk.
The setup matters. Match the hem allowance to the width the foot is designed to roll, because too much fabric bunches in the scroll and too little slips out before it turns. On chiffon, that small difference is often the reason a hem looks smooth or starts twisting.
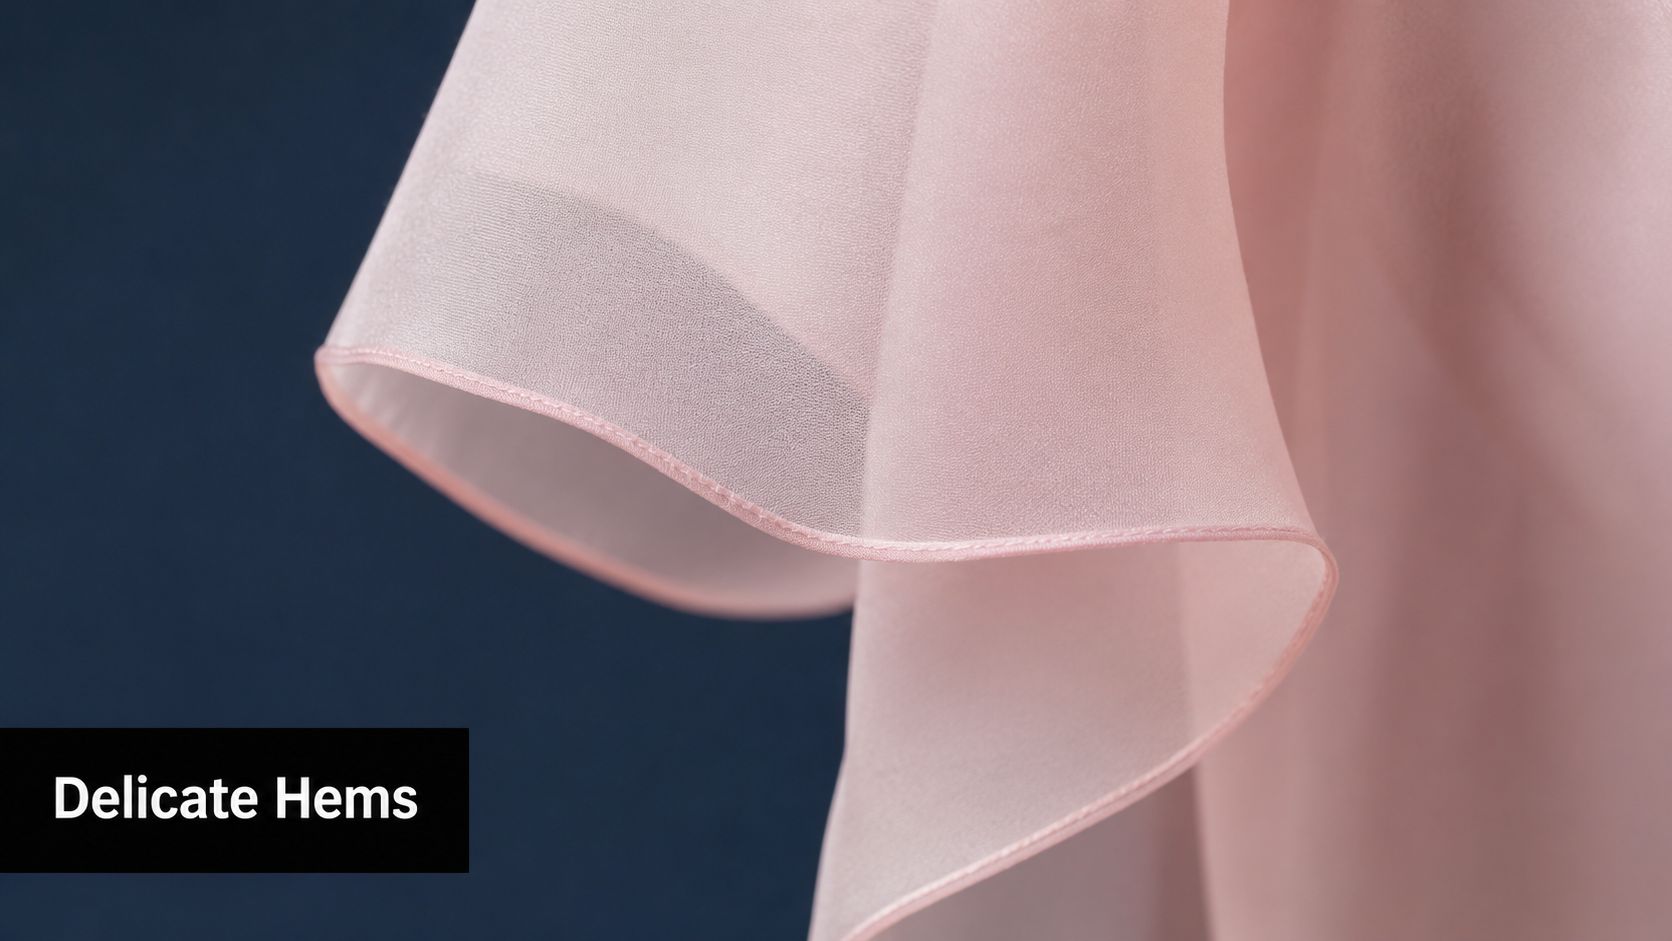
The first few centimetres are usually the hardest. I often hand-fold that opening, stitch a short distance, then feed the edge into the foot once the fabric is under control. That avoids the usual scrabble at the start, where chiffon wants to slide away just as the foot tries to curl it.
A rolled hem foot is a good choice for:
- Long skirt hems where speed matters once the machine is set up
- Scarves and veil edges where you want the lightest possible finish
- Soft frills with only gentle shaping
It is less reliable on tight curves, sharp changes of direction, and very limp chiffon that refuses to feed evenly. In those cases, the foot can save time on one project and waste it on the next. That is the trade-off.
The manual narrow hem
A manual narrow hem takes longer, but it gives you far more control over where the fabric folds and how much fullness you ease in. For curved blouse hems, dipped hemlines, and circular skirts, that control is often what prevents puckering.
A dependable method is to stitch a narrow guide line close to the raw edge, press or finger-fold the fabric along that line, stitch again close to the fold, then trim away the excess bulk before the final pass if needed. The guide stitching stabilises the edge first. That matters on chiffon because the cut edge is the loosest, most fray-prone part of the fabric. Once it is lightly controlled, the fold behaves better.
Another option is a very fine double turn, about 3mm each time, worked gradually rather than all at once. This gives an especially soft hem, but only if the fabric is not being stretched while you fold. If you pull the edge even slightly, the hem sets in a wave.
Which hem method works best where
Match the method to the hem shape, not to the tool you hoped to use.
| Project type | Rolled hem foot | Manual narrow hem |
|---|---|---|
| Scarf or straight hem | Excellent once started | Very good |
| Circular hem | Can struggle on tight curves | Usually easier to control |
| Sleeve frill | Good with practice | Very reliable |
| Small child's dress hem | Fine on simple shapes | Often calmer and tidier |
| Lightweight polyester chiffon | Fast and neat | Slower but forgiving |
If the rolled hem foot is fighting the fabric, stop and switch. Chiffon rarely rewards stubbornness.
Small handling details that help
Start the hem in the least visible place, usually at a side seam or underarm seam if the design gives you one. That keeps any tiny join or uneven overlap away from the front.
Curves need to be eased, not coerced. On a shaped hem, make the fold a little at a time and let the edge settle before stitching. If you try to turn too much in one movement, the outer edge compresses and the hem begins to ripple.
Corners are another place to lower expectations slightly. On chiffon, a soft rounded corner nearly always looks better than a sharp point, because the fabric has too little body to hold a crisp corner without extra bulk.
If the hem still wants to fray while you work, trim any whiskery threads between passes. Leaving them trapped in the fold creates tiny hard spots, and those hard spots show up once the hem catches the light.
The Final Press and Fixing Common Problems
You can sew a careful seam in chiffon and still spoil it in the last five minutes at the ironing board. The final press is where many otherwise tidy projects pick up shine, ridges, or fresh puckering.
Press to set the stitches and settle the seam, not to flatten the fabric into submission. Chiffon reacts quickly to heat and pressure because it has so little body of its own. Use a pressing cloth, keep the iron on a low setting, and test on an offcut first if the fibre content is uncertain. Polyester chiffon in particular can stiffen, mark, or soften too much under an over-hot iron.
In a typical UK sewing room, humidity can make chiffon feel slightly limp one day and crisp the next. That changes how the seam responds under the iron. If the fabric is feeling reluctant, use less steam, press for a moment, then leave the piece flat on the board until it cools. Moving it too soon can put the ripple straight back in.
A good press is often just a light touch and patience.
Quick fixes for the problems that usually appear
If the machine grabs the fabric at the start of a seam, the edge is usually dropping into the needle plate before the stitches can anchor it. Start a few millimetres in from the raw edge, or begin on a scrap leader and sew straight onto the chiffon. Both methods give the feed dogs something firm to catch first.
If puckering shows up after stitching, check the simplest causes in order. A slightly blunt needle, thread with too much drag, presser foot pressure that is too high, or hands pulling the fabric forward can all create tension the chiffon cannot absorb. The reason chiffon puckers so easily is simple. The cloth is too fine to hide even small imbalances.
Use this checklist if the finish still looks wrong:
- The seam start is being pulled into the machine: Start in from the edge or use a scrap starter.
- The seam is puckering: Change to a fresh fine needle, reduce presser foot pressure if your machine allows it, and let the machine feed the fabric without help from your hands.
- The hem looks wiry or ropey: The hem is too wide or has trapped stray threads inside the fold. Trim back and make the finish narrower.
- The fabric shows iron marks or shine: Lower the heat, keep the pressing cloth in place, and press from the wrong side where possible.
- The seam looks slightly stretched: Let it rest flat, then press it back into shape gently rather than dragging the iron along the seam line.
Small adjustments usually solve chiffon problems faster than dramatic ones. One needle size finer, one pass less with the iron, or a little less pressure from the presser foot is often enough.
If you're ready to try chiffon with better odds of success, More Sewing is a good place to find quality fabrics, haberdashery, and practical sewing supplies for home dressmaking projects.
