
Blog, Dressmaking, Fabric
How to Sew and Style Beaded Fringe Trim
You've just unwrapped a length of beaded fringe trim, admired the movement and sparkle, and then placed it beside your sewing machine with a slightly sinking feeling. The beads are heavy, the header looks delicate, and one misplaced needle could turn an expensive trim into a trail of loose components.
That hesitation is sensible. Beaded fringe trim isn't ordinary binding. It's a structural assembly of beads, threads, a header, and sometimes a chain or tulle backing. Treat it as a load-bearing embellishment rather than a strip of decoration, and you can use it successfully on clothing, cushions, curtains, and costumes without sacrificing durability.
The Heritage and Appeal of Beaded Fringe
The first time I handle a particularly ornate trim, I think less about speed and more about where its weight is travelling. The dangling beads pull downwards, the header carries that force, and the fabric underneath must support both. A hurried line of stitching can leave you with broken needles, distorted fabric, or an attractive edge that starts unravelling after limited wear.
That care makes more sense when you understand the trim's lineage. Beaded fringe belongs to the wider British tradition of passementerie, the decorative-trimmings trade associated with English court and aristocratic use during the Tudor and Stuart periods. Heritage Crafts' history of passementerie records Henry VIII and Mary Queen of Scots as documented buyers and users, and traces the trade's expansion through Spitalfields before it spread during the nineteenth century to textile centres including Manchester, Macclesfield, Leek, Nottingham, and Coventry.
A useful mindset: you're not sewing a string of loose beads to fabric. You're attaching a small piece of textile engineering with a long decorative history.
Styles of fringe were clearly defined in England by at least 1688, according to the same UK historical framework. Beaded fringe is a later variant of that broader tradition, replacing loose thread ends with beads that create a more reflective, weighted edge. The result has the visual drama of traditional fringe, but with a very different mechanical response.
Continental luxury production also shaped British practice. The Victoria and Albert Museum's record of a red-and-gold fringe identifies a piece made in England and France, notes France's leading role in manufacturing fringes, tassels, and braids, and explains that British nineteenth-century production emulated French styles. Gold-thread fringe became particularly popular from the 1870s, especially in Anglo-Japanese textiles.
That movement from elite interiors to industrial textile centres explains the trim's enduring appeal. It still signals occasion, richness, and movement, but modern makers can apply it to a velvet cuff, a dance costume, a cushion border, or a dramatic dress hem. The sewing room challenge is to preserve the visual luxury without ignoring the structure underneath.
Understanding Trim Anatomy and Specifications
Before choosing a stitch length or presser foot, turn the trim over. The visible beads are only the most obvious part of the construction. The header, backing, attachment thread, and any chain or ribbon at the top determine where the seam can safely go.
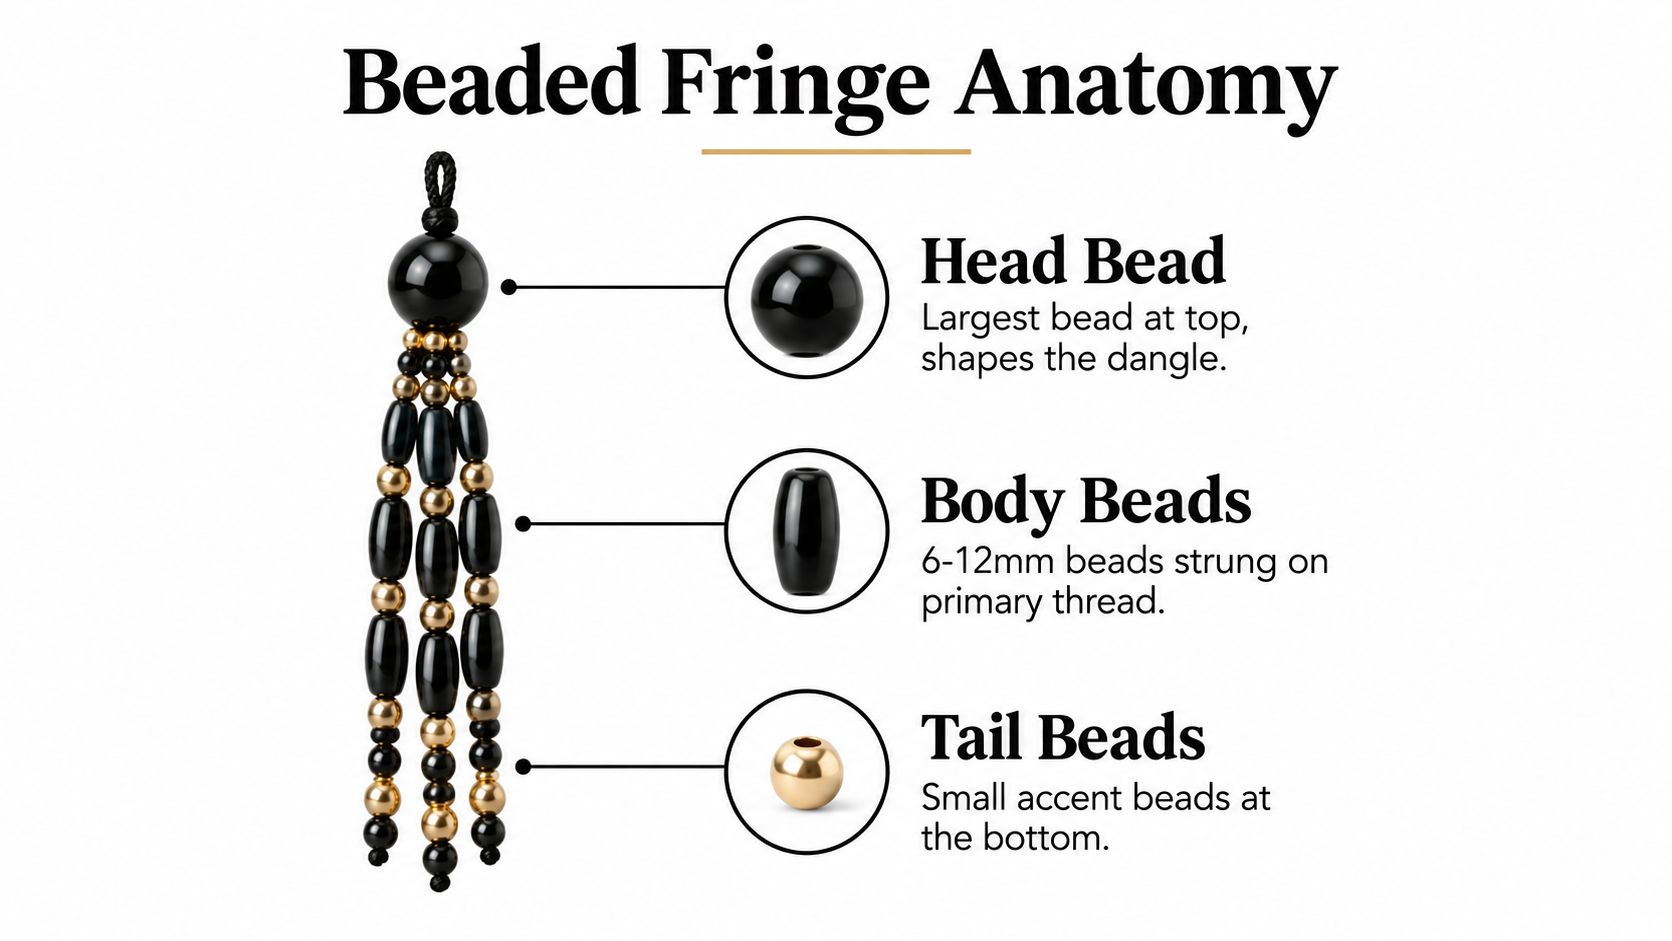
A useful UK retail example is a black beaded fringe trim listed with a 14cm fringe length, a 14cm roll width, a 100% nylon tulle base, a metal chain, and glass beads. The product specification from Top Fabric also notes that the trim is sewn onto a tulle strip that should be cut back. Those details tell you several important things before the trim reaches the garment.
Read the construction from the back
The hanging section is the decorative body. The flat strip at the top is the attachment zone. In some trims, that zone is woven braid or satin ribbon. In others, it's nylon tulle supporting a metal chain and the beadwork. The machine must stitch through the stable part of that upper zone, not through the bead bodies or the threads from which they hang.
The fringe length affects movement, visual proportion, and the amount of weight placed on the header. The roll width includes the supporting structure, so don't assume the full width is intended to remain visible. If a tulle edge extends beyond the finished seam, trim it back carefully after attachment or conceal it within a facing, lining, or seam allowance.
Cutting back excess tulle isn't just a neatness preference. Loose backing can catch on jewellery, zips, and furniture, while an exposed edge can make the trim look unfinished. Leave enough material for secure stitching, then remove only the surplus that would otherwise show or snag.
Identify hard components before sewing
A metal chain at the top changes the setup more than a row of soft beads does. It creates a rigid line that can push against the presser foot and make the trim wander. A zipper foot gives you more control around that raised component, while a standard foot may work if the header is broad and flat.
Lay the trim against a scrap of the intended fabric. Check whether the beads hang freely, whether the header distorts the fabric, and whether the trim's weight requires a supporting strip or interfacing. This short inspection often prevents a long repair.
Techniques for Attaching and Securing the Header
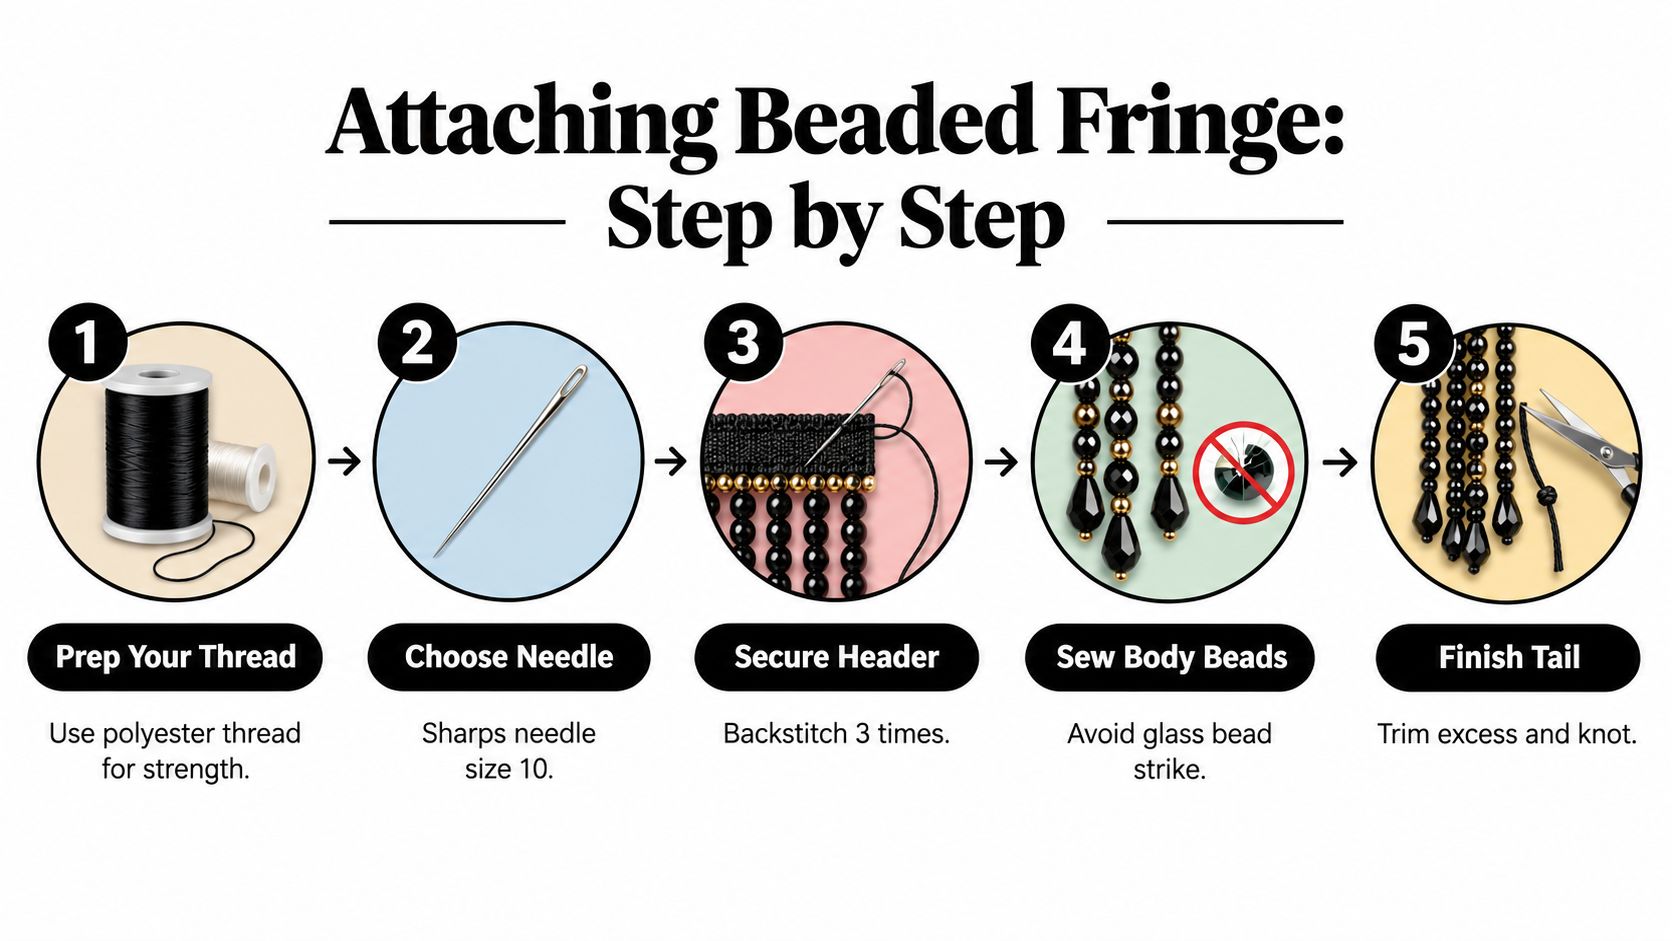
The safest method is to make the header carry the stitching while the hanging beads stay clear of the needle path. A needle striking a glass bead can break the needle, damage the bead, and create a dangerous shard. It can also disrupt stitching and, in severe cases, affect the machine's timing.
Prepare the edge
Start by marking the finished placement on the fabric. If the trim will sit inside a seam, keep the fringe facing inward while the seam is caught, then turn it out after pressing. For an edge application, align the header so the decorative body falls exactly where you want it, rather than using the bead line as an approximate guide.
Pin the flat header braid first, placing pins across the header rather than through the hanging beadwork. For a delicate tulle base, small pieces of low-tack tape can hold the trim temporarily without forcing pins through fragile areas. Check the entire length for a consistent drop before you stitch.
Needle placement matters more than needle speed. Keep the seam line inside the header tape, away from hard bead bodies and loose hanging threads.
Stitch the safe zone
Fit a standard foot if the header is flat and unobstructed. Choose a zipper foot when a metal chain, raised bead row, or bulky top edge prevents the foot from sitting level. Position the foot so the needle travels straight down the centre of the header tape, or through the strongest clear strip identified during your inspection.
Sew slowly with the beads moved away from the needle. Don't force the machine over a bead that has shifted into the seam line. Stop with the needle down, lift the foot, reposition the trim, and continue. If the header is too narrow for a single central line, use carefully placed parallel lines within the tape, but keep both lines clear of the bead attachments.
A short test row on scrap fabric is essential. It reveals whether the trim pulls the fabric, whether the foot catches the chain, and whether the thread tension creates puckering. It's far easier to adjust those problems before the final garment is under the needle.
The following demonstration is useful for seeing how a trim behaves during attachment. Watch the relationship between the header and the decorative edge, rather than trying to copy a setting without testing your own fabric and trim.
Reinforce the beadwork
Stitching the header secures the trim to the fabric, but it doesn't automatically protect the bead rows from unravelling. UK beading guidance recommends appropriate backing, secure stitching, and no loose threads. For complex rows, UK textile construction guidance recommends knotting off at intervals and reinforcing with double-stitching every 2cm of beads to limit unravelling if a thread breaks.
Use a hand needle to secure vulnerable ends and stress points. Knot off where the bead structure changes, near a cut end, and beside a seam interruption. Don't bury a bulky knot directly under a hard chain, where it can create a lump. Instead, secure it into the backing or header and cover the area with a facing or lining where appropriate.
Navigating Colourfastness and Long-Term Care
A trim can look perfectly sound during sewing and still create problems at cleaning time. Beads may rub against the fabric, dyes can transfer, and the weight of the embellishment can pull a light cloth out of shape. Runway styling shows the movement and shine, but everyday wear tests the attachment points, backing, and care plan.
Colourfastness deserves attention before cutting into the final garment. Red beads are a particular concern in UK qualification guidance, which flags colour transfer as a common failure mode and requires checks before production. Dampen a white cloth with the proposed cleaning method, press it against an inconspicuous part of the trim, and inspect the cloth and the fabric beneath it. Test the actual bead and backing combination, because a colour-safe fabric doesn't guarantee a colour-safe embellishment.
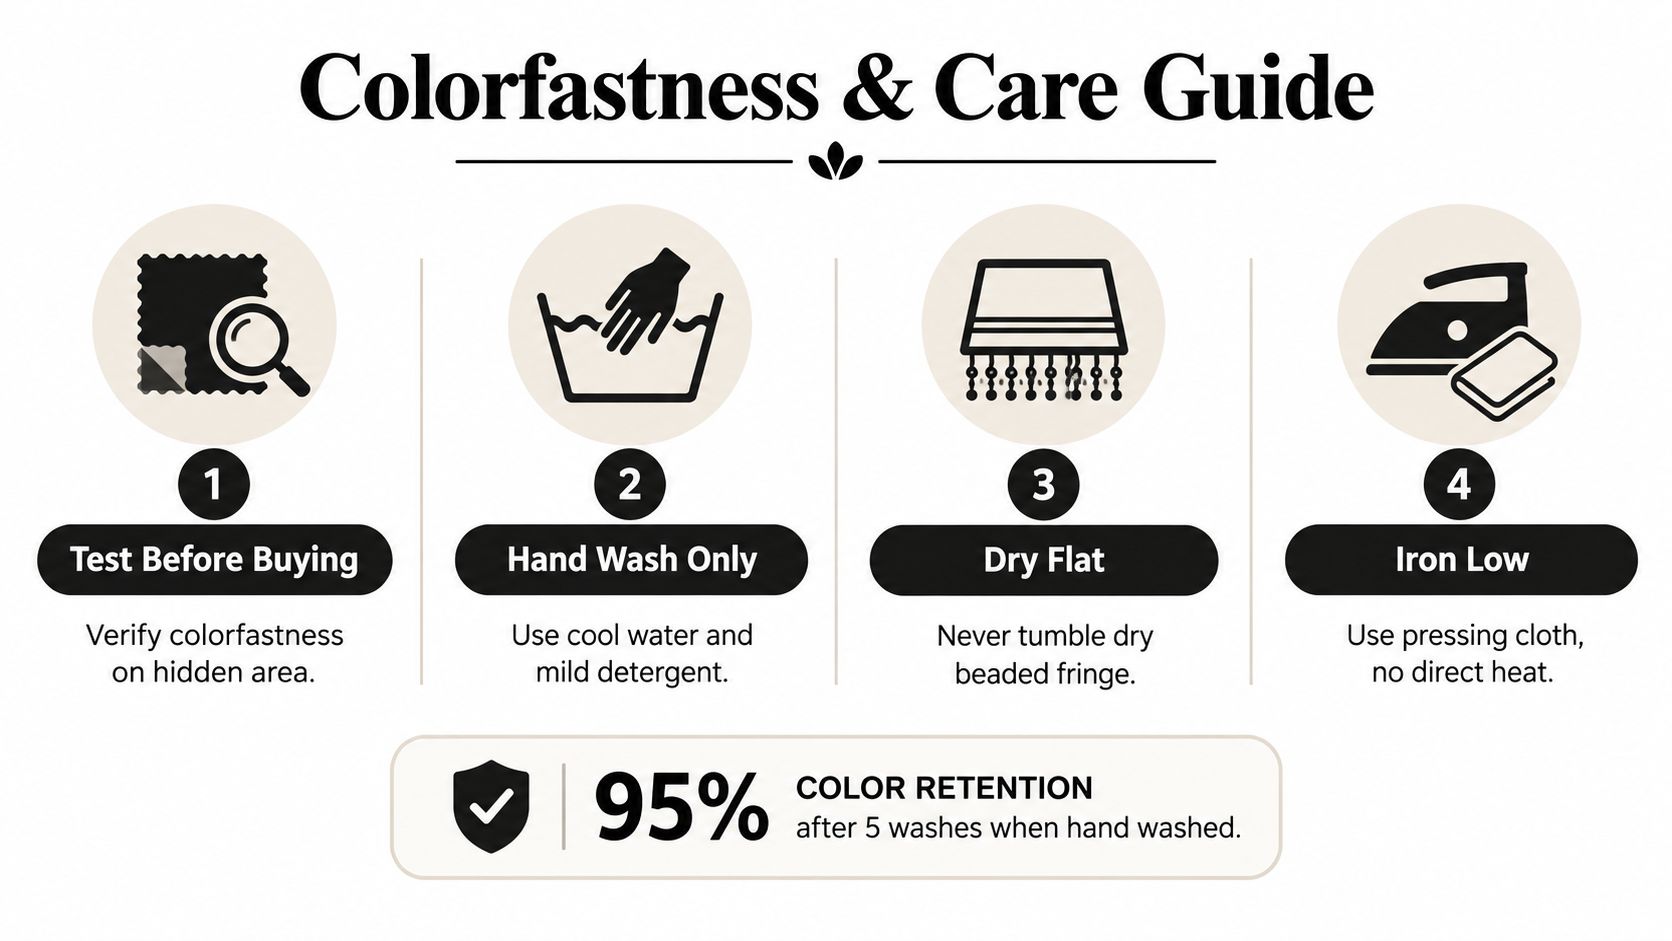
For a broader method of checking dyed materials, this guide to preventing dye bleed in quilts offers useful colourfastness-testing principles that can be adapted to a trim sample. Carry out the test before the trim is permanently attached, especially if the garment fabric is pale, absorbent, or difficult to replace.
Choose care before construction
Machine washing is usually a poor match for heavily beaded fringe. Agitation encourages threads to catch, beads to strike one another, and the weighted edge to stretch the base fabric. Attachment guidance for beaded trims commonly points towards secure anchoring and dry-clean-only handling, so follow the trim supplier's care information and consider professional cleaning for a finished occasion garment.
If hand cleaning is approved, support the trim rather than lifting the garment by the embellished edge. Use cool water and mild treatment only when the materials allow it, then keep the piece flat while it dries. Never tumble-dry beaded fringe, and don't place direct heat over beads, chain, or tulle.
Storage matters too. Hang garments so the fringe isn't crushed against a crowded rail, or fold them with acid-free tissue between embellished layers. Keep the trim away from rough fastenings and jewellery. A snag caught early can often be secured with a hand stitch, while a pulled thread left loose can begin a much larger unravel.
Design Applications for Garments and Interiors
Placement determines whether beaded fringe looks intentional or becomes a maintenance problem. The trim performs best where the fabric can support its weight and where the movement is part of the design. Hems, outer borders, cuffs, and decorative panels offer that freedom.
On occasionwear, a sweeping skirt hem gives the beads room to move and catch the light. A velvet jacket cuff creates a controlled, high-contrast accent, although the cuff must be kept clear of surfaces that repeatedly rub the beadwork. A neckline can work when the trim is lightly weighted and firmly backed, but a dense, heavy border may pull a fine bodice out of shape.

Interiors offer a different set of advantages. Cushion borders, curtain edges, lampshade trims, and costume panels tend to experience less stretching than a waistband or armhole. UK haberdashery retailers describe fringe and braid trims across fashion, accessories, home décor, and craft, while soft-furnishing categories include curtains, costumes, cushions, and homeware. Nova Trimmings' fringe and braid range reflects that broad use.
Compare the stress points
| Application | What works | What usually fails |
|---|---|---|
| Dress hem | A supported edge with room for the fringe to swing | A lightweight unsupported hem carrying dense beads |
| Velvet cuff | Short decorative sections with controlled movement | Placement where the cuff constantly catches on a desk or bag |
| Cushion border | A stable seam and concealed header | A loose edge exposed to repeated abrasion |
| Curtain border | Reinforced fabric and a protected lower edge | A trim that drags across the floor |
| Waistband or armhole | Usually better avoided | Tension, friction, and body movement at the structural seam |
Keep beaded fringe away from high-stress structural seams wherever possible. A waistband must tolerate tension, an armhole must flex, and both areas experience repeated friction. If you're refreshing a room rather than embellishing a garment, compare the trim's role with practical upholstery choices such as stretch-fit couch covers, which solve fit and protection differently from a decorative beaded border.
Sourcing Premium Trims and Planning Your Budget
Buy by construction, not by sparkle alone. A cheap-looking header can make a beautiful bead arrangement difficult to attach, while a stable braid or well-supported tulle base can save considerable time during sewing. Ask how the trim is sold, what the backing contains, how much of the width is usable, and whether the top edge includes a chain that needs a zipper foot.
UK retailers show a useful range of formats. Abakhan lists a Long Beaded Fringe on a 1-metre card, while its haberdashery range also includes embellished self-adhesive trims. At the specialist end, a UK listing gives a detailed black trim with metal chain and glass beads at £54.00. Abakhan's trim listings illustrate why a short card and a premium metre-based trim serve different buying decisions.
A sample length may suit a small bag, test panel, or costume detail. For a full hem, curtain edge, or repeated cushion border, metre-based purchasing gives you more control over continuity and alignment. Buy extra for test-stitching, matching, and pattern repeat placement, particularly when a visible chain or repeating bead structure must meet at a closure.
Good trim is easier to sew when you've tested the actual trim. A photograph can't show whether the header slips, whether the chain catches the foot, or how much the beads pull on your fabric.
| Format Type | Best For | Key Consideration |
|---|---|---|
| Short card length | Samples, small accessories, and isolated accents | Check that the length covers testing and matching |
| Metre-based trim | Dress hems, curtains, cushions, and continuous borders | Allow extra for repeat alignment and joins |
| Premium chain-topped trim | Couture details and statement interiors | Test the foot position and attachment route |
| Tulle-backed trim | Light-catching edges and flexible decorative panels | Plan how the backing will be trimmed or concealed |
| Self-adhesive embellished trim | Temporary craft placement and low-stress decoration | Don't assume adhesive alone will replace stitching |
For fabric, notions, and project supplies in one place, More Sewing offers dressmaking fabrics, haberdashery, ready-to-sew kits, and practical sewing support for makers planning embellished garments or home projects. Visit the shop, compare the trim and fabric requirements, and test your chosen combination before committing the beaded fringe to the final piece.
