
Blog, Dressmaking
How to Sew a Bias Cut Skirt That Actually Drapes
You've cut the first panel, lifted it from the table and watched the waist edge lengthen in your hands. The hem already looks uneven, one side seam seems to have shifted, and the elegant bias cut skirt you imagined is starting to resemble a very expensive experiment.
That reaction is common, but the problem usually isn't the pattern. Bias fabric behaves differently from a standard lengthwise cut, so it needs different preparation, support and pressing. Once you respect that behaviour, you can achieve the soft movement and body-skimming drape that make a bias cut skirt worth the extra care.
Why Bias Cutting Is Worth the Extra Effort
You finish a skirt in soft viscose, put it on for the school run, and notice the hem is no longer level. One seam has rotated towards the front, while the fabric that looked elegant on the cutting table now clings in places you did not plan. That is the practical cost of bias cutting when the cloth, handling and construction have not been matched to its behaviour.
Bias cutting places the pattern at 45 degrees to the fabric weave, rather than along the lengthwise or crosswise grain. The diagonal direction lets woven fibres shift more freely. The result is a skirt that bends around the body, responds to movement and falls into a softer line.
A viscose circle skirt can pour away from the waist and swing as you walk. The same shape in firm cotton twill may stand farther from the legs and keep a sharper outline. The difference comes from the grain direction as well as the fibre. Bias cloth responds differently to gravity, body curves and everyday movement.
What the bias does to a skirt
The added movement brings trade-offs. Cut edges may lengthen during handling, seams can creep out of alignment, and a hem may drop while the skirt rests before sewing. A presser foot or feed dogs can stretch one layer more than the other if you handle the fabric like stable cotton.
A straight-cut cotton skirt often needs darts or shaped seams because the cloth resists the body. A bias-cut viscose skirt can skim those curves with fewer visible interruptions, but the waist and seams need support. In a UK home sewing room, that may mean allowing extra time for controlled cutting, gentle pressing and a proper hanging period before hemming.
Practical rule: treat every bias edge as temporarily unstable until it has been supported, stitched or allowed to relax.
The reward is movement that firm cloth cannot create through ordinary grain placement. A well-made bias cut skirt follows the body without looking stretched, twisted or forced. The technique asks more of your fabric choice and handling, but it gives the finished garment a distinctive fluidity.
Choosing a Fabric That Will Drape and Recover
Fabric choice decides whether your skirt glides back into shape or grows during the first day of wear. The most glamorous cloth in the shop isn't automatically the most practical choice, especially in the UK, where humidity, indoor heating, rain and frequent laundering can expose weaknesses quickly.
Silk satin and silk crepe offer beautiful liquid movement, but they demand confident handling and more careful cleaning. Viscose and rayon challis are easier to find and often give excellent drape for an accessible home-sewing project. Linen-viscose has more body, which can make it a sensible warm-weather choice when you want movement without a flimsy, clingy skirt.
For colder months, deadstock wool or viscose twill can produce a skirt with useful weight and swing. Check each length individually, because deadstock varies in weave, finish and recovery. If you're comparing fabric qualities for other garments too, this guide to choosing shirt fabric from T-Shirt Envy is a useful reminder to assess handle and care requirements rather than choosing by colour alone.
| Fabric | Drape | Recovery | Opacity | Care |
|---|---|---|---|---|
| Silk satin or silk crepe | Liquid and fluid | Can be delicate, test first | Satin may need checking in lighter colours | Often requires careful or specialist cleaning |
| Viscose or rayon challis | Soft, flowing movement | Varies by weave and finish | Can be translucent in light weights | Pre-wash and follow the cloth's care limits |
| Linen-viscose blend | Relaxed with more body | Usually more forgiving than very light satin | Often better coverage than sheer challis | Expect creasing and wash gently |
| Deadstock wool or viscose twill | Weighted, graceful swing | Often stable, but assess the individual cloth | Generally stronger coverage | Follow fibre-specific care instructions |
A test worth doing in the shop
Hold a corner and pull it along the diagonal. Then release it. A useful cloth should show movement without continuing to grow uncontrollably. If it lengthens and stays elongated, it may produce a stretched waist or uneven hem.
Cheap polyester chiffon can be particularly frustrating because it may stretch under handling and fail to recover cleanly. Heavy cotton sateen often fights the diagonal grain, creating a stiff cone rather than a fluid skirt. Very loose weaves can also snag or open along the seam line.
Choose for the life of the garment. A pure satin may suit eventwear, while a slightly heavier viscose or linen blend may serve better for an office skirt or washable everyday wardrobe.
Preparing Your Cloth and Finding the True Bias
Wash, dry and press the fabric as you intend to care for the finished skirt. Residual shrinkage can pull a bias hem into waves after the first wash, and careful stitching cannot level an edge once the cloth has changed shape.
Press on a clear, fully supported surface. Fabric hanging over a small ironing board can stretch under its own weight, especially with viscose or silk. Keep the length flat whenever possible, clear the whole cutting area and test a small diagonal pull before laying out the pattern. That preparation sequence is particularly useful with viscose, which may look settled until it is handled.
Find the grain before trusting the print
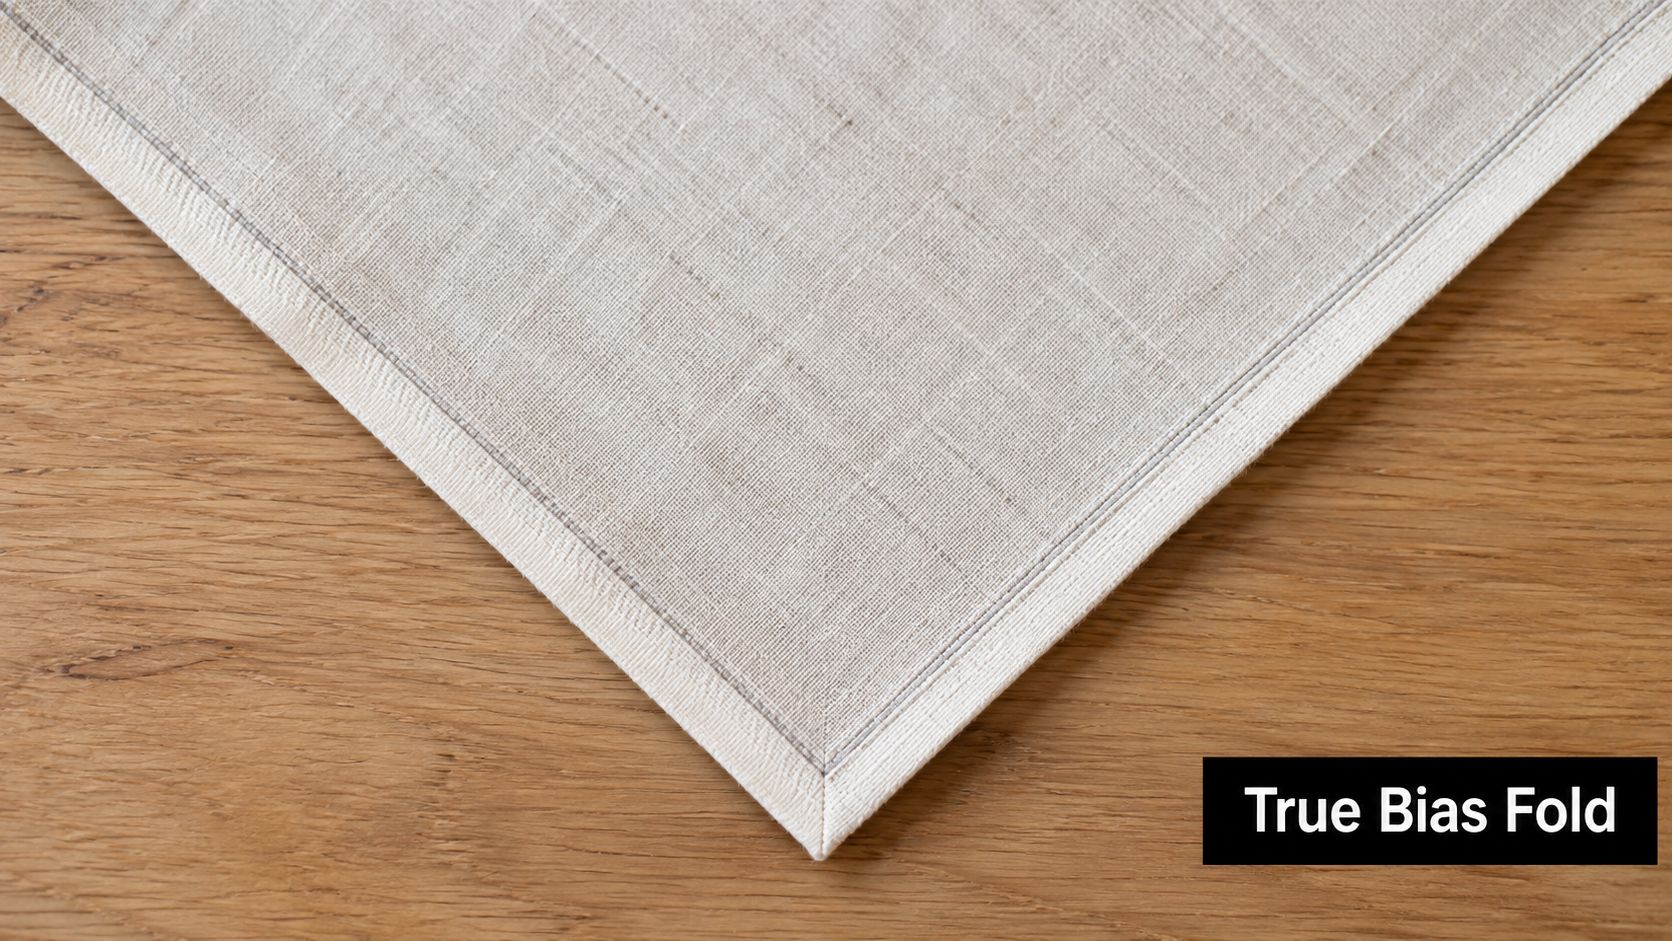
Cut a small square from a corner and pull one thread to identify the true lengthwise or crosswise grain. Fold the square diagonally. Its fold shows the true 45-degree bias, which may sit differently from a stripe, floral direction or printed motif.
At the selvedge, snip a 2 cm nick where the bias falls, then mark across the cloth with tailor's chalk or basting thread. This temporary line remains dependable when a busy print or loose weave hides the grain. Repeat the diagonal pull test here. A cloth that gives readily will need calmer handling and more support at every stage.
Lay each pattern piece in a single layer, with the bias grainline running corner to corner. Do not put a bias piece across a fold to save fabric. Weights hold the pattern without dragging the grain or leaving holes in delicate cloth. If pins are necessary, keep them within the seam allowance.
Before committing to a close-fitting style, consider how much shaping the cloth must support. An uncomplicated A-line or wrap skirt is a kinder first project than a fitted pencil shape. It allows viscose, silk or a linen-viscose blend to show its movement without loading unstable seams with tight curves. That choice can prevent twisted seams and makes later hem correction more manageable.
Cutting on the Bias Without Distorting the Fabric
A bias skirt can go wrong at the cutting table before a single seam is sewn. If the cloth shifts, stretches, or twists while you are laying it out, the finished garment will fight you later. Keep the fabric fully supported on a flat surface, right side down, and make sure any diagonal fold is a true 45-degree line before you trust it.
Work with each pattern piece in a single layer, and check the grain arrow against your marked bias line. Fabric weights are the safest way to hold pieces in place. If pins are needed, put them in the seam allowance, not through the visible area of the garment.
Use a sharp rotary cutter and a 30 cm ruler for clean, controlled edges. That matters on viscose and silk, which can move the moment scissors lift the cloth from the table. Long, smooth cuts are better than short, hesitant snips. Keep the fabric flat under the blade, and do not pull it towards yourself while cutting.
Mark before the pieces move
Transfer notches, waist points, and seam references with tailor's chalk or thread tacks before you lift the pieces off the table. Pen ink can bleed into silk and viscose, and tracing wheels can leave a line that stays visible. If the cloth has a clear right and wrong side, mark the wrong side consistently so you do not flip a panel by mistake.
Do not rush from cutting straight into stitching. Hang each piece from the waist edge on a padded hanger for 24 hours so the diagonal grain can relax and drop before construction. The technical guidance on bias-cut fabric also recommends letting cut pieces hang before hemming, along with stay-stitching and careful handling that limit stretch.
Skipping that rest is one of the quickest ways to end up with an uneven hem. Once the pieces have settled, compare them with the pattern again and trim only where the shape has changed. If you correct a temporary pull too aggressively, you can build distortion into the skirt before it is even sewn.
Sewing Seams That Stay Smooth and Stable
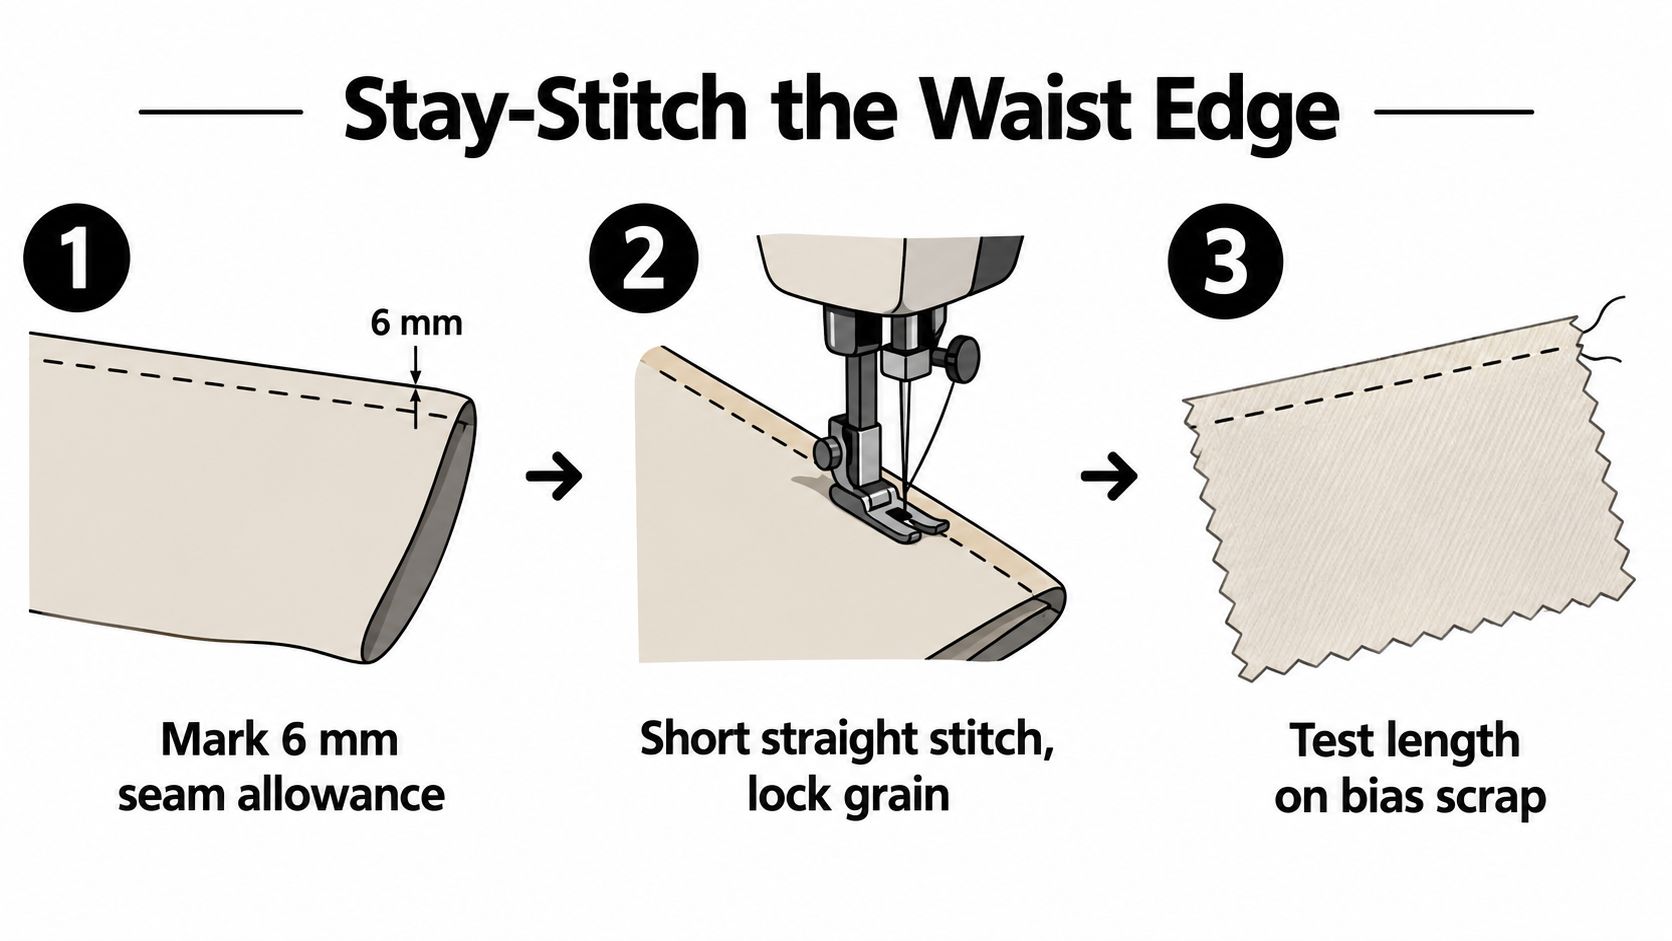
Start at the waist edge. Stay-stitch each skirt piece inside the 6 mm seam allowance with a short straight stitch. That locks the most vulnerable edge before you handle the panels, fit the waistband, or try the garment on.
Test the stitch on a bias scrap first. A 2.5 mm stitch length usually gives enough give without making the seam look sparse or the fabric ladder. One UK sewing source also describes a 1.3 cm stay stitch from the top edge and 3 mm stay stitching along the sides, while recommending a 2.5 mm stitch length and 0.5 mm width for a zigzag seam option where the seam itself does not need to stretch. The detailed bias-garment guidance is worth checking when your cloth behaves differently from the scrap you tested.
Reduce presser-foot pressure to about a third of the setting you would use for stable cotton, if your machine allows it. A walking foot also helps the layers feed at the same pace. Leave that out and the lower layer can run ahead, which gives you a wavy seam that steam will not fully put right.
Support the seam while you sew
Pin horizontally at intervals of 10 cm, keeping the joined edges supported on the machine bed. Feed the fabric steadily and do not pull from either side. Let the feed dogs do the work, and guide only enough to keep the seam line true.
I always sew one side seam on a spare panel or a scrap first, then check it before continuing. If the seam ripples, reduce pressure again, change the needle and thread combination if needed, and make sure the cloth is not hanging off the table edge while you sew.
After each seam, press it open while the skirt is flat. Use a silk organza press cloth for delicate surfaces, lift and lower the iron rather than dragging it, then press the curve over a tailor's ham so the seam settles naturally. Practical pressing guidance for bias fabric stresses lifting the iron instead of moving it across the cloth, which helps keep the diagonal from being pulled out of shape.
Heming, Hanging and Fitting Adjustments
Press the side seams first, then hang the assembled skirt on a dress form or sturdy padded hanger for another 24 hours. The skirt needs to settle as one garment, because different panels may drop at different rates once they're joined.
Don't pin the hem while the skirt is lying on the table. Put the garment on the form, check that it hangs freely and mark the edge with pins inserted at right angles to the floor. Work around the full circumference, noting where the bias has dropped lower instead of assuming the original cut edge is still accurate.
Trim to the shortest point
Trim the hem to the shortest marked point, then turn up a narrow 1 cm hem. A twin needle can provide a little flexibility as you edgestitch from the right side, but test it on the actual fabric first. If the cloth is too delicate or the twin needle tunnels, a narrow zigzag or carefully controlled single line may give a cleaner result.
Press the turn-up gently. Lift the iron rather than sweeping it around the circumference, and use a pressing cloth when the fabric has a satin surface or a strong sheen. A dragged iron can stretch one section and create the very ripple you're trying to remove.
For the waist, use a straight-cut waistband rather than a bias waistband. The stable grain adds support where the body pulls most often. Interfacing only the back portion can provide gentle shaping without making the entire waistband rigid.
If the waist feels tight after wearing, a small 5 mm slash with an added gusset can release the pressure without changing the drape below the hips. Make the adjustment at the waistband or upper edge, not through the lower skirt, where a correction could interrupt the fall of the bias.
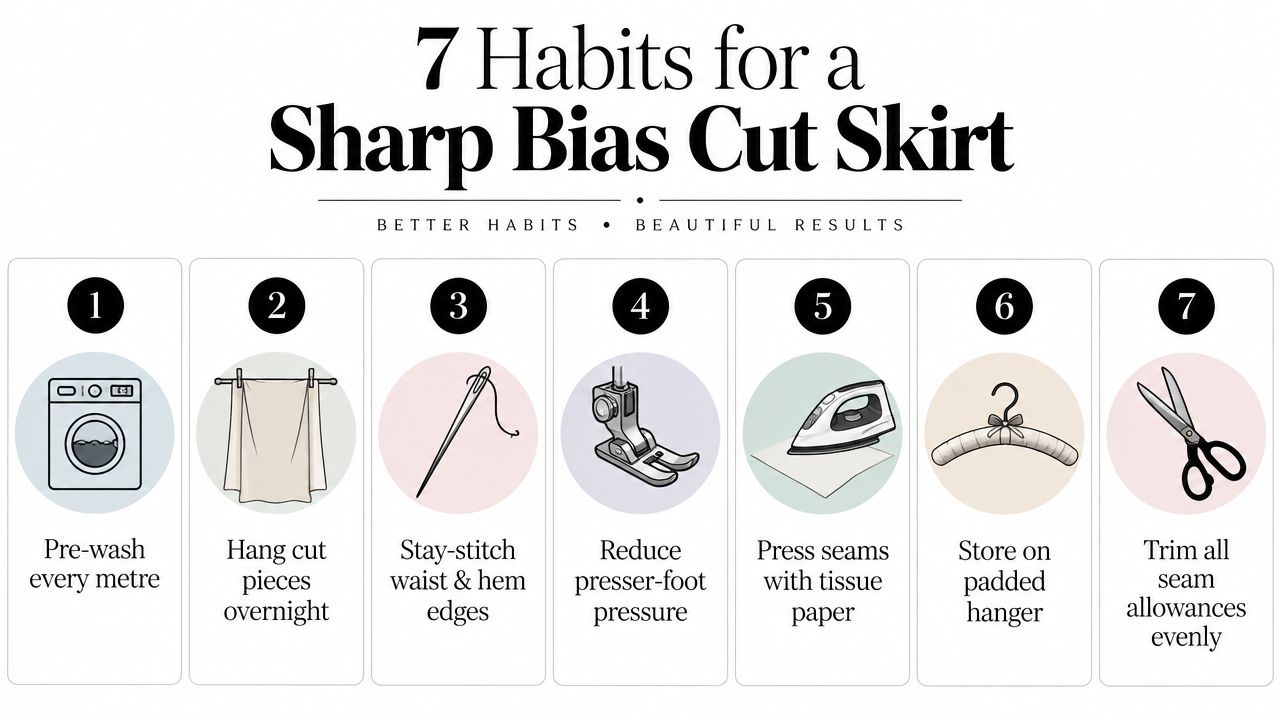
Habits That Keep Your Bias Cut Skirt Looking Sharp
A bias cut skirt stays attractive when the handling habits continue after the sewing is finished. The cloth remembers rough treatment, especially at the hem, waist and side seams.
- Pre-wash every metre: Remove likely residual shrinkage before cutting, using the care method the finished garment will receive.
- Hang cut pieces overnight: Let the diagonal grain settle before joining panels or shaping the hem.
- Stay-stitch waist and hem edges: Stabilise vulnerable edges before fitting, pressing or attaching a waistband.
- Reduce presser-foot pressure: Use a walking foot when necessary so the layers feed together instead of stretching unevenly.
- Press with a pressing cloth and steam burst: Lift the iron and avoid dragging it across the diagonal grain.
- Rotate between two skirts: Give the fabric a rest instead of wearing the same bias garment repeatedly.
- Refold the hem up for storage: Don't press the hem flat into a sharp storage crease that can become difficult to remove.
The durable result comes from combining fabric judgement with disciplined handling. Before your next project, return to the fabric table and assess drape and recovery, not just colour or price.
More Sewing offers viscose and Tencel blends, denims, premium cottons, haberdashery, sewing kits and ex-designer deadstock, along with fabric sample swatches to help you judge handle before committing to a bias cut skirt. Visit More Sewing to choose a cloth that suits your intended wear and gather the stabilising tools for a cleaner, longer-lasting finish.
