
Blog, Dressmaking
Fabric Pattern Matching Made Simple for Flawless Seams
You've cut the front of a beautiful checked fabric, only to hold it against the back and see the lines jump at the side seam. The fabric is lovely, the pattern is sound, and yet the finished garment already looks less polished than you imagined. That sinking feeling usually starts before the machine is switched on. Fabric pattern matching is decided at the buying, layout and cutting stages, then protected with careful sewing.
Perfect alignment doesn't mean every motif must meet everywhere. It means you've chosen where continuity matters most, allowed for the extra fabric it may consume, and made deliberate decisions about the places where a mismatch won't trouble the eye. The techniques below will help you match stripes, checks, plaids and bold repeats, while also showing when breaking the pattern can save fabric or create a stronger design.
Why Fabric Pattern Matching Transforms Your Finished Garment
A broken stripe at the centre front attracts attention immediately. So does half a flower disappearing into a side seam, a pocket that cuts through a prominent motif, or a plaid that rises on one side of the bust and drops on the other. These errors aren't always large, but the eye reads them as interruptions. A well-matched seam, by contrast, lets the garment look intentional and considered.
The highest-priority areas are usually the centre front, centre back, side seams, bust, hip and pocket edges. On a close-fitting bodice, horizontal lines should meet at the bust and hip where the body changes shape. On a jacket, a herringbone or check that flows across the front can make the construction almost disappear. A pocket can either preserve that continuity or become a deliberate interruption, depending on whether you cut it from the same repeat.
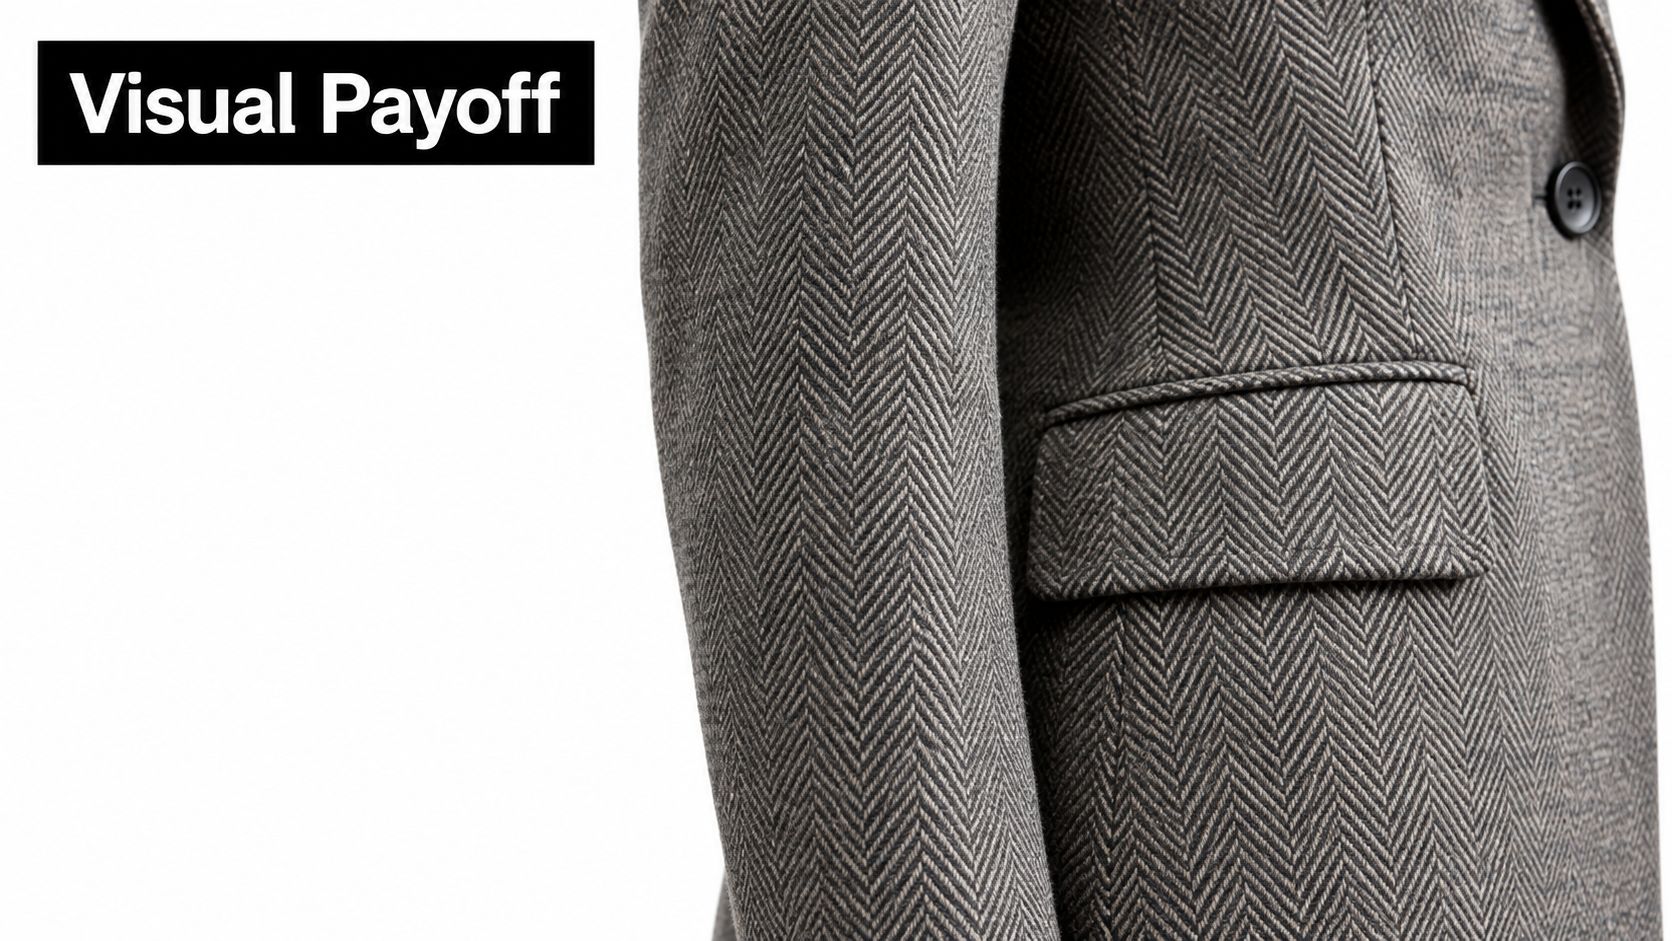
Matching improves the finish, but it consumes cloth
The cost of precision is fabric. A large repeat needs more length between possible placement points, and a directional design may prevent you from turning pieces to use space efficiently. Checks and stripes can also require single-layer cutting, which often leaves awkward gaps between pattern pieces.
That trade-off matters beyond one dress or shirt. A Manchester Metropolitan University paper describes a fashion waste stream of more than 60 billion square metres of scrap fabric annually, while around 15% of fabrics are left unused during garment manufacturing and discarded as solid waste. The research frames zero-waste pattern cutting as one response to this problem, and it reports fabric utilisation above 98% for both test styles, compared with traditional industrial practice where utilisation above 85% is often difficult to surpass. Read the full Manchester Metropolitan University zero-waste pattern cutting research for the wider context.
For home sewing, this doesn't mean you should accept a visibly broken centre front to save a small scrap. It means you should decide where matching earns its keep. If you're developing several placements or testing a complex repeat, 3D sampling and patterning software can help you assess the relationship between pieces before committing to cloth.
Bench rule: Match the seams people see first. Treat less visible joins, under-collar areas and some pocket details according to the fabric available and the look you want.
Intentional mismatch can work beautifully. A pocket cut on the cross-grain, a contrast yoke, or a deliberately off-centre floral can make the print part of the design rather than a problem to hide. The important distinction is control. Accidental mismatch looks unfinished. Chosen mismatch looks like a decision.
Understanding Repeats Grainlines and Direction Before You Cut
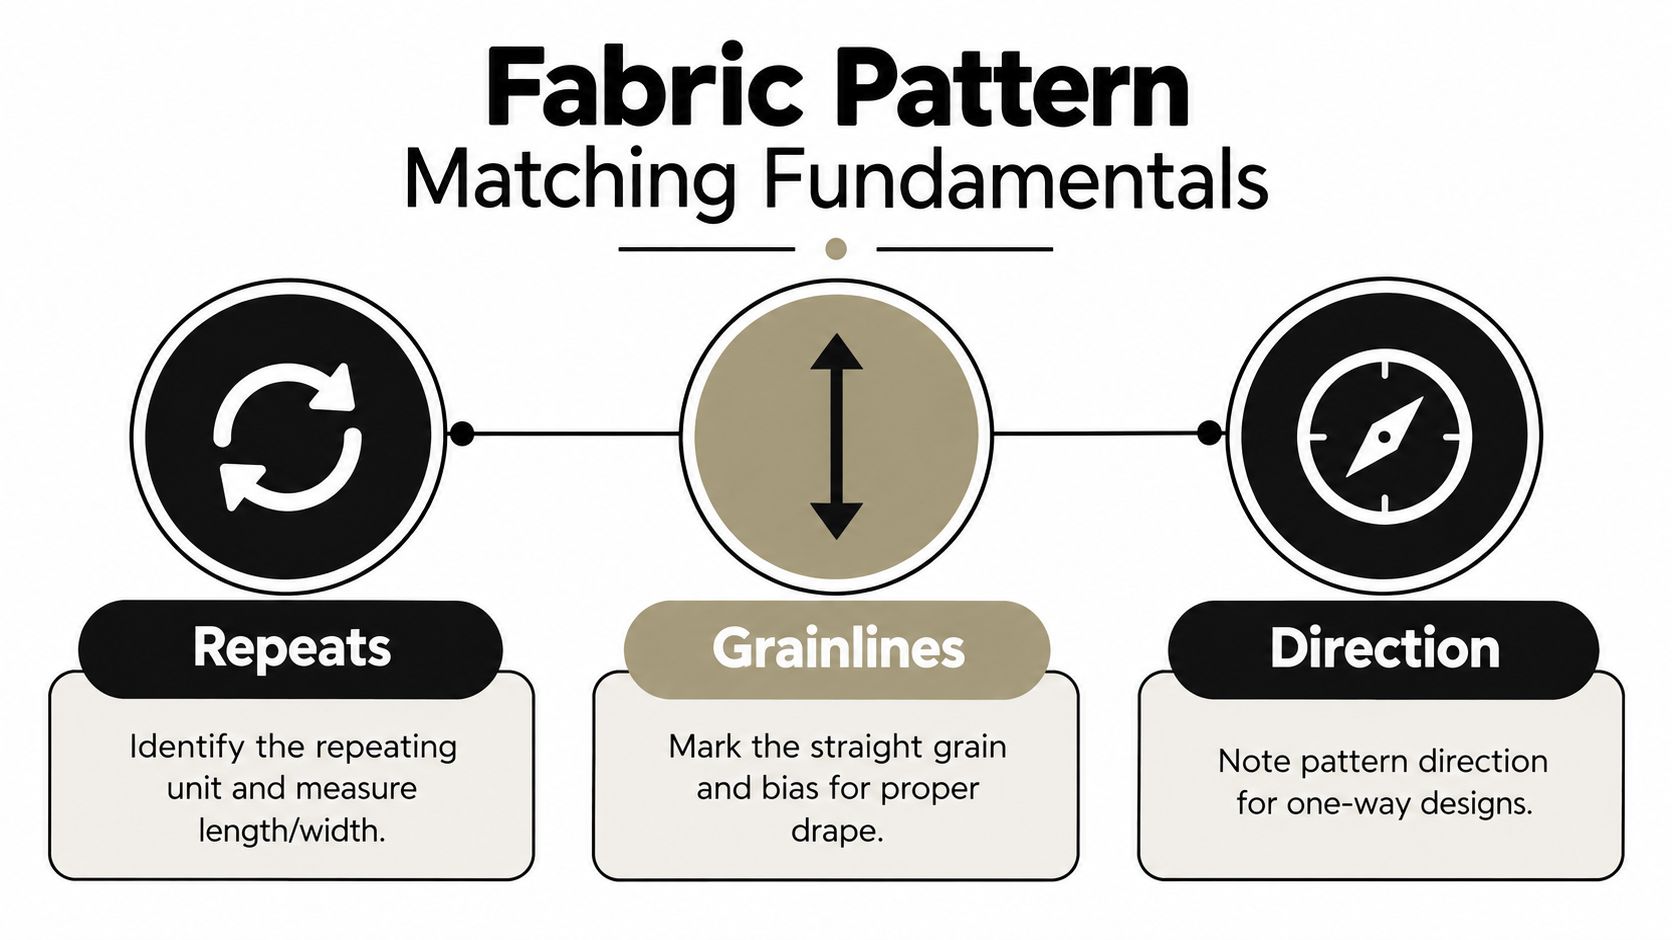
Before laying out a pattern, identify what the fabric is doing. Start by finding the repeat unit, the section of the design that returns in the same arrangement. On a stripe, measure from one equivalent stripe edge to the next. On a floral, choose a recognisable bloom or leaf cluster and measure the distance to its next identical position. Record both the vertical and horizontal repeat.
A ruler helps with regular checks. Hold the fabric flat and note whether the vertical and horizontal lines are evenly spaced. For a scattered floral, use tracing paper to mark a few recurring motifs. A large repeat may not have obvious symmetry, so don't assume that a visually similar flower is the correct alignment point.
Read grain separately from print
A print can look straight while the cloth is off-grain. Check the selvedges first, then inspect the weave. With a plain weave, the crossing threads usually give a straightforward reference. In twill, such as denim or herringbone, the diagonal surface lines can tempt you into following the wrong feature. Use the selvedge and the grainline printed on the pattern as your primary guides, then check how the design sits against them.
Hold the fabric to the light if the weave is difficult to read. Look for a thread running across the width and use that as a reference for horizontal pattern placement. If the print runs noticeably off-grain, you may have to choose between straightening the cloth, accepting a less-than-perfect print alignment, or changing the design.
Decide whether the fabric has direction
Turn the fabric upside down and look from a short distance. If the design changes visually, treat it as directional. This includes obvious motifs such as large flowers, chevrons and printed figures, as well as fabrics with a nap or raised surface.
Mark the top of every paper piece with an arrow pointing towards the hemline. For one-way designs, all arrows must point the same way. UK sewing guidance recommends a “with nap” layout so the print runs from the top of each piece towards the hemline; bold motifs that run from selvedge to selvedge should be cut separately on a single layer, with one side flipped to mirror the other. The practical guidance is shown in this guide to pattern matching directional fabric.
A University of Leeds academic benchmark also shows that regular geometric textile patterns can be described reproducibly through their symmetry characteristics. In practical terms, classify whether your repeat mirrors, rotates or steps forward, then use equivalent points at seam intersections. The University of Leeds textile pattern analysis thesis provides the research background for this way of reducing ambiguity.
Planning Your Layout and Cutting for a Perfect Match
Fabric matching works best when the layout is planned on paper before the cloth is cut. Trace the main pattern pieces onto inexpensive paper, mark the grainline, notches, bust point, hip line and any dominant stripe or motif. For a large floral, draw the repeat onto the paper so you can move the bodice front until the strongest bloom sits where you want it.
For extra fabric, the practical rule is to allow one full pattern repeat for each major piece, as explained in the fabric pattern matching calculator guide. A bodice front, bodice back, sleeve and large skirt panel may each need their own placement allowance. This isn't a universal fixed quantity because piece size, repeat size, garment width and fabric width all change the result, but the rule prevents the common mistake of buying only the plain-garment requirement.
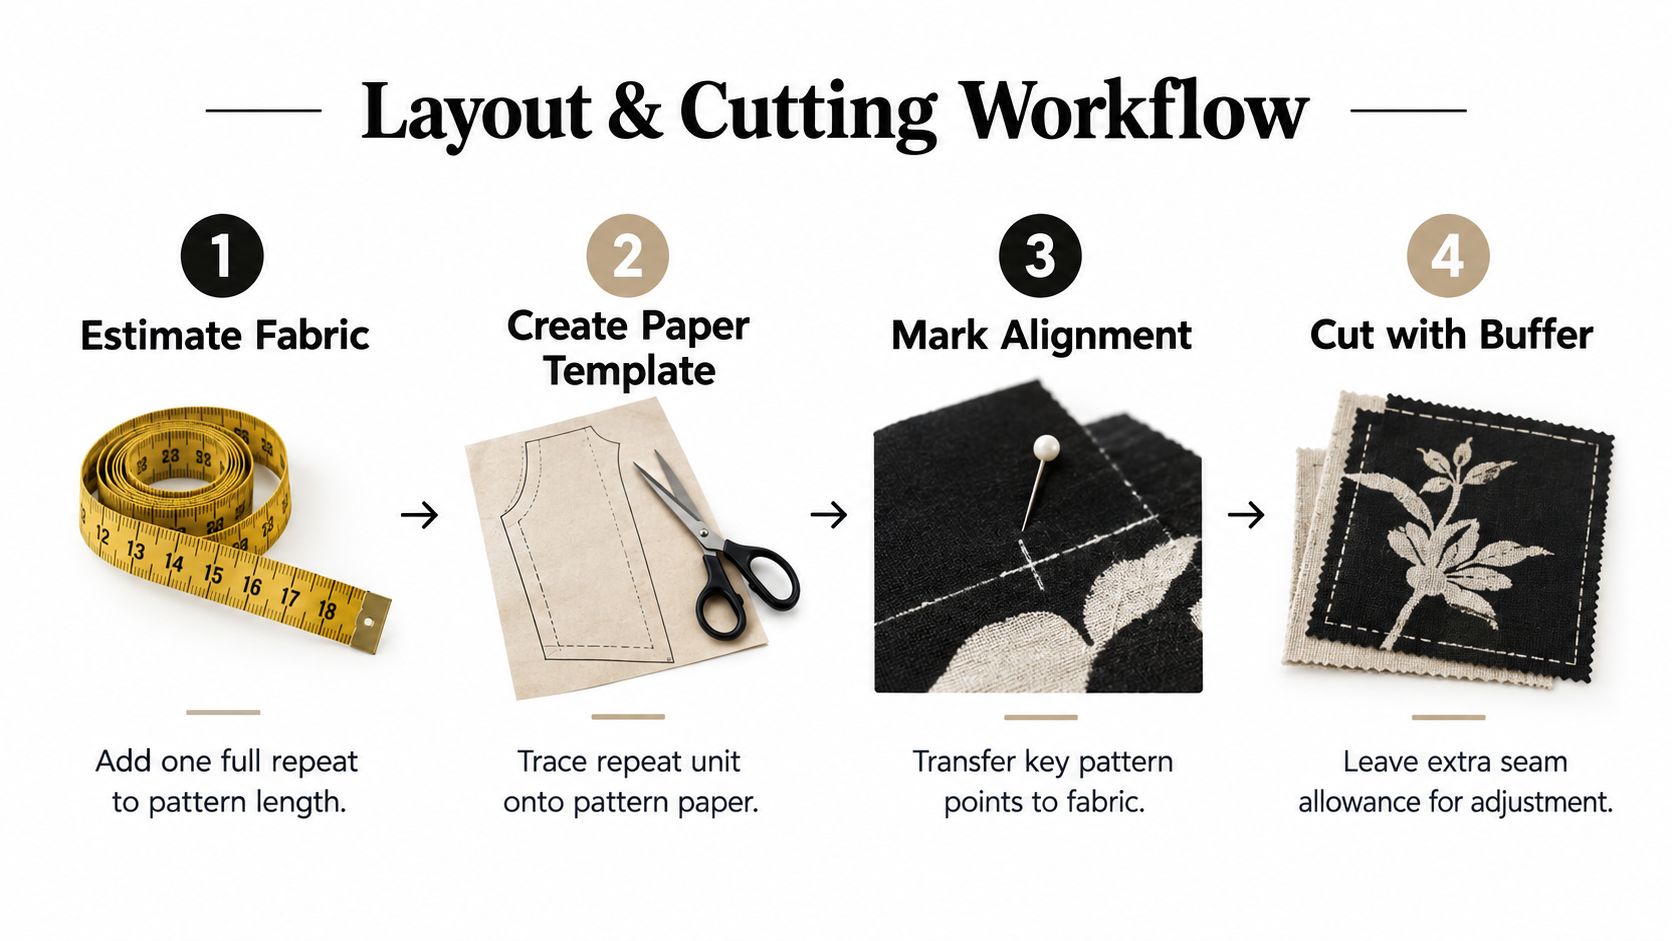
Use single-layer cutting for accuracy
For checks, plaids and strong directional prints, place the fabric right side up and cut each piece separately. Mark the dominant horizontal and vertical lines directly on the wrong side, then align the paper grainline with the fabric grain, not with a convenient printed stripe if the print is skewed.
Cut the first piece, but don't immediately move the remaining fabric into a new arrangement. Lay the cut piece next to the uncut cloth, matching the print at the seam edge and at key points such as the bust and hip. Place the next paper piece against that reference. This preserves continuity far more reliably than trying to remember where the lines fell.
For two identical pieces, such as sleeves or side fronts, flip the second paper piece face down after transferring the alignment marks. This creates a left and right side rather than two pieces facing the same way. Use weights while checking placement, then pin within the seam allowance so the pins don't distort the matching edge.
Build in adjustment room
Add a little extra at seams where the alignment is critical. A narrow seam allowance gives you less room to correct a line that has shifted, especially on a slippery viscose. Transfer the notches and draw short alignment lines across the seam allowance. On a chevron, mark the point where the angle meets the seam. On a plaid, mark the dominant horizontal line and the strongest vertical intersection.
One-way layouts need particular discipline. If a motif is bold and extends across the full width, don't fold the fabric and assume the mirrored piece will land correctly. Cut one piece, turn the pattern over for its partner, and check that both sides face the same direction in the finished garment. Folding is suitable only when the print and grain allow it without reversing or misplacing the design.
Pinning Basting and Sewing Matched Seams Accurately
Good cutting can still be lost under the presser foot. The feed dogs move the layers, the fabric stretches, and a seam that looked aligned on the table can drift by the time it reaches the needle. Secure the match in small stages rather than pinning only at the ends.
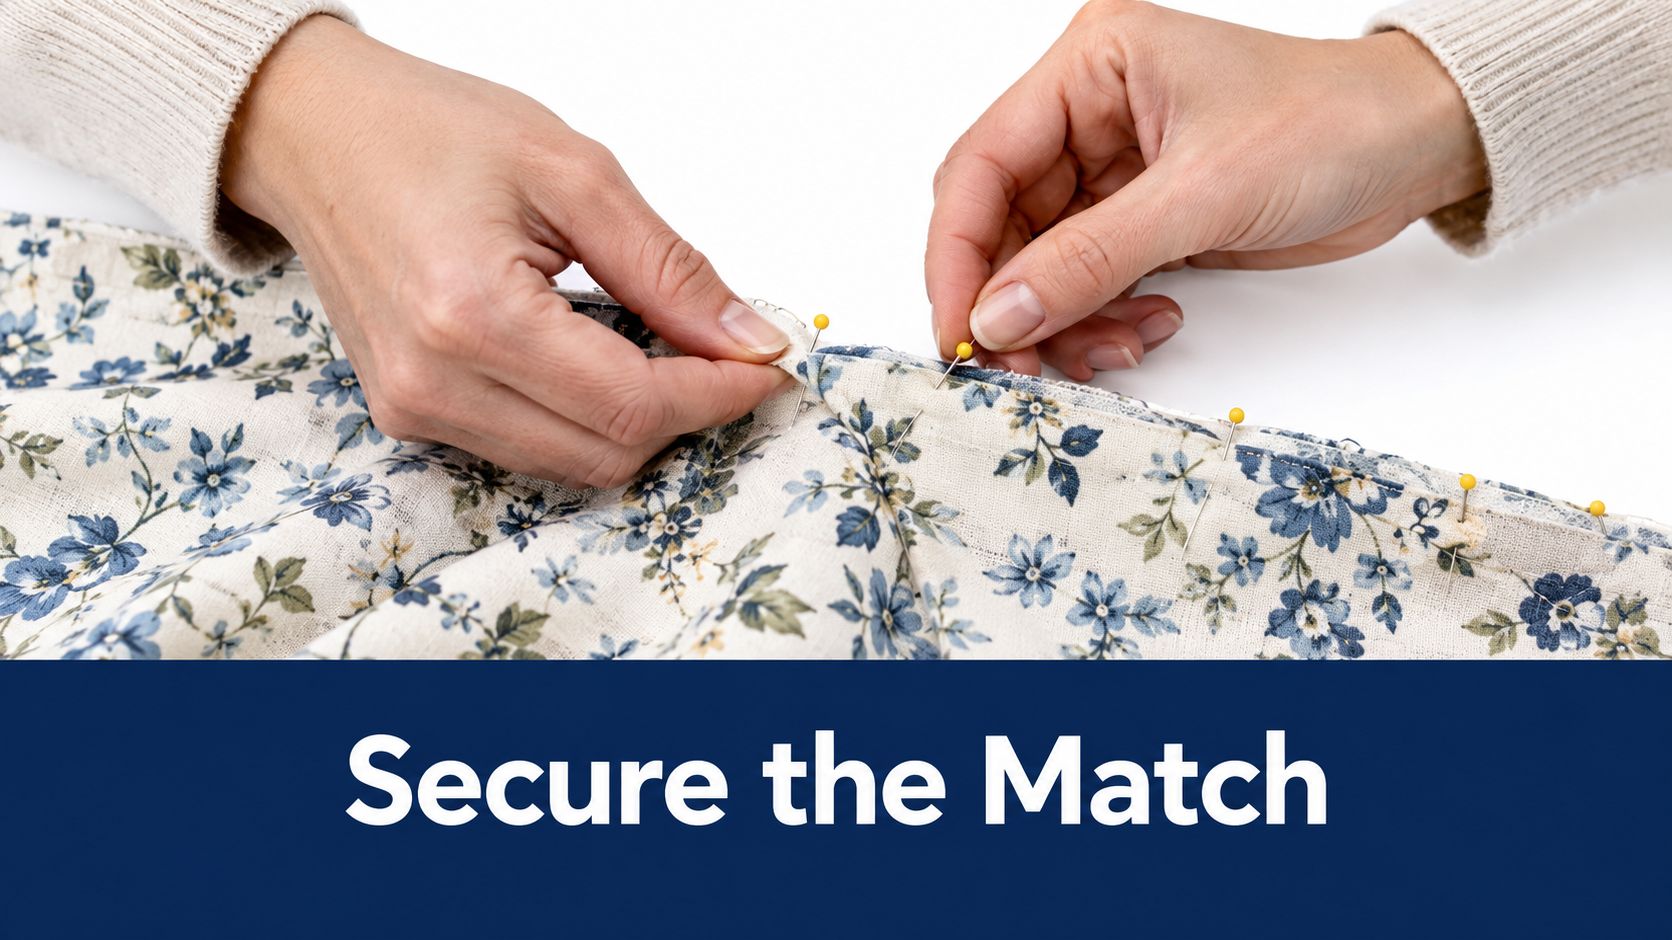
Place the panels right sides together, keep them facing the same way up, align the bottoms and selvedges, and find the repeat at the seam edge. UK sewing tutorials recommend folding over one selvedge edge to locate the matching point, then pressing the fold before sewing. This hands-on patterned fabric seam method is particularly useful when a stripe or motif is easier to locate from the edge than from the seam allowance.
Pin at the actual match points
For a horizontal stripe, pin directly through the stripe at the side seam, then add pins on either side before moving along the seam. Check the fabric remains flat between pins. If the stripe meets at the bust but drifts below it, the problem may be shaping rather than careless sewing. A dart or curved seam changes the fabric surface, so choose the area that must remain visually continuous and accept that another area may shift.
Plaids benefit from a similar hierarchy. Select the dominant line first, then align secondary lines around it. At a hip seam, a strong horizontal line usually matters more than a faint overcheck. Mark the selected line on both pieces and pin through those marks.
Slippery viscose deserves hand basting in the seam allowance. Use long temporary stitches, then inspect the seam from the right side before committing to the permanent stitch. Basting takes time, but unpicking a distorted floral repeat takes longer and can leave needle marks.
Use temporary bonding when pins aren't enough
Fusible tape can hold a folded edge while you align a repeat. Place the panels right sides together, fold back one selvedge edge to reveal the matching line, and press the crease. Apply the tape along the fold, peel the backing, line up the repeat and press again before stitching along the crease.
Test the tape on a scrap first. Some fabrics show shine under heat, and some adhesives can affect delicate surfaces. Keep the tape inside the seam allowance whenever possible.
The video below gives a visual demonstration of the controlled handling needed for accurate joins.
Sew with the matched edge uppermost if that lets you monitor the reference line, and reduce handling between the last pin and the needle. A walking foot can help when layers creep, but it won't correct a poorly positioned match. Sew a short test seam first, press it, and inspect from a normal standing distance rather than only nose-to-fabric.
Press after checking. Pressing can settle a seam and reveal whether the lines meet, but it can't repair a cut piece that was placed on the wrong repeat. If the seam is close but not exact, decide whether it will be visible in wear. Not every internal line deserves the same amount of unpicking.
Fabric Specific Tips for Stripes Plaids Florals and Nap Prints
Different fabrics fail in different ways. Stripes expose horizontal drift, plaids reveal both horizontal and vertical errors, florals make motif placement the main decision, and nap prints punish a piece cut upside down. The right method depends on the design's geometry as much as the fabric's fibre content.
| Fabric Type | Key Challenge | Recommended Cutting Method | Alignment Tip |
|---|---|---|---|
| Stripes | Lines can wander at side seams or across shaping | Single layer when the stripe must be placed precisely | Mark one dominant stripe through bust, waist or hip |
| Checks and plaids | Several line systems need to meet at once | Cut each piece separately, never rely on an untested fold | Prioritise the strongest horizontal and vertical lines |
| Large florals | A flower can be cut awkwardly or split at a focal point | Position major pieces individually, then mirror partners | Centre a bloom or keep it whole on a pocket where possible |
| Nap and one-way prints | Reversed direction is obvious on the finished garment | Use a with-nap layout and keep every top mark pointing the same way | Turn the paper for mirrored pieces, not the fabric |
Stripes need a reference line
For a regular stripe, choose the line that should run through the garment. A shirt might carry a narrow stripe across the bust and back, while a skirt could use a dominant line at the hip. Check whether the stripe is equal on both sides of its centre. Uneven stripes need a visual centre rather than a mathematical assumption.
A chevron is less forgiving. Match the point at the centre back or centre front first, then work towards the side seams. If the style includes a yoke, decide whether the chevron should continue into it or whether the yoke should deliberately run in a different direction.
Plaids require priority setting
Janome's UK sewing guidance recommends cutting patterned fabric, checks and plaids on a single layer rather than on the fold. It also advises placing each cut piece beside the remaining fabric so the next piece can be positioned against matching points such as the bust and hip, then placing the second of two identical pieces face down to create left and right sides. These instructions appear in the Janome sewing guidance.
Large plaids can make every line seem equally important. They aren't. Pick the line that defines the garment, then use the others as supporting checks. If darts interrupt the pattern, match below or beside the dart where the line will be most visible.
Florals invite controlled placement
A large bloom centred on a bodice can look elegant, while a face-like flower cut in half at the pocket can look accidental. Place the paper piece over the fabric and look at the entire motif, not only the seam edge. For a pocket, keeping one strong flower intact may matter more than matching every small leaf around the opening.
For shirt projects where print placement becomes part of the style, these tips for standout shirt designs offer useful inspiration. The same principle applies to dressmaking. You can use contrast placement, a cross-grain pocket or a separate yoke when a perfect repeat would consume too much cloth or leave an awkward composition.
Nap prints are the least negotiable. Velvet, corduroy and brushed surfaces can change colour when a piece is reversed, even if the printed motif appears symmetrical. Keep every pattern piece facing the same direction and check the surface by stroking it before you cut.
Smart Buying Sustainable Choices and Final Checks
Buy the fabric with the repeat in mind, not after you've fallen in love with the colour. Measure the vertical repeat, identify the major garment pieces, and use the one-full-repeat-per-major-piece rule as a starting point. The actual requirement still depends on the pattern, fabric width and whether pieces can nest without reversing the print, so make a paper layout before ordering expensive cloth.
Deadstock and surplus fabric make the decision more interesting. UK fashion-sector research describes deadstock as an underused resource that can reduce environmental impact and provide a cost-effective alternative to conventional fabrics. At the same time, UK textile-flow analysis reports that nearly half of discarded textiles enter general waste, and 84% of that general-waste share is incinerated for energy recovery, according to the UK circular fashion and textile-flow report.
A limited piece of deadstock may not contain enough cloth for perfect matching across every seam. That doesn't automatically make it unsuitable. Match the centre front and the most visible side seam, then use creative placement for facings, cuffs or pockets. A contrast panel can be more responsible than buying a second length solely to preserve a repeat.
Know when mismatch is the better design
Intentional mismatch works when the edges are clean and the choice repeats elsewhere. Cut a pocket on the cross-grain, place a floral off-centre on both fronts, or use a plain yoke with a patterned body. What doesn't work is allowing one side to look accidental while the other appears carefully aligned.
Before sewing, check the garment on a dress form or hanger. Step away from the table and photograph the front, side and back. A camera often shows a drifting line more clearly than close inspection, particularly across a bust or hip.
Use this final bench check:
- Before washing: Confirm the care method, dry the fabric appropriately and press it smooth.
- Before layout: Mark repeat, grainline, nap direction and the main matching points on every pattern piece.
- Before cutting: Complete the paper placement and protect the extra allowance needed for major pieces.
- Before stitching: Pin or baste the visible match points, then test a short seam.
- Before finishing: Press, photograph and inspect from normal wearing distance.
For visual planning outside sewing, even a carefully styled setting such as a classical Rome wedding venue can remind you how strongly the eye responds to repeated lines, balance and focal placement. Apply that same judgement to your garment. Perfect matching is a tool, not a rule, and the most sustainable result is the one that uses the fabric well while looking deliberately made.
More Sewing offers quality fabrics, haberdashery, ready-to-sew kits and ex-designer deadstock for projects where placement and fabric choice matter. Visit More Sewing to browse suitable textiles, order swatches before committing to a repeat, and find the practical supplies that help you cut, match and finish with confidence.
