
Dressmaking, Guides
Blanket Stitch Edging: A How-To Guide for Perfect Finishes
You've finished the seam, pressed the edge, and the piece is nearly there, but the raw edge still looks unfinished. That's the moment many sewists reach for blanket stitch edging. It gives a project that deliberate, hand-worked finish that machine topstitching can't quite mimic.
Most tutorials stop at felt ornaments and fleece blankets. Useful, yes, but not much help when you're sewing cotton lawn, a fluid viscose, or a jersey that wants to curl the second you touch it. Dressmaking fabrics behave differently, and blanket stitch edging needs to change with them if you want a clean result.
A neat edge comes down to a few practical choices. The right needle. A thread that suits the weight of the fabric. A consistent hand. And, just as important, knowing what not to do when the edge starts to pucker, twist, or look heavy.
Adding a Handcrafted Finish with Blanket Stitch
Blanket stitch edging earns its place because it does two jobs at once. It protects a raw edge, and it adds character. On a wool skirt hem it can look traditional and sturdy. On a cotton pocket edge it reads crisp and decorative. On appliqué it can become part of the design rather than just the finish.
For many home dressmakers, the first encounter with this stitch is on felt. Felt is forgiving. It doesn't fray, it holds its shape, and it lets you learn the movement without much resistance. The trouble starts when that same method gets copied directly onto dressmaking cloth. A soft viscose won't behave like felt. A fine lawn won't forgive a bulky thread. A jersey needs a different touch again.
Where it works beautifully
Blanket stitch edging is especially useful on projects such as:
- Pocket tops and patch pockets where you want a visible handmade detail
- Collar edges and cuffs on casual garments with a craft-inspired finish
- Appliqué on children's clothes where the stitching becomes decorative
- Blanket wraps, scarves, and shawls in heavier cloth where the edge needs reinforcement
- Sample pieces for textile students who want to practise edge control on different fabric types
Practical rule: If the edge is meant to be seen, blanket stitch edging should look intentional. If it looks accidental, the spacing, thread weight, or fabric choice usually needs adjusting.
A simple example is a cotton lawn pyjama pocket. A fine thread and short, even stitches can frame the pocket without making it stiff. Compare that with a deadstock denim tab or blanket edge, where a heavier thread and a wider stitch arm look more balanced. The stitch is the same family, but the handling changes.
That's why this technique is worth learning properly. Once the motion settles into your hands, you can apply it far beyond the usual felt-and-fleece examples.
Gathering Your Tools and Materials
You can feel a poor setup almost straight away. On a fine cotton lawn, the needle snags instead of slipping through. On viscose, the edge starts to pucker after only a few stitches. On jersey, the thread looks fine in your hand and then sits stiff on the fabric. Blanket stitch edging is simple enough to sew, but it looks tidy only when the tools suit the cloth.
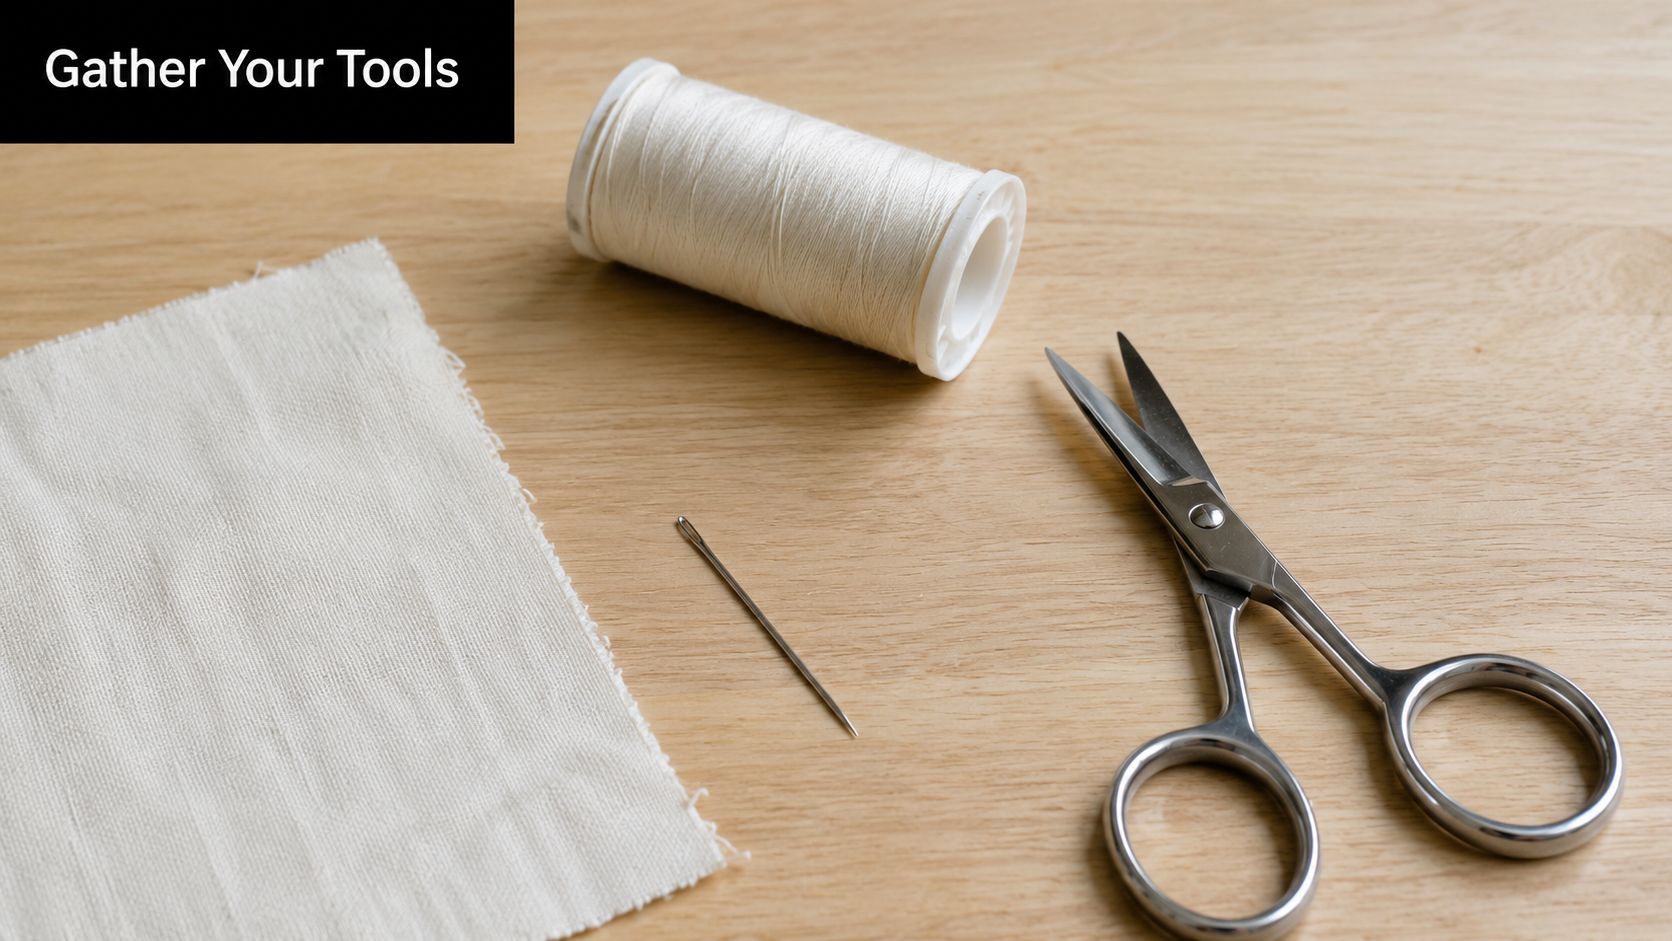
The essentials
Set out these basics before you begin:
- Sharp embroidery needle for most woven fabrics
- Suitable thread matched to fabric weight and the look you want
- Small sharp scissors for clean trimming
- Pins or clips if the fabric shifts
- A fabric marker or chalk pencil if you want to mark spacing
- A pressing cloth and iron to prepare the edge first
Needle choice matters more than many garment sewers expect. A sharp embroidery needle is usually the best starting point for cotton poplin, lawn, chambray, viscose, and denim because it passes through the fabric cleanly without forcing the weave apart. A blunt yarn needle can drag on woven cloth, leave a rough-looking hole, or push the edge out of shape.
I also change needle size sooner than many beginners do. Fine lawns and voiles usually behave better with a finer needle and a light thread. Midweight cottons can take a standard embroidery needle happily. Denim, canvas, and boiled wool often need a sturdier needle, but not one so thick that it punches obvious holes.
Matching thread to fabric
Thread decides whether the edging looks crisp, soft, decorative, or clumsy.
| Fabric | Thread choice that usually works | Effect |
|---|---|---|
| Cotton lawn | Fine polyester or fine cotton thread | Light, tidy edge |
| Viscose or Tencel blend | Fine, smooth thread | Less bulk and less puckering |
| Denim | Heavier topstitch or stranded embroidery thread | Stronger decorative line |
| Jersey | Smooth polyester thread with gentle handling | More flexibility at the edge |
For dressmaking fabrics, I usually test thread weight before colour. A beautiful contrast thread can still look wrong if it is too bulky for the edge. On a pyjama pocket in cotton lawn, a fine cotton or polyester thread gives a neat outline without making the pocket lip curl. On a brushed denim cuff or utility-style pocket, a heavier topstitch thread can look balanced and intentional.
Jersey needs a bit more caution. Smooth polyester thread tends to move with the fabric better than a stiff decorative cotton, especially on lighter T-shirt knits. If you want a bolder look on jersey, test it on a scrap first and stretch the sample gently. If the stitches bite in and the edge ripples, the thread is too heavy, the spacing is too tight, or both.
Helpful extras
A few extras make the work easier:
- An embroidery hoop for lightweight wovens if the fabric collapses in your hand
- A beeswax thread conditioner if the thread tangles easily
- Sample scraps cut from the same fabric before sewing the garment piece
- A thimble for denser fabrics such as boiled wool or denim
A hoop is useful on slippery viscose and soft lawn, but I would not use one automatically. It can help keep the edge steady while you stitch, yet it can also flatten the fabric so much that you pull the thread too tight without noticing. For jersey, I usually skip the hoop and support the fabric in my hand instead, with the bulk resting on the table.
On drapey cloth, a fine thread usually behaves better than a thick decorative one. You can still get contrast through colour without adding bulk.
One habit saves a lot of unpicking. Test the exact needle, thread, and stitch spacing on a scrap from the same fabric. If the edge dimples, the thread may be too heavy or your tension is too firm. If the holes look furry or uneven, try a different needle. Those checks take a minute on a scrap and can save a finished cuff, collar, or pocket edge.
How to Sew the Perfect Hand-Sewn Blanket Stitch
You cut a curved cotton lawn collar or a jersey pocket edge, work a few stitches, and the finish starts to wobble. That is usually not a blanket stitch problem. It is a fabric handling problem. On dressmaking fabrics, a neat result comes from controlling the edge, the thread path, and the spacing at the same time.
Prepare the edge first
Start with an edge that is clean and stable. Trim away any whiskery threads and press the piece so you are not stitching over ripples that were already there. On cotton lawn and viscose, that quick press often improves the finished line more than changing needles halfway through.
Jersey needs a lighter touch. Let the fabric lie on the table, support it with your hand, and avoid lifting the edge while you sew. If the edge stretches while you work, the stitches may look tidy at first and then ripple once the fabric relaxes.
For readers who like to watch the hand movement before trying it, this demonstration is useful:
The core movement
The movement is straightforward, but accuracy matters more on garment fabrics than on felt or fleece. Fine wovens show every uneven entry point. Soft jerseys exaggerate every tug.
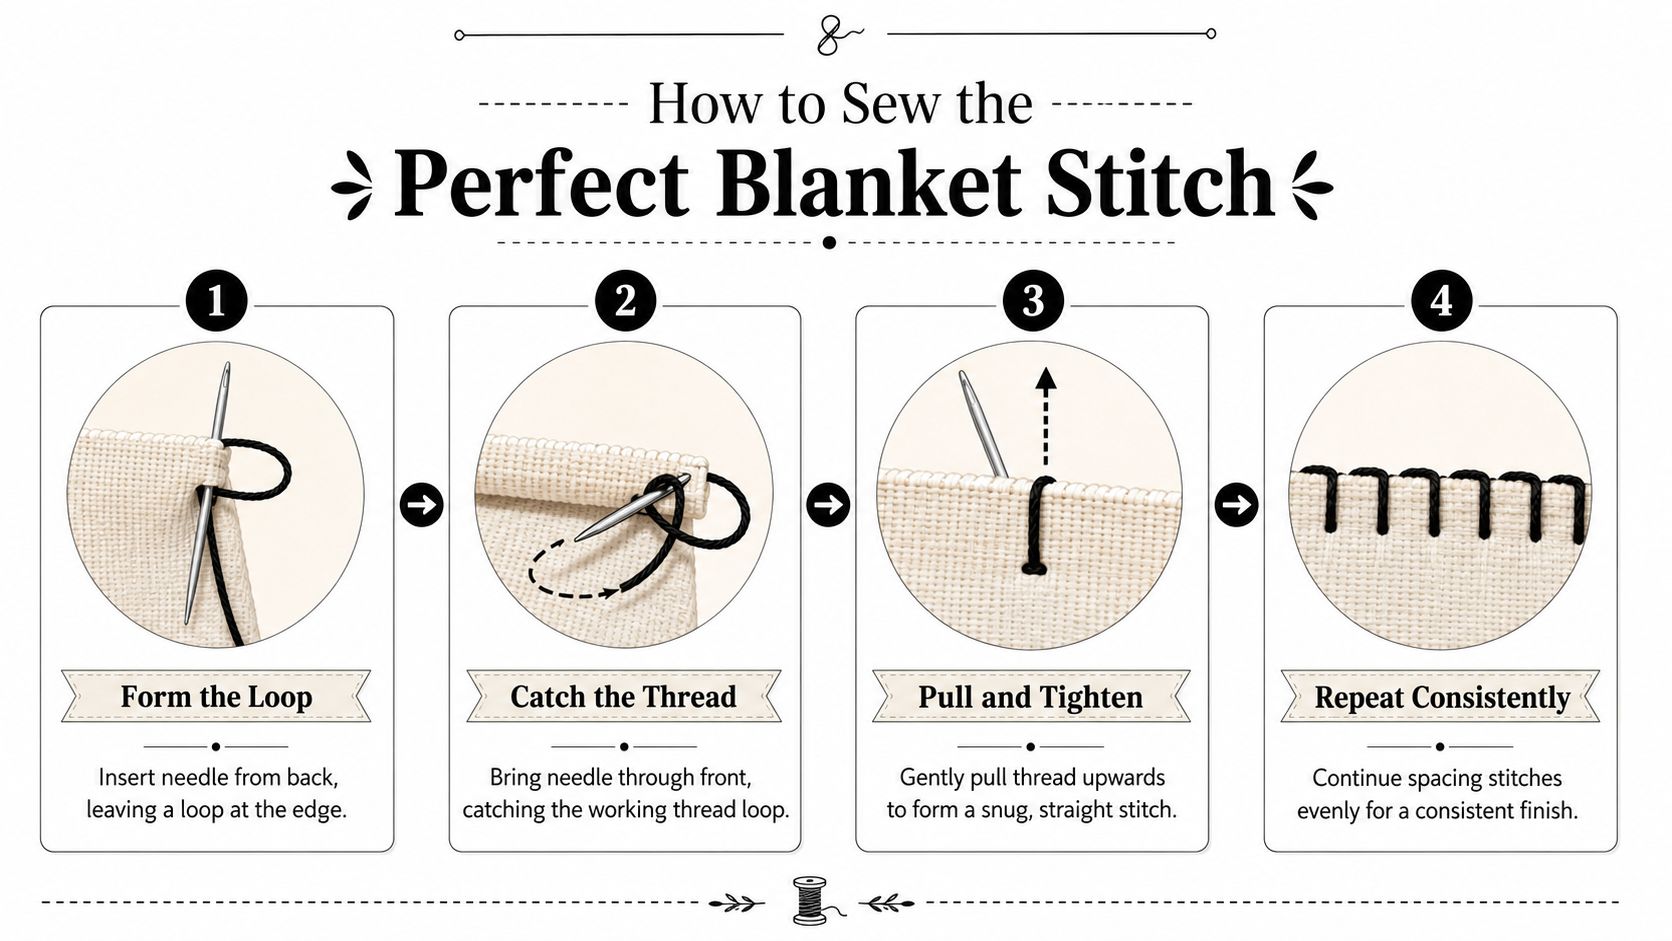
Work the stitch in this order:
Anchor the thread neatly
Hide the knot between layers where possible. If you are working on a single raw edge, place the first stitch in the least visible spot and keep the back tidy.Bring the needle from back to front
Bring it out a short distance in from the cut edge. On lightweight fabrics, I usually keep that distance small so the edge stays defined without looking bulky.Pass the working thread under the needle tip
This forms the little bar that sits along the edge. If the thread slips above the needle, the stitch loses its structure and starts to look like a loose loop.Pull through and snug gently
Pull until the loop sits against the edge. Stop as soon as it is settled. If you pull hard to make it look crisp, lawn and viscose will pucker, and jersey will draw up.
A workshop tip that saves a lot of frustration. Keep the pull direction consistent. I draw the thread up and slightly away from the edge each time, rather than sideways, because sideways tension is what makes soft fabric distort.
Getting an even rhythm
Good blanket stitch edging depends on repetition. The spacing between stitches needs to stay steady, and the upright part of each stitch needs to match the next one closely enough that the line looks intentional.
Inconsistent spacing is one of the most common mistakes I see. It usually happens when the sewer watches the thread loop instead of the next entry point. Marking tiny dots can help on a first attempt, especially on slippery viscose where the weave is hard to read. On cotton poplin or linen blends, the weave itself can act as a guide.
For garment work, shorter stitches usually look better than bold decorative ones. A blouse cuff, pocket edge, or collar point tends to suit a finer scale. Heavier wool, denim, or coating can carry a longer stitch without looking coarse. That balance is a judgement call, which is why a scrap test is still the best guide.
A few habits help:
- Use short thread lengths so the thread stays smooth and does not abrade the fabric
- Check every four or five stitches instead of waiting until the full edge is done
- Match the stitch size to the fabric weight rather than using one default spacing for everything
- Slow down at the start of each new length of thread because that is where spacing often changes
If the line starts to wander, unpick the last few stitches right away. Blanket stitch rarely improves if you keep going and hope the next section will disguise it.
Corners and curves
Corners and curves are where dressmaking fabrics separate themselves from craft felt. A thick felt corner can forgive a lot. A curved viscose facing will not.
For an outside corner, place one stitch right at the point so the edge looks wrapped cleanly. If you miss the point by even a little, the corner can look blunted. On an inside corner, bring the stitches slightly closer together around the turn so the fabric does not gape.
Curves need smaller spacing than straight runs. The tighter the curve, the more often the needle needs to enter the fabric. On a rounded cotton lawn collar, close spacing keeps the edge smooth. On jersey, keep the spacing close but the tension soft, otherwise the curve can tighten up and lose its shape.
Finishing cleanly
Finish on the wrong side or between layers, and keep the bulk away from the edge itself. A chunky knot at the edge can show through on fine fabric and spoil an otherwise neat line.
If you need to change thread, end the old thread securely, start the new one a stitch later in the exact same rhythm, and resist the urge to overlap heavily. Too much overlap creates a thick spot that catches the eye straight away, especially in contrasting thread.
A neat blanket stitch should look settled into the fabric, not perched on top of it. That is the standard worth aiming for, whether you are edging boiled wool, a cotton lawn applique, or a jersey detail on a child's top.
Exploring Creative Blanket Stitch Variations
A standard blanket stitch can look tidy on a practice scrap, then fall flat the moment it meets a real garment fabric. Cotton lawn can look pinched, viscose can droop between stitches, and jersey can start rippling if the variation is too heavy for the cloth. The decorative version only works when the stitch scale, thread, and fabric all agree.
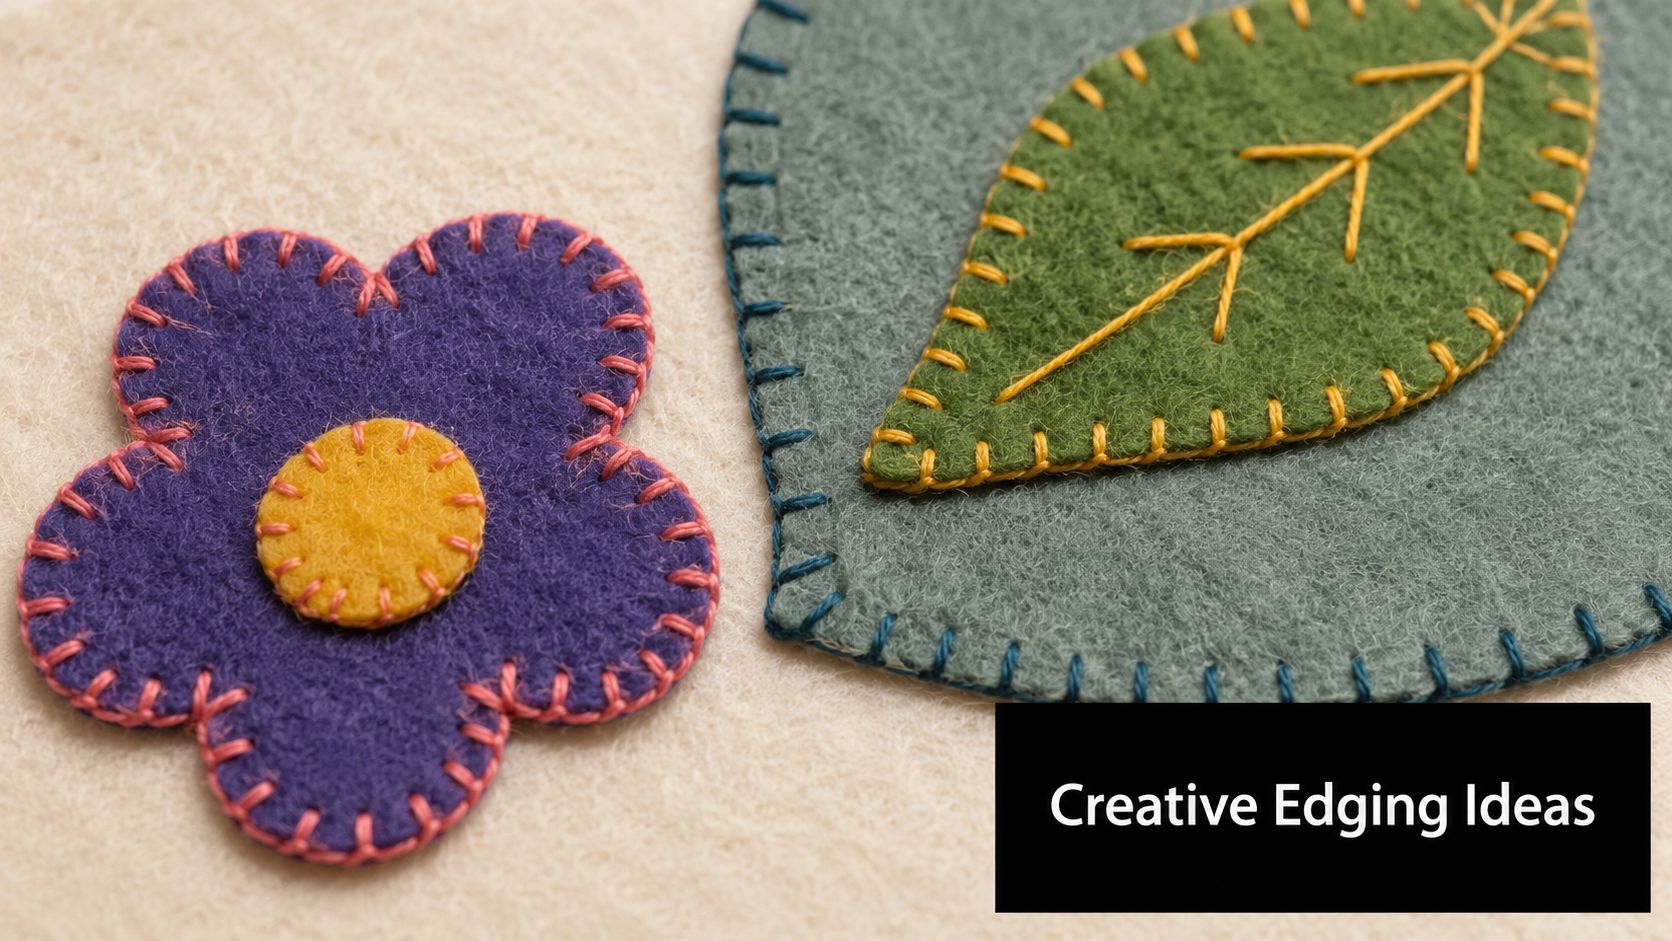
Appliqué on garments and accessories
Felt on felt is the usual teaching sample, but dressmaking fabrics need a more measured approach. On a cotton lawn patch pocket or a lightweight chambray yoke, the appliqué edge must be cut cleanly, pressed flat, and stitched with a finer thread than you would use on boiled wool or denim. Gutermann Sew-All works well for many garment projects. For a softer, less shiny finish on natural fibres, I often reach for a good cotton thread from the sewing box.
Fabric pairings matter.
- Wool appliqué on denim creates visible texture.
- Cotton appliqué on linen gives a flatter, cleaner finish.
- Felt appliqué on boiled wool keeps the edge bold and tactile.
- Cotton lawn appliqué on quilted cotton suits small, neat stitches that do not overpower the print.
If the base fabric is drapey, such as viscose challis, keep the motif small and the stitch spacing close enough to control the edge without building a hard ridge. I would also baste first rather than trust pins. Viscose shifts the moment you relax your grip.
Decorative spacing and colour play
Blanket stitch changes character quickly with small adjustments. Longer legs and wider spacing read as rustic on coating wool, while close, fine stitches look sharper on collars, pockets, and shaped facings.
A few combinations I use often in the workroom:
- Ecru thread on navy chambray for a crisp pocket edge
- Tone-on-tone thread on printed cotton lawn when the fabric print should stay the focus
- A slightly heavier thread on denim or canvas so the stitch does not disappear
- Short, compact stitches on viscose blends to keep the edge from looking loose and tired
Contrast thread is useful, but it shows every wobble. If stitch placement is still inconsistent, matching thread usually gives a better result than forcing a bold outline onto a fine fabric.
The Antwerp variation
The Antwerp variation, often called a knotted blanket stitch, gives a firmer, more decorative edge than the plain version. The knot sits along the edge line, so it reads best on fabrics with enough body to support it. Coating wool, melton, thick denim, and craft felt all handle it well. Fine lawn, silkier viscose, and very soft jersey usually do not.
The method varies slightly depending on who is teaching it, so the safest approach is to watch the thread path closely rather than rely on a memorised phrase. In the Antwerp edging stitch demonstration, the knot is formed as part of the stitch movement to build a raised, decorative edge. If you try it on garment fabric, test it on a scrap first. A knot that looks handsome on wool can look clumsy on a blouse hem.
A note on jersey edges
Jersey benefits from restraint. A heavy decorative blanket stitch can fight the stretch and make the edge look homemade in the wrong way. For stable ponte or sweatshirt fleece, a modified blanket stitch can finish an appliqué or pocket edge nicely. For soft T-shirt jersey, I keep the thread light, the spacing even, and the design simple.
Perle cotton may look tempting for decoration, but on lightweight knits it can drag the edge out of shape. Ordinary sewing thread or fine embroidery floss usually behaves better. If the jersey curls badly, a strip of wash-away stabiliser under the edge can save a lot of frustration and gives you a much cleaner line.
Troubleshooting Common Blanket Stitch Issues
You finish the first few inches on a cotton lawn collar or a viscose pocket edge, then the problems start showing themselves. The edge ripples, the stitches tilt, or the thread join catches the light in the worst possible spot. Blanket stitch is honest like that. On dressmaking fabrics, it shows every shortcut.
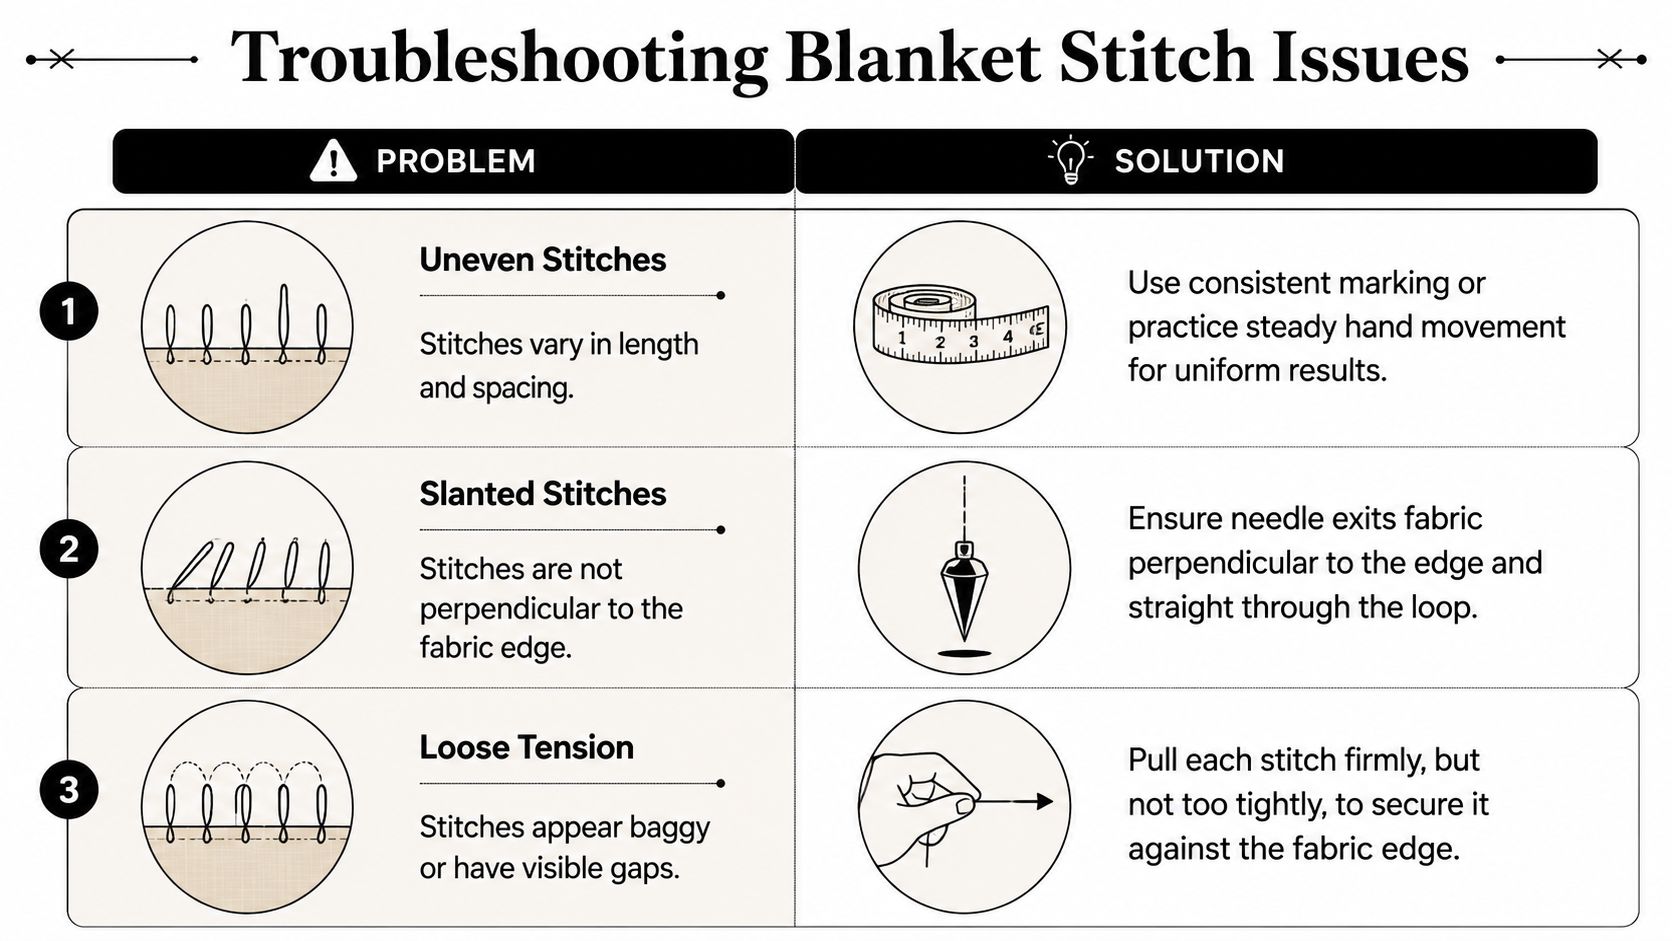
Uneven stitches
If one stitch is tall and the next is squat, the problem is usually inconsistent entry points rather than bad tension. I see this most often on fine woven fabrics where there is no obvious loft to hide small errors. Cotton lawn, poplin, and linen blends all reward careful marking.
Fix: draw a faint guideline on the wrong side or mark tiny dots at regular intervals on a scrap before you sew the main piece. On fabrics with a visible weave, use the threads of the cloth to keep your height consistent. Slow down at curves. That is where spacing usually starts to drift.
A sharp hand needle helps here. If the needle drags, placement gets sloppy. For lightweight dress fabrics, a fine embroidery needle or crewel needle is usually easier to control than a thicker all-purpose hand needle.
Slanted stitches on jersey
On jersey, slanted blanket stitches usually come from two things. The needle goes in at an angle, or the fabric is being stretched while you work.
Keep the fabric resting flat on the table. Bring the needle up and down as straight as you can, and tighten the loop just enough to sit against the edge. If you pull sideways, the stitch will lean and the edge can tunnel.
This is also the moment to be realistic about thread choice. Heavy perle cotton can look charming on a sample, but on a soft T-shirt jersey it often pulls the edge off line. A good polyester sewing thread, stranded cotton separated down, or a fine thread such as Gütermann Sew-All from the shop usually behaves better.
If the jersey will not keep still, add a strip of wash-away stabiliser or lightweight tissue underneath while you stitch. It gives your hand something stable to work against, then disappears or tears away after.
Puckering on fine fabrics
Viscose, Tencel blends, silkier cottons, and lightweight linen will pucker if the thread is too heavy or the stitch is pulled tight against the cut edge. Many sewists assume the answer is firmer tension. Usually the opposite is true.
Try this checklist:
- Choose a finer thread for lawn, viscose, and other fluid fabrics
- Use a shorter working length so tangles do not tempt you to yank the thread through
- Press before you start because creases throw off stitch placement
- Support the fabric in your hand rather than letting the edge hang and stretch
- Tighten each stitch gently so the loop sits neatly without drawing the cloth inward
If the fabric still ruckles, test a slightly deeper stitch. A blanket stitch taken too close to the edge can cut in and create a drawn look, especially on fabrics that fray easily.
Visible thread breaks
Visible joins spoil an otherwise neat edge, especially on blouse hems, collar edges, and appliqué on lighter garments. The bulky knot at the edge is usually the culprit.
The cleanest method is to finish the old thread on the wrong side with one or two tiny securing passes under the fabric threads, then begin the new thread a stitch or two back so the rhythm continues without a gap. On very fine fabrics, I avoid stacking knots altogether. They show from the front more often than people expect.
If you can feel the join from the right side with your fingertip, it is too bulky for a lightweight garment fabric.
Thread condition matters too. Older cotton thread can fuzz and snap mid-row, which leaves a messy repair point. Fresh thread with a smooth finish gives a cleaner result. If you want a soft decorative look without bulk, stranded embroidery cotton used sparingly is often more forgiving than a thick pearl thread.
Messy corners
Corners need planning. If you keep the same spacing you used on the straight edge, the turn usually looks awkward.
For an outside corner, place one defining stitch exactly at the point, then fan the next stitches out evenly on the new side. For an inside corner, shorten the spacing as you approach the turn so the thread does not pull open and leave a bare wedge. On fraying woven fabrics, it also helps to trim the corner neatly and keep the stitch depth consistent on both sides.
Practice this on scraps first. A square of cotton poplin, a bit of denim, and a piece of viscose challis will all behave differently, and it is much easier to learn those differences before you start on the actual garment.
Project Ideas and Machine Stitch Alternatives
Small projects are the quickest way to improve your blanket stitch edging because you get a full finish without committing to a huge piece. A set of linen napkins teaches even spacing on a straight edge. A denim apron pocket lets you experiment with heavier thread. A wool skirt hem gives you practice on a cloth with more body.
A few satisfying practice ideas:
- A patch pocket sample board in cotton, denim, and viscose
- Linen napkin edges using fine matching thread
- A felt or wool appliqué badge for a tote or jumper
- A jersey pocket edge test piece to practise control without stretching
Machine alternatives have their place too. Many modern sewing machines include a blanket-style stitch, and it can be a sensible choice for long straight runs or for projects where speed matters more than a hand-finished look. On stable fabrics, machine stitching can be neat and efficient. On small curves, corners, and delicate appliqué, hand sewing often gives more control.
Projected industry commentary for 2025 indicates a shift toward machine-applied blanket stitch on knits, yet 73% of hobby sewists still hand-stitch per outdated methods, leading to inconsistent edges on viscose and denim, while a 2024 British Sewing Guild study noted 42% of stitch irregularities in coastal regions, including Worthing, stem from unadjusted thread tension (industry discussion on machine versus hand blanket stitch and tension issues). In practice, the useful takeaway is simple. Hand stitching isn't old-fashioned when it's the better tool for the job. Machine stitching isn't cheating when the edge is long, stable, and better served by speed.
Blanket stitch edging works best when it matches the fabric in front of you. That's the key skill. Not copying one method for every project, but knowing when to go finer, wider, softer, or firmer so the finish looks settled and intentional.
If you're choosing fabrics, threads, needles, or want help matching the right supplies to your next hand-finished project, More Sewing is a reliable place to start. Their range covers dressmaking favourites including cottons, viscose and Tencel blends, jerseys, denims, haberdashery, and sewing essentials, with support for beginners and experienced makers alike.
