
Dressmaking, Guides
How to Sew with Lace Fabric: A UK Sewist’s Guide
You've got the lace on the table, the pattern beside it, and that small sinking feeling that one wrong cut will ruin the whole thing. That's a very normal place to start. Lace looks fussy because every decision shows. Needle marks can catch, bulky seams show through, and a lovely scalloped edge can either look couture or look accidentally chopped.
The good news is that lace isn't impossible. It just asks for a different set of habits than cotton poplin or denim. Once you know what tends to go wrong, and why, how to sew with lace fabric becomes much less mysterious and much more enjoyable.
Embracing the Beauty of Sewing with Lace
A lot of home dressmakers fall in love with lace as finished clothing long before they feel ready to sew it. A sheer sleeve, a pretty overlay, a lace yoke on a simple blouse. Those details look delicate, but the challenge isn't delicacy alone. It's knowing where the fabric needs control and where it needs to be left alone.
Machine lace is what most UK sewists are buying. According to this guide to identifying handmade and machine lace, machine lace dominates the modern UK market, makes up over 95% of lace sold in UK haberdashery stores, and its development traces back to John Heathcote's 1791 bobbinet machine in Tiverton, Devon. That matters at the sewing machine because modern lace usually has a consistent open weave, which responds better to techniques such as the appliqué seam than to ordinary straight-stitched seams.
If you've ever looked at a lace dress and thought you'd wear it but would never dare make it, start smaller in your mind. Think sleeves on a shell top. Think a lace overlay on a skirt. Think trim at a hem. Once you can control the seams and edges, the rest follows.
A useful way to build confidence is to study finished lace garments as clothing, not just as sewing projects. If you want outfit ideas that help you notice hem shapes, transparency, and how lace sits against the body, this piece on styling your lace midi dress is worth a look.
Practical rule: Lace rewards patience more than speed. A slower approach nearly always looks better than a clever shortcut.
What makes lace feel difficult
The common problems are predictable:
- Open weave: The machine can chew the fabric, stretch it, or let it shift.
- Visible seams: On sheer lace, a standard seam can look heavy straight away.
- Motif placement: If flowers or scallops don't line up, the eye notices immediately.
- Pressing risk: Many lace blends include synthetic fibres, so too much heat can damage them.
That sounds like a long list, but it's indeed useful. When you know the failure points, you can plan around them.
Preparing Your Lace and Tools for Success
Good results with lace are decided before you start sewing. The home-sewing failures I see most often begin at the prep stage: lace that was pressed too hot, a needle that looked fine but had a tiny burr, or a beautiful fabric cut without checking how it behaves under the foot.
Start with handling and pressing
Lace does not all behave the same way. A stable cotton lace for a summer top can often cope with gentle pre-washing. A fine nylon blend, corded lace, or anything embellished needs a more cautious approach. Test an offcut first, especially if you want to keep the fabric's crisp finish or surface texture.
Pressing is often where damage happens. Keep the iron low, usually on a synthetics setting, use a pressing cloth, and press from the wrong side where possible. Lift and lower the iron rather than pushing it across the fabric. That stops the motifs stretching out of shape and reduces the risk of shine on synthetic fibres. The Minerva guide on sewing lace fabric also recommends gentle handling and careful heat testing before full pressing.
A quick test piece saves frustration. Stitch, press, and handle a small scrap exactly as you plan to treat the garment. You will find out very quickly whether the lace puckers, melts, snags, or settles nicely.
Set up the machine for control, not speed
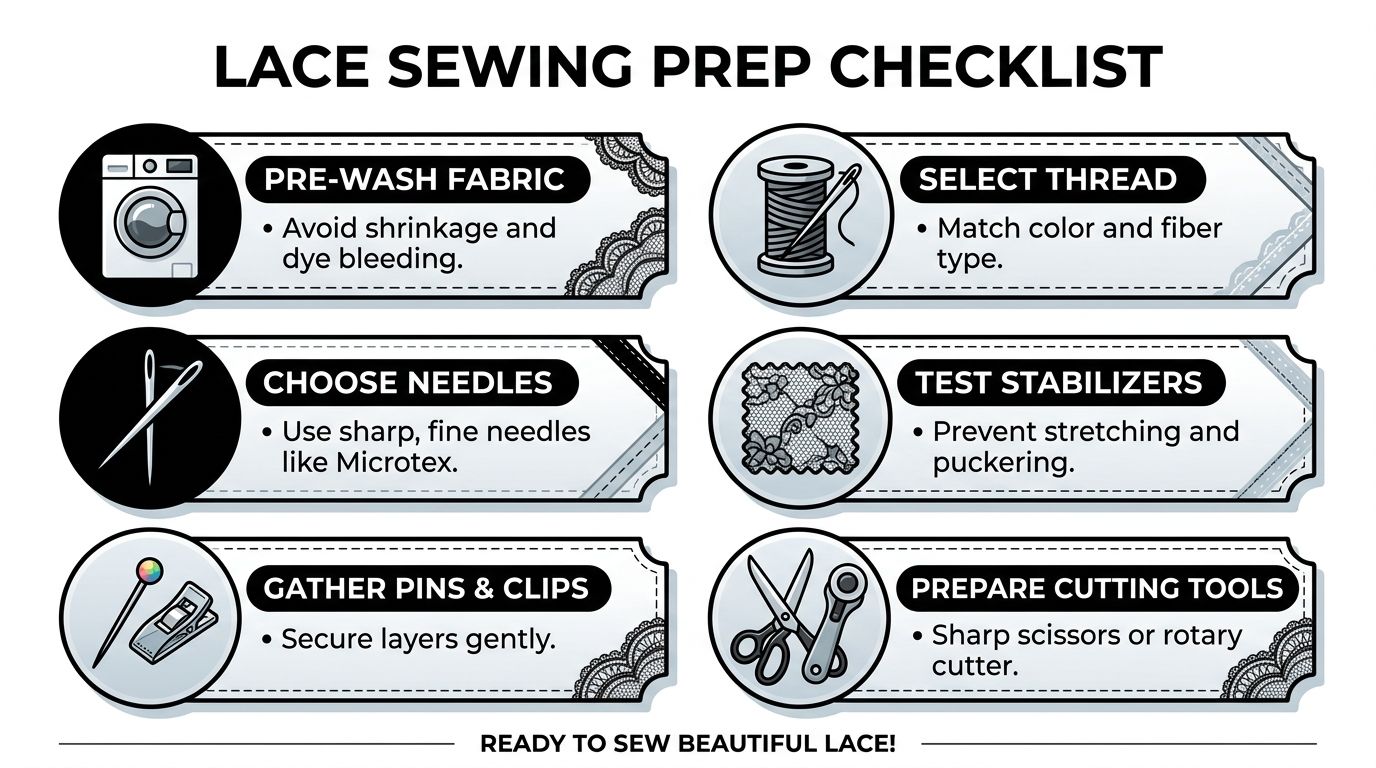
Lace usually sews best with a fresh fine needle and a balanced, simple setup. Start with a 60/8 or 70/10 needle, depending on how open or firm the lace is. Use a fine polyester thread that blends in rather than sitting on top of the fabric.
I usually advise customers to begin with a straight stitch on a scrap and adjust from there. Some laces feed cleanly at around 2.0mm stitch length. Others need a touch longer to stop tunnelling or drawing up. The exact setting matters less than the result on your own fabric, which is why a test sample is more useful than copying a number from the internet.
If the lace is being pulled into the throat plate, place a strip of fine stabiliser or seam tape in the seam allowance, or start stitching on a small scrap leader before feeding the garment piece under the foot. That is one of those small fixes that makes a big difference on soft, open lace.
A practical prep kit
You do not need a specialist studio setup. You do need tools that suit delicate fabric.
- Fresh fine needle: Usually 60/8 to 70/10. Change it at the first sign of dragging or skipped stitches.
- Fine thread: A lighter thread gives a cleaner seam and does not build bulk on sheer lace.
- Seam tape or wash-away stabiliser: Helpful on seams that want to stretch or collapse into the feed dogs.
- Sharp shears or rotary cutter: A clean cut keeps motifs intact and stops the fabric shifting as you work.
- Fine pins or clips: Use fewer than you would on cotton, and place them where they will not distort the pattern.
Prep choices that prevent visible problems later
Lace stands apart from many dressmaking fabrics. Preparation is not only about making sewing easier. It also affects which seam finish will work later.
For example, if your lace is soft, sheer, and prone to fraying at the edge, accurate testing and pressing make a French seam much more likely to sit neatly. If the lace is bulky, heavily textured, or has raised cords, forcing it into a French seam can leave a visible ridge. In that case, a narrower seam treatment or motif-overlap method often looks better. The right choice starts here, with the fabric in your hands and a proper sample in front of you.
What tends to go wrong
A few habits cause the same problems again and again:
| Habit | What happens |
|---|---|
| Sewing with an old needle | Snags, skipped stitches, bunching |
| Using a thick all-purpose thread on fine lace | Seams look heavy and obvious |
| Pressing with too much heat | Fibres flatten, shine, or melt |
| Skipping the test sample | You discover tension, shrinkage, or heat problems too late |
Get the lace lying flat, test the stitch on a scrap, and sort the machine before you cut anything. That quiet half hour saves far more time than it costs.
The Art of Cutting Lace Fabric
Cutting is where lace either starts to look polished or starts to look homemade. The mistake I see most often is treating lace like a fabric that should be folded, pinned, and cut quickly. That works for a plain woven. It rarely gives the best result with lace.
Look at the motifs before the pattern
Before you place a single pattern piece, study the lace itself. Find the dominant repeat. Notice whether there's a clear top and bottom to the design. Check whether the scalloped edge could become a sleeve edge or hem, because if it can, you may save yourself a finishing step and get a much prettier result.
This is also where fabric quantity matters. UK lace sewing guidance notes that lace needs approximately 15 to 20% more yardage than standard woven fabrics to allow for motif matching. The same source explains that the appliqué seam overlaps ends by 2 to 3 cm, reduces seam bulk by about 40% compared with traditional seams, and reports that 85% of successful lace garments avoid back-stitching, using a stitch length of zero for several stitches instead. That guidance appears in this UK tutorial on sewing with lace.
A bodice example that saves disappointment
Say you're cutting the front of a lace blouse. Don't centre the paper pattern first and think about motifs second. Centre the most important motif first. If there's a large floral spray, decide whether you want that flower sitting at the bust, at the centre front, or slightly off-centre for a softer look.
Then compare the left and right sides. If one side shows a full flower and the other cuts through half a petal, move the piece. This is the kind of adjustment that uses more fabric but gives a much more deliberate finish.
- Use the scallop intentionally: A scalloped hem on a sleeve often looks better than any stitched hem you could add later.
- Cut in a single layer when possible: It's slower, but you can match motifs more accurately.
- Mark lightly: Too many chalk lines can disappear badly or show through open areas.
A visual demonstration can help if you're still getting your eye in for motif placement:
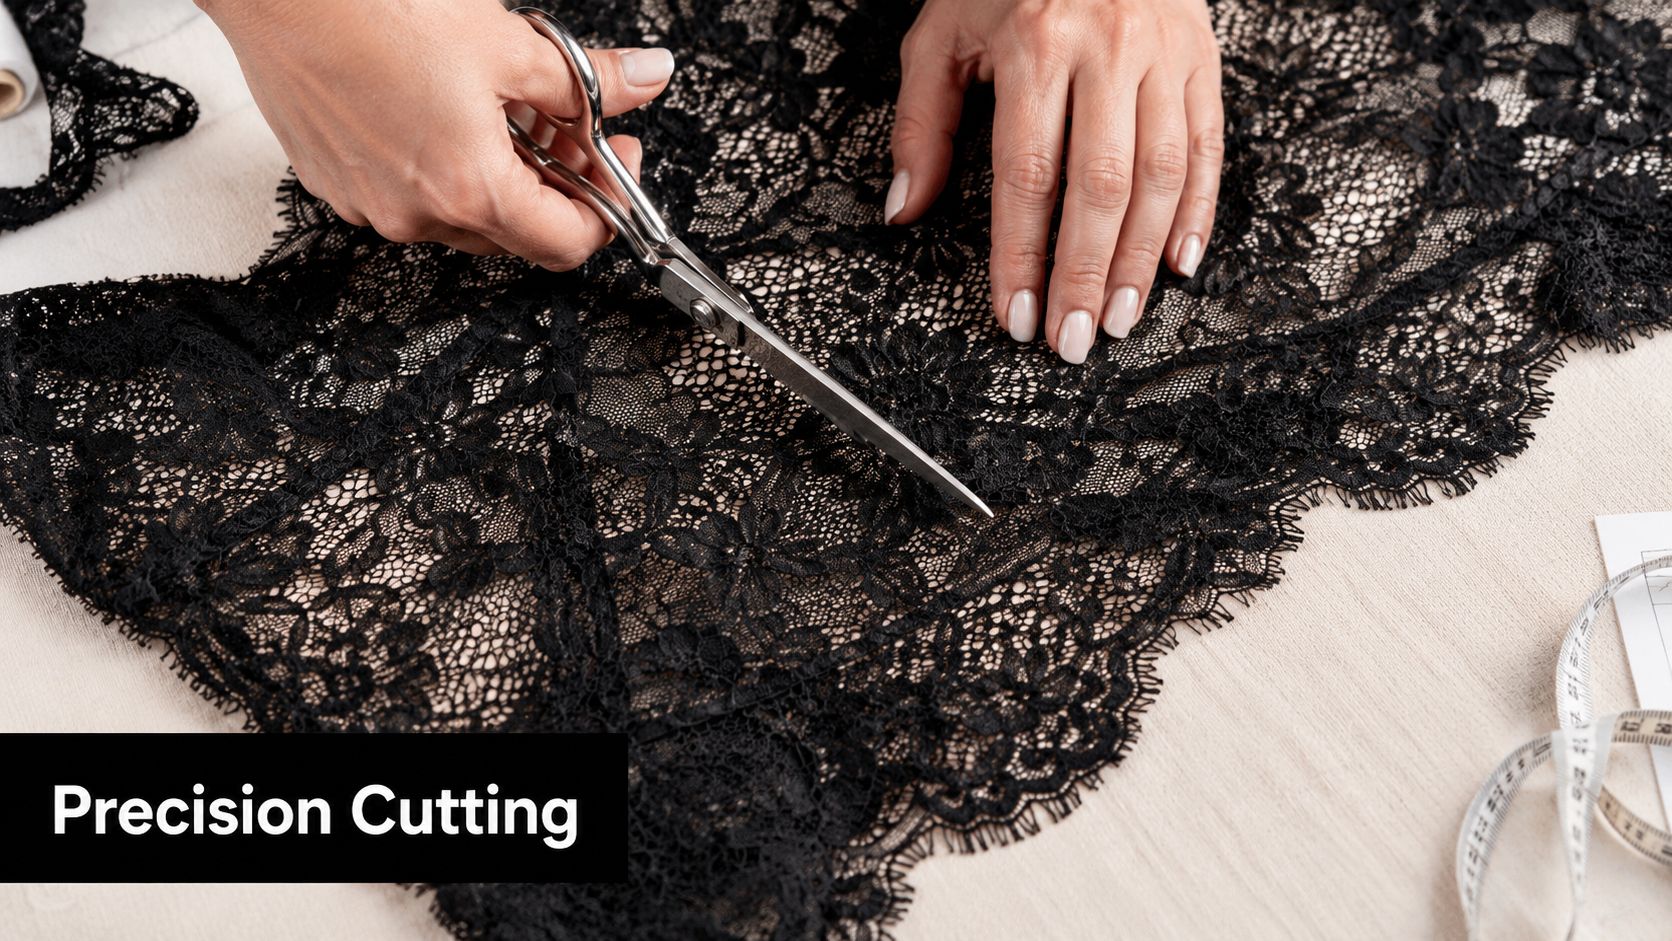
Rotary cutter or shears
Both can work. I prefer a rotary cutter on flatter, more stable lace because it reduces lifting and shifting. Sharp shears are better when I'm cutting around a motif for a seam that needs to disappear. The tool matters less than the control. If the lace moves as you cut, stop and reset it.
The neatest lace garments are often cut more like appliqué work than ordinary dressmaking. You're shaping around the design, not fighting it.
Choosing and Sewing the Perfect Lace Seam
This is the point where many first lace projects go wrong. The fabric was cut beautifully, then joined with the same seam you'd use for pyjama trousers. Lace won't forgive that. The best seam depends on the type of lace, how sheer it is, and whether the seam is meant to disappear or to stay neat.
When a French seam is the best choice
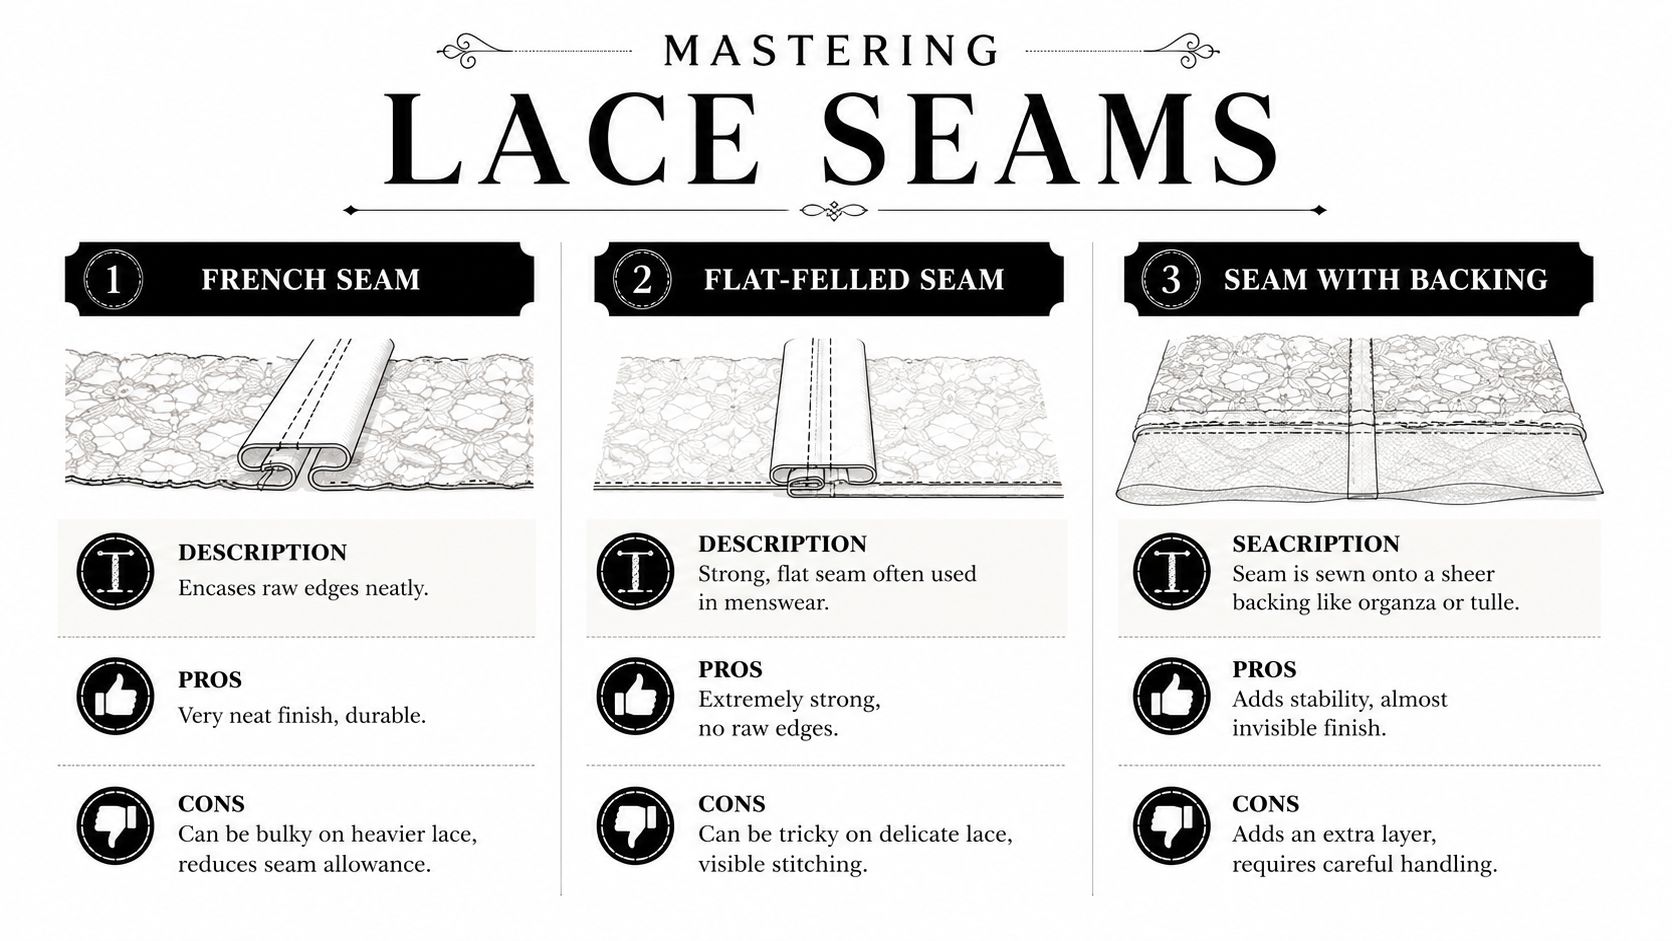
A French seam is usually my first recommendation for fine, sheer lace where you want a clean inside and outside. It encloses the raw edges, which matters when the garment is unlined or partly transparent. Blouse side seams, simple shell tops, and delicate sleeve seams are all good candidates.
A lace sewing tutorial recommends a 1.5cm total seam allowance, sewing wrong sides together first with a 0.75cm seam, trimming the excess to 0.375cm, then folding right sides together and sewing the second seam to enclose the raw edge. That method is shown in this French seam lace tutorial.
Why it works
- It looks tidy from both sides.
- It contains fraying without an overlocker.
- It suits light, airy lace that would look messy with a visible overcast edge.
Where it struggles
- Heavier guipure-style lace can become bulky.
- Strongly raised motifs don't always fold neatly into the seam.
When a narrow zigzag is the practical answer
Not every seam needs couture treatment. If the lace is stable, if the seam is partly hidden by a lining, or if you're attaching trim, a narrow zigzag often does the job beautifully. It has enough give for a fragile open structure and can be less bulky than forcing a formal enclosed seam where it doesn't belong.
I use this approach for straightforward construction seams on less sheer lace, and for trim application where the stitch needs to flex around a decorative edge. It's also friendlier for beginners because it asks less of the fabric during handling.
When an appliqué or lapped seam wins
For all-over lace where you want the seam to vanish, the appliqué seam is hard to beat. You overlap one motif onto the next and stitch around the pattern rather than through a conventional seam line. This works especially well on bodice fronts, centre backs, and anywhere a hard seam line would interrupt the design.
This is slower sewing, but the result often looks as though the fabric was woven to shape. If you've ever admired a lace dress and wondered how the seam disappeared into the flowers, this is usually the answer.
Don't choose the fanciest seam. Choose the seam that least interrupts the lace.
A quick comparison
| Seam type | Best for | Main strength | Main drawback |
|---|---|---|---|
| French seam | Fine sheer lace garments | Clean inside and outside | Can bulk up on heavier lace |
| Narrow zigzag | Stable lace, trim, simpler seams | Flexible and approachable | More visible than a French seam |
| Appliqué seam | All-over lace with visible motifs | Seam nearly disappears | Slow to cut and sew |
What I'd choose in real garments
For a sleeveless lace shell top, I'd usually use French seams at the side seams and shoulders if the lace is fine enough. For a lace yoke on an everyday blouse, I'd keep the construction simple and stable, often with a neat narrow zigzag where appropriate. For a lace overlay dress with large floral motifs, I'd spend the extra time on lapped or appliqué joins at the most visible seams.
That's the trade-off at the heart of lace sewing. The more visible the seam, the more carefully it deserves to be chosen.
Structuring Garments with Linings and Hems
A lace garment can look lovely on the hanger and then lose its shape the moment you put it on. Necklines stretch. Hems ripple. The lace collapses around the zip or goes stiff at the edge because the wrong support was used. Most home sewists do not have trouble with the lace itself. They run into trouble when the hidden layers are doing the wrong job.
The first decision is whether the lace needs a lining, an underlining, or both.
Lining or underlining
Use a separate lining when you want the lace to stay light and move on its own. That suits soft overlay skirts, occasion dresses, and loose tops where the lace provides the look and the inner layer provides coverage. A hanging lining also gives you a cleaner way to hide seam allowances without trapping every bit of movement.
Use underlining when the lace needs help to behave. If the lace is floppy, very open, or likely to sag at the neckline and armholes, attach it to a support fabric and treat both layers as one. That usually gives a better result on fitted bodices, shaped waists, and anywhere with darts, zip openings, or close-fitting curves.
The trade-off is simple. A loose lining keeps the softness. Underlining gives control.
If you are unsure, test both on a leftover piece. Pin the lace to your chosen support, hold it up, and see what changes. Some corded and heavier guipure laces become bulky if underlined with anything too firm. Fine eyelash or mesh laces often need that support or they look tired after a few wears.
Choosing a support fabric that suits the lace
The best support fabric is usually the one that disappears behind the lace rather than fighting it. Lightweight cotton lawn, voile, silk habotai, viscose lining, or a soft polyester lining can all work, depending on the garment.
Match the support to the job. For a summer blouse, keep it breathable and light. For a fitted party dress, choose something with enough body to hold the shape without turning the lace cardboard-stiff. In the shop, I often steer people away from bargain acetate linings for lace bodices because they can feel clammy and add a harsh, slippery layer that is awkward to sew accurately.
Colour matters as much as weight. An exact colour match makes the pattern read clearly. A contrast lining changes the whole character of the lace, which can be beautiful, but it also makes every construction choice more visible.
Hem decisions that make the garment look expensive
The best hem is often the one already woven into the lace. If you have a scalloped border, use it at the hem whenever the pattern allows. It keeps the motifs whole and removes a finishing step that often causes puckering.
If you need to make a hem on a cut edge, keep bulk down from the start. Wide turn-ups can show through and make the hem kick out, especially on narrow skirts or sleeves. A very narrow turned hem works on finer lace, but many home machines will chew soft open lace unless the edge has some support from tissue, wash-away stabiliser, or a strip of lightweight organza underneath while you sew.
For heavier lace, I usually avoid forcing a deep folded hem. A better option is to finish the lower edge of the lace neatly, then let the lining carry the hem allowance and weight. The outer lace can sit free over the top. That gives a cleaner line and avoids the lumpy ridge that shows up under corded motifs.
Press lightly and test the iron first. Many lace fabrics contain synthetic fibres, and too much heat can flatten texture or leave a shine.
What works for necklines and armholes
Necklines and armholes are where homemade lace garments often give themselves away. The edge looks pretty until it starts flipping out or stretching by lunchtime.
Three finishes tend to work best:
- Facings: Best on garments with some structure, especially if the lace is underlined. Keep the facing fabric light, trim it well, and understitch where possible.
- Bias binding: A good choice for simple shapes, sleeveless tops, and softer lace. It controls the edge without adding much thickness.
- Scalloped edge placement: Excellent if the pattern can be adapted to the lace border. It gives a decorative finish without extra trimming or turning.
Very open lace rarely holds a sharp curve on its own. Support the edge first, then finish it. A strip of sheer stabiliser, a fine underlining, or a carefully shaped facing usually solves the problem before it starts.
If one method is more work, but prevents stretching and rippling, it is usually the better choice. Lace rewards the quieter finish.
Mini-projects and Troubleshooting Common Issues
The easiest way to learn lace is to make something small enough that a mistake doesn't feel disastrous. Two projects teach most of the skills you'll use later in bigger garments.
Project one, adding lace trim to a hem
This is ideal on a plain T-shirt, camisole, or simple skirt. Keep the base fabric stable, press the hem first, then position the trim so the decorative edge extends below the garment.
A sewing guide for trim application recommends a narrow zigzag stitch with 2mm width and 1.5 to 2mm length, sewn slowly along the lace edge. For hand finishing, it recommends tiny slip stitches 2 to 3mm apart through the lace net from the wrong side so the stitches stay invisible, as shown in this guide to sewing lace trim onto fabric.
This little project teaches you alignment, stitch visibility, and how lace behaves under the foot without asking you to fit a whole garment.
Project two, a simple sleeveless lace top
Keep the shape easy. A shell top with bust darts, shoulder seams, and side seams is enough. Use your chosen seam finish based on the type of lace, finish the neckline with a facing or binding, and if you've got a good scalloped border, let that become the hem.
The lesson here isn't complexity. It's decision-making. You're learning which seams suit the lace, where the motifs matter, and when an edge already looks finished.
Quick fixes for the problems that annoy everyone
- The machine eats the lace at the start: Begin on a small leader scrap, then sew straight onto the garment piece.
- The seam puckers: Recheck the needle first. Then test thread tension and stitch on an offcut.
- The motifs don't line up: Unpick sooner rather than later. Lace rarely looks better if you “leave it and hope”.
- The seam feels bulky: Your seam choice may be wrong for that lace. A French seam on one fabric can be elegant and on another can be too thick.
- The lace looks flattened after pressing: Your iron was likely too hot, or you used too much pressure.
A first lace project doesn't need to be ambitious. It needs to teach your hands what the fabric wants.
If you're ready to try your own lace project, More Sewing is a useful place to find quality dressmaking fabrics, haberdashery, sewing kits, and practical supplies for beginners and experienced makers alike.
