
Dressmaking, Guides
Pinning Techniques for Sewing: A Practical How-To Guide
You've cut the pieces, matched the notches, and laid out a fabric you were excited to sew. Then the layers start drifting. One side seam grows longer than the other, a neckline ripples, or a neat dart twists off course. Most of the time, that mess starts before the machine ever runs. It starts at the pinning stage.
Pinning looks basic, but it decides whether fabric feeds cleanly or fights you all the way through. That matters even more with slippery Tencel blends, soft viscose, stable cotton shirting, and dense high-thread-count fabrics that can show every mark. Good pinning holds shape, keeps seam allowances honest, and gives you enough control to sew calmly instead of correcting as you go.
A lot of guides stop at “use pins to hold the fabric together”. That's not enough when the fabric has a mind of its own. The way you place a pin, the distance between pins, and whether you leave them in or remove them early all change the result.
Introduction to Pinning for Sewing
If your seams end up slightly uneven, your first instinct might be to blame cutting accuracy or machine tension. Often, the cause is simpler. The layers shifted because they weren't anchored in a way that suited the fabric.
With stable woven cotton, careless pinning may only give you a mildly wonky seam. With Tencel blends or fine British dress fabrics, the same habit can create drag, rippling, or visible holes. That's why pinning isn't just prep. It's part of the construction.
What pinning is actually doing
Pins do three jobs at once:
- They hold alignment so raw edges, notches and markings stay matched.
- They control feed so the top and bottom layers move together under the presser foot.
- They protect shape so curves, darts and delicate prints don't distort before the stitching secures them.
When that's done well, sewing becomes smoother. You stop tugging. You stop easing one side to fit the other mid-seam. You rip out less.
Practical rule: If the fabric is hard to keep flat by hand for more than a moment, it needs a more deliberate pinning method.
The biggest improvement most home dressmakers can make isn't buying more tools. It's matching the pinning method to the fabric in front of them. Dense cotton lawn, jersey, brushed denim and deadstock prints all behave differently, and they should be pinned differently too.
Choosing the Right Pins for Your Project
The best pin is the one that holds firmly without bruising the fabric or slowing you down. That means tip shape, thickness, shaft strength and head style all matter. If you've ever used a chunky general-purpose pin on fine lawn, you already know that “close enough” isn't always close enough.
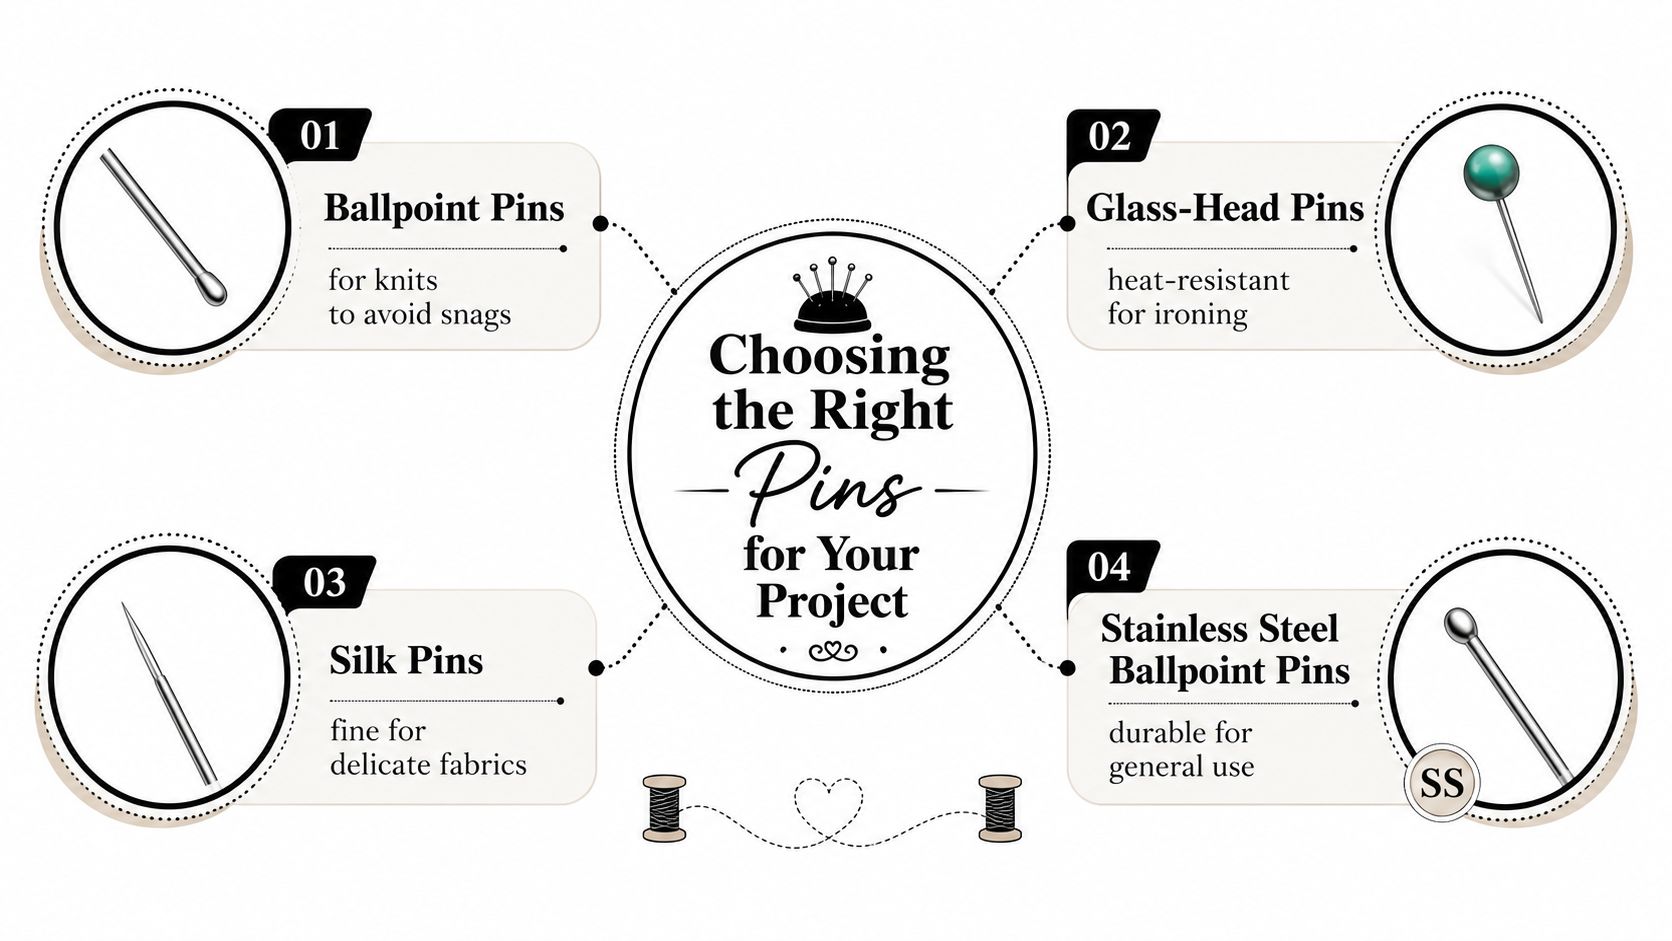
A quick comparison that helps in real sewing
| Pin type | Best use | What works well | Trade-off |
|---|---|---|---|
| Ballpoint pins | Jersey, interlock, soft knits | Rounded tip slips between fibres instead of piercing them harshly | Not sharp enough for some dense woven fabrics |
| Glass-head pins | Pressed seams, slippery viscose, general dressmaking | Easy to see and comfortable to grab | Bulkier heads can get crowded on tiny curves |
| Silk pins | Fine cotton lawn, voile, delicate shirting | Thin shaft leaves less disturbance in tightly woven cloth | They can bend more easily in heavier layers |
| Stainless steel ballpoint pins | Regular knit sewing and repeated use | Durable and resistant to wear in a busy sewing box | Still not the right choice for every woven project |
How I'd choose for common projects
For a stretchy knit top, use ballpoint pins. The rounded tip is kinder to knit structure, and that matters when you're pinning along side seams or a neckband where the fabric wants to curl.
For a slippery blouse in viscose or Tencel blend, glass-head pins are usually easier to control. They're visible, easy to remove quickly, and practical if you're pressing as you go.
For a fine cotton lawn shirt or any high-thread-count woven, silk pins are the safer bet. A finer pin glides in with less force and usually leaves less evidence behind.
Don't choose pins by habit. Choose them by how much resistance the fabric gives when the pin enters.
A useful sewing kit usually includes more than one pin style. That's more practical than trying to force one type through every project. If you're sewing mixed garments, such as a dress with a stable bodice and a softer drapey sleeve, it's completely reasonable to switch pins between stages.
Pinning Straight Seams Accurately
A straight seam is often where a garment first tells on you. If one layer creeps even slightly at the underarm or side seam, the hem can hang unevenly and matching points stop lining up where they should.
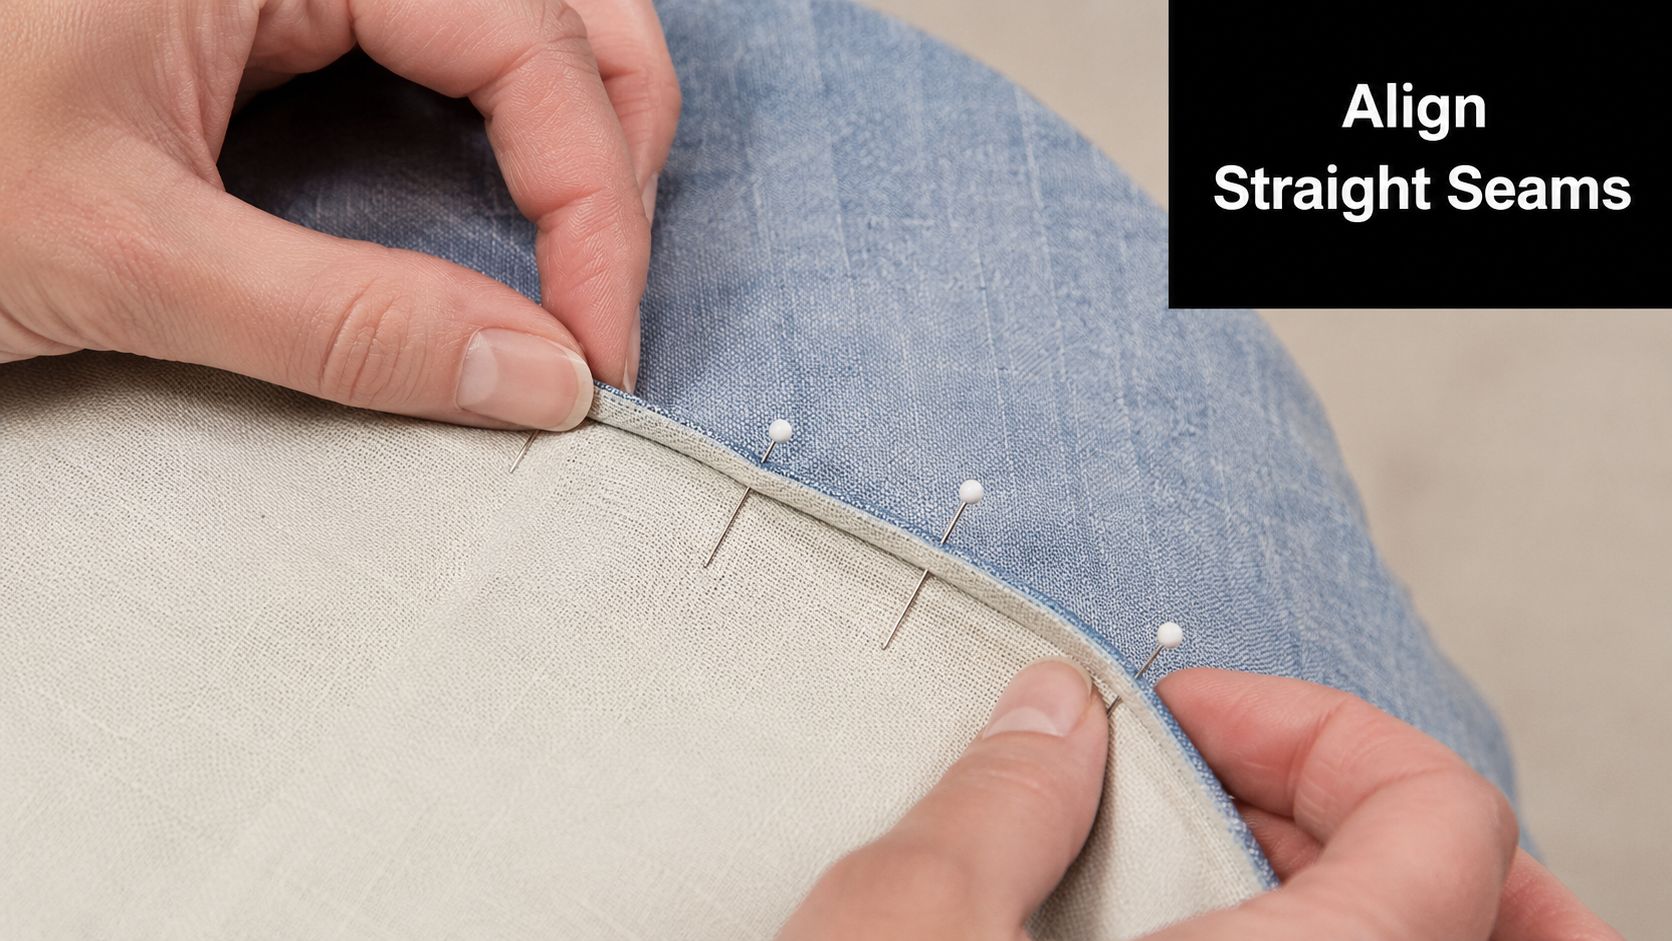
Build accuracy before the first pin
Lay both layers flat on the table and let the fabric settle before you match anything. High-thread-count cottons and fine British shirtings can shift less than drapey cloth, but they also show every tiny mismatch, so accuracy matters more, not less. With Tencel blends, the problem is usually the opposite. The cloth looks flat, then slides a fraction while you reach for the next pin.
Match the fixed points first. Start at the cut ends, notches, or any seam intersections. Then smooth the section between them with the palm of your hand so you are pinning fabric in its natural position, not pinning in drag.
I rarely pin a long straight seam from one end straight through. It is more reliable to anchor the seam in a few controlled spots, then fill the gaps.
Choose an orientation that suits the fabric
For stable woven fabrics, pins placed perpendicular to the seam line are usually the quickest way to hold layers evenly. They keep the raw edges easy to check, and they let you adjust a small section without disturbing the rest.
For slippery Tencel blends, washed viscose-linen mixes, or any fabric that shifts while you breathe near it, pinning parallel to the seam line often gives better control. The pin sits inside the seam allowance and holds a longer section of cloth, which reduces twisting between pins. I use that approach when the fabric has drape but little surface grip.
Dense, high-thread-count shirtings need a lighter touch. If the weave is tight, use finer pins and insert them with less force. If you have to push hard, the pin is too thick or the angle is wrong.
A practical workflow for straight seams
- Align the seam at the ends and key match points first. Confirm that both layers are flush before adding more pins.
- Smooth each section before pinning it. Small ripples near the cut edge usually become sewing problems later.
- Pin at intervals that match the fabric's behaviour. Stable poplin may need only a few pins. A fluid Tencel twill usually needs closer control.
- Keep pin heads positioned for easy removal at the machine. That matters most when the fabric shifts as soon as your hand leaves it.
- Recheck the full seam on the table. A seam can look aligned near the pins and still be off between them.
If the seam allowance is fighting you before sewing, stop and repin it. The machine will not correct a twisted seam.
On heavier seams, such as denim pockets or layered facings, insert the pin in a shallow scooping motion instead of stabbing straight down. That keeps the layers from shunting sideways. On fine woven cloth, the same motion helps for a different reason. It disturbs the weave less and leaves a cleaner line to stitch against.
Pinning Curves Darts and Tricky Fabrics
Curves and darts punish rushed pinning. A straight seam can sometimes survive a slightly clumsy approach. A neckline, armhole or bust dart usually won't.
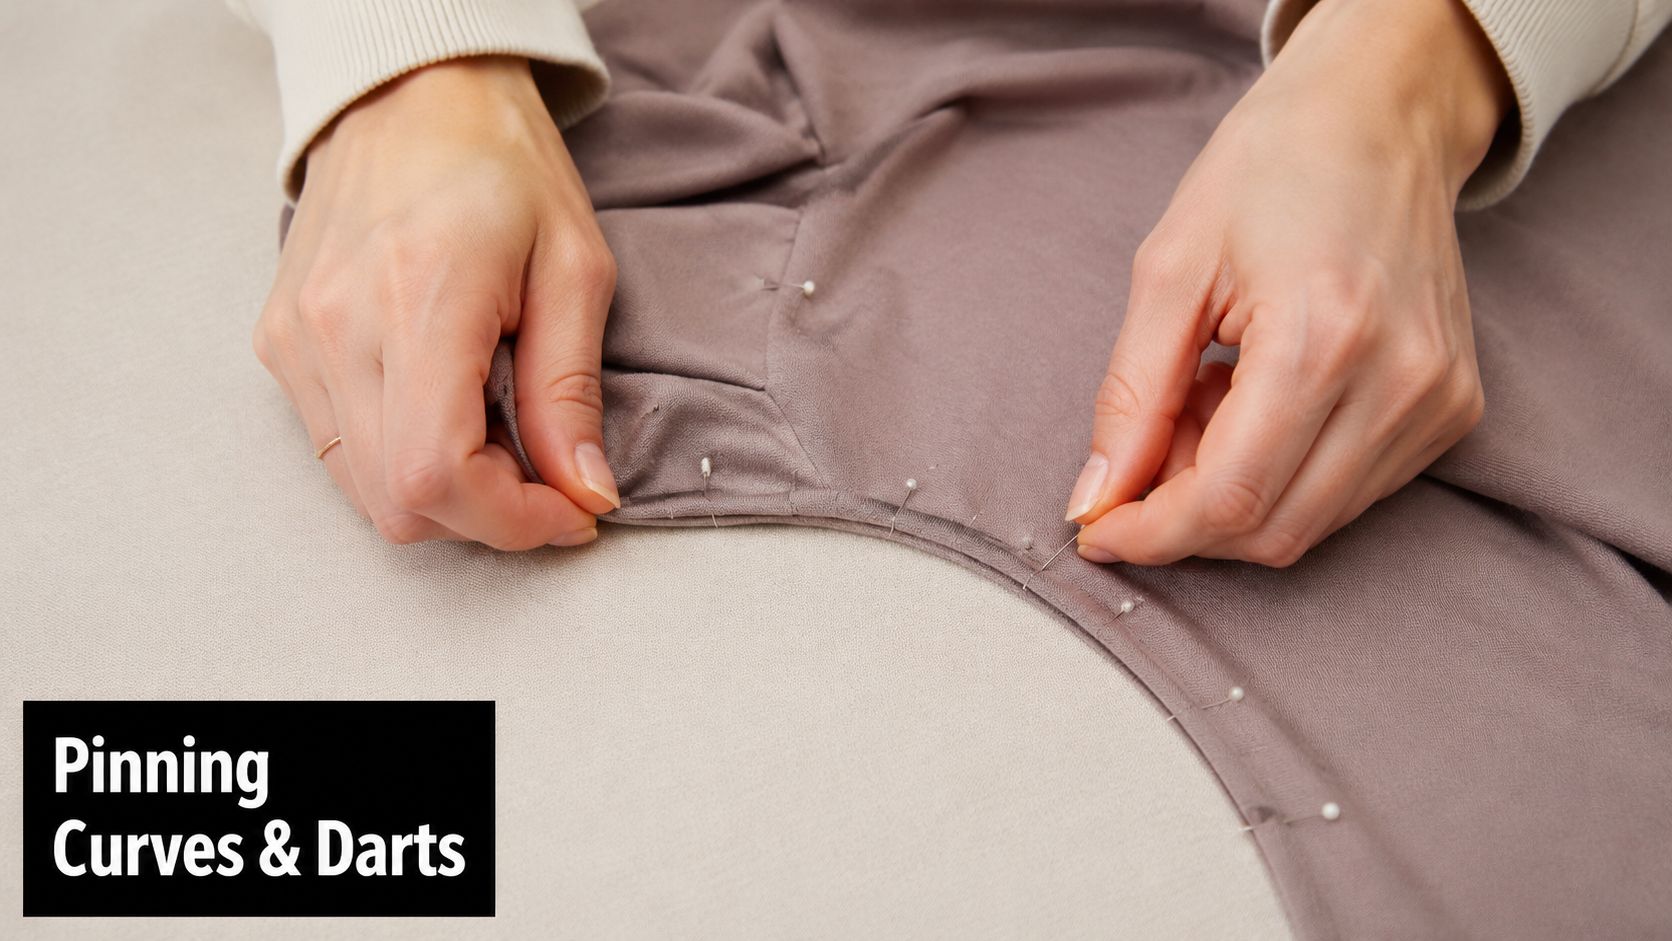
Curved edges need smaller decisions
When pinning a neckline, don't try to make the whole curve behave with a few widely spaced pins. Match the shoulder seam or centre point first, then ease the rest in small sections. I prefer to open the curve gently with my fingers as I pin so the seam allowance sits naturally instead of being forced flat.
For darts, pin from the wide end towards the point. That keeps the fabric flat where you need control and avoids twisting the dart legs. On knit darts or shaping seams, fewer pins often work better than crowding the area.
Deadstock and print-sensitive fabrics
Ex-designer deadstock often needs more thought because the surface can mark, drag or shift in ways standard tutorials barely mention. For delicate prints or textured deadstock, place pins perpendicular to the grain line at 1.2-inch intervals. The UK Textile Conservancy reports this reduces print distortion by 24% compared to diagonal pinning, as noted in this industry reference.
That's especially useful when the print itself matters as much as the seam. A diagonal pin can tug a motif slightly off, and on statement fabrics that's visible.
High-thread-count fabrics need restraint
Dense cottons and tightly woven Tencel blends often show pin marks more readily than people expect. A common mistake is using a “pin and leave” approach all the way to the machine. On cloth with a refined surface, that can leave the fabric looking handled even when the seam is technically correct.
A better option is often one of these:
- Pin out of the stitching line when the seam allowance allows it.
- Hand baste first on visible areas such as collars or centre fronts.
- Use fewer, finer pins and remove them earlier.
Here's a useful visual walkthrough for handling shape and control in fiddly seams:
On difficult curves, pinning is less about force and more about distributing ease without trapping distortion.
If you're working on a round neckline in a slippery blend, pin half the curve, check it, then finish the second half. That pause catches most problems before stitching locks them in.
Mastering Pin Spacing and Orientation
Pin spacing changes the whole result. Too few pins, and the layers drift. Too many, and the fabric can become stiff and overhandled. The right spacing depends on whether you're cutting, aligning, or sewing.
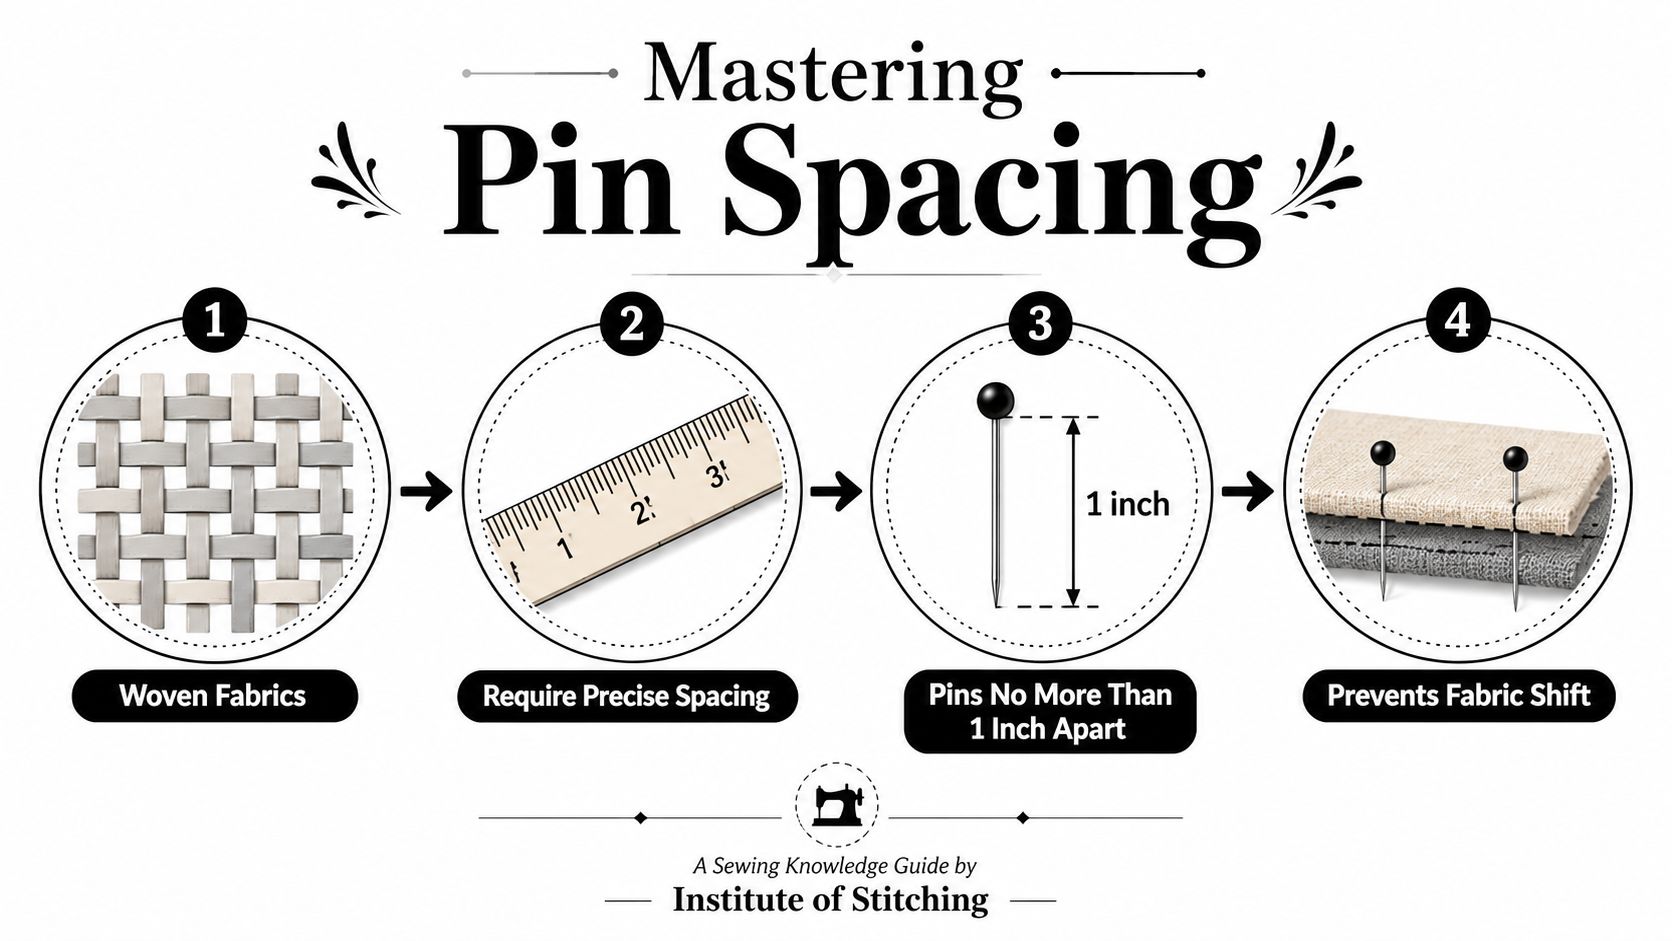
For woven fabric, close spacing matters before cutting
When laying out and securing woven fabric before cutting, wider gaps can let the cloth creep just enough to affect accuracy. Pinning woven fabrics before cutting requires pins no more than 1 inch apart, and the UK's Institute of Stitching and Design notes that going beyond that can cause up to 3mm of fabric shift in cottons and viscose blends, according to this cited industry page.
That's one of those small measurements that turns into a visible problem. A few millimetres at a side seam, hem or collar stand can be enough to throw things off.
A simple measure, mark, pin routine
If you struggle to keep spacing even, mark the intervals lightly with washable chalk along the edge before pinning. That sounds fussy, but it's fast once you get used to it.
Use this sequence:
- Measure first so you're not guessing where the next pin should go.
- Mark lightly on fabrics that shift or have a slippery finish.
- Insert with purpose based on whether the seam needs feed control or shape control.
- Face the heads outward so removal stays smooth at the machine.
Parallel or perpendicular
There isn't one universal answer. Orientation depends on what the fabric is doing. Parallel pinning is useful when you want the layers to feed steadily and the fabric dislikes snagging. Perpendicular pinning can help hold exact points in place, especially where matching matters more than continuous feed.
The best orientation is the one that stabilises the fabric without creating drag as you sew.
If a seam starts misbehaving repeatedly, don't just add more pins. Change the spacing or the direction.
Safety Removal and Alternatives for Pinning
You feel this lesson fastest on a slippery seam. The needle is approaching a pin, the Tencel blend is already trying to drift, and there is a split second where sewing over it looks quicker. It rarely is. One hit can bend the pin, deflect the needle, mark the fabric, or leave you unpicking a seam that was behaving perfectly well a moment earlier.
Remove pins before the needle reaches them. That is the safer habit for you, and it is kinder to the machine and the cloth.
Safe removal at the machine
Sew until the pin is just in front of the presser foot. Stop with the needle down if the seam wants to shift. Hold the layers flat with your left hand, pull the pin with your right, then continue. On very drapey cloth, especially Tencel blends, that needle-down pause matters because it keeps the seam from sliding open while you remove the pin.
If the fabric is bulky, lift the presser foot slightly before pulling the pin free. If the fabric is delicate, pull the pin out along the angle it went in, rather than twisting it upward. Twisting is what snags fine yarns and leaves those tiny disturbances you only notice once the light hits the finished garment.
This takes a little more attention. It usually saves time overall because the seam stays cleaner and you avoid broken needles, skipped stitches, and repair work.
When pins are not the best tool
Pins are useful, but they are not the right answer for every fabric. Some cloth responds better to another method.
Clips for thick layers and firm edges
Clips are practical on heavy denim, coating, bag-making cottons, and stacked seam allowances where a pin has to force its way through too much bulk. They also help on fabrics that show holes or pressure marks.
The trade-off is control. Clips hold layers together at the edge, but they are less precise on shaped seams, collars, and any area where the stitching line matters more than the raw edge.
Hand basting for fine or temperamental fabrics
Hand basting earns its place on fabrics that shift, bruise, or object to repeated pinning. I use it often on high-thread-count British shirtings and fine lawn because those fabrics can show pin marks longer than expected, especially after handling and pressing. A few rows of basting hold the seam exactly where you want it without the start-stop rhythm of pin removal at the machine.
It is also one of the best fixes for Tencel blends that feel cool, fluid, and slightly restless under the hand. Pins can secure them, but basting often controls them better through curved seams, necklines, and sleeve insertion.
Temporary tape for hems and narrow turns
Wash-away or fabric-safe tape can help on turned hems, zip placements, and narrow facings where pins distort the fold. It is useful in small doses. Too much tape can gum up the needle or make the fabric feel forced into place, so keep it for short areas where you need the fold to stay put long enough to stitch.
Choosing by fabric behaviour
The better question is not whether to pin, clip, or baste. It is what the fabric will tolerate without losing accuracy or surface quality.
- Stretchy or unstable fabric often does better with fewer pins and more support from basting.
- High-thread-count or tightly woven fabric may need finer pins, wider spacing, or no pins in visible areas.
- Bulky layers are usually easier with clips at the edge and pins only where exact matching matters.
- Very slippery fabric often behaves best with a mixed approach, one or two anchor pins, then hand basting through the difficult section.
Good sewing habits are flexible. The method changes with the cloth. That matters most on fabrics many guides skim past, like fluid Tencel twills or crisp British cottons with a dense weave, because they punish rough handling much faster than an ordinary quilting cotton ever will.
Conclusion and Next Steps
Neat sewing starts before the first stitch. Good pinning keeps layers aligned, protects shape, and makes difficult fabrics far more manageable. It's one of those small skills that changes the finish of almost every garment you make.
The details matter. Fine pins for fine cloth. Smarter spacing for woven fabric before cutting. More thoughtful control on curves, darts and drapey blends. And no sewing over pins. Those choices don't just protect your machine. They protect the fabric and your time.
If a project has been fighting you lately, don't assume the problem is your sewing ability. Test your pinning first. Try the seam on scraps. Change the orientation. Reduce the number of pins on dense fabric, or add control where slippery fabric keeps escaping. A quick muslin or test seam will teach you more than forcing through a full garment.
The more deliberately you pin, the calmer the rest of the process becomes. And calm sewing nearly always looks better.
If you need fresh pins, fabric swatches, or dressmaking supplies for your next project, take a look at More Sewing. Their range is especially useful if you sew with cottons, jerseys, viscose, Tencel blends, denim, or ex-designer deadstock and want tools that suit the fabric rather than fighting it.
