
Guides
Decorative Stitching Guide: Techniques, Tools and Projects
You've finished the garment, pressed the seams, and hung it up expecting that little moment of pride. Instead, it looks technically correct and visually flat, as if the fabric did exactly what you asked but stopped short of giving you any character. That's the point where decorative stitching starts earning its keep, because the right line of thread can turn a plain seam, hem, or patch into something that looks deliberate rather than merely complete.
Most home sewists already know how to join fabric. The harder part is deciding when a stitch should also add texture, contrast, repair value, or a bit of visual rhythm. In practice, that decision is less about scrolling through the machine's stitch menu and more about reading the cloth in front of you, then choosing what will behave on that cloth.
The First Time a Plain Seam Was Not Enough
You know the moment. The garment is finished, the fit is fine, the seams are clean, and the piece still looks a bit blank. The sewing is correct, but the surface has no place for the eye to settle, so the whole thing reads flatter than it should.
That is usually the point where decorative stitching earns its place at the machine. A row of visible topstitching on a yoke, a line of blanket stitch on a hem facing, or a small sashiko repair on worn denim does more than add ornament. It gives the cloth structure, intention, and a stronger visual rhythm, while still letting the garment do its job.
Why it feels different from ordinary sewing
A plain seam is there to hold fabric together. Decorative stitching changes the look and often the feel of the fabric, and sometimes it also carries some structure. Britannica describes embroidery as the art of decorating textile fabric with needle and thread, and that practice has been part of textile work across many cultures for thousands of years (Britannica on embroidery). That history matters because it shows decorative stitching is not an extra flourish bolted on at the end. It is part of the core language of cloth.
For a studio sewist, the useful shift is simple. Stop asking, “What stitch do I like?” Start asking, “What does this fabric tolerate, and what does it need?” Crisp cotton can take a bolder surface treatment than loose viscose. Denim usually welcomes visible mending and firm topstitching. A stretchy jersey needs more restraint, because a decorative line that looks charming on woven cloth can pull, pucker, or fight the fabric once it is on the body.
Deadstock behaves the same way. Some pieces are stable and ready for assertive stitching, while others are thin, slippy, or irregular, and those need a lighter hand and a smaller footprint. Linen usually sits somewhere in the middle, because it can show off texture well, but it also telegraphs every wobble in your hand. The cloth in front of you decides how much decoration it can carry.
Practical rule: if a seam looks finished but still feels anonymous, add one controlled decorative detail rather than covering the whole garment in extras. One good line beats five busy ones.
What Decorative Stitching Is
Decorative stitching is any stitch used mainly to change the look, texture, or surface interest of fabric rather than to join two pieces together. In practice, that still puts it inside dressmaking, because many of the stitches sewists use most often do both jobs at once, they hold fabric and they also show.
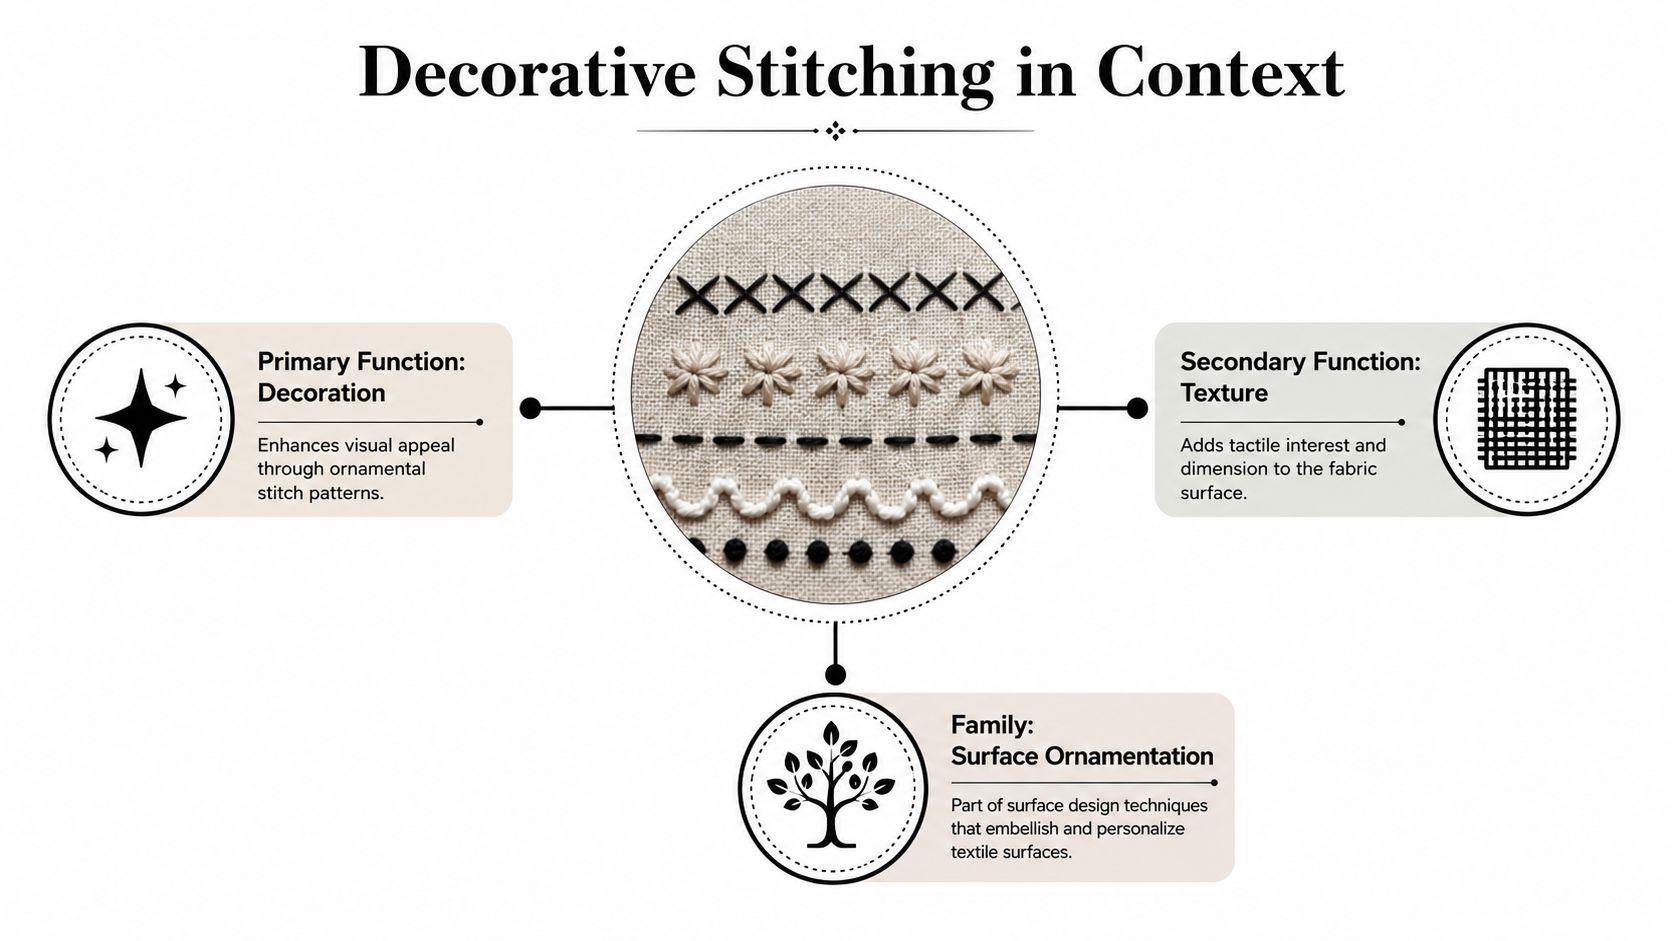
Four working families to keep in mind
The cleanest way to sort the options is by what the stitch is doing on the cloth in front of you.
- Hand embroidery stitches, such as chain stitch or cross stitch, build pattern by hand and stay useful for monograms, borders, and visible mending.
- Machine decorative stitches are the built-in stitch patterns on many home machines, including zigzags, scallops, heirloom-style patterns, and open decorative motifs.
- Structural stitches that also decorate, such as topstitching or quilting lines, hold layers together while shaping the surface. Britannica's needlework reference treats quilting as the stitching method that holds the top and bottom layers together with batting in between, which is why quilting lines can be practical and ornamental at once (Britannica on needlework and quilting).
- Surface techniques, like sashiko, smocking, or visible mending, use the surface treatment as part of the design, not as an afterthought.
The useful distinction is not hand versus machine. It is what job the stitch is doing on this cloth. A decorative line on denim can reinforce a seam. A dense satin stitch on a patch can cover and protect a hole. A narrow row of quilting can add weight and shape to a bag flap.
For UK sewists, that matters because decorative stitching has never sat in a small corner of sewing. It belongs in garment finishing, patchwork, repair, and embellishment. The history is there, but the day-to-day use is practical. A stitch earns its place when it improves how the item looks and how it behaves.
A quick way to sort the options
Ask three questions before you stitch.
- Is this mainly for surface interest? If yes, think embroidery or machine ornament.
- Is this also holding fabric together or strengthening it? If yes, think topstitching, quilting, or visible repair.
- Is the cloth stable enough to show the stitch cleanly? If not, stabilise first or choose a simpler line.
That simple filter saves a lot of trial and error later.
Hand Stitches Worth Learning First
The best hand stitches aren't the fanciest ones. They're the ones that give you the strongest visual return for the least amount of practice time. If you only want a few stitches in your pocket, choose the ones that suit the projects you make.
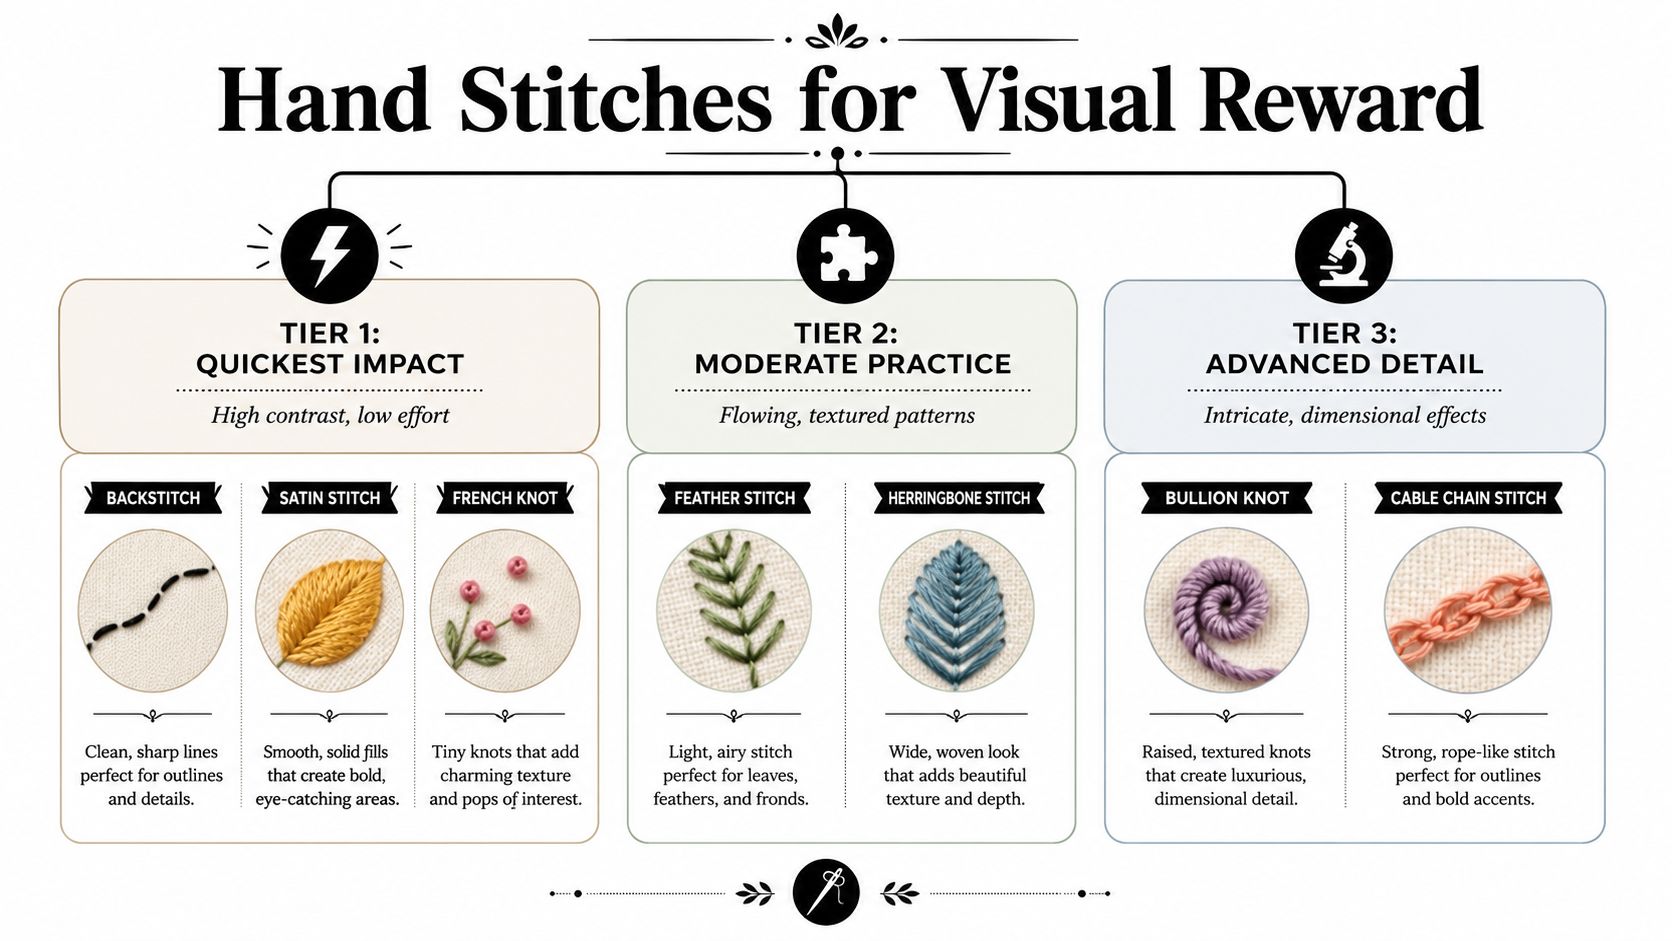
The stitches that pull their weight
Running stitch is the workhorse. On its own it's plain, but repeated in a sashiko-style grid it becomes sharp, graphic, and useful for mending denim or reinforcing cotton. It's the one to learn if you want your repairs to look intentional rather than apologetic.
Blanket stitch has a clear edge-finishing role. It works around blanket edges, applique shapes, and wool felt pieces because it both binds and frames the edge. On a child's felt toy or a wool patch, it reads as tidy and handmade in the best way.
Chain stitch gives you a bolder outline. It's especially useful for curved motifs, names, and borders on heavier cloth where a thin line would disappear. On a denim pocket or canvas tote, chain stitch can carry a design without looking fussy.
Cross stitch still works well for monograms and small motifs on garment corners, pocket flaps, or tea towels. It's more structured than running stitch, which makes it a good choice when you want the pattern to look counted and regular.
Feather stitch brings movement. On folk-style blouses or decorative seam joins, it adds a soft, branching line that feels airy rather than rigid. It works especially well when you want the decoration to look integrated with the garment rather than applied on top.
Back stitch is the cleanest choice for outlining motifs on denim or canvas. It's steadier than freeform embroidery when the line itself matters more than the fill.
A thin stranded cotton can look neat, but pearl cotton or sashiko thread gives more visible texture and stronger presence on top of fabric. If you want the stitching to read from a distance, choose thread with enough body to hold its own.
What to learn first
If you're starting from zero, learn running stitch, blanket stitch, and back stitch first. Those three cover mending, edging, and outlining, which is where most useful decorative hand stitching lives. Add chain stitch once you want stronger outlines, then feather stitch when you want a softer, more flowing finish.
Hand stitching does take longer, but it gives you total control over the look. That matters on repair work, where you may want the stitches to disappear into a patch, or on a special garment where you want the detail to feel personal rather than mass produced.
Machine Stitches That Do the Heavy Lifting
A domestic machine can do far more than straight seams and utility zigzag. The trick is not to run through every decorative option. It's to choose the one that suits the cloth, the spacing, and the job in front of you.
Pick the stitch to match the fabric
Decorative zigzag is useful on stable woven fabrics, especially cotton and linen, where the cloth can hold the pattern without collapsing. It gives you visible rhythm without the weight of a dense embroidery fill. On hems, cuffs, or facings, it can be enough all by itself.
Multi-step zigzag behaves better than a basic zigzag when you want a smoother, more deliberate edge. It's handy for finishing, edging, and appliqué, especially when the design needs to look purposeful rather than elastic.
Satin stitch is the one to treat with care. It can look rich on patches, initials, and small shapes, but it gets heavy fast. On light or unstable fabric it can distort the cloth, so it's usually better for accent panels than for large areas.
Scallop stitch works well when you want a soft, ornamental edge on collars, cuffs, and homeware trims. It can look especially good on linen and cotton where the shape stays readable.
Heirloom stitches add a lacy effect on suitable fabrics, especially when paired with proper stabilisation and, where needed, a wing needle. They suit collars, cuffs, button bands, hems, pillowcases, and curtains where you want a lighter, old-world finish.
Topstitching is still the most underrated decorative stitch in the machine room. A slightly longer stitch length on a visible seam can sharpen a garment instantly, particularly on denim, twill, canvas, and other stable fabrics. It's not flashy, but it's often the smartest choice.
When a twin needle earns its place
A twin needle is useful on knits when you want decorative topstitching without losing stretch. On jersey, it usually makes more sense than a dense decorative pattern that can pucker or tunnel. Use it on hems, necklines, and some seam finishes, not because it's trendy, but because it behaves.
A simple matching logic
- Stable cottons and linens: decorative zigzag, scallops, topstitching, heirloom styles.
- Knit jerseys: twin-needle topstitching or restrained decorative lines.
- Denim and canvas: bold topstitching, satin accents, or heavier machine motifs on limited areas.
- Accent panels only: dense satin or elaborate heirloom patterns.
The best results come when the stitch doesn't compete with the fabric's own character. A linen shirt needs a different surface language from a denim jacket. The cloth sets the terms.
Mini Tutorials for Three Signature Stitches
A stitch stops being abstract the moment you do it once. These three are worth trying because they cover edge-finishing, visible repair, and garment detail without demanding specialist equipment.
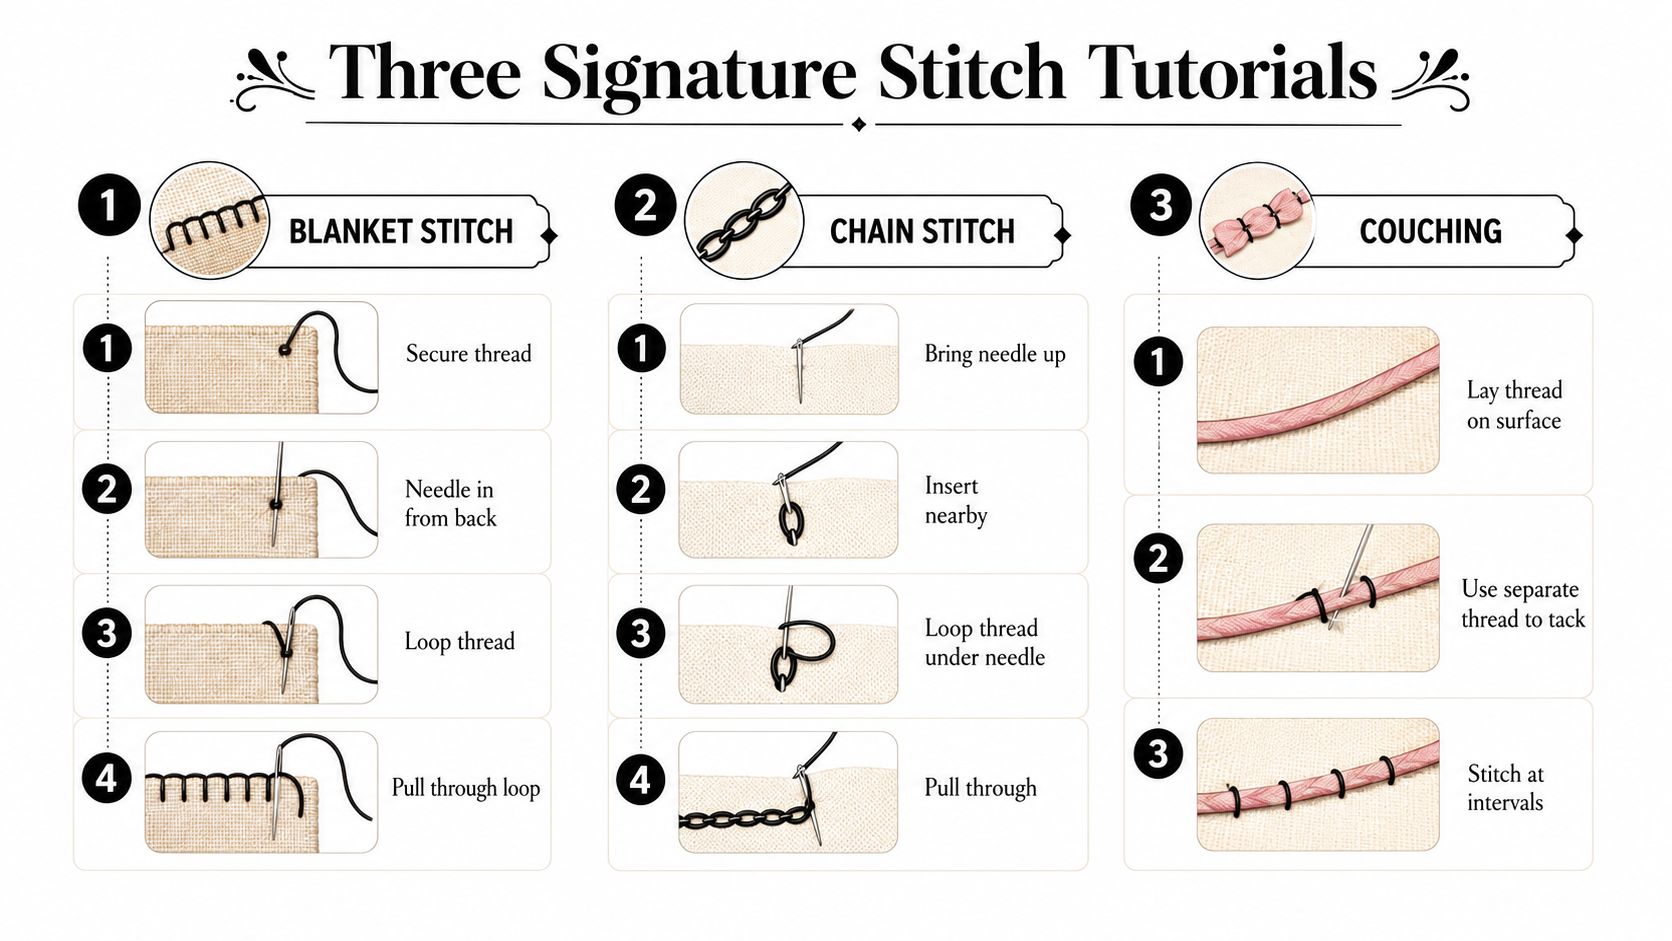
Blanket stitch by hand
Use wool thread, pearl cotton, or a sturdy stranded cotton. Start on a wool blanket edge, felt applique, or a bound edge that needs a strong visual finish. Secure the thread on the wrong side, bring the needle up from the back, and make each stitch sit at the edge so the loop forms neatly over the fabric line.
Keep the spacing even. It doesn't need to be tiny, it needs to be consistent. If the edge is curved, shorten the spacing a little so the stitch follows the shape cleanly.
Don't tug the thread hard after each loop. Blanket stitch looks crisp when the loops sit open, not when the edge gets dragged tight.
Finish by anchoring the thread on the back with a couple of small stitches. If the thread is too fine, the edge can disappear. If it's too thick, the corner can look bulky, so test on a scrap first.
Sashiko running stitch on denim
Start with a marked grid or simple parallel lines on denim, a knee patch, or a bag panel. Use sashiko thread or another sturdy cotton thread that shows clearly, then work a running stitch through the fabric in a steady rhythm.
The beauty of sashiko is repetition. The stitch itself is plain, but the pattern becomes graphic once rows and blocks start stacking up. Keep the stitches and spaces as even as you can, but don't chase machine-level perfection. Visible mending looks best when it feels considered, not overcontrolled.
Press the work lightly when you're done, especially if the denim has lifted or buckled. A neat finish helps the stitched area settle into the garment rather than sitting on top like a patch afterthought.
Machine topstitching on a curve
Pick an edge-stitch foot or the foot that gives you the clearest view of the seam edge. Use a thread colour that either matches for a quiet finish or contrasts for a deliberate line. On a collar, yoke, or curved facing, reduce speed and guide the fabric gently without pushing it.
A curved seam needs patience. Keep your hands light, let the machine feed the cloth, and stop often enough to adjust the angle. If the line starts wandering, slow down rather than trying to yank it back.
Use the same topstitching on one sample first. The sample shows whether the stitch length feels right and whether the curve is holding its shape. That one test saves a lot of unpicking later.
Matching Stitches to Fabric and Tools
A stitch menu is the wrong place to start. The cloth in front of you should decide the decorative stitch, because fabric behaviour tells you more than the machine's options do. Once stitch density, thread weight, needle size, and stabiliser match the cloth, the result settles down fast and starts looking intentional.
Read the cloth first
Cotton and linen are the easiest starting point because they stay put and behave predictably under the foot. They take surface detail well, cope with visible seams, and usually handle topstitching without complaint. Jersey needs a different approach. It stretches, so dense decorative stitching can pull it out of shape unless you support it properly or keep the design light.
Viscose and similar drapey fabrics sit in the awkward middle. They can carry subtle detail beautifully, but heavy stitching can weigh them down or make them ripple. Denim is more forgiving for bold lines, visible mending, and heavier thread because the cloth has enough body to carry the work. Deadstock is the unknown, because fibre content and finish may stay hidden until you sample it.
Match needle, thread, and stabiliser
One specialist guide gives a useful groove rule, where thread diameter should be about 40% of the needle size, with the example that a 100/16 needle pairs best with 0.40 mm thread (Maggie Frames on decorative stitching). In practical terms, that helps stop the stitch from looking cramped or shredding as it passes through the needle path.
For decorative machine stitching, stabiliser changes the whole result. A solid method uses a tear-away or water-soluble stabiliser under the fabric, plus a test swatch with the exact fabric, thread, and stabiliser combination, then tension changes if the line looks too tight or too loose (Seamwork on decorative machine stitching). The same guide recommends stitching only 2–3 inches on a scrap before judging the effect, because pulling on the fabric can distort the design ([Seamwork on decorative machine stitching]).
Useful habit: sew a sample with the same fabric, thread, stabiliser, and needle you plan to use on the final piece. Decorative stitching shifts once all four are working together.
Quick reference for setups
| Fabric | Best Decorative Option | Needle | Thread | Stabiliser |
|---|---|---|---|---|
| Cotton poplin | Topstitching, scallop stitch, simple machine motifs | Universal or embroidery needle, matched to thread and fabric weight | Cotton or all-purpose sewing thread | Light tear-away or none if the fabric is stable |
| Jersey | Twin-needle topstitching, very light decorative lines | Stretch or twin needle | Polyester or sewing thread that can flex | Lightweight stabiliser, if needed, to control puckering |
| Denim | Sashiko-style hand stitching, bold topstitching, patch detail | Denim or topstitching needle | Sashiko thread or heavier sewing thread | Tear-away or stabiliser on layered areas |
| Viscose | Narrow topstitching, restrained accents | Fine needle suited to the cloth | Fine sewing thread | Water-soluble or temporary support if the fabric is delicate |
| Deadstock | Test first, then choose the lightest viable stitch | Based on the fabric test | Based on the fabric test | Start with temporary stabiliser and adjust after sampling |
Foot choice matters too. A standard foot handles routine work, an open-toe foot gives better visibility on decorative patterns, a walking foot helps with quilting lines on multiple layers, and an edge-stitch foot makes precise topstitching much easier. If the stitch is dense or the cloth is slippery, visibility and feed control matter more than speed.
When Decorative Stitching Is and Is Not Worth It
Not every decorative stitch earns its place. Some look excellent on the sample and then fail in real wear, usually because the fabric, the placement, or the stitch density wasn't suited to the job. The honest question is whether the visual payoff is worth the durability trade-off.
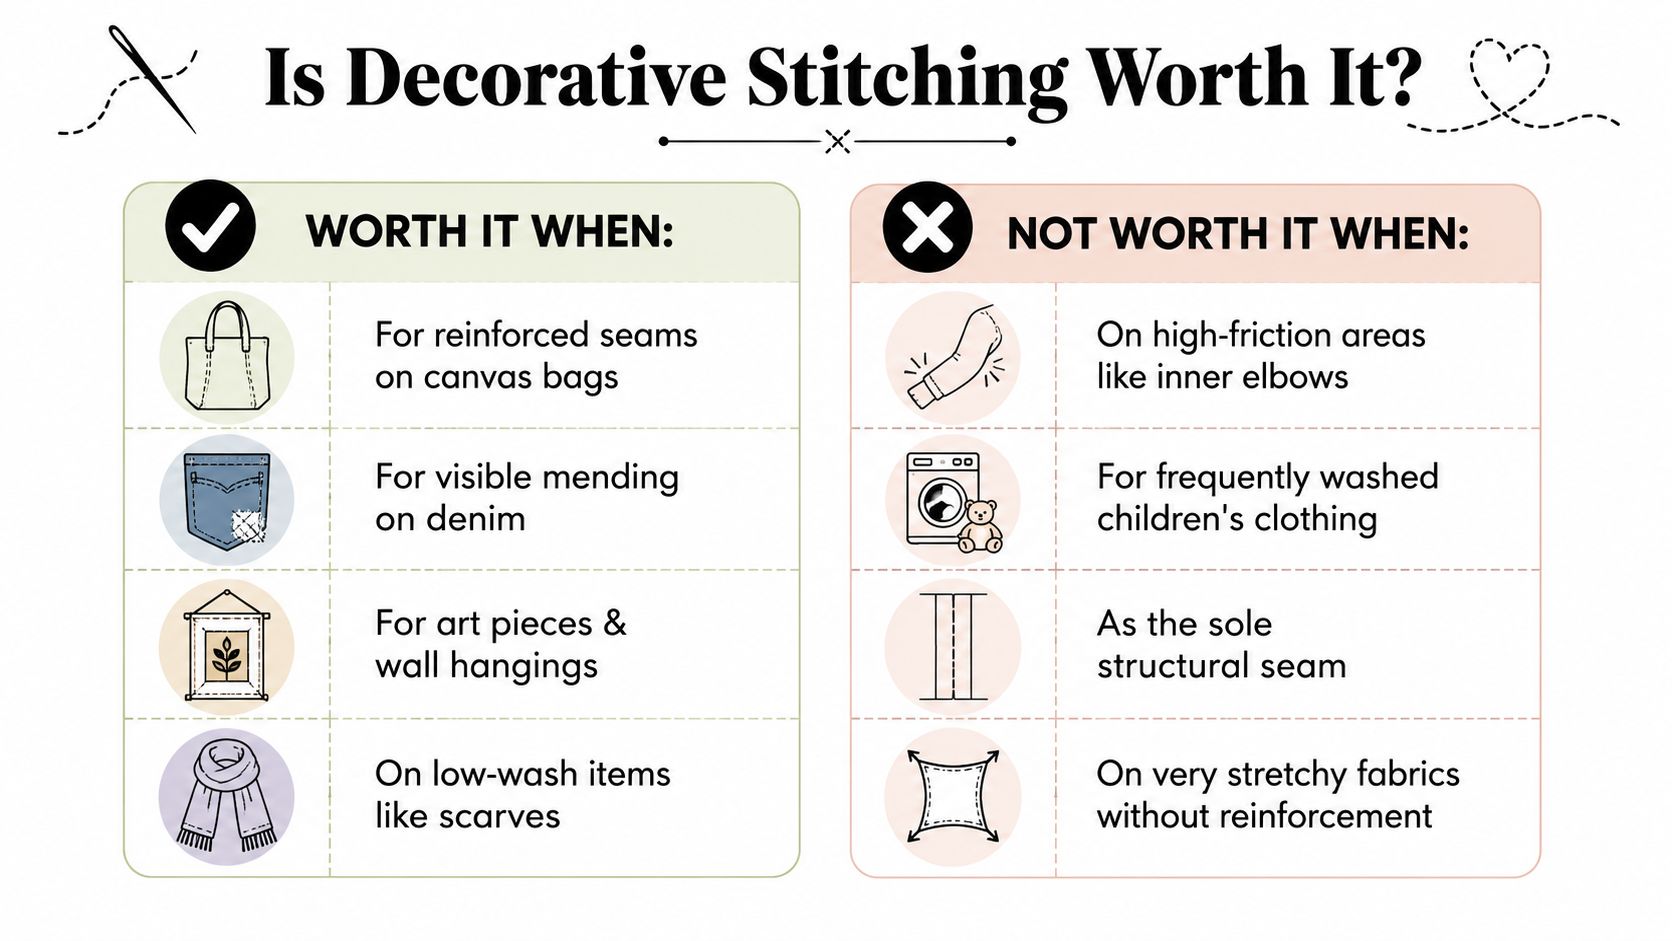
Good places to use it
Topstitched seams on denim usually hold up well because the fabric can support the extra line of thread. Blanket-stitched blanket edges also make sense, because the edge treatment is part of the item's purpose. Sashiko on sturdy cottons works for visible mending and reinforcement, especially where you want the repair to become part of the garment's story.
Decorative stitching also makes sense on items that don't face hard daily wear. Homewares, wall pieces, low-wash accessories, and statement panels all give the stitches more room to be purely visual.
Places to be cautious
Dense decorative stitching on a light jersey is often trouble unless it's carefully stabilised. The same goes for loose satin stitch on fabrics that shift in the wash, because the satin surface can distort or snag. Decorative stitching over seams that already take a lot of strain needs restraint, because the thread line can become the weak point if the cloth keeps moving underneath it.
The safest habit is still the simplest one: make a sample, then wash it the way the finished item will be washed. A 10 cm sample is enough to show whether the stitch puckers, snaps, or distorts before you commit to the whole garment.
What usually makes the difference
- Stabiliser used well: helps stop puckering and keeps the stitch readable.
- Appropriate thread choice: avoids bulky tension issues or thread that looks too fine for the cloth.
- Placement: keeps decorative work away from the highest-friction areas when possible.
- Real-life testing: catches problems before the item is worn, washed, and then regretted.
A stitch can look beautiful and still be the wrong choice for a particular garment. That's not a failure of skill, it's just fabric behaviour. The better question is whether the cloth and the use case are strong enough to carry the decoration.
Projects and Inspiration to Try This Week
The best decorative stitching jobs are small enough to finish in an evening, but useful enough that you'll keep reaching for the item afterwards. That's how the stitch choices start becoming instinctive instead of theoretical.
Garment details
For a beginner, try topstitching a yoke or collar on a cotton shirt. It teaches control on curves without demanding much thread or setup. For a stretch project, add sashiko patches on elbows or knees using a visible mending layout that makes the repair look intentional.
Homewares
Start with a linen cushion panel and a simple line of machine stitching or blanket stitch at the edge. It's low pressure and easy to unpick if needed. For something more ambitious, make a quilted table runner with decorative lines that echo the shape of the cloth rather than overpower it.
Upcycling
A beginner can turn a worn jeans knee into a visible mend with running stitch or a small patch. A more confident sewist can add decorative stitch detail to a refashioned shirt, especially on cuffs, plackets, or pocket edges. Another strong option is a sashiko-stitched patch over a hole in knitwear, provided the fabric is stable enough to support the repair.
Choose one stitch, one small project, and one evening. Decorative stitching gets real the moment thread touches fabric, not when you've collected another menu of possibilities.
If you want the fastest route to better results, start with the cloth that's already on your table. A scrap of denim, a plain cotton cushion panel, or a tired shirt will teach you more than a perfect plan ever will. Pick one stitch, test it on the actual fabric, and let the result tell you whether to go bolder or simpler next time.
If you're ready to try your first decorative stitching project, browse the current fabric and haberdashery selection at More Sewing, pick a small piece of cloth that feels forgiving, and give yourself one evening at the machine to test, stitch, and finish something you'll actually use.
