
Blog, Dressmaking
Mastering the Dress Pattern Shift for a Perfect Fit
The most popular advice about a shift dress is also the most misleading: “Just choose your usual size. The loose shape will hide any fitting problems.” It won't. A shift dress has no defined waist seam to interrupt the eye or redistribute excess fabric, so it hangs from the shoulders and bust. If the bust is tight, the armhole gapes, the back length is wrong or the hem loses balance, the error travels visibly through the whole garment.
A reliable dress pattern shift starts with measurements, not a size number. You need to understand the silhouette, assess the fabric, alter the paper pattern in the right order and test the result before cutting the cloth you want to wear. That approach takes more care than blindly enlarging a pattern, but it prevents the familiar disappointment of a dress that technically goes on yet pulls, twists or hangs unevenly.
Understanding the Shift Dress Silhouette
A true shift dress is relatively straight or gently shaped from the shoulder and bust towards the hem. It may contain bust darts, waist darts or seams for controlled shaping, but it usually lacks the pronounced waist definition of a sheath dress. An A-line shift widens towards the hem, while a boxy mod version keeps a more consistent width through the body.
That apparent simplicity creates the fitting trap. A sheath dress has a waist seam or strong contouring that can separate upper-body and lower-body adjustments. A shift dress often presents one uninterrupted surface, so the relationship between shoulder width, bust projection, torso length and hem position matters enormously.
If the shoulder area is too wide, the entire dress can drop outward and make the neckline look too large. If the bust needs more room, the centre front may swing away from the body or the side seam may move towards the back. If the back waist length is too short, the hem can rise at the rear even when the hip measurement seems generous enough.
Practical rule: Treat the shoulders and bust as the dress's suspension system. If they're wrong, changing the hem width won't solve the problem.
Why ease doesn't eliminate fitting work
Ease is the space added beyond body measurements for movement and the intended style. A loose silhouette may tolerate more ease around the waist and hip, but it still needs controlled proportions at the upper chest, shoulder and armhole. Too much ease in the wrong place creates folds rather than comfort.
The shift can also expose posture. Forward shoulders may push the front neckline upwards and create excess fabric across the upper back. A prominent abdomen may pull the centre front forward, while a swayback can leave horizontal folds above the seat. These are balance problems, not just questions of whether the dress feels tight.
A useful diagnosis begins with the pattern's balance lines. Mark the centre front, centre back, bust level, waist level and hip level on the toile. When the dress is worn, those lines should remain visually stable. A centre-front line that swings outward points towards a width or length issue at the front, while a hem that rises only at the back suggests a different correction.
The historical development of dress patterns also shows why a pattern shouldn't be treated as a fixed answer. Between 1825 and 1850, sewing machines, flexible dress forms and inexpensive steam-produced paper helped expand domestic dressmaking in Britain, turning patterns into practical household tools rather than specialist aids for professional makers. Butterick's easier-to-use patterns reached Britain during the 1870s, supported by fashion-magazine and draper distribution, including a Colchester draper listed as an agent in an 1882 trade directory, as described in this history of the nineteenth-century dress pattern shift. The pattern became more accessible, but accessibility never meant that one printed outline could fit every body.
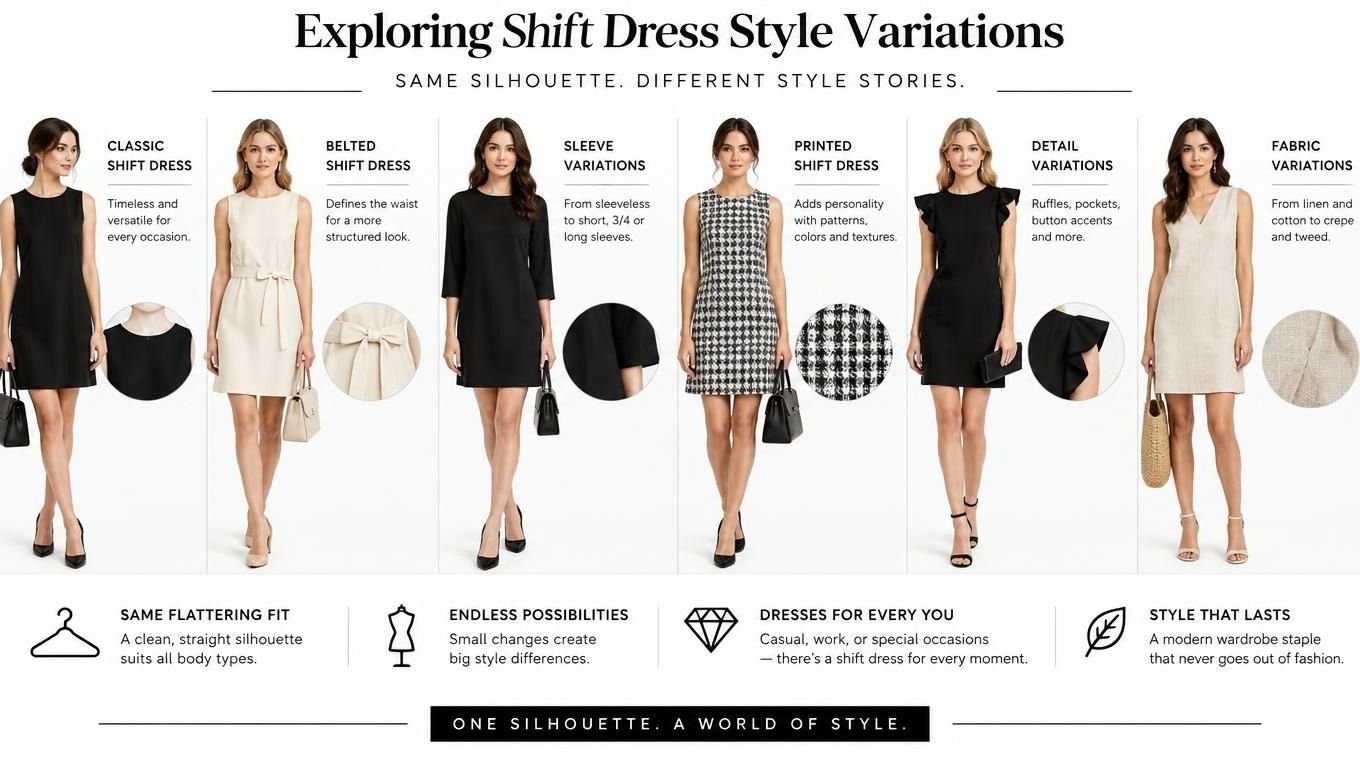
Exploring Shift Dress Style Variations
The design details determine where the fitting work will happen. Two garments may both be called shift dresses, yet one may need careful bust shaping and armhole control while the other depends mainly on shoulder balance and fabric behaviour.
Darted and dartless designs
A darted shift gives you a clear route for a full-bust adjustment. The dart can be lengthened, rotated or redistributed while the side seam and centre front remain comparatively easy to control. This makes a darted pattern a sensible starting point when the bust and waist measurements sit in different size brackets.
A dartless shift may look simpler, but it doesn't remove shaping. The pattern relies on ease, fabric drape and the relationship between shoulder, bust and hem. On a fuller bust, a dartless block can develop drag lines or a raised front hem unless the pattern has enough length and width through the bust area.
A boxy, mod-inspired style usually offers more room around the waist and hip. It still needs a stable neckline and correctly positioned shoulder seam. If the upper chest is too broad for the wearer, the garment may look oversized rather than deliberately architectural.
Seams and panels
Princess seams divide the front into sections and provide a powerful fitting route. You can adjust the bust, waist and torso length along a curved seam, then true the adjoining pieces. The trade-off is that every seam must match accurately, and small errors become visible at the joining points.
A back yoke changes the fitting map. The upper back can be shaped independently from the lower back, which helps with shoulder slope or a prominent upper back, but the yoke seam must remain smooth. Altering only the lower back piece may leave the yoke pulling or standing away from the neck.
Necklines have their own consequences. A high neckline shows gaping quickly if the upper chest or neckline circumference is too large. A lower scoop neckline may feel more forgiving, but it still needs a stable facing or binding so that it doesn't stretch during construction.
Sleeves and armholes
A sleeveless shift requires close armhole control. If the armhole is too deep or too wide, the garment can gape and reveal the undergarment. Removing fabric from the armhole after the side seam has been altered may also narrow the opening too much, so make the change on the paper pattern and redraw the curve smoothly.
A short sleeve adds coverage but introduces a bicep and sleeve-cap fitting problem. A long sleeve can make the dress more wearable for movement, yet it won't excuse a poor shoulder seam. Test forward reach in the toile. If the sleeve pulls the whole dress forward, the issue may be shoulder posture or insufficient back width rather than sleeve width alone.
For a first project, a darted sleeveless pattern with a moderate neckline is often easier to diagnose than a heavily panelled or long-sleeved version. Once the block fits, design changes become much more predictable.
Selecting the Correct Pattern Size Using Body Measurements
Printed size numbers are not reliable body specifications. UK retail research found substantial inconsistency among garments carrying the same nominal size, with an investigation of 47 high-street retailers reporting significant measurement differences between garments labelled UK 10 in its sizing study. A commercial sewing pattern's size number should therefore be treated as a reference label, not as a promise of fit.
Start with the body, wearing the underwear and supportive garments intended for the dress. Keep the tape level and comfortably close without compressing the flesh. If you need a refresher on positioning the tape and keeping measurements consistent, this guide to taking body measurements correctly is a useful companion.
Build a measurement record
For a shift dress, record more than bust, waist and hip. Those three measurements are essential, but they don't describe posture, torso length or shoulder shape.
Write down:
- Bust: Measure around the fullest part, keeping the tape level.
- Waist: Find the natural waist rather than guessing from the pattern's waist marking.
- Hip: Measure the fullest area, then note where that level sits below the waist.
- Back waist length: Measure from the prominent neck point to the waist.
- Shoulder width: Record the shoulder span and compare it with the pattern.
- Bicep: Use this for sleeved versions, even if the body of the dress is loose.
- Vertical bust position: Note the distance from the shoulder or neckline reference to the bust point.
The SizeUK survey scanned approximately 11,000 people, about 5,500 women and 5,500 men, with three-dimensional whole-body scanners and extracted roughly 130 clothing-relevant measurements per participant, supported by anatomical landmarks and manually captured dimensions, as documented in the SizeUK information report. You don't need a scanner at home to learn the practical lesson. Bust, waist and hip alone can miss shoulder slope, posture, torso length and front-to-back distribution.
Anchor the upper pattern at the bust
Choose the upper front and shoulder area from the closest bust measurement, not your usual high-street size. A UK fashion-construction text notes that dressmaking sizes commonly run from size 6 to size 22, with sizes 10, 12 and 14 identified as best sellers, while also explaining that patterns are graded and altered across different wearer sizes in its construction guidance. The useful point is not the popularity of a label. It's that the printed range is a drafting system, not a body identity.
If your bust corresponds to one size and your hip to another, cut the shoulder and bust from the upper measurement, then blend gradually towards the hip size. Don't draw a sudden diagonal line from one size to another. Use a curved ruler or a smooth hand-drawn transition that respects the side seam.
Measure the paper pattern
Before cutting fabric, measure the actual pattern. Measure across the bust, waist and hip seam lines, then subtract the seam allowances. Compare each result with the wearer's body measurement plus the intended design ease.
This tells you whether the pattern is loose, merely close fitting or excessively roomy. It also catches patterns where the size chart suggests one result but the finished measurements produce another. Mark both body measurements and finished measurements directly on the pattern envelope or tracing paper, then record every alteration so you can reproduce the successful block later.
Choosing Suitable Fabrics for Different Shift Dress Styles
The same pattern can look crisp, fluid, clingy or heavy depending on the cloth. A stable cotton may hold the geometry of an A-line shift, while viscose can collapse closer to the body and expose small fitting errors. Jersey changes the rules again because stretch and recovery affect both ease and movement.
Research comparing the same geometric garment pattern in knitted jersey and woven fabrics, with pieces cut on straight and bias grain, found that the resulting fit and hang varied substantially. The practical conclusion is direct: a test garment should use fabric with comparable weight, stretch and drape to the final cloth, as shown in this Nottingham Trent University textile study.
Match the fabric to the silhouette
Cotton poplin, cotton sateen and similar stable wovens support a clean outline. They're useful for a structured shift with a visible A-line or box shape, but they may need more movement ease than a fluid fabric. Denim adds weight and seam stability, yet it can make armholes feel restrictive and can exaggerate bulk at facings or intersecting seams.
Viscose and Tencel blends usually provide more fluid movement. They suit a relaxed shift, but they can reveal an uneven hem or a slightly misaligned neckline because the cloth responds to gravity rather than holding the drafted shape. They also need careful pressing and support at areas that must remain stable.
Jersey can be comfortable and forgiving, but don't fit a final stable woven from a very stretchy jersey toile. The test dress may appear larger or hang more loosely, leading you to remove ease that the final fabric needs. For stretch, check recovery after stretching a sample and leaving it to rest. A fabric with poor recovery may grow at the neckline or armhole during wear.
| Fabric Type | Drape and Structure | Pattern Adjustment Needed |
|---|---|---|
| Stable cotton | Holds shape and supports a clear outline | Check movement ease, especially at the bicep and hip |
| Denim | Firm, heavier and seam-stable | Allow for armhole comfort and reduce bulk at facings |
| Viscose | Fluid and close to the body | Stabilise shoulders and neckline, then reassess the hem |
| Tencel blend | Soft drape with moderate fluidity | Use a comparable toile and support areas that stretch |
| Jersey | Stretchy, with recovery varying by knit | Confirm stretch percentage and adjust ease to the fabric |
| Deadstock | Properties vary by fibre, weave and finish | Test weight, opacity, shrinkage and seam behaviour before cutting |
Test before you trust the cloth
Prewash the fabric using the care method you expect to use for the finished dress. Test a separate sample for shrinkage, colourfastness, opacity and seam stability. A fabric that looks perfect on the roll may become more fluid after washing or may show a pressing mark along the neckline.
Interfacing should support rather than stiffen. Use it at a facing, neckline or shoulder seam when the fabric needs control, but test it on scraps first. A firm interfacing can make a soft shift look rigid and can create a visible ridge where the facing ends.
London's Textiles Action Plan prioritises reuse, repair, waste prevention and improved textile collection, which gives fabric selection a practical sustainability context in the city's textile policy document. For a home dressmaker, that means choosing cloth you'll maintain, repair and wear repeatedly, not just picking the most attractive drape at the cutting table.
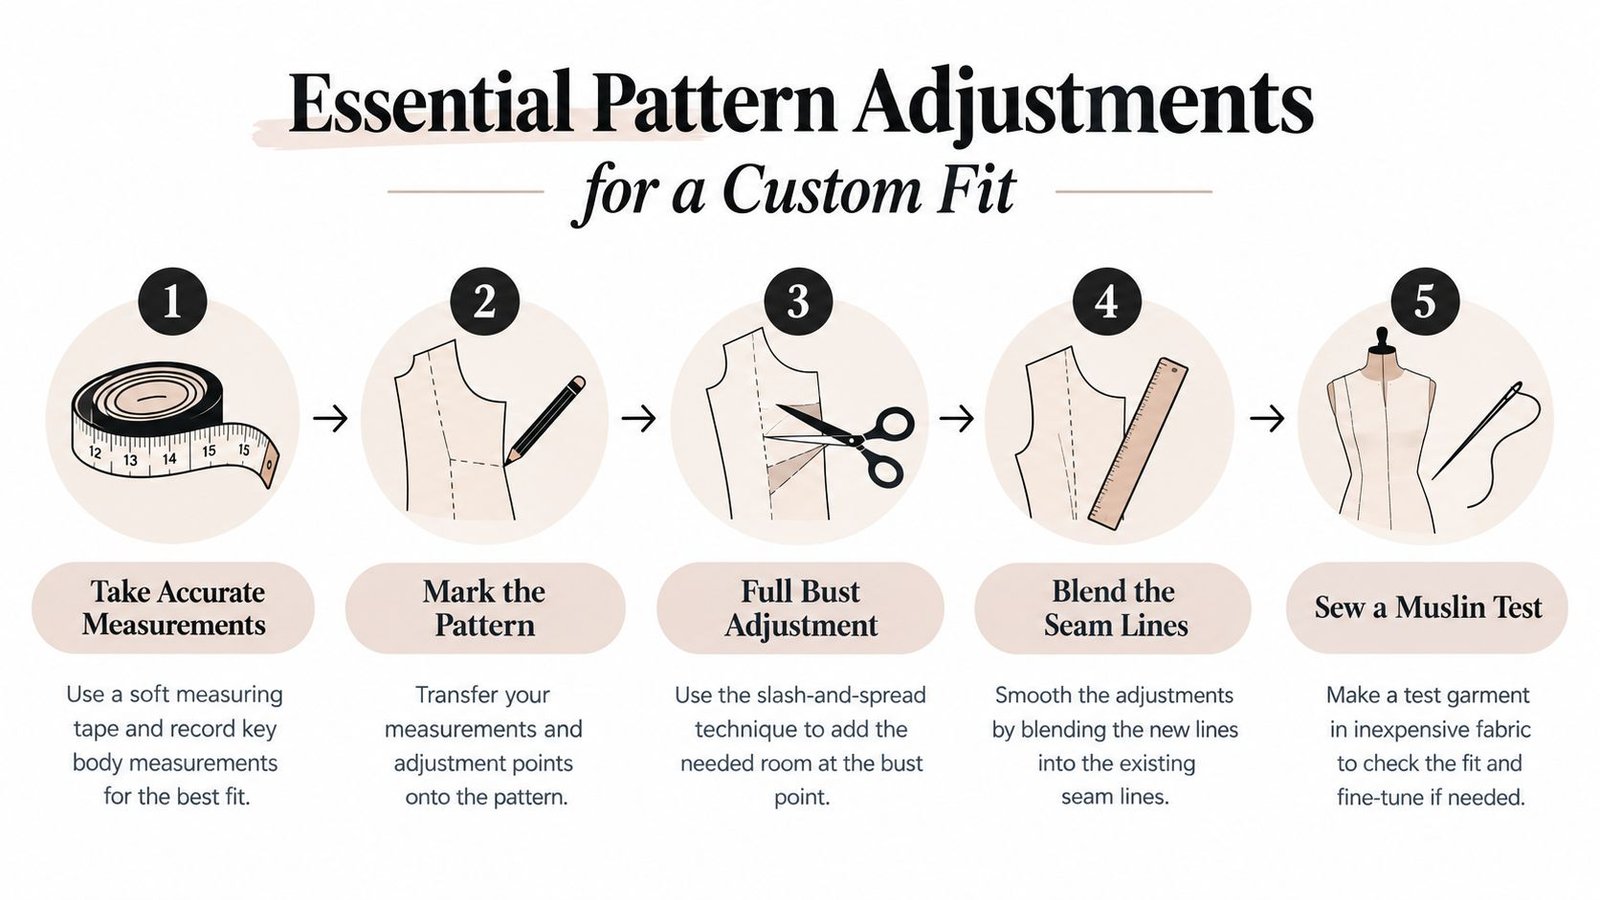
Making Essential Pattern Adjustments for a Custom Fit
Alter in an organised sequence. Length changes generally come before width changes when adapting a dress pattern, because changing length first protects the relationship between bust, waist, hip and hem as outlined in UK fitting guidance. If you widen the pattern first and then alter the length, you may distort the side seams and make the original adjustment harder to assess.
Correct length before width
Find the marked lengthen-or-shorten lines on the pattern. To shorten, cut across the line, overlap the sections by the required amount and tape them securely. To lengthen, separate the sections and insert paper, keeping the added amount even across the piece. Redraw the side seams with a smooth line, then true the hem.
If the pattern has no adjustment line, alter the lower section carefully and redraw both side seams and hem. Make a toile before deciding that the new length works. Sit down in it, check whether the hem remains level and confirm that the dress still has enough ease for movement.
Perform a full-bust adjustment
A full-bust adjustment can be necessary even in a loose shift. Use it when the bust area pulls or the centre front swings away, while the shoulder and upper chest fit correctly.
- Mark the bust point. Transfer the pattern's bust point, then place the adjustment point slightly away from the actual apex to avoid a dart ending directly on the fullest point.
- Draw the slash lines. Draw from the bust point to the side-seam dart, or to the side seam if the pattern is dartless. Add a line towards the armhole and another towards the hem.
- Slash and spread. Cut along the lines, leaving tiny hinges at the pivot points. Spread the pattern to add the required bust width and length, allowing the existing dart to open if the design has one.
- Redraw the dart. Move the dart intake so that the new dart points towards the adjusted bust point, then shorten the dart tip away from the apex.
- True the seams. Place paper behind the opened area, smooth the side seam and check that adjoining front pieces still match.
For a dartless shift, the spread creates extra room without necessarily creating a visible dart. The additional width may be absorbed into the side seam or converted into a subtle dart, depending on the design.
Fix a gaping sleeveless armhole
A gaping armhole doesn't always mean the whole bodice is too large. It may indicate excess length across the upper chest, a shoulder slope difference or an armhole curve that doesn't follow the body.
Pin out a small wedge from the armhole edge towards the bust area on the toile. Transfer that wedge to the paper pattern, keeping the side seam and shoulder smooth. Redraw the armhole with a French curve, then check the new curve against the facing. The facing must receive the same alteration or it won't fit the garment opening.
For forward shoulders, shift the shoulder seam slightly towards the front while maintaining the neckline and armhole relationships. Make the change on the toile first. Removing fabric from the back armhole without correcting the shoulder balance can create a tighter opening while leaving the posture problem intact.
Correct a swayback and rear hem hike
A swayback adjustment removes excess horizontal length from the lower back while preserving the side seam and hem width. On the toile, look for horizontal folds across the small of the back and a hem that rises towards the rear. Pin out the excess in a horizontal wedge, tapering towards the side seams, then transfer that reduction to the back pattern.
Blend the centre-back line and side seam smoothly. If the pattern has a centre-back zip, keep the seam straight enough for accurate zip insertion. After the alteration, make another toile and check the hem while standing naturally, not while pulling the dress into place.
The goal isn't to make every line perfectly flat. The goal is to remove the drag that shows where the pattern and body disagree.
Sewing Techniques for a Professional Finish
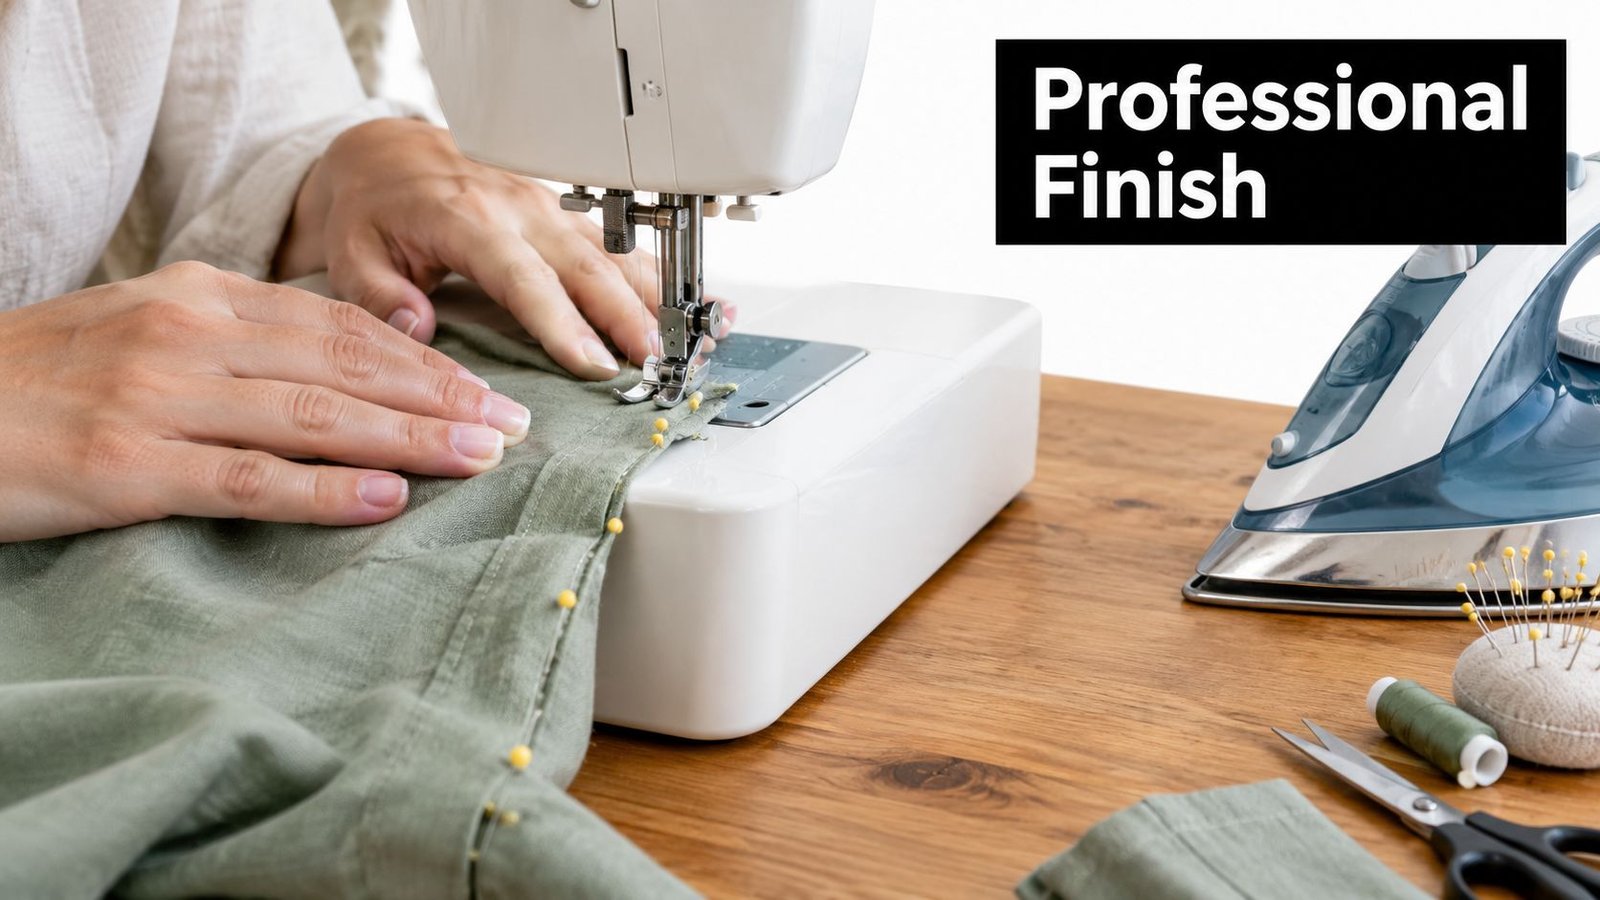
A well-shifted pattern can still produce a disappointing dress if the construction is rushed. The unbroken surface of a shift makes uneven pressing, a rolling facing or a wavering hem especially obvious, so treat each stage as part of the fit.
Stabilise before the fabric moves
Staystitch curved necklines immediately after cutting, following the direction recommended by the pattern. The neckline often sits partly on the bias, and handling can stretch it before the facing is attached. Staystitching won't rescue a badly stretched edge, so keep the piece flat and avoid lifting it by the neckline.
Press every seam as you sew. Pressing isn't decoration, it sets the seam allowance and clarifies whether the garment is developing unwanted fullness. A tailor's ham helps shape curved bust and shoulder seams without flattening them.
An invisible zip needs accurate preparation. Fuse a narrow strip of lightweight interfacing behind a delicate or unstable side seam if the fabric needs support, then press the zip teeth away from the seam line before stitching. Use an invisible-zip foot if available, but don't rely on the foot alone. Match the waist and underarm seams, baste first if the fabric is slippery, and check the zip operation before finishing the seam below it.
Keep facings inside
Understitch the seam allowance to the facing after attaching the neckline or armhole facing. Clip curves, grade bulky seam allowances and press the facing towards the inside before understitching. The stitching stops the facing rolling to the outside and creates a cleaner edge.
For stable cotton, overlocking or a neat zigzag may be sufficient. French seams can work beautifully in lighter fabrics, but they may create too much bulk in denim or at the underarm. Bias-bound seams suit unlined garments and add a polished internal finish, though the binding must not pull the seam off grain.
The hem needs to match the fabric. A narrow turned hem works well with a fluid cloth, while a deeper hem may help a stable fabric retain its shape. Let a drapey dress hang before marking the final hem, then measure from the floor or use a fitting assistant to check that the edge is level.
This short visual guide is useful when you want to compare the sequence of machine sewing, pressing and finishing in practice:
A professional finish comes from repetition of small checks. Trim thread tails, press without stretching, grade thick intersections and inspect the garment inside out. If the lining or facing is fighting the outer dress, fix the tension before hemming rather than hoping the final pressing will hide it.
Conducting Final Fit Checks Before Wearing
Put the finished dress on with the shoes and undergarments you expect to wear. Stand naturally, then sit, walk and reach forward. A shift should move with you without dragging the shoulder seam forward or forcing the centre front away from the body.
Check the garment in this order:
- Centre front and back: Both lines should hang vertically rather than swinging towards one side.
- Shoulders: The seam should sit at the shoulder edge without collapsing towards the front or back.
- Neckline: Look for gaping, choking or a neckline that rises when you move.
- Armholes: Raise your arms and reach forward. The dress shouldn't pull the whole body of the garment upwards.
- Side seams: They should fall in a consistent direction, not twist towards the front or back.
- Drag lines: Horizontal folds usually indicate excess or insufficient length, while diagonal folds often point towards width, posture or balance issues.
- Hem: Check it while standing and sitting. A raised back or dipped front identifies where to revisit the toile.
The recent analysis of women's body scans described only 19% matching the bust, waist and hip measurements used by high-street clothing, while 80.88% had a C cup or larger, as discussed in this analysis of clothing fit and body-shape variation. Those figures reinforce a practical truth: a technically finished dress can still need personal adjustment.
For visual planning, tools that show how an outfit image may be represented can offer inspiration, such as this overview of how Vtry AI transforms outfit imaging. It doesn't replace a toile or a fitting check, but it can help you assess proportion, colour and styling before committing to a final version.
Keep notes on what you changed and how the dress behaved after wearing. Your next dress pattern shift should start from that evidence, not from the size you happened to cut last time.
More Sewing offers quality cottons, viscose and Tencel blends, jerseys, denims, ex-designer deadstock, haberdashery and ready-to-sew kits for fitting-led dressmaking projects. Visit More Sewing to order fabric swatches and practical supplies, or drop into the Worthing shop for help choosing cloth that suits your adjusted shift pattern.
