
Guides
Hook & Eye Fasteners: A Complete Sewing Guide
You've finished the zip, pressed the waistband, and tried the garment on for that last satisfying check. Then you reach the closure and realise the whole piece depends on one tiny bit of haberdashery. A button looks bulky, a zip would spoil the line, and leaving it unsecured isn't an option. That's where hook & eye fasteners earn their place.
Most of us first think of them as a practical extra at the top of a zip or inside a waistband. In good dressmaking, though, they do more than fasten two edges together. They keep a neckline neat, stop strain at the waist, and give a garment that clean, finished look that separates homemade from handmade.
A well-sewn hook and eye doesn't call attention to itself. That's the point. It sits flat, closes smoothly, and supports the garment without distorting the fabric. When it's chosen badly or stitched badly, you notice it at once. The edge twists, the closure gaps, or the hook pulls loose just when the garment is under strain.
The Unsung Hero of Your Sewing Box
A hook and eye is often the last thing sewn on, but it should never be an afterthought. It's the detail that lets a skirt waistband meet properly, holds a blouse neckline in place, or gives the top of a zip a more polished finish than machine stitching alone ever can.
Where this tiny fastener makes a big difference
Think about the garments that need control without bulk. A fitted skirt usually needs the waistband to sit firm without adding a visible button. A dress with a lapped back opening often looks cleaner with a concealed fastening. A collar opening may need just enough hold to keep the shape, without the stiffness of a button stand.
That's why experienced dressmakers keep several kinds of hook & eye fasteners to hand. They solve problems that other closures don't solve neatly.
Practical rule: If you want the closure to disappear visually but still hold under strain, a hook and eye is often the right answer.
They're also useful where the closure only needs a short point of fastening. At the top of a zip, for instance, the fastener helps keep the edges aligned while taking some strain off the opening. On waistbands, it can secure the edge close to the body without the extra depth of a button and buttonhole.
Why they read as professional
Small details change how a garment feels when worn. If the top edge stays flat, the waistband doesn't spring apart, and the neckline closes without fuss, the whole make feels better. That's why hook and eyes turn up so often in precisely fitted pieces, occasionwear, lingerie, and everyday dressmaking alike.
A few places where they're especially useful:
- Waistbands: They keep the top edge firm and reduce gaping.
- Necklines: They give a discreet closure at the back or side.
- Zip tops: They support the opening and tidy the finish.
- Lapped openings: They bring edges together without adding visible hardware.
The best part is that they're simple once you understand what each type is for, how to match the size to the fabric, and how much movement to leave in the stitching. That small bit of know-how makes all the difference.
Understanding Hook and Eye Varieties
A hook and eye can look almost identical in the packet and behave very differently once it is sewn into a garment. We see this most often with waistbands that spring open, blouse necklines that sit stiffly, or delicate fabrics marked by a fastening that is too heavy. The fastener was not faulty. The type was wrong for the job.
The main types you'll meet
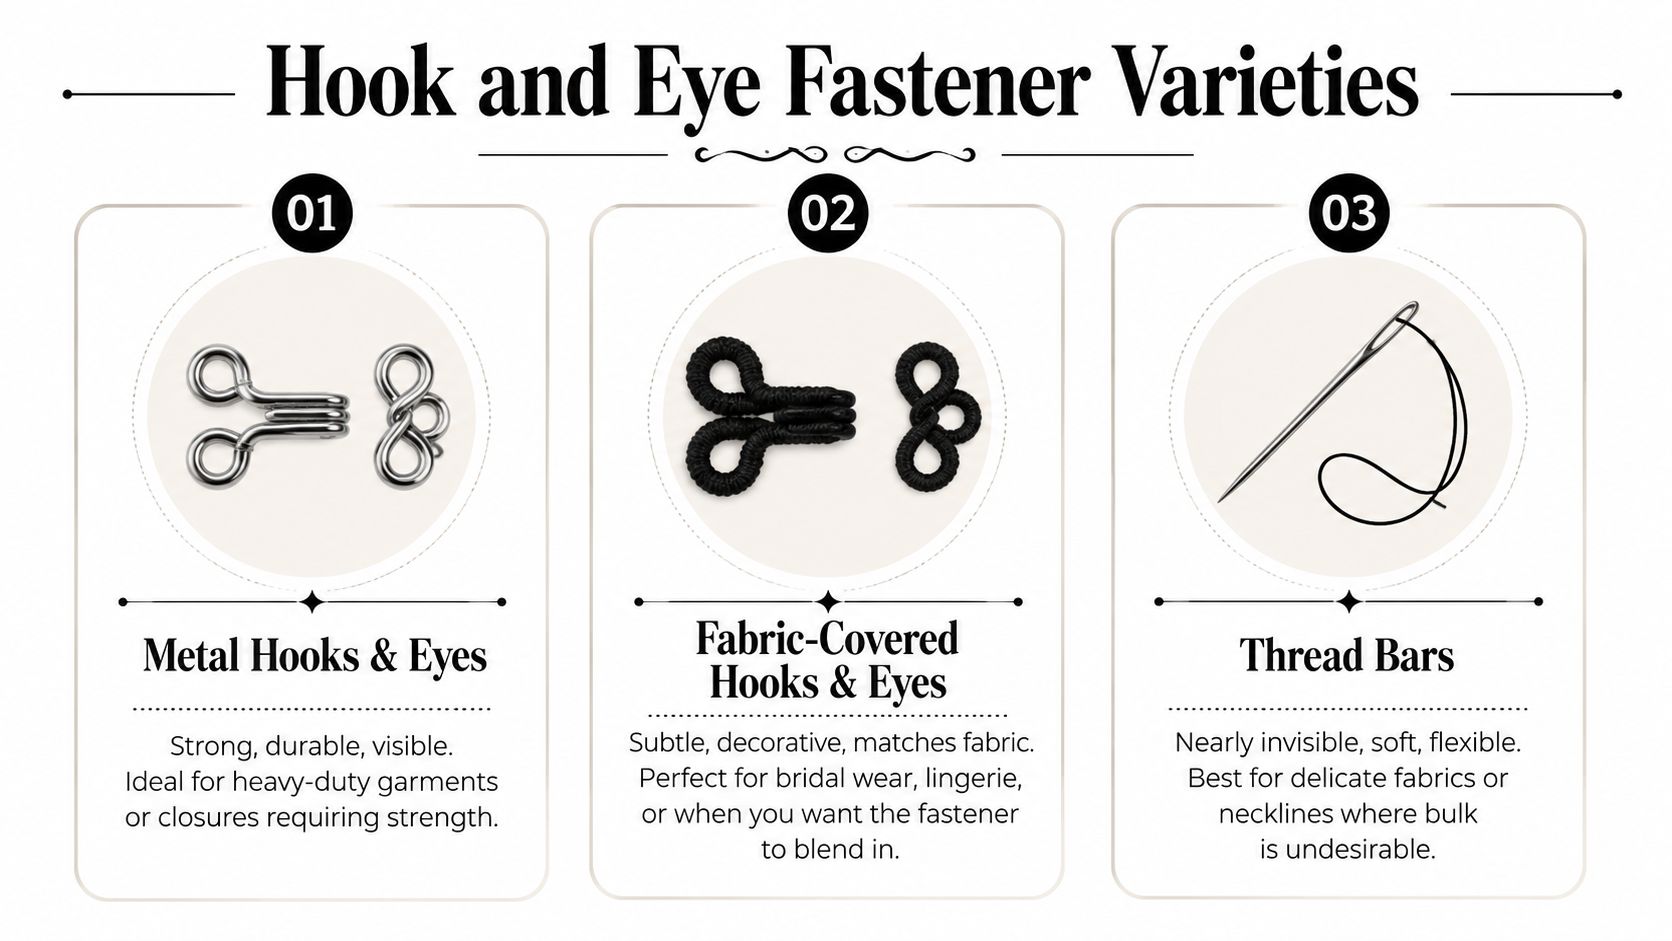
Metal sew-on hooks and eyes are the workhorse option for dressmaking. They suit areas that need a firm close and regular wear, such as waistbands, cuffs, neck openings, and the top of a zip. They are easy to stitch securely, and they tolerate pressing and handling well.
Fabric-covered hooks and eyes give a softer finish. We recommend them where the fastening may be seen, or where bare metal would feel too harsh against the look of the garment. They are a good choice for special occasionwear, finer blouses, and more decorative makes, though they are usually less hard-wearing than plain metal versions.
Thread bars are lighter and more flexible. They work well on delicate fabrics and in places where a rigid metal eye would show through or create a hard edge. They do need careful stitching, because too much thread tension can make the closure pull tight and distort the opening.
Eyes, bars, and how the shape affects the hold
The eye matters as much as the hook.
- Round eyes suit light-duty closures where only a small loop is needed.
- Straight eyes or bars help garment edges meet more cleanly.
- Hook-and-bar styles are often the better choice for waistbands and other areas that take strain.
For garment construction, hook and eye fasteners fall under UK commodity code 830810, defined as hooks, eyes and eyelets of base metal used for clothing, and they are commonly lacquered or nickel-plated to prevent corrosion according to Tailor Mouse's hook and eye fastener guide. In practice, that finish helps the fastening cope with wear, pressing, and repeated handling without roughening or discolouring as quickly.
Why bar eyes often hold better
A bar-style eye usually has a slight curve, and that shape has a purpose. The hook is meant to sit into the concave side so it stays put more securely under pull. On a fitted skirt or trouser waistband, that small detail can make the difference between a closure that feels settled and one that works loose during wear.
If the bar is sewn on the wrong way round, the hook may still catch, but it will not seat as firmly.
We check this before stitching the second side down, especially on higher-strain openings. It is a small step, but it gives a more professional result and saves unpicking later.
Choosing the Right Fastener for Your Fabric
Choosing the size is where many home dressmakers hesitate. The packet may say very little, and the sizes can look deceptively similar until you hold them against your fabric. The easiest way to choose is to match the fastener not just to fabric weight, but to the job the garment edge has to do.
Start with the size range
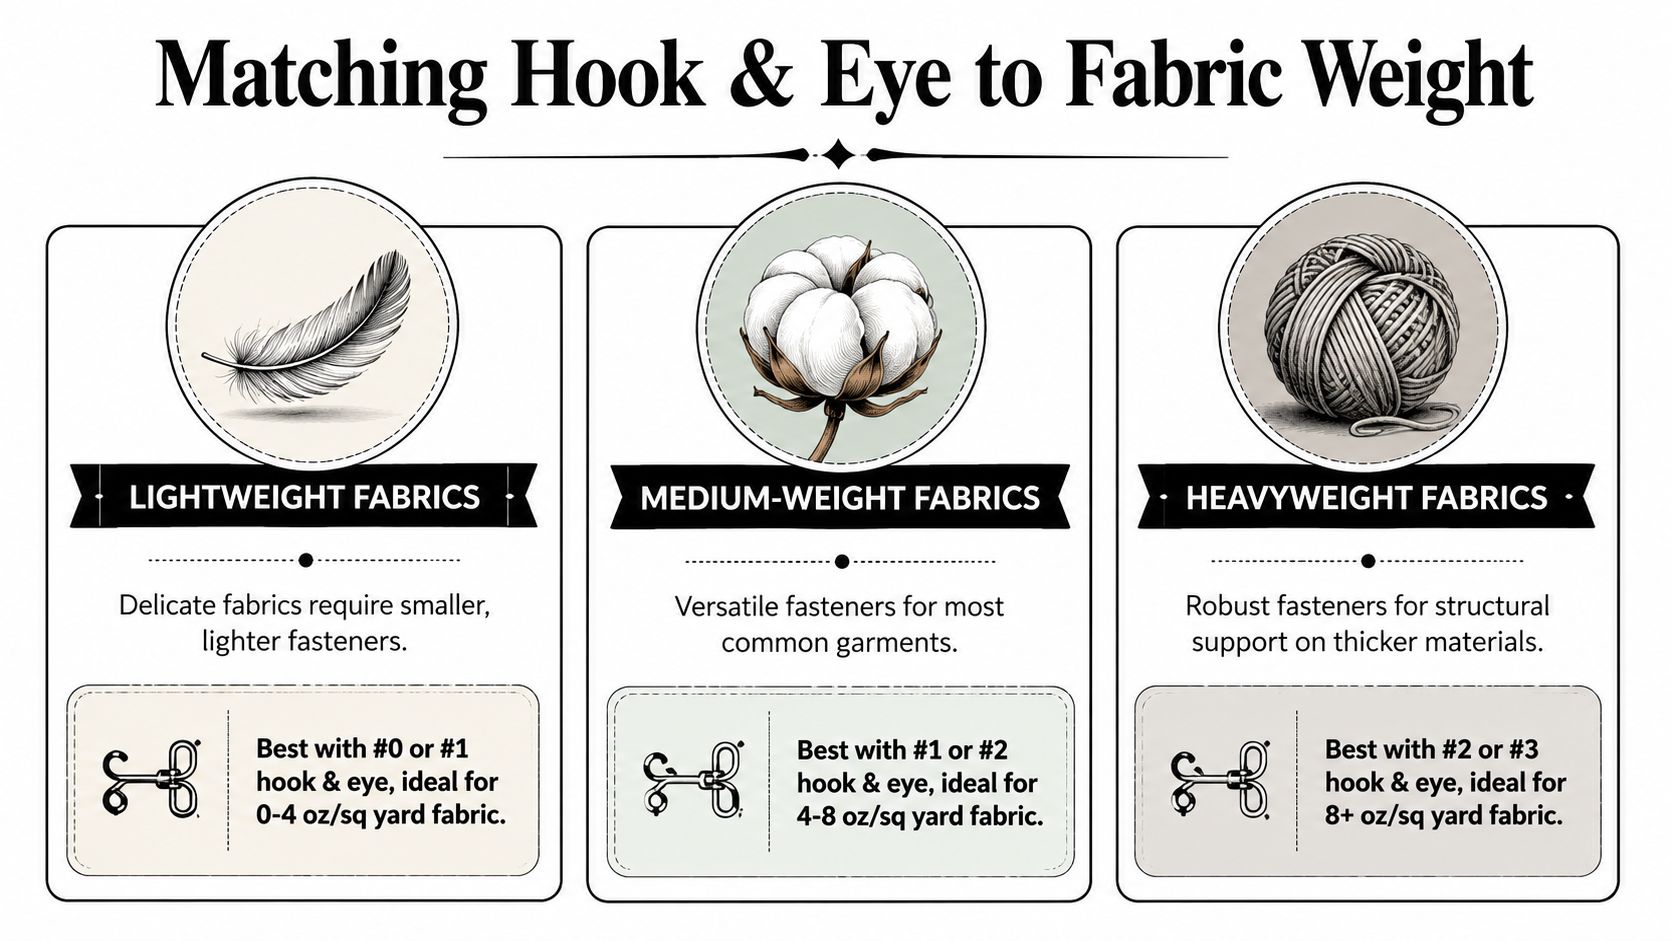
Hook and eye fasteners are made in four standard sizes, 0 to 3, with size 0 the smallest for delicate fabrics and size 3 the largest for heavier-duty use, as set out in WAWAK's hook and eye size chart.
That same size guide notes that size 1 measures 6mm × 7mm and is often recommended for mid-weight wovens, while size 2 suits denims. Those are useful starting points when you're standing at the cutting table with your fabric and trying to avoid a closure that's either too weak or too bulky.
A practical matching guide
Here's the way we'd think about it in dressmaking terms:
| Fabric or project | Best starting point | Why |
|---|---|---|
| Fine silk blouse neckline | Size 0 | Small enough to stay discreet |
| Cotton dress or viscose waist seam | Size 1 | Balanced for mid-weight fabric |
| Denim skirt or sturdier Tencel blend | Size 2 | Better suited to firmer cloth |
| Heavy wool coat or weighty outerwear | Size 3 | Stronger for substantial pull |
The point isn't to memorise every size. It's to notice the relationship between fabric bulk, garment strain, and fastening scale.
What works and what doesn't
A few common pairings make sense straight away:
- Light fabrics with small hooks: Better for blouses, slips, and refined necklines.
- Mid-weight wovens with size 1: A sensible default for many dresses and skirts.
- Denim and heavier bottoms with size 2: More reliable where the fabric resists folding.
- Coating and structured outerwear with size 3: The closure needs to cope with the garment's own weight.
What doesn't work is using a tiny fastening on a high-strain area and hoping extra stitches will compensate. They won't. Equally, a large hook on a delicate edge can telegraph through the fabric and spoil the finish.
Choose for strain first, visibility second. A fastening that disappears but fails isn't the right choice.
Perfect Placements for Hooks and Eyes
Some fastenings are all about decoration. Hook and eyes are about control. They're most useful where two edges need to meet cleanly, stay close, and open without fuss.
Waistbands, zip tops, and lapped edges
A classic place for a hook and eye is at the top of a skirt or trouser zip. The zip closes the opening, but the hook stabilises the very top edge where movement and pulling often happen first. That little extra hold can stop the waistband from separating when you sit down or bend.
Waistbands are another obvious home for them. On a skirt, especially one with a fitted waist and a side or back zip, the fastener lets the top edge meet neatly without the visible interruption of a button. On dress trousers, a sturdier hook-and-bar style often makes better sense because the closure needs to feel firm rather than delicate.
Lapped edges benefit too. If one side of the garment overlaps the other, a hook and eye can secure that overlap while staying almost invisible from the outside.
Necklines, collars, and finer finishes
Blouses and dresses often need a tiny fastening at the back neck, especially when the opening is too short for a zip or the style would be spoiled by a button loop. A small hook and eye keeps the neckline clean and doesn't distract from the garment shape.
Collars and cuffs can also benefit, particularly on dressier makes. The fastening can sit inside the edge and hold securely without creating bulk.
Useful examples include:
- Back neck openings on blouses: A discreet close with minimal show.
- Collar points: Helpful when you want a neat meeting edge.
- Cuffs on occasionwear: Less visual weight than a button in some designs.
- Bodice tops above a zip: Adds security where the opening gets handled most.
Lingerie and structured garments
Hook and eye fasteners come into their own in garments that need repeated fastening and reliable hold. Lingerie, corsetry-inspired pieces, and close-fitting bodices all rely on closures that can sit flat and keep tension under control.
The exact type matters here. A soft, nearly invisible finish may suit one project. A stronger metal fastening is better for another. The placement matters just as much. If the strain point is at the waist, side seam, or top edge, the closure needs to support that point rather than fight it.
A good placement feels natural when the garment is worn. If the edge twists or the fastening takes all the pull on its own, it's probably in the wrong spot or needs better support from the seam structure.
A Step-By-Step Guide to Sewing Fasteners
You finish a blouse, close the neckline, and the hook twists the edge out of line. Usually the problem is not the fastener itself. It is placement, stitch tension, or both. A neat result comes from careful marking, steady hand sewing, and leaving the metal just enough freedom to do its job.
Position the hook first
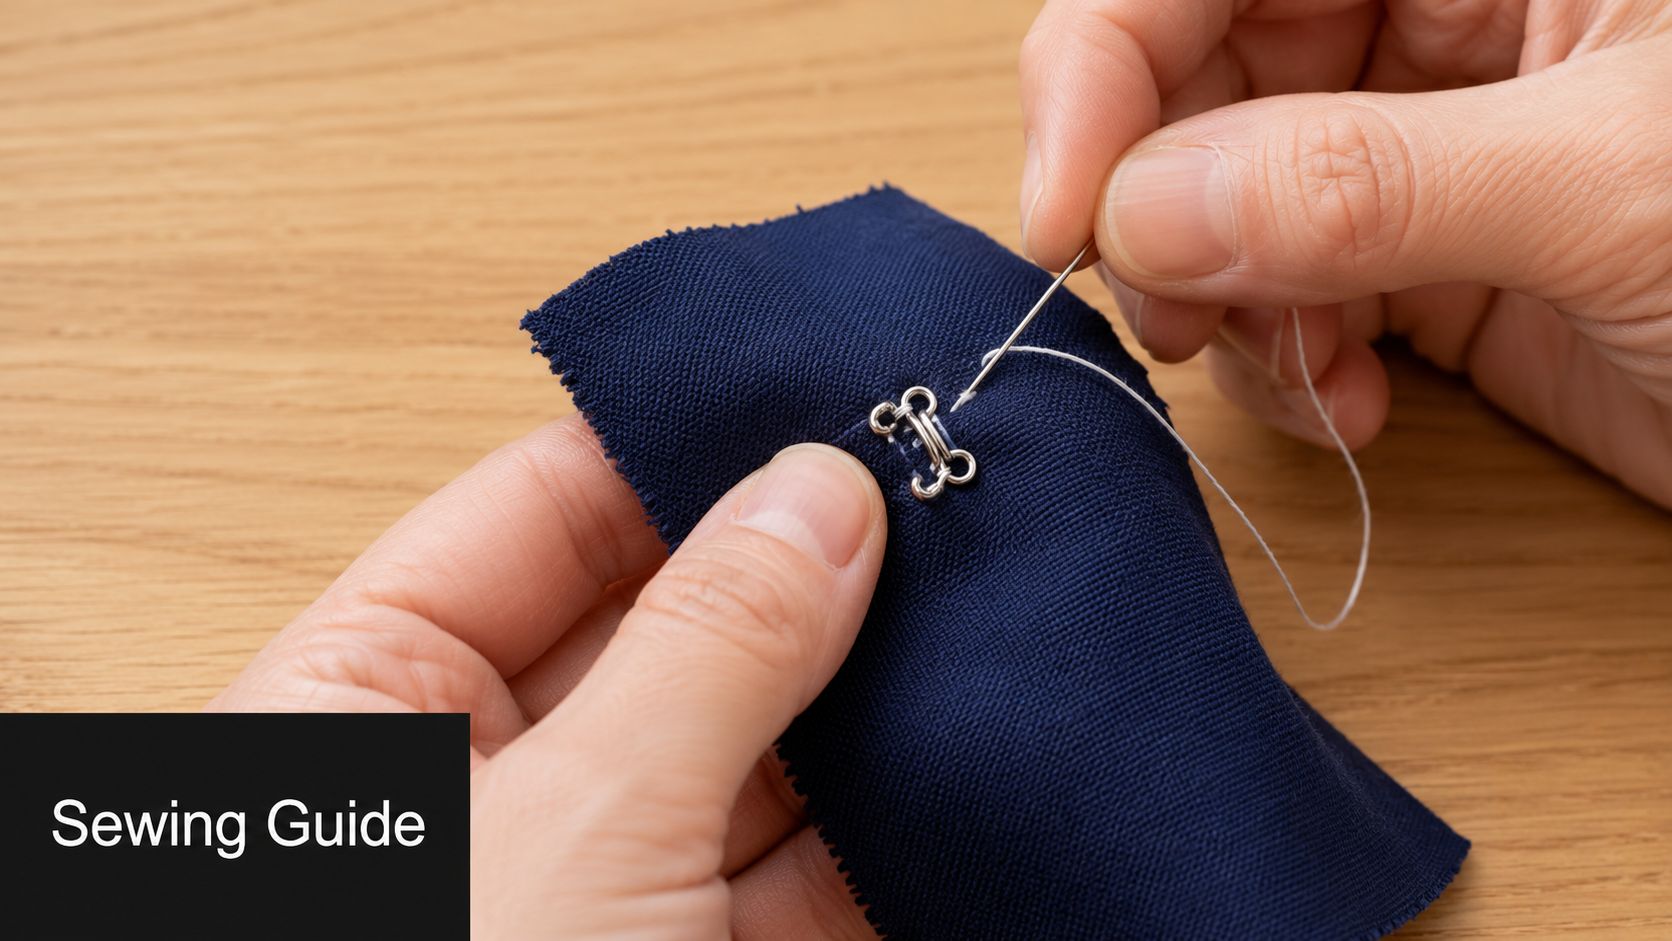
We start with the hook side because it sets the line of the closure. If the hook sits too close to the edge, it can show from the right side or force the garment edges apart. As shown in this hook and eye sewing demonstration on YouTube, setting the hook a little back from the edge helps the finished opening sit cleanly.
Use a fine hand sewing needle and thread that suits the fabric weight. On a delicate blouse, that means fine thread and light stitches. On a firmer waistband, use a stronger thread and take the time to anchor each ring properly so the fastener can cope with strain in wear.
A reliable working order is:
- Bring the garment edges together and check where they should meet when worn.
- Place the hook on the inside of the overlap, slightly back from the edge.
- Sew through the hook rings with small stitches, catching enough fabric for strength without showing on the right side.
- Check the edge after every few stitches so the hook stays flat and correctly aligned.
Secure it without strangling it
This is the part many sewists rush. The hook needs to be held firmly at the rings, but the stitches should not clamp the metal so tightly that it cannot sit naturally against the fabric.
A locking stitch is useful here because it builds strength exactly where the strain falls. We use it often on bodices, skirt openings, and waistbands that get opened and closed repeatedly. For lighter garments, the same method works well, just with finer thread and fewer bulky wraps.
Workshop note: If a hook feels stiff before the eye is even attached, the stitching is probably too tight.
For thicker fabric, avoid piling thread on top of itself. Bulk under the fastener can make the closure stand proud and feel uncomfortable against the body.
Mark and attach the eye or bar
Once the hook is sewn on, close it into the eye or bar and use that position to mark the second side. This gives a more accurate result than measuring by eye alone, especially on curved edges or soft fabric that shifts as you handle it.
The eye or bar should sit so the hook catches cleanly without dragging the edge sideways. In practice, that often means the eye extends a touch beyond the finished edge. Sew each side down neatly and test the closure before tying off. If the edges meet smoothly and open without resistance, the placement is right.
If you'd like to watch the hand movement and stitch sequence in action, this tutorial is a useful reference:
A professional finish usually comes from a few simple habits:
- Match the thread to the job: Fine thread for delicate fabrics, stronger thread for areas under pull.
- Keep stitches neat and purposeful: More stitches are not always better if they create bulk.
- Test the fastening before finishing off: Open and close it several times and watch how the edges sit.
- Trim thread ends cleanly: Leave the work tidy without cutting so close that the stitching loosens.
- Press around the area with care: Shape the fabric, but do not crush the metal into it.
Troubleshooting Common Hook and Eye Issues
The most common advice sewists hear is to stitch the fastener on as tightly as possible. That sounds sensible, but it often causes the very problems people are trying to prevent.
Why tight stitching can fail
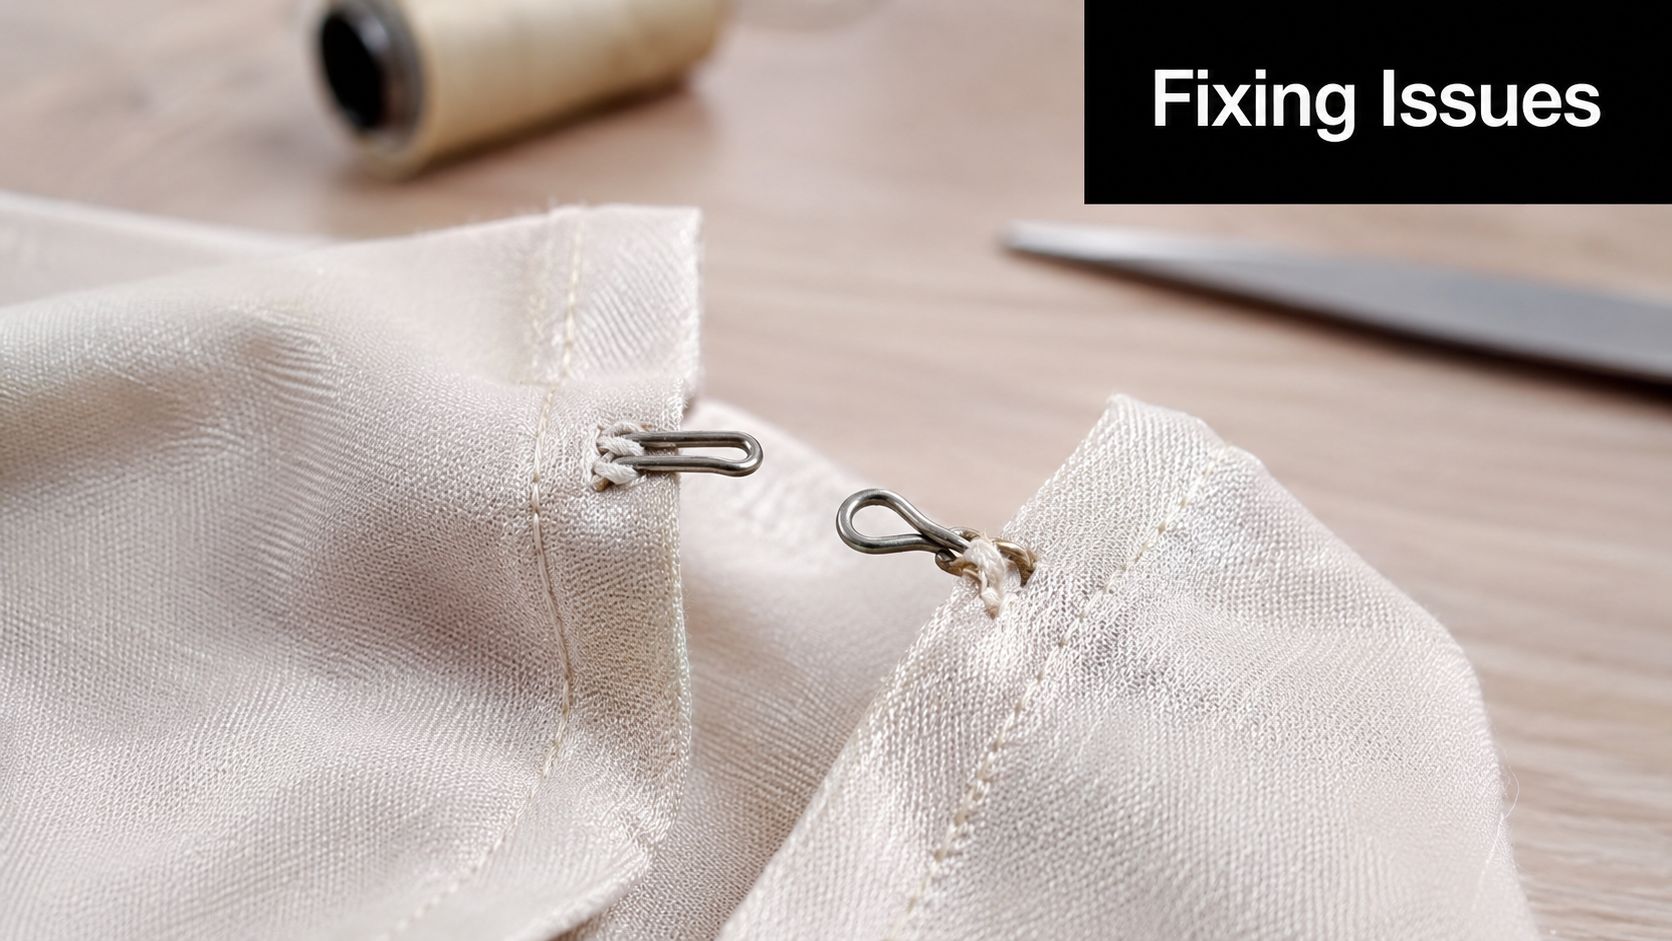
Expert guidance notes that the hook's head needs a “tiny bit of room to move” so it can slip into the eye easily, and that pulling stitches “super tight” can lead to binding or breakage, as described in this hook and eye guide discussing common sewing errors.
That's the piece many home sewists miss. A hook and eye isn't meant to be immobilised. It needs security at the stitching points, but also just enough freedom to engage and release without strain.
If the hook feels awkward to close, don't assume you need tighter stitches. Often you need slightly less tension and better placement.
Common problems and likely causes
| Problem | Likely cause | Better fix |
|---|---|---|
| Hook is hard to close | Stitches pulled too tight | Reseat and allow slight movement |
| Fastener snaps loose under pull | Wrong size or weak placement | Choose a stronger fastening or reinforce area |
| Closure gaps | Eye placed too far out or edge unsupported | Reposition for cleaner meeting edges |
| Fabric puckers around fastener | Too much tension in stitching | Sew flatter and distribute stitches more evenly |
Practical fixes that help
Sometimes the solution is mechanical rather than forceful. Try these:
- Reinforce the area first: On softer fabric, add support within the seam allowance before sewing the fastening on.
- Leave micro-looseness: The metal should be secure, but not strangled by thread.
- Use a thread shank effect on thicker cloth: A little space helps the fastening sit over bulk rather than drag against it.
- Check the closing path: The hook should travel into the eye smoothly, not at an angle.
One example: on a denim waistband, a fastening can fail even when it's stitched firmly because the cloth is thick and resistant. If the stitches clamp the hook tight against that rigid surface, the hook has to fight both thread and fabric every time it closes. A little movement often solves more than another layer of stitching.
Another example is jersey. If the edge stretches but the fastening area doesn't have enough support, the closure can distort the fabric. In that case, stabilising the area before sewing gives better results than sewing harder and tighter.
Your Guide to Buying Hooks Eyes and Alternatives
Buying the right hook and eye is easier once you stop thinking of it as a generic notion. The useful questions are simple. How much strain will this point take? How visible can the fastening be? Does the fabric need delicacy or firmness?
What to look for when buying
In the UK market, standard garment sizes 0 to 3 are commonly sold, with silver and black finishes widely available from local haberdashers and online sewing shops, as noted in this UK hook and eye product listing. That gives most home dressmakers plenty of choice for everyday garment sewing.
Black lacquered hooks can be useful on darker fabrics where a flash of silver would be distracting. Nickel-plated or silver-coloured finishes are a practical general option and often easier to spot while sewing on lighter fabrics.
A sensible buying checklist:
- Match the finish to the garment: Dark fasteners usually disappear better in dark cloth.
- Buy by project type: Keep finer sizes for blouses and dresses, sturdier ones for waistbands and coats.
- Inspect the shape: A cleanly formed hook and a properly shaped eye make sewing easier.
- Keep a small selection on hand: One packet rarely suits every make.
When an alternative is better
Hook & eye fasteners are excellent, but they're not the answer to every closure.
A sew-on snap can be better when both sides need to overlap flat and the fastening doesn't need the directional action of a hook. A button and loop may suit soft or decorative garments better, particularly where the closure is meant to be seen. For repeated rows of fastening, hook and eye tape can be more practical than sewing each one individually.
Choose the closure by the result you want:
- Use a hook and eye when you want a discreet, controlled fastening.
- Use a snap when you want a quick close with a flatter overlap.
- Use a button and loop when the closure should add to the design.
- Use tape-based options when the project needs multiple fastenings in sequence.
The takeaway for better results
The strongest sewing isn't always the tightest. The neatest closure isn't always the smallest. The best result usually comes from balancing three things: the garment's strain point, the fabric's behaviour, and the amount of visibility you can tolerate.
Once you understand that, hook and eyes stop being a last-minute add-on and start becoming a precise finishing tool. That's when they become useful.
If you're choosing supplies for your next blouse, waistband, coat or special project, More Sewing is a dependable place to find quality fabrics, practical haberdashery, and the kind of sewing essentials that help a handmade garment look properly finished.
