
You've bought a gorgeous length of viscose. It has that lovely drape, the sort that makes you think blouse, dress, swishy skirt, maybe wide-leg trousers. Then you get it onto the cutting table and it starts misbehaving at once. It slides off grain, the edges fluff up if you so much as look at them, and the first seam comes out looking a bit wrinkled and cross.
If that sounds familiar, you're in good company. In the shop, this is one of the fabrics people ask about most because it looks soft and easy to wear, but it can feel awkward and slippery under the needle. The good news is that viscose isn't impossible. It just needs a slightly different approach from cotton poplin or linen.
If you want to learn how to sew with viscose without it slipping or fraying, the answer isn't one magic trick. It's a chain of small choices that keep the fabric calm from the minute it arrives at home to the final hem. Get those choices right and viscose becomes much more cooperative.
The Beauty and Challenge of Sewing With Viscose
Viscose is one of those fabrics that wins hearts very quickly. You pick up a print in the shop and it feels cool, fluid, and elegant. It hangs beautifully, skims the body without stiffness, and gives simple patterns a softer, more expensive look. That's exactly why so many dressmakers love it for blouses, tea dresses, camisoles, loose trousers, and bias-cut garments.
Then the practical side begins.
You lay it out to cut and the fold won't stay where you put it. You pin one edge and another edge shifts. By the time you've cut your pieces, the corners don't quite match and a fine fuzz is already appearing along the raw edges. If you go straight to the machine with an ordinary setup, the fabric can pucker, creep, or feed unevenly.
Viscose rewards patience. Rush it, and it behaves badly. Support it properly, and it sews up beautifully.
I've seen this happen with everything from a simple shell top to a floaty wrap dress. The same maker who can sew a crisp cotton shirt with no trouble suddenly starts doubting their skills because viscose seems to have a mind of its own. Usually, it isn't the maker. It's the method.
The biggest shift is to stop treating viscose like a standard woven. We need to think about movement, grain stability, seam finishing, and how much handling each piece can tolerate. A loose sleeve head, for example, may be perfectly manageable in cotton, but in viscose it can stretch if it's left unsupported while you pin.
What makes it lovely also makes it tricky
A soft hand and fluid drape are the very things that cause trouble in the sewing room. The fabric doesn't have much resistance, so it slides during cutting and can distort while you're sewing. The raw edges also tend to fray quickly, which means delays between cutting and finishing can create more work later.
What usually works best
The projects that go most smoothly are the ones sewn in a deliberate order. Prepare the fabric carefully. Cut with control. Stabilise vulnerable edges early. Finish seams in a way that matches how much fraying the cloth wants to do.
That's the core secret. Not force. Control.
Preparation is Key to Taming Viscose
You wash a lovely length of viscose on a Saturday morning, hang it up, and by the afternoon it looks slightly longer on one side than the other. Then the doubt starts. Have you helped the fabric, or made the job harder before you have even laid out the pattern?
That is why “pre-wash it” is too blunt to be useful.
With viscose, a key question is whether pre-washing the full length will settle the fabric or distort it. For an everyday blouse, shirt, or loose dress, washing the yardage first is usually the safest choice. It gets rid of shrinkage surprises and removes some of the finish that can make the cloth feel slick and uncooperative.
Bias-cut styles need a more careful decision. A full length of soft viscose can drop, twist, or stretch while wet and drying, especially if it is very fluid. In those cases, I do not automatically treat it like a standard woven. I weigh up the fabric, the pattern, and how much of the garment hangs on the bias. Sometimes it is better to cut with a more generous seam allowance, sew the garment, then let the finished piece go through its first wash in a controlled way rather than asking the whole length to behave perfectly on its own.
That trade-off matters in UK sewing rooms because many home sewists want garments they can wash and wear, not pieces that only behave if they are babied. Shrinkage is one risk. Warping is the other. Good preparation balances both.
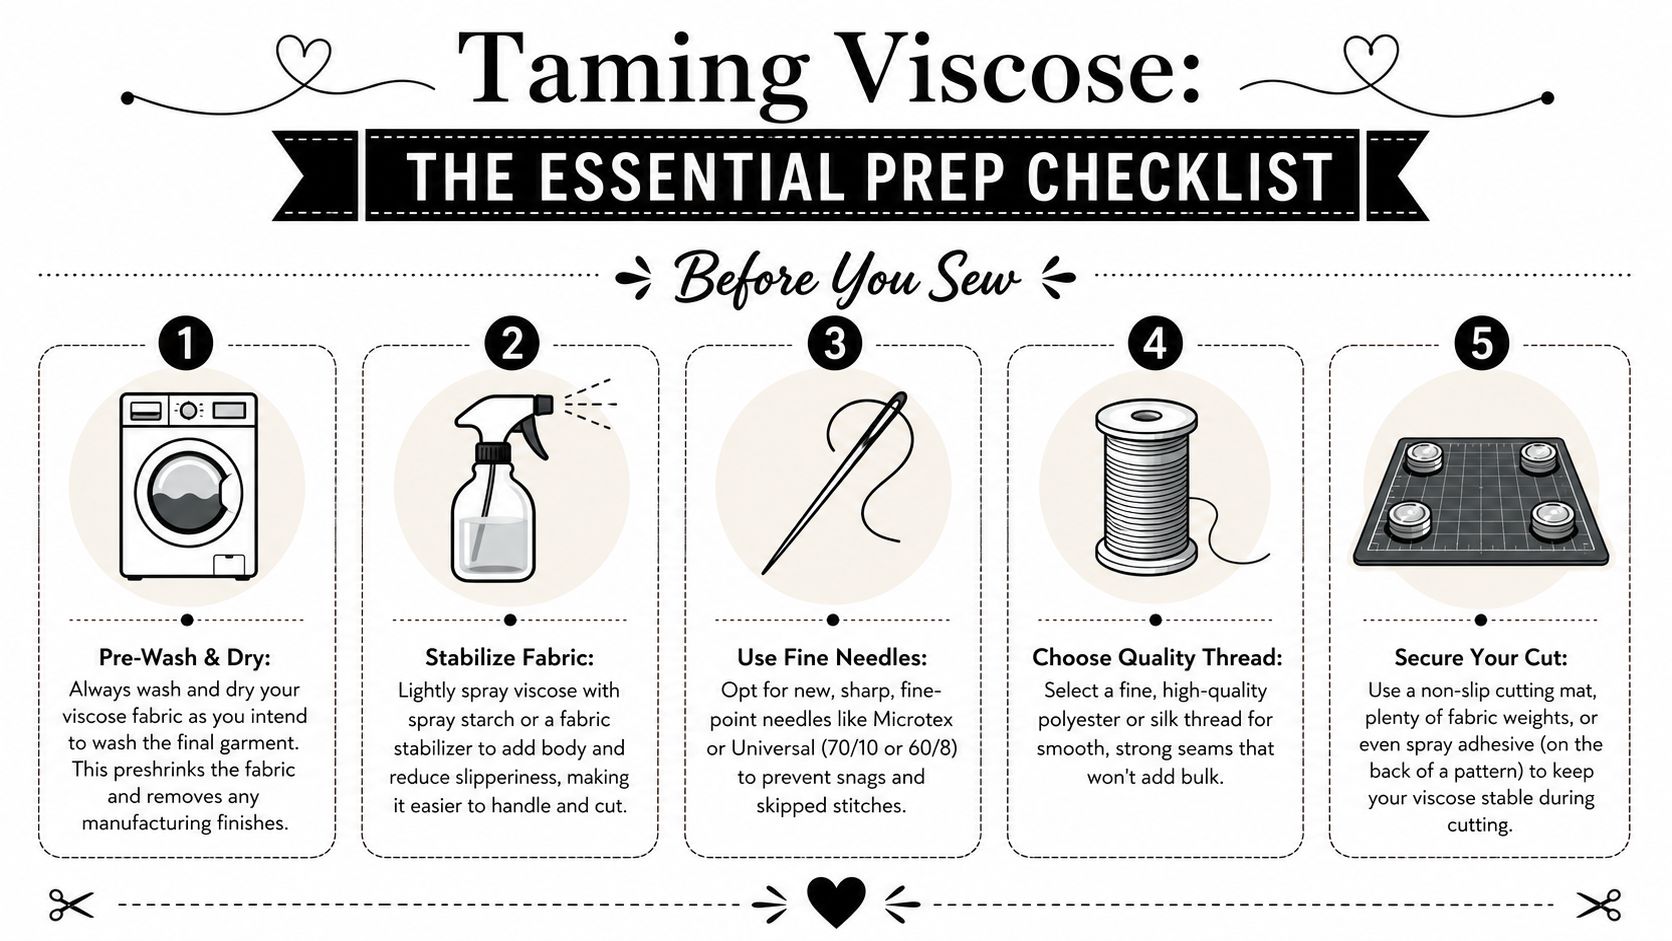
A simple rule helps. If the garment is cut mostly on the straight grain, pre-wash the fabric as you plan to wash the finished item. If the design relies on bias drape, pause and assess before you send the whole length through the machine.
Once you have made that choice, the handling matters just as much:
- Wash it as you intend to care for the garment: machine wash, hand wash, or delicate cycle. Match the intended care plan.
- Dry it completely before cutting: damp viscose can stretch from its own weight.
- Press it lightly before layout: a rumpled length is harder to measure accurately and easier to distort.
- Add temporary body if needed: a light mist of spray starch can steady very soft viscose for marking and cutting.
- Let it rest flat before you start: fabric that has been twisted in a bag or folded tightly often needs time to relax.
I use starch sparingly. Too much can make the fabric feel crisp in a misleading way, and then you lose the sense of how it really wants to hang. A light spray is enough to calm the cloth without turning it into cardboard.
If I am sewing a relaxed summer top, I usually pre-wash, dry, press, and then give the fabric a little support if it still wants to slither about. If I am making a bias-cut slip skirt, I handle the yardage far less and avoid unnecessary lifting and refolding. That one change can save a lot of grief later.
Before you cut, check five things:
- Does the washing method match how the finished garment will be cared for?
- Is the fabric fully dry and lightly pressed?
- Does it need a small amount of temporary stabiliser?
- Will a bias-cut project benefit from extra seam allowance and later washing instead of pre-washing the whole length?
- Has the fabric had time to rest flat before measuring and cutting?
This stage is quiet work, but it pays for itself. Get the preparation right and viscose feels far less temperamental from the very start.
Achieving Accurate Cuts on Shifty Fabric
You smooth the viscose on the table, line up the pattern, and by the time you reach for the scissors the edge has crept two centimetres off grain. That is the moment many viscose projects start to go wrong. If the cut is off, every step after that becomes a tidy-up job, from mismatched necklines to twisted side seams and uneven hems.
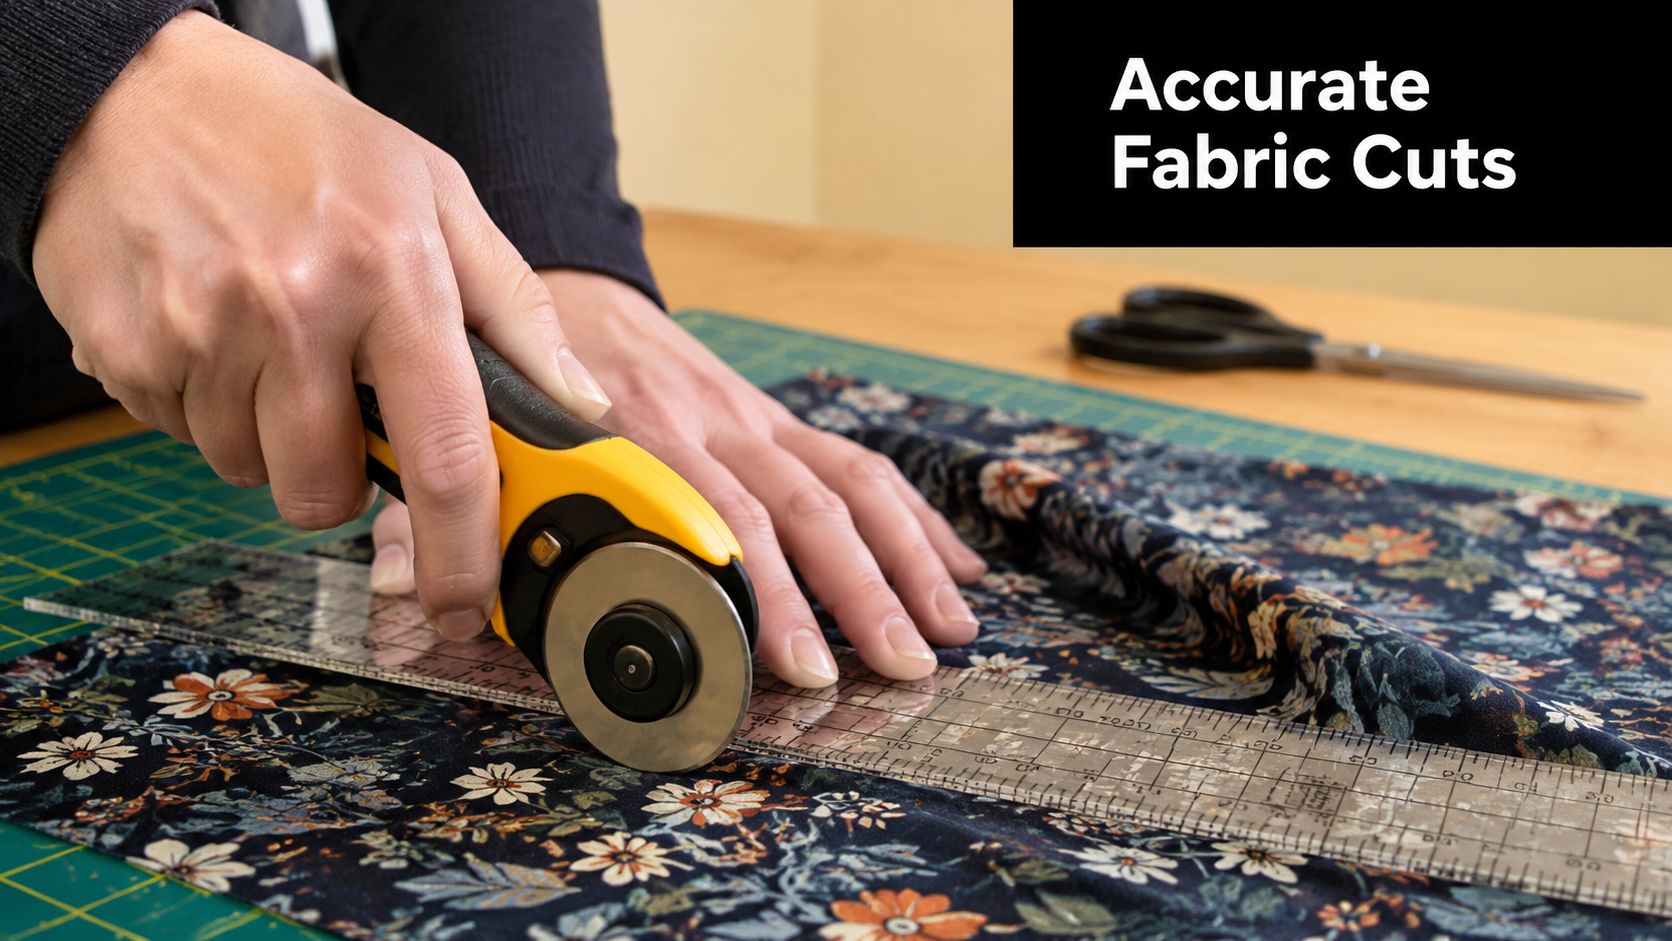
The goal is to keep the cloth flat, supported, and as undisturbed as possible. I treat viscose a bit like a fussy customer in the shop. Handle it gently, give it enough space, and it behaves far better.
Why flat cutting gives better results
A rotary cutter usually gives the cleanest result because the fabric stays on the table while you cut. Dressmaking shears can still work, especially for small notches or awkward inner curves, but they lift the cloth with every snip. On a steady cotton that is manageable. On viscose, that lift is often enough to nudge the grain out of place.
Single-layer cutting is slower, but it is usually the safer choice. The top and bottom layers of viscose rarely stay perfectly matched for long, and a tiny shift at the cut stage can become a much bigger problem once you start sewing.
Here is the practical trade-off:
| Cutting method | Best use on viscose | Main drawback |
|---|---|---|
| Rotary cutter and mat | Most accurate flat cutting | Needs space and a cutting mat |
| Fine shears | Useful for tight curves and small details | Lifts fabric as you cut |
| Folded double-layer cutting | Quicker on stable weaves | Layers can creep apart |
| Single-layer cutting | Best for precision and matching print or grain | Takes longer |
If I am cutting a simple blouse in a stable printed viscose, I might fold and cut carefully. If I am cutting a bias skirt or anything with a long side seam, I cut in a single layer and accept the extra time. It saves more time than it costs.
Use weights first, pins sparingly
Pattern weights hold the paper in place without dragging the fabric about. Fine pins still have their place, but keep them inside the seam allowance and use only as many as you need. Too many pins can create little ridges, and those ridges throw off your cutting line.
Support matters just as much. Keep the whole width of fabric on the table or cutting mat. If one end is hanging off the edge, its own weight can pull the section you are trying to cut out of shape. That is especially noticeable on long bodice fronts, sleeves, and any piece cut on the bias.
The tissue paper trick that steadies lively viscose
If the fabric keeps skating about, lay tissue paper underneath before you place the pattern on top. The tissue adds grip, steadies the lower layer, and helps the rotary cutter move cleanly without pushing the cloth sideways.
This is one of the most useful tricks for soft challis, lightweight woven viscose, and anything with a slippery finish. I also use it when cutting narrow straps or facings, where even a small wobble shows up later.
For example, a sleeve cut on the cross-grain can start shifting away from the ruler just as you reach the curve. Tissue underneath often keeps that edge still long enough to get a clean, accurate shape.
A quick visual demo helps if you haven't tried that setup before:
Small habits that make a big difference
- Cut one piece, then check it before moving on: It is easier to correct a layout issue early than after every piece is cut.
- Mark notches and dots with care: Tailor's tacks, chalk, or tiny clips in the seam allowance are often kinder than lots of handling.
- Keep your ruler honest: If you are using a striped or bordered viscose, check the grain or print line again before each long cut.
- Work soon after laying out: The longer slippery fabric sits, the more chance it has to shift.
Accurate cutting is where control starts. On viscose, a calm half hour at the table often makes the whole project feel easier.
Calibrating Your Machine for Flawless Stitches
You can cut viscose beautifully and still lose the battle at the machine. The first few stitches pucker, the seam twists, and the fabric tries to dip into the needle plate. That is usually a setup problem, not a sewing problem.
Viscose shows every small mismatch. A slightly worn needle, too much presser foot pressure, or a stitch length that suits poplin better than a soft challis can all leave the seam looking wavy. I treat the first scrap test as part of construction, especially if the fabric has already been pre-washed and softened. In UK sewing rooms, that matters more than many guides admit, because a line-dried viscose can behave quite differently from the same cloth pressed and flat straight off the roll.
Start with the needle, thread, and feed
For woven viscose, fit a fresh Microtex 70/10 or another fine sharp needle. For viscose jersey, switch to a 75/11 ballpoint so the knit structure is not snagged. If the needle has sewn even one demanding project already, I change it. Viscose is quick to expose a tired point.
Thread matters as well. A decent polyester thread usually gives steadier tension than cotton on this fabric, particularly on lightweight dress viscose that shifts as it feeds. If your machine allows it, reduce presser foot pressure a touch and test again. That one adjustment often improves feeding more than people expect.
Viscose Machine Settings Quick Reference
| Setting | Recommendation for Woven Viscose | Why It Works |
|---|---|---|
| Needle | Sharp Microtex or 70/10 | Pierces cleanly and helps prevent snags and skipped stitches |
| Stitch length | 1.5 to 2.0 mm | Gives better control on lightweight fabric |
| Test sample | Always sew on scraps first | Lets you catch puckering before it appears on the garment |
| Presser foot | Walking foot if available | Helps feed both layers evenly |
| Edge control | Stay-stitch every edge just inside the seam allowance | Helps stop stretching and distortion |
A 1.5 to 2.0 mm stitch length is a sound starting point for most woven viscoses. Very fine fabric often prefers the shorter end of that range. If the seam starts to look crowded or stiff, lengthen slightly and test again rather than forcing one setting to suit every cloth.
Control the edge before it stretches
Stay-stitch necklines, armholes, and any bias edge as soon as the pieces are cut. Sew just inside the seam allowance so the stitching stays hidden in the finished seam. On a standard 5/8 inch seam allowance, that means stitching a little inside that line, not right on the cut edge.
This is especially useful on pieces that were not pre-washed because you were protecting the grain or a bias-cut layout from distortion. In that case, the fabric may feel a little crisper while sewing but still drop and grow on the bias once handled. Stay-stitching keeps those lively edges in check before they have a chance to misbehave.
A walking foot can help if the top layer is creeping ahead of the lower one, but it is not the answer every time. On some very light viscoses, the added bulk of the foot can make close control around curves feel clumsy. I use one for long seams on slippery cloth, then swap back to a standard foot for detail work if I want better visibility.
Stay-stitch necklines, armholes, and any bias edge as soon as the pieces are cut. Don't wait until after they've been carried round the sewing room.
Small machine tweaks that save a lot of unpicking
If the fabric is being pulled down into the needle plate at the start of a seam, begin a few millimetres in from the edge on your test piece, or hold the thread tails firmly for the first stitch or two. A leader scrap can help as well. Sew from the scrap straight onto the garment piece to support the fabric as it starts feeding.
If the seam looks peaky, do not go straight for the iron and hope for the best. Test in this order. Needle first, then stitch length, then upper tension, then presser foot pressure if your machine has that option. Change one thing at a time so you can see what solved it.
On a lightweight viscose blouse, I often stay-stitch first, sew one shoulder seam, press it, then test the side seam on a leftover strip from the same fabric. If that sample lies flat and the stitches look clean on both sides, I carry on. If it tunnels or ripples, I stop there. Five minutes at the machine is far quicker than unpicking an armhole in fabric that frays the moment you look at it.
Creating Fray-Proof Seams and Perfect Hems
You can sew a lovely viscose dress, hold it up at the end, and find the inside already shedding threads and the hem sitting in soft waves. That is usually the point where sewists decide viscose is the problem. More often, the finish is.
Raw edges on viscose start breaking down early, especially on lightweight weaves and anything with a loose structure. Choose your seam finish before you sew the first long seam, because the right finish depends on the garment, the fabric weight, and how much bulk the style can tolerate.
The best seam finish if you have an overlocker
An overlocker is often the quickest answer for everyday viscose. It keeps the edge under control, it washes well, and it suits garments that do not need a couture inside.
I use it for shirts, simple dresses, skirts, and pyjama bottoms where I want a clean result without spending extra time on enclosed seams. The trade-off is appearance and, sometimes, a little show-through on very pale or very fine cloth. On a whisper-light viscose blouse, a dense overlock can look heavier than the fabric itself. In that case, I switch methods.
French seams for a cleaner inside
French seams are excellent on lightweight viscose where fraying is persistent and the inside of the garment may be visible. They give a neat finish, feel good against the skin, and hold up well in the wash.
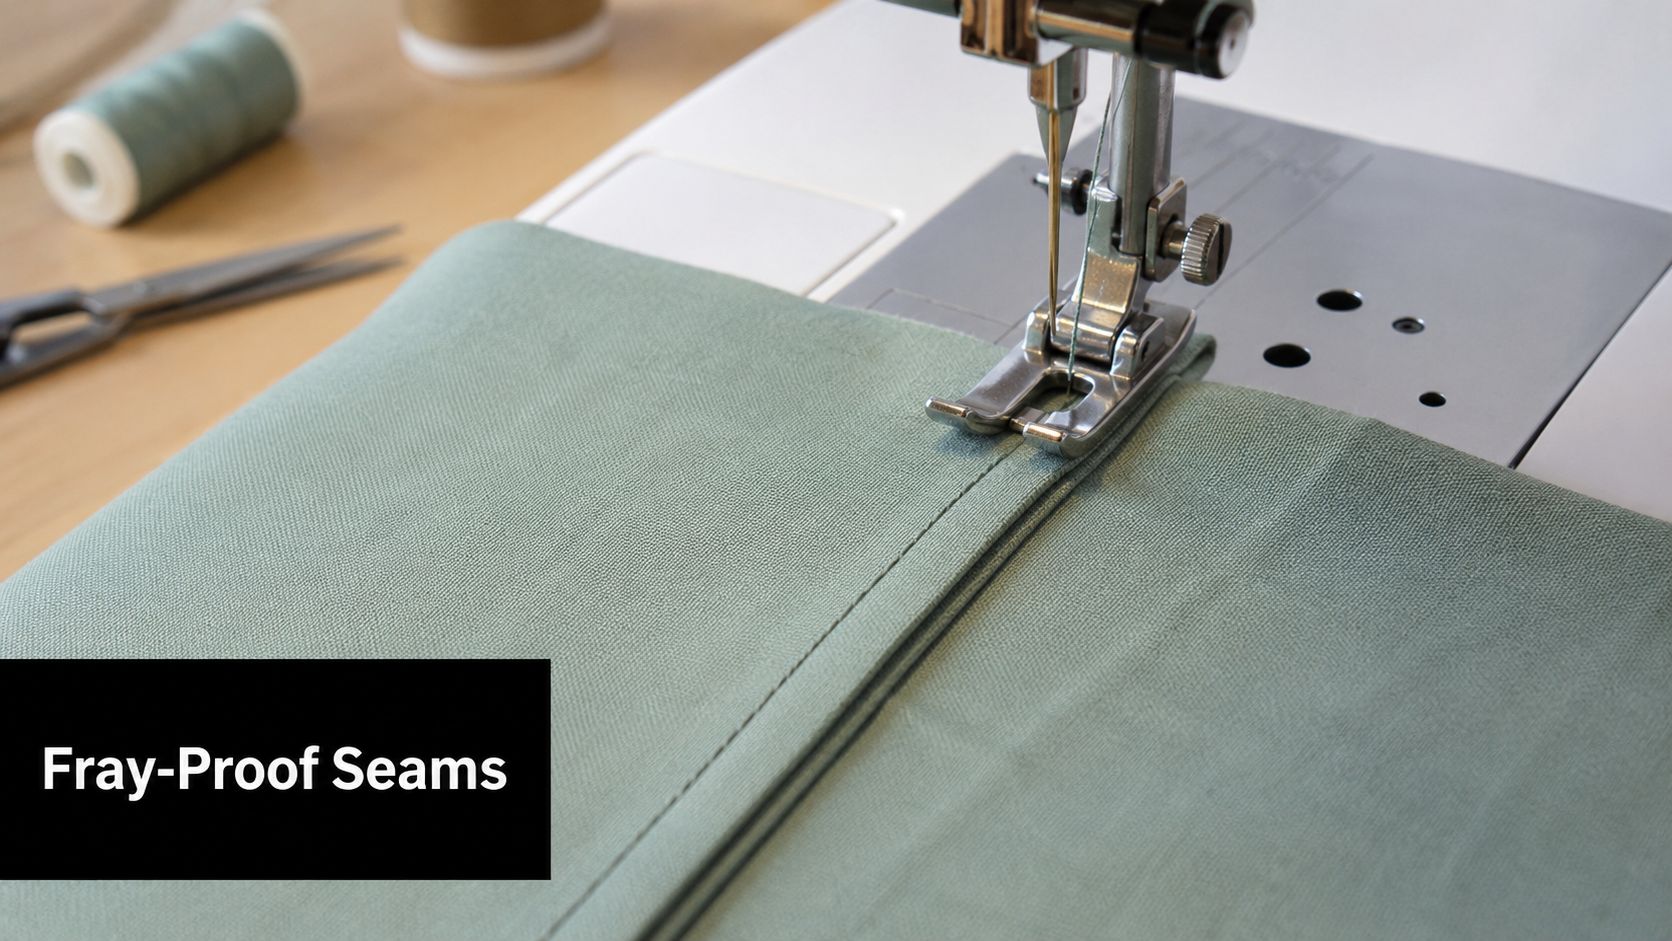
They are not right for every seam. I avoid them on tight curves, bulky underarm points, and anywhere the seam allowance needs to be clipped or shaped heavily. For side seams and shoulder seams on a summer blouse, though, they are hard to beat.
How to sew a French seam neatly
- Sew wrong sides together first with a narrow first seam.
- Trim the seam allowance closely and evenly.
- Press the seam, then fold so right sides are together.
- Sew the second pass wide enough to fully encase the raw edge.
- Press again so the seam sits flat and crisp.
Shop-floor advice: Keep that first seam genuinely narrow. If it is too wide, the finished French seam turns lumpy and can twist on soft viscose.
Hems that hang properly
Viscose hems go wrong for two main reasons. The edge stretches while being handled, or the garment is hemmed before the fabric has settled. On dresses and skirts, especially anything cut on the bias or with a curved hem, let it hang before you mark the final length. That matters even more in the UK, where many of us sensibly pre-wash viscose to deal with shrinkage but then find the fabric has relaxed again on the hanger.
For a straight hem on a blouse or simple skirt, a narrow double-turn hem works well if the cloth will take it. For a curved hem or a very drapey dress, I get a better result by machine-stitching a line close to the fold first, using that stitching line to turn the hem evenly, then pressing in sections rather than hauling the whole edge round in one go.
Lightweight hemming tape or a soft fusible can help on difficult hems, but it is not automatic. On very fluid viscose, too much adhesive can make the edge look slightly cardboard-like. Test it on a scrap with the same curve as the actual hem before committing.
Narrow hems and soft drape
A narrow hem suits scarves, ruffles, and fine viscose tops because it keeps the edge light. The deeper the hem, the more chance you have of dragging the shape out of a soft fabric.
If the edge starts to ripple while you are pressing, stop. Let it cool flat on the board, then continue in smaller sections. That small pause saves a surprising amount of unpicking.
Small choices that prevent a lot of fraying
A few habits make a real difference:
- Finish seams soon after sewing them. Do not leave raw viscose edges knocking about the sewing room.
- Trim and grade carefully. Bulky seam allowances show through soft fabric.
- Use polyester thread for construction. It has the strength and slip that viscose usually prefers.
- Match the finish to the garment. French seams for fine unlined pieces, overlocking for practical daywear, and a narrow hem where you want drape to stay soft.
The overall aim is simple. Keep the edges controlled without making the fabric stiff. Once you strike that balance, viscose stops feeling temperamental and starts behaving like the elegant cloth it is.
Quick Fixes for Common Viscose Mishaps
Even with careful prep, viscose can still throw up the odd nuisance. Most of them are fixable.
My seams are puckering
First, stop sewing and test on a scrap from the same fabric. Puckering usually points to setup rather than talent. Try a fresh fine needle, then sew another sample. If the sample improves, don't keep battling through the garment.
If the seam already exists, press it gently and assess whether it's a machine issue or just a stretched edge. A puckered shoulder seam on a blouse often settles once the edge has been properly supported and pressed.
My neckline has stretched
This often happens when a curved or bias edge has been handled too much before it was secured. The quickest rescue is to stabilise it before adding the facing or binding. Clear elastic can help recover a neckline that's grown, especially on a soft, drapey style.
If the distortion is minor, easing it back with steam and careful pressing may be enough. If it's severe, it's better to recut that piece than to force a neckline that will never sit right.
My hem is wavy
A wavy hem usually means the edge stretched while being turned and stitched. Let the garment hang, then reassess the level before doing anything drastic. If the edge still looks fluted, remove the stitching and re-hem with stabilising support.
A curved viscose dress hem is a classic example. It can look dreadful while half finished, then recover beautifully once it's rehung, trimmed evenly, and stabilised before the second attempt.
The fabric keeps shifting while I sew
Reduce handling. Pin or clip more thoughtfully, support the weight of the garment on the table, and let the machine feed the fabric rather than pulling it through. If you have a walking foot, use it.
The raw edges are fraying before I've finished construction
That's your cue to change the sewing order. Finish or enclose vulnerable seams earlier rather than later. On a blouse, for instance, get the main seams secured and finished before the pieces spend days being moved around the sewing room.
If viscose starts unravelling your patience, slow the project down. The fix is usually gentler handling, not tougher handling.
Viscose has a reputation for being awkward, but once you understand where it misbehaves, it becomes much less intimidating. Most problems come from movement, distortion, or unprotected edges. Control those, and the fabric becomes a pleasure again.
If you're ready to try these techniques on your next project, More Sewing is a lovely place to browse quality viscose fabrics, haberdashery, and sewing essentials, whether you're planning your first floaty blouse or your next favourite dress.
