
Guides
How to Make Piping for Sewing Projects
You've got the fabric cut, the project is pinned, and the plain edge still looks unfinished. That's the moment many home dressmakers realise they need piping, because a neat line around a cushion, neckline, or pocket can make the whole make look intentional instead of flat. If you've ever held a shop-bought cushion cover next to your own and wondered why theirs feels sharper, piping is often part of the answer.
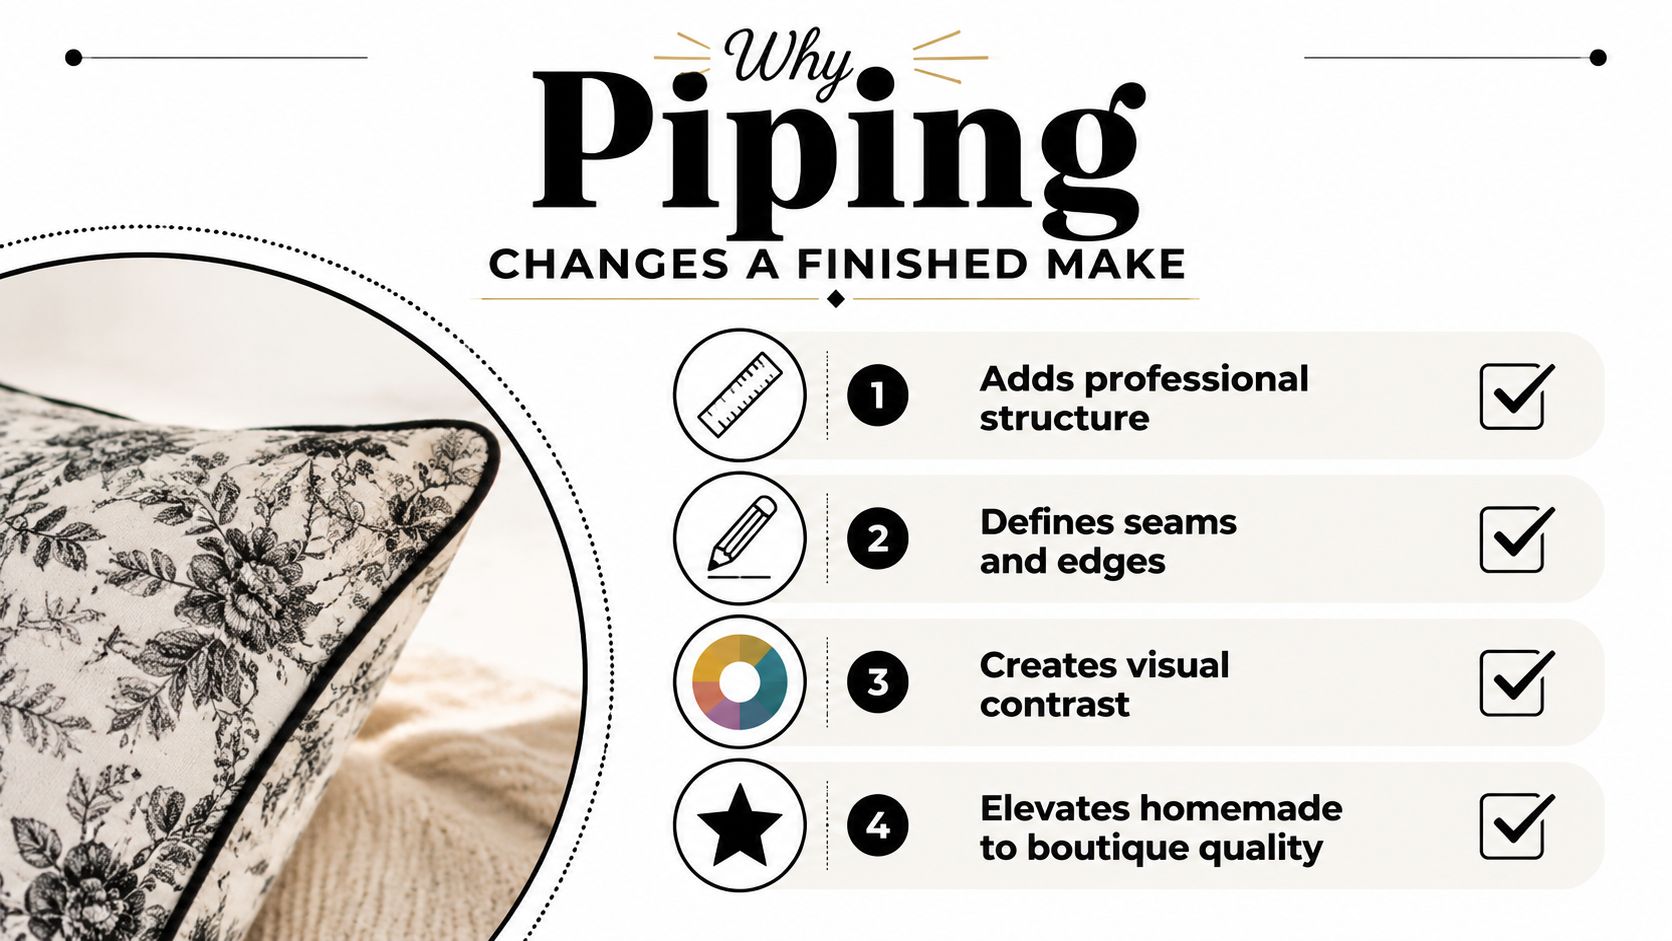
Piping does more than add decoration. It defines edges, reinforces stress points, and gives a garment or soft furnishing a crisp outline that topstitching alone can't always match. In UK dressmaking, it's a long-established finish, and historical sewing references place it firmly in the 1840s, with a later decline by the 1880s and 1890s (historical sewing reference). That history matters because it shows piping isn't a trend. It's a practical method that has stayed useful because it works.
By the end of this guide, you'll be able to make single-fold and double-fold piping, join strips into continuous lengths, insert piping into seams, and fix the little problems that trip people up on their first few tries. You'll also see where finish quality really lives, in corners, curves, and the hidden join that disappears into the seam allowance.
A good starting point is a calm, beginner-friendly sewing resource like how to start your first quilt, because the same habit helps here, keep the process simple, work in order, and test before you commit to the final fabric.
What to gather before you cut
A sewing machine with a zipper foot is the most useful tool here, because the foot lets you stitch close to the cord without forcing the fabric out of shape. Add sharp fabric scissors or a rotary cutter and mat, fine pins or clips, a seam ripper, chalk or a fabric pen, and a long hand-sewing needle for basting. Those basics are enough for a first project, and they keep you from improvising with tools that distort the strip.
Cord choice matters more than many tutorials admit. Stranded cotton piping cord gives a neat result for dressmaking, rattail works when you want a smoother decorative line, twisted polyester cord is sturdy for everyday use, and thick yarn can suit soft furnishings if you want a softer edge. The rule is simple, the cord needs to fit the seam allowance you've planned, or the edge will either look lumpy or expose the cord.
Fabric choice changes the whole feel. Lightweight cotton lawn gives crisp piping for dresses and blouses, medium-weight cotton or viscose suits cushions and bags, and heavier deadstock or denim usually needs a larger cord and a slightly longer stitch so the layers don't fight each other. If you're making a cotton dress, a 3 mm cord with a 1 cm seam allowance is a sensible starting point. For an upholstery cushion, a 5 mm cord with a 1.5 cm seam gives the piping more presence and helps it sit cleanly against thicker fabric.
Practical rule: match the outer thread to the main fabric when you want the stitching to disappear. If you want the piping to look outlined rather than invisible, pick a contrast thread on purpose.
Cutting and Joining Bias Strips
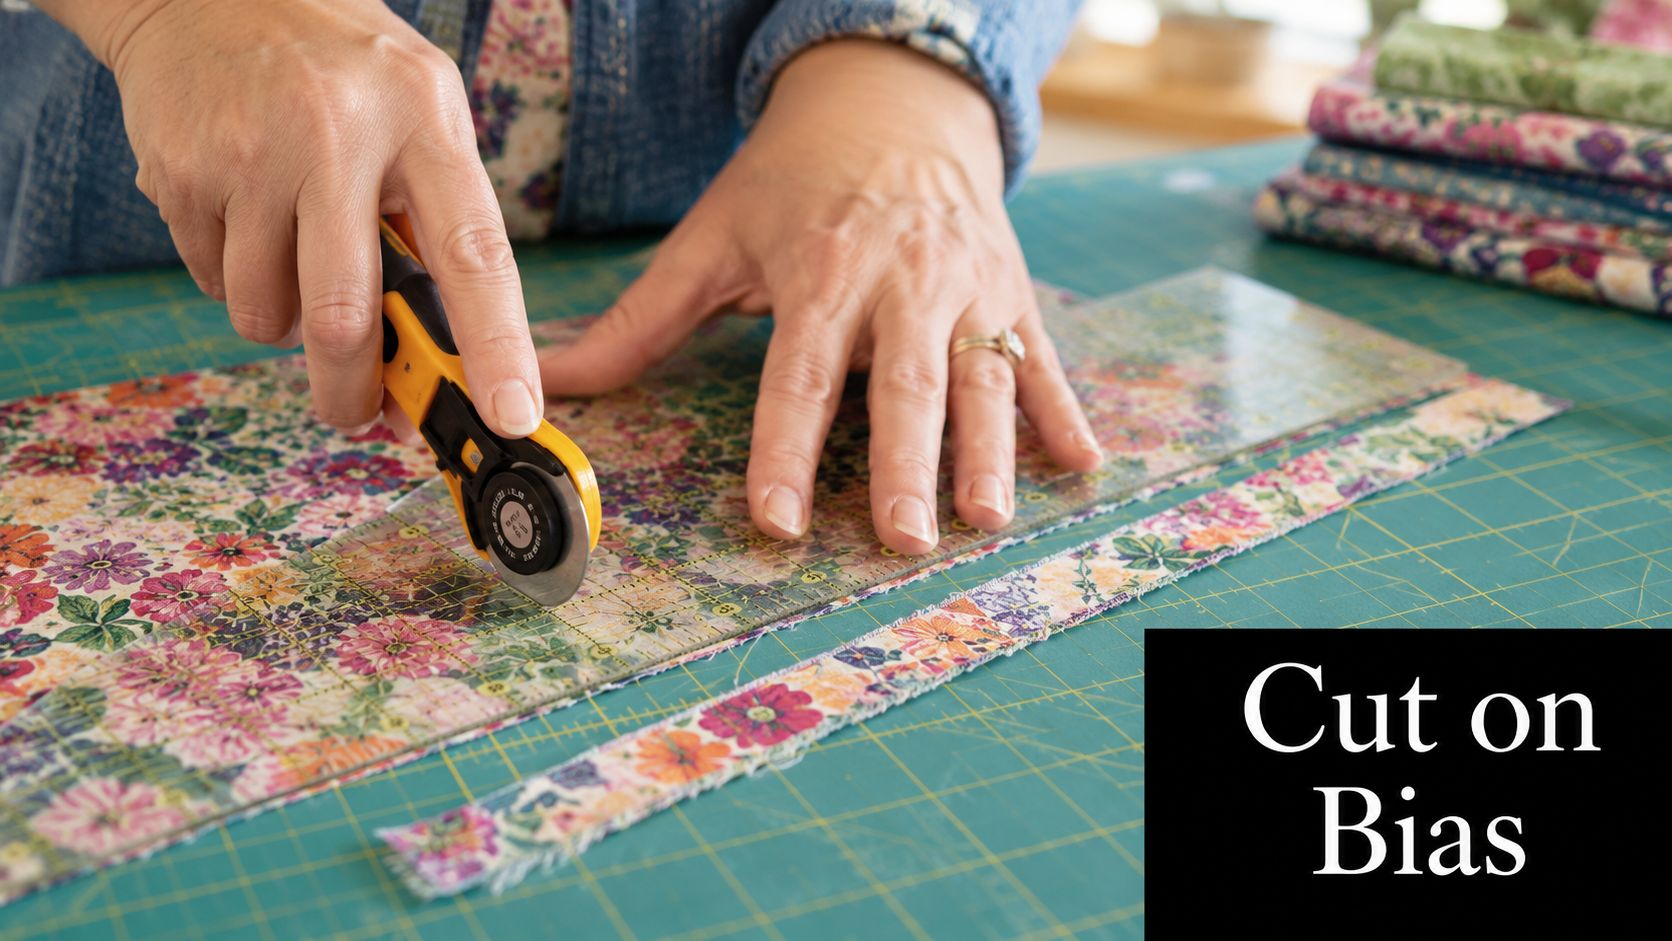
Bias grain is what lets piping curve cleanly around a neckline, an armhole, or a cushion corner without tugging the fabric out of shape. Cut the strip on the straight grain and it behaves like a stiff ruler, which is why it starts to buckle as soon as it has to turn.
The width formula is straightforward. Take the cord diameter plus seam allowance, then double it. For a 5 mm cord with a 1 cm seam allowance, that gives a 3 cm strip width. That calculation keeps the cord wrapped securely without crushing it or leaving it visible at the seam edge.
Cutting continuous length without a dozen tiny joins
Start with a square or rectangle of fabric, mark your bias lines, and cut the first strip. After that, rotate the piece so you can keep cutting long diagonal strips instead of lots of short ones. That saves time and keeps the piping from filling up with visible joins later. The goal is one long, clean run, not a trail of little ends.
Join strips end to end with a 45-degree diagonal seam, then press that seam open so the bulk spreads out instead of building into a ridge. After pressing, trim the seam allowance to about 6 mm, which helps the strip fold neatly around the cord and keeps the join flatter inside the piping casing. Press the strips flat before you wrap them, because crisp fold lines make the next stage easier to control.
The bias-cutting technique tutorial shows the setup clearly, but the workshop habit behind it is the same each time, keep the fabric supported on the table and let the bias lie flat as you work. If the strip starts to wrinkle while you cut, stop and reset it before going on. Bias fabric behaves better when it is resting, not hanging from the machine or pulled off at an angle.
A straight-grain strip can look fine in your hands and still fail around curves. It kinks first at necklines and rounded cushion edges, then the piping looks as if it is fighting the seam instead of following it. That kind of waviness usually points to the grain direction, not a bad stitch line.
Wrapping the Cord and Basting the Piping
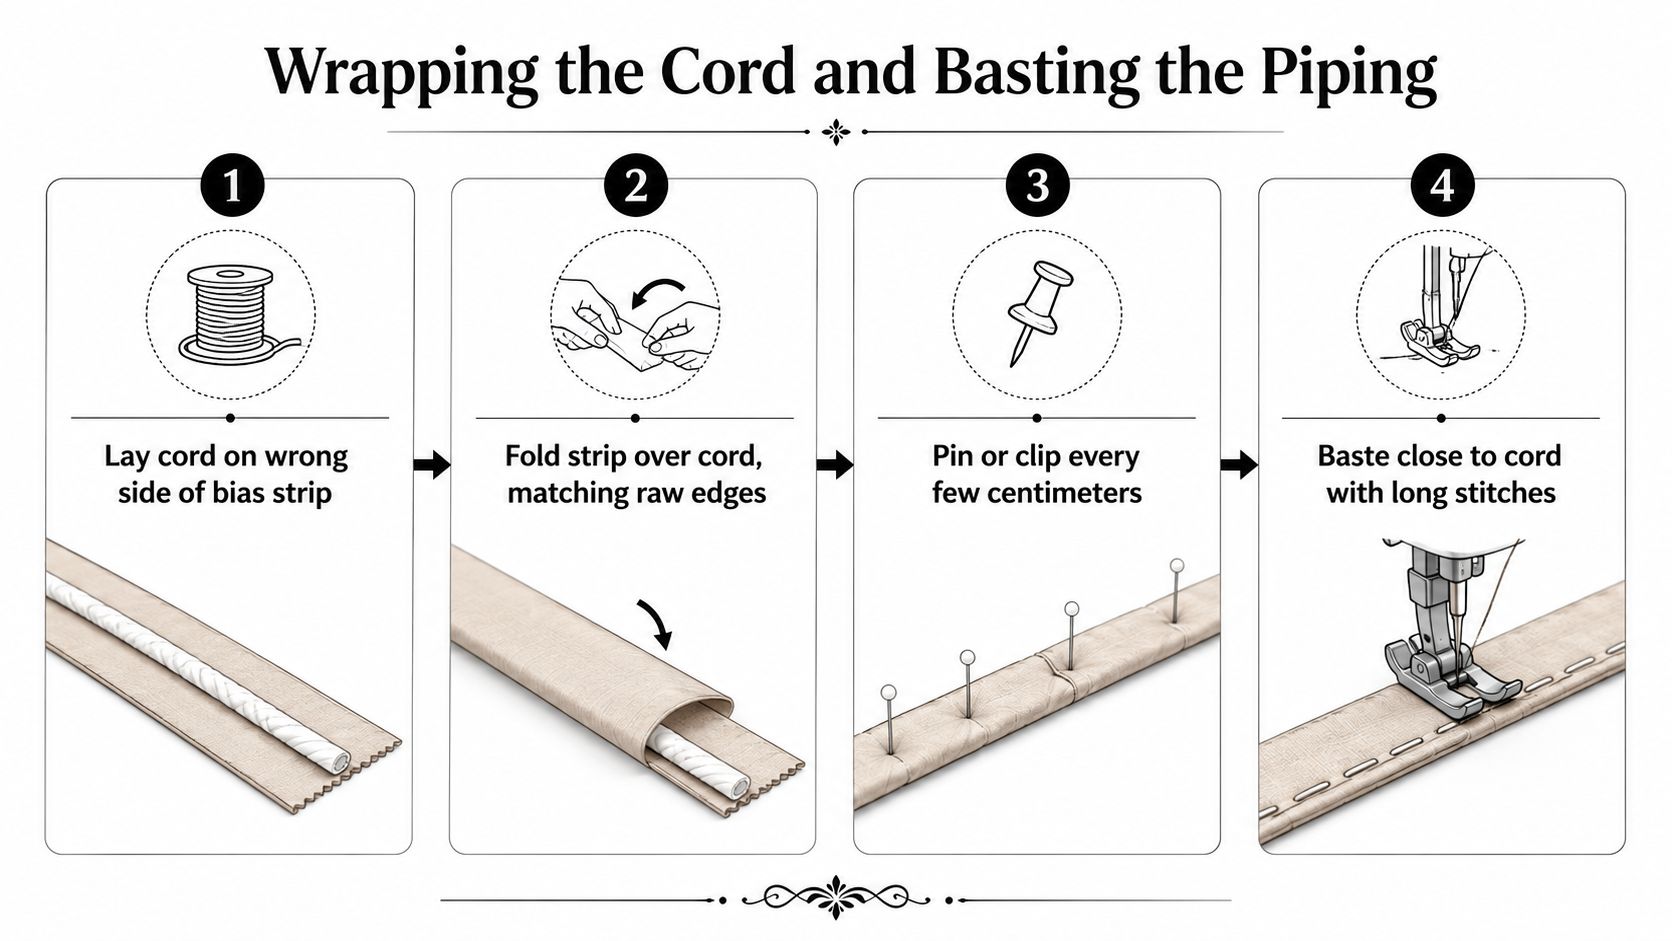
A piping strip only behaves well if the cord sits in the fold from the very beginning. Lay the cord along the centre of the wrong side of the bias strip, then bring the fabric over so the raw edges meet evenly. Clip or pin every few centimetres, just enough to hold the shape without pulling the strip out of alignment. If the fold twists now, the problem shows up later as a ropey edge that never quite lies flat.
Use a zipper foot and a slightly longer stitch length for the basting line, so the cord stays round instead of being flattened under the needle. Stitch close to the cord, but do not sew through it. That line becomes your reference when the piping is inserted into a seam, so a wandering basting row here turns into a wandering finish later.
A cushion edge example
For a 40 cm cushion edge, cut the piping strip a little longer than the finished run so there is room to manage the ends neatly. Leave a tail at each end. That extra length gives you room to settle the cord, adjust the fold, and handle the join later without forcing everything into place at the last minute.
Keep the tension gentle while you baste. If you pull the strip hard, the bias can stretch and the piping may look wavy once it relaxes off the machine. A calm feed gives you a calmer line, and that line is what sits neatly against a cushion edge or neckline.
Small habit, big payoff: pause now and then to check that the cord is still centred in the fold, not drifting towards one raw edge. Catching that shift early saves unpicking later.
Thicker dress fabrics and body-heavy deadstock need a slower hand. Let the machine feed the layers instead of tugging the piping through, especially if the fabric feels stiff or slightly bulky. In workshop practice, a neat basting line is what makes the next stage manageable, because the piping already holds its own shape before it meets the seam.
Inserting Piping Into a Seam
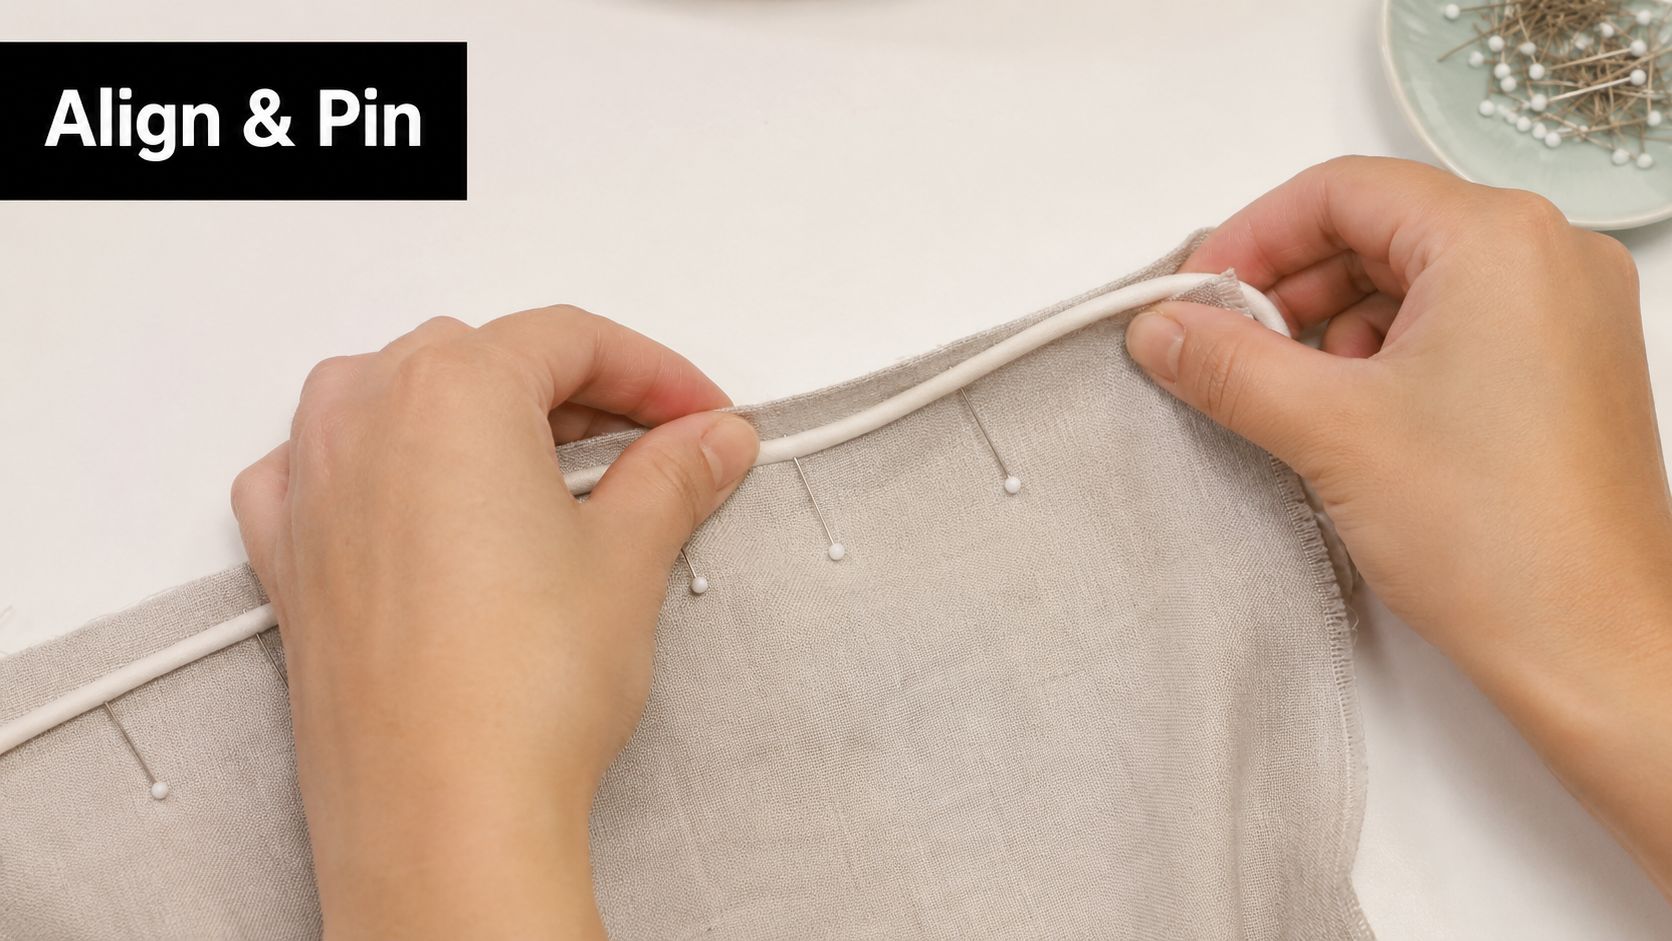
The cleanest way to insert piping is to place it on the right side of the main fabric, with the raw edges lined up and the cord sitting exactly where the seam will run. Stitch from the piping side with a zipper foot, since that gives you room to sew close to the cord without nudging the layers out of position. If you sew from the wrong side, or drag the fabric as it feeds, the edge can begin to ripple before the seam is even finished.
For slippery fabric, curved edges, or anything with a bit of weight to it, baste the piping to the main fabric first. That extra line holds the strip steady under the machine, which is useful on cushions, bags, and neckline edges where layers love to drift apart just when you want them to behave. Matching the top thread to the outer fabric also helps, because a small wobble is much easier to lose in the cloth when the colour is right.
Hiding the join cleanly
Leave the piping tails long enough to handle comfortably, then stop stitching about 2.5 cm to 5 cm before the point where the ends need to meet. That gap gives you space to trim, overlap, and tuck the join inside the seam allowance instead of trapping it at the visible edge. An overlong strip helps here too, and a useful working allowance is to leave about 10 inches, around 25 cm, extra so the fit is easier to control.
Trim the cord tails so they meet cleanly end to end, then overlap the fabric strips, snip them diagonally, and fold the join back into the seam allowance before you finish the seam. The finished edge should read as one continuous line, with no obvious patch or lump where the join sits. Once the seam is closed, the join should disappear into the construction.
Don't stretch the piping as you sew it in. It can spring back after stitching and pull the edge out of shape, especially on curved bags and cushions.
If you're making a cushion cover, slow stitching pays off here. A steady pass with the zipper foot gives a tidier outline than rushing around the edge and hoping the corner will sort itself out later.
For a fuller walk-through of the piping method, the sewing school piping tutorial shows the same basic steps in a home-decor setting.
Corners, Curves and Invisible End Joins
Finish quality shows up at the awkward places. A straight edge is easy, but outside corners, inside corners, and curved edges expose every small mistake in cord size, seam allowance, and foot control. If you want piping to look expensive, the work happens here.
Working a square cushion cover
On an outside corner, clip the piping seam allowance almost to the stitch line so the fabric can turn without bunching. Snip the cord itself at a 45-degree angle so it bends rather than buckles, then pivot with the needle down and keep the line of stitching close to the cord. That little pivot is what keeps the corner sharp instead of rounded off.
On an inside corner, make a small V-snip in the seam allowance so the piping can fold inward without a pucker. The key is to let the fabric move, not force it into a shape it doesn't want. If the inner corner still stands proud, the snip is usually too timid.
For a gentle curve, slow your stitching and shorten the stitch length slightly so the piping follows the arc smoothly. Tiny snips every few centimetres in the seam allowance help it spread without pulling. On a tight curve, the same idea applies, only with more patience and more frequent checks.
Making the join disappear
To hide the end join, overlap the two piping tails and mark the exact point where they meet. Trim the cord so the ends butt precisely, then overlap the fabric strips, snip them at 45 degrees, and finger-press the join flat before closing the seam. That sequence keeps the bulk inside the allowance, where it won't telegraph through the finished edge.
Diagnostic rule: if the ridge looks twisted, the cord has been stretched. If it lies flat but looks soft and loose, the cord is too slack for the seam allowance.
The best test is visual and tactile at the same time. Run your fingers along the edge, then look at it from the side. A good piping line sits proud but calm, with no kinks where the join meets the corner.
Homemade Versus Shop-Bought Piping
For a quick cushion, shop-bought piping is hard to beat. It's consistent, fast, and easy to find in contrast colours, so you can get moving without cutting fabric or fussing with cord selection. For a dress or special make, though, homemade piping usually wins because the fabric match is exact and the cord size is yours to choose.
Here's the trade-off in practical terms. A metre of shop-bought piping often costs roughly the same as a metre of bias-cut fabric plus cord, so the saving isn't dramatic, but it does add up when you use offcuts from the same project. Homemade piping also lets you use deadstock and remnants, which is useful when you want the finish to match the fabric story rather than fight it.
| Factor | Homemade piping | Shop-bought piping |
|---|---|---|
| Cost | Often similar to making it from offcuts and cord | Often similar per metre, but ready to use |
| Time | Slower, because you cut and baste it yourself | Faster, because it's already made |
| Seam bulk | Adjustable, because you choose the cord and fabric | Fixed by the product you buy |
| Durability | Depends on your fabric and cord choice | Usually consistent, but less customisable |
For a home cushion, shop-bought piping can be the sensible choice if you want speed. For a dress, blouse, or special gift, homemade piping usually looks better because it sits in the same fabric language as the rest of the make. For a small independent brand watching material costs, deadstock cord-wrapped piping gives the best balance of control and waste reduction.
Fixing Common Piping Problems
Most piping problems are not mysterious. They come from one small choice made too early, then repeated across the whole edge. The fix is usually simple once you know what to look for.
- Piping looks twisted. The cord was stretched during basting. Rebaste with even tension and let the fabric feed naturally.
- Cord shows at the seam. The seam allowance is too small. Recut wider strips so the cord sits fully inside the fold.
- Piping puckers on a curve. The strip was cut on the straight grain. Recut on the bias so it can bend.
- Piping is too bulky. The cord is too thick for the seam allowance. Drop down a cord size.
- Stitching misses the cord line. The foot choice is wrong or the pressure is too high. Switch to a zipper foot and lengthen the stitch.
- The join is visible at the edge. The overlap wasn't trimmed back into the seam allowance. Redo the join inside the seam.
- Piping springs back after sewing. It was stretched during insertion. Basting first usually prevents that problem.
A scrap test saves more projects than people expect. Sew a short sample in the same weight fabric as the actual piece before you cut into the full run, because that tiny trial shows whether the cord size, seam allowance, and foot setup are working together. Five minutes of testing can stop an hour of unpicking.
The three habits that separate a good piping job from a great one are simple. Cut on the bias, baste before machine stitching, and finish the join inside the seam allowance. Keep those three in your head, and the finish starts to look deliberate instead of improvised.
Start with something low-risk, like a piped cushion cover in deadstock cotton, a piped pocket edge on a simple tote, or a piped neckline on a cotton lawn dress or blouse. Once those feel steady, the same technique carries into piped armholes on a vintage-style dress, piped seams on a quilted jacket, and sharper cushion edges with more complex corners. That's the same finish dressmakers were using in 19th-century UK garments, and it still earns its place because it makes an edge look finished in a way plain stitching can't always match (historical sewing reference).
Your first attempt will probably be a little wobbly. The second will look neater, and by the third, the join starts to disappear exactly where it should.
If you want more clear sewing tuition, fabric ideas, and practical project support, visit More Sewing for quality fabrics, haberdashery, and beginner-friendly kits that make finishes like piping much easier to practise well. It's a handy place to pick up the right materials for your next make, especially when you want a result that feels polished from the start.
