
Dressmaking, Guides
Patterns for Simple Dresses: Your Beginner’s Guide
You've found a fabric you love. It might be a crisp cotton with a cheerful print, a soft viscose that feels lovely in the hand, or a bit of deadstock you don't want to waste on the wrong project. Then you open a pattern envelope, or browse an online shop, and suddenly everything feels less fun. There are line drawings, fabric notes, finished garment measurements, terms like “ease”, and a lot of dresses that all look simple until you read the details.
That wobble is completely normal.
Most beginners don't need a more exciting pattern. They need a clearer one. The best patterns for simple dresses aren't plain in a boring way. They're well designed, forgiving to sew, and sensible about fabric, fit, and fastening. That's what turns a first dress from an abandoned project into something you wear.
The other part people often miss in the UK is the practical side. Many sewists are buying all-in-one kits or using small lengths of ex-designer deadstock, so pattern choice matters even more. A beautiful pattern isn't much use if it needs extra notions your kit doesn't include, or if its layout fights the fabric you've managed to get. Choosing well at the start saves frustration later.
From Overwhelmed to Inspired Your Simple Dress Journey Starts Here
The confusion usually starts with too much choice. One envelope shows a fitted bodice with a zip. Another says “easy” but still includes facings, sleeves, and a neckline that wants careful clipping and pressing. A third looks ideal until you realise it needs a slippery fabric and several notions you don't own.
A simple dress pattern should make your first few decisions easier, not harder. It should help you sew with confidence on a standard domestic machine, use fabric that behaves nicely under the iron, and avoid techniques that need lots of precision before you've built that muscle memory.
There's a long history behind the appeal of simple dress shapes in the UK. The minidress, pioneered by Mary Quant in the 1960s, became a cultural milestone, and by 1966 Quant's shop Bazaar on Kings Road sold over 1,000 minidress patterns weekly, reflecting a 300% surge in demand for simple dress sewing kits across Britain, as noted by the V&A's feature on sewing your own Mary Quant style minidress. Those clean A-line shapes caught on because they were stylish and achievable.
Simple doesn't mean second best. It usually means the pattern designer has done more of the hard thinking for you.
If you're working with a kit, or with a precious deadstock cut, that matters even more. A good first dress pattern has a tidy number of pieces, sensible fabric requirements, and construction steps that won't leave you stuck halfway through because you need an invisible zip foot or a specialist interfacing you didn't plan for.
A helpful way to think about it is this:
- Start with wearability: Choose a dress you can picture using in real life, such as a pull-on day dress, a relaxed shift, or a gathered sundress with straps wide enough for everyday underwear.
- Match the pattern to your setup: If you've got a domestic machine, a basic iron, dressmaking shears, pins, and thread, your pattern should suit that toolkit.
- Respect the fabric you have: Small deadstock lengths, all-in-one kits, and beginner fabric bundles often work best with uncomplicated silhouettes and minimal extras.
That first dress isn't a test. It's practice with a purpose. You're learning to read instructions, handle fabric, sew straighter seams, press properly, and understand fit. If the pattern supports those skills, you'll enjoy the process far more.
What Defines a Simple Dress Pattern
A simple pattern is a bit like a good set of building plans. The shape is clear, the instructions don't send you in circles, and the structure doesn't depend on one difficult step going perfectly. When you're looking at patterns for simple dresses, three things matter most: silhouette, construction, and ease.
Silhouette that forgives
The easiest dress shapes don't cling to the body or rely on close fitting through several points at once. Think A-line dresses, shifts, trapeze styles, or gently gathered day dresses. These shapes skim rather than sculpt, which means small sewing wobbles are much less noticeable.
That's one reason the A-line became such a classic in British home sewing. It looks polished without demanding advanced fitting. If the side seam is a millimetre off, the whole dress doesn't collapse into disaster.
Construction without fiddly extras
The next thing to check is how the dress goes together. In the UK market, patterns for simple dresses are often built around a “no-fiddly-bits” design philosophy, eliminating complex closures and reducing stitch count to under 1,200 per garment, which shortens construction time by 25% for average hobby sewists, according to Guthrie & Ghani's dress pattern round-up.
That phrase is useful because it tells you what to avoid. Fiddly bits include:
- Set-in sleeves: These aren't impossible, but they add matching points, easing, and shape.
- Zips and hooks: They demand accuracy. If the seam shifts, the fastening shows it.
- Complex collars and cuffs: Lovely when you're ready. Not ideal for a calm first dress.
- Lots of facings or tiny pattern pieces: More cutting, more interfacing, more chances to get turned around.
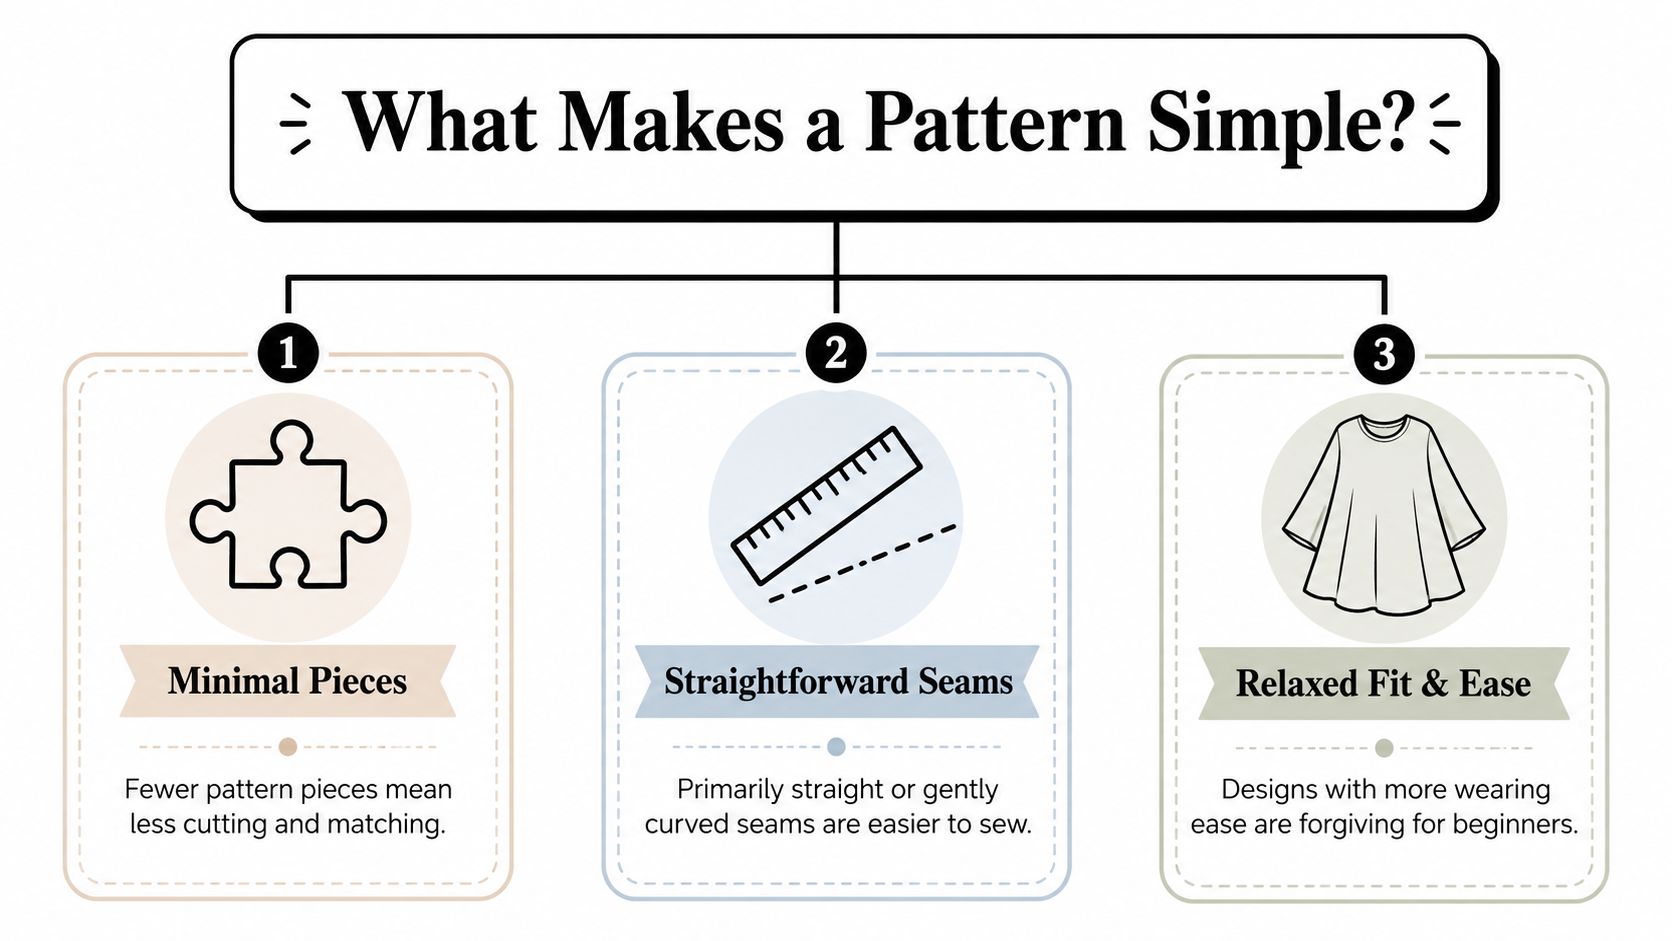
A strong beginner pattern usually has a short list of main pieces. Front, back, maybe a bodice facing or strap, and not much else. Straight or gently curved seams are your friend.
Practical rule: If the line drawing looks calm, the sewing often is too.
Ease that gives you breathing room
“Ease” confuses many new sewists because it sounds abstract. In plain terms, it's the extra room built into the garment so you can move, sit, breathe, and get the dress on. A dress can be your size and still feel wrong if it has too little wearing ease.
Here's a quick way to assess a pattern:
| Check | What you want to see | Why it helps |
|---|---|---|
| Shape | A-line, shift, trapeze, gathered day dress | Easier fit, fewer pressure points |
| Fastening | Pull-on, tie, elastic casing | No zip stress |
| Pieces | Fewer main pieces | Less cutting and matching |
| Seams | Mostly straight seams | Easier stitching and pressing |
Patterns for simple dresses often look modest on the page, but they're doing a lot of clever work. They hide fitting complexity inside relaxed shaping, sensible seam placement, and enough ease to make the finished dress pleasant to wear.
How to Choose Your First Simple Dress Pattern
You are in a UK fabric shop with a paper pattern in one hand and a dressmaking kit in the other. The cover looks lovely, but the key decision starts once you turn it over and read the practical details. That small habit can save you from buying a pattern that asks for more fabric, more notions, or trickier techniques than your first project needs.
Start by treating the information panel as your map. It tells you the size range, fabric type, notions, and the line drawing. Those details matter more than the styled photo because they show how the dress is built.
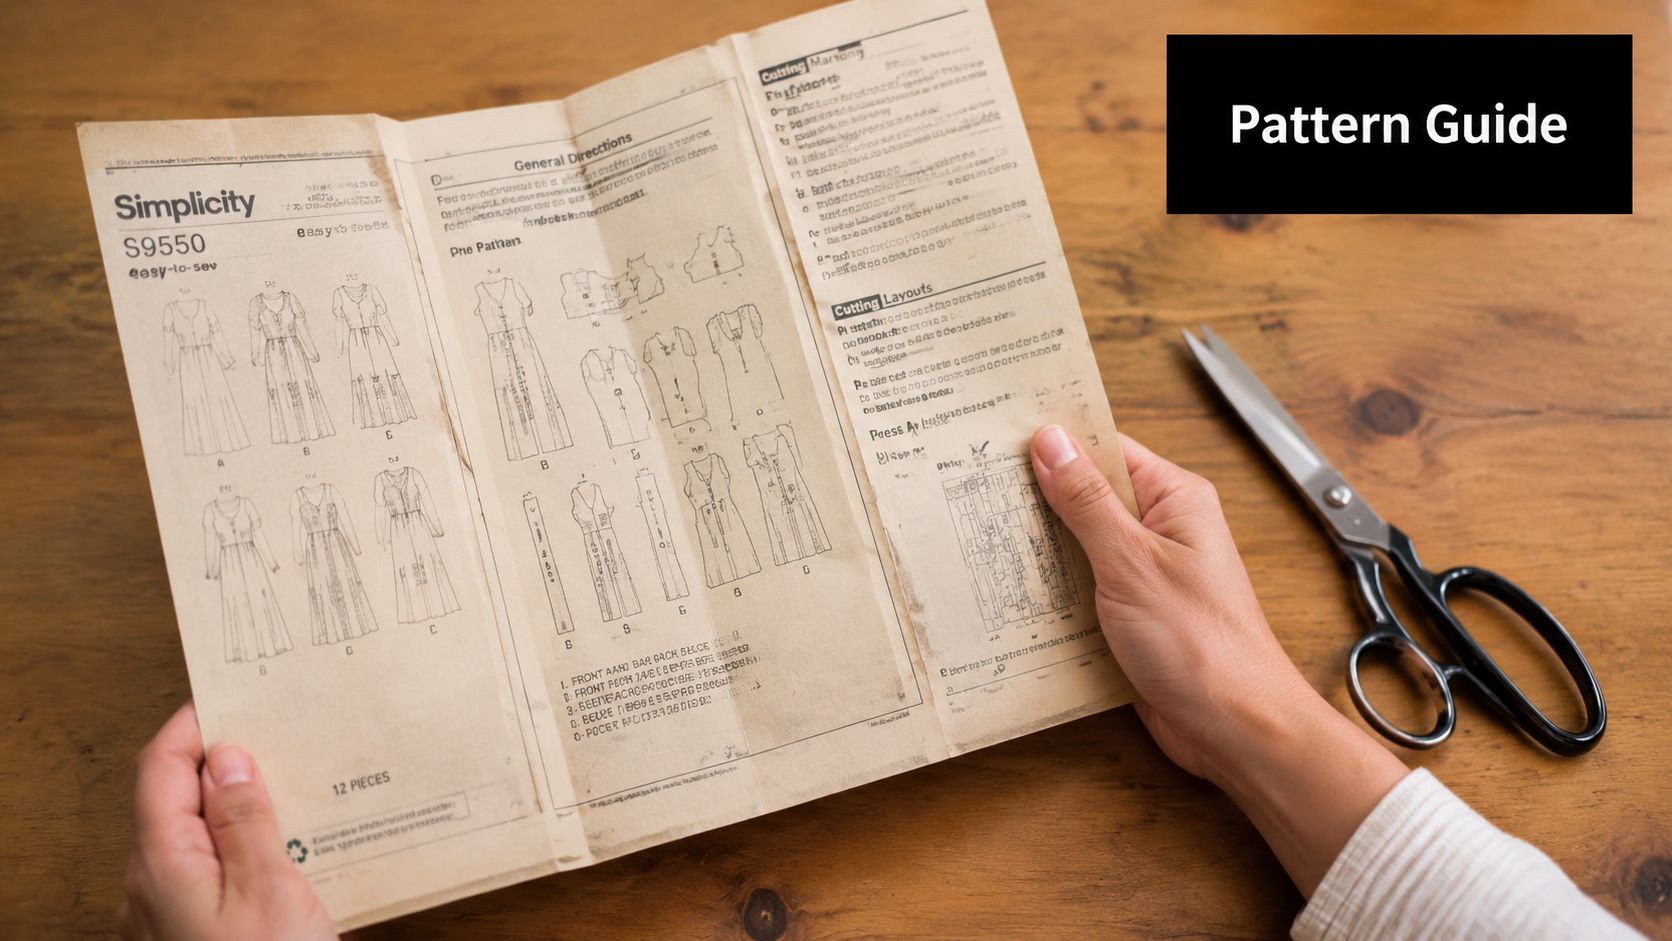
Read the back before the artwork
A good first check is to ask, “Can I picture myself making every part of this?” If one element gives you pause, set it aside for later. Sewing is easier to learn in tidy layers, much like learning to bake with a simple sponge before attempting laminated pastry.
Use these four checks:
Look for the closure
Pull-on dresses, elastic backs, and tie styles are usually kinder to a first project. A zip or a row of buttonholes is not wrong, but it adds another skill to learn at the same time.Check the notions list
Thread, elastic, and interfacing are straightforward. A pattern that also asks for a concealed zip, special buttons, hook and bar, and extra tape may be less suitable for a first make, especially if you are buying a ready-packed kit.Study the line drawing
The line drawing is the plain-speaking friend of the pattern envelope. It shows darts, seam lines, facings, gathers, and sleeve shape without clever photography getting in the way.Read the fabric suggestions
If the pattern recommends slippery satin, sequins, or very stretchy knit, leave it for another day. Stable woven fabrics are usually a calmer place to start.
Pattern labels can be a bit loose. “Easy” on one envelope may still include a fiddly fastening or several finishing steps. Clear instructions, a simple shape, and a short notions list are usually better guides than the marketing label.
Use sizing information sensibly
Sizing information needs a sensible approach. Pattern sizes are drafted from body measurements, not the number you buy on the high street, so it is completely normal for your pattern size to look different from your shop size.
Measure your bust, waist, and hips, then compare those numbers to the chart on the envelope. If your measurements point to different sizes, that is normal too. In that case, choose the size that matches the part of the dress that needs the most room, then adjust the lines between sizes if needed.
For example, a relaxed shift dress may only need a gentle blend at the hip, while a fitted bodice needs more care at the bust. If that sounds technical, do not worry. You are smoothing one line into another so the dress fits your shape instead of asking your shape to fit the paper.
Inclusive size ranges help, and so do brands with clear drafting and friendly instructions. The Thrifty Stitcher's survey summary of summer dress patterns is useful for spotting pattern companies that UK sewists often find approachable.
Think about kit compatibility
This part gets missed in a lot of dressmaking advice, especially in US-focused blogs. In the UK, more beginners are buying all-in-one kits with pre-matched fabric, thread, and notions, or sewing with deadstock fabric where the available cut is limited. That changes how you choose a pattern.
A pattern and a kit need to suit each other like a recipe and the ingredients in your cupboard. Even a simple dress can become awkward if the fabric width is wrong, the kit does not include the fastening, or the pattern needs more yardage than the deadstock piece allows.
Use this quick check before you buy:
- Fabric width: Check that the layout works with the cut included in the kit.
- Notions list: Make sure every extra is covered, not just the fabric and thread.
- Closure type: Pull-on dresses are often the easiest match for curated kits.
- Yardage flexibility: Simple shapes are more forgiving if you are working with a shorter deadstock length.
- Print and nap: If the kit fabric has a one-way print or nap, confirm the pattern allows enough fabric for all pieces to face the correct way.
That last point matters more than it first appears. Deadstock can be brilliant value and a more sustainable choice, but it does not always come in generous lengths with perfect repeat options. A dress with a relaxed silhouette and fewer pieces usually makes better use of what is available.
Later, if you want a visual walk-through of how pattern instructions are laid out, this video is a helpful companion before you cut into fabric:
A strong first pattern suits your skill level, the fabric you can buy, and the tools you have on the table at home.
Pairing Patterns with the Right Fabric
Beginners often blame themselves when a dress goes wrong, when the primary culprit is fabric. The pattern may be simple, but if the fabric frays wildly, slithers off the cutting table, or stretches where it shouldn't, sewing becomes harder than it needs to be.
Fabric is the foundation. If it behaves well, everything above it gets easier. Cutting is cleaner, seams feed more evenly, and pressing gives you a crisp result instead of a wrestle.
What to look for in a first dress fabric
For simple day dresses, technical guidance recommends light-to-medium weight woven fabrics in the 120–180 gsm range with good fluidity. That fabric density can reduce seam tension by about 15% compared with heavier alternatives, helping prevent issues like puckered hems, according to this fabric guidance video on dressmaking basics.
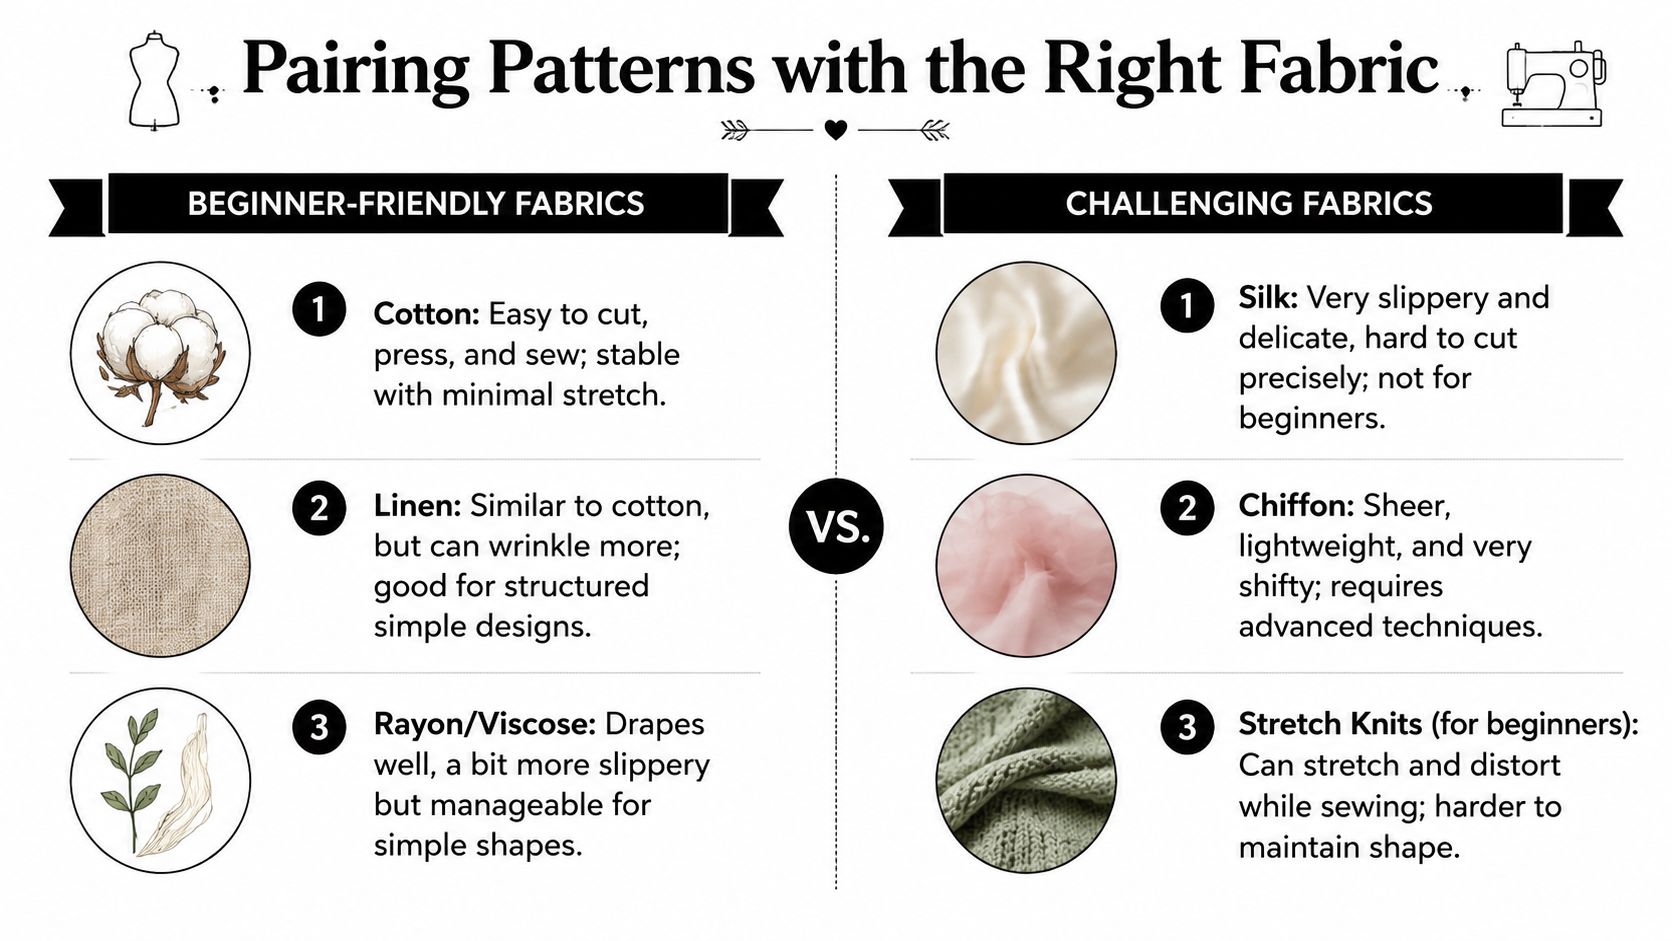
That's why fabrics such as cotton lawn, stable cotton poplin, soft chambray, and manageable viscose or rayon blends are so often suggested. They're easier to cut than silk, easier to press than slippery synthetics, and easier to control than lively knits.
Match the fabric to the shape
Different simple dresses want different fabric personalities.
A shift or structured A-line usually looks best in a fabric with a bit of body. Cotton holds the shape and shows the style lines clearly. A gathered dress or trapeze dress softens beautifully in viscose, rayon crepe, or a fluid Tencel blend.
Try this as a rule of thumb:
- Structured shape: Choose cotton lawn, poplin, linen blend, or chambray.
- Soft gathered dress: Try viscose, rayon, or a drapey deadstock woven.
- First project with a kit: Pick stable wovens over slippery or stretchy options.
If you're torn between two fabrics, choose the one that cuts flatter and presses better. It's usually the kinder teacher.
Deadstock and UK kit sewing
UK sewing needs a bit more practical thinking than many US-centred blogs provide. Future-dated verified research notes that only 12% of UK dressmaking patterns explicitly recommend fabric types compatible with deadstock materials, while 73% of UK home dressmakers prioritise eco-friendly inputs. That gap matters if you're working with ex-designer lengths, unusual fibre blends, or kit fabrics chosen for sustainability as much as style.
When using deadstock, read the pattern with extra care. Look for simple layouts, fewer pieces, and fabric suggestions that allow a little flexibility. If your deadstock has lovely drape but limited quantity, a pull-on dress with front gathers and minimal facings often uses the cloth more efficiently than a design with sleeves, collars, and a separate waistband.
A fabric sample helps when you're unsure. It lets you test opacity, drape, and surface feel before you commit. That's especially useful with deadstock and Tencel blends, where the label doesn't always tell you how the fabric will behave under the needle.
Understanding Sizing and Basic Alterations
Many dressmakers lose confidence at the size chart. They assume they've done something wrong because the pattern size doesn't match the number on their usual shop clothes. It doesn't mean your body is difficult. It means sewing patterns use their own measurement system.
Take fresh body measurements in the underwear you'd wear with the dress. Stand naturally. Measure bust, waist, and hips, and write them down. Don't pull the tape tight. You're measuring your body, not trying to win an argument with it.
Pick the size from measurements, not habit
Once you have your numbers, compare them to the chart. If your bust is one size and your hips another, that's extremely common in dressmaking. A simple dress pattern often makes blending between sizes straightforward because the side seams are less complicated.
This is also where seam allowance and hem allowance become useful to understand instead of intimidating. In UK dressmaking patterns for simple dresses, a common threshold for a straight gather silhouette is 1.5 metres of 110cm-wide cotton or viscose for sizes 12–16, with a 2.5cm hem allowance and 1.25cm seam allowance to support fit consistency, as described in Seamwork's PDF sewing pattern information.
Those allowances matter because they tell you how the pattern expects to be sewn and adjusted.
Two simple alterations worth learning
The first alteration is lengthening or shortening. Most patterns include printed lines for this. You cut across the marked line, spread or overlap the pattern by the amount needed, then true up the side seam. It's neat, controlled, and far better than chopping the hem and hoping for the best when the dress shape changes lower down.
The second is a small bust adjustment or bust blend, done in a simple way for relaxed dresses. If the bust fits but the neckline gapes, or if the bust pulls while the waist feels loose, the pattern may need shaping for your proportions. On easy dresses, that might mean choosing by your upper bust and adding room where needed, rather than sizing up the whole garment.
Here's a practical order to follow:
- Measure first: Bust, waist, and hips before buying or tracing.
- Trace if possible: It lets you preserve the original and experiment calmly.
- Alter length early: Before cutting fabric, not after sewing half the dress.
- Sew a toile when unsure: Even a partial bodice or simple test version can reveal fit issues.
A small alteration is routine dressmaking, not a rescue mission.
If you're sewing from a kit, check the finished length against your height before cutting. Kits simplify shopping, but they can't know whether you like your hem above the knee, mid-calf, or lower. That's your chance to make the dress feel like yours.
Simple Pattern Hacks to Make It Your Own
The nicest thing about a plain dress pattern is that it becomes more interesting each time you sew it. One straightforward pattern can become a weekend dress, a work dress, or an easy holiday piece just by changing a detail or two.
I often see beginners assume customising is advanced work. It isn't, as long as you keep the hack smaller than the pattern itself. Start with one change. Sew the main dress as drafted. Then add one feature that teaches you something new.
Three easy changes that make a big difference
A very beginner-friendly base is a dress with a straight neckline, front gathers, and a back elastic casing. That construction avoids buttons, zips, and hooks entirely, and can reduce sewing time by about 40%, as described by Tilly and the Buttons. It's also ideal for hacks because the shape is uncomplicated.
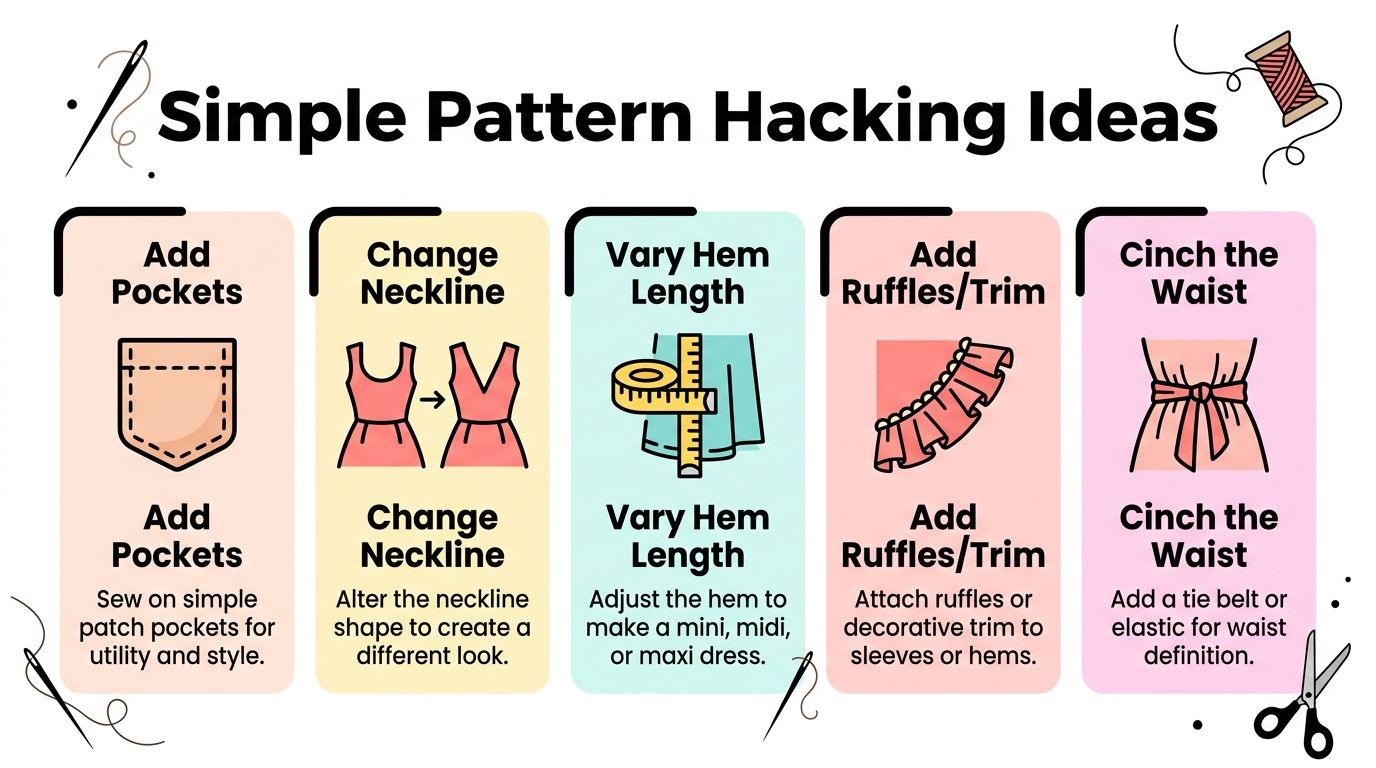
Try one of these:
Add inseam pockets
If your dress already has side seams, pockets are often an easy addition. Use a pocket bag shape with a gentle curve. Mark the placement around hip level, stitch each pocket piece to the side seam edges, then sew around the pocket and continue down the side seam. Press the pocket toward the front for a smoother finish.Change the neckline slightly
A round neckline can become a boat neck by widening it gently at shoulder level while keeping it high. A shallow V-neck can work too, but keep it modest on your first hack so the facing or binding stays manageable. Always redraw both sides evenly.Adjust the hem style
Shorten to above the knee for a breezier day dress, or lengthen to midi for a more swishy shape. If you want extra movement, add a gathered ruffle to the hem. Cut a long strip, join it, gather it evenly, and attach it before hemming.
A dress can evolve with you
One simple pattern sewn three times often teaches more than three unrelated patterns sewn once.
The first version helps you understand the instructions. The second gives you confidence to change the neckline or add pockets. The third might use a deadstock viscose and a longer hem, and suddenly the same pattern feels completely different.
A nice beginner sequence looks like this:
| Version | Fabric | Hack |
|---|---|---|
| First make | Stable cotton | Sew as drafted |
| Second make | Soft chambray or viscose blend | Add pockets |
| Third make | Deadstock drapey woven | Change hem or neckline |
That progression keeps your learning organised. You're not just collecting patterns. You're learning how clothes are built.
Your Sewing Success Checklist for a Flawless Finish
Before you start cutting, slow down for ten minutes. That small pause saves far more time than it costs.
Pre-wash your fabric if it's washable. Press it before laying out your pieces. Put in a fresh machine needle that suits the fabric. Check that your thread matches well enough for visible topstitching if any will show. These are small habits, but they change the result.
Pre-flight checks worth doing every time
- Read the whole instruction booklet: Don't sew step 1 before you know what step 8 needs.
- Cut accurately: Good cutting makes sewing easier. Ragged edges create trouble later.
- Transfer markings clearly: Notches, dots, and fold lines are there for a reason.
- Press as you go: Pressing each seam gives shape and neatness. Ironing at the end can't fix missed pressing.
- Test stitches on a scrap: Check tension, stitch length, and needle choice before sewing the dress.
- Keep the pattern beside you: Especially with kits, confirm every notion is to hand before you begin.
A polished handmade dress rarely comes from speed. It comes from calm decisions repeated throughout the project.
If this is your first dress, choose one thing to do beautifully. Maybe it's accurate cutting. Maybe it's careful pressing. Maybe it's sewing a neat elastic casing. Let the rest be learning. The pleasure of dressmaking grows quickly once you finish a garment that fits, feels good, and teaches you something useful for the next one.
If you're ready to put all this into practice, take a look at More Sewing for UK-friendly fabrics, haberdashery, and all-in-one dressmaking kits that make choosing your first simple project much less daunting. Their range is especially handy if you want to pair beginner-suitable patterns with deadstock, cottons, viscose blends, and the practical tools that help a dress come together smoothly.
