
Guides
How to Sharpen Sewing Scissors for a Perfect Cut
You lay out a beautiful piece of lawn, viscose or denim, line up your pattern, make the first cut, and the scissors don't slice. They grab, push the fabric away, and leave a rough edge that already looks harder to sew cleanly. Most home sewists have been there, usually halfway through a project they were enjoying.
That moment tells you something important. Sharp sewing scissors aren't a luxury. They're part of accurate dressmaking, just like a stable cutting table or a reliable iron. When the edge is right, your shears glide. When it isn't, every cut asks for more force, more correction, and more patience.
The awkward part is that most advice swings too far in one direction. Some guides suggest shortcuts like foil or sandpaper. Others tell you to send every pair away and never touch them yourself. In a real sewing room, the answer is more practical than that. Some scissors can handle careful home maintenance. Some absolutely shouldn't. The value sits in knowing the difference.
We've handled enough dressmaking shears over the years to know that the best result usually comes from matching the method to the tool. A basic utility pair might tolerate a light home touch-up. A cherished pair of tailoring shears deserves more caution. If you understand where the safe line is, you can keep your scissors working properly without wasting money or damaging the blades.
The Secret to Clean Cuts Every Time
A clean cut usually looks effortless. That's why people often blame themselves before they blame the scissors. They think they slipped, pulled the fabric wrong, or laid it out badly. In practice, the blade is often the main culprit.
Take a slippery fabric such as viscose challis or a fine lining. With a sharp pair of shears, you can open the blade fully, settle the lower blade against the table, and make a long controlled cut. The cloth stays put and the edge comes away neat. With a dull pair, the same fabric starts shifting, the cut line wobbles, and the tip may snag before you've reached the notch.
Practical rule: If your scissors are crushing fibres instead of slicing them, the problem won't improve later in the project.
That matters more than people realise. A rough cut edge isn't only untidy. It can throw off seam allowances, distort matching points, and make clipping, grading, and trimming less precise. On heavier cloth, dull shears can also tire your hand surprisingly quickly. You end up squeezing harder, and the cut still looks worse.
There's also a money angle. Good sewing scissors aren't cheap tools you replace casually. They're the kind of item you want to keep in service for years, especially if you've found a pair that fits your hand properly and behaves well on your usual fabrics.
What a sharp edge changes in daily sewing
A sharp pair helps with ordinary jobs, not only special ones:
- Long pattern cuts stay closer to the line because the blade doesn't drift.
- Delicate fabrics are less likely to pucker or pull at the tip.
- Layer cutting feels steadier because the blades bite cleanly.
- Small trimming jobs around facings, curves, and corners become more accurate.
The secret isn't some magic sharpening hack. It's consistent maintenance and sensible judgement. If you know how to sharpen sewing scissors safely at home, and when to stop and send them out, you'll get better results with less frustration.
Signs Your Fabric Scissors Need Attention
Dull scissors rarely announce themselves all at once. More often, they become irritating in small ways. You start noticing that one fabric is awkward, then another. A cut that used to feel smooth begins to sound rough. That's the point to pay attention, before a project suffers.
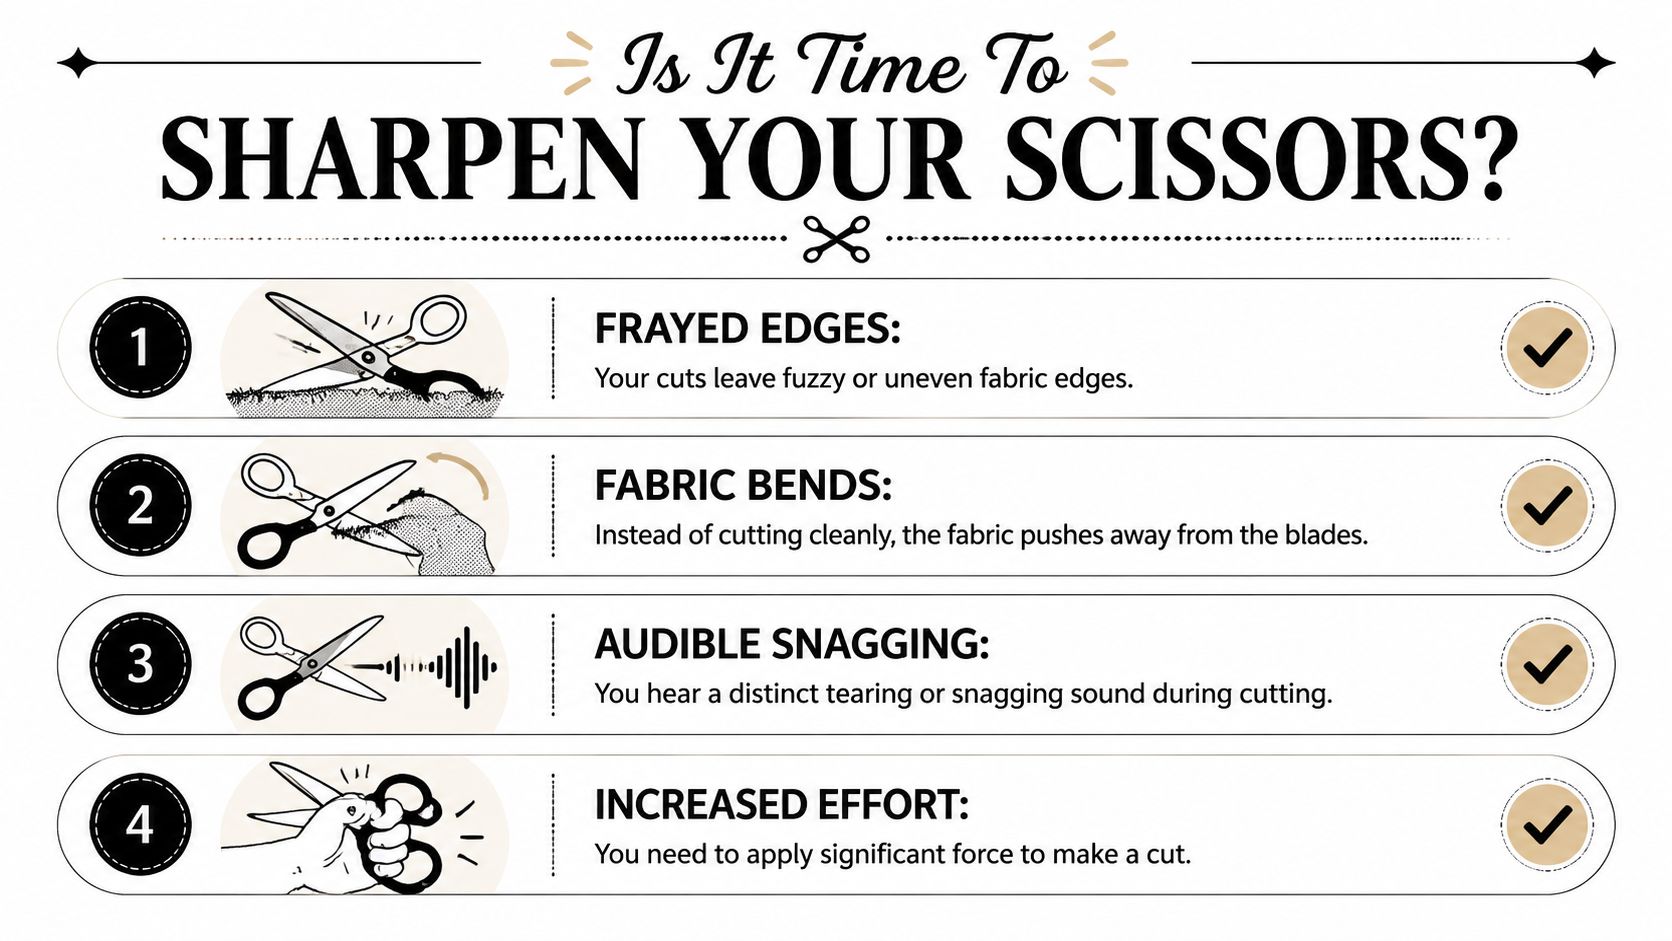
Industry maintenance guidance recommends routine sharpening about twice a year to maintain cutting performance, and notes that neglect can lead to fabric fraying, increased blade tension, and premature wear on scissors that often cost £20 to £150 according to Diamond Needle's scissor sharpening guidance. Treat that as a starting rhythm, not a blind rule. A sewist cutting heavy coating cloth every week won't use scissors in the same way as someone trimming cotton poplin now and then.
Four signs worth noticing
The obvious sign is “they feel blunt”, but that's too vague to be useful. Look for behaviour instead.
- Frayed edges. The cloth separates, but the cut line looks fuzzy rather than crisp.
- Fabric bending away. The blades push the material aside before they finally bite.
- A snagging sound. Good shears usually sound clean and controlled. A tearing noise is a warning.
- Extra effort. You have to squeeze harder, especially near the tip.
Simple checks at the cutting table
You don't need a workshop test bench. A few ordinary sewing-room checks tell you plenty.
Try these:
- Cut a scrap slowly, not quickly. Dull scissors often hide the problem when you force the cut.
- Use a delicate scrap such as lining, lawn, or another fabric that shows dragging easily.
- Test the tip on a small snip. Many scissors feel acceptable at the pivot and fail at the end.
- Snip a single thread held taut. If the blade slides off rather than catching cleanly, the edge wants attention.
A pair can still cut cotton and still be underperforming. Fine fabrics usually tell the truth first.
Trust performance over habit
Some home sewists sharpen too late because they wait for total failure. Others sharpen too often because they've been told to do it by the calendar alone. The better habit is to pair a regular schedule with observation. If your scissors still cut smoothly from heel to tip, leave them alone. If they're starting to fold fabric, act before they chew through your next project.
Your Home Sharpening Toolkit Essentials
A good result at home starts with the right kit. We see more damage from the wrong sharpening tool than from ordinary wear. A coarse gadget can strip metal fast, round the edge, or leave the blades cutting worse at the tip than they did before.
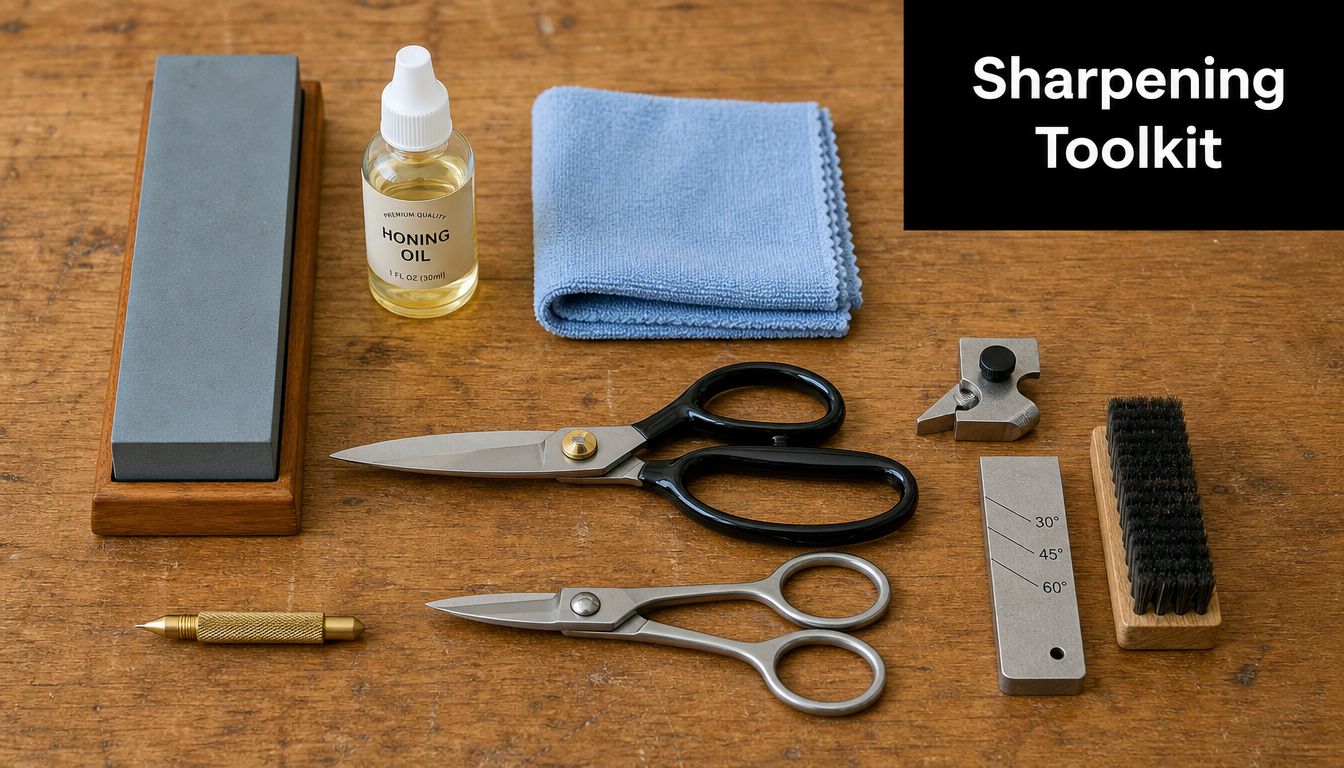
For most home sewists, the aim is modest: clean the scissors, make a light touch-up if the edge is suitable for it, and avoid changing the original shape of the blade. You do not need a bench full of equipment. You do need control.
The tools that make sense
| Tool | Best use | Trade-off |
|---|---|---|
| Diamond plate | Controlled edge work on standard fabric scissors | Removes metal quickly, so it rewards a light hand |
| Fine grindstone or water stone | Slower touch-ups on decent dressmaking shears | More forgiving, but you must hold the angle steadily |
| Soft cloth and cleaning supplies | Removing lint, adhesive, and filings | Helps performance, but will not restore a worn edge |
| A safe work surface | Keeping the blade stable while you work | Easy to overlook, yet it affects accuracy straight away |
A stone is the best starting point because it gives you feedback. You can feel when the bevel is sitting flat, ease off near the tip, and stop after a few passes instead of grinding away blindly. If you want to build that hand skill, Blade Master's complete water stone sharpening manual is a useful reference.
What we don't recommend for dressmaking shears
Home sewing forums are full of quick fixes. Cut foil. Cut sandpaper. Pull the blades through a kitchen sharpener and hope for the best.
We do not advise those methods for fabric shears. They are blunt instruments for a tool that relies on precise blade geometry. They may rough up the edge enough to feel sharper for a short while, but they also risk scratching the blade, changing the angle, or wearing the two blades unevenly. On a cheap household pair, that may be an acceptable gamble. On proper dressmaking shears, it is poor value.
Pinking scissors need extra caution. Their teeth are shaped and sharpened very differently from standard shears, so a normal home touch-up method is usually the wrong choice.
A sensible home kit by scissor type
Match the kit to the scissors, not the other way round:
- Basic craft or utility scissors can cope with a little more experimentation.
- Dressmaking shears respond best to a fine stone and a careful touch.
- Pinking scissors are usually better left alone unless you have the right specialist setup.
- Heirloom or premium shears deserve the most restraint. A light clean and inspection may be wiser than sharpening at home.
That trade-off matters. A home touch-up can save time and money if the scissors are sound and only slightly tired. If the pair is expensive, serrated, badly worn, or already cutting out of line, a bigger toolkit will not solve the underlying problem.
The Right Way to Sharpen Fabric Scissors at Home
Home sharpening can work, but only if you're careful about what part of the blade you touch. The single biggest rule is this: sharpen only the bevelled outer edge. Leave the flat inner face alone. If you abrade the inner face, the blades may stop meeting properly and the cutting action suffers.
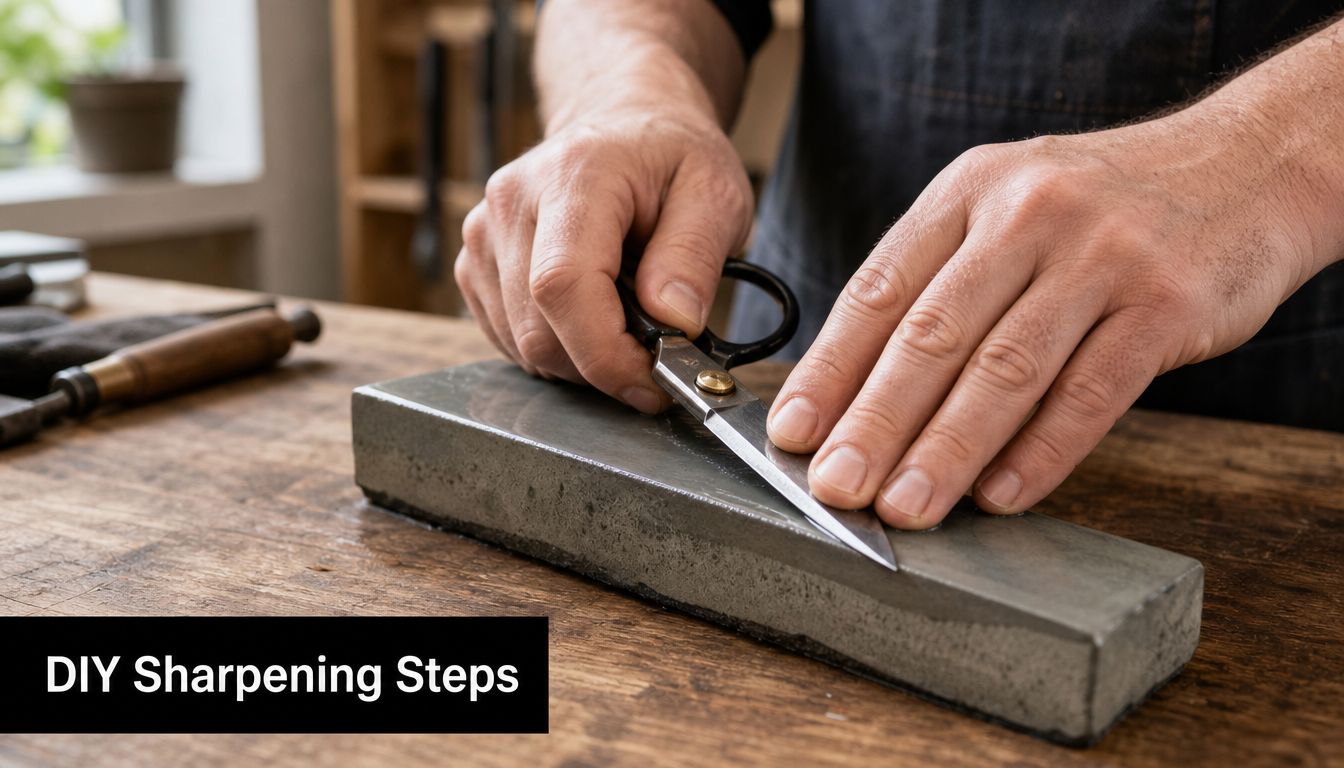
Verified technical guidance for the home method calls for a 400–600 grit diamond plate or grindstone and light, vertical strokes on the bevelled edge. It also notes that failing to remove the slight burr on the back face causes 90% of persistent dullness complaints, according to the demonstration discussed in this scissor sharpening video reference.
Set up the blade properly
If your scissors can be disassembled safely, doing so gives better access and helps you avoid bumping the second blade. Work on a stable table with good light. Clean off lint and sticky residue first so you're not sharpening through grime.
A lot of beginners rush the angle. Don't. Fabric scissors generally rely on a narrow, deliberate bevel. You want to lay that bevel against the stone and follow what's already there, not invent a new shape.
The home method that does the least harm
Use this sequence for an ordinary pair of fabric scissors that isn't chipped, bent, or specialised.
Identify the bevelled edge
Open the blade and look at the outer side. You'll see the angled face. That's the only sharpening surface.Place the bevel flat on the stone
Rock the blade gently until the bevel sits flush. If the blade wobbles or you can see daylight under the edge, reset it.Make light strokes
Use controlled strokes from the base towards the tip. The guidance above specifies light, vertical strokes. Don't scrub back and forth aggressively.Repeat sparingly
The same source notes that 2 to 3 strokes per side on a fine abrasive is often enough to restore the edge when the scissors only need routine maintenance, as summarised from the same verified video reference cited earlier.Feel for the burr
A tiny burr may form on the back face. That means you've reached the edge.
The step people miss
If you stop once the bevel looks brighter, the scissors may still cut poorly. Burr removal is what finishes the job. Close the scissors through their normal action to slice off the slight burr, or remove it very lightly as described in the verified guidance above. If that burr stays put, the blades can continue to feel dull even after sharpening.
Sharpening creates the edge. Deburring lets the edge work.
Here's a useful demonstration of handling and motion before you try it yourself:
Mistakes that ruin the result
Most poor DIY sharpening comes from one of a few repeat problems:
- Touching the inner face instead of the bevel.
- Using too much pressure, which removes more metal than needed.
- Overworking the tip, which changes how the scissors start a cut.
- Ignoring burr removal, then wondering why the cut still drags.
- Trying to repair damage that really belongs with a professional.
The broader maintenance logic is similar to other edged tools. Value Tools Co's effective saw blade maintenance tips make the same general point: careful upkeep extends tool life, while aggressive sharpening shortens it. The tools are different, but the discipline is much the same.
When home sharpening is a reasonable choice
A home touch-up suits scissors that are slightly tired but still structurally sound. If the blades meet well, there are no chips, and you're confident you can hold the bevel consistently, a careful refresh can bring them back.
If you find yourself guessing about the angle, pressing harder to get results, or trying to fix obvious damage, stop there. That's usually the point where a simple maintenance job turns into avoidable wear.
Testing Adjusting and Maintaining Your Shears
Freshly sharpened scissors should be tested on fabric, not paper. Paper tells you very little about how the shears behave on cloth, especially near the tip. A proper test uses scraps that reveal flaws quickly.
Test the edge like a sewist
Start with a slow cut on a fabric that tends to show drag. A slippery lining, a fine cotton, or another smooth woven scrap is useful because it exposes hesitation in the blade. Then make a short tip cut and see whether the fabric slices or folds.
You can also hold a single thread or a narrow strip under gentle tension and try a precise snip. If the scissors catch cleanly from pivot to tip, the edge is behaving. If they only cut well in the middle, the sharpening may be uneven or the tension may not be right.
Be careful with the pivot screw
This is the part people are often tempted to fiddle with after sharpening. We'd urge restraint. Ernst Wright explicitly instructs users never to adjust the screw that holds the blades together, warning that over-tightening or loosening it can affect cutting action, and they advise professional sharpening to avoid damaging the fine edge, as reflected in this Ernst Wright guidance summary.
That warning matters because the pivot screw does more than make the scissors tighter or looser. It affects how the blades meet across their length. A small mistake there can make a newly sharpened pair feel worse.
If the screw is already stable, leave it alone. Sharpness problems and tension problems can look similar, but they aren't the same fix.
Everyday habits that keep the edge longer
Once the scissors are cutting well, the maintenance is plain and boring. That's good news. The habits that preserve shears are easy to stick to.
- Wipe the blades after cutting to remove lint, sizing, and sticky residue.
- Keep them for fabric only. Don't use them for paper patterns, packing tape, or interfacing backing.
- Store them closed and protected so the edge isn't knocked against other tools.
- Check the area near the screw for fibre build-up if the action starts feeling heavy.
A useful routine is to test your fabric scissors briefly before a new project rather than during it. Make one slow cut on a scrap, notice how the blade sounds and feels, then carry on. That small pause catches trouble early and saves you from hacking through your good fabric with a pair that should have been maintained first.
When to Choose Professional Sharpening or Replacement
Some scissors are worth a careful home touch-up. Others are worth protecting from your own enthusiasm. The practical question isn't whether you can sharpen them yourself. It's whether doing so is the best use of the tool.
Professional sharpening of dressmaking scissors in the UK typically costs £6 to £15 per pair, excluding postage, and UK mail-in options such as Sharpening Service in Radstock (BA3 4BH) offer a satisfaction guarantee, which makes professional work a sensible choice for quality shears that can cost over £100, according to Threads Monthly's overview of fabric and pinking scissor sharpening.
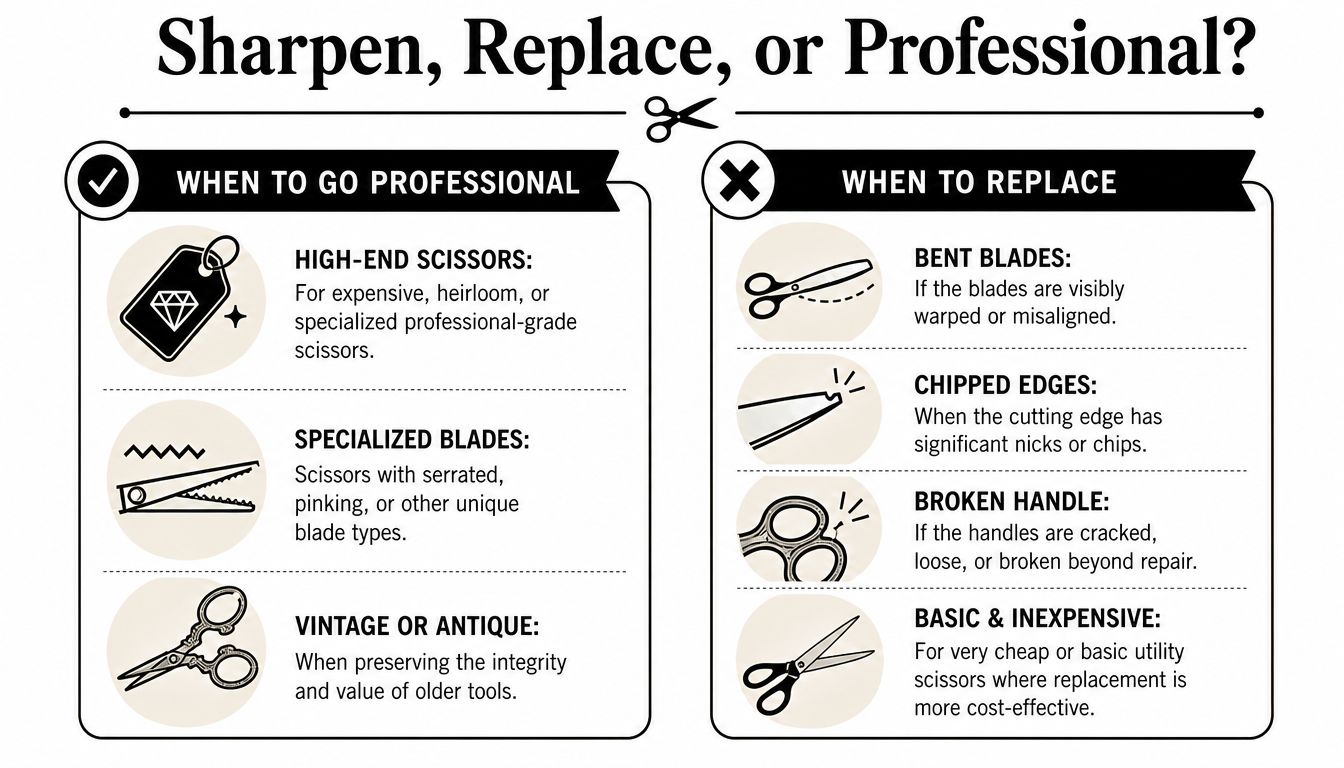
When professional sharpening is the better investment
In the shop, we'd send these out rather than improvise:
- High-end dressmaking shears that you rely on regularly.
- Pinking scissors, because the teeth require specialist work.
- Vintage or sentimental pairs where preserving the original grind matters.
- Blades with visible nicks or uneven cutting action that a light touch-up won't solve.
There's also a long-term maintenance view worth keeping in mind. A verified UK-specific note referencing Ernest Wright says a proper pair of scissors may only need sharpening once in many years, which is a useful corrective to over-maintenance in hobby sewing culture, as discussed in this UK sewing community reference. In plain terms, not every pair needs frequent intervention. Good scissors need the right intervention.
When replacement makes more sense
Replacement is usually the cleaner choice when the scissors are damaged in ways sharpening won't fix:
- Bent blades that no longer meet correctly
- Chipped edges that would require heavy material removal
- Broken or cracked handles
- Very cheap general-purpose scissors where repair costs and effort outweigh the value
A simple decision rule
If the scissors are ordinary, sound, and only mildly dull, a careful home method can be enough. If they're expensive, specialised, old, or damaged, professional sharpening is usually the smarter and cheaper decision in the long run.
A good pair of sewing scissors earns its keep. Look after it with the same care you give your machine, your iron, and your best fabric, and it'll return that favour every time you cut.
If you're planning your next project and want fabrics, haberdashery, or practical sewing supplies from a trusted UK shop, visit More Sewing. It's a reliable place to find quality dressmaking materials, sewing kits, and support for home sewists who care about getting the details right.
