
Guides
Sewing Without Pins: A Complete Guide (No Pins!)
You've got a seam clipped, the fabric keeps creeping, and every time you reach the machine another pin seems to land exactly where your fingers need to be. That is usually the moment sewists start asking whether Sewing Without Pins is possible, or whether it only works for tidy fabrics and easy seams. It is possible, and in the right situations it is cleaner, faster, and far less stressful.
The question is not whether you can skip pins on every project. It is which holding method fits the fabric, the seam, and the amount of handling the piece will take before it reaches the needle. For slippery satin, a row of neat hand basting may save far more time than fighting with pins. For a straight seam that only needs a light hold, clips or tape may be the better choice. If you are also working on soft furnishings, a practical guide like selecting drapery hardware can sit naturally beside pin-free sewing, because both rely on choosing the right fixing method for the task.
Why Ditch the Pins and Sew Freely
Pins look harmless until they start slowing you down. They prick fingers, shift delicate fabric, and turn a steady seam into a stop-start job that feels more fiddly than creative. On fabrics that mark easily, they can leave tiny holes or puckers that stay visible long after the garment is finished.
Pin-free sewing is not a shortcut around care, it is a way to choose the right hold for the job. Clips, basting, tape, and weights let you match the method to the fabric instead of forcing every project through the same routine. That usually means fewer marks, less distortion, and a cleaner line under the presser foot.
Practical rule: if a method keeps the layers flat before they reach the needle, it is usually worth trying before a pin goes in.
Good tools matter because sewists want results that feel smoother and look more professional, not just quick fixes, a point that fits the wider demand seen in IBISWorld on UK textile retailing. Pin-free sewing fits that mindset well, because it is less about doing without and more about choosing the cleanest holding method for each task. For a straight seam, clips may be enough. For slippery fabric or a piece that needs exact placement, basting or tape can save more time than wrestling with pins.
A practical example is selecting drapery hardware, where the fastening choice has to suit the fabric and the final hang. Sewing works the same way. The best choice depends on how much the fabric moves, how visible the marks would be, and whether you need a temporary hold or a more exact one before stitching.
Your Pin-Free Sewing Toolkit
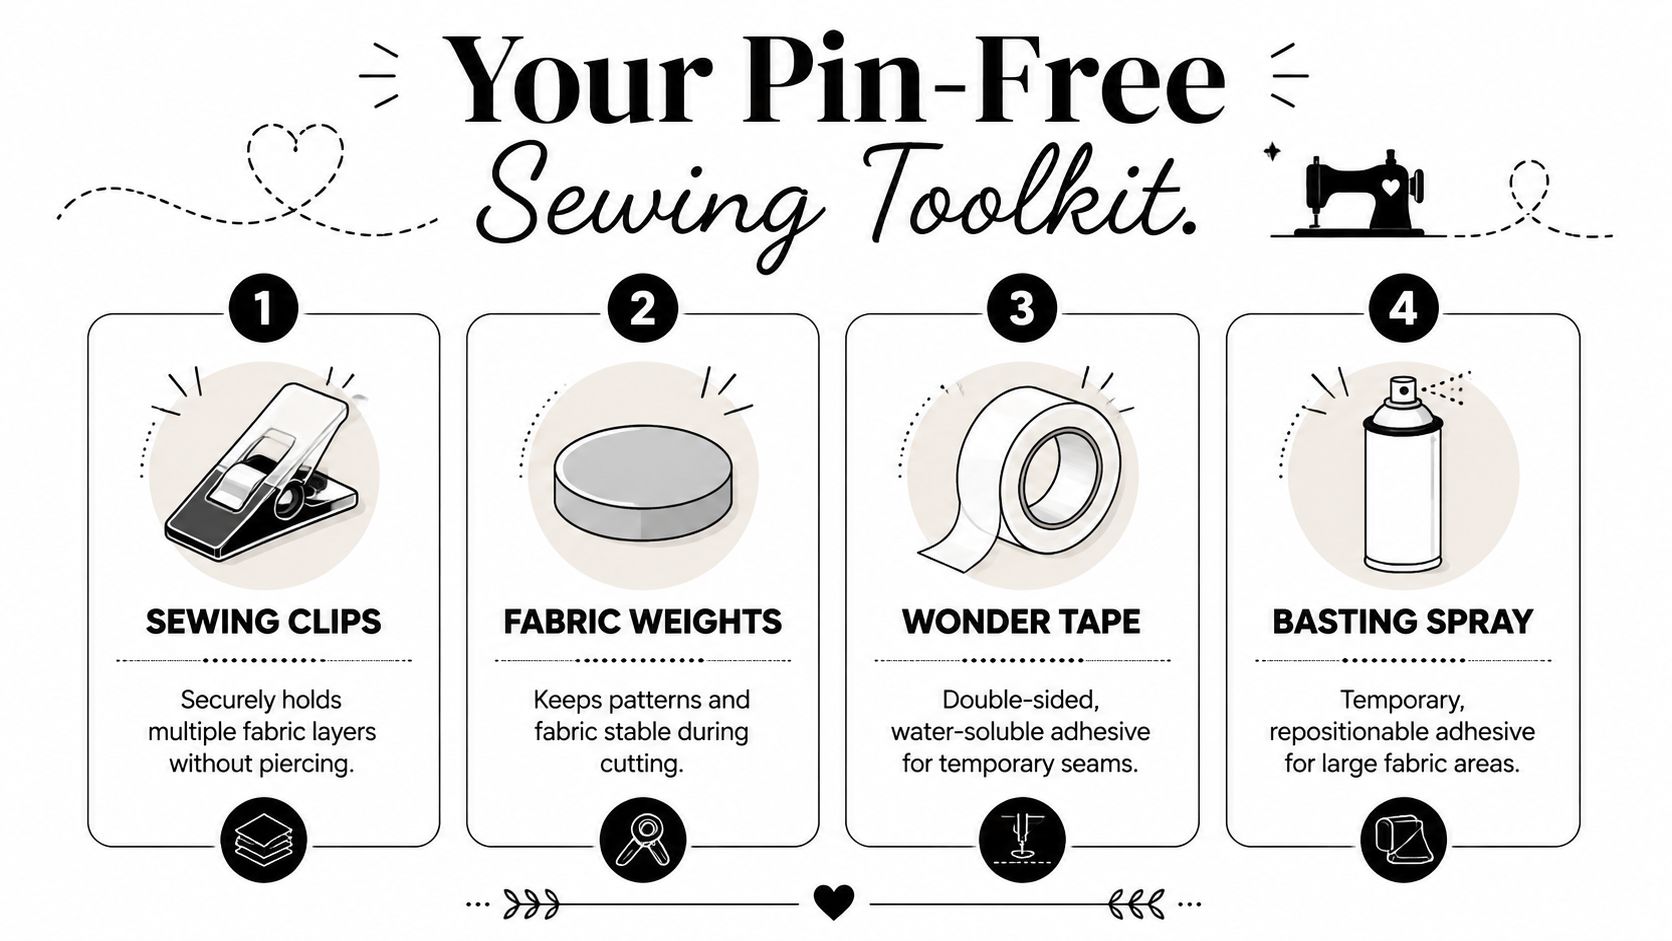
A pin-free setup works best when you stop looking for one miracle substitute and start using a few tools for different jobs. Sewing clips are the first grab for thick layers, bindings, and anything that would bend or blunt a pin. They hold the fabric from the edge, so they're especially useful where you don't want holes, marks, or distorted seam allowances.
Pattern weights belong at the cutting table, not the sewing machine. They keep paper patterns and fabric stable without piercing either one, which makes them ideal for slippery cut layouts and repeated cutting sessions. If you've ever chased a shifting pattern piece around the table, weights feel like a small luxury that saves a lot of frustration.
Basting stitches, by hand or by machine, are the most precise option when the fabric wants to move. They're excellent for curves, stripes, matching points, and silky fabrics where clips alone can't guarantee alignment. Basting takes longer, but it gives you a temporary seam line you can trust before the final stitch goes in.
Double-sided tape, including products such as Wonder Tape, is brilliant for positioning zips, patch pockets, and hems that need to stay exactly where you put them. Use it sparingly, because tape is about control, not bulk. For larger areas, temporary spray adhesives can help, but they need careful testing first because some fabrics react differently to any adhesive.
A good decision is to think in terms of fabric movement, seam shape, and how visible the holding method might be after stitching.
Clips hold. Basting controls. Tape positions. Weights stabilise. Choose the one that matches the problem, not the one that happens to be nearest.
Mastering Core Pinless Techniques
A straight seam is the easiest place to build confidence without pins. Start by clipping the fabric layers together at the raw edge, placing the clips close enough to stop sliding but not so close that they crowd the presser foot. Sew slowly and remove each clip just before it reaches the needle, keeping the seam allowance flat with your other hand.
The rhythm matters more than speed here. If you remove clips too early, the layers can creep apart. If you leave them too long, you'll be tempted to sew over one and risk a machine jam or a damaged clip.
Straight seams with clips
For cotton poplin, denim, or quilted layers, clips often feel easier than pins because they grip the edge instead of piercing the cloth. Keep the pieces aligned at the start, then check again after the first few stitches. That first check often catches a tiny shift before it becomes a visible mismatch at the end of the seam.
For stripes or checks, hand-basting gives you more certainty than clips. Match the design lines carefully, then place loose basting stitches across the seam line so the layers can't slip while you sew. You can remove those stitches afterwards, and the pattern matching usually looks much more intentional than a clipped-and-hope approach.
A gentle curve, such as a neckline facing, is where basting really earns its keep. Clips can help at the beginning and end, but the curve itself usually benefits from hand-basting in short sections so the fabric lies smoothly. This is one of those jobs where patience shows in the final garment.
Try the clip-and-baste combination on a project with a front princess seam or a curved cuff. It's a good test because it teaches you where clips are enough and where the fabric wants a firmer hold before stitching.
A useful habit is to sew a few inches, stop, and smooth the layers flat before continuing. That tiny pause catches drift early and keeps the seam honest, especially when you're learning to trust a pin-free workflow.
Tackling Tricky Tasks Without Pins
The hardest jobs are usually the ones people pin most heavily, which is exactly why pin-free methods are so useful there. A stretchy hem, a zip insertion, and a shirt collar all behave differently, so the holding method has to change with them.
A jersey hem often wobbles under pins because the fabric stretches and relaxes as you work. Double-sided tape gives you a steadier edge because it fixes the fold in place before stitching, which helps the hem stay straight as it passes under the needle. Use it sparingly along the fold, press the hem into position, and stitch slowly so the feed dogs don't tug the edge out of line.
For a standard zip, tape can be a real problem-solver. It holds the tape exactly where you want it, so the zip doesn't drift as you topstitch. That's especially helpful if the two sides of the opening need to stay symmetrical, because any wobble becomes visible immediately on the finished garment.
A shirt collar needs a slightly different approach. Use clips on the straight runs where the fabric lies flat, then switch to hand-basting around the curved points where a sharp angle or small shift would show. That mix gives you the crisp outer edge you want without forcing the collar into a pin-heavy setup that can twist the layers.
Useful habit: when a task has both straight and curved sections, don't force one holding method across the whole thing. Mix methods instead.
The general sewing advice in many tutorials assumes stable woven cotton, but that's not where most frustration comes from. A better measure is how your fabric behaves when you combine seams, folds, and pressure at the machine, especially on slippery, stretchy, or delicate materials (fabric-specific pinless sewing guidance).
Fabric Specific Advice for Pin-Free Sewing
Bulky fabrics need grip more than delicacy. Denim, fleece, and layered seams usually respond best to clips, because pins can bend, disappear into the thickness, or leave the layers misaligned. If the fabric feels springy or heavy in your hands, clips are usually the first tool to reach for.
Slippery fabrics want restraint. Silk charmeuse and viscose shift easily, so hand-basting is often the most dependable option when you need seams to stay matched. That extra temporary stitching stops the layers skating around each other and helps prevent the puckering that can happen when clips only hold the edge.
Delicate fabrics like chiffon and organza need a lighter touch still. Fine basting thread is safer than anything that could leave obvious holes or marks, and short, careful stitches are better than forcing the fabric into a heavy-handed method. If the fabric is sheer enough that every hole matters, the wrong holding method becomes visible very quickly.
Vinyl and leather are the clearest case for clips. They don't forgive punctures, and each hole stays there. If the material shows marks permanently, pins stop being a convenience and start being a risk.
The key decision is simple. Ask whether the fabric wants to be held, guided, or protected. Once you answer that, the method usually picks itself.
Finishing Touches and Final Tips
If the layers have shifted slightly, don't panic and don't keep sewing blindly. Stop, reopen the affected section, and realign it before the problem spreads further down the seam. A small correction early is much easier to live with than a crooked finish at the end.
Basting stitches come out cleanly with a seam ripper if you take your time. Snip every few stitches, then pull the thread gently so you're not dragging against the fabric surface. That keeps the finish neat, especially on finer cloth.
Pin-free sewing gets easier because your eye starts learning where movement happens before the machine does. Faster sewing, cleaner results, and less frustration are these advantages, and they come from choosing the right support method for each fabric and task.
If you're ready to build a pin-free routine that suits the way you sew, browse More Sewing for quality fabrics, haberdashery, and practical tools that make your next project smoother from the first cut to the last stitch.
