
Velvet usually looks forgiving on the bolt. Then you cut a bodice, stitch a sleeve, hold the garment up to the light, and realise one panel looks deeper in colour than the next. Nothing is technically “wrong” with the seams, yet the whole piece reads patchy. That's the moment velvet teaches its main lesson. It doesn't behave like a flat woven. It reacts to direction, pressure, heat, and handling from the first layout to the final press.
That's why learning how to sew with velvet nap is less about one magic trick and more about discipline. Small decisions matter. How you test the pile, how you lay the cloth, where you place pins, whether you baste, how you steam. Get those right and velvet gives you that rich, light-catching finish people associate with expensive ready-to-wear and old-school dressmaking. Rush it and it shows every shortcut.
Introduction to Sewing with Velvet Nap
You see the problem the moment two freshly cut panels are laid side by side. Same fabric, same pattern, different depth of colour. On velvet, that usually comes down to nap direction, and once those pieces are sewn into a garment, the mismatch is there to stay.
Nap gives velvet its richness, but it also sets the rules for cutting. The pile catches light one way and absorbs it the other, so every pattern piece needs to run in the same direction. If one sleeve is cut opposite to the bodice, the garment can look uneven even when the stitching is accurate.
For that reason, velvet is usually cut flat in a single layer rather than folded. Industry guidance has long treated single-layer cutting as standard practice for pile fabrics because it limits shifting and helps keep the nap consistent across the full set of pieces, as noted in guidance from the UK's Textile Institute and related training materials used in professional dressmaking practice: https://www.textileinstitute.org/
That matters even more with deadstock velvet. Rolls can vary from batch to batch, and even within one roll the pile can read slightly differently under side light. At More Sewing, working with UK-sourced deadstock means checking batch continuity and nap consistency before cutting starts, not halfway through when a front and back suddenly look like different dye lots.
Practical rule: Mark the nap direction on every pattern piece before the fabric goes on the table.
Handled with that level of care, velvet rewards the effort. The colour reads evenly, the surface keeps its depth, and the finished piece looks intentional rather than patchy.
Understanding Velvet Nap and Pile
You can spot a nap mistake before you touch the seams. One bodice panel looks richer, the other looks flatter, and the colour shifts as soon as the wearer turns toward a window. On velvet, that usually comes back to pile direction or to pieces that were cut from deadstock lengths with slightly different surface character.
Nap is the direction the pile lies. Pile is the raised surface formed by the short fibres. Brush the fabric one way and it feels sleek. Brush it back and it grips your hand a little more and often reads darker because the light hits the fibres differently.
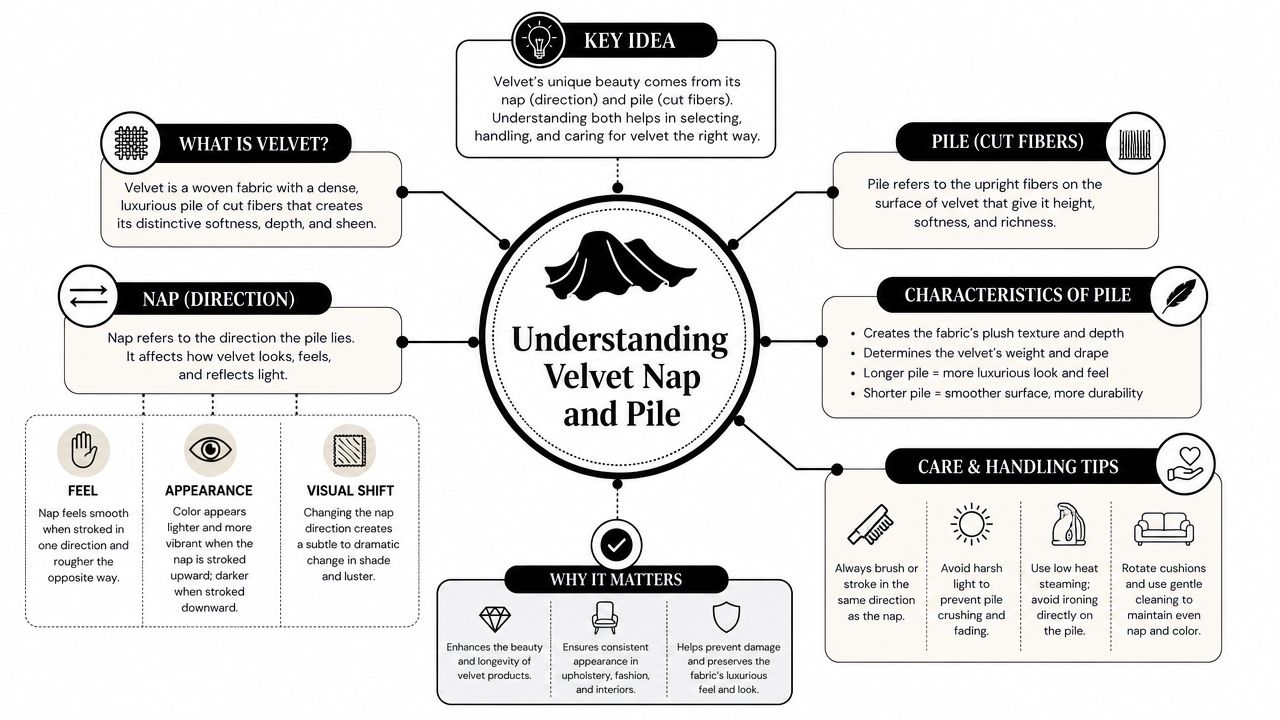
The quickest test is simple. Put the cloth under side light and sweep your palm up and down the length. One direction will look smoother and more even. The opposite direction will look rougher, deeper, or slightly bruised. On black, navy, bottle green, and other dark shades, that difference can hide until the garment is worn, which is why I check it before any pattern piece is pinned down.
What nap changes in the finished garment
Nap affects more than colour.
- Surface appearance shows first on wide areas such as skirt fronts, jackets, and dress backs. A single panel cut the opposite way will stand out even if the stitching is perfect.
- Handle matters on collars, cuffs, facings, and waistbands. If the chosen nap runs the wrong way on a collar, it can feel scratchy against the skin.
- Drape shifts slightly on details that catch light from several angles, especially cowls, bias sections, and full sleeves. The fabric itself has not changed, but the way the pile reflects light changes how the shape reads.
Velvet keeps a clear record of every decision. If the nap plan is sloppy, the finished garment shows it.
Deadstock velvet needs an extra level of checking because two cuts sold together are not always from the same batch or from the same point on the roll. Rather than quoting an unsourced percentage, it is better to treat inconsistency as a common enough risk to inspect for every time. At More Sewing, UK-sourced deadstock velvet is batch-traced before cutting, and the pile is checked across all lengths under the same light so a front, sleeve, and collar do not end up reading like different fabrics once sewn.
Batch checks before you cut
If your velvet arrives in separate lengths or folded cuts, inspect each one before you commit to layout.
| Check | What to do | What you're looking for |
|---|---|---|
| Piece comparison | Place every cut side by side under the same light | Matching sheen, colour depth, and pile lay |
| Hand test | Stroke each piece in both directions | One shared smooth direction across all cuts |
| Labeling | Tag each cut as soon as it's opened | Clear separation of bundles or batch numbers |
| Edge review | Compare selvedges and cut edges | Signs one length was rerolled, stored differently, or cut off-grain |
I also look at the fabric from both standing height and table height. Velvet can appear uniform from above and mismatched from an angle, especially if one length has a slightly flatter pile from storage.
After the visual checks, watch this short demo to train your eye for directional pile.
Keep the supplier note, invoice, and your own labels with the fabric until the garment is finished. That small bit of discipline makes fault-finding much easier. If one sleeve catches the light differently, you can trace whether the issue came from a separate deadstock batch or from your cutting direction.
Preparing Velvet Before Cutting
A lot of velvet trouble starts before the scissors come out. You smooth the fabric once, it creeps off grain. You pin it like a stable woven, the pile shows every mark. Good preparation saves more than time. It protects the finish.
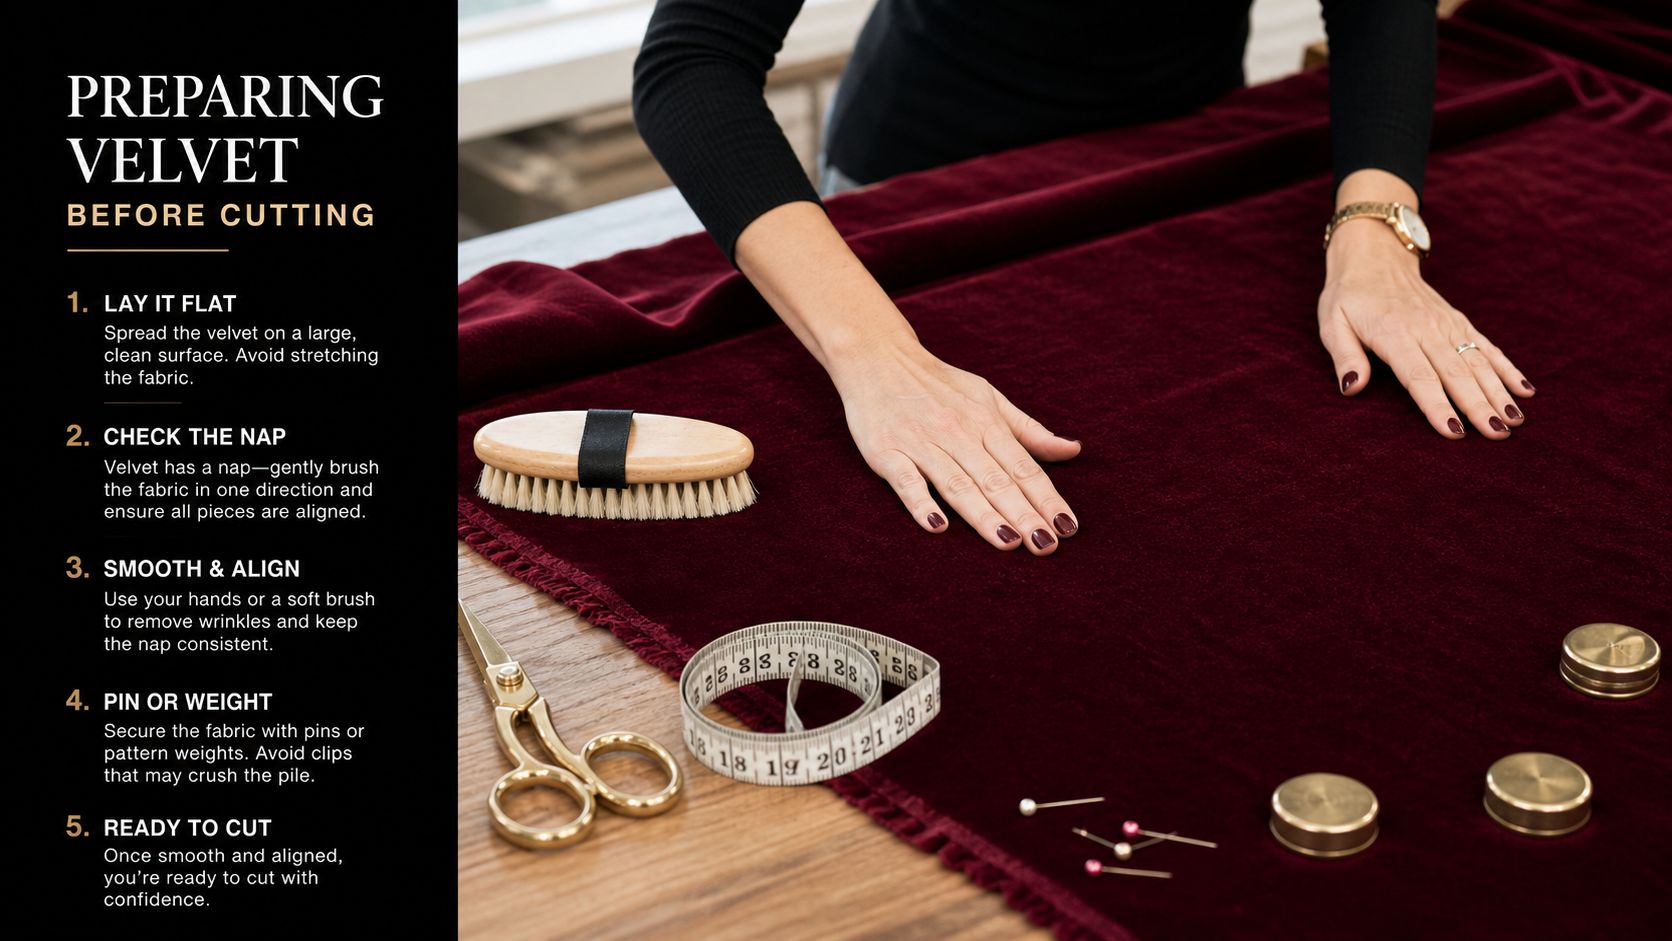
Before I prepare anything else, I confirm that every length I plan to cut from is behaving the same way. That matters even more with deadstock velvet, where two cuts labelled similarly can still differ slightly in pile recovery or sheen. More Sewing's UK-based sourcing is useful here because batch-tracing gives you a way to separate lengths before cutting, and a quick nap consistency check across the whole order can stop one rogue panel from spoiling the garment.
Once that is done, set the cloth up so it stays calm on the table.
Set up the cloth properly
Lay the velvet flat on the cutting surface and leave it alone for a while if it arrived tightly folded or rolled. Many temporary lines will relax on their own if the pile has not been crushed too hard in storage. Tugging and re-folding usually makes the surface look worse, not better.
Keep the table clean and smooth. Velvet picks up lint, thread ends, and tiny bits of grit very easily, and all of them interfere with accurate cutting. If the table has any roughness, cover it first with a clean sheet or paper so the backing glides without snagging.
Then prepare the fabric in this order:
- Mark the nap direction on the wrong side with chalk or removable pencil, especially if you are working from more than one deadstock cut.
- Cut in a single layer so the top and bottom do not shift against each other.
- Let the full length rest supported on the table. Hanging part of it off the edge can pull the grain out before you notice.
- Slide tissue paper under the cloth if the velvet wants to creep or the table surface has too much drag.
Single-layer cutting takes more table space and usually more patience. It is still the safer choice. Velvet layers like to travel in opposite directions under very little pressure, and once that happens your edges stop matching cleanly.
Marking and pinning without damage
Velvet shows handling marks fast, so every pin needs a reason. Place pins parallel to the selvedge and keep them within the seam allowance whenever possible. Straight cross-pinning through visible pile is asking for bruising, permanent holes, or both.
For most markings, use gentler methods. Tailor's tacks work well for darts and match points. Chalk on the wrong side is fine for grain arrows and piece labels. On darker or denser velvet, a loose thread tracing often gives the clearest result without scuffing the surface.
If a point will show on the right side, keep metal out of it.
When underlining helps
Some velvet has enough body to hold shape on its own. Some collapses the moment you ask it to support a neckline, opening, or waist seam. Underlining can steady those areas, particularly on fluid rayon or viscose-blend velvet, but it needs a light hand.
Use it where the garment needs control rather than everywhere by default:
- Neckline and front edges that are likely to stretch during handling
- Button or fastening areas that will take repeated strain
- Pocket openings that need support without bulk
- Waist seams and bodice joins where the garment's weight can drag
Baste the underlining to the backing and handle both layers as one piece from that point on. Test the pair first. The wrong support can make velvet look stiff and slightly padded, which defeats the soft, light-catching finish you are trying to preserve.
Cutting Layout and Pattern Matching
Cutting velvet well is mostly a layout problem. The pile wants to shift, the surface marks easily, and folded cutting invites mismatched direction. That's why the cutting table has to do part of the work for you.
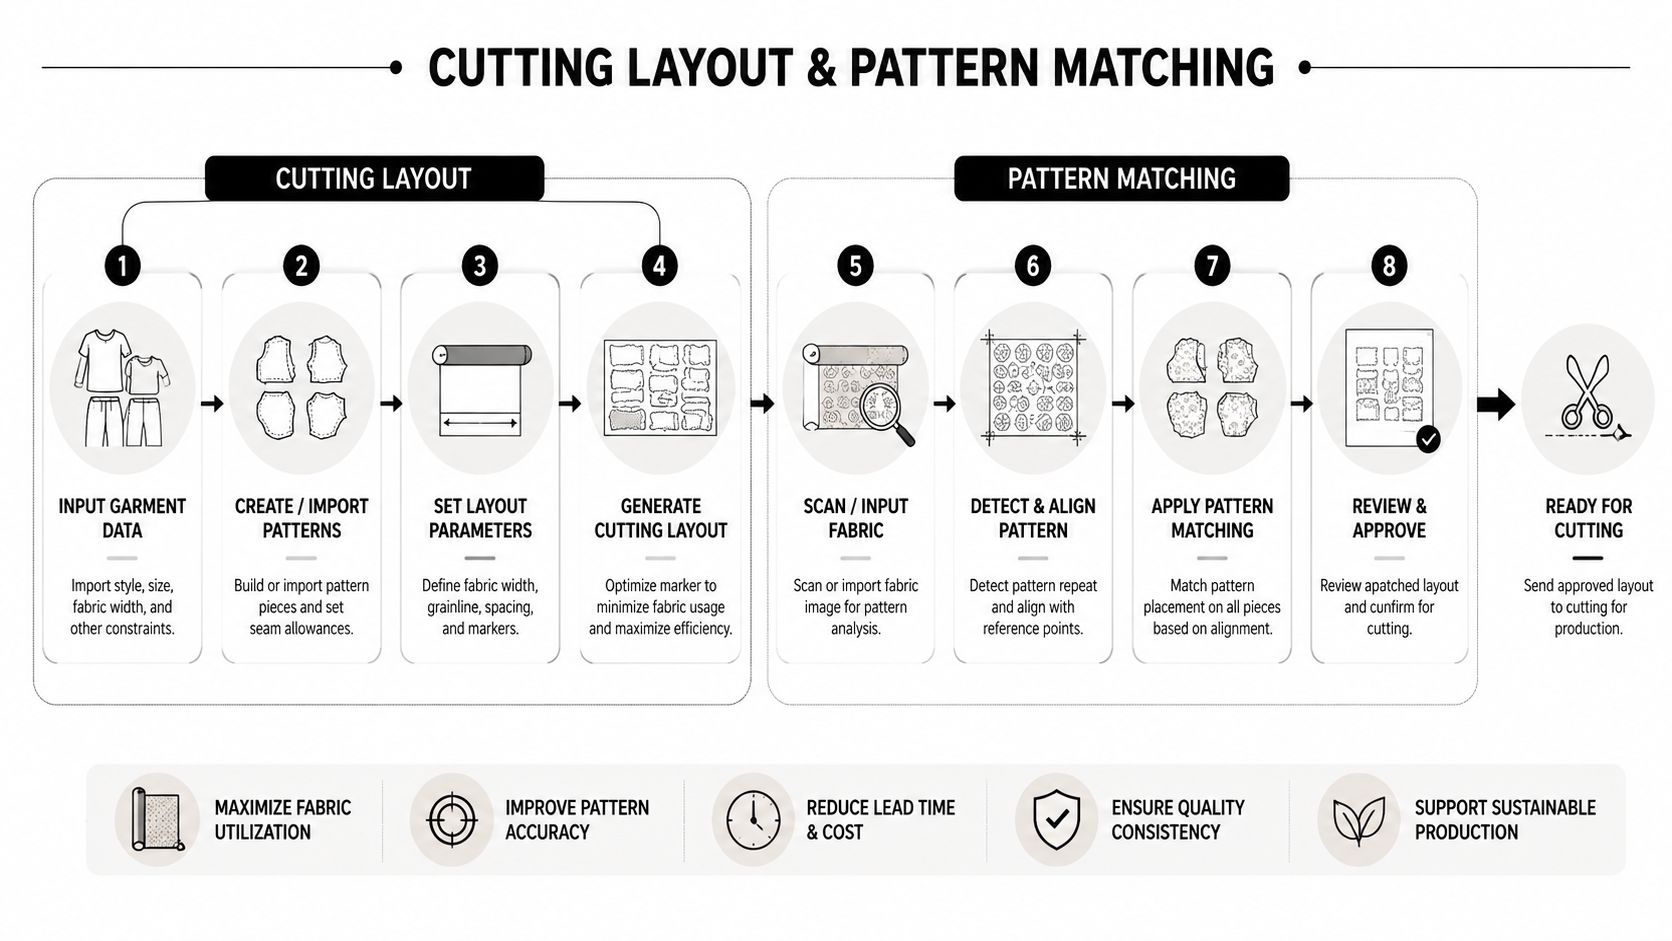
The most reliable method is to lay the fabric pile-side down on a clean cutting surface and use pattern weights instead of pins to prevent shifting and pile damage. Placing tissue paper beneath the velvet helps maintain grainline integrity without compressing the pile, as shown in Closet Core's velvet cutting guidance.
A layout that keeps the nap consistent
With velvet, the pattern pieces need more space than they might on another fabric because every piece must face the same direction. That often means you can't use your pattern envelope's most economical folded layout. Accept that early. Fighting it usually wastes more cloth than a sensible single-layer plan.
Use this order:
- Start with the largest pieces such as front, back, and skirt panels.
- Add directional pieces next like sleeves, collars, and cuffs.
- Fit small items last. Facings, pocket bags, and tabs can often use remaining single-direction spaces.
If you're cutting a jacket, keep both fronts aligned in the same nap orientation and do the same with the sleeves. One sleeve flipped to “save room” is the sort of shortcut that makes the whole garment look off under daylight.
Pattern matching across seams
Velvet doesn't have a printed motif to match, but it still needs visual continuity. Think of the pile as the pattern. On princess seams, side seams, and sleeve heads, the goal is that the light travels smoothly across the join.
A simple checklist helps:
| Area | What to check before cutting |
|---|---|
| Front bodice pairs | Both pieces point in the same nap direction |
| Back sections | Centre back and side back catch light the same way |
| Sleeves | Left and right sleeve mirror shape, not nap direction |
| Collar and lapel | Visible outer sections follow the garment's chosen nap |
| Pocket flaps | Flaps read the same as the garment body when worn |
For example, if you're making wide-leg velvet trousers, place the two fronts side by side before cutting and stroke both from waist to hem. If one feels smooth and the other rough, one is rotated wrongly even if the grainline looks correct.
Weights, tissue, and cutting tools
Pins distort velvet at the cutting stage. Weights don't. Use enough to stop drift, but not so many that you have to tug the pattern from underneath them. Lightweight weights spread around the outline are better than one heavy object in the middle.
A rotary cutter often gives a cleaner edge on velvet than lifting the cloth with shears. If you use one, keep the blade sharp and cut slowly through fabric and tissue together. If you prefer shears, let the lower blade stay on the table as much as possible so you don't lift and stretch the pile.
Cut one piece, then pause and check the nap arrow on the pattern before moving on. Velvet punishes autopilot.
One more habit makes a difference with deadstock. Label every cut section on the wrong side as soon as it's cut. Write “left sleeve”, “right front”, “collar under”, and a batch note if you're working from more than one supplier piece. That small bit of organisation prevents a very common mistake, which is mixing visually similar cuts that don't share the same pile character.
Machine Setup and Sewing Techniques
Velvet can look neat at the machine for the first few stitches and then start creeping so one layer finishes longer than the other. That slippage is normal. The answer isn't to pin more aggressively. It's to control the seam before it reaches the presser foot.
Baste before you sew
Velvet has a high tendency to shift or “creep” during machine sewing, so the dependable method is to hand baste two rows of stitches, one on the seamline and one within the seam allowance, using a contrasting thread before machine stitching, as recommended in By Hand London's velvet sewing tips. This is slower than pin-and-go sewing, but it works.
The double-baste approach does two jobs. It holds the layers in their intended position, and it gives you a visible path so you don't over-handle the seam trying to steer it. For curved seams such as a sleeve head or a shaped waist seam, this matters even more.
Useful machine choices
A few setup choices make velvet easier to sew cleanly:
- Walking foot or roller foot helps feed both layers more evenly.
- Sharp new needle reduces snagging and skipped stitches.
- Test scraps first because velvet varies from crisp cotton velvet to fluid stretch velvet.
- Moderate stitch length often looks cleaner than very tiny stitches, which can chew at the base fabric.
On a side seam in silk-mix velvet, for instance, a walking foot often keeps the seam allowance from crawling upward. On a denser cotton velvet, a standard foot may work well enough if the seam has already been thoroughly basted. The point isn't that one setup suits all velvet. The point is that basting gives you room to test rather than guess.
Sewing direction and handling
The cloth should be guided, not pulled. Let the feed system work, and support the weight of the garment on the table so the seam isn't dragged downward as it stitches. If the fabric starts to push ahead of the foot, stop with the needle down and smooth the layers without stretching them.
One old dressmaking habit still earns its place. Rub the two velvet layers together gently before stitching to help “marry” the nap. It sounds quaint, but it helps the surfaces settle against each other instead of fighting for grip.
Sew a sample seam with the same number of layers, the same seam finish, and the same foot you'll use on the garment. Velvet usually tells you what it wants on the sample.
Seam and Hem Finishes
Bulky seams are one of the fastest ways to make velvet look homemade. The fabric already has body because of the pile, so every extra layer shows. Good finishing is less about fancy techniques and more about reducing thickness while keeping the outside smooth.
Seam allowances that sit flatter
After stitching, grade or trim the seam allowances where needed. On collars, facings, cuffs, and enclosed waist seams, removing some excess bulk helps the garment fold and turn properly. Long-pile velvet benefits especially from trimming or shaving pile out of hidden seam allowance areas so the outer line stays clean.
Finger-press the seam open first. That lets you assess whether it needs more intervention. If the seam looks smooth already, leave well alone rather than overworking it.
A few seam finish choices suit velvet particularly well:
- Plain trimmed seams for most garment interiors where bulk is the main concern
- Lined seams in jackets and dresses, which keep the inside neat without adding visible ridge lines
- Careful overlocking on allowances only when the base cloth frays and the pile can tolerate the extra stitching
- Hand-finished seam allowances in special garments where you want maximum control and minimum imprinting
Hems that don't fight the drape
Velvet hems need to support the weight of the garment without creating a hard ridge on the right side. A deep, stiff hem can print through. A soft finish usually looks better.
For a dress or skirt, these methods tend to behave well:
- Narrow hand-stitched hem on fluid velvet where you want the edge to disappear.
- Catch-stitched hem allowance on medium-weight velvet to spread the support softly.
- Lined hem finish on jackets or coats where the lining takes some of the strain.
If you're hemming velvet trousers, hang them first so the legs settle. Then mark from the floor up, not by trusting the cut edge alone. Velvet can look level on the table and drop unevenly once gravity takes hold.
Facings, linings, and edge control
Understitching can help facings stay inside, but test first. On some velvets, additional rows of stitching too close to the edge create visible ridges. In that case, a line of hand tacking inside the seam allowance often gives better control with less imprinting.
For neckline facings and front edges, a lining can be the cleaner option. It hides the internal bulk and gives the velvet a smoother roll. On special-occasion garments, this is often what separates a soft, expensive-looking finish from one that feels stiff around the edges.
Pressing Storage and Troubleshooting
A velvet garment can look perfect at the machine and tired after one careless press. The pile marks easily, and once it is crushed, full recovery is never guaranteed.
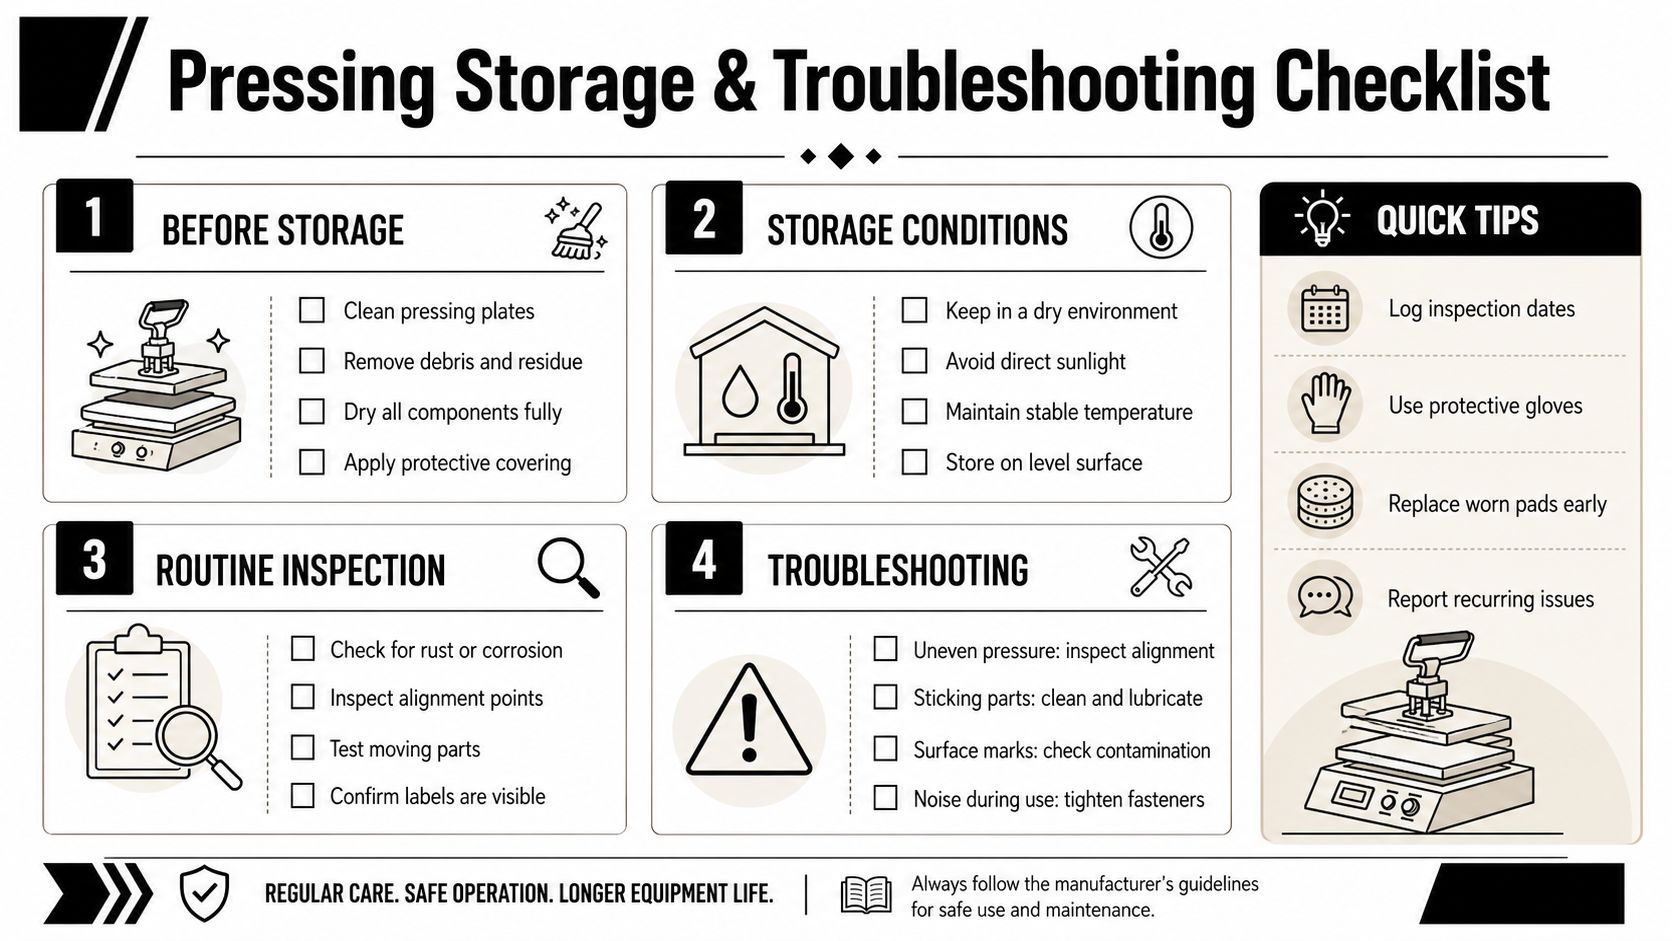
Press without crushing
Keep the iron off the pile side. Use steam, a press cloth, and a surface that lets the nap sink rather than flatten. A needle board is the standard choice, but a thick towel or a scrap of the same velvet, pile side up, also works well for home sewing.
I usually finger-press first, then add steam from just above the fabric. That gives the seam a chance to settle without forcing a hard crease into the face. If you need a sharper result on hems or facings, work from the wrong side and test on an offcut first. Velvet varies a lot by fibre content and pile density.
If an area does get bruised, hold it over steam and tease the pile up lightly with a soft toothbrush or velvet brush. This can improve minor flattening. It will not fully restore a badly crushed patch, especially on shorter-pile or heavily pressed velvet.
Storage and common problems
Store finished velvet garments on a shaped hanger with space around them so the pile is not compressed by other clothes. If the piece must be folded, pad the folds with tissue or smooth cotton and change the fold line from time to time.
For fabric still in the length, roll it with the pile protected if you can. That is one reason I pay attention to sourcing. With UK deadstock velvet, one roll can behave differently from the next, even when the colour name is the same. More Sewing's More Sewing range is useful here because the deadstock focus makes batch checks and nap consistency worth asking about before cutting, which can prevent the mottled look that appears when panels reflect light differently.
Most problems have a clear cause once you know what to look for:
- Puckered seam. Usually caused by shifted layers, too much presser foot pressure, or tension that is slightly tight for the thickness.
- Shiny seam ridge. Usually caused by pressing from the face or pressing over a hard surface with too much pressure.
- Mottled colour across panels. Usually caused by inconsistent nap direction, or by mixing pieces from batches with slightly different pile lay.
- Flattened shoulder, seat, or hip area. Usually caused by storage pressure, repeated sitting, or pressing after wear instead of re-steaming.
A light overall steam often freshens velvet better than pressing it flat. Let the garment dry fully on the hanger before wearing or storing it again.
