
Dressmaking
Create Your Dream Coat: Patterns for Coats 2026
You've probably reached the point where jackets feel easy enough, but a proper coat still seems like a project for “later”. That's usually where most home dressmakers pause. A coat uses more fabric, more structure, more pressing, and more decision-making than almost anything else in a handmade wardrobe.
It's also one of the most satisfying things you can sew.
A good coat isn't just about picking pretty wool and hoping for the best. Success comes from matching the right silhouette to the right fabric, then using construction methods that support both. That's why some handmade coats look crisp and expensive, while others collapse at the hem, twist at the front edge, or never sit comfortably over a jumper.
Patterns for coats ask more of you than a blouse pattern ever will. They ask you to think about layers, movement, sleeve pitch, bulk, seam support, pressing order, and whether the pattern you love on paper suits the cloth you want to use. Get those choices right and you can make something you'll wear for years, not just one winter.
Your Guide to Making the Perfect Coat
You cut into coating fabric on a quiet afternoon, convinced you've chosen a simple project. By the time you reach the front facings, the cloth feels heavier than expected, the hem wants to ripple, and the sleeves suddenly seem far more important than they did on the pattern envelope. That's the moment coatmaking becomes real.
A well-made coat asks you to make good decisions early. The pattern shape, the behaviour of the fabric, and the construction method all have to agree with each other. If one is out of step, the finished coat shows it fast. A sharp, structured silhouette needs cloth with enough body to hold the line. A soft wrap style needs drape, but it still needs support in the right places so it does not sag after a month of wear.
Start by deciding what kind of work the coat has to do in your wardrobe, not which pattern illustration you like best.
- Commuting coat: Choose ease through the shoulders and upper back, pockets you can use with cold hands, and a length that works with everyday movement.
- Dress coat: Look for a cleaner silhouette, controlled shaping, and fabrics that press well without turning bulky at seams and hems.
- Weekend outerwear: Prioritise durability, practical closures, and a pattern that tolerates heavier layers underneath.
- Statement coat: Let shape and cloth lead, but be honest about the extra structure, testing, and pressing it will need to look intentional rather than theatrical.
Shop rule: If you cannot say what the coat will be worn over, in what weather, and for how many months of the year, you are choosing too soon.
A quick style comparison
| Coat silhouette | Key characteristics | Best for | What to watch |
|---|---|---|---|
| Trench | Belted waist, collar, lapels, often storm details | Mild weather, polished daily wear | Works best in fabric that can hold topstitching, folds, and edge definition |
| Pea coat | Double-breasted front, broad collar, compact shape | Cold urban wear | Thick meltons can make the front and collar unmanageably bulky |
| Duffle | Relaxed fit, hood, patch pockets, toggle closures | Casual winter wear | Shoulder width and cloth thickness decide whether it looks purposeful or boxy |
| Wrap coat | Soft structure, tie belt, elegant drape | Layering, dressier outfits | Too-soft fabric can make the front edge and belt area collapse |
| Overcoat | Structured long line, tailored details | Smart wear and winter layering | Shoulder fit, sleeve hang, and interfacing choice matter more than decorative details |
| Minimalist collarless coat | Clean front, reduced detail, modern look | Everyday modern wardrobe | Simple lines show every wavering edge, so stabilising and pressing have to be exact |
| Parka or utility coat | Practical pockets, zip closures, weather focus | Outdoor use, active days | Hardware, topstitching, and layered seam allowances add time and bulk |
History helps here because these shapes were built around use. A trench was designed around movement, weather protection, and crisp detailing. A pea coat came from naval practicality, which is why it suits dense wool and broad collars. A wrap coat relies more on drape and belt control than on firm tailoring. If you ignore that relationship between purpose and fabric, the coat can look wrong even when the sewing is neat.
It also helps to study ready-made examples before you commit. Even if you are sewing a different style, looking closely at proportions, pocket placement, sleeve width, and hem depth will train your eye. For a clean utilitarian reference, you can shop lab coats and notice how much the silhouette depends on balanced length, stable front edges, and enough room to move without looking oversized.
That balance is what makes a handmade coat feel professional.
A Visual Guide to Coat Pattern Styles
The first decision isn't the brand of pattern. It's the shape. Silhouette controls not only the look of the finished coat, but also how demanding the project will be at the machine and ironing board.
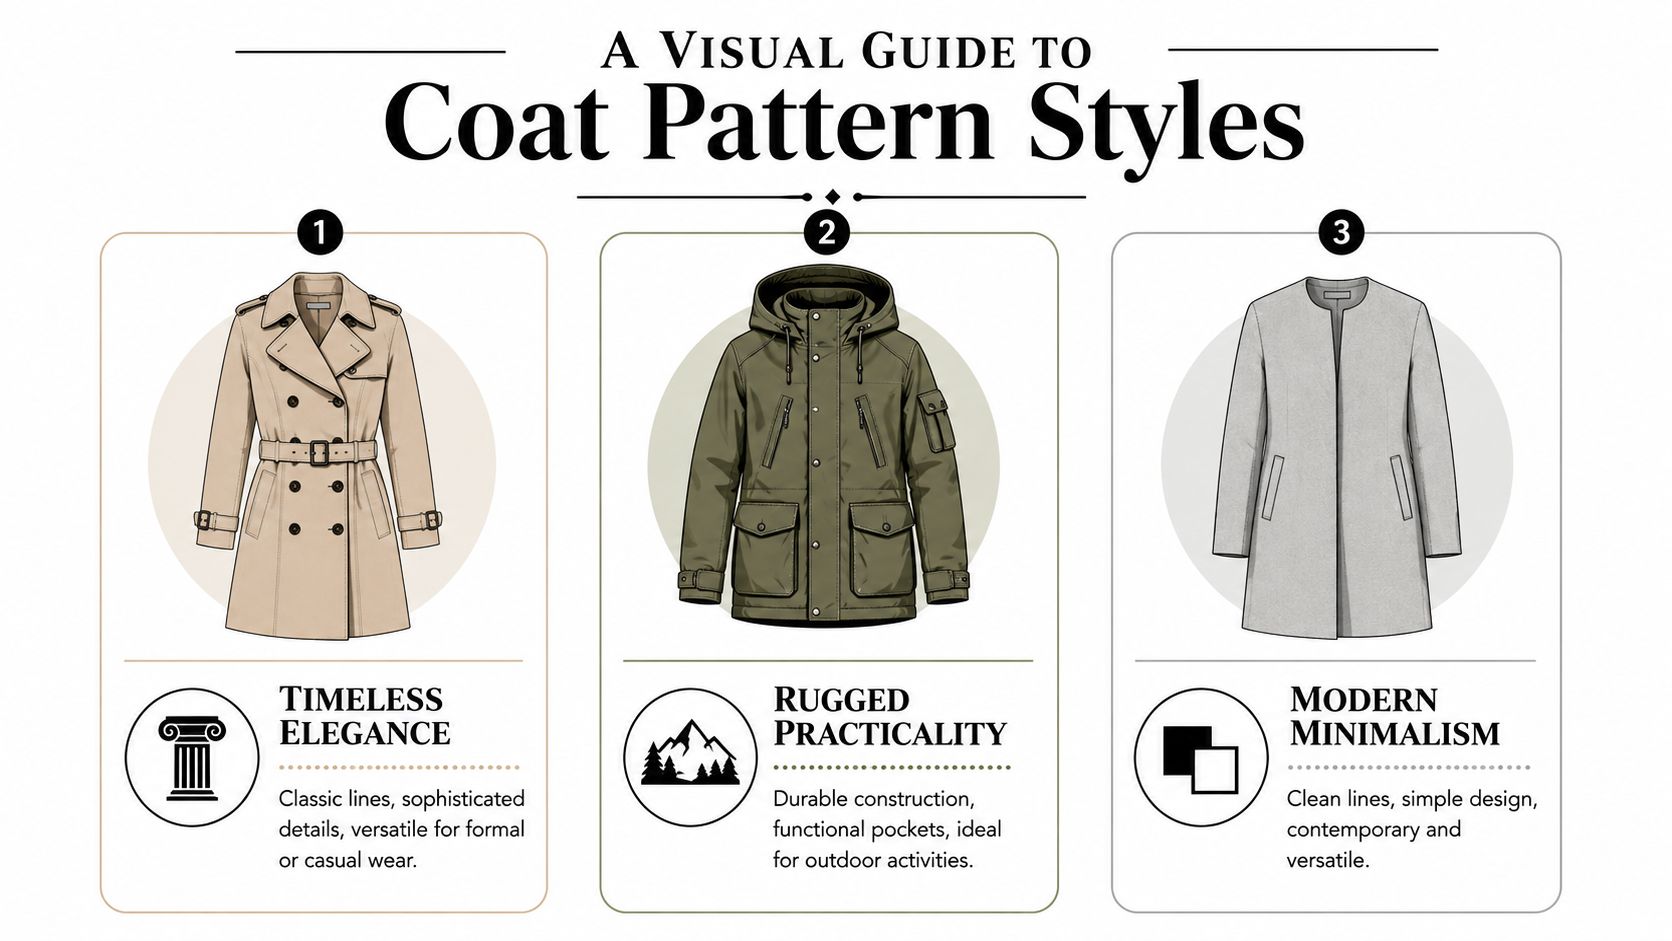
The silhouettes that earn their keep
A trench coat suits sewists who enjoy detail. You'll usually handle collars, lapels, sleeve tabs, belt loops, and more topstitching than you first expect. It rewards precise work, but only if your fabric holds a crease and doesn't fray into chaos.
A parka or utility coat leans practical. It's a strong choice if you care more about wearability than formal tailoring. Drawstrings, zips, patch pockets, and hoods ask for accuracy, but not necessarily classic tailoring skill. The challenge is bulk management at pocket corners, plackets, and hood seams.
A minimalist coat looks easy because it appears simple. In truth, simplicity leaves nowhere to hide. A collarless front edge has to be perfectly even. Facings need support. Hem balance matters. This is often where newer coat makers discover that “clean lines” can be less forgiving than decorative details.
If you want a real-world visual reference for functional workwear proportions, it can help to look at garments outside the home sewing world too. Browsing structured examples like these shop lab coats is useful for studying length, pocket placement, and how a simple silhouette relies on balance rather than ornament.
Pick the style that matches your sewing temperament
Some people enjoy slow precision. Others want momentum. That matters.
| Coat Style | Key Features | Best For | Recommended Fabrics |
|---|---|---|---|
| Trench coat | Belt, collar, lapels, multiple tabs and topstitching | Transitional weather, polished daywear | Gabardine, tightly woven twill, lighter coating |
| Parka | Hood, zip, utility pockets, weather-ready details | Casual wear, outdoors, travel | Dry oilskin, technical shell, sturdy cotton canvas |
| Minimalist coat | Collarless or simple neckline, hidden closures, clean front | Modern wardrobe, easy styling | Melton, boiled wool, stable double-faced wool |
| Pea coat | Double-breasted front, broad lapels, compact length | Everyday winter city wear | Melton wool, dense wool blend |
| Duffle coat | Hood, toggles, patch pockets, roomy fit | Relaxed layering | Boiled wool, heavy wool coating |
| Wrap coat | Belted waist, softer structure, elegant movement | Smarter casual and occasion wear | Wool crepe, cashmere blend, softer coating |
| Overcoat | Tailored line, set-in sleeves, formal finish | Smart dressing and deep winter wear | Melton, tweed coating, structured wool |
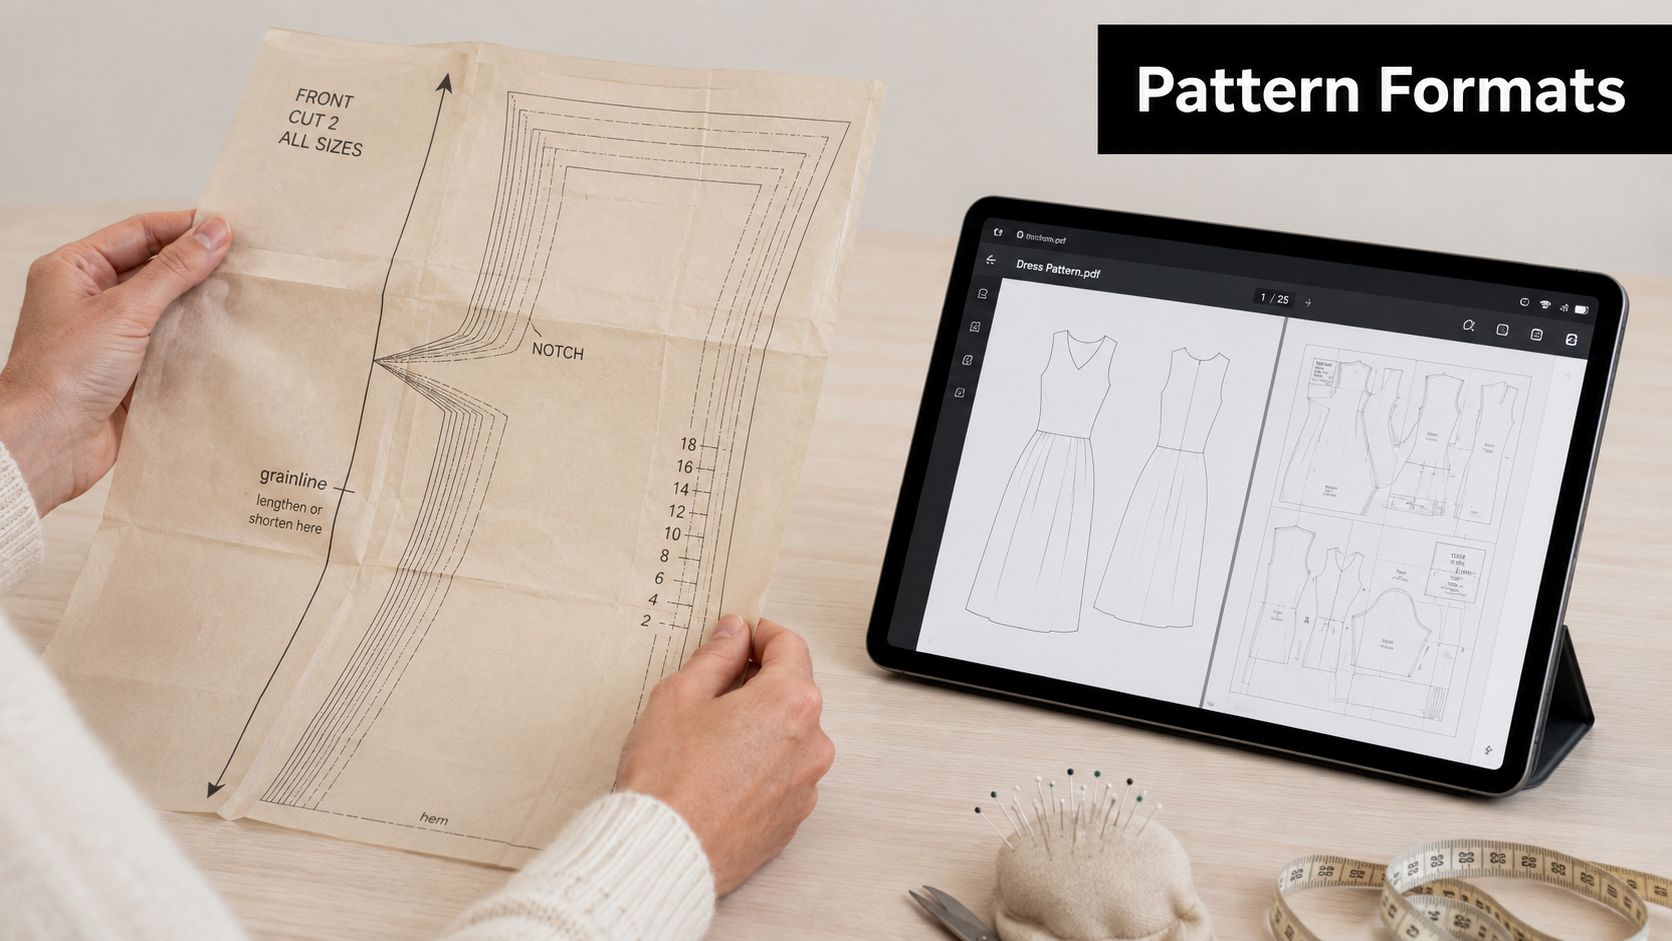
PDF or tissue pattern
This choice changes your prep work more than your sewing.
PDF patterns
PDFs are good when you want instant access, layered sizing, and the option to reprint one piece after an accident with the rotary cutter. They're especially useful if you blend sizes or alter often, because tracing from a fresh printout is straightforward.
The downside is assembly. Taping pages for a full-length coat can test your patience, and small printing errors can multiply if you don't check the scale square first.
Printed tissue patterns
Tissue patterns feel more direct. You open the envelope, identify your view, and get on with tracing or cutting. For some sewists, that simplicity is worth a lot, especially with large coat pieces.
The weak point is durability. Tissue tears at corners, softens after repeated pinning, and can become awkward if you alter heavily.
Don't choose PDF because it's modern or tissue because it's traditional. Choose the format that matches how you actually prepare garments.
Read the envelope like a cutter, not a shopper
Look beyond the line drawing.
- Skill level: Treat “intermediate” with respect on coats. The shape may be simple, but collar construction, sleeve setting, and lining order can push the project well beyond a simple dress.
- Fabric list: Don't read this as decoration. If the pattern recommends gabardine, melton, tweed, or coating, the designer is telling you what level of body the seams, facings, and silhouette expect.
- Notions: Buttons, zips, shoulder pads, sleeve heads, interfacing types, and lining all affect the final result.
- Finished garment measurements: These matter more than the body chart once you start thinking about sweaters underneath.
If a pattern envelope hides the technical details and sells only the romance, I get cautious. A good coat pattern should tell you enough to plan before you ever touch fabric.
Selecting the Right Pattern Format and Features
A first coat project often starts the same way. Someone falls for a sharp line drawing, buys beautiful coating, then discovers halfway through that the pattern assumes a completely different kind of fabric and finish. The result is usually not bad sewing. It is a bad match between silhouette, cloth, and construction.
Read the pattern as a construction plan
Start with the pieces, not the styling shot. Count the panels. Look for a two-piece sleeve, separate upper and under collar, shaped facings, full lining pieces, pocket bags, belt loops, tabs, vents, and any area that will need careful turning and pressing.
Those details tell you how the coat gets its shape. A clean, minimal coat can still be advanced if it depends on crisp edges, accurate roll lines, and invisible support inside the front. A more casual utility coat may have more visible topstitching but be easier to sew because patch pockets, straighter seams, and looser shaping tolerate small irregularities.
This matters before you buy fabric. A pattern with many enclosed edges and internal layers behaves very differently in thick melton than it does in lighter gabardine.
Pattern format changes how accurately you work
PDF and tissue are not just shopping preferences. They affect preparation, alteration, and accuracy on large pieces.
Layered PDFs help if you blend sizes through shoulder, bust, waist, and hip, which is common in coat fitting. They also make it easier to preserve the original lines while tracing changes for shoulder width, sleeve bicep room, or extra hem depth. Tissue still has advantages. Full-size pieces are easier to assess at a glance, especially on long fronts, wide collars, and substantial sleeves where tiled pages can hide a wobble in the join.
For a first structured coat, I usually tell customers to choose the format they will handle most carefully. The best draft in the wrong hands still leads to crooked fronts and mismatched seams.
Fabric behaviour matters more than the fibre label
“Suitable for wool” is not enough information. Wool coating can be springy and sculptural, soft and collapsing, smooth and compact, or lofty and thick enough to double every seam allowance.
Ask four practical questions:
- Does the silhouette need body, drape, or a balance of both?
- Will seam layers press flat enough at collar points, hems, and pocket welts?
- Can the chosen cloth support the roll line, lapel, or hood edge without fighting the pattern?
- Will the coat still hang cleanly once interfacing, lining, and closures are added?
A trench pattern asks for a cloth that can hold topstitching, a belt, and a structured collar without looking bulky. A wrap coat needs enough movement to skim the body, but enough stability that the fronts do not sag under the belt. A cocoon coat needs body in the cloth, or the silhouette collapses and loses the shape the pattern promised.
Double-faced wool needs a different kind of pattern
Double-faced wool exposes weak pattern choices very quickly. Many standard coat patterns are drafted for lined construction with facings doing part of the internal work. Remove the lining, use a thicker splittable fabric, and the same draft may feel tight, heavy, or awkward at the edges.
According to the presenter in this double-faced wool guidance, coat patterns for that fabric often benefit from extra ease through the hip and a slightly lower armhole, rather than relying on a close fit drafted for a conventional lined coat. Treat that as fabric-specific advice, not a universal rule. The point is that double-faced wool changes the engineering.
Patterns with fewer seams, calmer shaping, and edges that can be finished cleanly usually give better results. Tight armholes, narrow facings, sharply fitted hips, and complicated enclosed construction often create trouble fast. Expensive cloth makes those mistakes easier to see, not easier to hide.
If you are considering faux fur or statement animal print for a coat, this guide for ethical luxury lovers is useful for understanding how pile and surface character affect the final look.
Features worth paying for
Good coat patterns save trouble before the first cut. Look for features that answer workroom questions clearly.
- Layered sizing: Useful for tracing a narrower shoulder with a fuller hip or adding room for winter layers.
- Cup options or specific fit guidance: Helpful if your upper chest and full bust do not sit in one straight size.
- An interfacing map: Collars, fronts, hems, vents, and pocket openings all depend on the right support in the right place.
- Clear lining diagrams: These reduce mistakes in bagging order, sleeve insertion, and hem finishing.
- Finished garment measurements: They show whether the coat has enough wearing ease for knitwear, not just a blouse.
A strong pattern earns its price by showing how the coat is meant to function. That is what separates a project that merely goes together from one that wears well, hangs properly, and still looks polished after a full season.
Matching Fabrics Linings and Interfacing
You can choose a beautiful coat pattern, cut into expensive cloth, sew carefully, and still end up with a coat that feels stiff, droops at the front, or twists at the collar. That usually comes down to a poor match between silhouette, fabric behaviour, and the hidden support inside the coat.
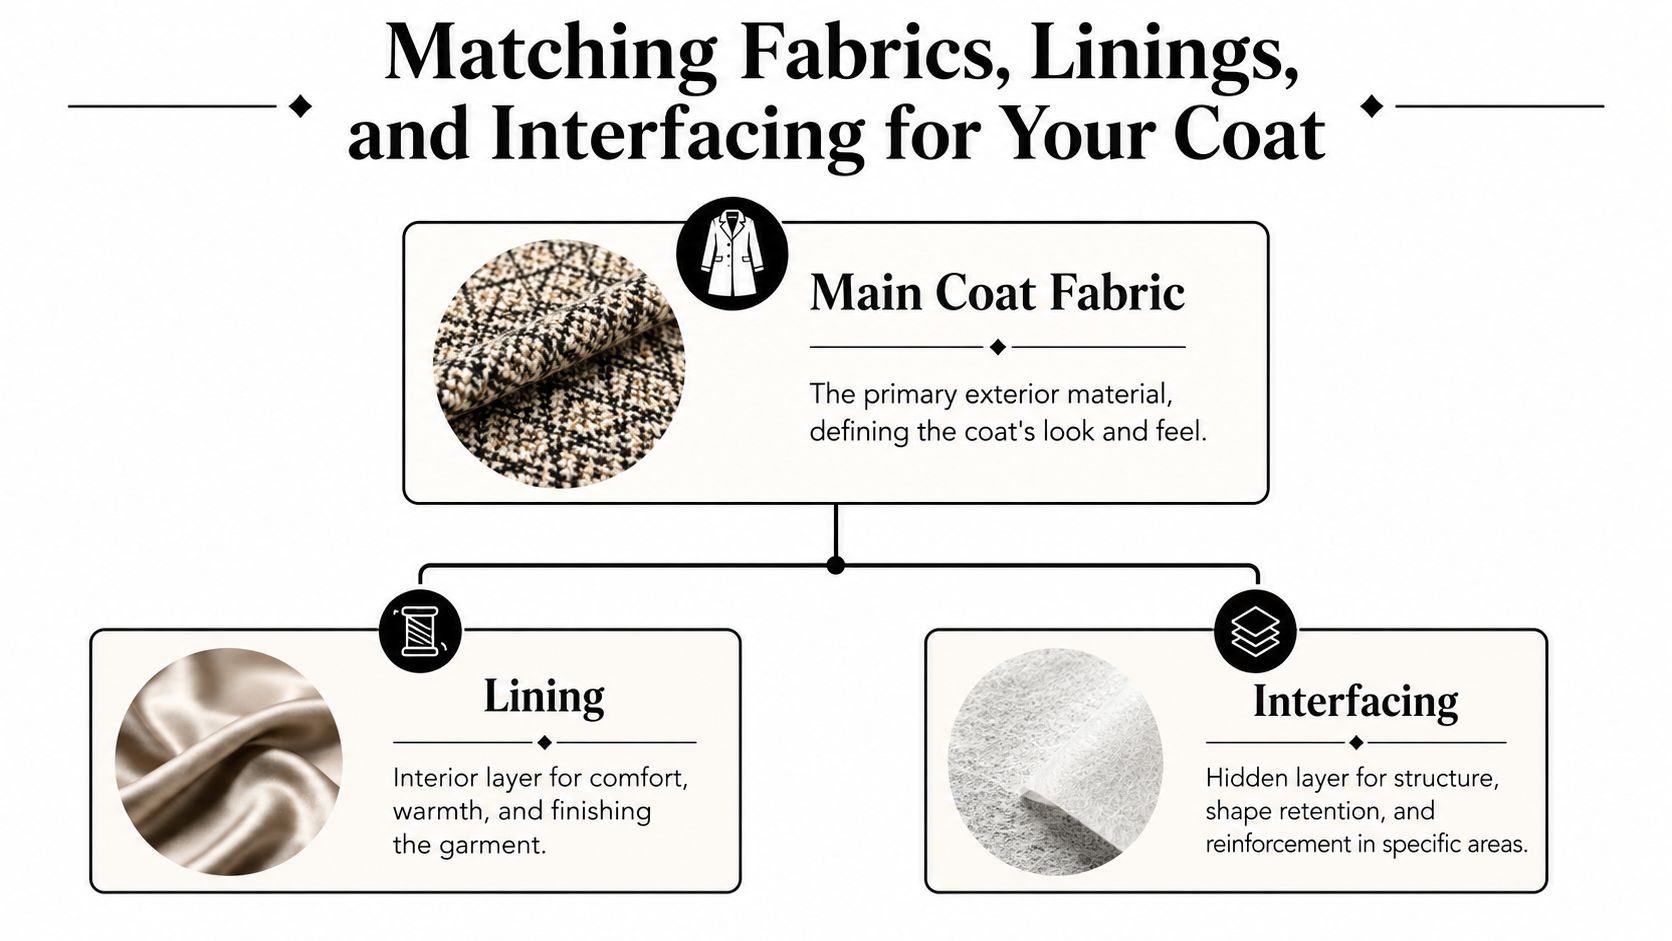
A soft cocoon shape can tolerate a cloth with drape. A sharp double-breasted style with a defined lapel usually needs a fabric that presses well and holds an edge. That relationship matters more than whether the fabric is fashionable or expensive.
Start by matching the outer fabric to the pattern's shape
In the workroom, I sort coat fabrics into three practical groups. Soft coatings, such as brushed wool blends, suit relaxed coats with dropped shoulders, easy sleeves, and gentle shaping. Firm coatings, melton, and tightly woven wool suit styles with collars, fronts, and hems that need to stay crisp. Bulky fabrics, including bouclé, teddy, and faux shearling, work best with simple seam lines and reduced internal layering because every join becomes thicker than the pattern envelope suggests.
Pattern lines that look clean on paper can disappear in the wrong cloth. Princess seams, welt pockets, and sharp lapels need fabric that will show them clearly. If the fabric is heavily textured or has a deep pile, simplify your expectations. You may gain warmth and surface interest, but lose precision at edges and style lines.
The same rule applies to faux fur and statement prints. Surface character changes the whole coat. If you're interested in fabric ethics as well as appearance, this guide for ethical luxury lovers is useful for thinking about sourcing with intention rather than impulse.
Lining affects wear, not just appearance
Many first-time coat makers treat lining as an afterthought. It is part of the coat's performance.
Choose lining by asking how the coat will be worn.
- Slippery viscose, acetate, or anti-static lining: Best for coats worn over knitwear or jackets because the sleeves slide on easily.
- Breathable lining options: Better for coats that move between outdoors, the car, the train, and overheated shops.
- Quilted or insulated linings: Useful for true winter coats, but they add bulk fast, especially at armholes, hems, and sleeve heads.
A heavy outer fabric with a clingy lining feels awkward every time you put it on. A light outer fabric with an overly heavy lining can sag out of balance. Good coat making is often about balancing those layers so the whole garment hangs as one unit.
Unlined coats need even more discipline. Seam allowances, pocket bags, edge finishes, and hem treatments all become visible design choices, so choose a pattern drafted for that cleaner interior if possible.
Interfacing decides whether the coat keeps its shape
Interfacing does the quiet structural work. It supports collars, lapels, front edges, hems, vents, facings, button stands, and pocket openings. Without the right support, a coat can look respectable on the hanger and tired after a few wears.
The trade-off is simple. Too little interfacing and the coat collapses. Too much and it feels cardboard-stiff, especially in softer silhouettes.
Match the interfacing to both the fabric and the area being supported:
- Lighter woven or fusible support: Good for soft shaping in facings and hems where flexibility matters.
- Firmer support: Better for collar stands, front edges, and areas around buttonholes that take strain.
- Sewn-in support or hair canvas: Worth considering for structured wool coats where press shape matters as much as raw stiffness.
Always test on scraps from the actual fabric. Press, cool, and then handle the sample the way the coat will be handled in wear.
Press a fused sample, let it cool completely, and then bend it. If it bubbles, cracks, or feels papery, reject it before you touch the real pieces.
Some coatings blister under heat. Some loosely woven fabrics show adhesive through to the right side. Some beautiful brushed wools lose their softness if the interfacing is too aggressive. Ten minutes of testing can save a full coat front.
Check construction stress points before you cut
This is the stage where experienced makers pause and study the pattern pieces together. Look at the collar, the front edge, the pocket opening, the hem depth, and any vent. Then ask whether your chosen fabric can support that construction cleanly.
A thick wool with a deep hem, full facing, turn-back cuffs, and welt pockets may be technically possible, but the bulk will fight you at every press. In that case, a simpler pocket, a reduced hem allowance, or selective trimming inside the seams often gives a better finish than forcing the original plan.
Likewise, a softly draping fabric will not suddenly behave like tailoring cloth because interfacing was added. Interfacing supports a decision. It does not replace one.
Test the full fabric stack
Before cutting the coat, build a small sample that includes the outer fabric, interfacing, and lining together. Sew a seam, press it, turn an edge, and check the thickness. This tells you far more than handling each material separately.
I recommend doing this anywhere bulk will matter, especially at collars, front facings, pocket welts, sleeve hems, and vents. If the sample feels hard to turn or refuses to press flat, the full coat will be worse. Adjust early by changing the interfacing weight, swapping the lining, or choosing a pattern detail that asks less of the cloth.
That is how coats end up looking professional. The finish starts long before the final pressing.
Mastering Coat Sizing and Fit Adjustments
You put on the toile, reach forward as if grabbing your keys, and the whole coat drags backward. Or the front looks clean on the stand, then pulls open the moment it goes over a jumper. That is the point where sizing stops being about the envelope and starts being about how this pattern, in this fabric, is going to live on your body.
Coat fitting is less forgiving than dress fitting. The silhouette has to work with layering, the fabric has to move without collapsing, and every adjustment affects construction later. A cocoon coat needs different ease from a fitted princess-seamed style. A dense melton will behave differently from a softer coating, even if the pattern line drawing looks similar.
Measure the body you're dressing, not the one on the envelope
Take measurements while wearing the kind of clothes the coat is meant to cover. A coat for office wear needs different room from one meant for thick winter knits.
Start with upper chest, full bust, shoulder width, upper arm, waist, and hip. Then compare those to both the body chart and the finished garment measurements if the pattern gives them. For coats, I trust finished measurements more, because they show whether the drafted ease matches the silhouette you want.
Do not chase a familiar dressmaking size. In outerwear, the shoulder and upper body set the coat up for success. If those areas are wrong, the neckline shifts, the sleeve hangs poorly, and the whole garment feels harder to wear.
Build a sensible toile
Use a stable test fabric that has some relationship to your final cloth. It does not need to mimic the colour or finish, but it should tell you something useful about weight and body. If your final fabric is firm and sculptural, a limp old sheet will hide problems instead of revealing them.
Include the full body and sleeves. Add the collar, hood, or front facing if they affect balance. You can skip decorative details, but do not skip the parts that control hang and movement.
Check the toile in this order:
Shoulders and neckline
The shoulder seam should sit where your shoulder ends, and the neckline should rest against the body without standing away or choking.Upper chest and back
Reach forward, sit down, and cross your arms. Coats need working room here, especially if the pattern has a close armhole or a shaped back.Bust and front hang
The fronts should fall evenly. If one side swings open or the hem kicks up, sort the bust and length balance before touching style details.Sleeve mobility
Raise your arms and bend your elbows. You want movement, but not so much strain that the underarm bites or the whole coat lifts with you.Length and proportion
Hem depth, pocket placement, and belt level all change the look of a coat. A technically correct fit can still look off if those landmarks hit the wrong place on your frame.
If a toile feels nearly right, keep working. Coats reward patience.
High-impact adjustments
A few fit changes solve most first-coat problems. The trick is choosing the adjustment that matches the strain line, instead of sizing up and hoping the extra room lands in the right place.
Broad back
This is one I see often in the shop. The coat looks fine from the front, but the back pulls across the shoulder blades and the sleeve seems to drag backward.
Add width across the upper back only. That preserves the front shape and keeps the side seam from creeping behind the body. It also matters more on structured fabrics, because a firm wool will not stretch to forgive a narrow back the way a knit jacket might.
Full bust adjustment
On shaped coats, especially princess-seamed styles, a full bust adjustment keeps the front hanging straight and prevents those diagonal drag lines that run toward the side seam. It also protects the rest of the fit.
Sizing up to get bust room often creates a coat that is too wide in the shoulders and too loose at the neck. In a coat, that mistake is expensive. You do more work and get a weaker result.
Blending between sizes
Many sewists need one size through the shoulder, another at the bust, and another at the hip. Coat patterns often handle this well because the silhouette usually has built-in ease. Blend with intention, though. A sharply fitted coat needs smoother transitions than a relaxed wrap or swing style.
Here, silhouette and fabric need to be considered together. A softly draping fabric will hide a gentle blend line. A crisp coating will show every abrupt change.
Sleeve refinement
Sleeves decide whether a coat feels good all day. Check bicep circumference, sleeve pitch, cap shape, and finished length.
If the sleeve twists, the issue may not be the sleeve alone. Shoulder angle, armhole shape, and how the fabric supports the sleeve cap all work together. On heavier cloth, even a small error becomes visible because the fabric holds the wrong shape instead of falling out of it.
Small checks that save a lot of trouble
Good fit and clean construction support each other. Before final sewing, run through these points:
- Keep the seam allowance consistent: As noted earlier, coat patterns often rely on a standard seam allowance for both strength and shaping. If you shave that down carelessly, the coat can lose support and the finished measurements shift.
- Press on the right surface: Use a ham or sleeve roll on curved areas so you build shape into the coat instead of ironing it flat.
- Staystitch early: Necklines, front edges, and roll lines can stretch long before the coat looks assembled.
- Mark every notch and balance point: Coats have enough layers that small inaccuracy shows fast.
- Walk the facings against the front edges: If the lengths do not match before sewing, they will not improve later.
Bubble-free facings and clean set seams
Beginners often pick a simple collarless coat and expect an easier project. The opposite can happen. A plain front edge leaves nowhere to hide, so the facing has to be cut accurately, supported correctly, and sewn without stretching.
If a facing bubbles, look at three things first. Was the interfacing right for the fabric? Did the front edge stretch during sewing? Was the edge pressed into shape, or just flattened on the board? Soft fabrics need restraint. Dense fabrics need bulk managed before they will lie flat.
The same standard applies to shoulder seams, sleeve heads, and hems. Slow sewing helps, but controlled preparation matters more. In coat making, a good fit is never separate from fabric behaviour or construction method. They have to agree, or the coat will tell on you.
Professional Techniques for a Flawless Finish
You can spot the first coat project across a room. The fit may be respectable and the fabric may be lovely, yet the front edge ripples, the sleeve cap looks tired, and the hem swings unevenly. Those problems rarely come from one bad seam. They come from a mismatch between the pattern's shape, the cloth's behaviour, and the order of construction.
A polished coat is built in stages. Each step supports the next.
Pressing creates the shape
Pressing in coat making is construction, not cleanup. Wool, melton, coating, gabardine, and brushed twills all respond differently to steam and pressure, so the pattern silhouette only comes through if the fabric is shaped as you sew.
Let the fabric cool on a ham, seam roll, or sleeve board after pressing. That pause helps the curve or crease hold. If you lift and handle the piece while it is still warm, the shape softens and you lose some of the definition you just worked in, as noted in this coat pressing advice.
Use enough steam to persuade the cloth, not so much that you soak it. Heavy coatings often need a firm press and time to cool. Softer wool blends can mark or stretch if you rush them. A pressing cloth is cheap insurance on dark fabrics and lofty surfaces.
Warm wool can still shift. Cooled wool keeps its shape.
Facings should lie flat and stay flat
Front edges show every decision. On a sharp revere coat, the lapel roll can disguise a small wobble. On a simple collarless or clean-front style, the facing, interfacing, and stitching line have nowhere to hide.
The usual causes of bubbling are predictable. The facing stretched during handling. The interfacing was too heavy or too soft for the cloth. The edge was stitched without controlling turn of cloth. Sometimes the seam allowance was not graded enough for the fabric thickness, so the edge fights itself from the inside.
A plain coat front is exacting work.
What helps
- Match interfacing to both the fabric and the silhouette. Soft cloth with a structured pattern needs more support than the fabric alone suggests.
- Baste the front edge before final stitching if the fabric creeps.
- Grade and, where needed, trim seam allowances so the turned edge is not overstuffed.
- Understitch whenever the construction allows it.
- Press the edge over a curved surface if the coat shape calls for it, instead of forcing everything flat on the board.
What causes trouble
Front edges stretched by handling, facings cut a touch off grain, skipped understitching, bulky corners, and edge stitching that pulls the facing toward the outside.
Pockets and closures need daily-life strength
Coats earn hard wear. Pockets carry weight. Closures get tugged with cold hands. A pattern that looks refined on paper can fail fast if these points are not reinforced for the fabric you chose.
Welt pockets need careful marking, clean clipping, and support at the ends of the welts. Patch pockets need a top edge that will not collapse after a week of use. On thick coatings, I often reduce bulk inside the pocket turnings before topstitching. On softer fabrics, I add a little extra support to stop the pocket mouth from stretching.
Buttonholes deserve a full test sample. Use the actual fabric layers, interfacing, and any seam buildup from the front edge. A buttonhole that behaves nicely on a single scrap can look rough or jam on the actual coat.
Sleeve setting separates competent from polished
Sleeves tell the truth about a coat. If the pattern has a high sleeve cap and the fabric is dense, the sleeve needs shaping and support. If the pattern is softer and the cloth has more drape, too much structure can make the coat look stiff.
A reliable order helps:
- Sew and press the shoulder seams first.
- Prepare the sleeve cap with easing stitches before you bring it to the armhole.
- Match notches, underarm seam, and shoulder point first.
- Ease the fullness in gradually. Do not push it all into one section.
- Steam the cap into shape and let it cool on support.
- Add sleeve head or head roll if the pattern and fabric need it.
A sleeve can be fully sewn in and still look poor. The trouble shows as drag lines, a flat cap, or puckers that return after pressing because the ease was never distributed properly.
Bagging the lining cleanly
A bagged lining gives the inside a neat finish and protects the seam allowances from wear, but it only works well if the coat shell has already been shaped accurately. If the outer coat is twisted or bulky, the lining will trap those problems inside.
Leave enough opening to turn the coat without straining the seams. Grade bulky areas before turning. Check that the lining has the right amount of ease at the centre back pleat, hem, and sleeve hem. Too tight, and it will pull on the outer fabric. Too loose, and it will sag and twist during wear.
For a first coat, a pattern with clear lining instructions saves a lot of grief. Improvised lining methods usually cost more time than they save.
Good finishing starts with the right materials
The finish is never separate from the materials. A strong pattern for a structured cocoon coat still needs cloth that can hold a line. A relaxed wrap coat needs fabric that folds and drops cleanly without turning thick and ropey at every seam.
That is why coat making rewards system thinking. Pattern silhouette, fabric weight, interfacing choice, and finishing method all need to agree. If one element is working against the others, the coat will show it at the edges, hem, collar, and sleeves long before the season is over.
Good work deserves suitable cloth, stable lining, dependable interfacing, and closures that can stand regular use. That is what gives a coat its long life.
Where to Find Your Dream Coat Materials
Start your sourcing with the main fabric, not the buttons. Too many coat projects drift off course because the sewist falls in love with toggles, horn-style buttons, or a lovely zip pull before deciding whether the cloth can support the design.

Look for specialist wool merchants, well-described deadstock suppliers, and shops that offer swatches. For coats, swatches are worth the wait because hand feel matters so much. You need to know whether a cloth springs back, crushes easily, feels itchy, or turns bulky at a fold.
What to buy together
It helps to source your coat as a complete system rather than separate bits collected over weeks.
- Main fabric: Match it to silhouette first.
- Lining: Choose for glide, comfort, and bulk level.
- Interfacing: Test it with heat before committing.
- Closures: Buttons, snaps, toggles, or zip should suit the weight of the garment.
- Support materials: Sleeve heads, shoulder pads, stay tape, and pocket reinforcement often matter more than the glamorous extras.
If you're still deciding what quality looks like in practice, it helps to watch a coat-making process from planning through construction.
Buy the best version of the basics that your budget allows. Cheap lining, weak interfacing, and poor buttons can drag down a strong project fast. A thoughtfully chosen, well-made coat feels different in wear, and that difference lasts.
If you're ready to turn your chosen pattern into a coat you'll be proud to wear, More Sewing is a practical place to start. You'll find quality fabrics, haberdashery, and tools for beginners and experienced dressmakers alike, along with ready-to-sew kits, swatches, and dependable support for planning your next outerwear project.
