
Blog, Dressmaking
Bomber Jacket Pattern Sewing: A Practical Guide
You've chosen a bomber jacket pattern, bought a handsome woven fabric and found the perfect ribbing. Then the first fitting reveals the problem: the jacket is roomy everywhere, the hem hangs flat instead of gripping the body, and the neckline refuses to sit neatly against the zip. Bomber jacket pattern sewing looks straightforward because the pattern pieces are usually uncomplicated, but the garment depends on careful control of volume, stretch and bulk.
The mechanical challenge comes from combining a stable woven body with knitted rib trims. The woven fabric won't stretch to meet the ribbing, while the ribbing must stretch enough to fit without developing waves or losing recovery. Add an oversized silhouette, a lining, a collar and a zip, and small inaccuracies become visible quickly. The techniques below focus on the points that decide whether the finished jacket looks deliberately relaxed or just too large.
Choosing the Right Bomber Jacket Pattern and Size
A bomber can fit across the chest yet feel badly oversized at the hem. That usually happens when the size is chosen from the bust alone. The pattern needs room for a relaxed body, but the waistband, cuffs and collar must control that volume. For many oversized designs, the hip is the most important measurement, as shown by this UK-facing bomber jacket pattern listing.
Check the finished garment measurements before cutting. Compare the finished hip circumference, sleeve width, body length and shoulder dimensions with a jacket you already wear comfortably. Allow space for the layers you plan to wear underneath, then assess where the extra width will sit. A bomber should gather into its waistband. If the hem hangs straight and wide, the jacket can look like a loose cardigan rather than a bomber.
Treat the hem as the silhouette control
The waistband has a mechanical job. It gathers the wider woven body into a smaller lower edge, while the ribbing supplies recovery and keeps the jacket close to the body. That function reflects the garment's history. Leslie Irvin established his British shop in 1926 and supplied outerwear to the Royal Air Force, and early flight jackets prioritised warmth, movement and secure closures. The UK-developed Irvin jacket of 1932 used horsehide, nylon zippers and knitted cuffs for extreme cold.
Modern patterns retain those requirements through ribbed cuffs, waistbands, warm linings and durable front closures. The surface may be leather, nylon or satin, but the controlled hem remains part of the recognisable shape. British street style reinforced that identity when mods and skinheads adopted bomber jackets during the 1960s and 1970s.
Practical rule: Choose the size that accommodates your hip and intended layers, then refine the shoulder, sleeve and length. Do not size up again simply because the pattern is labelled oversized.
Grade between measurements
If your hip corresponds to a larger size than your bust, blend gradually between the size lines. Keep the shoulder at your actual shoulder point and check the sleeve width before adding more room. A wide shoulder combined with a roomy sleeve can make the jacket look dropped and heavy, particularly with a raglan sleeve.
A relaxed sweatshirt pattern can provide a useful starting block, but it still needs bomber-specific adjustments. The UK sewing-magazine bomber project demonstrates the principle of raising the neckline and sleeve-cap areas while adding room at the centre front for the zip. Use those adjustments to create a closer bomber shape without removing the ease needed for layering. Apply the detailed construction figures during the cutting stage, where the altered seam lines can be checked against one another.
For a drafted bomber neckline, adjust the centre back, shoulder and centre front according to the construction method detailed below, then redraw the curve and separate the back yoke. The yoke pleat also needs its intended underlap. Before cutting, compare the collar seam with the finished neckline. These lengths must match. If they do not, the collar can gape, pull the neckline out of shape or distort beside the zip. Use this bomber jacket pattern-construction method as a reference while checking the draft.
The fit decision comes first. Once the hip, layering allowance and hem control are correct, the remaining adjustments are easier to judge on the body.
Sourcing Fabrics, Ribbing and Essential Notions
The body fabric needs enough structure to support the bomber shape without becoming impossible to sew. Mid-weight denim, jacquard, imitation leather, cotton gabardine, velvet and softshell are all suitable starting points, with the Wardrobe by Me Amelia Bomber Jacket fabric guidance offering a useful range of woven options. Stable cotton twill and denim are forgiving because they stay put during cutting and pressing. Satin gives a fluid, dressier result, but it shifts under the presser foot and shows puckering more readily.
Consider the complete layer stack, not just the outer cloth. A woven body, pocket bag, seam allowance, rib and lining can create substantial thickness at the hem and cuffs. If you're using imitation leather or a coated fabric, test pressing and stitching on scraps first. Some surfaces mark permanently, and many can't tolerate direct heat.
Ribbing is a fit component
Bomber ribbing needs both stretch and recovery. The retailer guidance for the Amelia Bomber specifies 1×1 or 2×2 ribbing with 25–40% stretch and excellent recovery. That range is practical because the rib must contract around the woven hem or wrist without fighting the seam, then return to shape after wear.
Test the rib before cutting. Mark a section, stretch it gently and measure the change, then release it and check whether it returns close to its original length. A rib that barely stretches may make the cuff opening uncomfortable. A rib with poor recovery may look acceptable on the cutting table but loosen at the wrist and hem after use.
| Component | Ideal Fabric Type | Key Requirement |
|---|---|---|
| Body | Denim, jacquard, gabardine, imitation leather, velvet or softshell | Mid-weight structure |
| Pocket bags | Pocketing, lining or light woven fabric | Low bulk and smooth movement |
| Lining | Slippery woven lining or suitable lightweight fabric | Easy sleeve movement |
| Cuffs, hem and collar | 1×1 or 2×2 knitted rib | 25–40% stretch and excellent recovery |
| Front closure | Separating zip suitable for jacket thickness | Smooth slider and stable tape |
Match the needle to the layer
Use a fresh sharp needle appropriate to the body fabric, and change it if the point starts dragging or skipped stitches appear. A universal needle may handle stable cottons, while thicker or coated materials often need a stronger needle suited to the fabric. The rib itself needs a stitch that can tolerate movement. A narrow zigzag or another stretch-capable stitch can prevent the seam from breaking as the cuff is pulled over the hand.
Thread tension deserves testing. A dense woven body and a stretchy rib behave differently under the foot, so sew a sample joining the actual layers. If the rib tunnels or the woven edge puckers, reduce pressure if your machine allows it, stabilise the seam temporarily and avoid stretching the body fabric as you sew.
Preparing and Cutting Your Pattern Pieces
A bomber can look correctly cut on the table and still become difficult to sew once woven panels meet stretch ribbing. Start with a stable cutting setup. Print the pattern at its required scale, check the test square, and trace the selected size instead of cutting the master sheet. Mark the grainline, notches, pocket placement, centre front and fold lines clearly. Thick fabric can hide a small notch, so use tailor's tacks, chalk or a removable fabric pen for markings that must survive several construction stages.
Prepare each fabric according to its fibre content and care instructions. Press the outer fabric flat, taking care not to crush velvet nap or polish a satin surface. A slippery lining can shift during cutting, especially when paired with a smooth table. Anchor it with weights, keep the layers square and use a rotary cutter if it gives you better control. Shears work well too, provided you cut slowly without lifting or dragging the fabric.
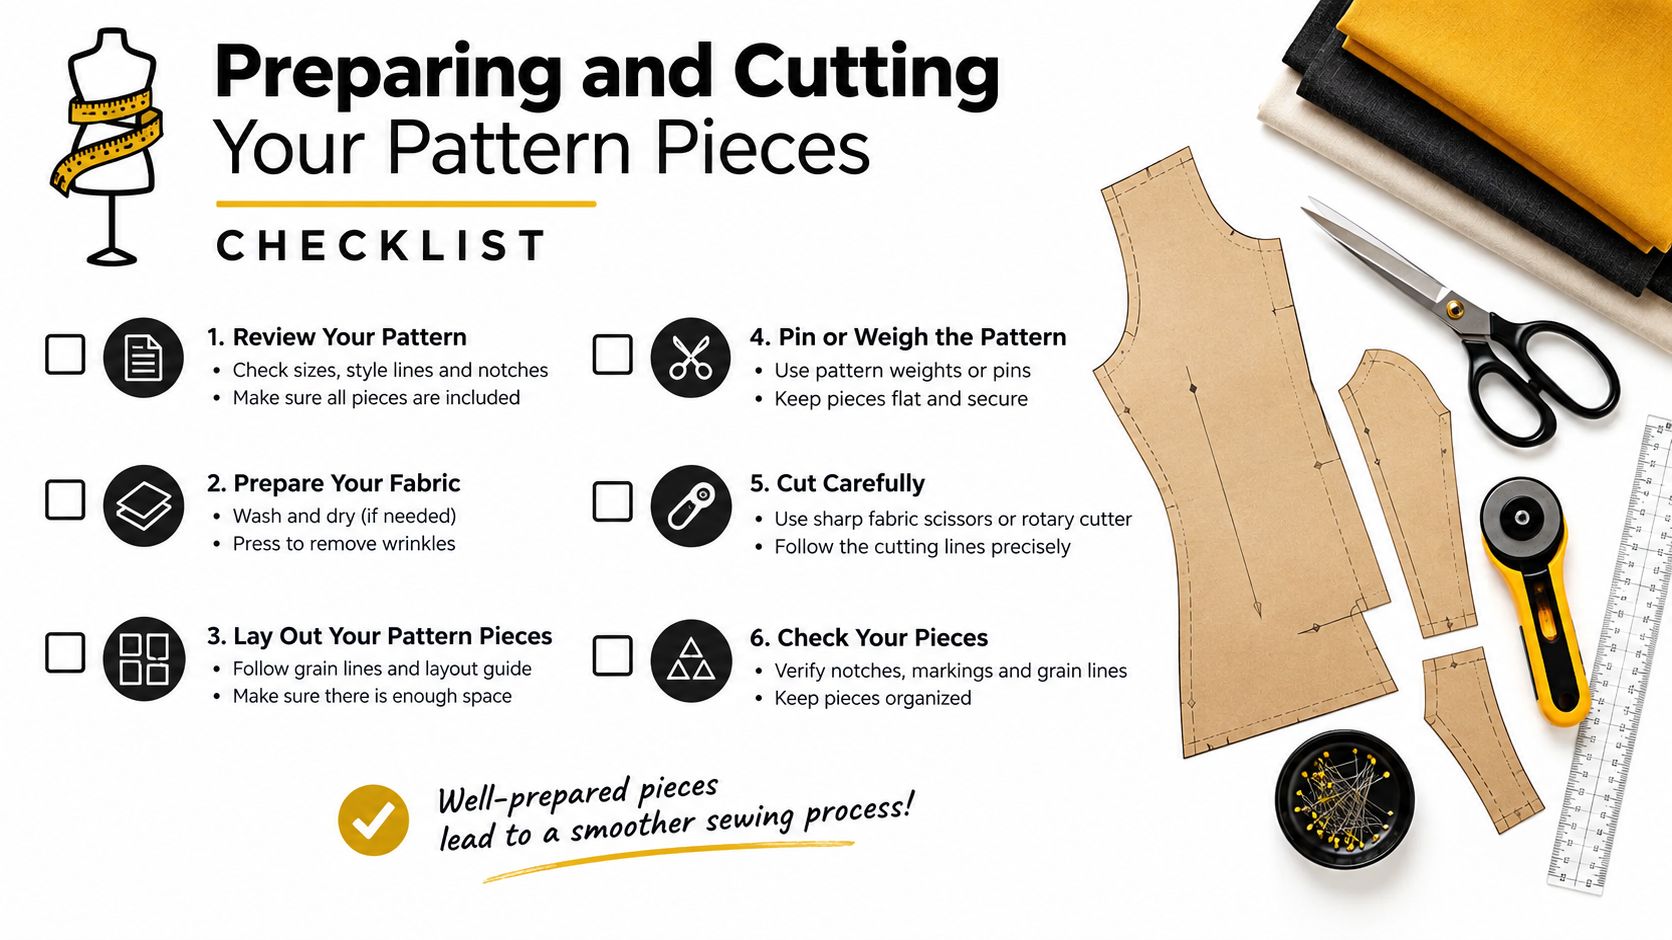
Check the pattern before cutting
Apply the neckline and centre-front adjustments noted in the sizing section, then verify the finished centre-front line against the zip length. Keep the cutting line and finished line marked separately. Lay the zip beside the front pattern piece and confirm that the slider position leaves room for the collar and does not finish against the wearer's chin. The Domestika bomber construction guide and the Simply Sewing bomber project both place the slider slightly below the neckline, but the actual distance depends on the zip, collar construction and seam allowances in your pattern.
Measure the collar seam against the completed neckline paper edge before cutting ribbing or collar pieces. Raglan seams and bulky seam allowances can alter the measurement, so include the intended seam allowance and check both front halves for symmetry. A collar that is longer than the neck edge creates fullness at the join. One that is too short pulls the front open and makes the rib fight the woven body.
Cut the body fabric with the grainline aligned, then cut matching fronts together where possible. Transfer every notch, especially at raglan joins and sleeve cuffs. For velvet, corduroy or directional prints, place all pieces with the nap running consistently. Mark the wrong side of similar-looking pieces immediately. This prevents mirrored fronts, reversed sleeves and lining pieces cut from the wrong orientation.
Cut ribbing from the actual measurements
Measure the hem circumference from the pattern edge after accounting for the seam allowances and construction order. Cut the ribbing only after checking its stretch across the finished body width. Test the proposed band around the fabric edge without stretching the woven body. The rib should draw the hem in evenly, not create sharp gathers or force the side seams out of alignment.
The free UK bomber pattern guide lists a basic machine with straight and zigzag stitches, main, pocket and lining fabrics, ribbing, a zip, pins, a tape measure, and paper and fabric scissors. Accurate cutting still matters more than owning specialist equipment. Keep the cut pieces flat, label each one, and stack them in sewing order so stretch components do not get mixed with stable woven panels.
Assembling the Jacket Body and Pockets
The body assembly is easiest to control when the pockets are treated as part of the front and side-seam structure, not as an afterthought. I've found that rushing pocket placement creates problems later because the lining, side seam and pocket bag all compete for the same space. Transfer every pocket marking before sewing, then check both fronts together so the openings sit at matching heights.
Begin by sewing each pocket piece into the side edge of the relevant front and back panel. The UK satin bomber construction sequence places the pocket pieces into the side edges first, before the shoulder and side seams are closed. This order leaves the pocket bags accessible and prevents you from trying to insert them through a narrow opening after the body has become bulky.
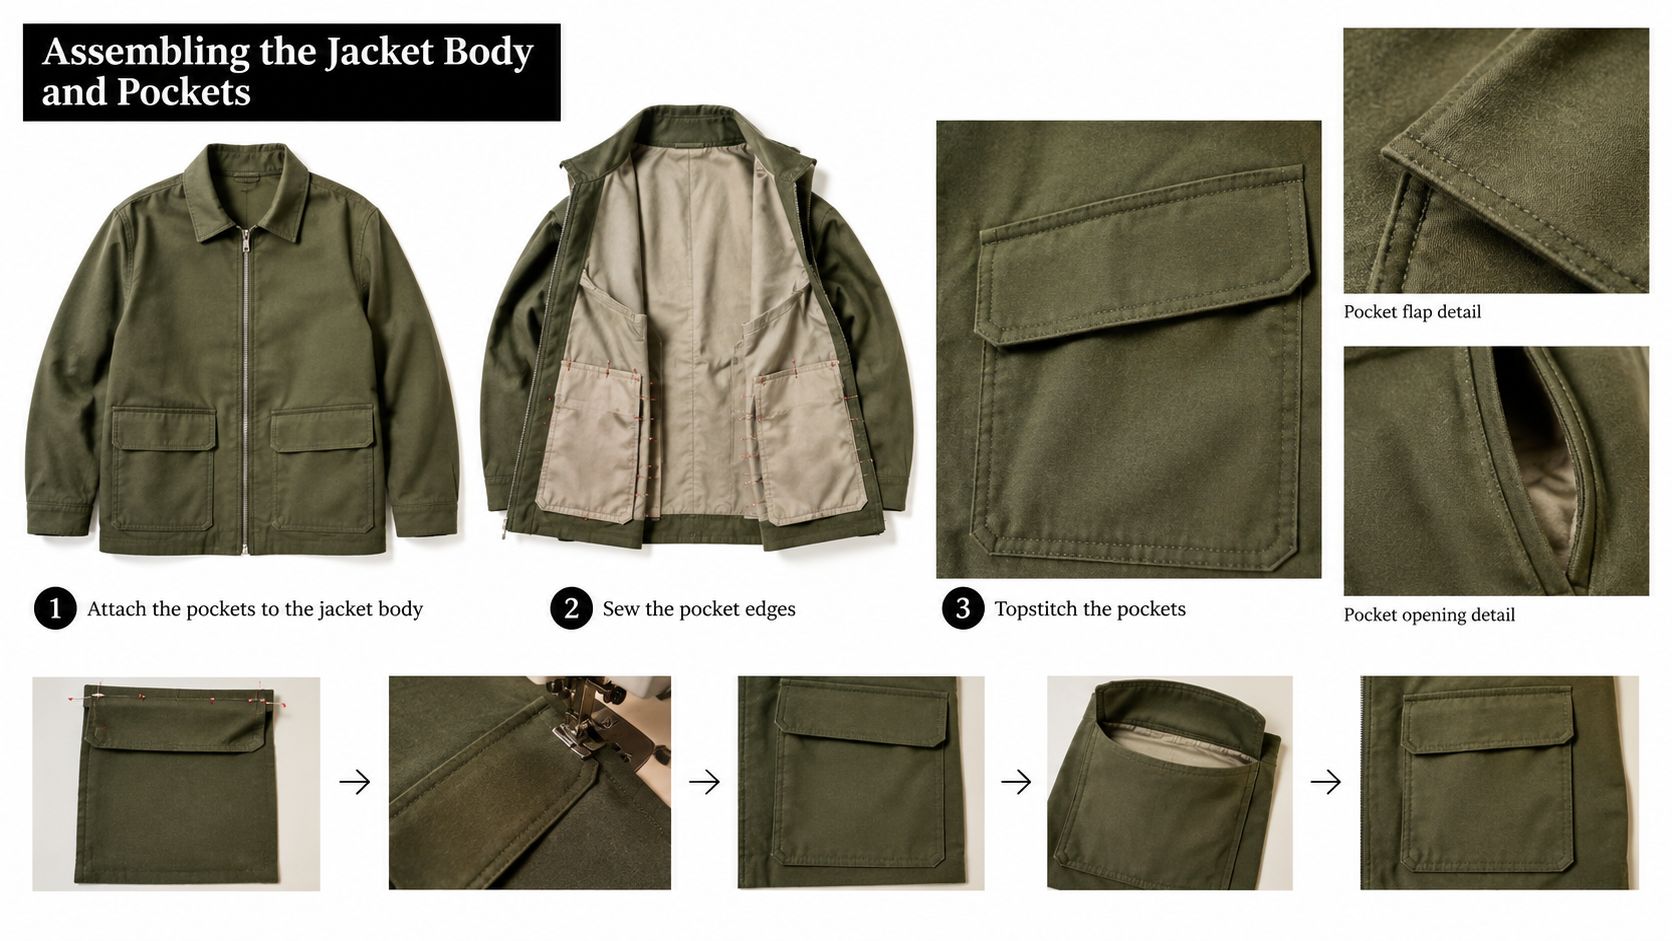
Build the body in a manageable sequence
Stitch the pocket seams accurately, clip only where the curve demands it and press the pocket bags away from the opening. If the fabric is thick, grade the allowances so several layers don't finish at the same point. On a denim or imitation-leather bomber, excessive bulk at the pocket entry can stop the front from hanging smoothly.
Join the shoulder seams next, then align the pocket bags and close the side seams in one continuous operation where the pattern allows. Match the front and back notches carefully, and keep the pocket bag edge from twisting into the seam. Before pressing, reach into each pocket and confirm that the bag is free, the opening is clean and the side seam hasn't caught an unintended fold.
At the machine: Let the feed dogs move the fabric. Pulling a heavy body through the foot can stretch the seam and create a slight diagonal drag that becomes obvious once the lining is inserted.
The jacket body should now be stable enough to assess. Try it on over the layers you expect to wear, pin the centre front closed and inspect the hip, shoulder and neckline. Don't add ribbing yet if the body needs alteration. It's much easier to correct a side seam or adjust a shoulder before the hem becomes a compressed series of bulky layers.
Prepare the sleeves rather than forcing them in
Sleeve setting works best when the cap fullness is distributed gradually. Sew the sleeve seams, press them open where possible and mark the front and back notches. The Sew Magazine method changes the machine stitch length to number five for gathering stitches around the sleeve head, running from the front notch to the back notches. Sew the sleeve head with the gathering threads inside the seam allowance, then draw them up only enough to absorb the excess.
Don't pull the threads into tight pleats. The aim is a smooth sleeve head with controlled ease, not visible gathers. Match the sleeve underarm seam first, then the front and back notches, and spread the remaining fullness between those points. If the cap still resists the armhole, check the pattern balance before forcing it. Excess fabric can often be eased with additional gathering stitches, but a mismatched sleeve needs a pattern correction.
Setting Sleeves, Collars and Ribbed Trims
Once the sleeves are prepared, turn the body inside out and the sleeve right side out. Insert the sleeve into the armhole, matching the underarm seams and notches before distributing the cap fullness. Sew with the sleeve on top if that gives you better control, and keep the seam allowance flat rather than allowing it to roll underneath the foot.
The sleeve cap should enter the armhole without sharp folds. If you see a pucker, stop and redistribute the ease instead of stitching over it. A bomber can tolerate a relaxed sleeve, but it can't hide a caught fold at the shoulder. Press the finished seam towards the sleeve where the fabric permits, using a tailor's ham or rolled towel to preserve the curve.
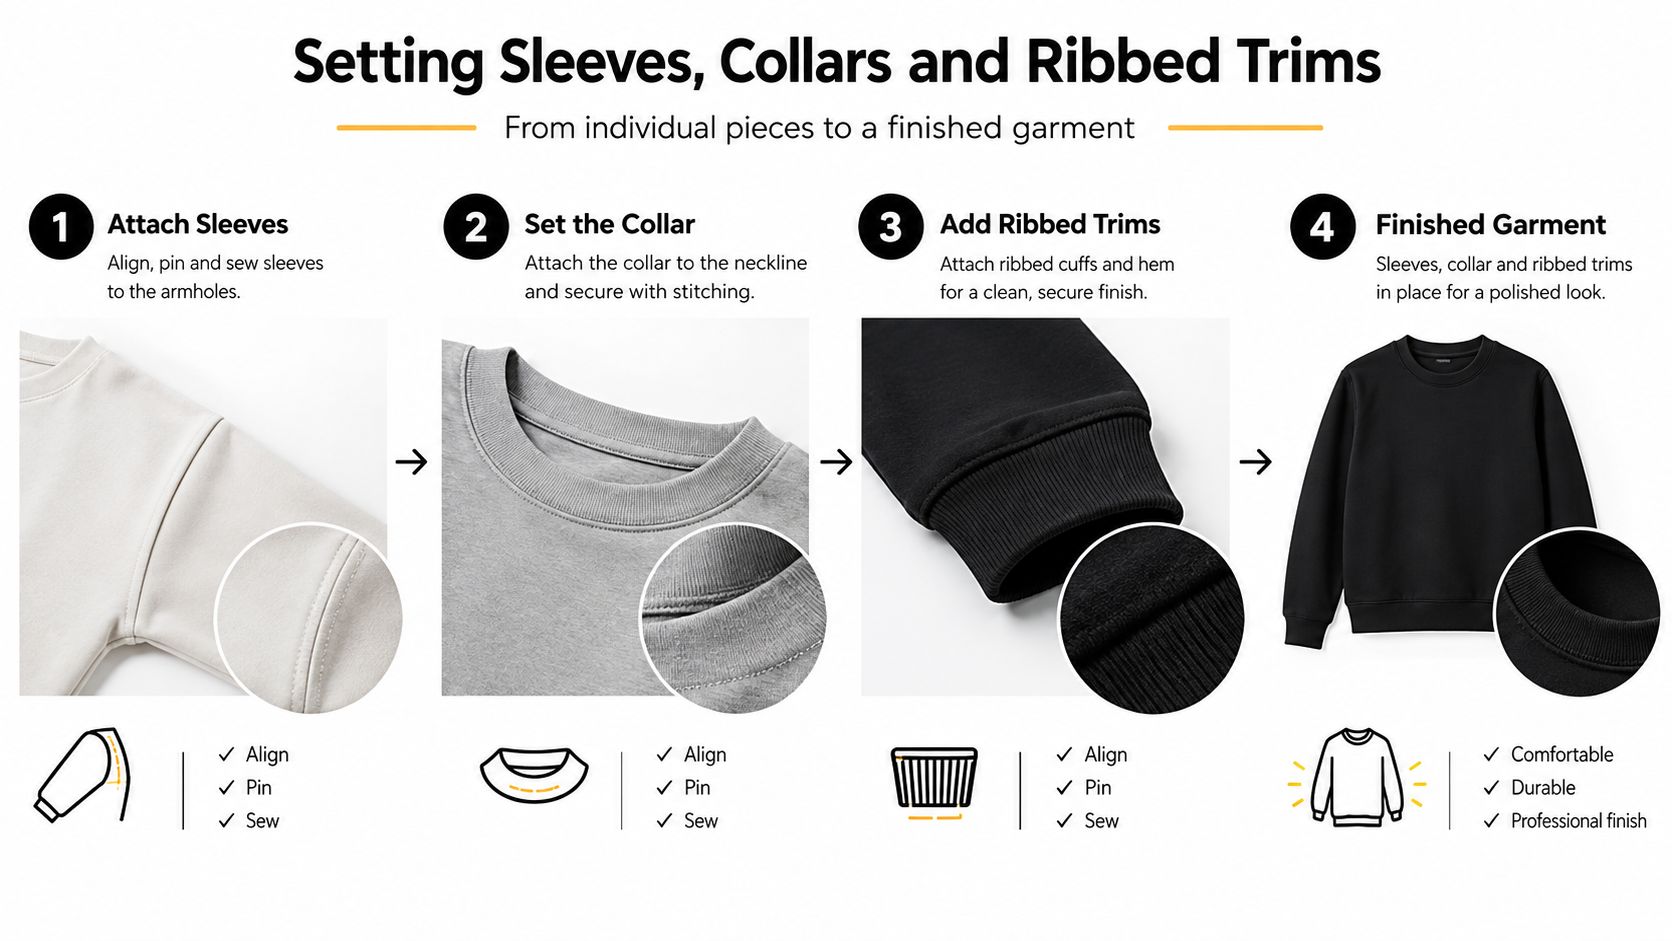
Quarter the rib before stretching
Join the short ends of the collar, cuffs or waistband, then press the seam allowance as the pattern directs. Fold the ribbed piece into quarters and mark each quarter with clips or chalk. Divide the matching woven edge into quarters as well. This prevents the stretch from being concentrated in one area, which is the usual cause of a wavy hem or an over-tight section beside the zip.
Place the rib and woven edge right sides together, matching the quarter marks. Sew with the rib on top, stretching it between the marks while leaving the woven fabric relaxed. Never stretch the woven body to make the lengths meet. The rib is the component designed to give, and pulling both layers creates rippling rather than controlled compression.
A walking foot can help when the outer fabric is slippery or bulky, but it won't correct poor quartering. Use clips instead of pins where the seam is thick, and stitch slowly over joins. If the rib layers become too dense for the machine, grade the allowances and press them in opposing directions at adjoining seams.
The finish you want: The rib should lie flat when released. If the edge forms a lettuce shape, the rib was stretched unevenly, the cut length is too short for its recovery, or the seam has been sewn with excess tension.
Build a collar that supports the zip
The collar needs to fit the neckline, not merely resemble its paper shape. After drafting or adjusting the neckline, measure the finished neck edge and compare it with the collar seam. This check controls collar roll and prevents a stand collar from pushing the zip away from the centre front.
Stay-stitch a curved woven neckline if the fabric is prone to stretching, then attach the collar in quarters. Keep the seam allowance clear of the zip path and press the collar seam without crushing the rib. For a narrow rib collar, use a stretch stitch and maintain even pressure. For a structured woven stand collar, stabilise the upper edge if the cloth collapses.
Check the collar before proceeding to the hem. Zip the jacket temporarily or pin the centre front closed, then inspect whether the collar sits flat and snug. A neckline that gapes at this stage won't be rescued by topstitching.
Inserting the Zipper, Lining and Final Finishes
The jacket is nearly complete, but a zip can expose every alignment error at the centre front. Install it only after checking the body, collar and prepared hem. Add the centre-front extension specified by the pattern, align the teeth with the finished centre-front line and baste through the layers before permanent stitching. Position the slider at the setback established during cutting preparation, then close the collar temporarily and check that the front edges meet cleanly. The Simply Sewing guide recommends allowing the zip to extend 7.5 cm below the finished hem before trimming the excess.
That extra tape gives room to anchor the zip without crowding the rib seam. Confirm the finished hem position first, then trim the tape and secure it so the bottom stop cannot pull away as the rib stretches. If the zip ripples, inspect the tape for stretching, the stitch line for proximity to the teeth and the fabric feed for uneven pressure. Baste again, press the area flat and inspect the closure before adding topstitching.
Bag out the lining without trapping it
Assemble the lining in the same body sequence, including the pockets and their openings. Leave the turning opening required by the pattern, then attach the lining to the facings, collar or hem as the design specifies. A slippery sleeve lining must move freely inside the outer sleeve, with enough ease for the arm to enter without dragging the cuff or twisting the sleeve.
Bagging out encloses the internal seams and gives the jacket a clean interior after turning. Before closing the turning opening, reach through the garment and check both sleeves. The lining should hang in the same direction as the outer sleeves, with no twist at the cuff. Correcting a trapped sleeve becomes much harder after the opening is stitched shut.
Turn the jacket carefully, push out corners with a blunt point and press from the correct side. Use a pressing cloth where heat or pressure could mark the shell. At the cuffs, secure the lining without pulling the rib inward or exposing the outer seam. Tack it to seam allowances at selected points if the pattern permits, leaving enough freedom for the jacket to move.
Diagnose the last visible faults
A flared hem usually means the rib has contracted unevenly, the seam was stretched during sewing or the woven hem is larger than expected. Unpick the affected area, re-quarter both edges and test the rib's recovery before sewing again. If the hem lies flat but lacks snugness, the rib may be too long or may not recover enough for the intended oversized fit.
A rippling zip commonly results from uneven feeding or stretched tape. Remove the topstitching, stabilise the edge if necessary and baste the zip again with the slider positioned at the checked setback. If the neckline refuses to lie flat, revisit the collar seam and neck edge instead of forcing the area with an iron.
Secure the hem, collar and cuffs with even topstitching where the fabric allows. The jacket should open smoothly, the lining should follow the body without catching and the rib should recover after handling. Those mechanical checks matter more than decorative stitching for a durable bomber jacket finish.
More Sewing offers carefully selected fabrics, ribbing, zips, lining materials and haberdashery for projects combining woven and stretch fabrics. Visit More Sewing to choose materials, request fabric swatches and find practical sewing supplies for a clean, durable finish.
