
You've cut the panels carefully, stitched the first side seam, and turned the garment right side out. The red stripes look crisp across the front, but they jump at the side seam, the hem appears to rise on one side, and a small pucker has formed near the underarm. On the fabric shop shelf, the cloth looked straightforward. On the sewing table, it has exposed every shortcut.
Red and white striped fabric rewards planning more than speed. The contrast makes alignment visible, while washing, fabric weight, grain direction and seam construction all affect the finished result. Treat the stripes as part of the garment's structure, not merely as surface decoration, and you'll get cleaner seams, more balanced proportions and far fewer unpleasant surprises.
Why Red and White Striped Fabric Demands More Than a Straight Cut
Plain fabric gives you room to correct a slightly inaccurate cut. A stripe doesn't. If one front panel begins with a red band at the neckline and the other begins with white, the imbalance remains visible even when the garment is otherwise well sewn. A small shift at the side seam can travel down the body, making the hem look skewed or the garment appear twisted.
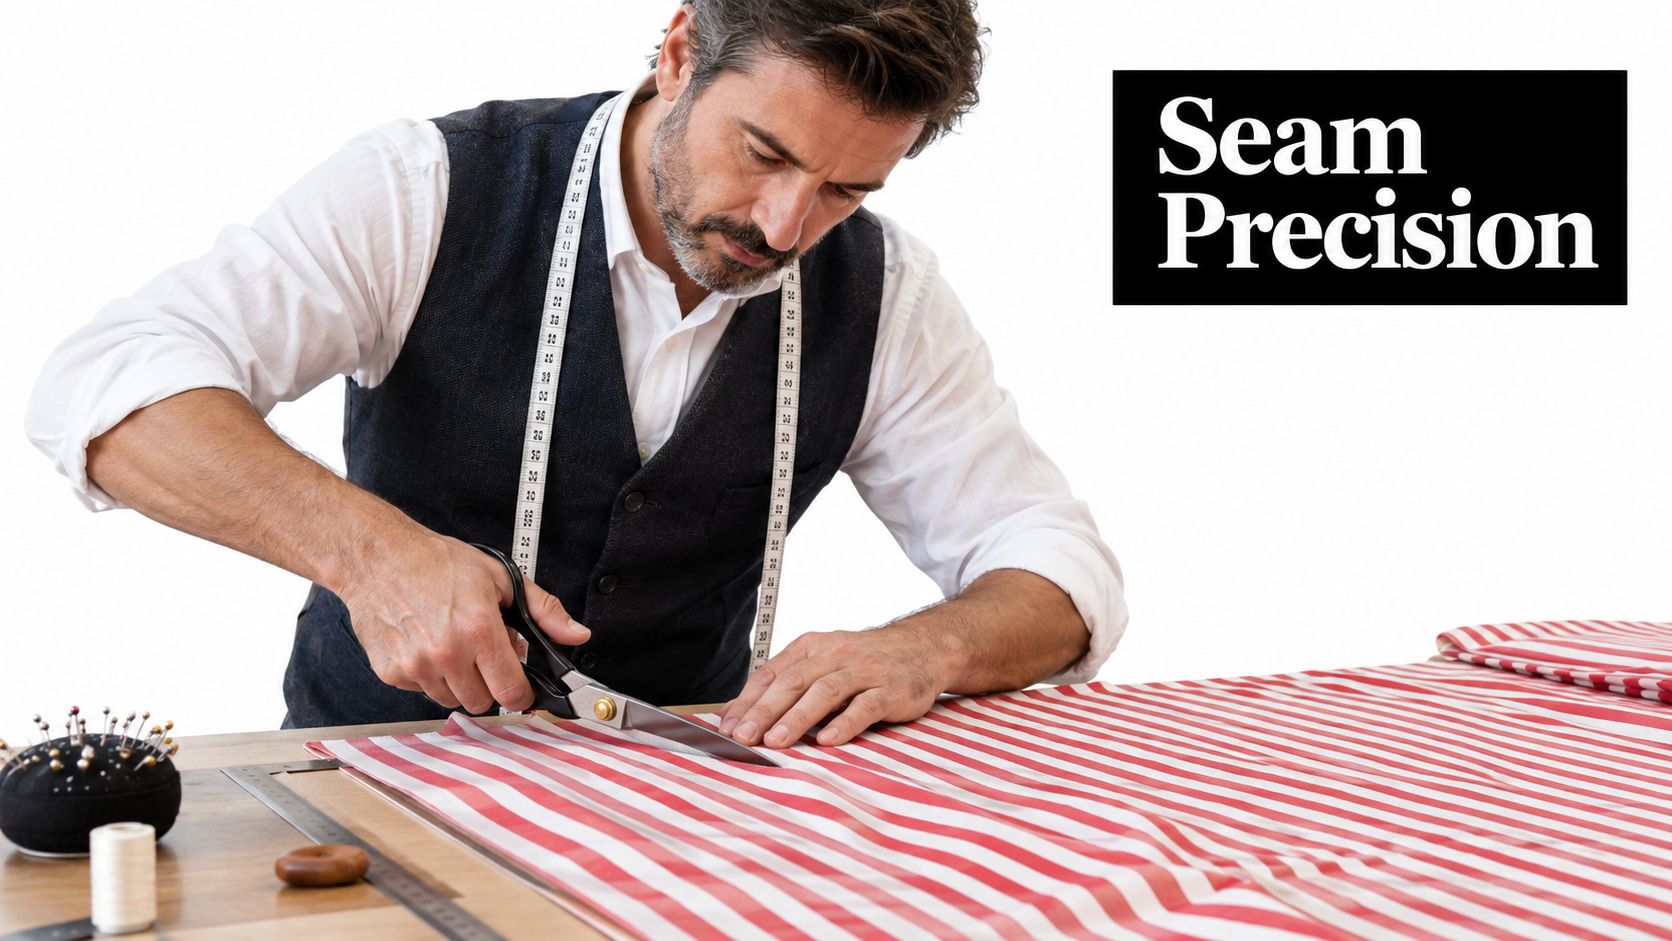
The first mistake is assuming that the fabric can be folded, pinned and cut in the same way as a quiet solid. Folding can move the stripes out of alignment, particularly when the cloth has a slight skew from manufacture. Cutting both sides at once may save time, but it can also produce mirrored pieces that begin on different parts of the repeat.
Why washing changes the plan
Untreated cottons can shrink 4–7% in the UK's humid climate, and wider stripes can pucker up to 10% more than narrow stripes because of differences in weave tension, according to UK guidance on preparing striped cotton fabric. Those figures aren't a reason to avoid cotton. They're a reason to wash and dry the cloth before you position a pattern.
Shrinkage can alter more than the overall size. It can change the relationship between the stripe repeat and the pattern pieces, so a placement that looked balanced before washing may no longer sit in the same place afterwards. Pressing the fabric flat after washing also reveals whether the stripes run square to the grain or whether the cloth needs careful handling before cutting.
Practical rule: If the finished garment must have accurately matched stripes, treat pre-washing as part of cutting preparation, not as an optional care step.
Why contrast magnifies errors
Red and white sit far apart visually. The eye follows the boundary between the colours, which means it notices a half-stripe shift more readily than it would notice a small difference in a mottled print. The same applies to puckered seams. If the stitching draws one stripe into a shallow wave, the red-and-white contrast outlines the distortion.
A simple T-shirt can therefore require more thought than a plain skirt. The knit may stretch as you sew, while a woven stripe may need matching at the shoulder, side seam, pocket and hem. You don't need to match every stripe at every point, but you do need to decide which lines matter most before cutting.
Treat the repeat as a construction line
Look at the fabric as a sequence of horizontal or vertical reference lines. Mark the dominant stripe, identify the centre of the repeat, and decide whether that line should sit at the centre front, across the bust, along a pocket opening or at the hem. Once you make that decision, the pattern becomes a placement tool rather than a shape you trace around.
That approach also helps you accept useful compromises. A pocket may be deliberately cut across the stripe, while the body panels match exactly. A cuff may reverse direction to create contrast. Deliberate variation looks designed. Accidental variation looks like a cutting error.
Understanding Fabric Bases and Stripe Scales
The same red and white stripe can behave like a crisp summer shirt, a structured skirt or a stretchy casual top, depending on the fabric base. Start with the cloth's construction and weight, then judge whether the stripe scale suits the pattern. A photograph rarely tells you enough about drape, body or recovery.
A UK fabric listing describes 100% cotton poplin at 112 cm wide with a 1 cm stripe repeat, while a gabardine variant is 150 cm wide, 195 gsm, with a 5 cm stripe repeat. The figures and fabric specifications appear in the red and white striped cotton and gabardine listing.
Match the base to the garment
Poplin has a relatively clean, stable character. A narrow repeat works well for shirts, children's clothes, simple dresses, facings and binding because the stripes don't dominate small pattern pieces. The tighter scale also makes a narrow collar or waistband feel connected to the main garment rather than visually oversized.
Gabardine brings more body. The wider repeat gives you a clearer reference line when you're matching across seams, and the 195 gsm cloth supports a steadier silhouette in trousers and skirts. It can also suit casual outerwear where a flimsy poplin would collapse around pockets or openings.
Jersey needs a different decision. Its stretch can distort the stripe during cutting and stitching, particularly around necklines and armholes. A striped jersey top may need a walking foot, stabilising tape or careful use of a ballpoint needle, but the main issue remains control. Keep the fabric supported on the table and avoid allowing the cut edge to hang while you mark it.
Blends can combine the easy care of synthetic fibres with the handle of cotton, but the result depends on the actual composition and finish. Test a swatch before committing to a fitted garment. A fabric that springs back neatly may suit a close-fitting top, while one with little recovery is safer in a looser shape.
Read the repeat, width and weight together
| Fabric base | Width / weight | Stripe repeat | Best use case |
|---|---|---|---|
| Cotton poplin | 112 cm wide | 1 cm | Shirts, binding, light dresses and smaller details |
| Cotton gabardine | 150 cm wide, 195 gsm | 5 cm | Trousers, skirts and casual outerwear |
| Jersey or cotton blend | Check the listing and swatch | Assess visually and by stretch | T-shirts, tops and relaxed garments |
A wider fabric can reduce joins in a full skirt or pair of trousers, but it may also make the stripe appear stronger across the body. A narrow repeat can be forgiving on small pieces, yet it gives you more stripe crossings to monitor along a long side seam. Neither is automatically easier. The better choice depends on the pattern's scale and the amount of matching you're prepared to do.
The gabardine listing reports a Martindale rating of 10,000, which can act as a useful proxy for abrasion resistance when you're choosing cloth for repeated wear, skirts or casual outerwear. It doesn't predict every aspect of performance, but it gives more practical information than a product photograph alone.
Check classification before commercial sourcing
If you're buying for resale, importing garments or writing product descriptions, construction matters beyond the sewing room. HMRC textile apparel classification guidance places woven and non-woven textile apparel in Chapter 62, while knitted or crocheted garments fall under Chapter 61. It defines fine knit as at least 12 stitches per cm in both directions.
The stripe itself doesn't determine the classification. A cotton-blend poplin shirt would normally be treated as woven apparel, while a jersey striped top would typically be assessed as knitwear. Confirm the fabric construction before pricing, tariff coding and care-label planning.
Cutting and Layout Techniques for Accurate Stripe Matching
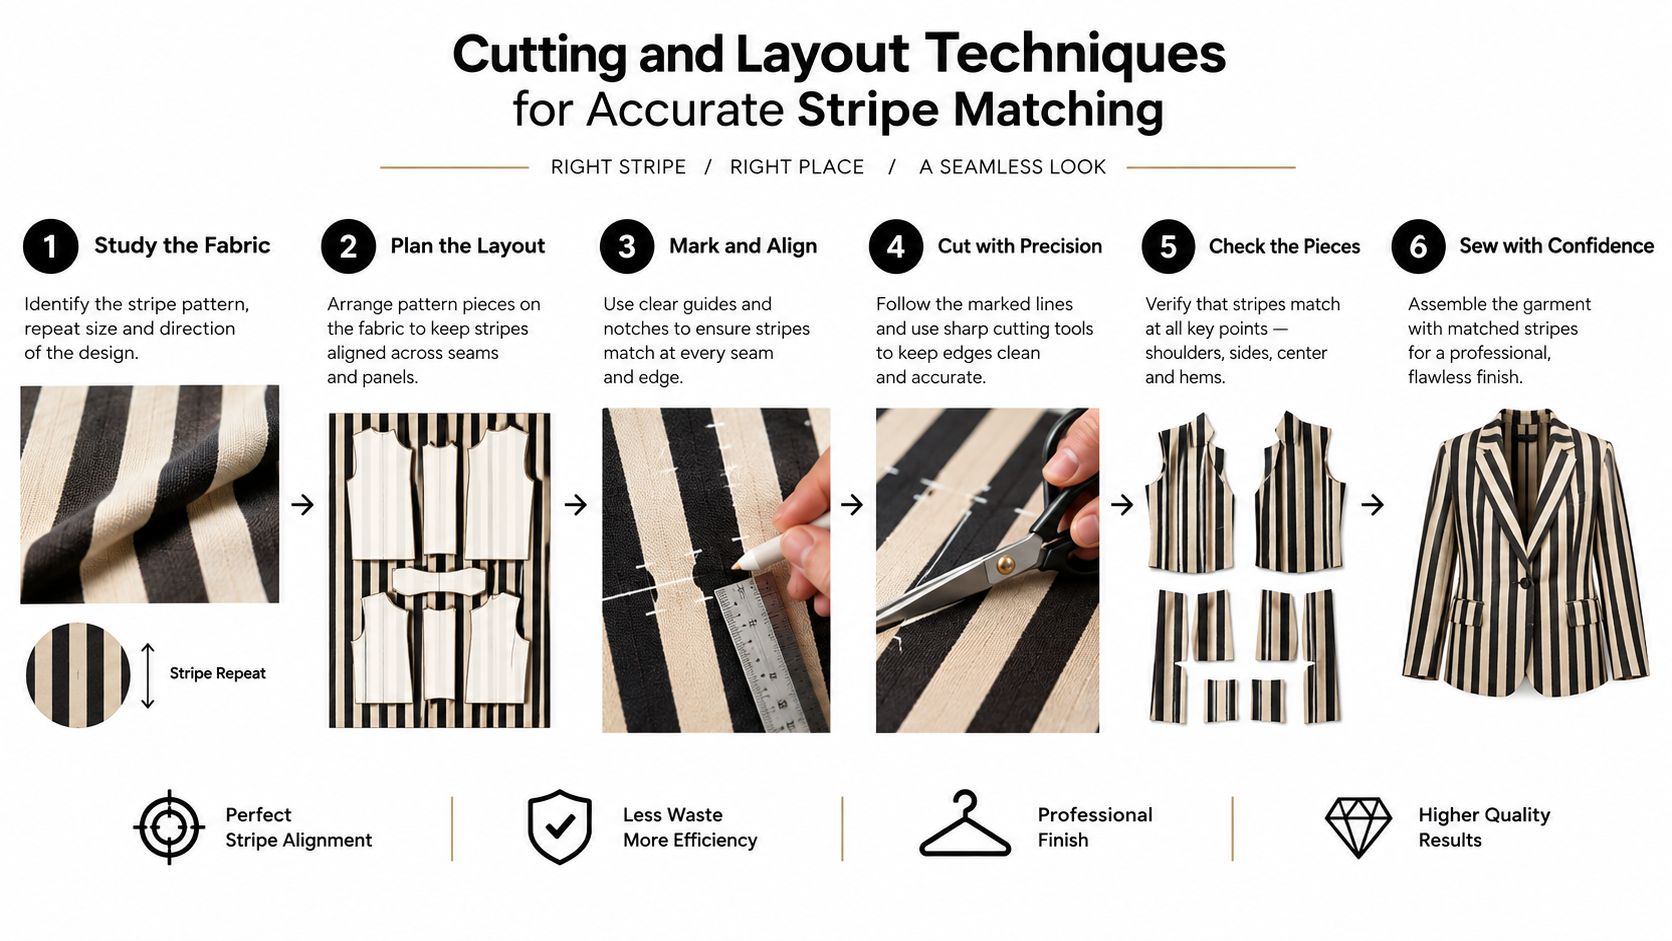
Accurate matching starts before the scissors touch the cloth. Press the fabric, square the cut ends if necessary, and find the dominant stripe that you want to control. If the cloth is folded, check that the stripe sits directly on top of itself rather than drifting gradually across the width.
Establish the main reference points
A UK pattern instruction set gives a useful matching rule: match vertical stripes at horizontal seams and horizontal stripes at vertical seams. The reasoning is simple. At a horizontal seam, the vertical lines should continue through the join. At a vertical seam, the horizontal bands should meet across the width.
Lay out pieces with a clear order:
- Place on-the-fold pieces first. Position the centre front, centre back or other fold pieces before single pieces. This fixes the most important visual axis and prevents later pieces from forcing an awkward compromise.
- Mark the new grainline when rotating fabric. If you turn a pattern piece so the stripe runs in a different direction, draw a new grainline at 45 degrees to the old one, following the guidance in the pattern cutting instructions for stripes and checks.
- Check prominent stripes at key seams. Before placing the remaining pieces, inspect where strong red bands will fall at the side seams, shoulder seams, neckline and hem.
- Use the first cut piece as the template. For a second sleeve or side panel, place the finished cut piece over the fabric and match the stripes rather than trusting the printed pattern alone.
This sequence prevents a common problem: placing every piece for the best fabric yield, then discovering that the most visible seams cannot match.
Cut single layer when accuracy matters
Single-layer cutting takes longer, but it lets you see the full stripe and place each piece deliberately. It's particularly valuable for a large repeat, a prominent centre front, or fabric that shifts when folded. Mark the wrong side and right side clearly, because red and white stripes can look almost identical from either face.
Use pins every stripe, or every other stripe, when transferring a pattern to fabric. A pin at the top and bottom of a piece isn't enough to control a long line. For slippery or stretchy fabric, use pattern weights and a rotary cutter where appropriate, but still mark matching points with chalk or washable pen.
Cutting discipline saves more time than unpicking. Match the visual landmarks first, then worry about conserving fabric.
A seam allowance can hide a small amount of movement, but don't rely on it to repair a badly placed piece. Transfer notches, mark the centre of important stripes, and baste a difficult seam before permanent stitching. If the basting shows a mismatch, you can correct it without weakening the final seam.
Test the first seam
Sew one representative seam before assembling the whole garment. A side seam is usually the best test because it reveals stripe alignment, fabric stretch, seam puckering and the effect of your stitch length. Press the seam as you intend to press the finished garment, then inspect it from a short distance as well as close up.
The stripe-matching video guide can help visualise the process before you start cutting.
Don't expect every seam to carry equal importance. Prioritise the centre front, centre back, bust-level joins, pockets and side seams. A hidden underarm seam can tolerate more variation than the front edge of a fitted bodice.
Smaller Details, Clever Decisions, and Design Techniques
Perfect matching across every small component can consume fabric and time without improving the garment. Smaller details offer a controlled way to introduce contrast. Cut a neckband, cuff, collar or pocket with the stripes running in the opposite direction to the main garment, and the change reads as a deliberate design feature rather than a failed join.
This works especially well when the main body has vertical stripes. A horizontal cuff or pocket creates a clear boundary, so the viewer doesn't expect the lines to continue through it. The same choice can make a simple pattern look more considered without adding a complicated construction detail.
Use direction to control attention
A horizontal pocket on a vertically striped shirt draws attention to the pocket opening. A crosswise collar frames the face, while a cuff in the opposite direction gives the sleeve a defined endpoint. These choices are useful when exact matching would place an unattractive stripe at the edge of a small piece.
Cut smaller components on a single layer when their placement matters. Use the first cut piece as a template for the second side, and pin every stripe or every other stripe before sewing, following the practical stripe-matching techniques for cuffs, collars and pockets. The aim isn't to remove all variation. It's to make the variation repeat consistently.
If you're making a pair of pockets, for example, decide whether the same red stripe should cross both pocket centres or whether both pockets should begin at the same point in the repeat. Then copy that decision from the first pocket. Don't cut the second one from memory.
Build sample blocks before committing
Striped fabric is excellent for small decorative blocks because the lines provide built-in geometry. Make a square template and use 10 cm squares as a reproducible starting point. Cut identical fabric squares so that each begins and ends on the same coloured stripe, then stitch the pieces into alternating layouts.
This method suits cushions, patch pockets, bag panels and quilted sections. You can rotate every other square, keep all stripes aligned, or create a checkerboard effect by changing the direction of the stripe. The important part is consistency. If the squares start at different points in the repeat, the finished block will look unsettled.
Diamonds and triangles come from the same principle. Change the angle of the template, mark the stripe direction on the paper, and cut with the grain and repeat in mind. A test block made from scraps will show whether the red bands create the shape you expected before you cut into the main length.
Add pin-tucks with a measured guide
Pin-tucks give you another way to interrupt a strong stripe without fighting it at every seam. Draw a guide line, stitch along it, and repeat the process at spacing of roughly 6 cm between lines, as shown in the striped fabric construction guide. Keep the spacing consistent and press each tuck in the same direction.
The technique works best on a stable woven fabric with enough body to hold the folds. Test the finished width before placing the tucks on a bodice or front panel, because the fabric will draw in. A small sample also shows whether the stripe remains attractive when the cloth is folded and stitched.
A detail doesn't need to imitate the main panel. It needs to look intentional, repeatable and secure after pressing.
These options are more realistic than demanding perfect matching everywhere. Reserve exact alignment for the garment's main visual lines, then use reversed stripes, sample blocks or pin-tucks where contrast adds value.
Care, Durability, and Directional Use in Garments and Homewares
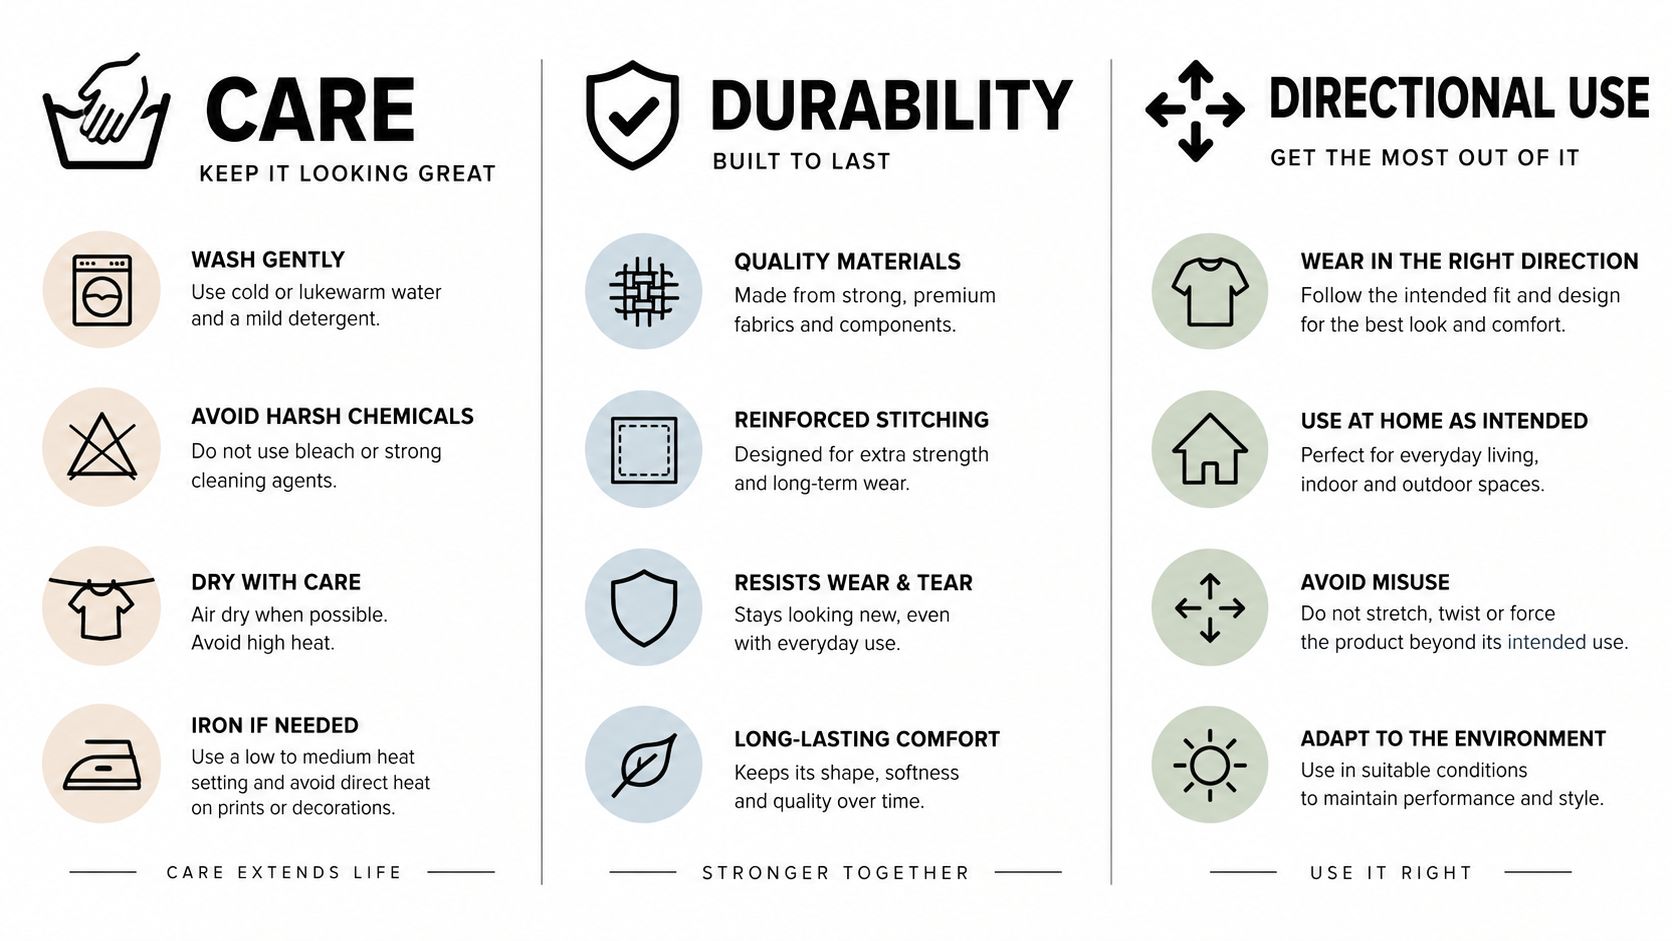
The finished item still has to survive washing, pressing, sunlight and ordinary handling. Red and white striped fabric can look sharp on the cutting table but lose that precision if the cloth shrinks unevenly or the colours fade at different rates. A small swatch test gives you information that a product photograph can't.
Wash a spare piece using the care routine you expect for the finished item. Let it dry fully, press it flat and compare the stripe spacing, colour and handle with the unwashed piece. This is particularly important for natural fibres, which can change more noticeably than a stable synthetic blend.
Decide whether the cloth is directional
A garment often benefits from vertical stripes because they support the length of a shirt, skirt or trouser leg. Homewares may need a different arrangement. UK guidance for made-up striped products notes that stripes may need to run horizontally for structural reasons, particularly in upholstery and other applications where the fabric must follow the construction of the item. The stripe guidance for made-up products and home furnishings also highlights grain direction and fading as practical considerations.
Before cutting a cushion cover, blind or upholstered panel, decide which direction gives the best visual balance and the most sensible use of the cloth. A stripe that runs across a chair back may look correct, while turning it vertically could create an awkward break at the edge or fail to follow the product's structure.
Test colour and wear conditions
Natural fabrics can fade in sunlight. If the item will sit beside a bright window, make a swatch and place it in the intended room before buying the full quantity. Compare the exposed piece with a protected piece after your test period, then decide whether the cloth is suitable for that location.
Check colour fastness with a damp white cloth, particularly when the red is deep or highly saturated. Press on the wrong side first and use a pressing cloth if the fabric finish or colour gives you cause for concern. Always follow the supplier's care information rather than assuming every cotton or gabardine can be treated identically.
For frequently used skirts, bags or casual jackets, consider abrasion resistance as well as appearance. The gabardine specification discussed earlier includes a Martindale rating, which is useful when comparing fabrics intended for repeated contact. For a decorative wall hanging, drape and colour may matter more than hard-wearing construction.
Plan the first wash before sewing
If the fabric needs a gentle wash, complete it before cutting. Press the cloth without stretching it, and allow it to cool flat before placing the pattern. After sewing, avoid pulling a wet garment into shape, because that can distort the stripes around seams and hems.
For upholstery and made-up home products, keep a record of the stripe direction and pattern placement while cutting. A quick photograph of the laid-out panels can help when you're assembling several pieces, especially if the design includes reversed directions or matched repeats.
Conclusion and Next Steps for Working with Striped Fabric
Red and white striped fabric becomes manageable once you stop treating it as an ordinary print. Choose the base, width, weight and repeat for the pattern you're making. Pre-wash and press the cloth, identify the dominant stripe, and place the centre and fold pieces before you optimise fabric usage.
Use the matching rule at the seams that people will notice, and test one representative seam before assembling the garment. Cut cuffs, collars, pockets and neckbands across the stripe when that makes the contrast look intentional. For homewares, check whether the stripe needs to run horizontally, and test colour fastness before committing to a sunlit room.
Before cutting, make a short checklist:
- Is the fabric washed and pressed?
- Have you chosen the most important stripe placement?
- Will the repeat suit the pattern's scale?
- Which seams need exact matching?
- Could a reversed stripe make a small detail easier and more attractive?
- Has a swatch been tested for colour, care and durability?
Treat the stripes as a structural design element, and the finished piece will look controlled rather than lucky.
More Sewing offers striped cotton fabrics, haberdashery, sewing kits and fabric swatches to help you test scale, colour and handle before cutting. Visit More Sewing to choose materials for your next carefully matched garment or home project.
