
Dressmaking, Fabric, Guides
Fabric and Garment Care) the Complete Sewist Guide
You've just finished a dress, a shirt, or a pair of jeans that took hours, and the last thing you want is to ruin it at the first wash. Yet that's exactly where many makes go wrong, a viscose dress shrinks in a mixed load, a red print bleeds into the lining, or a lovely knit comes off the line stretched out of shape. Fabric and garment care isn't the afterthought at the end of sewing, it's the second half of the project, and the same logic applies to deadstock, offcuts, and the sewing machine that made the piece in the first place.
Why Care Matters After the Last Stitch
A customer once brought in a newly finished viscose dress that had gone straight into a 40 degree wash with jeans. The hem had twisted, the colour had dulled, and the shape had changed enough that the dress no longer hung the way it had on the cutting table. That sort of disappointment is common, and it usually starts with a care choice made in thirty seconds.
The fix is rarely complicated, but it does need a bit of thought. A fabric can look stable on the bolt and still behave badly once it meets heat, agitation, detergent, or a heavy companion garment in the drum. The same goes for sewing machines, because lint, needle wear, and tension problems often show up after the project is “done” if nobody gives the machine a proper clean.
What usually goes wrong
- The wash load is mixed badly. A delicate viscose blouse doesn't belong with heavy denim or towels.
- The drying method is wrong. Knits stretch when hung wet, and crisp wovens can turn limp if left crumpled.
- The machine gets ignored. A tiny buildup of thread fluff in the bobbin area can make the next project behave badly.
The rest of this guide stays practical. It's built around the things that come back to the counter, the garments that have warped, bled, pilled, stretched, or picked up stubborn marks, and the machines that suddenly skip stitches after a project that seemed to go fine. If you sew at home, run a small studio, or keep deadstock in boxes until the right project appears, the right care habits save fabric, time, and frustration.
Practical rule: The best care decision is usually the one that protects shape first, colour second, and convenience last.
Reading Care Labels and Symbols Without the Guesswork
Care labels are easiest to use when you separate the legal information from the symbol language. In the UK and EU, labels tell you the fibre content and country of origin, while the symbols sit in an international ISO system that uses shapes and marks to show how the item should be washed, dried, ironed, and cleaned. If the label feels cryptic, start by reading it in that order, fibre first, symbols second.
A few symbol families do most of the work. The wash tub covers washing, the triangle covers bleaching, the square covers drying, the iron covers ironing, and the circle covers professional cleaning. A crossed-out symbol means the opposite of the base symbol, so a crossed-out tub means do not wash, while a square with a circle inside means tumble dry, and a plain circle means dry clean.
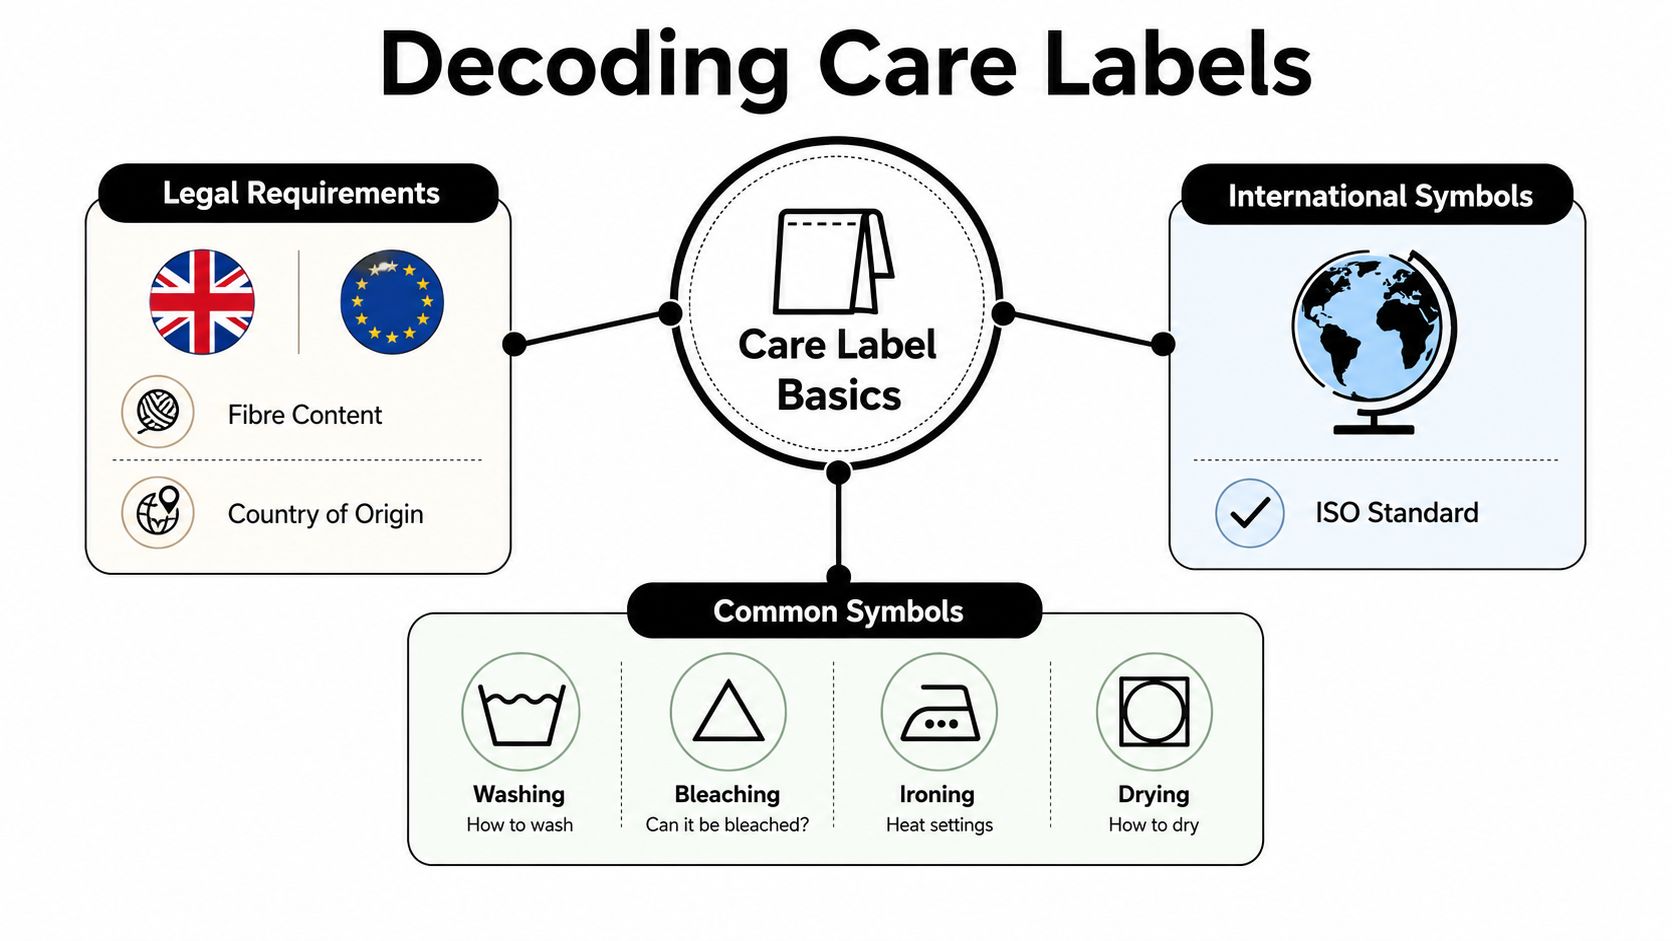
How to read the symbols in practice
A single dot on an iron means low heat, which is useful for synthetics like acrylic. Two dots mean medium heat, and three dots mean hot. A square with a circle is tumble dry, while the small dots inside the symbol tell you whether it's low, medium, or higher heat. A crossed-out triangle means no bleaching, which is common on coloured prints and many blended fabrics.
The quickest mistake is reading fibre content as if it were the whole care story. A cotton lawn and a cotton-elastane denim both contain cotton, but they do not behave the same way because the weave, weight, and stretch content change how the fabric reacts to washing and heat. A lawn may tolerate a gentler routine with careful pressing, while denim usually wants more durable treatment and less frequent washing.
A label tells you the manufacturer's safest advice. It doesn't always tell you the nicest result for your finished garment, so read the fibre and the symbol together.
When the label is missing, deadstock needs a small test square before it meets a full garment. Cut a 10 cm square, wash it the way you intend to treat the main fabric, and check for shrinkage, colour loss, texture change, or edge distortion. Ten minutes at the sink is far cheaper than recutting a bodice or discovering that a lining has gone wavy after assembly.
Fibre by Fibre Washing, Drying and Ironing
The safest routine depends less on the word “fabric” and more on the actual fibre family, because each one reacts differently to water, agitation, and heat. I've seen sewists treat everything “natural” the same way and end up with surprises. Cotton often forgives a lot, viscose usually doesn't, and deadstock needs suspicion until it proves itself.
The six common families
Cotton is straightforward, but it still benefits from planning. Pre-wash it to preshrink, then use 30 or 40 degree washing for most garments. A cotton lawn blouse usually behaves well when line dried and ironed hot with steam, especially if you want crisp seams and a neat collar.
Viscose asks for more caution. Hand wash or use a delicate 30 degree cycle, don't wring it, and dry it flat if you want to keep the drape stable. A viscose midi dress usually presses best when it's still slightly damp, with a medium iron.
Tencel and lyocell sit in the middle. A cool wash with mild detergent usually keeps them looking good, and they can often cope with gentle tumble drying or line drying depending on the label. A Tencel shirt tends to keep its drape beautifully when ironed on medium rather than blasted with heat.
Jersey needs shape protection. Wash it inside out at 30 degrees, dry it flat, and don't hang it while wet or the weight of the water can pull it out of shape. A cotton-elastane T-shirt usually only needs a low iron, ideally with a pressing cloth.
Denim asks for restraint rather than frequent laundering. Wash it less often, turn it inside out, use a cold cycle, and hang it to dry. Raw selvedge jeans usually take a hot iron well, but you'll keep the colour deeper if you avoid unnecessary washing in the first place.
Deadstock is the unknown, so treat it like the most delicate fibre you suspect is in there. Pre-wash a sample square, then move cautiously. An ex-designer printed silk-cotton blend, for example, may need gentler handling than the printed face suggests.
Quick Care Settings by Fibre
| Fibre | Wash Temp | Drying | Iron | Shrink Risk |
|---|---|---|---|---|
| Cotton | 30 or 40 degrees | Line dry | Hot, with steam | Moderate before pre-wash |
| Viscose | Cool or 30 degrees | Flat dry | Medium, while damp | High if overheated |
| Tencel | Cool wash | Line or gentle tumble | Medium | Low to moderate |
| Jersey | 30 degrees | Flat dry | Low, with cloth | High if hung wet |
| Denim | Cold cycle | Hang dry | Hot | Moderate if washed hot |
| Deadstock | Test first | Treat as delicate | Start low | Unknown until tested |
If you want a practical shorthand, think shape, then fibre, then finish. That keeps you from pressing a garment too hot just because it looks sturdy, or line drying a knit just because the fabric came from a “washable” shelf.
Stain Removal the Triage Method
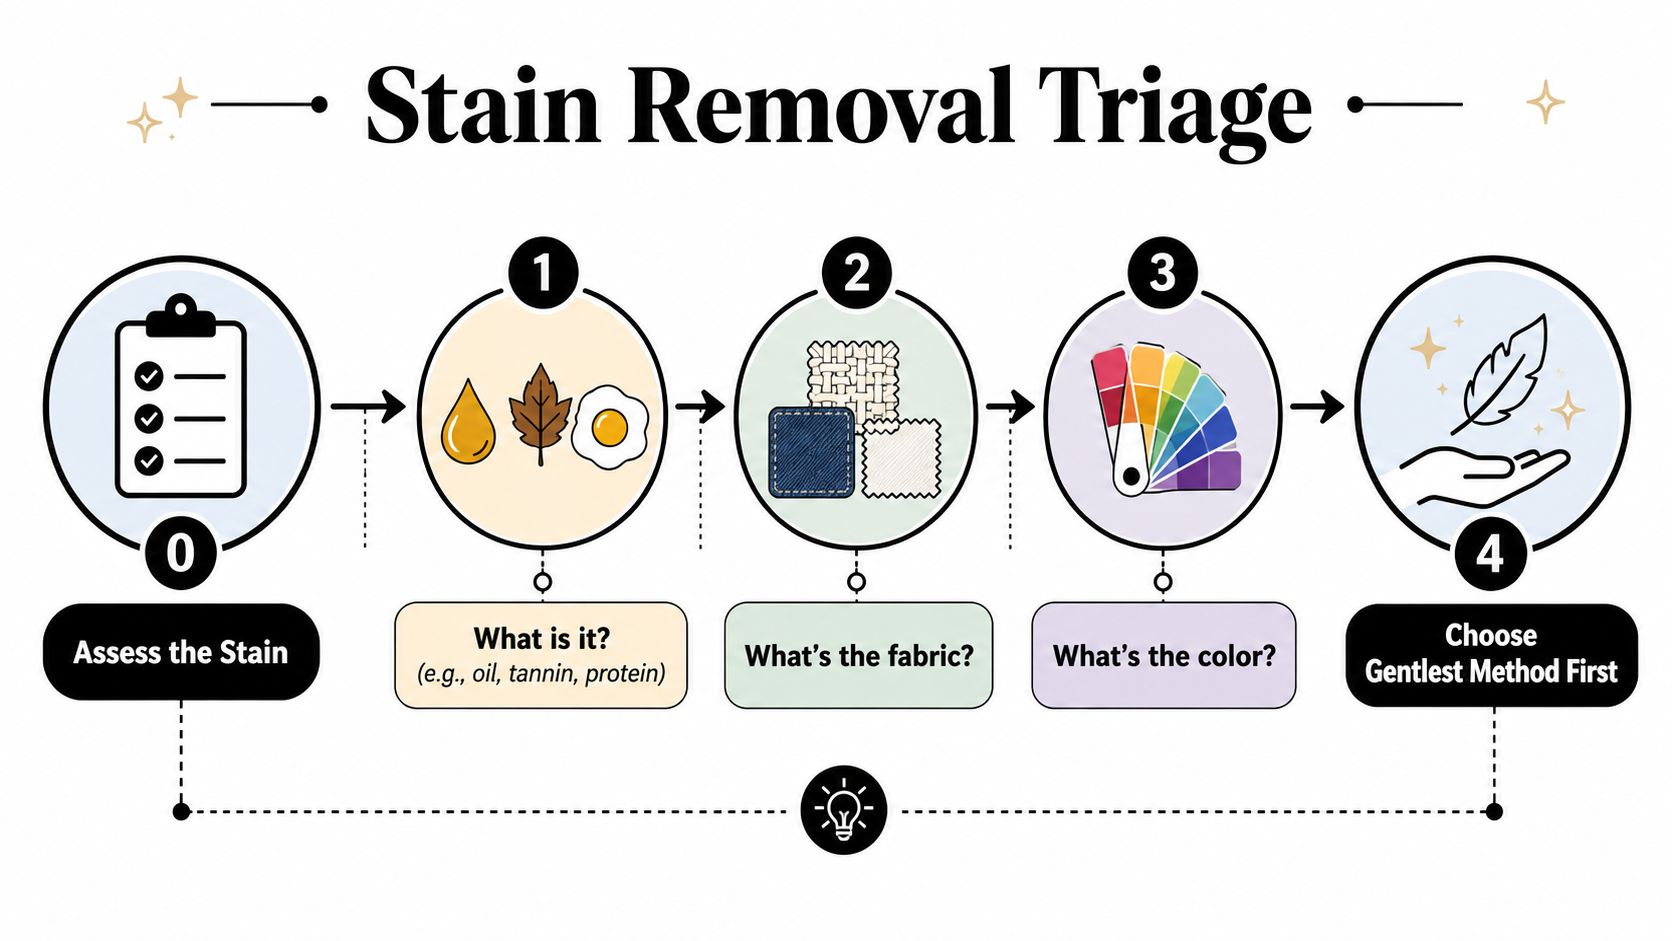
The fastest way to make a stain worse is to attack it before you've identified it. Oil, tannin, dye, and protein stains all behave differently, and the fibre underneath matters just as much as the mark itself. Start with three questions, what is the stain, what is the fibre, and how long has it been there.
Work from gentlest to stronger
Cooking oil on denim usually responds to blotting first, then a small amount of dish soap, then a 40 degree wash if the fabric can take it. Don't rub hard, because that only pushes the oil deeper into the weave. Denim is tough enough to cope with a staged approach, but it still pays to test the soap on an inside seam first.
Red wine on cotton lawn needs cold treatment at the beginning. Rinse from the back, then use white wine or soda water if that's what you have to hand, then move to a stain soak before the next wash. Heat makes tannin stains cling harder, so don't rush the iron over the mark just to “see if it's gone”.
Biro ink on viscose is where people get impatient and cause permanent damage. Test a tiny hidden area with milk or a gentle solvent before you do anything else, and stay away from anything aggressive that could distort the fibre. Acetate is especially unforgiving, so never use acetone on acetate.
A mystery mark on deadstock gets the quietest treatment first. Use cold water, mild detergent, and photograph it before treatment so you can compare before and after. That record helps if the stain shifts but doesn't vanish, and it also helps if you need to ask a supplier what the cloth contains.
Bleach is almost never the first move. It can strip colour, weaken fibres, and turn a small problem into a permanent one.
A basic stain kit stops the panic improvisation. Keep white cloths for blotting, a small bottle of mild liquid detergent, a soft toothbrush, soda water, and a stain bar you trust. A good soap stick is also worth having in the drawer, and a useful example is the Meliora soap stick for stains, because it gives you a gentle option before you reach for harsher treatment.
Storing Fabric and Finished Garments the Right Way
Storage ruins more good sewing than people expect. A garment can be beautifully made and still come out creased, stretched, musty, or faded if it's stored in the wrong place for too long. The answer isn't complicated, it's matching the storage method to the fibre and to the room you have.
Match the storage to the fabric
Fold jerseys and other knits rather than hanging them, because hanger weight can pull the shoulders out and lengthen the body. Hang wovens like dresses and shirts on padded hangers so the shoulder line keeps its shape, and use the wardrobe space you already have instead of stuffing them into boxes. Deadstock offcuts are best stored flat in labelled boxes away from light, because scraps are easier to use when they're visible and protected.
Silk and wool do best in breathable cotton bags with a lavender sachet rather than sealed plastic. Plastic traps moisture, and that can lead to stale smells or worse if the room runs damp. If you've got a finished wool coat or silk blouse that won't be worn for months, give it air, not a bag that suffocates it.
UK homes add their own problems. Loft and cellar storage can swing between damp and dry, and those changes are rough on fibres, elastication, and thread. Keep pieces away from radiators too, because constant heat can fade colour gradually and leave fabrics brittle over time.
A small sewing-room shelf works well if you split it by fibre type. One box for cottons, one for jerseys, one for delicates, one for deadstock, and one for trims and notions keeps the inventory easy to use. It also makes it obvious when a piece needs to be moved into a better bag or washed before seasonal storage.
If you want a deeper sense of how careful storage preserves woven materials over time, the guidance on oriental rug preservation tips is a useful parallel, because the same principles, airflow, light control, and avoiding damp, matter significantly.
Looking After Finished Garments and Your Sewing Machine
A finished garment and the machine that made it need the same kind of attention, small habits done early. Loose threads can ladder if they're left to catch on bags or jewellery, buttons work loose if the shank wears thin, and wool holds onto dirt on the surface long before it needs a full wash. A clothes brush often keeps a wool coat or skirt looking presentable for much longer than people expect.
Small garment habits that pay off
Trim loose threads as soon as the garment is complete, not a week later when they've started snagging. Reinforce buttons with a proper shank so they have a little room to move, especially on coats and thick shirts. Spot-clean between full washes wherever possible, because every full wash adds wear that you don't always need.
The machine side is less glamorous but just as important. In the Worthing service shop, lint in the bobbin case is one of the most common reasons a machine starts skipping stitches or bunching thread. A blunt needle creates its own problems too, because once the point is dulled, the fabric gets pushed instead of pierced cleanly.
I've seen a machine that looked ready for a full repair turn out to need nothing more than a careful bobbin clean. The owner had repeated thread jams for two projects running, and once the bobbin area was brushed out and reassembled properly, the jam disappeared. That's the sort of fix that feels almost too simple, but it's exactly why routine cleaning matters.
Clean the bobbin area after every project, change the needle after every project, and book a professional service every 6 to 12 months if you use the machine regularly.
Older mechanical machines also need oil from time to time, and if you leave them dry for too long they can start to feel stiff or noisy. If your machine suddenly sounds different, don't force it through another project. Get it checked before the fault becomes damage.
Troubleshooting Common Care Problems
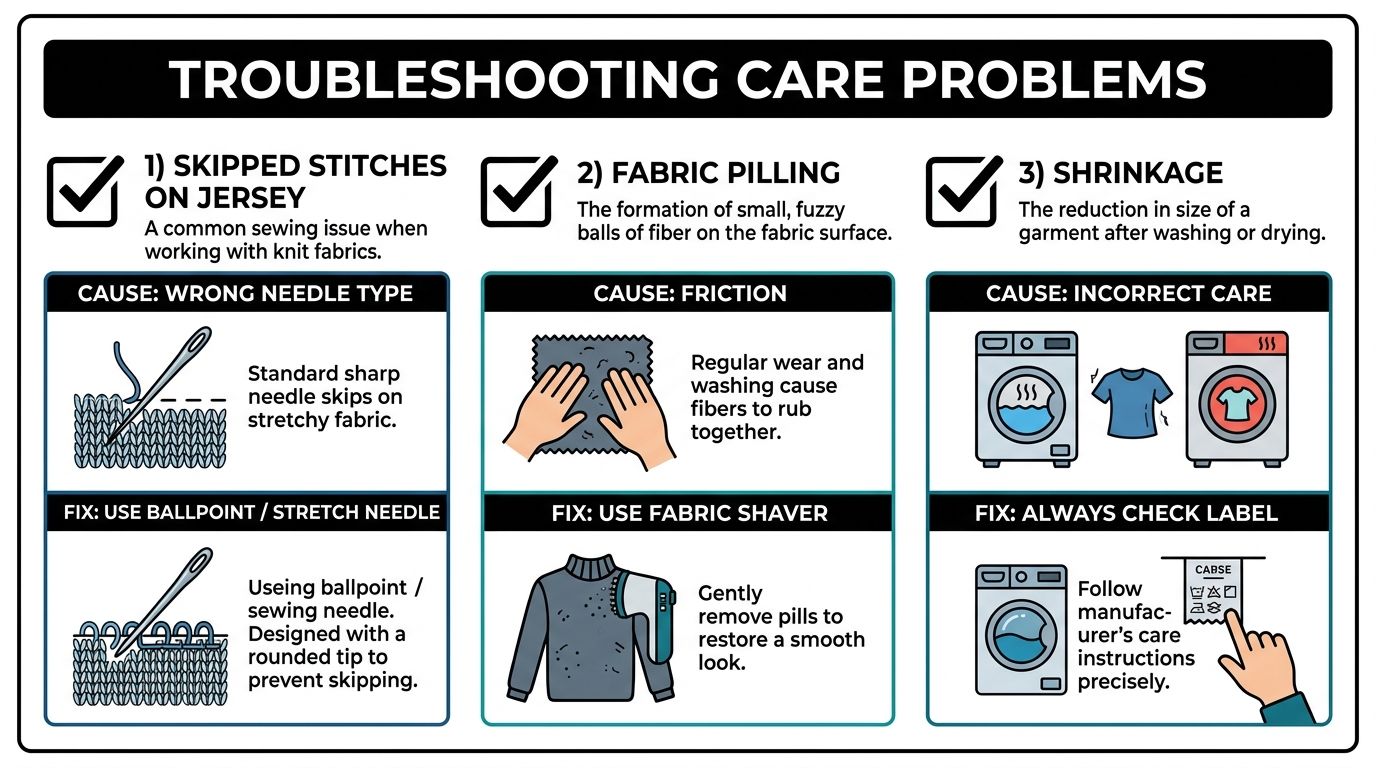
Most care disasters show the same symptoms again and again, so it helps to recognise the pattern quickly. A problem on the garment often has a machine cause, and a machine problem often starts with the wrong needle, the wrong tension, or the wrong wash habit. Once you know the usual pairings, the fix gets faster.
Common failure and fix pairs
Skipped stitches on jersey usually point to the wrong needle, often a universal needle used where a ballpoint or stretch needle should have been fitted. Old thread can make the problem worse, so change the needle, rethread the machine, and try again with the correct needle type.
Puckered seams on viscose usually come from too much tension or from pulling the fabric through the machine. Lower the tension and let the feed dogs do the work, because viscose shows distortion very quickly and hates being dragged into shape.
Colour bleed in a red and white print usually means the dye needed a pre-wash and, in some cases, a colour catcher sheet. Wash it cool going forward and separate it from pale fabrics until you know it's stable, because one loose dye can tint an entire load.
A shrunken wool jumper usually means the wash was too hot or too harsh. The partial repair is gentle re-blocking while damp, which can coax the shape back a little, though it won't undo severe felting. Treat that as a reminder that wool wants cool handling from the start.
Bobbin thread bunching under the fabric usually means the upper path wasn't threaded correctly, especially if the presser foot was down while threading. Rethread with the presser foot up, then test on a scrap before going back to the garment.
The habit that prevents most of these problems is simple. Check the needle, check the thread path, check the wash temperature, and don't assume the first obvious cause is the actual one. Most sewists lose more time by skipping that check than they ever save by rushing.
Your Fabric and Garment Care Checklist
The easiest way to make care second nature is to keep one short checklist where you cut, press, and pin patterns. Pre-wash new fabric when it needs it, check the label or test a sample when it doesn't have one, and choose the wash temperature based on fibre rather than habit. Line dry when shape matters, tumble dry only when the label and the fabric can handle it, and store finished garments in a way that suits their weight and fibre.
A simple habit list
- Before sewing: pre-wash, test deadstock, and check for shrinkage or colour loss.
- Before washing: read the fibre content and symbols, then match the load to the fabric.
- Before drying: decide whether the piece should lie flat, hang, or go in the dryer.
- Before storing: clean the garment, use the right hanger or fold method, and keep it out of damp, heat, and strong light.
- Before the next project: brush out the bobbin case, change the needle, and notice any change in stitch quality.
The win is consistency. Once these steps become normal, they take less time than fixing the damage they prevent, and they make the sewing machine last longer too. If you're testing lower-temperature washing or air-drying more often, that's a useful habit for both fabric life and household energy use, not just a nice eco slogan.
Bring your tricky fabric questions to the More Sewing shop in Worthing or browse the website when you're choosing the next fabric for your project. More Sewing can help you keep the making part and the care part working together, so your garments look good for longer and your machine stays ready for the next cut of cloth.
