
Dressmaking, Guides
Sewing with Minky Fabric for Baby and Quilting Projects
You've got the cut on the table, and it's already trying to pull itself wider when you move it. That's the moment most sewists realise minky isn't behaving like quilting cotton, it wants a different grip, a different stitch, and a bit more planning before the first seam goes in. Used well, though, it makes some of the softest baby blankets, cot quilt backs, and cuddle-ready gifts you can sew.
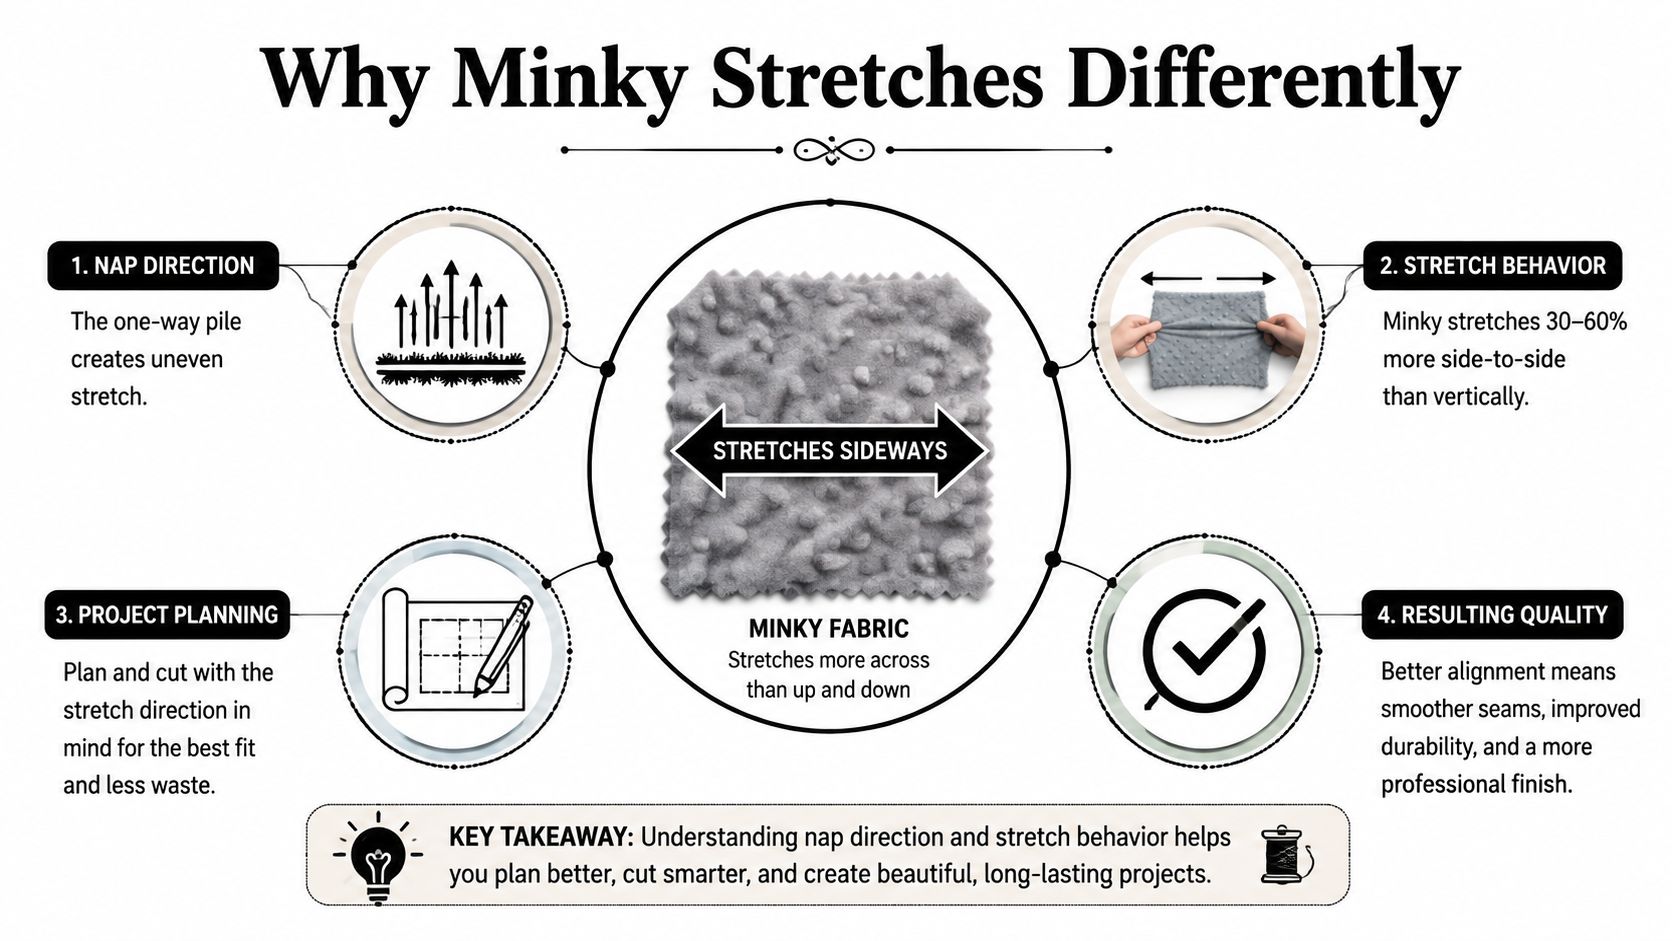
Why Minky Behaves Differently on the Cutting Mat
Minky catches people out because it looks straightforward until you move it. The fabric's construction causes that movement, not your cutting mat. Sewing guidance treats minky as a specialist synthetic textile, usually made from 100% polyester, with a knit base and a plush pile that gives it its soft hand and its tendency to shift under the machine Sewing.org guide to sewing with minkee-like fabrics.
What you feel when you touch it
A stable woven cotton holds its shape because the threads cross at right angles and resist stretch. Minky behaves more like a knit with a surface pile, so it has give in the body of the cloth and a visible nap direction on top. That one-way pile is why a piece can look slightly different depending on which way you stroke it, and why two panels cut without matching direction can read as mismatched even before they are sewn together.
Practical rule: if the fabric stretches on the cutting table, it will try to creep at the machine unless you plan for it.
That stretch matters most with baby items and quilt backs, because those projects usually have large, smooth surfaces where any movement shows. It also explains why minky is popular for baby blankets, soft toys, and quilt backs, while still asking for more control than stable cotton. The soft feel is what sells it, but the handling decides whether the finished project looks crisp or wobbly.
What changes once cotton is replaced by minky
Cotton behaves predictably under the ruler. Minky does not. A cotton quilt top can tolerate casual handling, but minky rewards a gentler workflow, more control, and a longer stitch than you would use on patchwork cotton alone. Specialist sewing guidance recommends a walking foot, a stretch or ballpoint needle, and a longer stitch length of about 3.0 to 3.5 mm to control the pile and stretch Sewing.org guide to sewing with minkee-like fabrics.
That is why the rest of this article keeps returning to the same decisions, project size, needle choice, pinning density, and washing plan. They are not separate tips. They are all responses to the same material behaviour.
The easiest way to judge a new cut is to run your hand across the surface, then lift one edge slightly. If the nap changes how it looks and the panel lengthens as you move it, treat it as a moving fabric. Once you start seeing it that way, the rest of the sewing becomes much easier to control.
Cutting and Prepping for Baby, Cot, and Quilt-Back Sizes
The first mistake with minky is treating every project as though it needs the same layout. A baby blanket is manageable on a dining table. A cot quilt needs more room to keep layers aligned. A full quilt back needs a proper plan before the rotary cutter even comes out.
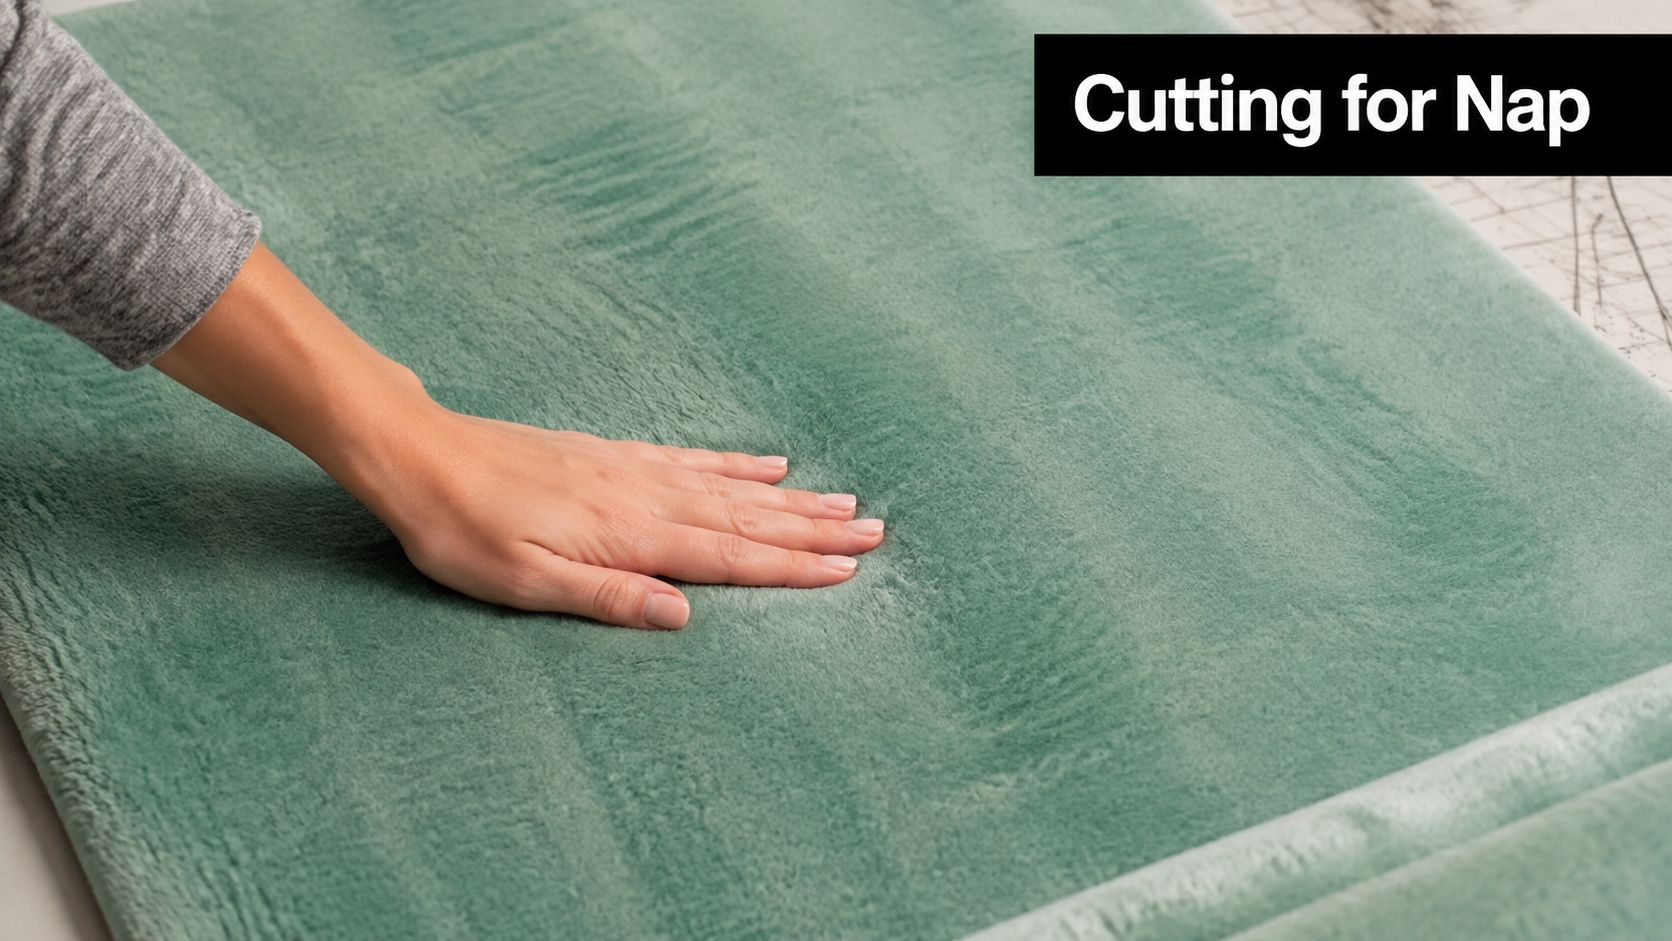
Mark the nap before you cut
I mark the wrong side of minky before I do anything else. A chalk dot, a small sticker, or a piece of tape near the corner saves a lot of head-scratching later, especially when you've got several similar cuts on the go. Keep all the nap running in the same direction across the project, because a reversed panel can catch the light differently and feel wrong in the finished blanket even if the sewing is neat.
On larger cuts, use a fresh rotary blade and a ruler with enough length to keep the edge secure. Minky drags more than cotton, so a dull blade tends to tug the pile instead of slicing cleanly. If I'm cutting a bigger backing, I clear the table first, spread the fabric flat without stretching it, then let it settle before I measure the final edges.
Wash first or sew first
For a baby gift that needs a quick turnaround, some sewists skip pre-washing because the fabric is used as a soft top layer and the priority is a tidy finish. For a long-life cot quilt, pre-washing can be worth the time if the rest of the quilt has already been washed, pressed, and handled. Question is whether every component in the project will be treated the same way after the first wash. If not, pre-wash the fabrics that are likely to change behaviour, then cut with that future wash in mind.
A larger quilt back benefits from an extra check after cutting. I square the edges again if needed, because any tiny pull in the pile becomes more obvious once the piece is laid behind a pieced top. For a baby blanket, that same attention goes into keeping the corners true and the nap consistent rather than chasing absolute perfection across a huge surface.
Minky is forgiving in feel, but not in layout. The cleaner your cut, the less fight you'll have at the machine.
Machine Settings, Needles, Thread, and Feet
A lot of minky frustration comes from using ordinary settings for a fabric that behaves in its own way. The fabric needs control more than force. That control comes from four choices working together, the walking foot, the right needle, the right thread, and a stitch long enough to sit on the pile instead of crushing it flat.
The setup that holds the fabric steady
A walking foot keeps the top and bottom layers moving at the same pace, which matters because minky shifts while you sew. Pair it with a 90/14 stretch needle or a ballpoint needle if you want the point to pass through the knit base without the machine fighting the pile. A longer stitch, around 3.0 to 3.5 mm, helps the seam stay neat through the plush surface Sewing.org guide to sewing with minkee-like fabrics.
Common mistake: when the seam looks messy, people often tighten the tension first. With minky, the needle is usually the first thing to check.
Thread choice matters as much as the needle. A detailed minky tutorial recommends 100% polyester thread in both the top thread and bobbin, which suits the fabric's stretch and helps the seam recover better after turning and washing Underground Crafter minky lovey tutorial. I treat that as the safest default for baby blankets and quilt backs, especially when the project will be handled often.
What goes wrong when one part is missing
Leave out the walking foot and the layers begin to creep apart, especially if you are sewing cotton to minky. Use the wrong needle and you are more likely to see skipped stitches or little snags where the point was not suited to the knit base. Use a stitch that is too short and the pile gets compressed, which can make the seam feel harsh and leave the edge looking busy rather than smooth.
For a baby blanket, I set the machine before I cut the final thread tails. For a quilt back, I test the stitch on an offcut first, because a long seam through bulk is less forgiving than a small sample. The point is not to find one magical setting for every machine, it is to build a repeatable setup that stops the fabric from dictating the result.
Pinning, Clipping, and Basting Across Project Scales
There isn't one correct way to secure minky before sewing. A small comforter doesn't need the same handling as a full quilt back, and over-pinning a soft pile can create its own problems. The right method depends on how much fabric you're moving and how much bulk the machine has to carry.
Choosing the prep by project size
For a small baby comforter, Wonder Clips every few centimetres can be enough if the layers are flat and you're sewing slowly. For a cot quilt, a light spray baste between the cotton and minky layers can save time and cut down on creeping when the quilt has more surface area. For a large quilt back, pinning alone is rarely practical, so basting becomes part of the job rather than an optional extra.
A useful middle ground is two rows of pins on trickier joins, especially where cotton meets pile. The first row stabilises the edge, the second stops the layers twisting as the presser foot passes over them. That approach works better than trying to pack the edge with pins so close together that the fabric starts to buckle.
| Project | Size Range | Recommended Prep | Why It Works |
|---|---|---|---|
| Baby comforter | Small, handheld | Wonder Clips or close pinning at the edges | Keeps the fabric flat without overloading a small seam |
| Cot quilt | Medium, table-sized | Light spray baste with a few pins or clips | Reduces creeping across a broader surface |
| Large quilt back | Wide backing piece | Full basting plan with pins, spray, or both | Controls shift across a big area where pinning alone is too slow |
What not to overdo
A tutorial can tell you to pin every inch, and for a demo that may work. In real sewing, that much pinning can distort the pile and slow the machine to a crawl. If the project is small, close clipping is often cleaner. If the project is large, choose a basting method that reduces stress on both the fabric and your hands.
When the layers are especially slippery, I'll use two rows of pins rather than one, but only where the seam needs it. That's usually enough to keep the nap aligned without turning the cutting table into a porcupine.
Sewing the Baby Blanket, Cot Quilt, and Minky Quilt Back
The construction changes with the project, and that is where many minky tutorials stay too general. A baby blanket wants a clean turn and a neat edge. A cot quilt needs the layers kept flat while the stitching goes through. A minky-backed quilt asks you to treat the backing as a full-width piece from the start, not something you sort out at the end.
Baby blanket first, because it shows the method clearly
For a basic minky baby blanket, cut the cotton and minky to the same size, place the minky right side up and the cotton right side down, then pin around the edges and leave a 6-inch gap for turning Suzy Quilts minky baby blanket tutorial. Sew a 1/2-inch seam around the perimeter, then backstitch on both sides of the opening so the seam holds when you turn the blanket through Suzy Quilts minky baby blanket tutorial.
Clip the corners before turning, then ease the blanket out by hand rather than pulling at the seam. That small bit of patience keeps the corners sharper and reduces stress on the pile. A 1/4-inch topstitch gives the edge a firmer finish and helps the blanket lie flat after washing Loganberry Handmade minky baby blanket tutorial. On minky, that topstitch does more work than it would on cotton alone, because the pile settles differently once the blanket has been turned and laundered.
Cot quilts and minky-backed quilts need bulk handled properly
A cot quilt usually behaves better if the layers are basted first, then quilted with straight lines through the cotton and minky together. Straight-line quilting gives the machine a clearer path and helps keep the soft backing from shifting under the needle. When you reach the binding, choose a method that copes with extra thickness rather than forcing the edge through as if it were a thin patchwork throw.
A minky-backed quilt needs a different approach again. Cut the backing as one oversized piece, and align the nap in the direction you want the surface to read once the quilt is turned or bound. For a simpler make, a turned edge with topstitching can work well. Where the quilt has bulkier seams or heavier piecing, a binding strip gives more control and keeps the edge tidier through repeated use.
If you are choosing the front of a baby gift, find useful baby gift ideas to help you match the softness of minky with a front panel that suits the occasion. The right pairing makes the whole piece feel deliberate rather than thrown together.
UK Baby-Safe Use, Care, and Washing
With minky, the last decision is not the stitch line, it is the way the finished piece will be used. A blanket that is lovely for pram time or floor play can still be the wrong choice for sleep, so the intended use should shape the size, the backing, and how much warmth the finished item adds in practice.
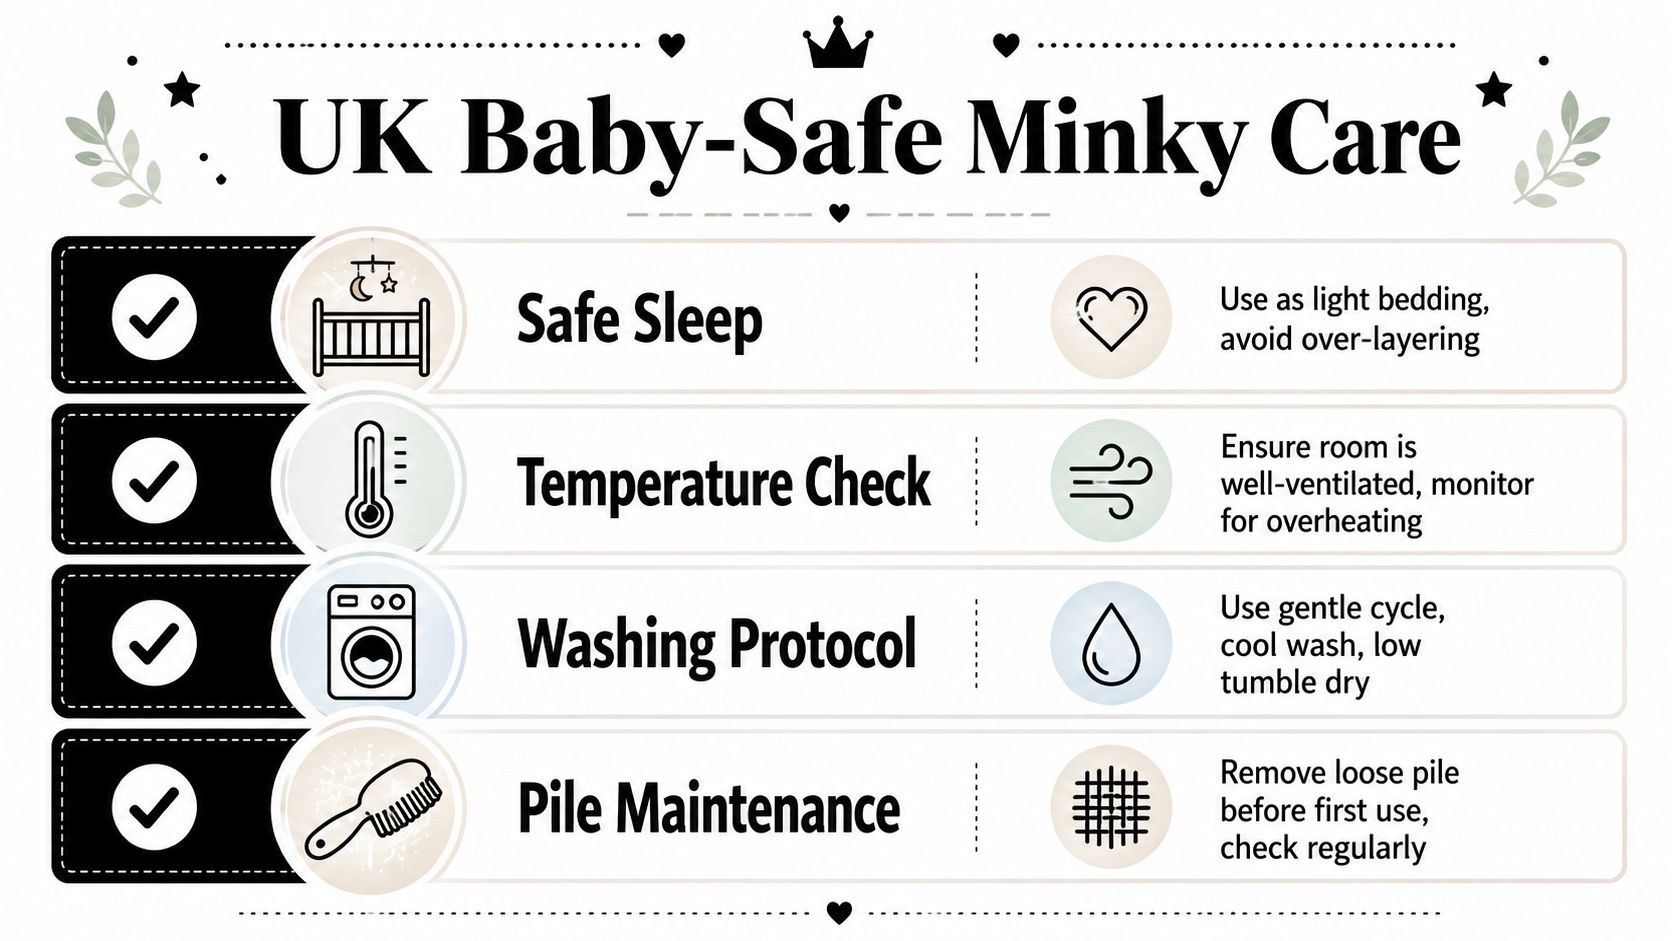
Make the finish match the use
A baby blanket works best when the edge is finished with enough strength to survive regular handling. A 1/2-inch seam, a 6-inch turning gap, and a 1/4-inch topstitch give the edge a cleaner, more durable finish, and that matters more once the blanket has been turned, folded, and washed a few times. A minky-backed cot quilt or a quilt with a minky back needs the same attention at the perimeter, because that is the part that takes the most strain first.
Keep the baby-safe decision simple. Use minky as light bedding or for supervised comfort, and avoid building up layers that make the sleep space feel too warm. The right choice depends on the baby's age, the room, and the way the family plans to use the item, not just how soft it feels in the shop. If you are unsure about sleep guidance, check the NHS advice on safe bedding before treating any blanket as overnight use.
Wash gently and preserve the pile
Minky holds its look better when it is washed with care. Use cold water, choose a gentle cycle, and air-dry if you want to keep the pile soft and even FleeceFun minky care guide. Wash it separately where you can, because that lowers the chance of pilling and snagging FleeceFun minky care guide.
Hot washes and fabric softener are poor choices for this fabric. Heat can flatten or damage the fibres, and extra softener does not help a cloth that already has a plush hand FleeceFun minky care guide. For a useful comparison, the faux fur care guide shows the same basic rule for pile fabrics. Gentle washing and careful drying keep the texture looking right for longer.
Troubleshooting the Problems Every Minky Sewist Meets
Minky usually tells you what it needs if you read the first wrong stitch, the first wavy edge, or the first crushed patch of pile. That is useful, because the fix is often a small change made before the seam gets much longer. At the machine, the aim is to correct the behaviour early, rather than spend the evening unpicking a seam that went off track halfway through.
Read the symptom, then change one thing
Skipped stitches usually point to the needle first. If the point is wrong for the knit base, the machine can miss the thread path or drag the pile, so changing the needle type or size is the first sensible test. Wavy or creeping seams usually mean the layers are feeding at different rates, and that is where a walking foot earns its place.
Highest-impact fix: change the thing that controls fabric movement before you start adjusting settings at random.
Bald or crushed spots usually come from heat, very sharp pins, or a stitch that is too short for the pile. A short stitch can press the texture down and leave the seam looking flat in the wrong way. If the binding looks puckered, bulk is often the issue, so the edge needs to be sewn more gradually or with fewer layers under the foot at once.
Fix pile direction before it shows
Uneven pile direction is another common one, especially on topstitching. If one pass brushes the nap one way and the return pass brushes it the other way, the line can look patchy even when the stitching is straight. Keep the fabric oriented consistently and avoid flipping the project around unnecessarily during finishing.
If the fabric shifts more than expected, add the second row of pins or switch to a basting method that suits the project scale. For a small baby item, that may be enough to stabilise the seam. For a larger quilt back, it usually means stopping, re-basting, and then sewing again with the layers under control.
The best minky result rarely comes from brute force. It comes from a calm setup, a longer stitch, the right needle, and enough restraint to let the pile behave instead of trying to flatten it into cotton.
