
Dressmaking, Fabric
How to Sew with Crepe Fabric: A Practical UK Guide
You've got the cut table cleared, the pattern pinned, and a length of crepe that still looks calm until it slips the moment you touch it. That's the point where most sewists realise crepe isn't misbehaving, it's asking for a different method. Treated properly, it makes beautiful dresses, blouses, trousers and occasionwear, but it punishes the habits that work fine on cotton lawn or denim.
Why Crepe Behaves Differently From Other Fabrics
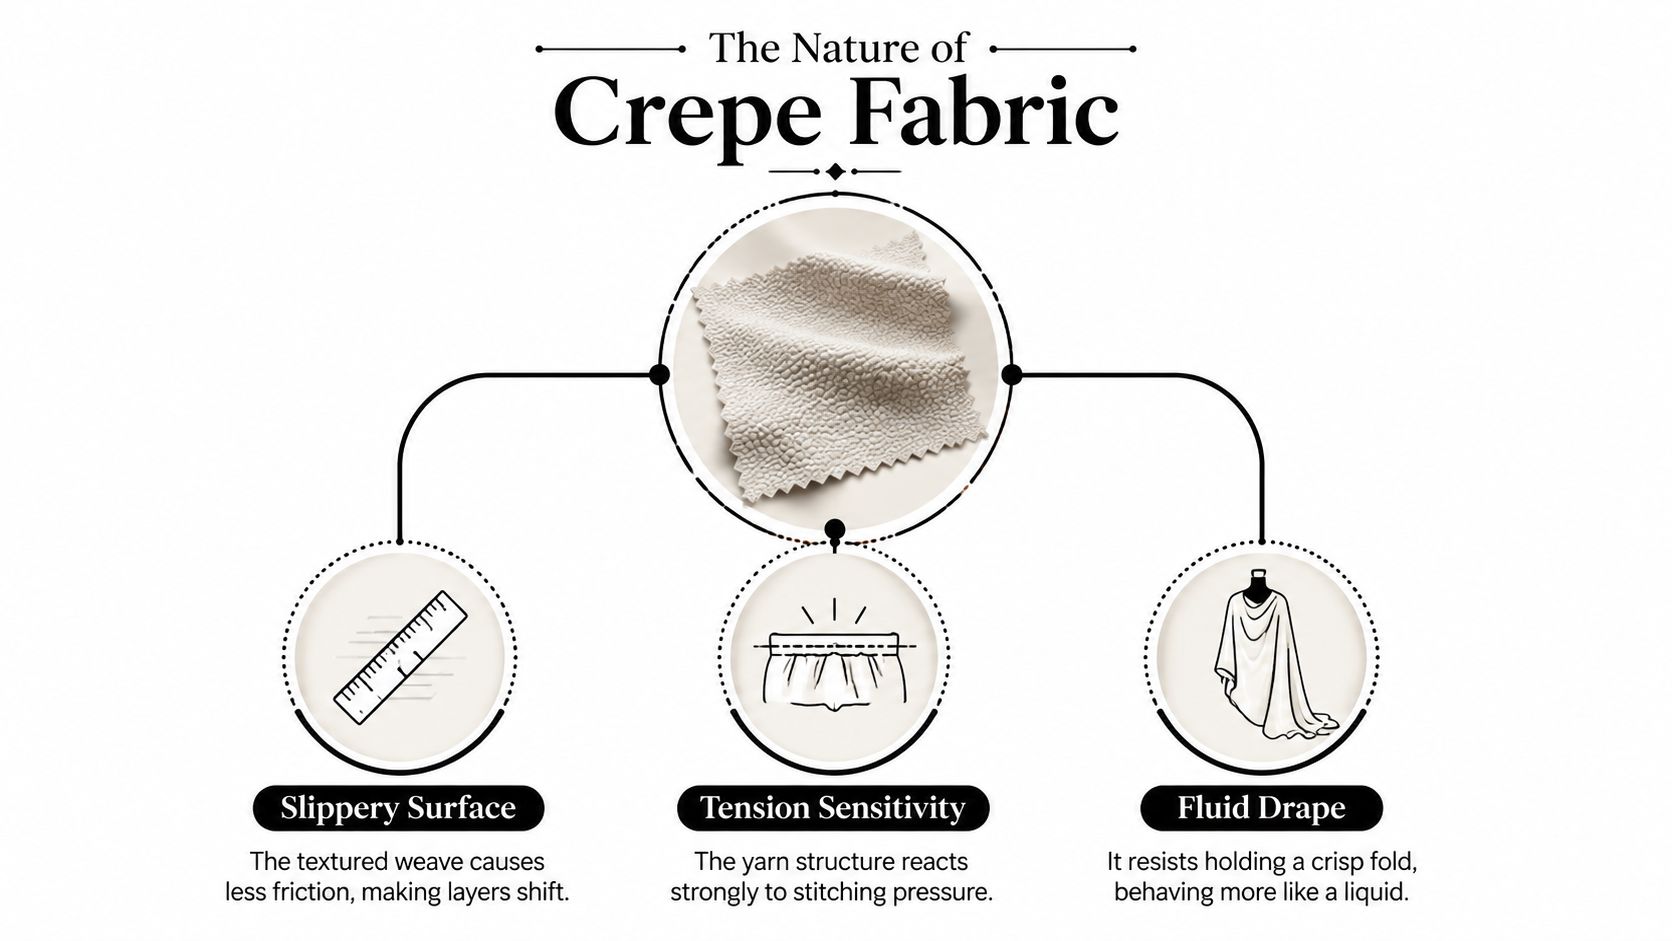
Crepe looks friendly on the roll, then moves under your hands like it has its own ideas. That's because it's not one fabric, it's a family of weaves with a crinkled or twisted surface that gives it drape, a little give, and a strong tendency to fray. If you're used to cotton lawn, you'll notice crepe won't hold a crisp crease in the same way. If you're used to denim, the lack of body can feel almost disorienting. If you're used to jersey, crepe still behaves differently because it's woven, not knitted.
The four crepes most home dressmakers meet
In UK dressmaking, the versions you'll run into most often are polyester crepe, viscose or rayon crepe, silk crepe de chine, and wool crepe. Each has the same broad family traits, but they don't all react the same way to the needle, the iron, or gravity. A silk crepe de chine blouse wants finesse and minimal disturbance. A wool crepe trouser can handle a more structured finish, but it still needs clean handling to keep the silhouette sharp.
Practical rule: if crepe is shifting on the cutting table, the answer is rarely to sew harder. It's to stabilise earlier and disturb it less.
That's why the right needle and stitch length only come into play after you've matched the method to the fibre. Crepe rewards precision dressmaking, not force. It's a fabric where seam quality, surface finish and hang matter just as much as fit, especially for dresses and occasionwear. The rest of this guide treats it that way, with choices based on what works at the table and the machine, not on trial and error.
Preparing and Cutting Crepe Without Distortion
Start before you touch the pattern pieces. Wash washable crepe first, then let it dry flat or press it gently while it's still slightly damp so the fabric settles before you cut. That matters because crepe can shift as soon as it's handled, and if you wait until after construction to discover movement, you're already chasing distortion.
Lay it flat, don't stretch it out
Use a wide, flat cutting surface and keep the fabric fully supported. Don't let crepe hang off the edge of the table, because the weight of the unsupported cloth can pull the grain out of shape. Smooth it with your hands, not by tugging. If you feel resistance, stop and reposition.
A bias-cut camisole and a structured trouser leg need different care even before the first cut. The camisole can benefit from the softness of the bias, but it also needs careful staystitching on curved or bias edges to stop the neckline or armhole from drifting. The trouser leg usually asks for more exact grain alignment so the side seam falls cleanly and the leg hangs straight.
For pattern choice, reach for designs with fewer seams, simple darts, and fewer notch points. Loose silhouettes forgive tiny cutting wobbles better than tight, seam-heavy styles, and that margin matters with slippery fabric. Use sharp shears or a rotary cutter, and if the crepe is especially shifty, cut a single layer so you're not fighting two layers that want to slide apart.
Use weights, not pin damage
Pattern weights are kinder than lots of pins because they don't leave obvious marks on delicate crepe. If you do pin, use fine silk pins and place them sparingly. For very slippery viscose crepe, single-layer cutting is often the safest route, especially for curved pieces where even a slight drag can distort the edge.
Cut the garment the way you want it to behave later. If it's stretched or skewed at the cutting stage, no machine setting will put the grain back.
Needles, Thread and Tools for Crepe
Needle choice is where generic advice gets too vague. A microtex or sharp needle pierces crepe yarns cleanly, instead of pushing them aside and leaving visible snags or holes. For finer silk and viscose crepe, a 60/8 or 70/10 usually gives the cleanest result. For polyester or wool crepe, 75/11 is often a more practical fit because those fabrics can tolerate a touch more needle presence without looking over-pierced.
Match the tool to the fabric behaviour
Ballpoint needles only make sense when you're dealing with a crepe knit, not a woven crepe. For woven crepes, a sharp point is the safer bet. Thread should be fine, smooth and colour matched, with fine polyester or silk thread giving a cleaner result than cotton thread, which can look duller against a delicate crepe surface.
A walking foot, or dual feed if your machine has it, makes a noticeable difference because it helps both layers move together. Fabric weights help at the cutting table. Sharp shears matter because ragged cuts invite fraying before you've even reached the machine. If you're pressing, a pressing cloth protects the surface, and a tailor's clapper helps set seams and hems without overworking them.
What changes the outcome in real sewing
A viscose wrap dress is a good example. Sew it with a standard foot and a blunt-ish needle, and the front edges can pucker before the side seams are even complete. Swap in a 70/10 microtex needle and a walking foot, and the same fabric usually behaves more like a garment than a problem. The difference isn't glamour, it's control.
| Crepe type | Needle size and type | Thread | Presser foot |
|---|---|---|---|
| Polyester crepe | 75/11 microtex or sharp | Fine polyester thread | Walking foot or standard foot if stable |
| Viscose crepe | 70/10 microtex | Fine polyester or silk thread | Walking foot preferred |
| Silk crepe de chine | 60/8 or 70/10 microtex | Fine silk or fine polyester thread | Walking foot or very light-pressure standard foot |
| Wool crepe | 75/11 microtex | Fine polyester thread | Walking foot or dual feed |
Machine Settings and Stitching Workflow
Crepe behaves best when you treat the machine setup as part of the sewing, not an afterthought. Start with a scrap test. Sew a 10 cm seam on a scrap folded the same way as the piece, because one bolt of crepe can behave differently from another, and even the same fibre can react differently by finish and weave.
Set the machine for control, not speed
For most polyester and wool crepe, a stitch length around 2.5–3 mm usually gives a balanced seam. For fine silk crepe de chine and crepe back satin, closer to 2 mm is often cleaner because it reduces visible holes and keeps the seam flatter. If the upper layer is feeding ahead of the lower one, reduce presser-foot pressure a touch, or loosen the top tension slightly and test again on scrap.
Staystitch curved and bias edges first, then construct the garment, then finish the seams. That order matters because crepe doesn't forgive late stabilising. A neckline or armhole cut on the bias can open out or ripple if you wait until after assembly to support it.
A real sewing sequence for a blouse sleeve
Take a crepe de chine blouse sleeve. Sew slowly with a walking foot, place tissue paper under the seam if the fabric is especially delicate, and lift the presser foot every 15 cm to make sure nothing has shifted. Tear the tissue away after pressing, not while the seam is still fresh, so you don't drag the fabric fibres.
Success sounds quiet. No thudding from forced feeding, no scratchy snagging, no sudden puckers where the seam crosses a curve.
What you want to see is a flat seam, even feeding, and no little grin of distortion at the edge. If the seam looks wavey on the table, it'll look worse after pressing. If it lies flat now, you've got a good foundation for the finish that comes next.
Seam Finishes That Match the Garment
Seam finish choice decides both the inside feel and the long-term wear of a crepe garment. On a lightweight blouse, the wrong finish can add bulk, ruin the drape and still fray at the edge. On trousers, a fragile finish can fall apart where the garment gets the most strain. The safest answer is the one that fits the fibre and the garment, not the one you always use.
French seams, zigzag, overlock and bound seams compared
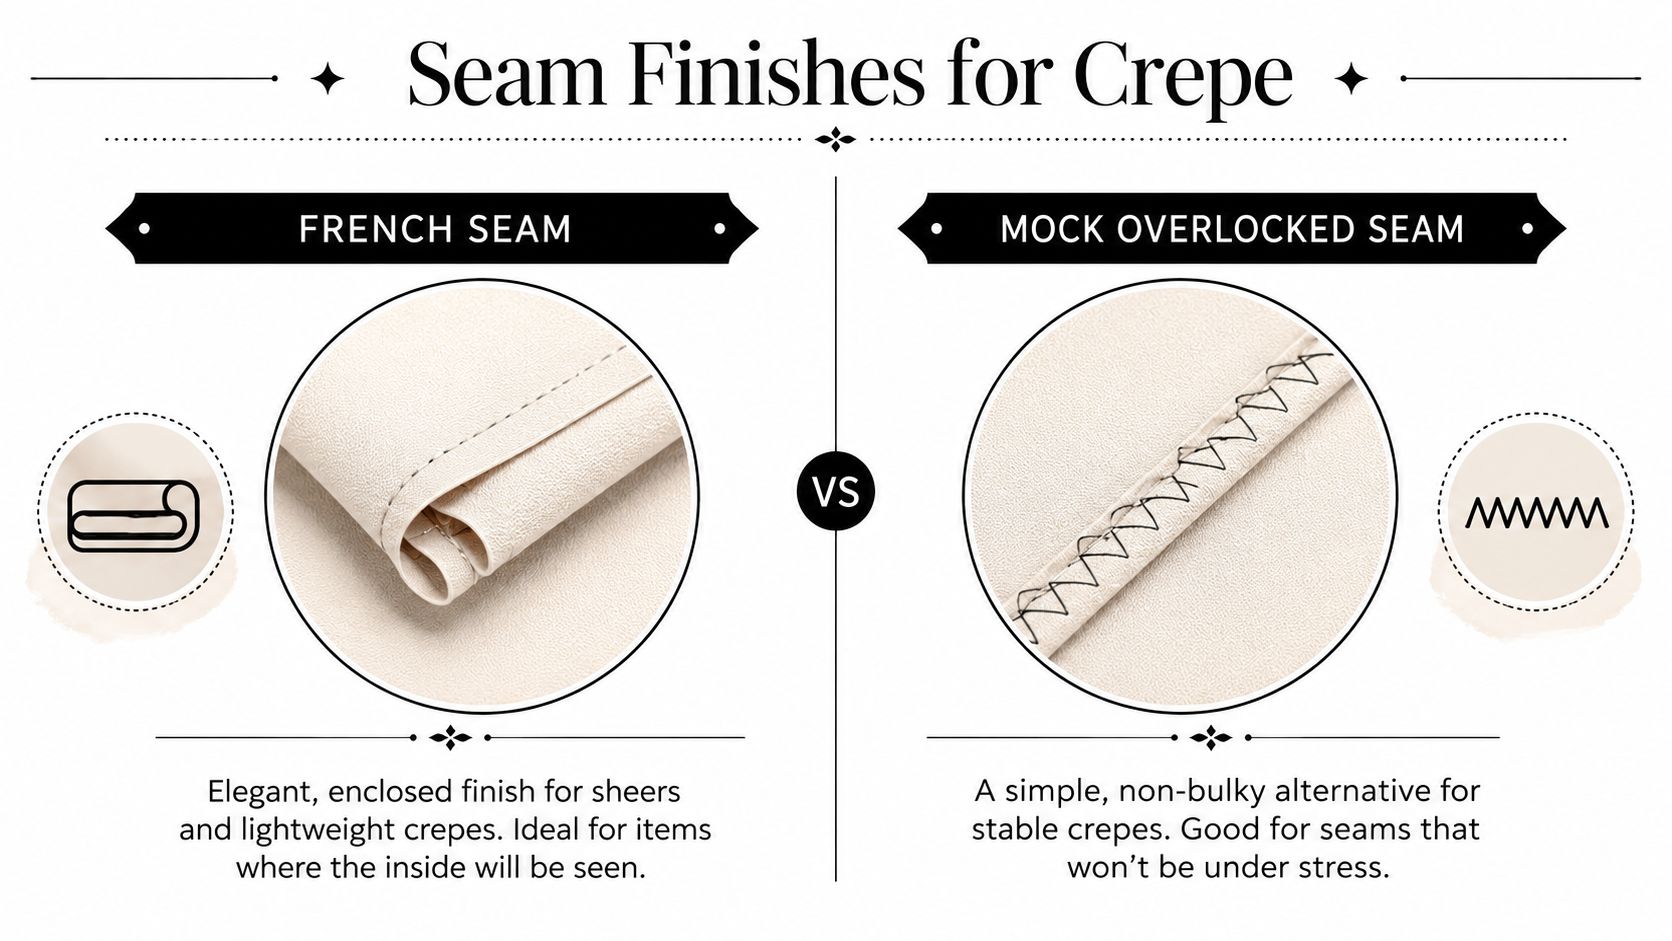
French seams are the elegant choice for sheer or lightweight crepe, especially silk crepe de chine and viscose. They enclose the raw edge, control fraying and look beautifully clean inside a blouse or lining. The trick is to sew the first pass, trim the allowance neatly, often to about 3 mm before the second pass, then press and enclose.
A narrow zigzag is the practical standard-machine option for everyday polyester crepe dresses. It's quick, reasonably tidy and forgiving on home machines that don't love very fine fabrics. A serged or overlocked finish suits wool crepe trousers and anything you plan to press open and topstitch, because it keeps the seam edge tidy without adding much weight. Bound seams work well in unlined jackets, especially when you want a polished inside and a little design interest from a matching or contrasting binding.
If you're new to crepe, try French seams on a scrap first. They solve the fraying problem that catches so many first-timers out, and they tell you quickly whether your stitch length and needle choice are right. For measurement confidence before you cut a garment like this, a solid fitting resource such as the Robosize measurement guide can help you double-check body measurements and ease.
A seam finish on crepe isn't just a technical choice. It changes how the garment sits, how it moves and how pleasant it feels against the skin.
Hemming, Pressing and Dealing With Hem Drift
Crepe hemmed too early often looks right on the table and wrong on the body. Gravity, a fluid drape and any bias-cut sections can let the hem drop after hanging, so a skirt or dress that seems level during construction may shift once it's been on a hanger. That's why hemming crepe works best as a two-stage job, not a single one.
Hang first, mark second
Complete the garment, then hang it on a dress form or a padded hanger for at least 24 hours in normal room conditions before you finalise the hem. After that, mark the hem on the wearer if you can, or on the form if the fit is already stable. This step makes a bigger difference than most beginner guides admit, and it's the simplest reason a handmade crepe garment can look shop-bought.
For a silk crepe de chine blouse or dress, a narrow rolled hem keeps the edge delicate. For viscose and polyester crepe, a blind-hem stitch on a standard machine is usually the most practical. For wool crepe trousers, a hand-stitched blind hem gives the cleanest, least visible finish.
Press crepe without flattening it
Use low to medium heat, a pressing cloth and steam rather than heavy pressure. Crepe doesn't need brute force, it needs shaping. A tailor's clapper helps set the fold after pressing, especially on hems and seam allowances where you want a crisp line without shine.
If the hem has already dropped, don't panic and don't force it flat with more heat. Re-press gently with steam, let it rest for about 30 minutes, then re-mark before you stitch again. I've seen that small pause save more hems than any fancy tool.
The video below is a useful visual reference for the sort of careful hemming rhythm crepe likes.
For a portable press that suits compact sewing spaces, especially where storage and heat-up time matter, the portable steamer for Australian homes is a practical reference point for the kind of lightweight steaming setup many home dressmakers look for.
Troubleshooting, Care and a Final Checklist
The problems with crepe are usually visible before they become serious. Puckered seams often point to too much presser-foot pressure or a needle that's no longer cleanly slicing the weave. Snagged threads usually mean it's time to snip the loose end and change to a fresh microtex needle, not pull at the thread and make the run worse. Shiny press marks usually come from heat that's too high or direct pressure without a cloth.
Common faults and the quickest fix
A rippled curved hem usually means the edge needed more stabilising or should have been re-cut before hemming. A creeping neckline often means the curve wasn't staystitched firmly enough, or the facing needed more support. If you see the fit slipping after construction, the problem usually started at the cutting or stabilising stage, not at the final stitch.
Care depends on fibre. Viscose and silk crepe are safest with cool hand-washing and flat drying. Polyester crepe can usually go through a cold machine wash on a synthetics cycle. Wool crepe generally belongs in dry cleaning unless the care label says otherwise. Store finished garments flat or on a padded hanger so the shape doesn't drift between wears.
A few habits solve most crepe headaches:
- Pre-wash washable crepe before you cut.
- Test on a scrap folded the same way as the seam.
- Use a microtex needle suited to the fibre.
- Fit a walking foot or dual feed for slippery layers.
- Staystitch curves and bias edges early.
- Choose a seam finish that matches the fabric.
- Hang before hemming.
- Press with a cloth and low heat.
- Store flat or on a padded hanger.
Crepe rewards patience and a few small habits. Once you've sewn one garment with the right settings, the fabric stops feeling like a fight and starts behaving like the elegant cloth it's meant to be.
If you want more practical fabric advice, sharper dressmaking guidance and carefully chosen sewing supplies, visit More Sewing. It's a useful place to find the fabrics, notions and kit that make tricky materials like crepe much easier to handle.
