
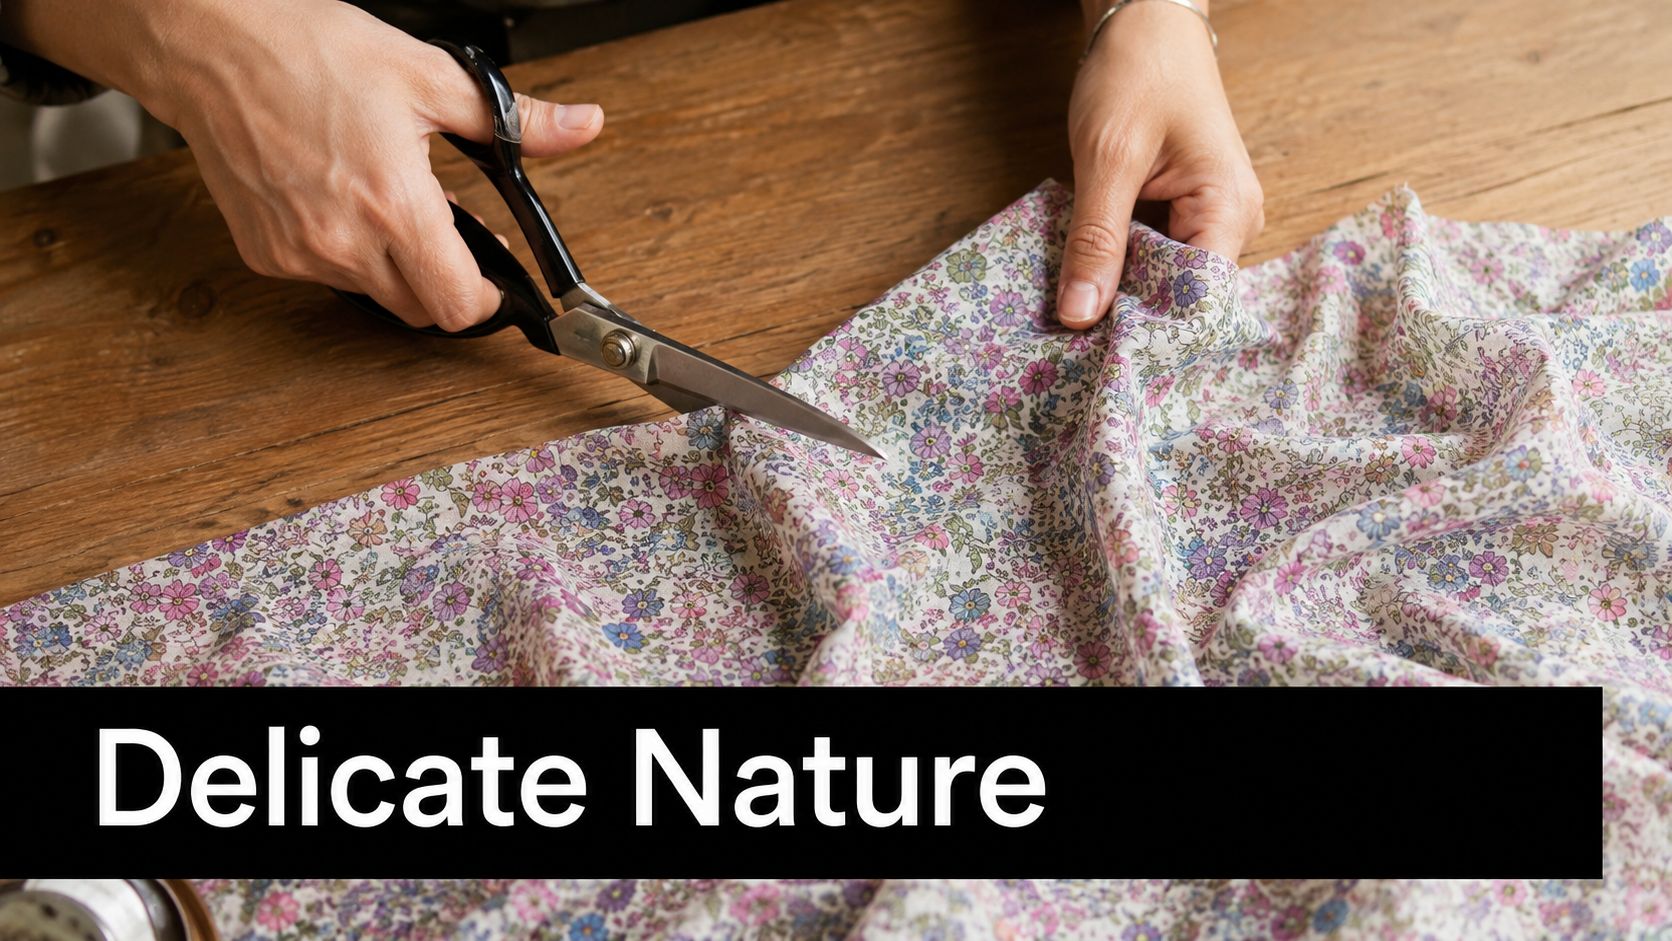
You know the moment: the Liberty lawn is spread out, the scissors are in your hand, and the fabric starts shifting the instant the blade meets it. It looks like ordinary cotton at first glance, but it won't behave like the dress cotton you can muscle into place. That's exactly why how to sew with Liberty lawn and fine cotton (heirloom techniques) rewards a slower, cleaner approach, with the payoff showing in the seams, the drape, and the finish on the wrong side.
Liberty of London's own history explains a lot of that behaviour. The company was founded by Arthur Lasenby Liberty in 1875, opened on Regent Street in 1885, and its Tana Lawn became a house specialty in the early 1930s under cotton buyer William Hayes Dorell. Liberty says the cloth was named after Lake Tana in Ethiopia, where the long-staple cotton fibres originated, and that its development drew on more than 100 years of refinement in the UK. That heritage matters because this is not a fabric that likes rough handling, bulky seams, or casual pressing. It wants accuracy, fine tools, and a dressmaker's patience. For a quick primer on weave density, thread count explained simply is a useful reference before you start comparing fabrics.
Why Liberty Lawn Behaves Differently From Standard Cotton
Fine cloth asks for lighter hands
A lot of sewists meet Liberty lawn as if it were just a prettier quilting cotton, then wonder why it skates around under the foot or shows every careless press mark. That's the wrong starting point. The fabric's fine weave and silk-like hand put it closer to couture cotton than to everyday dressmaking cotton, so the handling has to match.
Heirloom sewing fits this cloth because the technique family itself was built for delicate materials. It is widely described as imitating French hand sewing from roughly 1890 to 1920, but using a machine and trims such as lace insertions, tucks, ribbons, and smocking. Threads Magazine recommends a 2.5 mm straight stitch, a new 70/10 universal needle, and French seams for semisheer lawns and batistes, which lines up neatly with the way Liberty lawn behaves on the table and under the presser foot. As the article on fine cottons and laundress-like handling suggests, small stitches and clean interiors are what keep light cloth from turning wavy.
Why ordinary shortcuts fail here
The usual shortcuts on medium-weight cotton create problems fast. Heavy needles leave bigger holes, steam can spread the fabric out of shape, and thick pins can push the lawn down into the needle plate or leave visible puckers. On a blouse front or a summer dress yoke, those flaws don't disappear later, they stay part of the garment.
Practical rule: if the cloth looks crisp on the bolt but turns slippery once folded, treat it like a fine dress fabric, not a general-purpose cotton.
That's where the reward comes in. Liberty lawn gives you a clean edge, a soft drape, and a polished surface that shows tucks, narrow hems, and delicate seam work very clearly. Ordinary cotton can hide a rushed finish. Liberty lawn exposes it, which is inconvenient at first and useful once you learn to work with it.
Preparing Liberty Lawn Before You Cut
Stabilise first, cut second
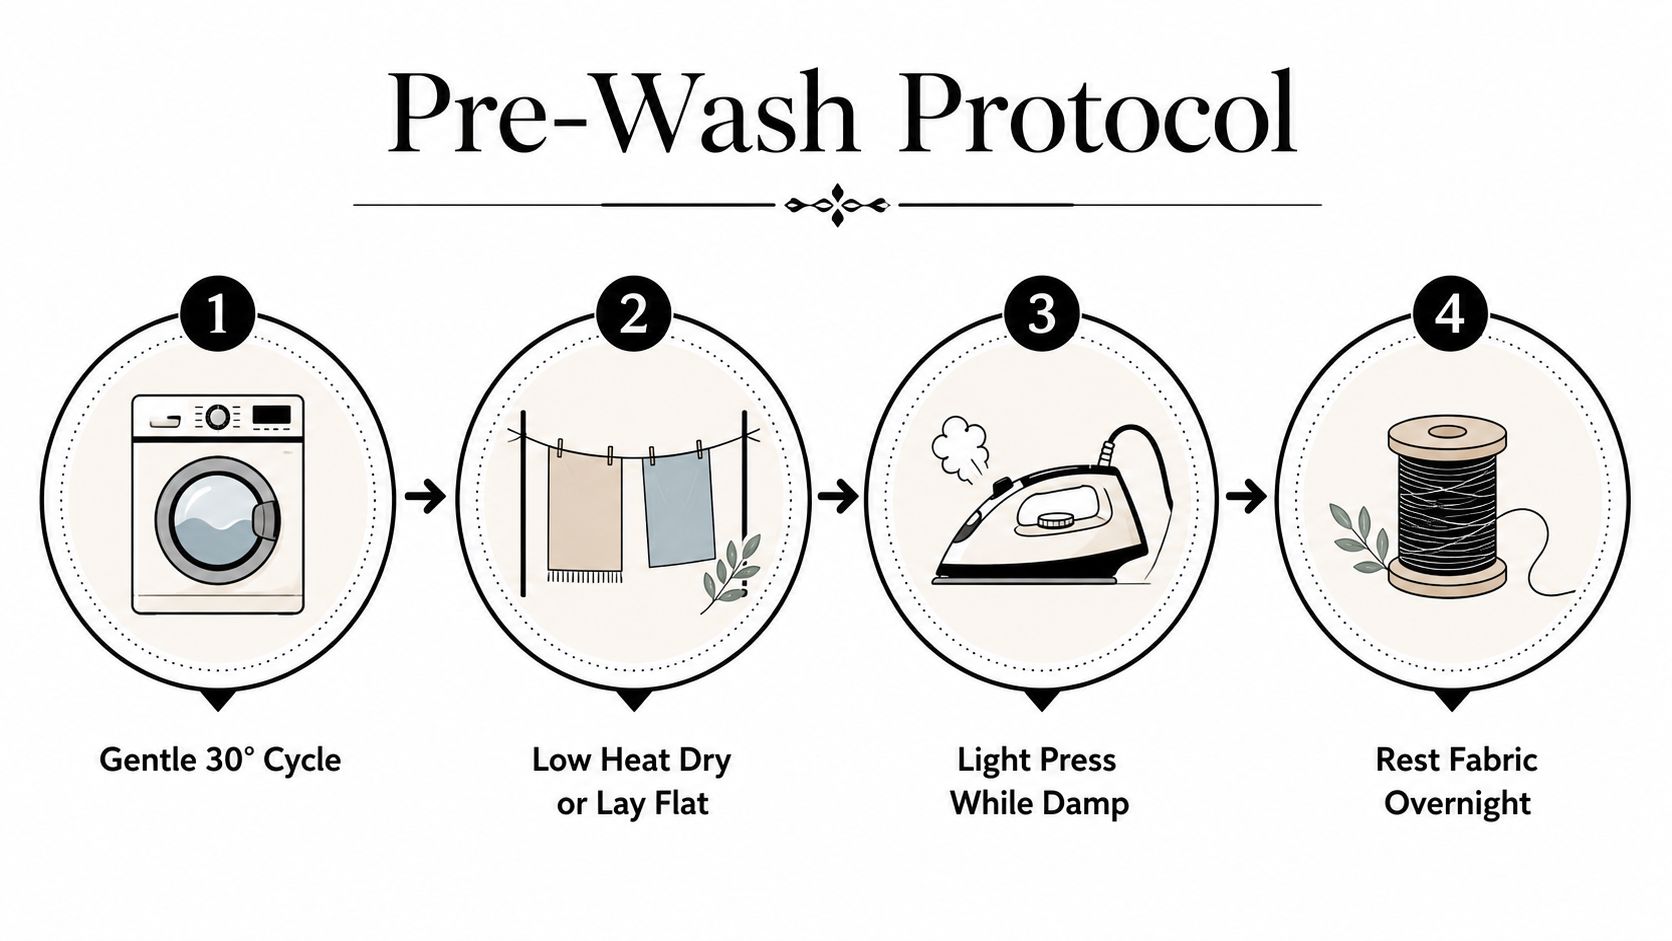
Start with the simplest truth about fine cotton, it moves when you breathe on it. Prewash on a gentle 30 degree cycle, then dry flat or on a low-heat line dry approach so the fabric doesn't skew before you've even planned your layout. If the piece arrives as a tightly rolled cut, give it time to settle before you cut into it, because a relaxed cloth is easier to square.
Starching is the next decision. On a summer blouse or a child's dress with small pieces, a light spray starch before cutting can make a real difference, especially if the cloth is soft and the seam lines are long. On a garment where you want a softer hand, starch after construction instead, so you get the handling help without flattening the finished drape. A quilting reference puts it bluntly, “Starch is lawn's best friend,” and that's fair, as long as you don't overdo it.
Press dry and keep moisture controlled
The dry-iron rule is the one I trust most with Liberty lawn. Independent guidance warns that steam can distort the very fine threads, and that warning shows up again and again because it's true in practice. Use a dry iron for routine pressing, then introduce moisture only if you're deliberately reshaping a section and know the cloth can handle it.
A good workflow looks like this. Lightly starch if needed, press flat with a dry iron, cut with sharp shears or a rotary cutter, then let the pieces rest before stitching. For tiny parts, such as collars or facing pieces, dry pressing gives you better control than trying to rescue them later with steam.
The fabric should feel managed, not dried out and brittle. If it starts acting fuzzy, wavy, or over-handled, stop and reset.
For a blouse in a pale print, I'd starch before cutting. For a child's dress in a darker Liberty lawn, I'd usually keep the prep lighter and save the extra body for after the seams are sewn, so the finished garment still moves well.
Needles, Thread, and Machine Settings for Fine Cotton
Start with the right needle and don't improvise
For Liberty lawn, the sensible everyday starting point is a size 70/10 universal needle. That's the size repeatedly recommended in UK-facing sewing guidance, and it gives you a fine enough point without becoming fragile. If the piece is especially sheer, a 60/08 can be the better choice, but I'd only drop that size when the fabric is delicate and the machine is feeding cleanly.
Thread matters just as much. A good-quality 100% cotton thread blends well with fine cotton and behaves predictably in seams and hems. On more decorative heirloom work, some sewists prefer fine silk or machine-embroidery thread, especially where bulk is a problem, such as buttonholes or ornamental stitching. If you need a useful comparison point for thread types, thread choices for durable logos is worth skimming because it clarifies how different threads behave under wear, even though the project focus is different.
Set stitch length and tension for control
The starting stitch length I trust for seaming is 2.5 mm straight stitch, which keeps the line neat without punching too many holes into the lawn. For topstitching on tucks or narrow hems, a slightly longer stitch can look cleaner, but don't lengthen it so much that the stitching starts wandering. Tension should be tested on scraps, because fine cotton will show a tension mismatch more than a heavier cloth.
A useful way to think about it is by failure mode:
- Snagging: usually means the needle is too heavy or dull.
- Puckering: often points to too much tension, too much foot pressure, or overhandling.
- Holes or rough seams: usually means the thread, needle, and stitch length aren't balanced.
I also keep an eye on the presser foot pressure if the machine allows it. Fine lawn likes to glide just enough to feed evenly, but not so much that it stretches as it goes through. If the machine starts chewing the fabric into the plate, stop and switch to a smaller needle, a cleaner thread, and a steadier hand before blaming the pattern.
A clean sample seam tells you more than a page of machine settings. Test on offcuts, then adjust one variable at a time.
Cutting, Marking, and Adjusting the Pattern
Cut like the fabric will remember everything
Liberty lawn is one of those fabrics where the cutting stage decides whether the garment looks calm or fussy. A sharp rotary cutter on a starched, pinned piece gives you excellent control, especially for long straight edges and precise pattern pieces. Fine fabric shears work too, but only if the cloth is laid flat and handled minimally, because over-lifting lets it shift under its own weight.
Pins need care. Thick pins can leave marks or push the cloth into the needle plate, so I prefer fine pins, or pattern weights where possible, especially on longer cuts. The goal is to keep the fabric flat without bruising it. If you're working on a blouse front or a narrow sleeve, small movements matter more than speed.
Build the seam finish into the pattern
Pattern adjustments save frustration later. If you want French seams, add 6 mm extra seam allowance so you have room to sew the seam twice without crowding the line. If the design uses a double-turned narrow hem, lengthen the hem allowance before you cut, because trying to add it later usually makes the edge look clumsy. Those little changes are easier than trying to force a standard pattern into a fine-fabric finish.
Marking should stay gentle too. Fine tailor's chalk works well on pale prints, silk thread tacks are excellent when you need absolute precision, and disappearing pens can help on darker or more complex designs. I'm cautious with pens on Liberty lawn because the weave is so fine that any heavy marking can show through before the garment is even sewn.
- Pale prints: chalk and thread tacks are usually safest.
- Dark prints: test a disappearing pen on a scrap first.
- Tiny detail areas: silk tacks give the cleanest control for darts, tucks, and insertion points.
The key is to mark just enough to guide the needle, not enough to decorate the fabric.
Choosing the Right Seam and Hem Finish
Match the finish to the stress on the garment
Liberty lawn can handle several finishes beautifully, but not all of them belong everywhere. French seams are the clearest choice for sheer or semi-sheer sections, especially sleeves, side seams, and blouse panels where the wrong side will show. They keep the interior clean and protect the delicate edges from fraying without adding visible bulk.
Narrow double-turned hems work well on children's dresses, summer skirts, and the lower edges of lightweight blouses. They look neat, wear well, and wash reliably when stitched evenly. Hand-rolled hems give the lightest, most refined edge, which suits ruffles, neck frills, or any area where the hem is supposed to disappear into the garment rather than sit as a feature.
Why some finishes earn their time
French seams take longer than an ordinary straight-stitched seam, but they repay that time in washability and a polished inside finish. Narrow hems are faster and often more durable for everyday wear, especially on garments that get frequent laundering. Hand-rolled hems look the most delicate, but they are also the most time-intensive and usually belong on smaller edges rather than full-length hems.
For a blouse you'll wear often, the finish should survive the wash as gracefully as it looks on day one.
A lined bodice changes the calculation. If the interior won't be seen and the fabric is already supported, you can reserve the most decorative finish for cuffs, collars, or hems, rather than using it everywhere. That's a practical heirloom habit, not a compromise. It keeps the effort where it matters and avoids overbuilding areas that don't need it.
Heirloom Techniques Worth Adding to a Liberty Lawn Garment
Pintucks and fagoting with modern clothes in mind
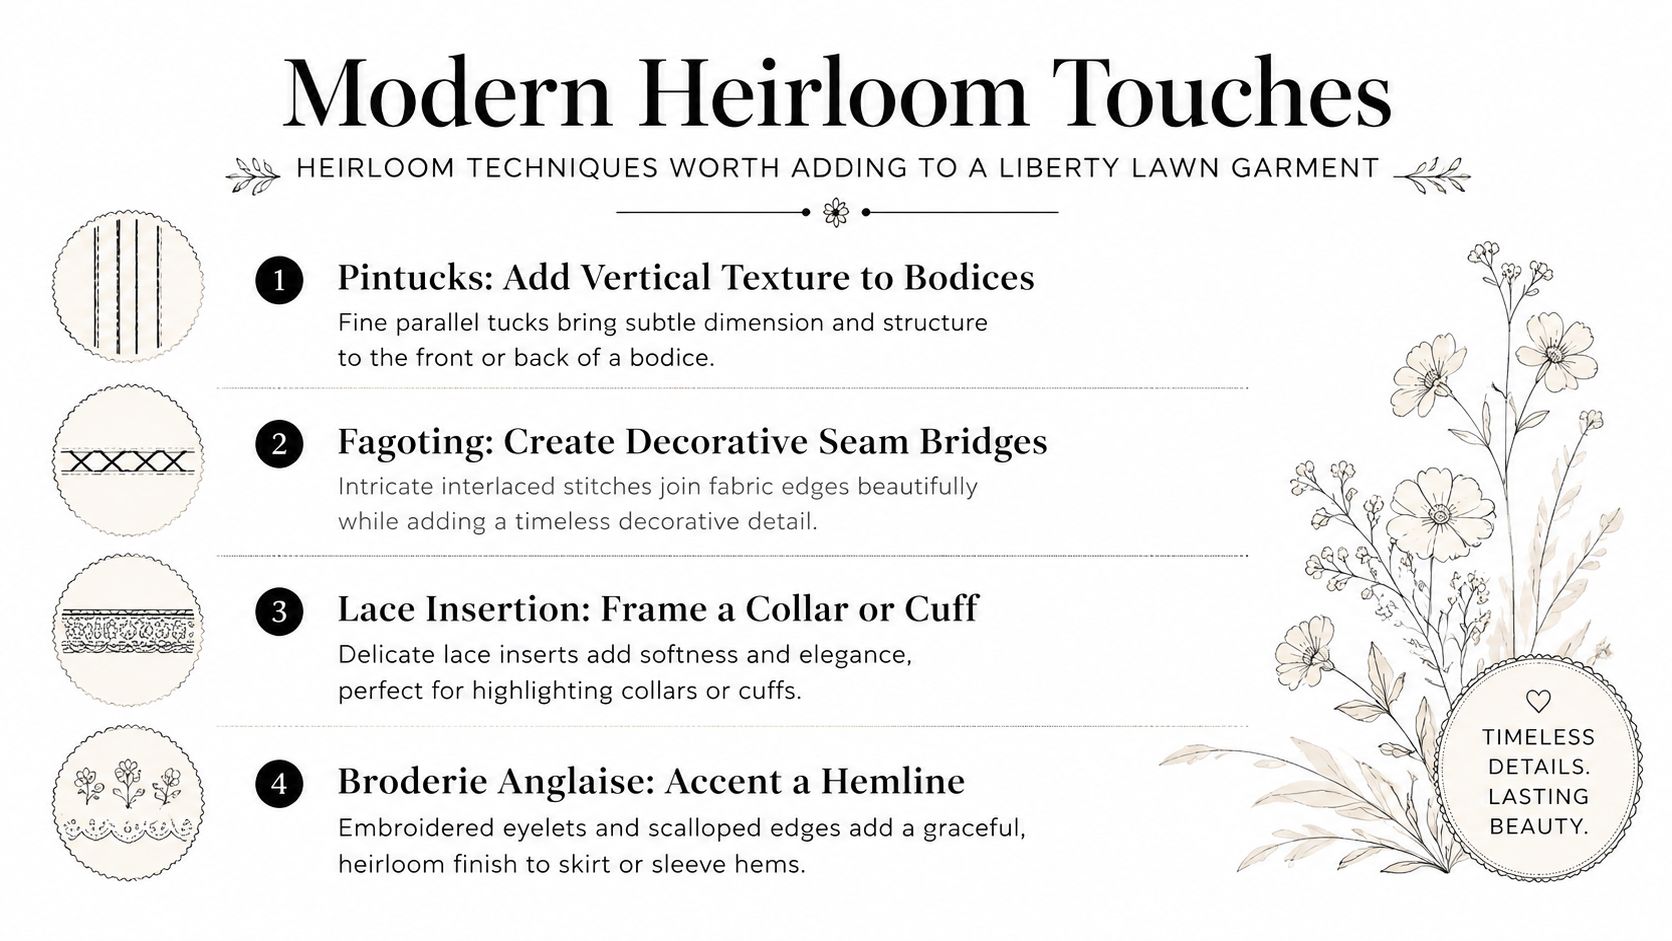
Heirloom sewing is often treated like a baby-clothes speciality, but it works beautifully on modern Liberty lawn blouses and dresses when you keep the detail in the right place. A row of pintucks down a blouse front or on a yoke adds structure without heaviness, and it suits the fine weave because the stitches can sit close together without overwhelming the cloth. I like pintucks on pieces that need a bit of quiet texture but still have to layer well under jackets.
Fagoting is another smart choice for a modern wardrobe. A fagoted seam on a cuff, or a narrow bridge between two fabric sections on a front placket, gives you that heirloom look without turning the garment into costume dress. The key is restraint. Use it where the fabric won't take a lot of strain, and don't put it where the garment will be tugged every time you put it on.
Lace insertion and broderie anglaise where they earn their keep
Lace insertion works best at collars, cuffs, yokes, and a carefully chosen panel edge. It brings light into the garment without adding weight, which is exactly what Liberty lawn can carry well. I'd avoid dense insertion in seams that need to flex hard, because repeated washing and wear can make those joins look tired sooner than a plain seam would.
Broderie anglaise is best used as a border, not a blanket. A hemline accent or sleeve edge gives a summer dress a crisp, finished note, while a full garment of dense cutwork can feel fussy and takes more maintenance. On an everyday dress, I'd keep broderie anglaise to the places where the eye naturally lands, then let the rest of the garment stay simple.
The practical rule is simple: use heirloom detail in low-stress areas, and keep high-stress areas straightforward. That's how you get a garment that feels refined without becoming precious.
Pressing, Finishing, and Caring for the Finished Garment
Press with the grain, not against the cloth
Pressing fine cotton is where a careful garment becomes a professional one. Press seams flat first to set the stitching, then decide whether to press them open or to one side based on the finish you've chosen and the thickness of the area. French seams usually press neatly to one side, while lighter seams on a yoke or lining edge may benefit from being pressed open if the construction allows it.
A clapper or pressing ham helps more than most sewists expect. Use a clapper to set a seam flat after pressing, and use a pressing ham on curved areas like sleeves, darts, or small bodices so the shape stays natural instead of squashed. If you need a quick refresher on safe heat and moisture handling for delicate garments, steamer technique and fabric safety is a practical guide, though I'd still keep the steam light on Liberty lawn.
Finish the garment so it keeps its shape
Trim threads close, then check every hem and seam finish before you call it done. Hand-tacking a hem invisibly gives extra security on a light blouse, and a light starch or spray finish after washing can restore some body without turning the cloth stiff. If you've used pintucks or lace insertion, press from the wrong side with a cloth barrier and keep the iron moving gently so you don't crush the detail.
Care is simple, but it has to be consistent. Wash gently, dry flat where possible, and iron the garment while it still has a little natural give rather than waiting until it's bone dry. That's the best way to protect the fine weave, the narrow hems, and any heirloom detail you've stitched into the piece.
For a first project, start with a French-seamed cushion cover if you want to practise control without fit pressure, move on to a pintucked yoke blouse if you want to learn precision on a wearable garment, and save a broderie anglaise-trimmed summer dress for when your cutting and finishing feel steady. A cushion cover can be finished in an afternoon, a pintucked blouse usually asks for a focused weekend, and a dress with decorative trim will take longer because the detailing has to be placed carefully and pressed with patience.
More Sewing is a good next stop if you want dependable fabrics and tools for projects like these, especially when you're choosing cloth that needs careful handling from the first cut to the final press. If you're planning a Liberty lawn blouse, summer dress, or heirloom-inspired make, visit More Sewing and pick out supplies that make the sewing smoother from the start.
