
Dressmaking
How to Sew with Ponte Roma Fabric
You've just bought ponte roma because you want something with the comfort of a knit and the finish of a trouser fabric, then the cutting table starts telling a different story. The good news is that ponte usually behaves better than the stretchy jersey many fear, because its double-knit structure gives it more stability, less curl, and far more control under the machine than slinky knits. Once you treat it as a stable knit rather than a fussy one, the whole project gets easier.
What Ponte Roma Fabric Is
Ponte roma is a double-knit fabric first developed in Italy, and that construction matters more than the name on the bolt. The fabric is made with two knitting beds and a double-layer interlock structure, which is why it feels firmer in the hand, lies flatter on the table, and does not roll into the same sort of curly edge you get with lighter jerseys. UK sewing guidance consistently treats it as a stable knit that behaves more like a woven than a slinky jersey, which is exactly why it earns a place in fitted dresses, skirts, and trousers. For a clear check on weight and how that affects garment choice, see branded apparel fabric weight basics. The Croft Mill guide to ponte roma explains the basics clearly in practical sewing terms, including pre-washing, ballpoint needles, and stretch-friendly stitching, and it is a useful reference if you want a fabric-by-fabric view of the construction and handling Croft Mill's ponte roma sewing guide.
A fitted dress front in ponte is a good example. Lay it on the table and it tends to stay where you put it, instead of twisting away from the scissors the way many jerseys do. That flatness is the first clue you are working with ponte, not a heavier jersey pretending to be one. The second clue is the hand, it usually feels denser, more substantial, and less drapey than a casual knit top fabric.
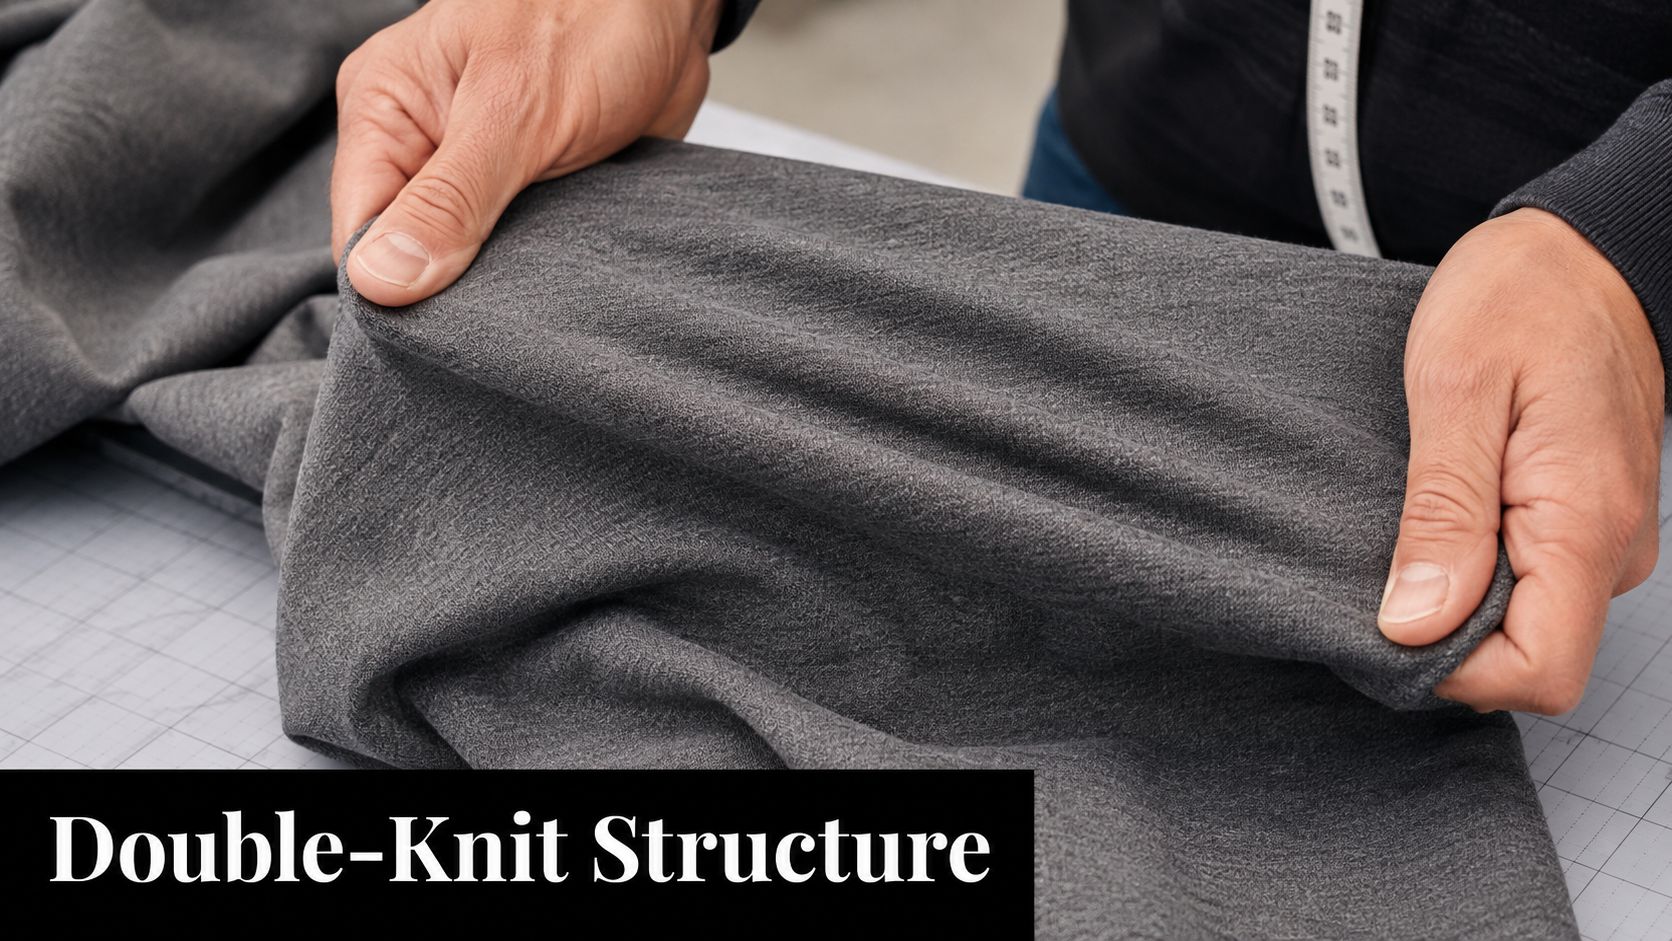
Practical rule: if the fabric lies flat, recovers well, and does not try to curl at every cut edge, you are probably looking at ponte rather than a slippery jersey.
Ponte usually sits in the medium to heavy weight range, and that explains why it works for garments that need shape. Dragonfly Fabrics notes that ponte is often used for jackets, skirts, and structured knit garments, and that structure is the reason many sewists reach for it when they want comfort without giving up a crisp outline Dragonfly Fabrics on ponte roma fabric. It also helps when a pattern needs recovery across the body, especially in workwear-inspired dresses and trousers where a lighter knit would slump or show every line underneath.
Pre-wash before you cut
Ponte should be pre-washed before cutting, then dried gently and pressed with medium heat to relax the fibres. That matters because ponte can behave beautifully on the table and then shift after washing if you cut it first and hope for the best. UK sewing advice also warns against the tumble dryer, especially when elastane is present, because repeated high heat can damage stretch fibres over time Dragonfly Fabrics on ponte roma fabric.
A pair of ponte trousers is the clearest cautionary example. If you skip pre-washing, you can end up with a waistband that feels fine at first and then tightens after the first wash, or knees that sit differently once the fabric has had its first proper clean. The fabric may not shrink dramatically every time, but the risk is enough that pre-washing is the cheap insurance policy here.
Lay the fabric out flat once it is dry, then let it rest before cutting. Check the grain, check the stretch direction, and make sure the stretch runs side to side across the body for most garment patterns. Block colours often have no obvious nap, but it is still worth checking the surface under good light, because some versions are reversible and some are not. Keep the fabric supported across the table so it does not hang off one edge and distort itself before you have even picked up the chalk.
A quick pre-cut checklist helps:
- Wash first. A cool or gentle wash keeps the fabric honest before you commit to pattern pieces.
- Dry gently. Avoid harsh heat if there is elastane in the blend.
- Press lightly. Use medium heat so the fabric relaxes without getting shiny or flattened.
- Check stretch direction. The stretch should usually sit around the body, not vertically.
- Keep it flat. Do not let panels droop off the table and grow longer under their own weight.
Choosing Needles, Thread and Feet
Ponte behaves like a stable knit, so the machine setup can stay straightforward. A ballpoint or jersey needle in the 70/10 to 90/12 range is the sensible starting point, with size 80 often the safest middle ground for midweight ponte. The rounded point moves between the knit loops instead of stabbing through them like a sharp needle would, which helps the seam keep its shape without turning the fabric into a row of tiny punctures.
| Tool | Recommended choice | Why it matters for ponte |
|---|---|---|
| Needle | Ballpoint/jersey 80, or 70/10-90/12 depending on weight | Slides between knit loops and reduces skipped stitches |
| Thread | Good-quality polyester all-purpose | Gives useful give without sounding brittle in the seam |
| Foot | Standard foot for simple seams, walking foot/dual feed for more even feeding | Helps both layers travel together and cuts down on waviness |
| Hem finish | Twin needle or stretch stitch | Keeps the hem flexible without looking homemade |
Polyester thread is the practical choice for most ponte garments because it copes with movement better than a thread that feels dry or brittle in the seam. Lowering presser-foot pressure helps if your machine allows it, and a walking foot or dual feed foot is worth using when the layers start to creep against each other Tilly and the Buttons on sewing with ponte. That matters most on long seams, curved side seams, and hems where one layer can travel a touch faster than the other.
A midweight ponte dress is a useful benchmark. An 80 ballpoint needle, polyester thread, and a walking foot usually give a clean seam, while a stretch twin needle makes a neat hem without making the garment stiff. Lighter ponte can move down toward the finer end of the needle range, and denser ponte often behaves better with a slightly larger needle before you start blaming the machine.
Cutting and Handling Ponte Roma Without Stretching It
The cut is where ponte either behaves beautifully or starts looking tired before it's sewn. Use a flat surface, weight the pattern rather than hauling the fabric around under it, and cut with sharp fabric scissors or a rotary cutter so you're removing fabric, not dragging it. If the fabric shifts while you're cutting, you've already changed the fit.
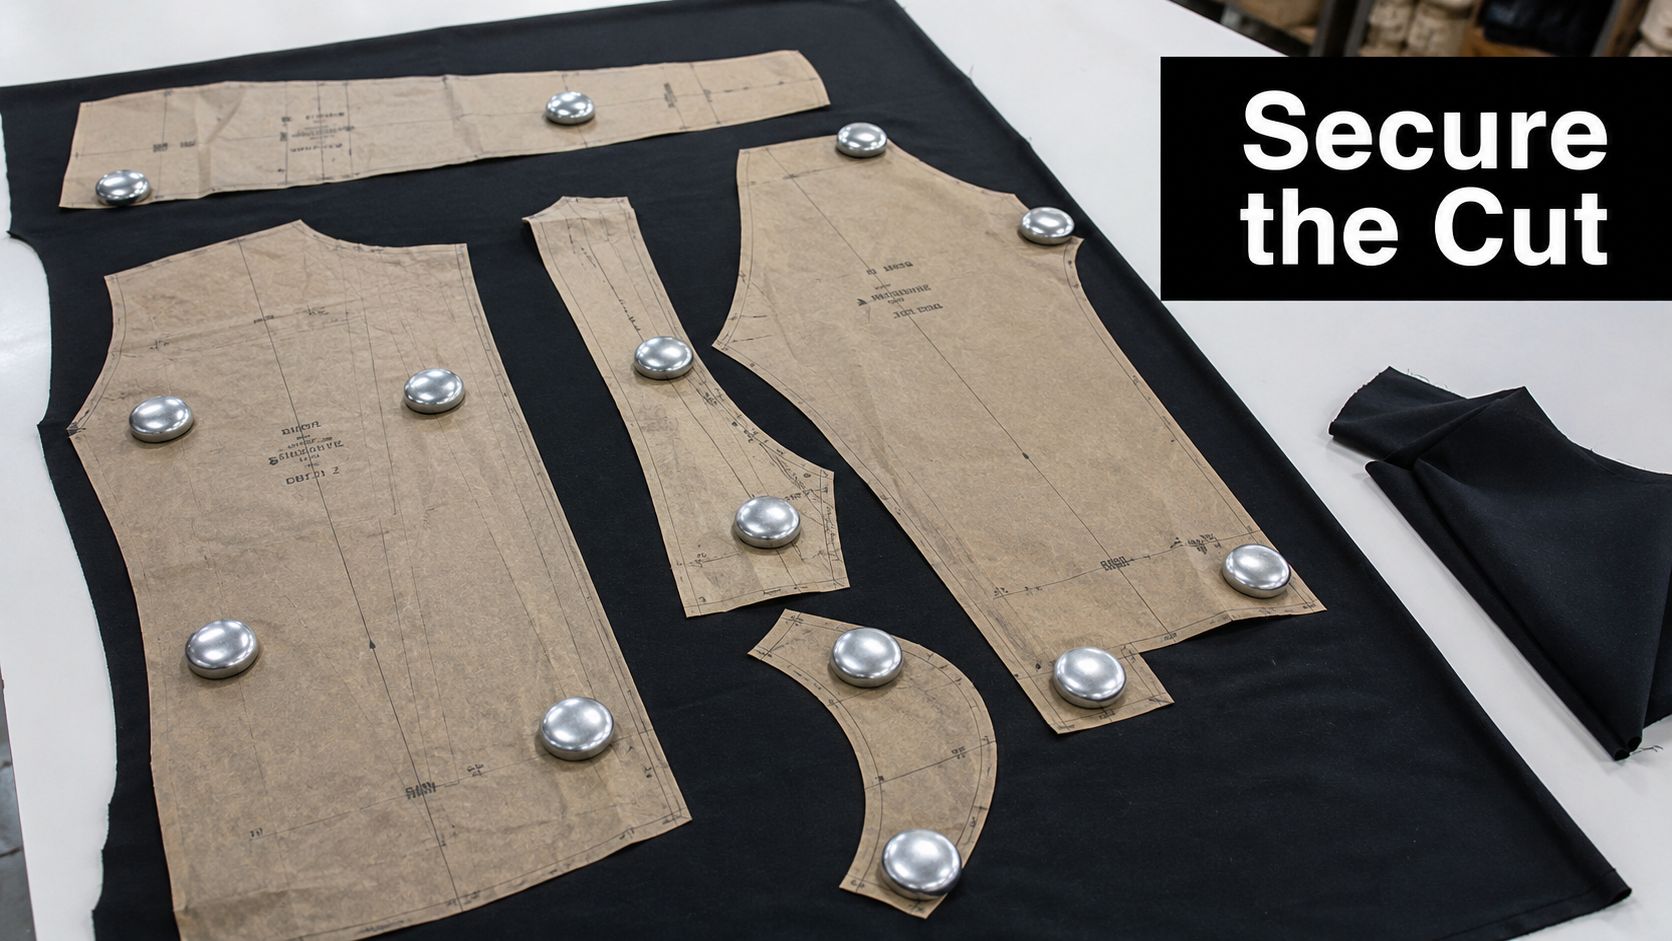
A fitted bodice front shows the problem clearly. If the side seam gets tugged off-grain while you're laying the piece out, the matching back seam won't meet the way the pattern intended, and the garment can twist on the body even when your stitching is perfect. That's why cutting single layer can be worth the extra time on shaped pieces, especially when you care about matching seams at the waist or side.
Keep ponte supported while you cut, then keep it supported again while you move it. Lifting one corner and letting the rest hang is how a stable knit starts acting unstable.
A rotary cutter can feel faster, but only if the fabric stays flat and the blade is sharp. Pins work too, though I prefer to place them where the pattern really needs fixing and use chalk or tiny snips for notches when I don't want a forest of holes in the seam allowance. If the piece is large and simple, folded cutting can be fine. If the shape is fitted or the seam lines matter, single-layer cutting gives you more control and fewer surprises.
The same rule applies once sewing begins. Don't pull ponte through the machine, and don't lift it off the table by one corner. Let the feed dogs move it, guide it gently, and keep the fabric relaxed from start to finish. If you can repeat that in your head while cutting, you're already avoiding the biggest fit mistakes.
Machine Settings and Stitches That Work
A good ponte seam starts with a scrap test, and it should be the same fabric you plan to use on the garment. Sew a short line, pull the scrap across your hands the way the finished piece will be worn, then look for thread popping, wavy seams, or tunnelling beside the stitching. Ponte is stable enough to behave predictably, so the test usually tells you quickly whether the machine setup is right or whether the seam still needs work.
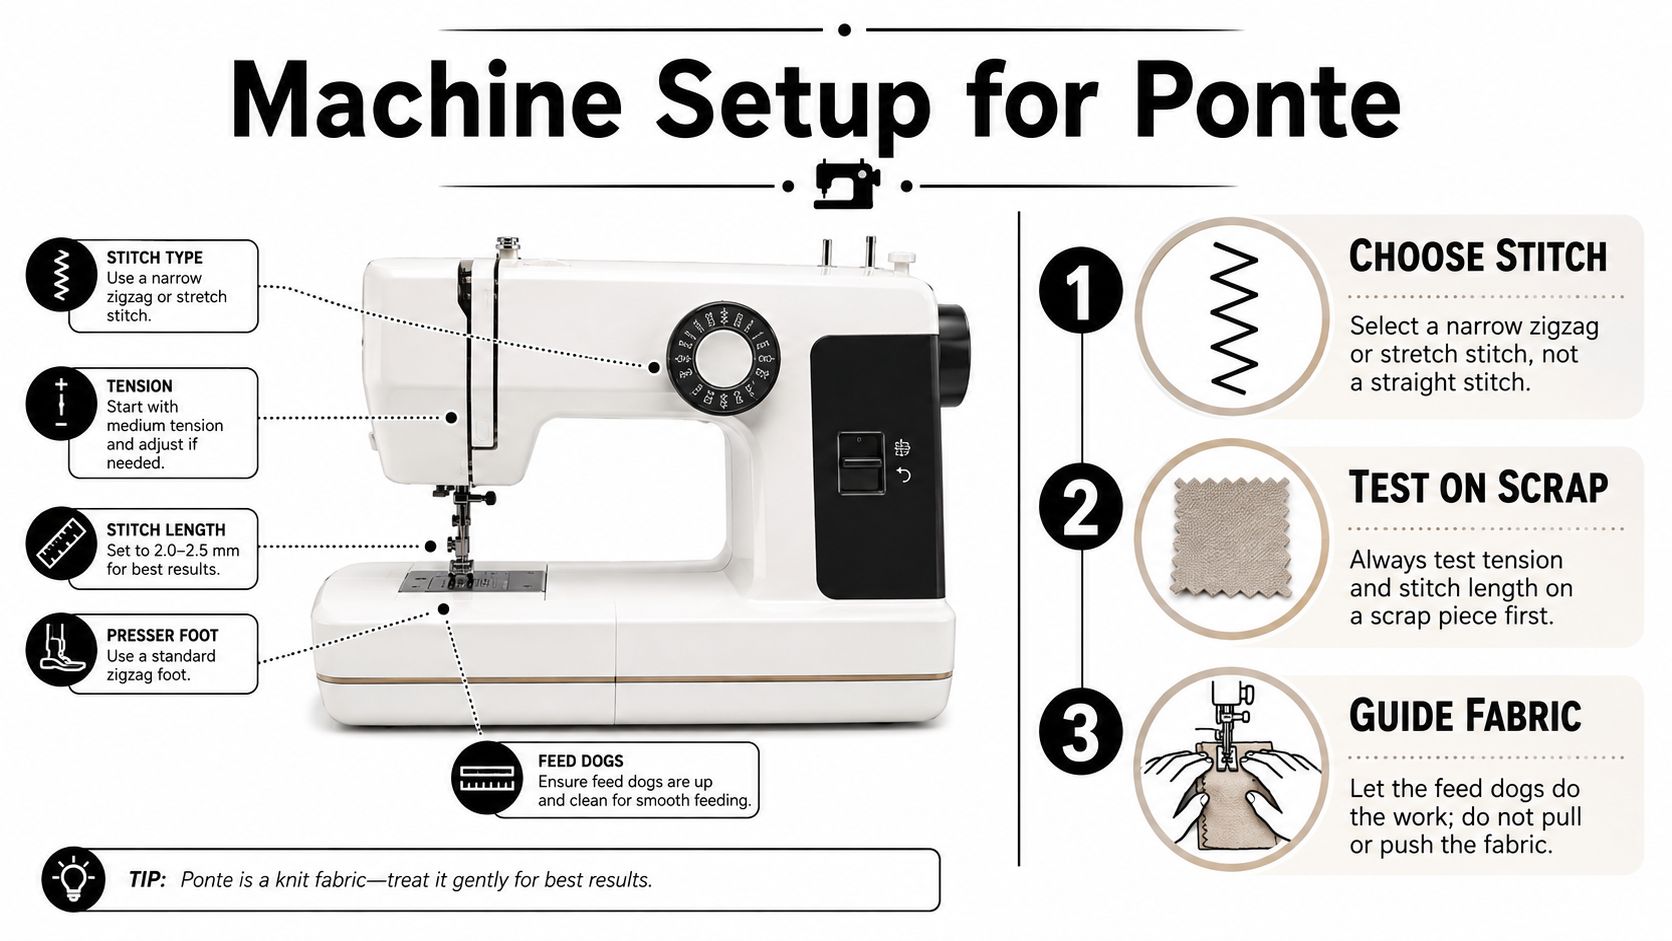
A narrow zigzag or a stretch stitch gives the seam room to move, while a straight stitch leaves too little give for a knit garment that has to be worn, sat in, and washed. With ponte, the sweet spot is usually a moderate stitch length, and the range commonly suggested by UK sewing sources sits around 2.5 to 3.0 mm, with one practical guide placing midweight ponte around 2.9 to 3.0 Sewing Fantatic Diary on ponte. That is long enough to avoid a tight, brittle-looking seam, but short enough to keep the stitch line neat.
Presser-foot pressure is the adjustment that gets overlooked most often. If the fabric is feeding flat and the seam lies smooth, leave the machine alone. If the layers start creeping or the top layer looks dragged, ease the pressure a little and test again. A walking foot or dual feed helps on longer seams, especially when the layers need to move through the machine at the same rate. For areas under stress, such as necklines, shoulders, and armholes, light stay tape or interfacing keeps the edge from stretching out while you sew.
A sleeve seam shows the difference between a useful setting and a lazy one. A narrow zigzag at 2.5 can stay flexible and tidy on ponte, but a straight stitch often gives itself away the first time the sleeve is raised or the arm bends. Once you find a combination that works, write it down and keep it with your pattern notes. Ponte rewards repeatable settings, not guesswork.
Finishing Seams, Hems and Necklines
Ponte looks best when the finish matches its structure. It is a stable knit with enough body to behave neatly, so the edge treatment can stay fairly simple. The goal is not ornate finishing. It is to keep bulk under control so the garment hangs flat instead of building hard ridges at the seams.
A skirt hem shows that clearly. A twin needle gives a ready-to-wear look on the outside and leaves enough give on the inside for the garment to move comfortably. Ponte has enough body to hold that hem well, which is why this finish usually works better than trying to force it into a very delicate knit treatment. I always test the twin needle on an offcut first, because a clean sample tells you whether the tension and stitch width are behaving before you commit to the hem.
Necklines and waist seams need a little more support. A neckline that is left alone can stretch while you handle it, even if the fabric itself feels steady on the table, so stay tape before sewing is a practical habit on fitted tops and dresses. For a waist seam, press it open, then topstitch from the right side if you want a tidy finish that sits flat. Trim the seam allowances sensibly first, because ponte can still look bulky if several layers are allowed to stack together.
Pressing rule: use medium heat, a pressing cloth, and a hover-then-press motion. Slide the iron and ponte can shine or flatten in all the wrong places.
Curved seams respond well to a tailor's ham because ponte will hold the curve once it is set, but it still needs support while it cools. Keep the iron controlled, and let the pressed shape rest on the ham instead of shifting it around straight away. If you trim seam allowances to different lengths, the edge sits flatter without weakening the seam, which is usually a better trade-off than trying to make the inside perfectly neat at any cost.
Common Problems and How to Fix Them
Ponte gets a reputation for being easy, then it punishes the one thing it dislikes most, casual handling. It isn't a woven, even though it often behaves like one at first glance. The fabric still reacts to stretch, heat, and skipped stabilisers, and the usual mistakes show up fast on the finished garment.
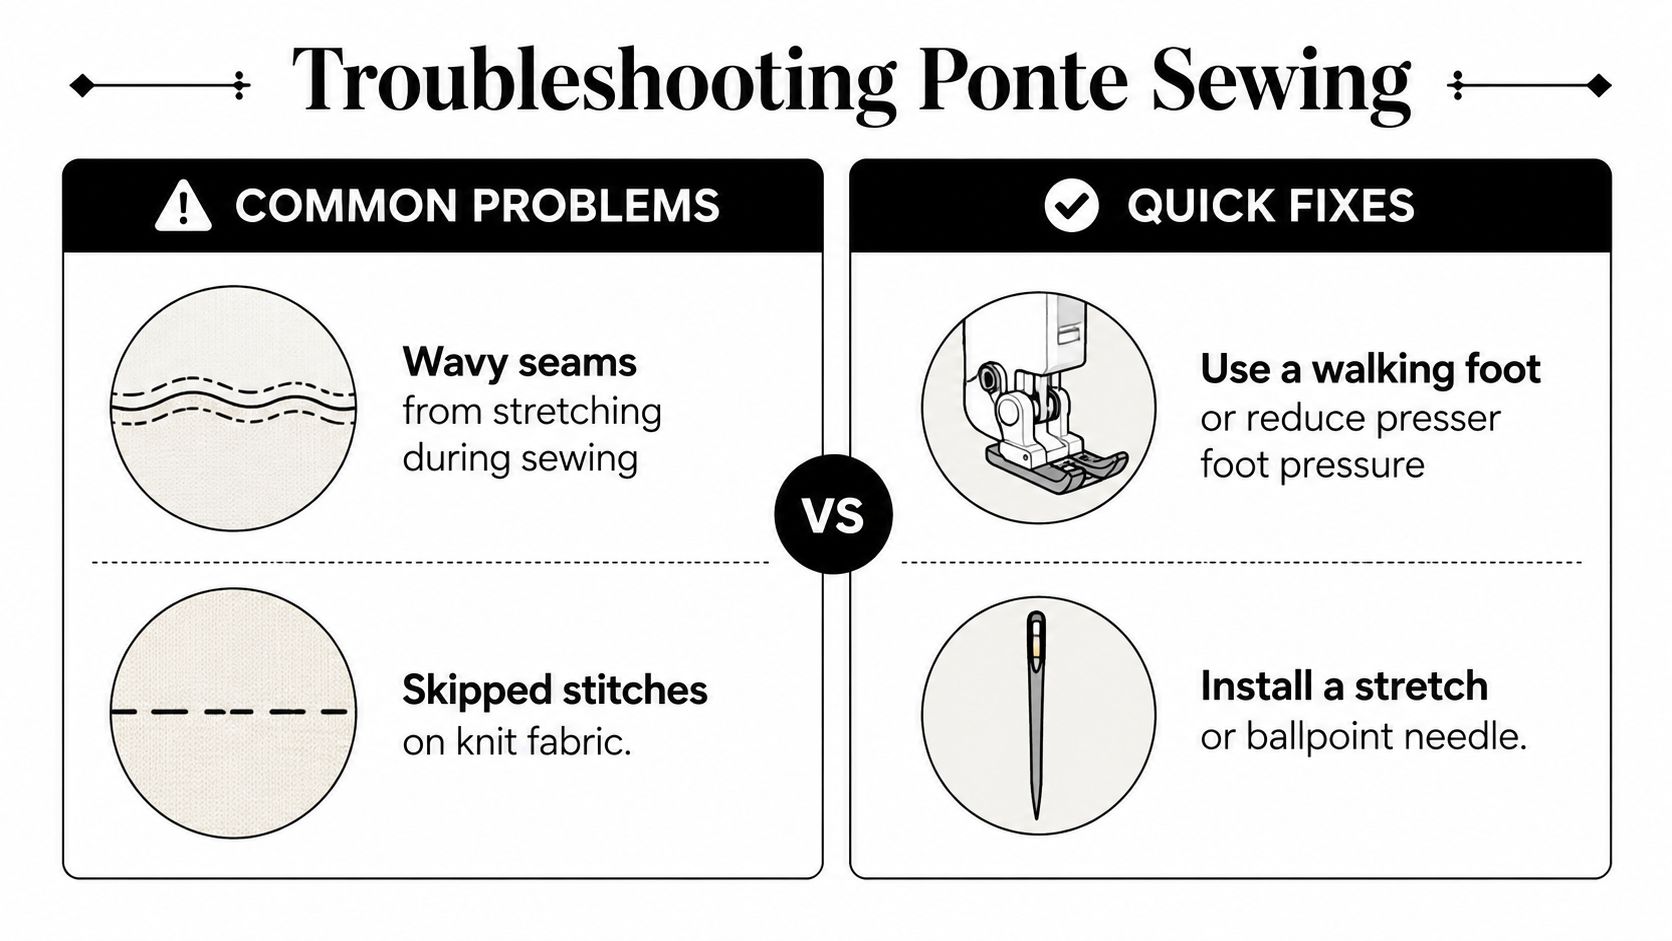
Symptom, cause, fix
- Rippling seams. The fabric was pulled through the machine or the presser-foot pressure was too high. Re-test on scraps, lower the pressure if your machine allows it, and let the feed dogs do the work.
- Popped stitches on first wear. A straight stitch was used on a knit seam that needed movement. Unpick it and switch to a narrow zigzag or stretch stitch.
- Stretched necklines. No stay tape or similar stabiliser was used. Add tape before sewing and handle the edge gently.
- Shiny pressed marks. The iron was too hot or the seam was pressed without a cloth. Re-press with medium heat and a pressing cloth, and stop sliding the iron across the surface.
Sometimes the fix is simple, and sometimes the seam needs to come out. If the thread has already broken or the line has gone wavy enough to change the shape of the garment, unpick it and sew it again rather than trying to hide it with more pressing. Ponte can recover well, but it won't reward a seam that was wrong from the start.
The useful mindset is this, trouble on ponte is normal, not a verdict on your sewing. Once you expect the fabric to want a little support at the right moments, the mistakes become easier to spot and much easier to prevent.
A Simple Starter Project to Build Confidence
A pull-on ponte skirt is the cleanest first project for this fabric. It keeps the construction simple, gives you straight seams to practise on, and lets you test the stretch and recovery without juggling a full set-in sleeve or a complicated neckline. An elastic waistband is forgiving, which matters when you're still getting a feel for how ponte sits on the body.
Start by pre-washing, then lay the fabric flat and cut with the stretch running around the body. Fit a ballpoint 80 needle, sew your seams with a narrow zigzag at about 2.5 mm, and test the stitch on scraps before committing to the skirt pieces. Press with a cloth, keep the seams from getting dragged or stretched, and finish the hem with a twin needle if you want a neat ready-to-wear edge.
The skirt is also a useful place to practise restraint. Ponte doesn't need fussing, and overhandling it is usually what makes the garment look less polished. If the waistband sits flat, the side seams are smooth, and the hem hangs straight, you've already learned most of what matters.
What to sew next is easy to judge. A simple ponte top comes after the skirt if you want to practise a neckline, and a fitted sheath dress is a sensible next step once you trust your seam control and pressing habits. The core routine stays the same every time, pre-wash, test on scraps, don't pull the fabric, stabilise high-stress areas, and press with a cloth.
If you want more fabrics and haberdashery that suit this kind of careful dressmaking, More Sewing is worth a look for quality materials and the kind of tools that make stable knits easier to handle. Visit More Sewing when you're ready to choose your next ponte project and build a kit that matches the standard of the fabric.
