
Blog, Dressmaking, Guides
Sewing Fabric Markers: A Complete Guide for UK Makers
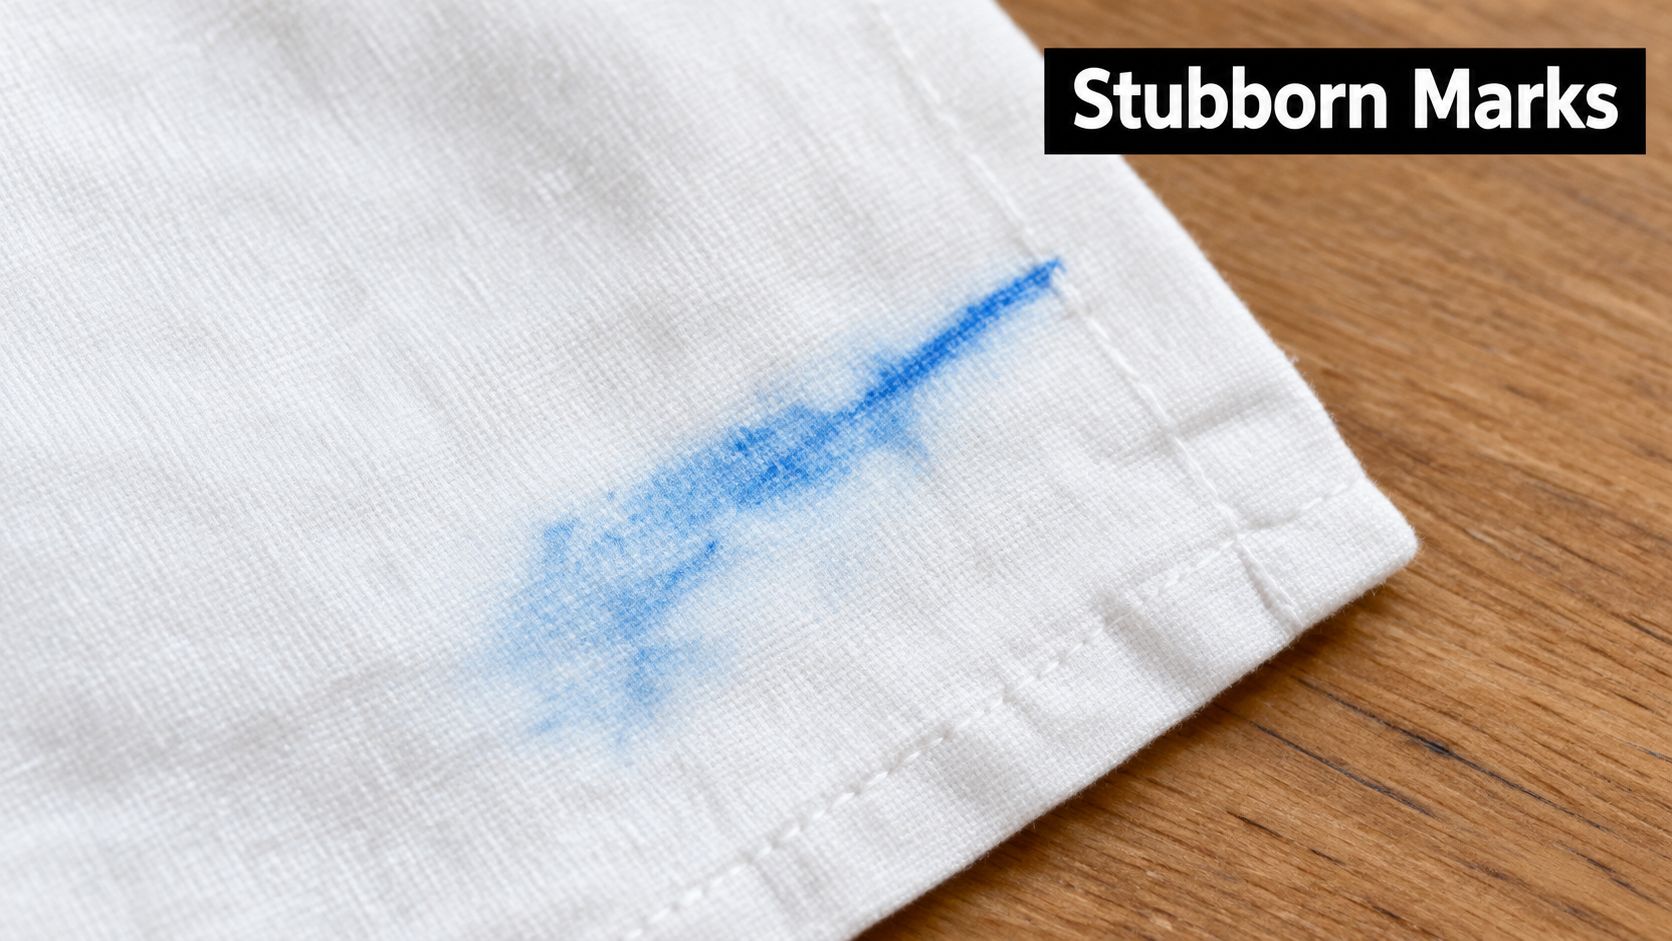
A blue line across pale viscose can look harmless when you draw it, then become the only thing you can see after pressing. You may have marked a dart, pocket position or hem with a pen labelled washable, followed the care instructions, and still be left wondering whether the shadow will ever disappear. The problem isn't usually poor sewing. It's that removability depends on the interaction between the marker, the fabric and the treatment used afterwards.
Sewing fabric markers are construction tools, not interchangeable stationery. Chalk, water-erasable pens, air-erasable pens, stitched tailor's tacks and industrial notching systems all transfer information in different ways. The safest habit is simple: test the exact marker on an offcut from the exact fabric, then test removal before you mark the garment.
The Mark That Wouldn't Come Out and Why It Matters
You've cut a beautiful length of cotton lawn for a special blouse. The pattern lines are transferred neatly, the darts match, and the pocket placement is clear. Later, after sewing, you dampen the blue marks as directed. Most of the line fades, but a pale halo remains beside the seam. Pressing makes it more visible rather than less.
That experience is why fabric marking deserves more attention than it usually gets. A marker can be highly visible and easy to control, yet still behave badly on an absorbent or loosely constructed cloth. A product claim describes the intended behaviour. It doesn't guarantee the same result on every fibre, colour or finish.
Historical tailoring shows that the underlying job hasn't changed. British tailoring evidence reaches back at least to the eighteenth century, when chalk was drawn directly across cloth during cutting. A 1769 description records chalk used for pattern lines and placement marks, an illustrated 1771 encyclopaedia entry shows chalk as a textile-marking tool, and the term “tailor's chalk” appeared in a European merchandise dictionary by 1799. A nineteenth-century tailoring treatise from 1838 also instructed tailors to place chalk or pipe-clay marks on a seam. These examples establish the central principle, temporary visibility without permanent alteration, documented in the historical record of tailoring markers.
Why the wrong tool becomes an expensive problem
The risk rises with pale colours, high-absorbency fibres, brushed surfaces and fabrics that can't be laundered conventionally. Viscose can allow a liquid mark to travel sideways. Jersey may stretch while you draw, spreading the line as the fibres move. Silk, wool and dry-clean-only fabrics give you fewer safe removal options.
A small test offcut costs almost nothing compared with replacing a cut panel. If a mark has already transferred to a household textile, the same principle applies: aggressive home treatment can spread a stain or damage the surface, which is why this explanation of why DIY rug cleaning fails is a useful reminder not to confuse a simple-looking mark with a simple removal job.
Practical rule: If you wouldn't accept the mark remaining on the finished garment, don't put it on the garment until it has passed a concealed-scrap test.
Chalk remains useful because it creates a temporary, visible guide that can often be brushed away. Modern UK textile education also distinguishes water-soluble and air-erasable markers, while tailor's tacks transfer information with removable stitches. The best marker is therefore the one whose working life and removal method match the job, not necessarily the one with the finest tip or strongest colour.
Understanding the Four Main Types of Sewing Fabric Markers
No category wins every project. A marker that stays visible for a long fitting session may be inconvenient when the fabric can't be rinsed. A mark that vanishes quickly may be ideal for a sleeve placement sewn immediately, but useless for a garment that sits unfinished for several days.
Marker Type Comparison Guide
| Marker Type | How It Disappears | Best For | Risk Level |
|---|---|---|---|
| Water-erasable pen | Water, a damp cloth or washing, depending on the product | Clear lines on light fabric when the removal method is available | Medium |
| Air-erasable pen | Fades naturally over time, or may be assisted by moisture | Short sewing sessions and quick placement work | Medium to high |
| Heat-erasable pen | Becomes invisible when heated, according to the product design | Fine temporary lines where heat treatment has been tested | High |
| Tailor's chalk or chalk pencil | Brushing, rubbing or washing, depending on the chalk and cloth | Darts, hems, pocket positions and dark fabrics | Low to medium |
Water-erasable markers provide a strong, precise line and can remain visible until you deliberately introduce moisture. They suit pattern transfer, appliqué placement and construction lines on washable fabrics. The weakness is residue. Pigment or dye can remain in absorbent cotton, viscose, linen or brushed fabrics, even when the surface appears clean.
Air-erasable markers fade without a separate washing step. UK sewing guidance describes a usual fading period of roughly 24 to 72 hours depending on the fabric and conditions, as explained in this guide to water-erasable and air-erasable marking tools. That makes them convenient when you'll sew straight away. It also makes them unreliable for a fitting, embroidery or sampling project that may pause unexpectedly.
Heat-erasable pens offer a smooth, narrow line and remove through heat rather than water. Treat that feature with caution. Heat can alter the removability of other erasable inks, and a line that disappears visually may not have left the fibre. Cold exposure can also affect some heat-erasable systems, so a garment that will be stored, transported or worn in changing conditions deserves additional testing.
Tailor's chalk and chalk pencils are the traditional low-commitment options. A wedge gives a broad, fast guide on medium or heavy fabric. A sharpened chalk pencil gives a finer line for darts, seam positions, hems and button placements. Chalk can rub away during handling, which is a disadvantage for a long project, but that same weakness reduces the chance of a permanent ink residue.
Keep marker choice separate from labelling. If you're preparing identifiable workwear, explore dedicated clothing labels for uniforms rather than using a construction marker where a permanent label is required. A permanent tool has a legitimate place, but not on a seam allowance or visible panel that may need alteration.
Essential Removal Tests Every UK Dressmaker Should Perform
The most reliable test uses the fabric offcut left after cutting, not a similar cloth from your stash. Composition, weave, dye and finish can all change how a line spreads or disappears. If the fabric will become a sleeve, test a scrap with the same face and reverse, and include a seam allowance-sized area if possible.
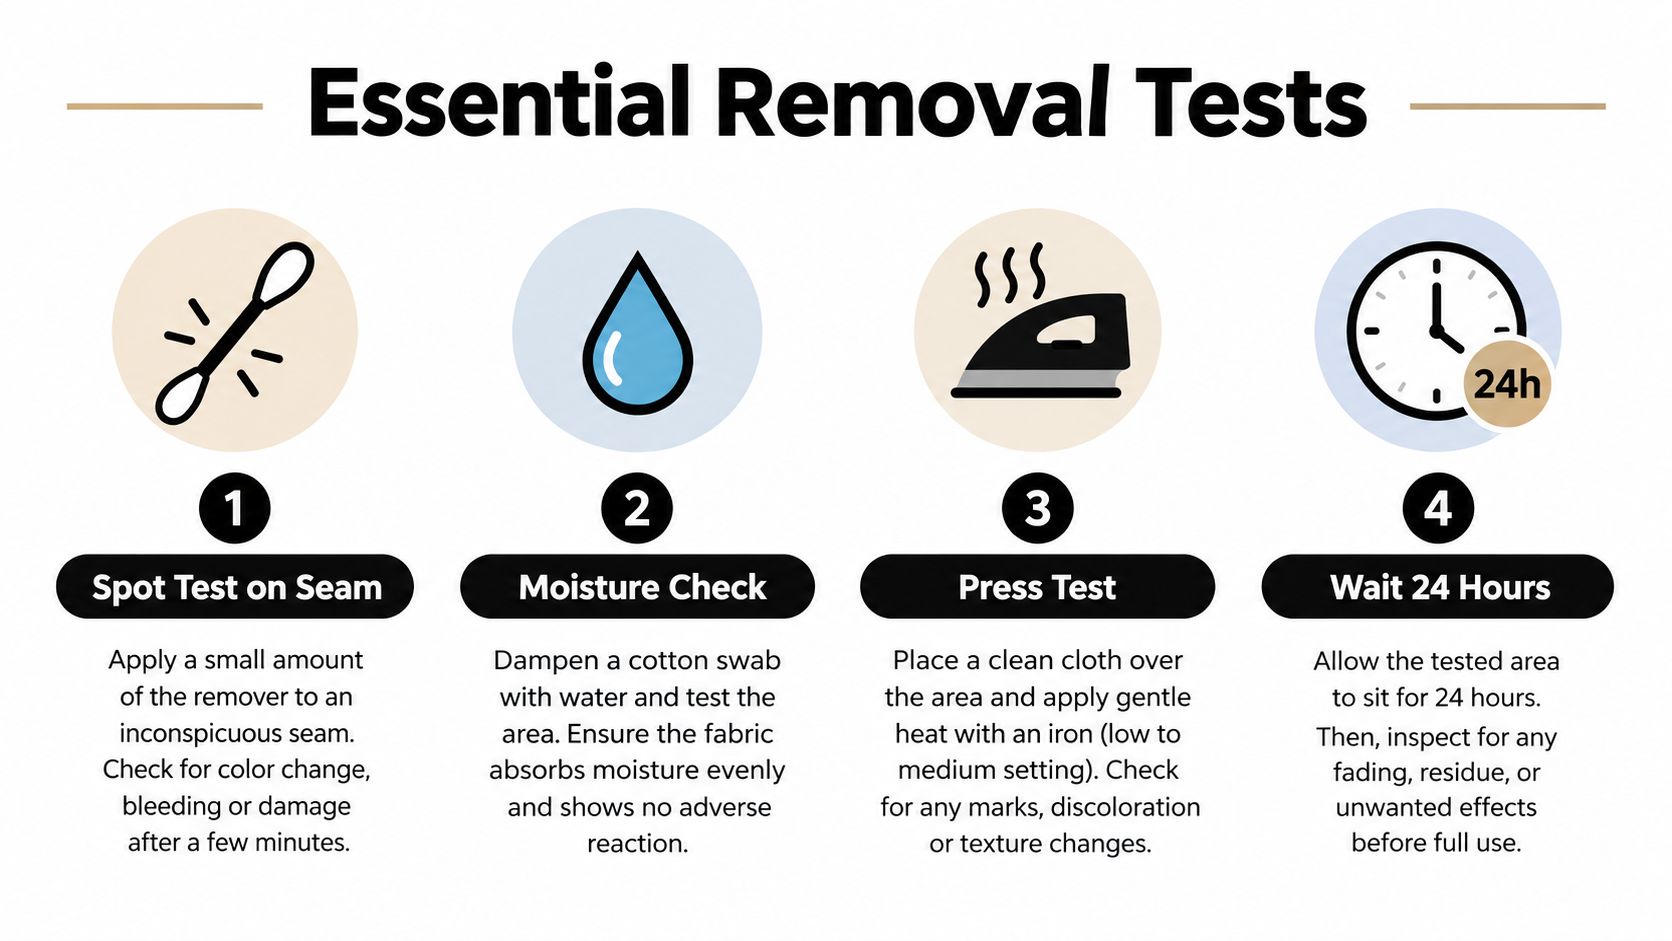
A four-part test that reflects real use
Mark a concealed area. Draw a short line on the wrong side and another on the right side. Add a dot or cross so you can assess both a fine line and a heavier deposit. Note the marker type, fabric composition and colour.
Leave the sample for the intended working period. If you expect to cut and sew immediately, assess it promptly. If the garment may remain marked overnight or longer, leave the scrap for that same period. Air-erasable pens can fade before construction is complete, while some water-erasable inks may become more difficult to remove after heat or handling.
Use the intended removal method. Dab or spray with water if the pen specifies water removal, brush chalk with a soft brush, or wash an offcut under the garment's planned care cycle. Don't judge success while the fabric is wet. Let it dry fully, because a faint shadow may become visible as moisture leaves.
Press a separate portion and inspect transfer. Keep one section unpressed as a control. On another section, use the planned iron temperature with a protective cloth if appropriate. Then check the marked fabric and a clean white cloth for haloing, transfer, colour change and residue.
The pressing test matters because heat can set a mark that looked removable before ironing. This is especially important for water-soluble and air-erasable systems. Don't press over an aqua or self-erasing line until you've removed it using the method recommended for that product.
What to record
A small notebook or phone record prevents you from relying on memory. Write down:
- Fabric details: composition, colour, weave or knit structure and care label.
- Marker details: colour, tip style, whether it is chalk, water-erasable, air-erasable or heat-erasable.
- Removal result: complete removal, faint shadow, lateral spread, staining or transfer.
- Treatment details: time left, moisture used, wash cycle, drying method and pressing conditions.
UK textile specifications treat resistance to washing, wet rubbing, dry rubbing, perspiration and light as separate performance properties. For a more formal approach, BS EN ISO 105-C07 assesses colour fastness to wet scrubbing, while BS EN ISO 105-A05 provides a measured method for evaluating colour change against the grey scale, as outlined in this UK textile colour-fastness standards reference. Home dressmakers don't need a laboratory for every project, but the principle is valuable: assess the result rather than trusting the word washable.
Practical Marking Techniques for Common Sewing Tasks
A marker should tell you exactly where construction needs to happen without creating another problem. Match the width and visibility of the mark to the task. Broad chalk works for a quick hem guide, while a sharpened chalk pencil or removable stitch is better for a dart point.
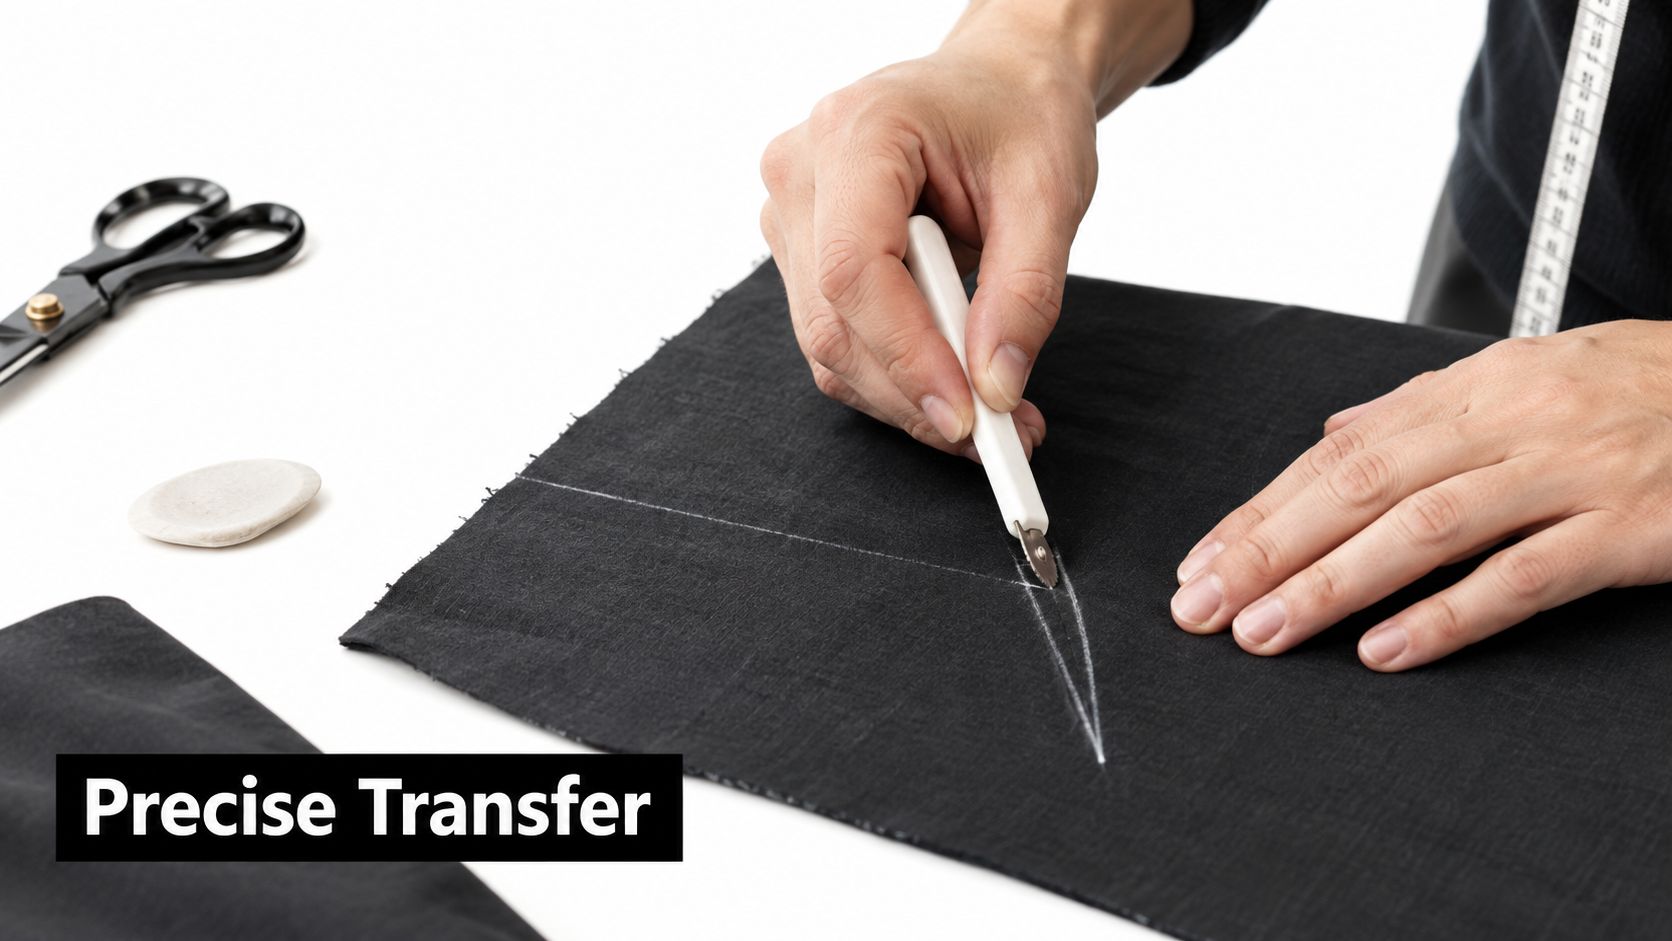
Darts and seam positions
For a dart, transfer the tip and both legs to the wrong side where you can sew from the reverse. Sharpen a chalk pencil first, then use a ruler to draw a narrow line from each leg towards the point. Don't force the pencil into delicate fabric. A light, controlled line gives you a guide without deforming the weave.
For a collar, sleeve or yoke placement, mark the balance points on the wrong side if the pieces can be aligned from there. You can also use a tailor's tack, made with a loose removable stitch, when the fabric is dark, textured or likely to reject a fine chalk line. Tailor's tacks take longer, but they avoid introducing liquid or pigment into a fabric that may be difficult to clean.
Hems, pockets and fastenings
Mark the hem on the wrong side with a removable line, then check the fold against the pattern and garment before stitching. On a skirt with a curved hem, use short sections rather than one heavy continuous line. This keeps the guide readable while limiting the amount of marking material applied.
Pocket openings, tucks, pleats, button positions and buttonholes often need to stay visible while you handle the right side. Mark them on the right side only after testing, and use the lightest line that you can follow accurately. For a button position, a small dot is usually more useful than a circle that can spread or remain visible around the fastening.
A clean construction mark is narrow enough to guide the stitch and temporary enough to disappear without a fight.
Pattern notches don't always need a marker. A small 5 mm, approximately ¼-inch, snip into the seam allowance can transfer a notch while keeping pigment away from the garment, as described in this guide to fabric marking tools and notch techniques. Keep the snip inside the seam allowance and avoid using it where the pattern requires a precise internal reference.
For embroidery or appliqué, tape the design and fabric against a light source, such as a window. Trace with a chalk pencil or water-erasable pen, then test that the chosen line will remain visible for the whole stitching session. A tracing wheel can transfer a design through paper, but its pressure and teeth should be tested on a scrap before use on fine cloth.
The following demonstration can help you compare tracing approaches and handling:
Use broad chalk for fast temporary guides, a pointed pencil for accuracy and tailor's tacks where contact with ink is a poor trade. No single method is automatically more professional. The right choice is the one that gives you a visible reference without compromising the finished fabric.
Choosing Markers by Fabric Type and Care Requirements
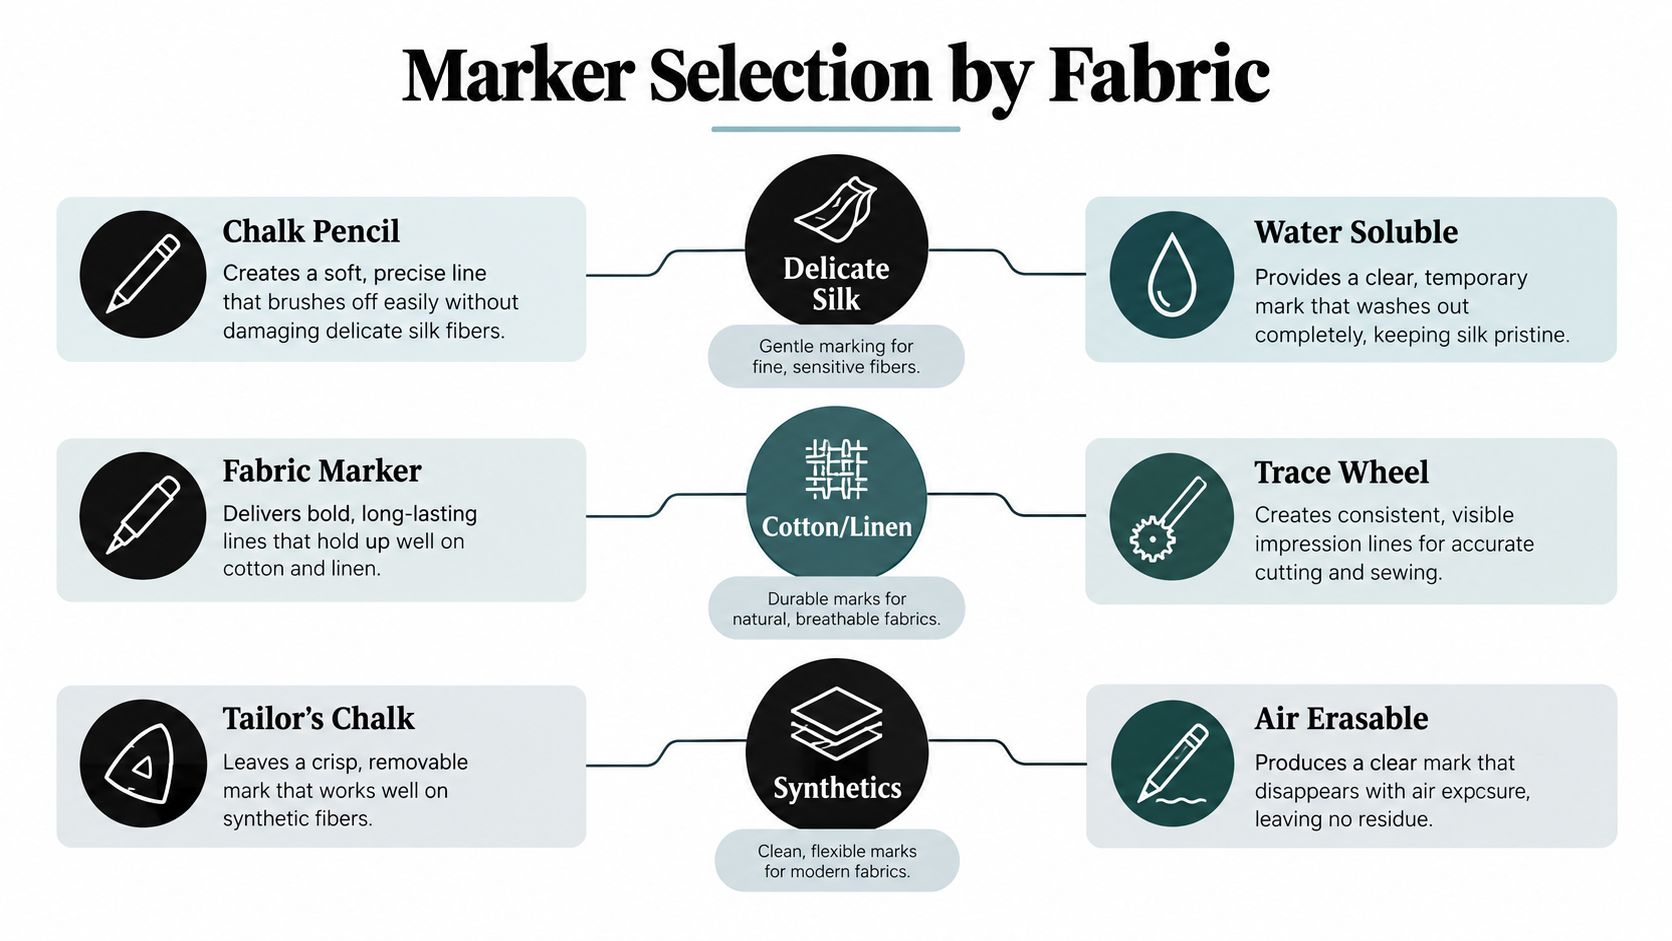
Fabric composition changes the risk profile. A tightly woven cotton may hold a crisp line, while loosely knitted jersey can allow liquid to wick laterally through the structure. Regenerated-cellulose fabrics such as viscose can absorb and spread a mark, and elastane blends may respond differently when stretched, dampened or exposed to heat.
Cotton, linen and denim
Cotton and linen generally accept chalk pencils and temporary pens clearly, but pale or absorbent versions still require testing. On a stable woven cotton, use a fine water-erasable line for a dart or pocket placement only if you can rinse the fabric safely. For linen that will be pressed repeatedly, remove the line before ironing and check for a shadow after drying.
Denim and other substantial fabrics often suit tailor's chalk because the surface gives the chalk something to grip. A white or contrasting chalk pencil can make pocket corners and topstitching guides visible without soaking into the cloth. Brush away excess before construction so loose powder doesn't transfer to other sections.
Viscose, Tencel blends and jersey
Treat viscose and Tencel blends as high-attention fabrics. Their drape and absorbency can make a wet line spread beyond the intended point. Start with chalk on the wrong side, then test a water-erasable pen if you need a finer mark. Keep the line light and avoid drawing on visible areas that can't be concealed by a seam, hem or fastening.
Jersey creates a second problem, stretch. Stabilise the scrap as you will during marking, and test it both relaxed and gently stretched. A line that looks narrow when the knit is flat may widen when the fabric returns to its original shape. For short construction references, a tailor's tack or a small seam-allowance snip can be safer than a liquid marker.
Wool, silk and elastane blends
Wool, silk and fabrics requiring dry cleaning deserve conservative marking. Water-based removal may not be compatible with the care label, and heat may alter the surface or set a residue. Use a concealed scrap to test chalk, a fine pencil and a stitched reference, then choose the option that leaves the least material behind.
Silk can show pressure as well as colour. Don't press hard with a sharp tool, and don't assume that a faint mark is harmless because it is on the wrong side. For elastane blends, check the sample after moisture, stretching and drying. Ink can migrate when the fibre structure moves, particularly if you apply a heavy line.
Dark fabrics reverse the usual visibility problem. White or silver chalk may show clearly, but a pale residue can transfer to the face. Test the chalk under handling, brushing and pressing, and consider tailor's tacks where removal is uncertain.
For permanent or heat-cured textile inks, process conditions matter. Textile-printing guidance describes some heat-curable inks as requiring approximately 125°C for around two hours to maximise wash resistance, but that process isn't a universal instruction for consumer fabric pens or home dressmaking. The practical rule is to choose temporary markers for temporary work and test any permanent product before it reaches a finished garment, as explained in this guidance on heat-setting and wash durability.
Building Your Personal Sewing Fabric Marker Toolkit
A useful sewing box doesn't need every marker on the shelf. It needs a small set that covers your fabrics, your usual project duration and the care labels you regularly encounter.
Start with a sharpened chalk pencil in a colour that shows on your common light fabrics, plus tailor's chalk for broad marks and darker cloth. Add a water-erasable pen only when you have a reliable way to remove it, and keep an air-erasable pen for work you'll complete during a short, planned session. Tailor's tacks remain valuable for delicate, dark or dry-clean-only materials.
Use this decision sequence before marking:
- Choose the task first. Use a broad line for a hem, a fine line for a dart, a dot for a button and a stitched mark when pigment creates unnecessary risk.
- Check the fabric second. Consider fibre, colour, weave, stretch and finish rather than choosing by pen colour alone.
- Match the care label third. If the garment can't be washed, don't select a marker whose safe removal depends on laundering.
- Test the timeline. Leave the sample for as long as the actual mark will remain before you decide that it works.
- Remove before pressing. Heat exposure can change removability, so treat an unremoved line as a risk.
Independent sewing discussions have reported faint shadows from some air- and water-soluble inks after washing, and permanent setting after ironing. Those experiences reinforce the need to test on a concealed scrap, especially with viscose, wool, silk, dark fabrics and dry-clean-only materials, where washable doesn't necessarily mean removable. The discussion of marker shadows and heat exposure is a useful reminder to assess the actual cloth rather than rely on the label.
Keep tested scraps with your fabric notes. When you buy a new fabric family, repeat the test instead of assuming that a marker that behaved well on cotton will behave identically on jersey or denim. That small record turns marker selection into a repeatable part of preparation, not a last-minute gamble.
More Sewing offers fabrics, haberdashery and ready-to-sew kits for UK makers, including cottons, viscose and Tencel blends, jerseys, denims and deadstock fabrics, alongside practical sewing supplies. Visit More Sewing to choose your fabric, request a sample swatch where available, and build your next project around a marker test before cutting.
