
You're halfway through a dress, quilt or trouser hem when the needle gives a sharp crack and disappears into the work. You stop, sigh, lift the presser foot and wonder whether the machine is failing or whether you've made a basic mistake.
A single broken needle can happen. When a sewing machine needle keeps breaking, though, it's usually reporting a specific fault in the setup, fabric handling or machine clearance. Brother's UK support guidance lists causes including incorrect installation, a loose clamp screw, a bent needle, damaged needle-plate or presser-foot holes, incorrect bobbin installation, upper-threading errors and using the wrong bobbin type. The practical message is reassuring: repeated breakage usually points to a finite mechanical checklist, not a machine that must immediately be replaced. Brother's UK troubleshooting guidance sets out that checklist in detail.
The Snap That Stops Every Project
The useful distinction is between an isolated snap and a pattern. If a needle breaks once while you're sewing a bulky seam, you may have hit a pin, a hard fold or a damaged spot in the plate. If the replacement needle breaks in the same place, on ordinary scrap fabric, stop treating it as bad luck. The machine is telling you where to look.
A dressmaker once brought in a machine that had broken several needles while sewing a simple cotton seam. The owner had changed needles repeatedly but hadn't checked whether the clamp was holding the needle fully up. Each replacement was being pushed slightly sideways as the fabric fed, so the needle struck metal at the same point in its descent. The needles weren't the root problem. They were the parts revealing it.
Technician's rule: repeated breakage is a diagnostic clue. Don't keep feeding fresh needles into the same fault.
Start by recording what happened. Was the machine on a straight stitch or zigzag? Did the break occur at a thick seam, during a reverse stitch, near a pin, or with the needle in a side position? Did the needle bend before it snapped, or did it break cleanly after touching the plate? Those details separate impact, alignment, fabric resistance and thread-loading problems.
| What Happened | Likely Cause | First Response |
|---|---|---|
| One needle snaps at a thick seam | Impact with a fold, pin or hard seam crossing | Replace the needle and test the same fabric on scrap |
| The needle bends before breaking | Fabric is being pulled, the needle is too fine, or clearance is poor | Stop handling the fabric and check needle type and clearance |
| Several needles break on the same stitch | Needle position, presser foot, plate or timing fault | Turn off the machine and perform a handwheel clearance test |
| Breakage follows a bobbin change | Incorrect bobbin, case position or bobbin interference | Remove and reinstall the bobbin and case correctly |
| Breakage happens with one thread only | Thread quality, eye friction or unsuitable needle eye | Fit a suitable needle and inspect the thread path |
A broken needle can also damage the needle plate, bobbin case or hook. That's why the right response isn't just “change the needle and carry on”. Find the contact point first, then resume only when the machine passes a slow, manual test.
Stop, Power Off, and Clear the Workspace Safely
The first action is simple: stop sewing immediately. Take your foot off the pedal, switch the machine off and disconnect the power before reaching near the needle, presser foot or bobbin area. UK Health and Safety Executive guidance advises switching off power before adjustments, removing feet from treadles while threading or changing needles, and using a weekly inspection system for guards, needles and work areas. The HSE's sewing-machine safety guidance is particularly relevant where several people use one machine.
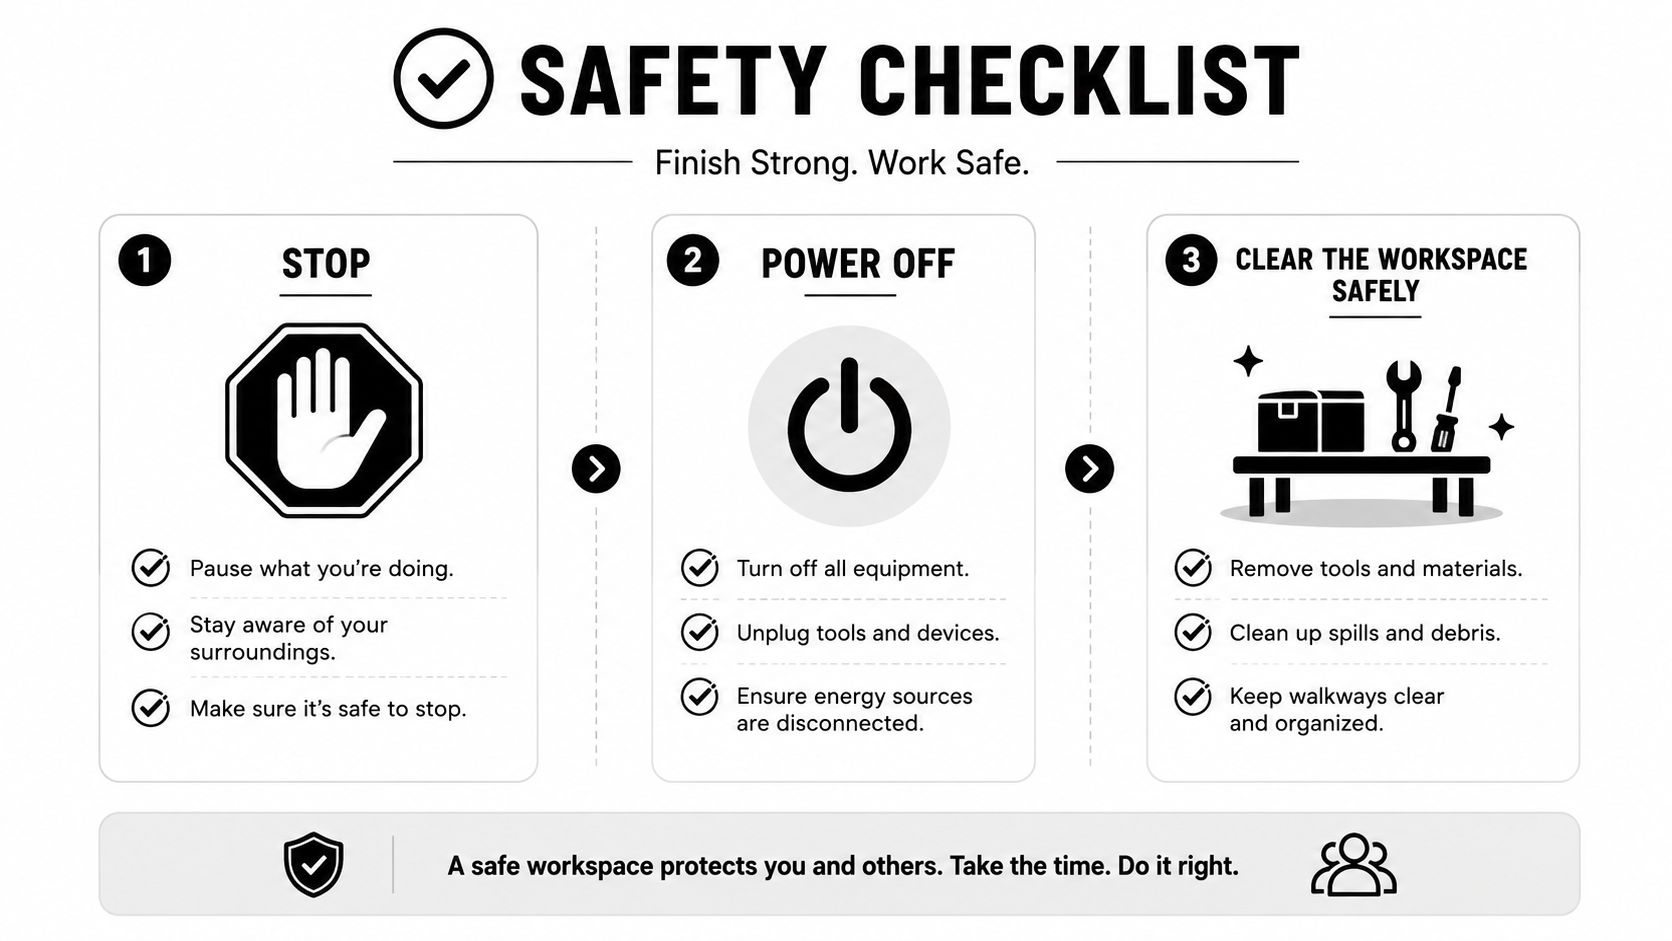
The immediate five-minute routine
- Stop and unplug. Don't press the pedal to lift the needle or test the motor. Use the handwheel only after the broken parts have been cleared.
- Remove the damaged needle. Loosen the clamp carefully and take out the remaining shaft. Use tweezers for fragments, especially if the break occurred over fleece, wadding or a child's project.
- Check the fabric. Run your fingers carefully over the area, then inspect the seam for embedded metal. A quilter once found tiny needle splinters in a fleece blanket because she had restarted immediately after each snap.
- Clear the machine. Remove the presser foot and needle plate if your manual permits it. Brush or vacuum lint and fragments from the bobbin area rather than pushing debris deeper into the race.
- Inspect before restarting. Look for a nick in the plate, a damaged bobbin case, a bent presser foot or thread wound around the hook.
Rushing back to the foot pedal can turn a loose needle into a damaged hook. Work slowly, keep children away from the exposed machine and never assume a missing fragment has fallen harmlessly onto the floor.
Match the Needle to the Thread and Fabric
Needle selection is a three-way decision. The fabric, thread and needle eye must work together. A fine needle forced through denim can flex until it hits the plate, while a large needle in delicate lawn can leave oversized holes and create unnecessary resistance around the thread.
For a heavy denim or canvas project, start with a denim or jeans needle. The practical sizes commonly used for this work are 90/14 or 100/16. A knit generally needs a ballpoint or jersey needle so the tip moves between loops rather than cutting them. Woven cotton lawn usually suits a standard 80/12 needle. Metallic and specialist threads need a dedicated needle with an eye large enough to prevent abrasion.
A useful sizing principle from UK sewing-machine guidance is that the needle eye should be about 40% larger than the thread diameter, which reduces frictional loading and needle flex. UK needle-snap troubleshooting guidance also advises using a larger needle as thread size increases. For example, if you're sewing a silk-viscose blend with ordinary polyester thread, don't automatically choose a heavy denim needle because the fabric feels slippery. Use a fine, appropriate needle with an eye that lets the thread pass smoothly without scraping.
| Needle Type | Typical Size | Best For | Common Mistake |
|---|---|---|---|
| Universal | 80/12 | Woven cottons and general dressmaking | Using it for stretch jersey or bulky denim |
| Denim or jeans | 90/14 or 100/16 | Denim, canvas and firm layered seams | Choosing it for lightweight fabric |
| Ballpoint or jersey | 70/10 to 80/12 | Knits and jersey | Using a sharp universal needle that catches loops |
| Specialist metallic | Choose for the thread and fabric | Metallic and decorative threads | Using a small eye that creates friction |
| Stretch | Select for elasticated knits | Lycra, stretch jersey and close-fitting garments | Treating all knits as ordinary woven fabric |
The professional sewing needle selection guide is useful when a fabric sits between categories. It's better to match the needle to the actual layers under the foot than to rely on the label sewn into the fabric shop roll.
Test on a scrap that includes the same seams, interfacing and number of layers. If the machine sounds laboured, the fabric struggles to feed or the thread scuffs inside the eye, stop before the needle breaks and change the combination.
Re-Thread, Re-Sit, and Re-Tension From the Top Down
A correct needle can still break when the machine is threaded incorrectly or the needle clamp hasn't secured it. Reset the machine from the top down instead of trying random tension changes.
Start with the upper thread
Raise the presser foot before threading. This opens the tension discs, allowing the thread to settle between them rather than sitting on the outside and running with erratic resistance. Follow every guide, take-up lever and needle bar guide in order, then lower the presser foot and pull the thread gently. It should move with controlled resistance, not lock solidly or fall slack.
Remove and reinstall the bobbin as well. Check that it's the correct type for the machine, that it sits in the case in the prescribed direction and that the case is fully engaged. An incorrect bobbin or poorly installed bobbin case can bring the needle into contact with the wrong part of the sewing path.
Before sewing, hold the upper thread and bring the bobbin thread to the top. This prevents loose thread tails from tangling below the plate on the first stitch. Sew the first few stitches on scrap, not on the garment.
Seat the needle firmly
A home dressmaker once broke three needles in an afternoon while sewing stretch jersey. The machine was threaded acceptably, but each new needle had been inserted slightly short of the top of the clamp. As the jersey resisted movement, the needle deflected sideways and struck the plate.
Push the needle fully up into the clamp, align the flat side correctly for your machine and tighten the clamp screw firmly. Check that the needle is centred in the presser-foot opening and that the selected stitch width or needle position won't move it into metal. UK repair guidance specifically warns that a needle not fully inserted, or held by a loose clamp screw, can bend under pressure. This UK sewing-machine repair guide shows the seating and alignment checks clearly.
Leave tension until last
Excessive tension can increase needle loading, while insufficient control can let the fabric drag or form unstable stitches. Set the machine to a sensible middle setting, sew a scrap of the same fabric and adjust gradually. Don't turn the tension dial repeatedly while the machine still has a threading, bobbin or clearance fault.
A good reset should leave the needle moving straight, the thread feeding smoothly and the handwheel turning freely. If it doesn't, stop adjusting tension and return to the mechanical checks.
Fabric Choice, Pin Habits and Sewing Technique
Two projects can use the same machine and produce completely different breakage patterns.
The denim jacket failed at a bulky seam crossing. The sewer had left pins in place and approached the ridge at speed. The needle struck a pin, then hit the thick seam with less room to recover. The fix wasn't a stronger needle alone. Remove pins before the foot reaches them, shorten the stitch slightly only where the seam demands it, and use the handwheel to cross a particularly hard intersection.
At a thick crossing, raise the presser foot with the needle down, support the fabric so the foot sits level, then continue slowly. A height-compensating tool or folded scrap behind the foot can help it climb and descend without tipping the needle bar. Support heavy fabric to the left of the presser foot rather than allowing its weight to pull the work sideways.
On a dense seam, let the handwheel decide the first stitch. Your foot pedal can follow once the needle is clearing the layers cleanly.
The viscose dress failed for the opposite reason. The fabric was light and drapey, but the sewer was pulling it from behind the needle to keep the seam straight. That stretched the feed path and changed the needle's angle as the fabric entered the foot. Guide the fabric from the front and sides, keep your hands relaxed and let the feed dogs move it. If the fabric slips, use suitable stabilisation or a controlled slower speed instead of gripping and dragging it.
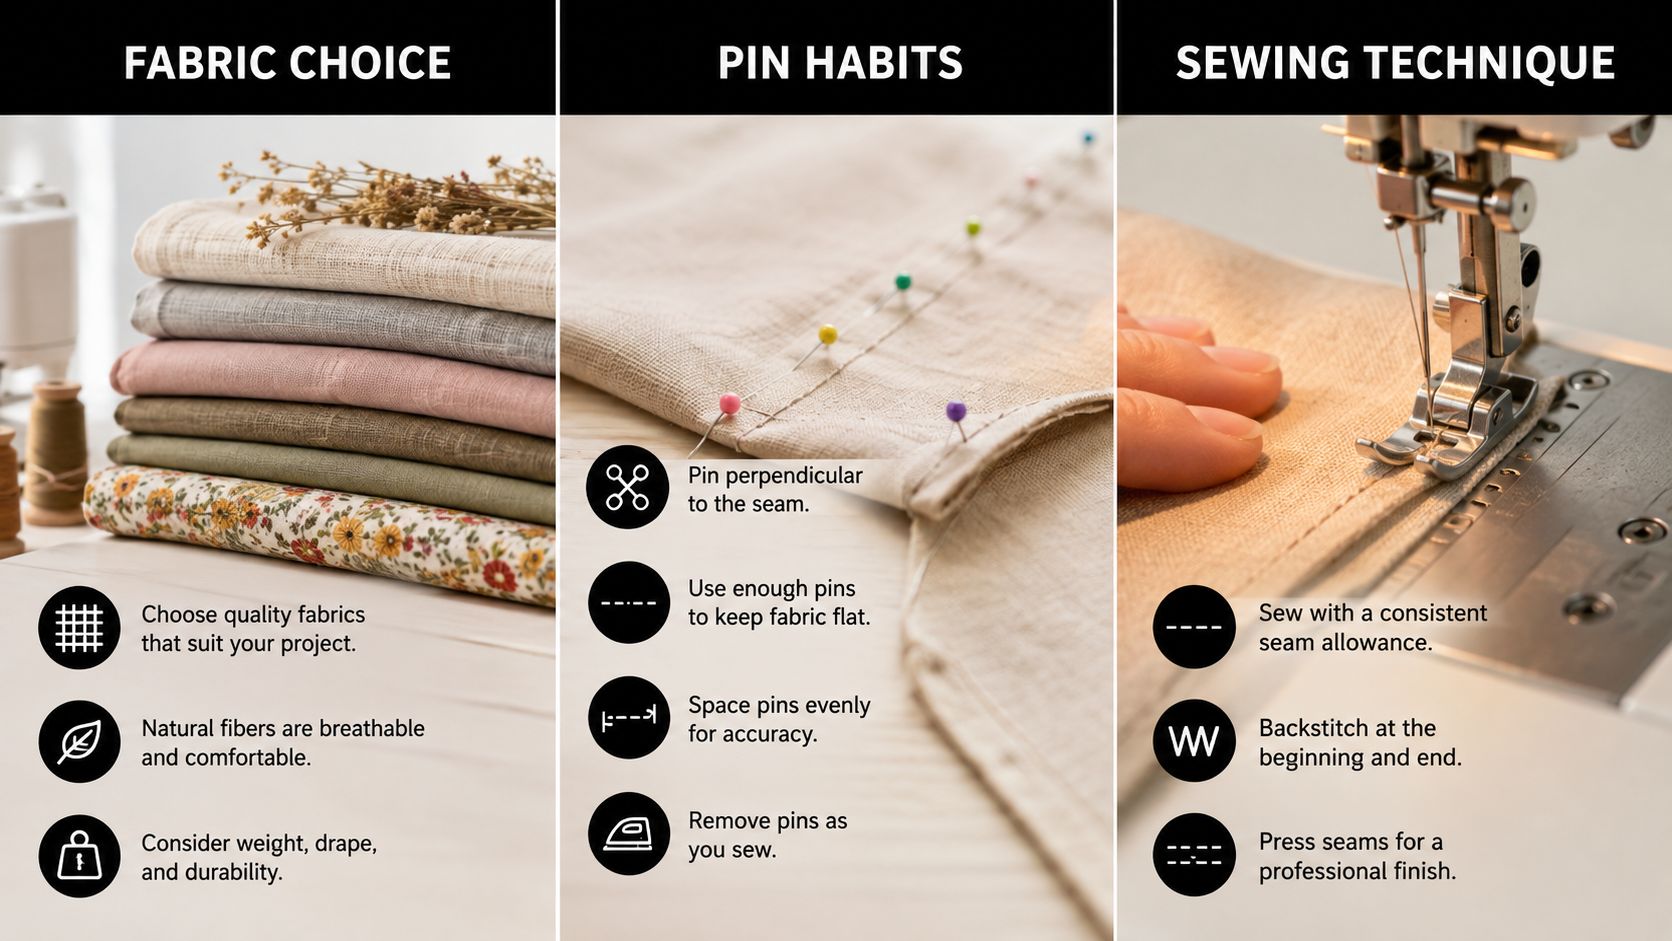
Change the technique when the material changes:
- Dense layers: Reduce speed, support the weight and approach seam ridges squarely.
- Pins: Place them across the seam only where they can be removed before the needle arrives.
- Viscose and other drapey cloths: Guide rather than pull, and test feeding on a scrap.
- Stretch fabric: Use a suitable stitch and avoid holding the fabric taut in front of or behind the needle.
The needle responds to every force applied through the fabric. A careful operator can prevent impact and sideways deflection that no needle package can compensate for.
Clearance Tests, Burrs and When to Book a Service
Once the needle, thread, bobbin and handling have been checked, inspect the machine's sewing path. UK technical guidance from Coats identifies excessive tension, sharp edges on the throat plate, hook point, needle guard, bobbin case, needle groove or needle eye as component-level causes. It also identifies needle heat from groove or eye blockage and poor-quality thread as factors that require inspection of the entire sewing path, not just another needle. Coats' technical guidance on broken needles explains why friction, wear and alignment matter.
Run the handwheel test
Fit a fresh, correctly sized needle, leave the machine unpowered and turn the handwheel slowly towards you. Watch the needle descend through the plate, pass the presser-foot opening and approach the hook. It should travel cleanly without lateral wobble, clipping, bending or touching metal.
Check the bobbin race for lint and thread, and inspect the plate with a fingertip or cotton bud. A rough nick can catch thread or deflect the needle. Safe home checks include cleaning the bobbin area, tightening the clamp, looking for burrs and replacing a visibly damaged needle plate with the correct part.
A vintage machine that breaks needles on cotton, jersey and denim alike needs a different level of suspicion. The fault could be a burr, a bent needle bar, a wrongly seated bobbin case or timing that has shifted. The symptoms overlap, so changing fabric or buying another packet of needles won't prove the cause.
If the needle still clips metal during a slow handwheel test, don't run the motor.
Book a service when the needle hits the plate after correct insertion, when the hook is visibly too close, when the needle bar wobbles, or when a fresh needle breaks on straight stitch through matching scrap fabric. The HSE recommends treating repeated faults as a reason to inspect the machine and working area, while UK service guidance points to the clamp, plate, bobbin case and timing when the impact continues.
For a proper timing and hook reset, use More Sewing's Worthing-based machine servicing. A technician can assess clearance and wear instead of allowing the same impact to damage more components.
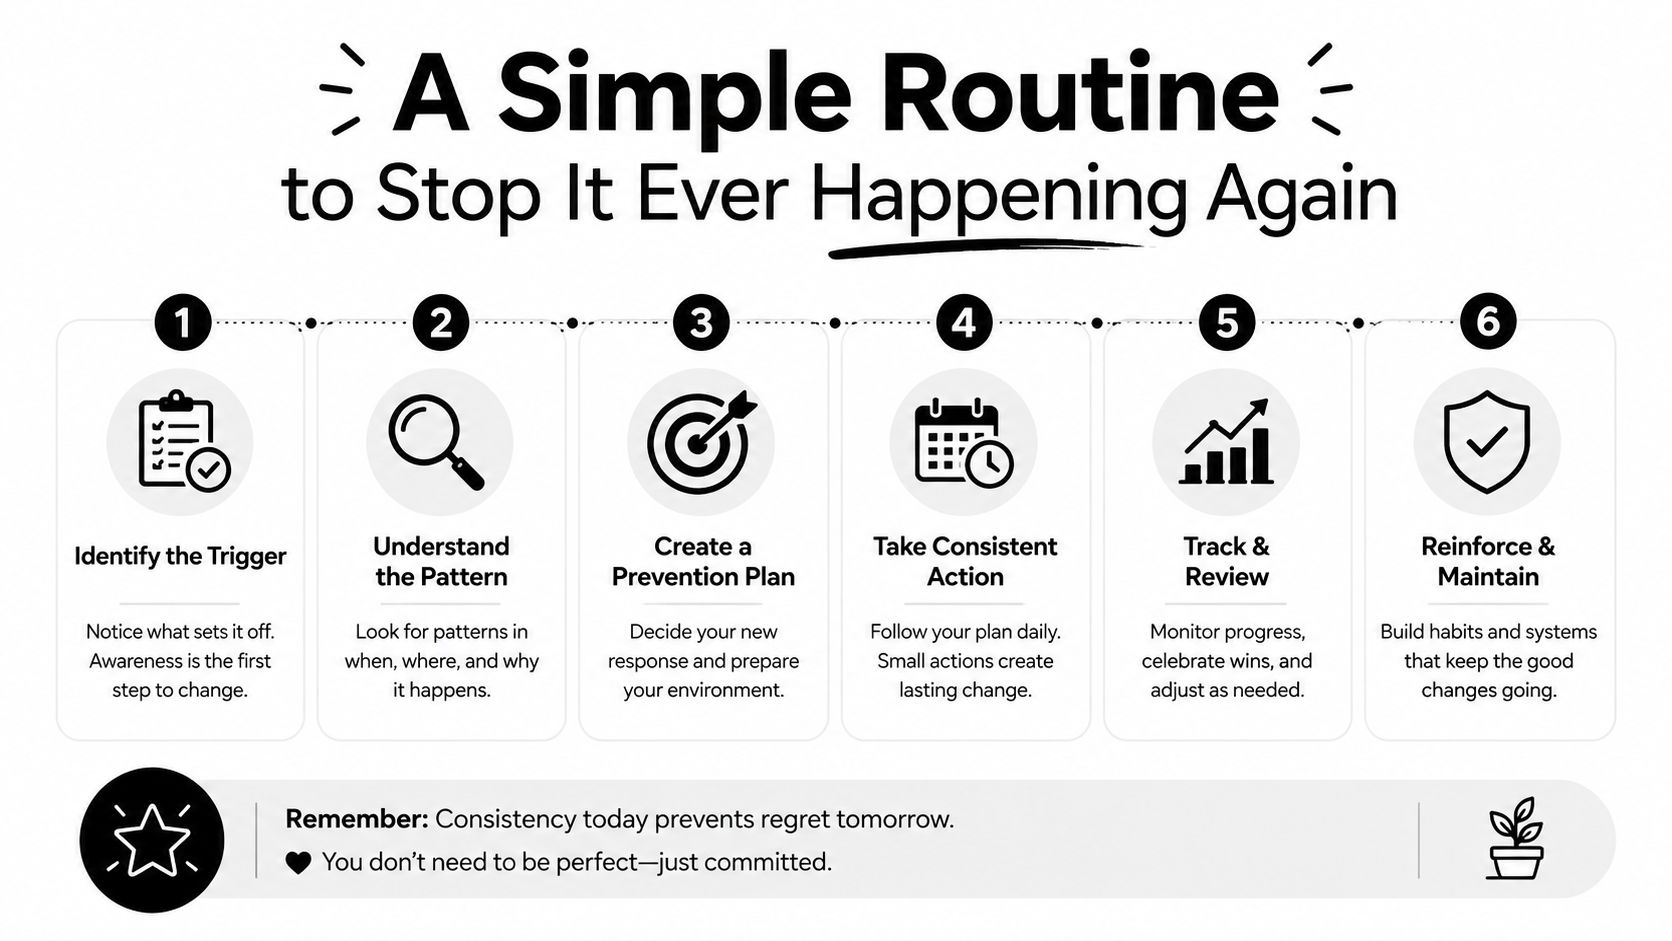
A Simple Routine to Stop It Ever Happening Again
Prevention works best as a short routine attached to familiar moments. Before a new project, identify the fabric, thread and needle combination. Before a new fabric section, re-thread from the top with the presser foot raised, confirm the bobbin and sew a scrap containing the same number of layers.
Use a fresh needle regularly, but don't pretend there's one universal replacement interval. UK guidance varies, with one troubleshooting source recommending replacement roughly every 8 sewing hours and another UK fabric retailer advising replacement every 2 hours. This UK needle troubleshooting guide highlights why the rule changes with fabric, speed and project intensity. Replace immediately after a break, visible bend or suspected impact. A bent needle can't be straightened safely, even if it appears usable.
Keep this compact habit:
- Before sewing: Match needle, thread and fabric.
- Before pressing the pedal: Check the needle is fully seated and the clamp screw is tight.
- At thick seams: Support the fabric and turn the handwheel through the crossing.
- After a major project: Clear lint and inspect the plate and bobbin area.
- During shared use: Follow a weekly inspection routine for needles, guards and the work area.
- When symptoms persist: Stop testing and arrange professional servicing.
Cheap needles may appear economical, but inconsistent finish or poor matching can create more trouble than the packet saves. Choose a suitable needle from a reliable source, then judge the result by smooth feeding, clean stitches and undamaged thread.
If your needle snaps again, don't panic and don't restart blindly. Stop, power off, clear the fragments, identify the contact point and test the machine by hand before sewing another seam.
If your machine is still breaking needles after these checks, visit More Sewing for Worthing-based sewing-machine servicing and repairs. You can also find suitable fabrics, haberdashery and project supplies there, so you can correct the setup and get back to sewing with confidence.
