
The usual advice about sewing machine notions is to buy a bigger kit. I'd start with a smaller one that actually matches your machine and the cloth on your table. A specialist foot won't cure a blunt needle, and a bobbin that almost fits can cause more trouble than an empty notions drawer.
Think fabric, technique, then visible fault. Those tell you what to reach for, what to replace and when to leave the machine with a technician.
Sewing Machine Notions Worth Keeping First
A short, matched kit beats a drawer of near-matches. Sewing machine notions are the small parts and tools that support reliable stitching. The needle, bobbin, presser foot and thread do the immediate work; your other tools help you prepare, check, clean or undo it.
Core sewing machine notions at a glance
| Notion | Job | Typical choice | Replace or check when |
|---|---|---|---|
| Needle | Forms the stitch and carries the thread | 75/11–90/14 universal for medium cotton; ball-point for jersey; 100/16 for denim | Bent, blunt, burred, or after persistent skipped stitches |
| Bobbin and bobbin case | Supplies the lower thread | Only the style named for that machine model | Lint in the race, a bent edge, or a thread nest under the fabric |
| Presser foot | Guides and holds the fabric | Standard, zipper and buttonhole feet before specialist feet | Foot doesn't sit flat, or the seam wanders off the allowance |
| Thread | Upper and lower stitch | Good polyester; fine cotton on lawn | Shredding, snarls, or thread outside the machine's permitted range |
| Seam ripper and snips | Unpick mistakes and trim tails | Ball-tip ripper and small thread snips | A dull blade pulls or cuts the cloth |
| Lint brush and screwdriver | Clear the race and change the needle | Soft brush plus the driver that fits the needle clamp | Before turning the tension dial to chase a new fault |
| Oil | Lubricates only the points the manual lists | The oil named by the maker, or none for a machine that requires no user oiling | Skip it entirely when the manual says not to oil |
The needle choices are starting points, not promises that every fabric will behave identically. The detailed fabric matches below distinguish a fine blouse fabric from a dense trouser cloth, and thread ticket numbers from domestic thread weights.
Start with what you'll sew
For a cotton blouse, put the appropriate fine needle, your chosen thread and a correctly wound bobbin beside the machine. For jersey, put out a ball-point needle before you begin. Keeping the intended needle packet with the fabric prevents the familiar mistake of sewing a stretch top with the needle left over from shortening jeans.
Identify the feet supplied with your machine before ordering more. A standard foot handles ordinary seams, a zipper foot gives access beside zip teeth, and a buttonhole foot supports that particular operation. An unfamiliar attachment isn't automatically something you need.
If the word notions itself is confusing, sewing essentials explained by B-Sew Inn offers useful context for the wider category. At the machine, narrow that broad shopping vocabulary to the parts your next seam needs.
Keep useful spares, not mystery parts
Leave unused needles in their labelled packets. Keep bobbins for different machines apart, even if they look alike, and discard damaged ones rather than returning them to the tin.
Practical rule: Match the notion to the fabric and the fault before adding anything to your basket.
Keep a spare matched needle, a spare approved bobbin and a spare reel of your working thread. That's a more useful reserve than a collection of unidentified feet and half-fitting bobbins.
How to Group Notions by the Job They Do
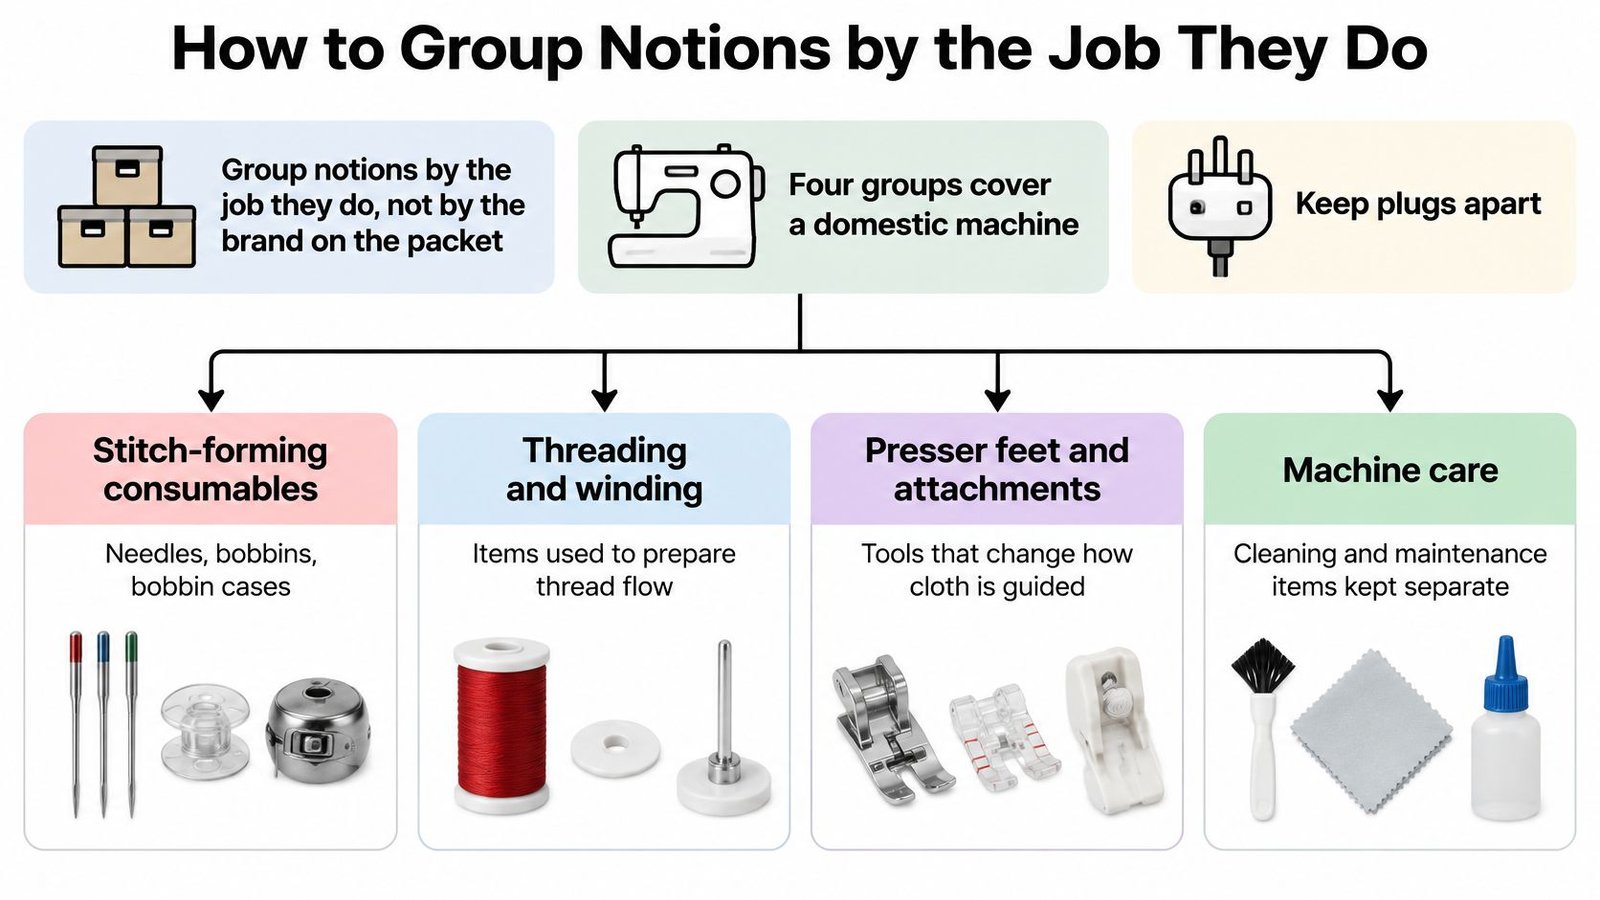
Organise your notions by what you're trying to do, rather than the brand printed on the packet. When the upper thread won't run freely, you should be able to reach the threading tools without searching through spare feet and bottles of oil.
This arrangement separates stitch-making parts from preparation tools, guiding attachments and maintenance items.
Give each job a home
- Stitch-forming consumables: Store needles, bobbins, bobbin cases and working thread together, with the machine model clearly labelled.
- Threading and winding: Keep spool caps, spool holders, compatible needle-threading aids and tweezers where you prepare the machine.
- Presser feet and attachments: Separate everyday feet from occasional attachments. Put a labelled sample beside an unfamiliar foot so you can recognise its purpose.
- Machine care: Keep the manual, cleaning brush and suitable screwdriver together. Store permitted lubricant separately from fabric and thread.
Hand tools can sit in a shallow tray alongside these groups. A seam ripper, snips and seam gauge need to be easy to reach, not buried under attachments.
For example, suppose your skirt pattern specifies a 1.5 cm seam allowance. Set the gauge to that measurement and check the needle-to-guide distance before sewing. You don't need several different seam guides to establish the same allowance.
Learn the names that explain faults
The shank describes the attachment arrangement and height associated with the presser-foot assembly. A snap-on foot clips onto a holder, while some feet screw onto the presser bar. Don't assume a low-shank attachment will fit a high-shank machine just because both packets say sewing machine foot.
The race is the track around the hook assembly beneath the needle plate, where lint can accumulate. Its exact arrangement differs between drop-in and front-loading bobbin systems.
The take-up lever is the moving arm in the upper threading path that draws thread through during stitch formation. Missing it can leave loose thread collecting underneath the work.
A walking foot helps move the upper fabric layers along with the lower layers. That makes it useful for a quilt sandwich or a slippery layered seam, but it belongs with guiding attachments, not with repairs.
Keep anything with a plug outside the notions tin. A lamp, iron or foot controller needs electrical checks, not just a convenient storage compartment.
Students sharing equipment can share suitable guiding tools while keeping their own labelled needles and thread. Compatibility still comes before convenience.
Needles Thread and Bobbins Matched to Fabric
Choose the thread the seam needs, then a needle that can carry it, then check the point against the fabric. A needle must both accommodate the thread and pass through the cloth without causing avoidable damage.
SATRA's needle-selection guidance explains that metric needle size measures blade diameter in hundredths of a millimetre, so a 120 is thicker than a 90. Its polyester matching examples appear in the table alongside domestic dressmaking choices.
Brother's fabric, thread and needle guide gives the lawn, broadcloth, denim and stretch-fabric ranges below, and warns against thread of weight 20 or lower for the machine covered by that guidance. Check your own manual before applying that restriction to a different machine.
Use the match as a starting point
Needle and thread matches for common cloth
| Fabric or thread | Needle | Thread | If mismatched |
|---|---|---|---|
| Lightweight lawn, viscose, linings | 65/9–75/11 microtex or universal | Fine cotton or polyester | Holes and a stiff seam if the needle is too large |
| Medium broadcloth and cotton | 75/11–90/14 universal | Cotton or polyester | Skipped stitches if the needle is unsuitable for the cloth or thread |
| Jersey and other knits | 75/11–90/14 ball-point, often gold | Thread made for knits | Cut loops and runs if an unsuitable sharp point damages the knit |
| Heavy denim and canvas | 100/16, or 90/14–100/16 | Size 30 with 100/16; size 50 with 90/14–100/16 | Breakage if the needle is too small |
| Corespun or filament polyester ticket 50 | 90–100 | Ticket 50 | Snarling and breakage if the needle is too small |
| Polyester ticket 36 | 100–110 | Ticket 36 | Unattractive holes if the needle is too large |
| Polyester ticket 18 | 110–120 | Ticket 18 | Skipped stitches and a weakened seam if the combination is unsuitable |
| Thread of weight 20 or lower | Not a needle choice | Don't use where the machine manual prohibits it | Machine malfunction risk |
Ticket numbers and thread weights aren't interchangeable systems. Don't read the industrial polyester rows as permission to use a similarly numbered domestic thread. Match the thread's actual specification to the machine's capability.
For woven and coated cloth, a suitable cloth point separates yarns rather than deliberately cutting them. A ball-point serves a different purpose on knitted loops. Gold colouring is a feature of Brother's specified needle, not a reliable identification system across every manufacturer.
Try a woven sample and a knit sample
Say you're making a cotton-lawn blouse. A useful trial would be a 70/10 microtex needle, fine polyester in the top and bobbin, and a stitch length of about 2.2 mm. Sew through the same layers you'll have at the collar, then look for holes, puckering and clean stitch formation.
For a ponte top, try an 80/12 ball-point with suitable thread. If the thread already suits both tests, change only the needle initially so you can see what that change achieves. Test a stretch stitch or narrow zigzag as appropriate, then gently stretch the sample.
Wind the bobbin evenly from the working reel for these trials. Insert it in the direction shown on the case or manual diagram, and guide its thread through the specified slot or tension spring.
Reject a bobbin the manual doesn't name, even if it drops into place. Replace a bent, blunt or damaged needle, or one that continues skipping after correct threading and fabric matching.
Presser Feet and a Sample for Each Technique
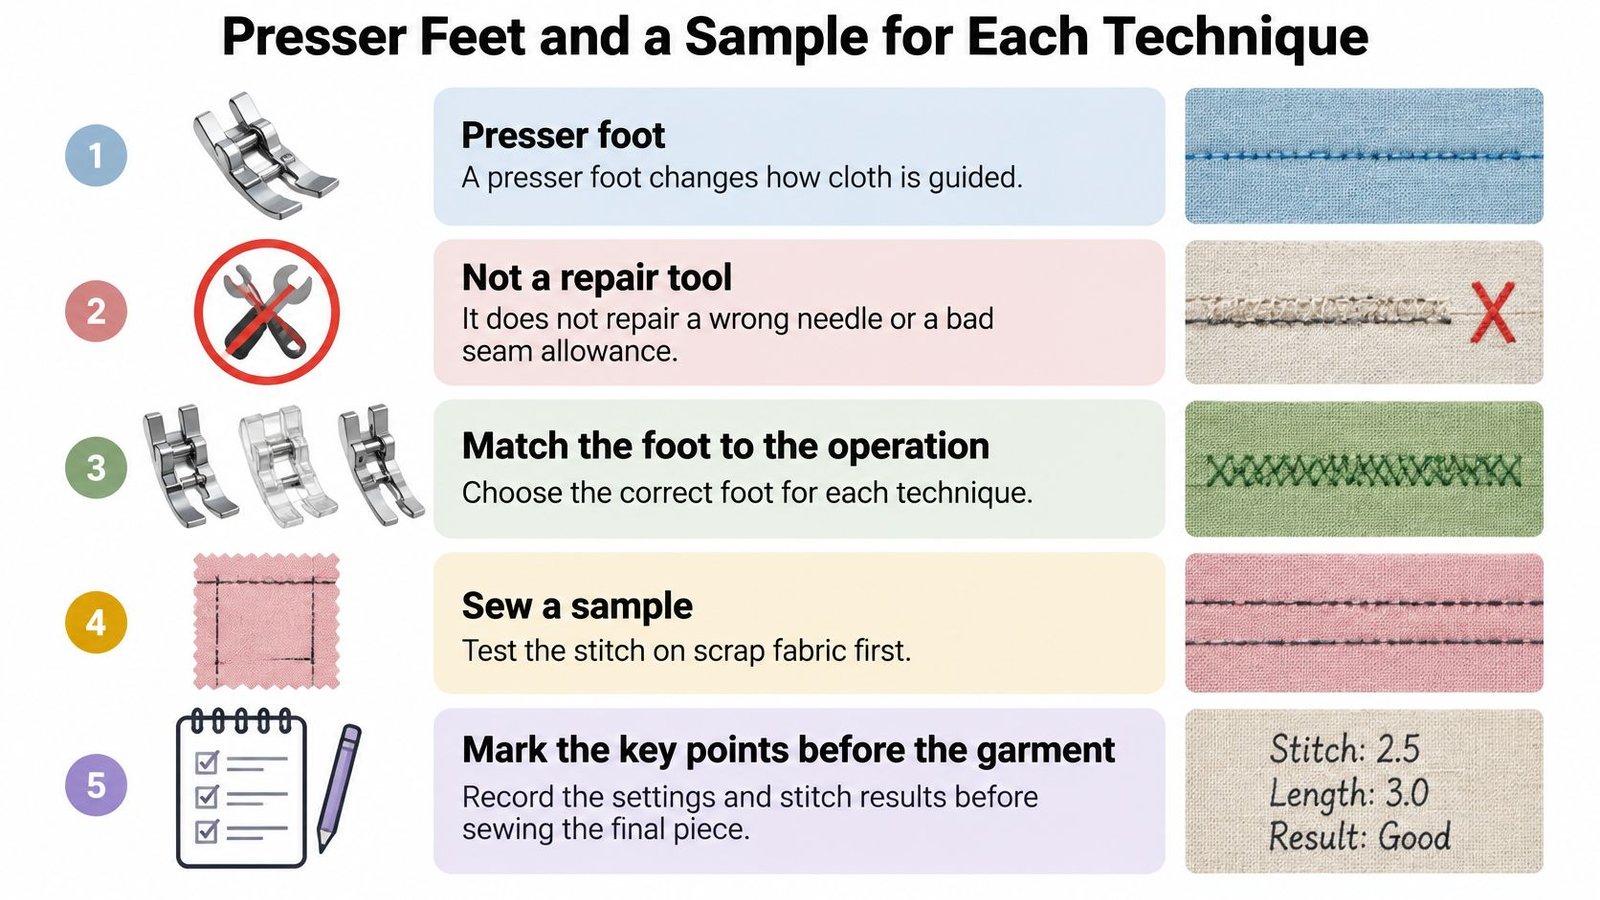
A presser foot changes how you guide and control fabric. It doesn't repair an unsuitable needle, and it won't correct a seam allowance you haven't marked.
Use this reminder before experimenting with a new attachment.
City College Peterborough's sewing-techniques course distinguishes straight, overcast, zipper, concealed-zipper, buttonhole, blind-hem and rolled-hem feet. Treat them as tools for separate operations, not as a collection you must complete.
Seams edges and zips
With a standard foot, sew a linen skirt side seam on a sample first. Mark the seam line at the beginning and check that your chosen plate guide corresponds to the pattern's allowance.
An overcast foot helps support a raw edge. For example, test a viscose seam allowance 1 cm wide with an appropriate overcasting stitch at about 2.5 mm length, where the manual permits that combination. Mark the allowance, guide the raw edge against the foot's guide and inspect for tunnelling; this isn't automatically equivalent to an overlocked finish.
For a skirt zip, use a zipper foot, baste the opening closed and mark the zip ends. Stitch down each side with the tape secured, repositioning the foot as needed so it doesn't ride over the teeth. Remove the basting only after checking that the zip opens cleanly.
A concealed-zipper foot guides invisible-zip coils through its grooves. On a cotton-lawn dress, mark the top stops and seam intersection, gently uncurl the coils as the zip maker permits, and stitch beside the coil without catching it. Stop before the slider obstructs the foot.
Openings hems and patchwork
- Buttonhole foot: For a shirt placket, test the actual interfaced fabric stack. As a trial, mark the button diameter plus 2–3 mm, or use the machine's button-sizing mechanism, then check the finished opening against the button.
- Blind-hem foot: On trousers, mark and press the finished hemline before arranging the folded hem. Adjust the guide until the sideways stitch catches only a tiny amount of the outer cloth.
- Rolled-hem foot: For a viscose blouse, mark the starting fold and test on a scrap cut on the same grain. Feed the prepared edge into the scroll without pulling it sideways.
- Quarter-inch foot: For a patchwork cushion, mark a test seam and measure the stitched allowance. It can help repeat a narrow allowance, but it's optional for ordinary dressmaking.
Check the foot's compatibility and permitted stitch width before running the motor. With power disconnected, turn the handwheel slowly to confirm the needle clears the opening.
Watch the movement of the fabric and attachment, then practise on your own sample.
Keep successful samples labelled with the foot, stitch and fabric. A sample showing an actual finish is more helpful than a packet photograph.
How to Set Tension and Maintain the Machine
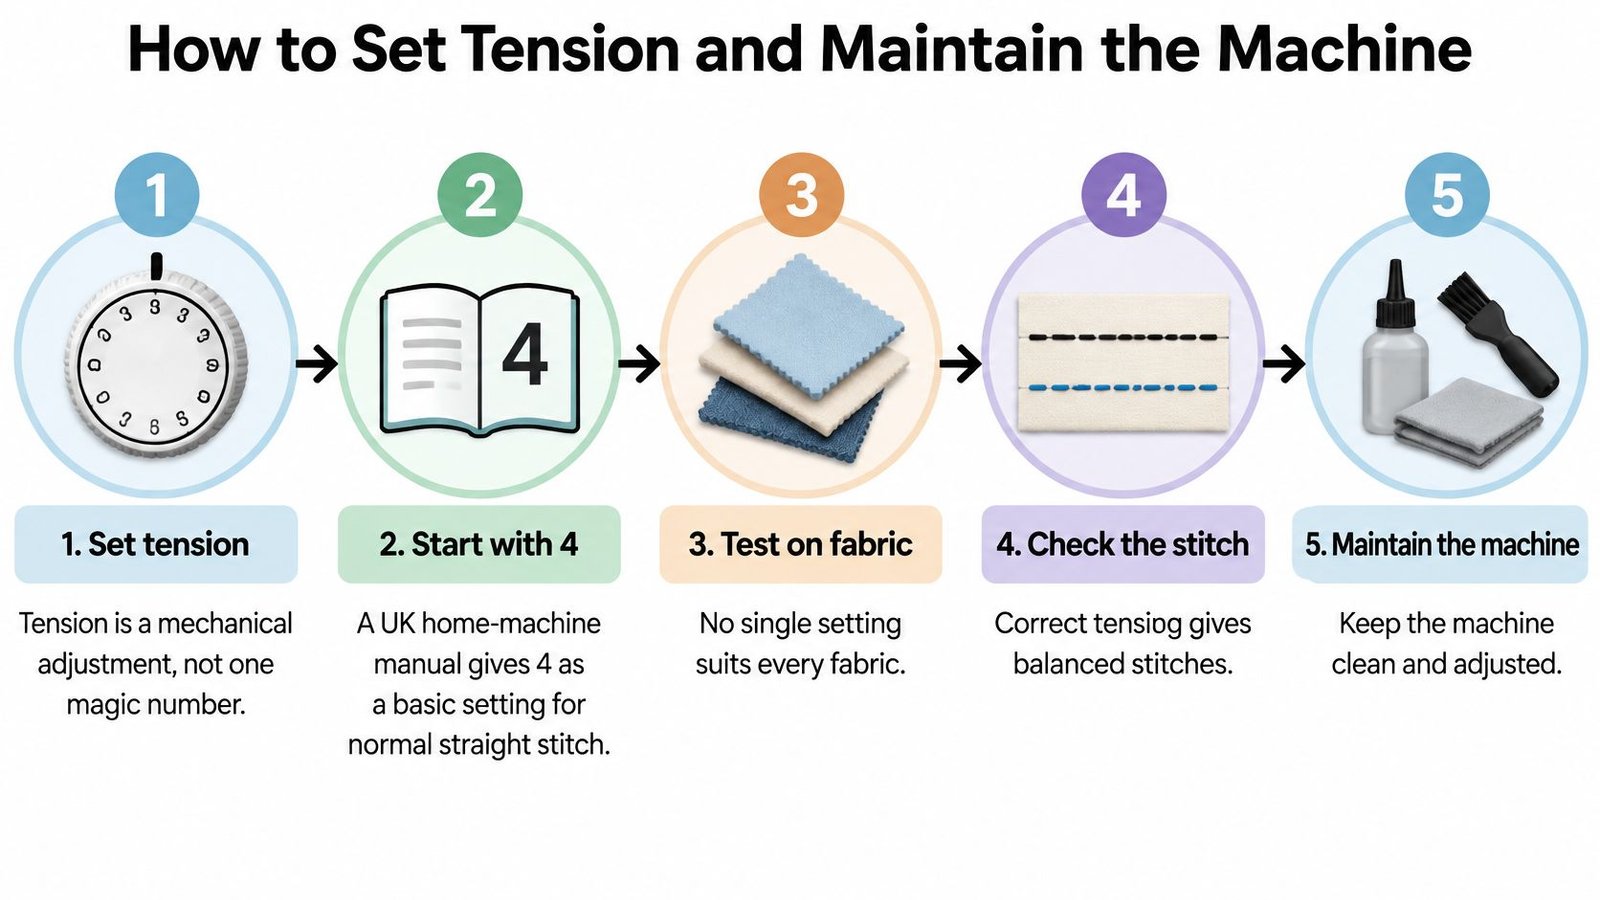
Tension isn't a magic number. The Hobbycraft HD17 instruction manual gives 4 as a basic setting for normal straight stitching, while explaining that no setting suits every fabric and stitch function.
That manual describes correct tension with a small amount of upper thread visible underneath. For your machine, compare the seam with its own manual's illustrations and aim for secure, balanced stitches without loose loops or drawn-up cloth.
The useful habit is to test before you adjust.
Run a controlled tension test
- Thread completely: With power disconnected, raise the presser foot and follow the whole upper path, including the take-up lever.
- Match the stitch-forming parts: Fit a suitable needle and a correctly wound, approved bobbin.
- Choose the baseline: Select straight stitch and the manual's normal tension setting, near the setting above where applicable.
- Sew the fabric layers: For example, sew a 10 cm test seam on scraps arranged exactly like the intended seam.
- Inspect both faces: Lay the sample flat and examine the underside as well as the top.
- Correct loose upper thread: If upper-thread loops remain underneath after correct threading, increase upper tension gradually.
- Correct excessive pull: If upper tension draws up the seam or pulls bobbin thread onto the top, reduce it gradually.
- Change one control: Sew another test line before making a further adjustment.
Puckering doesn't prove tension is the only problem. If loosening the dial gives loose stitches without flattening the seam, investigate needle size, stitch length and fabric handling instead.
Retest after changing fabric or the number of layers. A setting that behaves well on a plain cotton seam may need adjustment on satin, jersey or a thick folded hem.
Clean before chasing adjustments
Unplug the machine before removing its bobbin, case or needle plate. Remove only the parts the manual identifies as user-removable, noting their orientation so they go back correctly.
Brush lint out of the race and feed-dog area rather than blowing it deeper inside. Use tweezers for an accessible loose thread, but don't probe hidden mechanisms or force a resistant component.
Oil is conditional, not compulsory. Use it only where the maker tells you to, in the amount specified.
If the manual calls for a small drop at a named point, apply it there and sew on scrap until no oil marks appear. Don't oil a sealed machine or assume a quiet-looking joint needs lubrication.
Finish by replacing the parts securely and sewing another sample. Stop for grinding, repeated needle contact with metal or a fault that remains after a fresh matched needle, cleaning and complete rethreading.
Safe Handling of Needles Feet and Power
Treat the needle and the power supply as parts of the machine's safety system. A careful needle change begins before you loosen the clamp, not after your fingers are beside the point.
HSE's sewing-machine safety guidance advises a reliable needle guard, adequate lighting even with the motor off, and weekly inspections covering guards, needles and work areas. Its workplace procedure also includes taking the foot off the treadle and switching off before threading or changing a needle.
Use a deliberate stop sequence
- Stop completely: Remove your foot from the controller, switch off and unplug before changing a needle or foot, cleaning underneath the plate or working near the needle.
- Fit the needle correctly: Follow the manual's orientation. On many domestic machines the flat faces backwards, but don't assume yours does.
- Seat and secure it: Push the needle fully into its holder and tighten the clamp with the appropriate tool.
- Check clearance: Turn the handwheel slowly in the direction specified by the maker. The needle must clear the plate and foot.
- Light the work: Use an independent lamp if switching off the machine also removes its light.
Adjust a fitted guard to suit the operator's fingers. Keep the work surface clear enough that you don't have to reach across moving parts for snips or pins.
Keep electrical repairs out of the tin
HSE's electrical-equipment guidance says to remove equipment from service when plugs or connectors are damaged, cables expose internal wires, or repairs have been made insecurely with tape. It also explains that inspection and testing frequency should reflect the equipment, environment and previous findings, rather than an assumed universal testing schedule.
Use the correct UK plug and maker-specified fuse. Route power and controller leads away from walking routes, unplug when the machine isn't in use, and ask a competent person about appropriate RCD protection if you're unsure of the supply.
Stop immediately for sparking, scorching or a burning smell. Internal electrical work belongs to a competent repairer, not to someone with a spare screwdriver.
Put used needles in a closed, puncture-resistant container. Don't leave them loose among dressmaking pins where someone might pick one up by the point.
Faults Cross Referenced to the Notion to Check
Start with the symptom you can see, not the accessory you're tempted to buy. A loose loop, a line of holes and a wandering zip seam need different responses.
Stitch faults and the notion to check first
| What you see | Check this notion first | First action |
|---|---|---|
| Skipped stitches | Needle point and size | Fit a new needle matched to the cloth, then retest on a scrap |
| Thread nest under the fabric | Upper threading and bobbin direction | Rethread with the presser foot raised and reseat the bobbin |
| Loops of top thread on the underside | Upper tension too loose | After checking threading, raise the dial one step and sew another test line |
| Puckering or bobbin thread on top | Upper tension too tight, or needle too large | Lower the dial, or try a finer suitable needle on fine cloth |
| Ladder of holes on a woven seam | Needle too large for the cloth | Fit the next suitable finer needle, such as 75/11 on lawn, then retest |
| Runs or skipped stitches on jersey | Unsuitable point rather than ball-point | Fit a 75/11–90/14 ball-point and suitable knit thread |
| Zip or piping seam too far from the teeth | Standard foot | Change to a zipper foot and mark the ends first |
| Bobbin jam or rattling case | Wrong or damaged bobbin, lint in the race | Unplug, brush out, and fit only the listed bobbin |
| Grinding, burning smell, or needle hitting metal | Not a notion fault | Stop and book a technician |
Separate the cause from the aftermath
A nest underneath the fabric doesn't automatically mean the lower tension is wrong. The upper thread may have missed its intended path, leaving the hook to collect loose thread below. Don't start turning a bobbin-case screw because that's where the mess appears.
Suppose your machine sewed denim successfully but skips on a jersey sleeve. Begin with the needle point and suitability for that knit, rather than buying a walking foot. A guiding attachment can help with layer movement, but it won't change how an unsuitable needle enters knitted loops.
For a zip seam that sits too far from the teeth, inspect the foot and needle position. A heavier needle won't move the seam nearer the zip; a compatible zipper foot and a marked stitching line address the actual operation.
Diagnose on scrap, not halfway down the garment seam. Unpicking a test costs much less effort than rescuing a damaged front panel.
Follow a repeatable checking order
Check needle, upper threading, bobbin type and direction, foot and plate, then tension. Pause after each change to sew a sample so you know which action helped.
For a trapped bobbin thread, disconnect the power and remove accessible thread gently according to the manual. Don't force the handwheel, pull the garment hard against the needle or pour oil into the jam.
Record what happened: the fabric, thread, needle, stitch and whether the fault persists on another scrap. Keep the unsuccessful sample too, because it can help a technician distinguish an intermittent problem from a fault that occurs throughout sewing.
Repeated shredding can have several causes, including a burr, incorrect threading or a mechanical problem. Don't diagnose timing from thread damage alone. Needle contact with metal, grinding, damaged leads, burning smells and a jam that won't release safely all warrant professional attention.
Write the machine model and approved bobbin reference on your storage tin. That makes the next replacement a deliberate match instead of another packet labelled universal.
Build a Small Kit or Book a Service
Build your repair-first tin around a universal needle for ordinary woven cloth, a ball-point for jersey, a jeans needle for denim, approved spare bobbins, good polyester thread, a ball-tip seam ripper, a lint brush and the correct needle screwdriver. Choose the exact sizes for the fabrics you sew.
Then give every extra purchase a job. Buy a specialist foot when the technique repeats and a sample proves it helps; borrow a compatible walking foot for an occasional quilt or layered coat. Use a seam gauge and snips across projects instead of collecting narrowly marketed alternatives.
Buy borrow improvise or service
- Buy items that prevent damage or get used regularly, especially properly matched needles and bobbins.
- Borrow occasional attachments only after checking model compatibility.
- Improvise non-critical aids, such as a removable seam-guide mark, without obstructing moving parts.
- Service mechanical or electrical faults rather than adding accessories.
The University of Leeds' repair-café discussion explores sharing skills and keeping household goods in use. Apply that approach to sewing without improvising safety-critical machine parts.
We service and repair sewing machines in-house in Worthing. Bring the model number, a note of the notion you've already tried and a scrap showing the fault. The shop is closed when teaching, so phone 07948 373 284 to arrange a service drop-off appointment.
Our haberdashery includes needles and pins, threads, zips, interfacing and sewing machine accessories, and we also service and repair machines in-house. Visit More Sewing to find supplies for your next project or contact us about a fault that a matched needle and careful rethread haven't resolved.
