
Blog, Dressmaking, Fabric, Guides
What Is Pattern Matching in Sewing: Seams and Checks
You've laid out your fabric, opened the paper pattern and reached for the scissors. Then you notice that the flowers will stop halfway across the front, or the stripes on the pocket won't line up with the shirt underneath. It's rather like hanging wallpaper: you want the flower to continue across the join, not disappear and reappear somewhere else.
Pattern Matching in Sewing Explained
Pattern matching means cutting and joining fabric so a print, stripe, check or motif continues across a seam, allowing the design to read as one piece rather than separate offcuts.
If you're wondering what is pattern matching in a sewing context, that's the central idea. It isn't the computing term of the same name, and it doesn't mean choosing the correct paper sewing pattern for your fabric.
Say you're making a floral skirt. If you place the pieces wherever they fit, you might join the top of a rose to an unrelated leaf. Planning the placement before cutting lets you bring the corresponding parts together at the finished seam.
The diagram separates the fabric design from the cutting and joining needed to continue it.
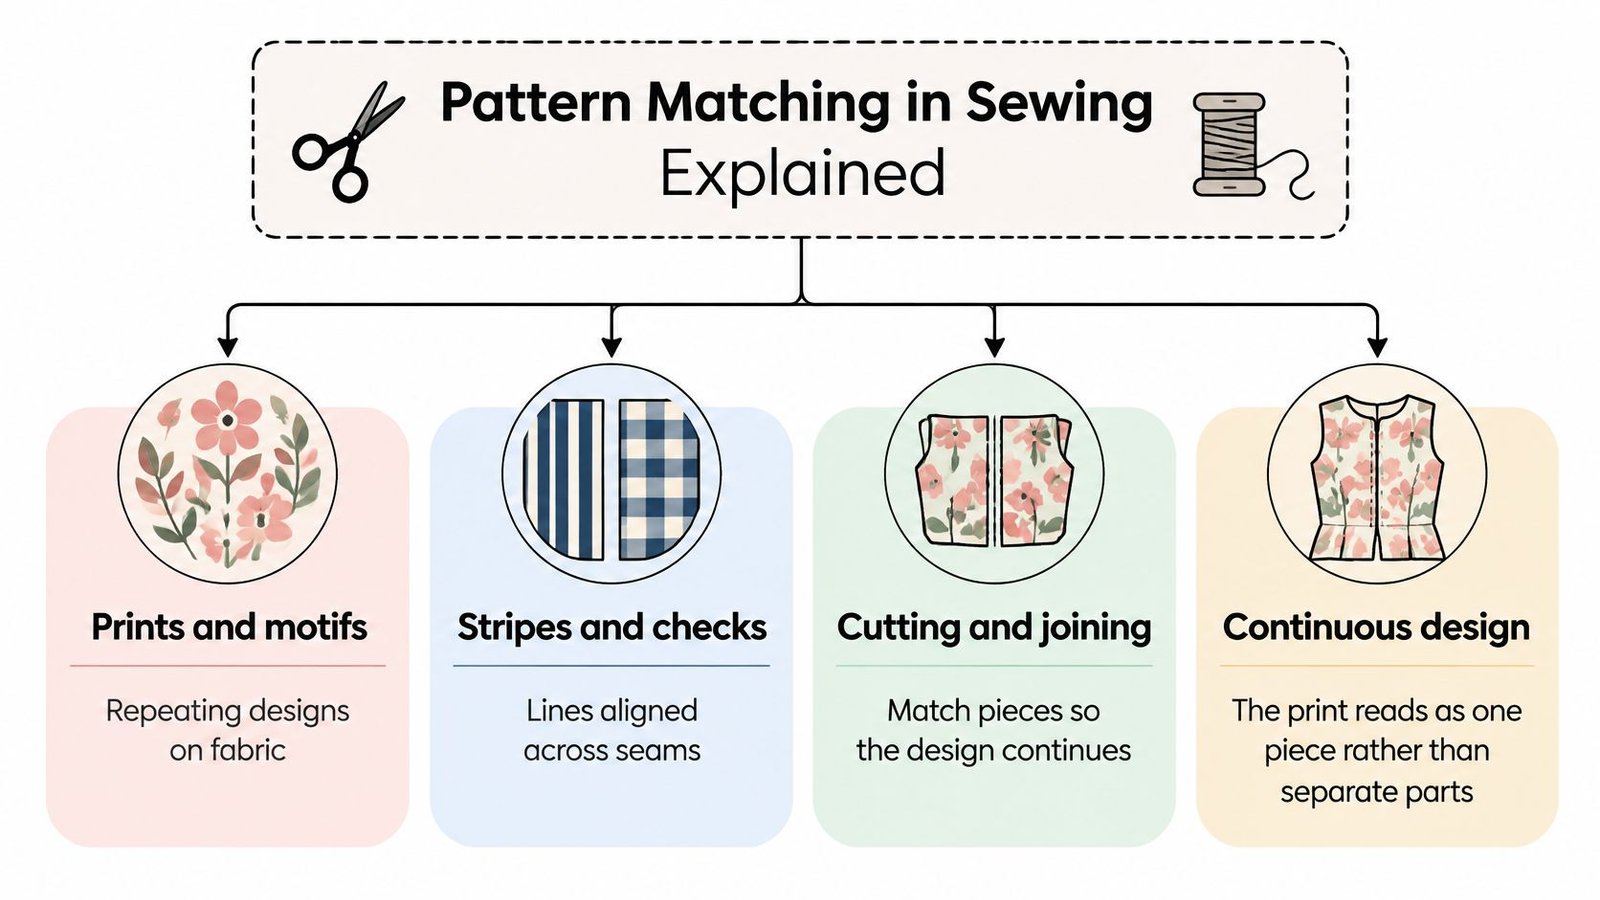
What you're looking for
- Visible continuity: Concentrate on seams where someone's eye follows a line or recognisable shape.
- The repeat: This is the vertical distance before an identical motif appears again. It determines where another matching piece can sit.
- Nap or direction: A one-way print needs consistent orientation. Velvet and corduroy also need consistent pile direction, even without a printed motif.
Matching is especially noticeable with cotton prints, stripes, checks, tartans and large florals. With plain fabric, print matching adds nothing and requires no extra allowance, although grain and any surface direction still matter.
Hold adjoining pieces together as they'll appear when finished, with the seam allowances tucked away. Does a recognisable motif stop dead at the seam? If so, that seam is a candidate for matching, rather than an automatic demand for perfection.
Which Seams Need Matching and Which Can Slide
Seam priority for pattern matching
| Seam or position | Matching priority | Why it matters | Practical call |
|---|---|---|---|
| Centre front | High | The eye lands here first | Match the motif and cut the front first |
| Pocket edges and flaps | High | A broken motif shows at once | Match to the body piece before cutting |
| Collar and collar stand | High | Frames the neckline | Match along the centre back line |
| Side seams | Medium | A continuous print reads across the body | Match at the hip or underarm |
| Sleeve to bodice | Medium | Visible when the arms move | Match at the notch |
| Centre back | Medium | Seen from behind and in photographs | Match at the waist |
| Inside facings and hems | Low | Mostly hidden | Accept small drift |
Use these priorities as a starting point, not a judgement on your sewing. A bold stripe needs more attention than a scattered print whose small flowers face in every direction.
On a striped cotton shirt, align the stripe across the finished front band and position the pocket so it blends into the shirt body. Let a slightly offset back yoke remain if correcting it would require an awkward layout or another length of fabric. You can also make a deliberate contrast, such as a crosswise yoke, provided the pattern and fabric allow it.
Mark priorities before buying
Trace the pattern pieces and label each joining edge H, M or L. Count the actual fabric pieces involved, remembering that a paper piece marked for a pair represents separate cutting decisions.
For horizontal stripes, choose a reference line at the hip or underarm and carry it across the side seam. Don't start by aligning the hem edges: shaping and different seam allowances can leave the visible stripes out of step.
The centre back deserves a look too. It's easy to overlook while checking yourself in a mirror, yet a broken band across the waist can be obvious from behind or in photographs.
Allow for garment shaping
A sleeve cap curves into an armhole, so you usually can't match every stripe around the entire join. Aim for a convincing match at the relevant notch without distorting the sleeve to force agreement elsewhere.
Similarly, collar shaping may prevent complete continuity around the neckline. Establish a balanced centre-back placement, then check that the collar ends look intentional.
Match where the eye follows the design, and accept drift where the seam hides.
Working Out Repeats and Extra Fabric
Extra fabric by repeat size
The purchasing rules and repeat-based calculation below follow the Pound a Metre fabric quantity guide: add roughly 10% for repeats under 15 cm, about 25% for repeats over 15 cm, or estimate a complete repeat for each major matched piece; the check example applies that calculation.
| Repeat size | Matching need | Extra fabric rule | Example |
|---|---|---|---|
| Under 15 cm | Light matching | Add about 10% | Multiply the basic fabric length by 1.10 |
| Over 15 cm | Full matching | Add about 25% | Multiply the basic fabric length by 1.25 |
| 24 cm repeat, four matched pieces | Full matching | One repeat per matched piece | 24 cm × 4 = 96 cm extra, about 1 m |
| 12 cm check repeat, five matched pieces | Check alignment | One repeat per matched piece | 12 cm × 5 = 60 cm extra |
These are alternative planning estimates, not allowances to stack together. The percentage approach gives a quick shopping estimate; the repeat calculation helps you examine the demands of particular pieces.
Measure and make a cutting list
Spread the fabric flat without stretching it. Choose a recognisable feature, such as the centre of a flower, and measure vertically to the same feature in the next identical arrangement. Write the measurement on your layout notes.
List the fronts, backs, sleeves and pockets that need deliberate placement. A small pocket might fit beside a larger piece within the same repeat, so don't automatically treat every small component as another full-length allowance.
Look across the width as well. Some prints have offset rows, meaning the next flower sideways isn't necessarily at the same height as the flower you're matching.
Check the layout before committing
Mark the usable fabric width on the floor with masking tape, then arrange your traced paper pieces inside it. Leave the selvedges outside the cutting area and keep grainlines parallel to your marked length.
Move pieces along the length until the selected motif reaches adjoining seam lines. Wider fabric may accommodate pieces side by side; a larger garment, narrow cloth or a directional layout may require more length.
For projects involving panels and backing fabric, the On Pins & Needles Quilting yardage guide from On Pins & Needles Quilting Co. is a useful companion when organising fabric quantities.
Buying check: Write down the repeat, count the matched pieces, calculate the allowance and test the layout before adding a modest mistake margin.
If you're shopping online and can't establish the repeat from the listing, ask for that measurement before ordering. A photograph alone won't reliably tell you how much room the design needs.
Matching Stripes, Checks and Directional Prints
Checks and tartans are easiest to handle when you choose a distinctive reference, such as a thin coloured overcheck. Measure from its centre to the centre of the next identical line, making sure the intervening sequence is the same rather than merely similar.
The Pound a Metre tartan guide gives approximately 8–20 cm as a common repeat range for UK tartans and suggests drawing around four or five horizontal and three or four vertical guide lines on transparent or lightweight pattern paper.
Build a visible reference grid
Trace your skirt pattern onto tissue or tracing paper and draw guide lines that follow the chosen check. Keep the printed grainline as your main positioning reference: don't twist a piece off grain to chase a coloured line.
Cut the front, then use its check sequence to position the adjoining pieces. For a skirt, select a horizontal design line below the hip and continue it across the side and centre-back seams.
Mark the same part of the motif at corresponding notches, adding a chalk reference if the original notch falls in an indistinct area. Leave the construction notches in their proper positions; your extra marks supplement them.
Keep directional designs upright
Treat a one-way floral or animal print as a nap layout, with every piece pointing the same way. Follow the pattern's nap layout for velvet or corduroy too, so adjoining panels don't appear to change shade.
A Thrifty Stitcher pattern-matching tutorial describes single-layer cutting for bold designs and flipping a paper pattern piece to create its mirrored counterpart. Keep the fabric face up and flip the paper, not the direction of the print.
Single-layer cutting takes longer than cutting folded cloth, but you can see exactly where each motif sits. Label left and right pieces on the wrong side with chalk or removable tape so you don't accidentally cut duplicates.
Before cutting the next piece, lay the cut piece beside its intended neighbour. Fold back the seam allowance and confirm the design meets at the stitching line, not merely at the raw edge.
How to Match Fabric When Joining Lengths
Joining a border print for a curtain or skirt panel is a useful way to practise because you can inspect a long, relatively straightforward join. Press the fabric first so a crease doesn't disguise an offset motif.
The illustrated sequence shows the main alignment stages.
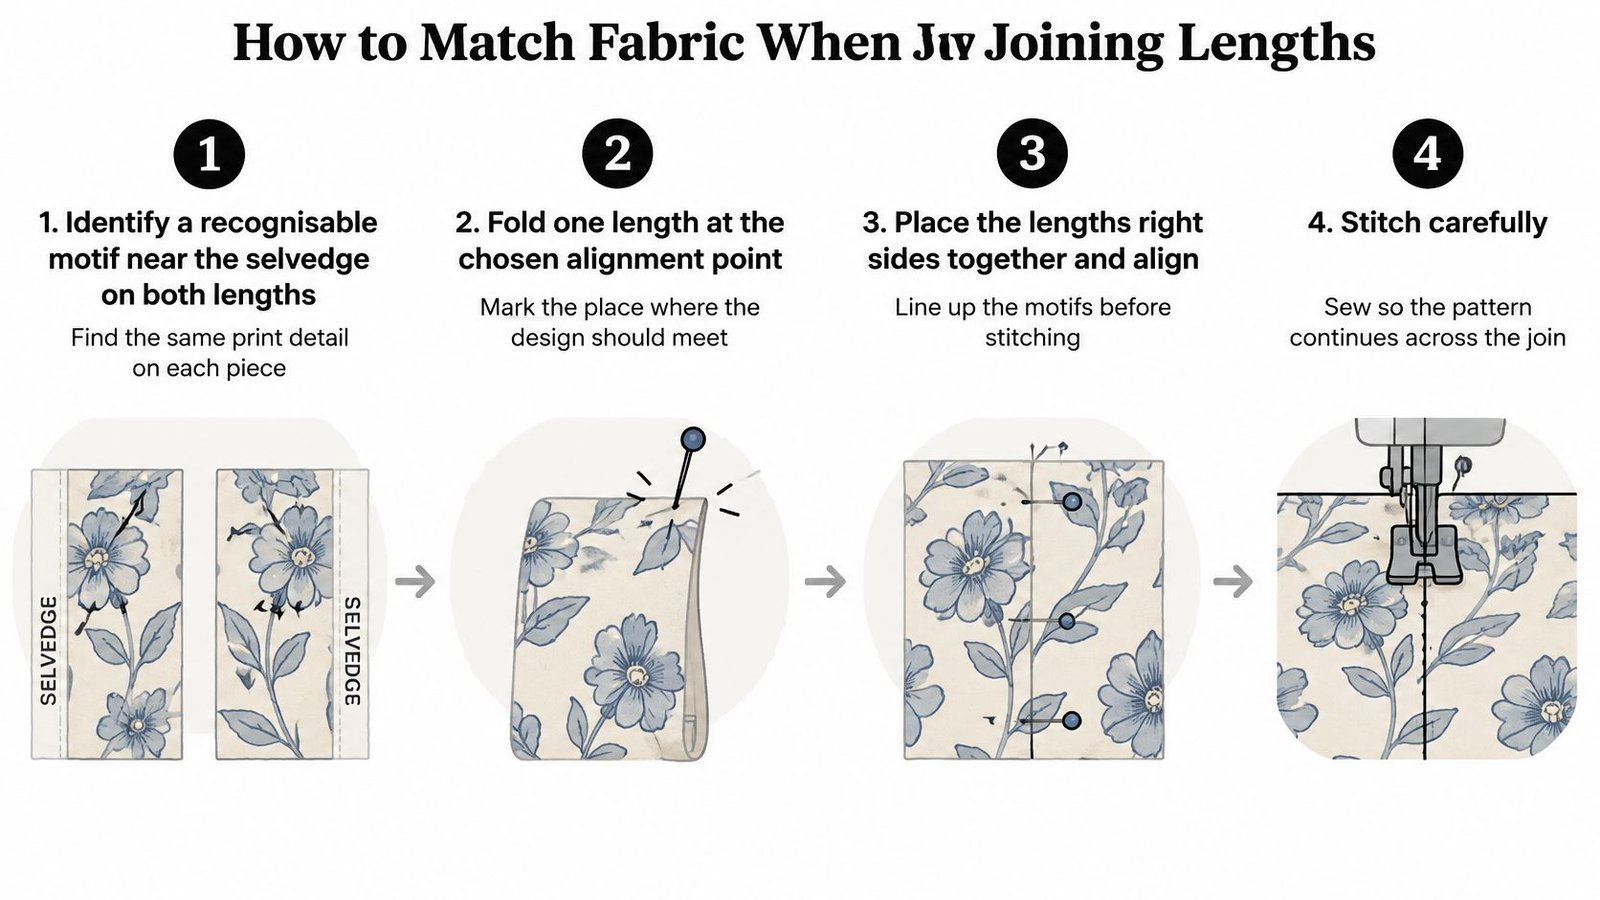
Prepare, secure and inspect
Identify a recognisable motif near the selvedge on both lengths. Choose a clear detail, such as a petal tip, rather than a vague patch of colour. Check that there's enough fabric beyond it for the seam allowance.
Fold one length at the chosen alignment point and press lightly. This fold represents the finished join and gives you a visible reference.
Place the lengths right sides together and align the motif along the fold. Peel the upper layer back to inspect the relationship underneath. Adjust before securing it.
Pin within the intended crease line, adding horizontal pins for stability. Pinning only far outside the seam line lets the layers shift where accuracy matters; tack the join if the cloth is slippery.
Stitch carefully, keeping the motif aligned. Don't let the folded motif roll under the presser foot and pull the print out of position. Remove pins before the needle reaches them.
Open the lengths and inspect the full seam from the right side. Check the whole join rather than assuming an accurate beginning guarantees an accurate finish.
Unpick only the affected section if the design slips. Reposition, tack and restitch locally. There's no need to undo a sound section.
Trim excess only when you're satisfied; the Fabric & Flowers tutorial recommends retaining approximately 1.3 cm (½ inch) for a backing seam. Keep garment allowances appropriate to their construction instead.
For home-textile projects, browsing Casamé Home sofa bed covers can help you think about which surfaces remain visible when furniture is in use. Apply the same viewing test to your own panel placement.
With staged checks, a local slip is often confined to a repeat and can be repaired without wasting the whole length.
When Perfect Matching Is Not Worth It
Perfect matching everywhere isn't a sensible beginner target. Each adjustment can mean more cloth, more offcuts and more time before you reach the sewing machine.
Compare the visible placement before deciding whether another cut is worthwhile.
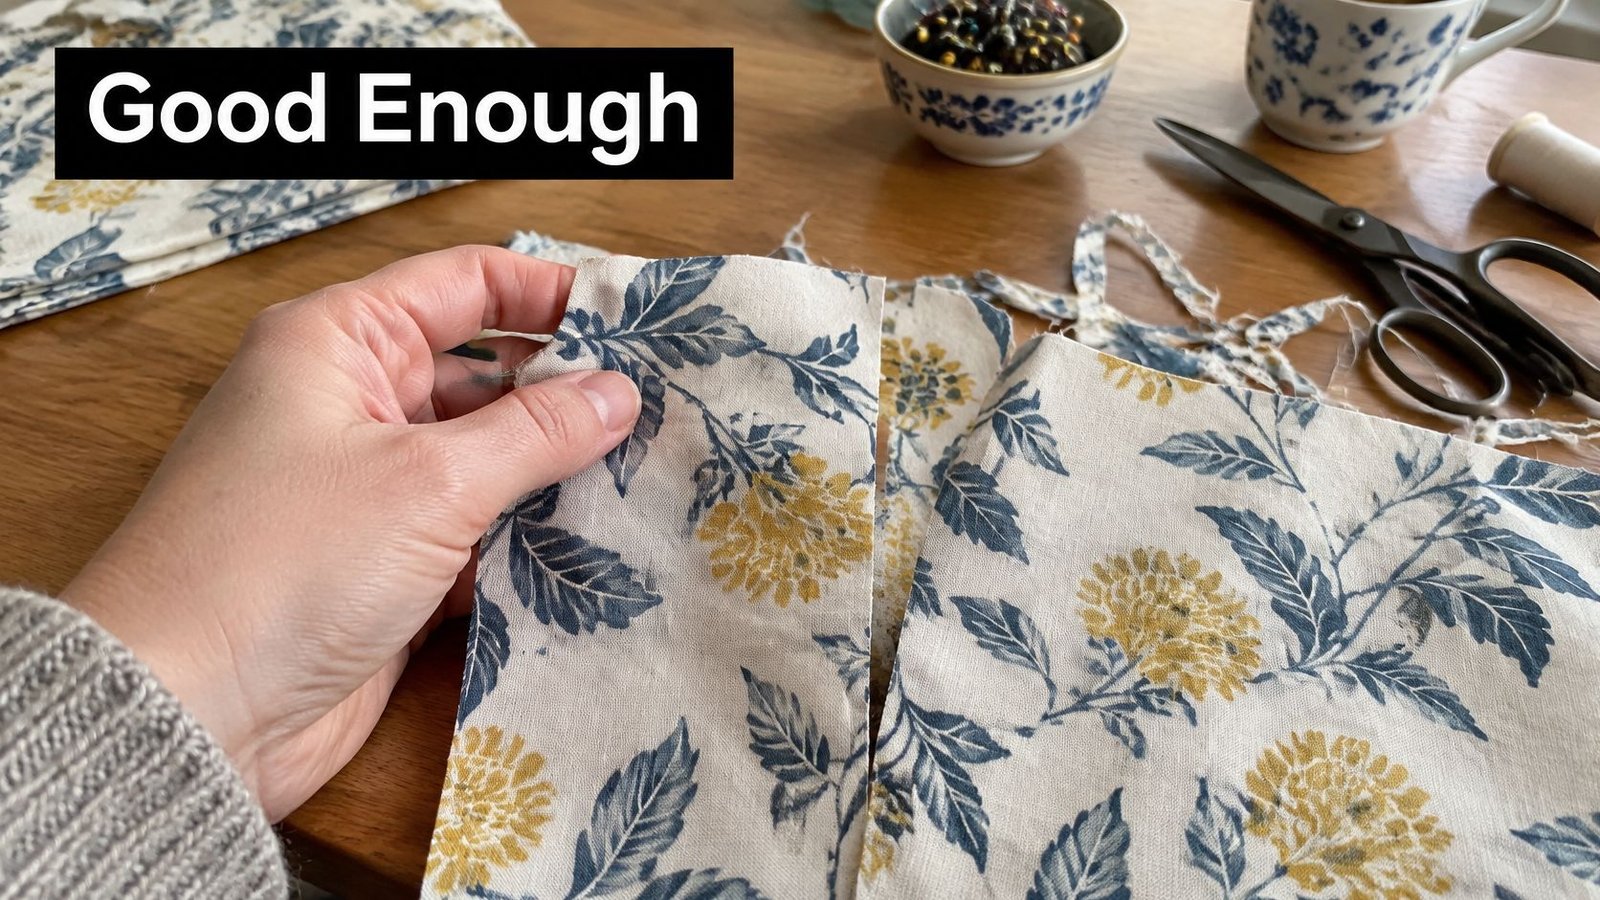
Keep the front, pocket edges and collar convincing, but don't spend your remaining fabric correcting a concealed facing. On a cushion cover or tote bag, a prominent matched join and a less exact back seam can be a sensible compromise.
Fix the mistake that matters
- Edges match, motif doesn't: Align the design at the notch and stitching line.
- Repeat wasn't measured: Record it before cutting another piece.
- Pieces point different ways: Check directional arrows throughout the layout.
- Fabric allowance was forgotten: Rework the layout before sacrificing a visible match.
- Hidden seams consume extra cloth: Mark them L and allow a controlled mismatch.
Watch the handling as well as the finished alignment in this demonstration.
A deliberate contrast can look better than an almost-match that distracts from the garment. Match what the wearer or viewer sees most, and accept drift elsewhere.
Plan Your Next Matched Project
Choose a project with a simple shape and a print you can read clearly. A cushion cover or tote bag offers room to practise without negotiating darts, sleeve caps or a fitted waist.
Your cutting-room checklist
- Measure the repeat between identical points and record it on the pattern.
- Mark joining edges H, M or L, judging the finished item rather than the flat pieces alone.
- Count the matched pieces and compare the repeat-based allowance with the percentage estimate.
- Arrange the paper pieces within the usable width, shifting them until the intended motifs meet.
- Cut the front first, keeping it available as a reference for neighbouring pieces.
- Test a join on scraps before cutting the remaining components, checking both alignment and fabric movement.
Keep the scraps from your test beside the machine. They're useful for checking stitch length, pressing temperature and whether tacking prevents the layers from creeping.
For your first garment, choose a large-repeat cotton or a check at More Sewing, and buy the planned length plus a small margin. Pick a print, measure its repeat and match a seam before tackling a full garment.
We offer fabric, sewing patterns, dressmaking sewing kits, sewing machines and haberdashery, including threads and zips, alongside sewing classes. Visit More Sewing to choose supplies for your matched project, or explore our sale and remnants section for practice fabric.
