
You're running your finger along the raised edge of a favourite cushion, a school blazer, or a sturdy tote bag and wondering how the seam became so crisp. It looks almost moulded into the fabric, yet there's no mysterious machine or expensive trim involved. The answer is piping, a narrow fabric covering wrapped around cord and sewn into a seam or applied along an edge.
Once you understand what sits inside that ridge, the technique becomes much less intimidating. You'll see why the fabric is cut on the bias, how the cord affects the finished shape, and why seam allowances can behave badly on curves. The method is simple enough to practise at home, provided you make a few important decisions before switching on the machine.
The Moment You Notice a Piped Edge
Run your hand around the edge of an upholstered armchair and you'll feel a slim, rounded ridge separating the fabric panels. On a cushion, it creates a neat border. On a jacket, it can trace a pocket or emphasise a collar. Around a tote bag, it gives the edge a firm outline that feels both decorative and practical.
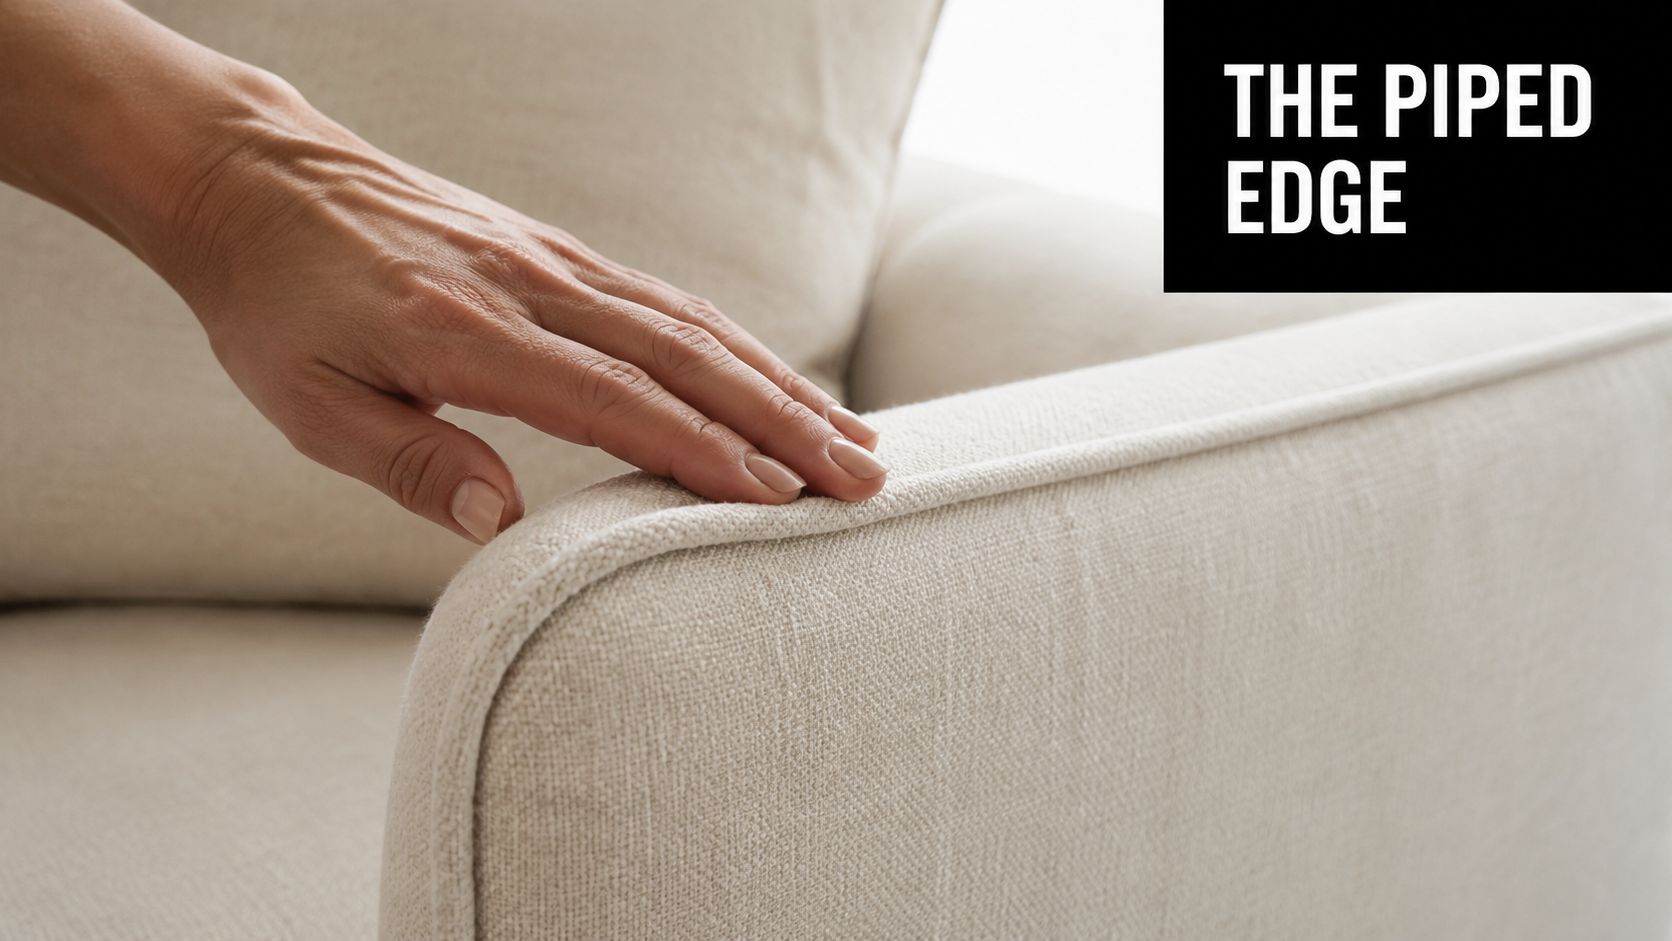
At first glance, the ridge can seem like a specialist finish. In reality, piping is usually a folded strip of fabric wrapped around a piece of cord. The covered cord is then placed between fabric layers or stitched along an edge. The cord supplies the rounded shape, while the fabric covering lets you match, contrast, or coordinate the trim with the rest of the project.
The details matter. A strip cut on the bias can bend around a cushion corner or curved armhole more smoothly than a strip cut along the straight grain. The strip also needs to be wide enough to wrap around the cord and provide the required seam allowance on both sides. If it's too narrow, the cord may escape or the stitching may sit too far from the ridge.
You may be asking three practical questions. What exactly is inside the raised line? Why does the grain direction affect the result? How can you sew close enough to the cord without catching it? By the end of this guide, you'll be able to recognise piping, choose the right version for your project, and construct a clean edge with ordinary dressmaking tools.
What Piping Is and How It Works
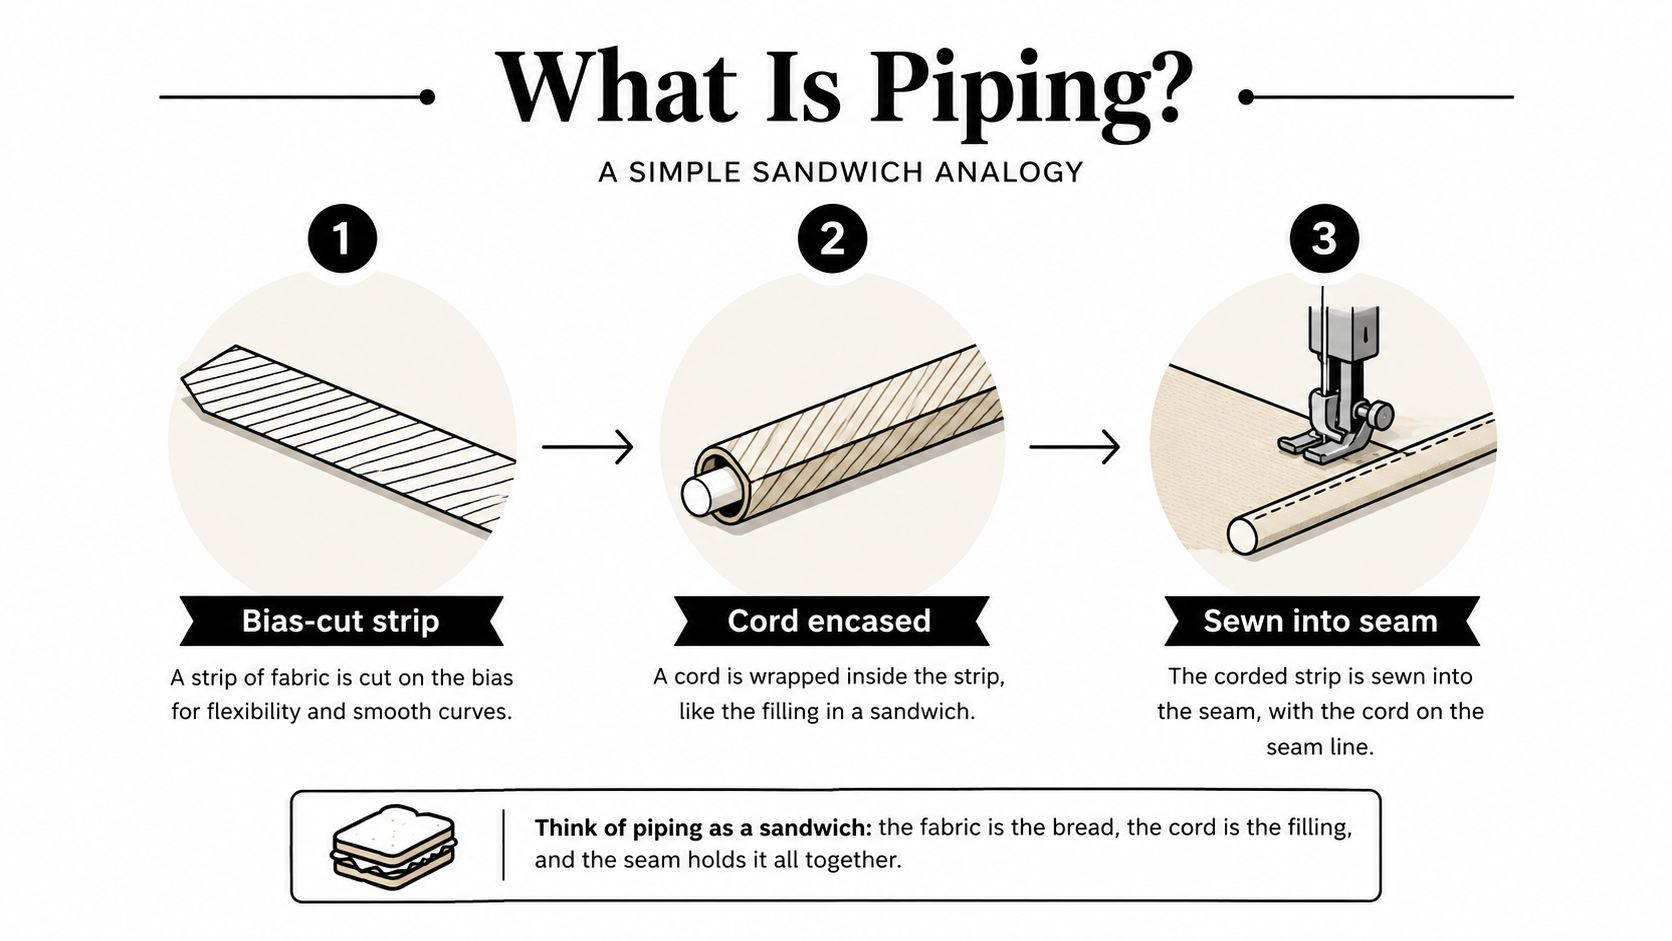
A cushion seam can look ordinary until a raised cord appears along its edge. That ridge is piping, a trim that gives the seam a clear outline while helping protect the fabric at the join. The construction is easier to understand as a fabric sandwich: the cord is the filling, the bias-cut strip is the wrapper, and two fabric pieces hold the covered cord between them.
Piping is a narrow folded strip of fabric, often cut on the bias and sometimes enclosing a cord, inserted into a seam or applied to an edge. It can define style lines and reinforce an edge. A common UK sewing starting point uses a bias strip around 3 cm, or 1¼ in, wide, for size 0 or 1 cord. Historical sewing guidance explains this construction and its two-stage method.
Why the bias makes a difference
The bias runs diagonally across the weave. Its extra flexibility helps the fabric follow curves instead of forming sharp folds. A straight-grain strip may sit neatly along a square cushion edge, then ripple around a rounded corner. For curved work, choosing the strip direction is part of the decision, not a minor cutting detail.
The cord's circumference sets the starting point for the strip width. Measure enough fabric to wrap around the cord, then add the seam allowance needed on both sides. A measurement that worked for one project may fail on another because cord thickness, fabric weight, and seam allowance have changed.
The two-stage sandwich
First, lay the cord along the centre of the strip, with the fabric's right side facing out. Fold the strip over the cord, align the raw edges, and stitch close to the cord using a zipper foot or piping foot. This forms the covered cord.
Next, place the prepared piping on the right side of one fabric piece. The cord should follow the intended seam line, while the raw edges point towards the fabric edge. Stitch it in place. Put the second fabric piece over it, right sides together, then sew the main seam close to the first stitching line. The piping is now enclosed between the layers.
This two-stage method explains why seam allowances can seem to betray you on curves. The first stitching line controls the cord's position, while the second line must sit close enough to hide that line without flattening the ridge. Small shifts become visible when the seam bends.
Piping and welting are sometimes used interchangeably. Piping usually means the complete corded trim, including its fabric covering. Welting more often refers to the visible ridge, although terminology varies across dressmaking, upholstery, and bag-making.
Common Types of Piping and Where Each One Shines
A cushion edge may need a soft rounded outline, while an unlined bag may need its raw seam hidden. The right piping depends on the finish you want, the fabric supporting it, and how much of the construction will remain visible.
Four useful choices
| Type | How It's Made | Best For |
|---|---|---|
| Single-fold piping | A fabric strip wraps around the cord once, with the raw edges enclosed in the seam | Cushions, bags, armchairs, and general home décor |
| Double-fold piping | The fabric folds over the cord twice, hiding the raw edge more completely | Unlined bags and exposed seams |
| Welt piping | Usually made from the garment fabric and shaped to sit relatively flush | Blazers, pocket facings, and traditional upholstery |
| Corded piping | A prominent round cord sits inside the covering and remains a visible feature | Statement cushions, structured bags, and decorative edges |
Single-fold piping is the practical starting point. The strip wraps around the cord, and the raw edges disappear into the joining seam. Use it when another fabric layer will cover those edges, such as around a cushion cover. It creates a visible ridge without adding extra folds.
Double-fold piping gives exposed construction a cleaner finish. The second fold covers the raw edge more fully, so it suits an unlined bag or a seam visible from the inside. The result is tidier, though the added fabric can make the edge slightly fuller.
Welt piping sits closer to the surface. It is often cut from the main fabric rather than made around a prominent cord, so it looks like part of the garment or project instead of a separate trim. On a blazer, it can define a pocket opening without creating a contrasting rounded ridge.
Corded piping is for situations where the edge should be noticed. A firm cord produces a sculpted outline on upholstery, structured bags, and decorative cushions. A matching cover gives a quiet border, while a contrasting one makes the shape stand out. Browsing different throw pillow colours and textures can help you decide which effect suits the project.
The names can overlap in commercial patterns and sewing shops. Check how the instructions use them, then judge the actual cord, covering, and finished profile rather than relying on the label alone.
Choosing Cord, Fabric and Tape for Your Project
Piping succeeds when the cord, covering strip, and base fabric agree with one another. A soft blouse fabric paired with a rigid upholstery cord will fight every curve. A heavy denim cover with a delicate cord may produce an edge that looks flat and underpowered.
Start with the cord diameter. Size 0 or 1 cord commonly pairs with a bias strip around 3 cm wide, while a thicker cord needs a wider strip to cover its circumference and preserve both seam allowances. The Stitchery's UK piping guidance explains why the strip width depends on the cord measurement plus the allowances, rather than on a universal pattern rule.
The fabric weight changes the feel of the result. Cotton cord has a natural, soft drape and can soften with washing, while polyester filler cord tends to keep a springier shape. Rattail and twisted cotton can suit fine decorative work, whereas upholstery projects usually need a firmer filler that holds a rounded profile.
| Fabric | Cord Size | Strip Width | Grain |
|---|---|---|---|
| Fine cotton blouse | Small, such as size 0 | Around 3 cm as a starting point, adjusted to the cord and allowance | Bias for curved or shaped seams |
| Jersey | Soft, narrow cord | Wide enough for the cord and allowances, with a flexible covering | Bias or a suitable stretch strip |
| Quilting cotton | Small to medium cord | Measure around the cord, then add both seam allowances | Bias on curves, straight grain on long straight edges |
| Denim cushion | Size 2 or 3 cord | Around 4 cm for the stated combination, checked against the actual cord | Bias for corners and curves |
| Home décor fabric | Firm upholstery filler cord | A wider strip matched to the cord circumference | Bias where the edge curves |
A UK sewing example pairs size 2 or 3 cord with a 4 cm bias strip for denim cushions, while fine cotton clothing may need a much smaller cord. Treat those combinations as practical starting points, not substitutes for measuring your own materials.
Tape and grain choices
Ready-made piping cord saves preparation time. Rattail is smooth and narrow, twisted cotton adds texture, and polyester filler cord gives upholstery a firm, rounded outline. On a long, straight cushion edge, straight-grain tape may be adequate because the strip doesn't need to turn sharply. Curves need the flexibility of bias.
The Pattern Pages piping tutorial also emphasises the zipper foot and the relationship between cord circumference and seam allowances. That geometry is what keeps the ridge centred instead of pulling towards one fabric layer.
Fabric rule: Match the softness of the cord to the movement of the fabric, and match the firmness of the cord to the structure you want at the edge.
How to Sew Piping Step by Step
Prepare a sample before cutting into your final fabric. Piping looks straightforward, but a small difference in strip width or stitching position can change how much cord shows.
Prepare the strip and cord
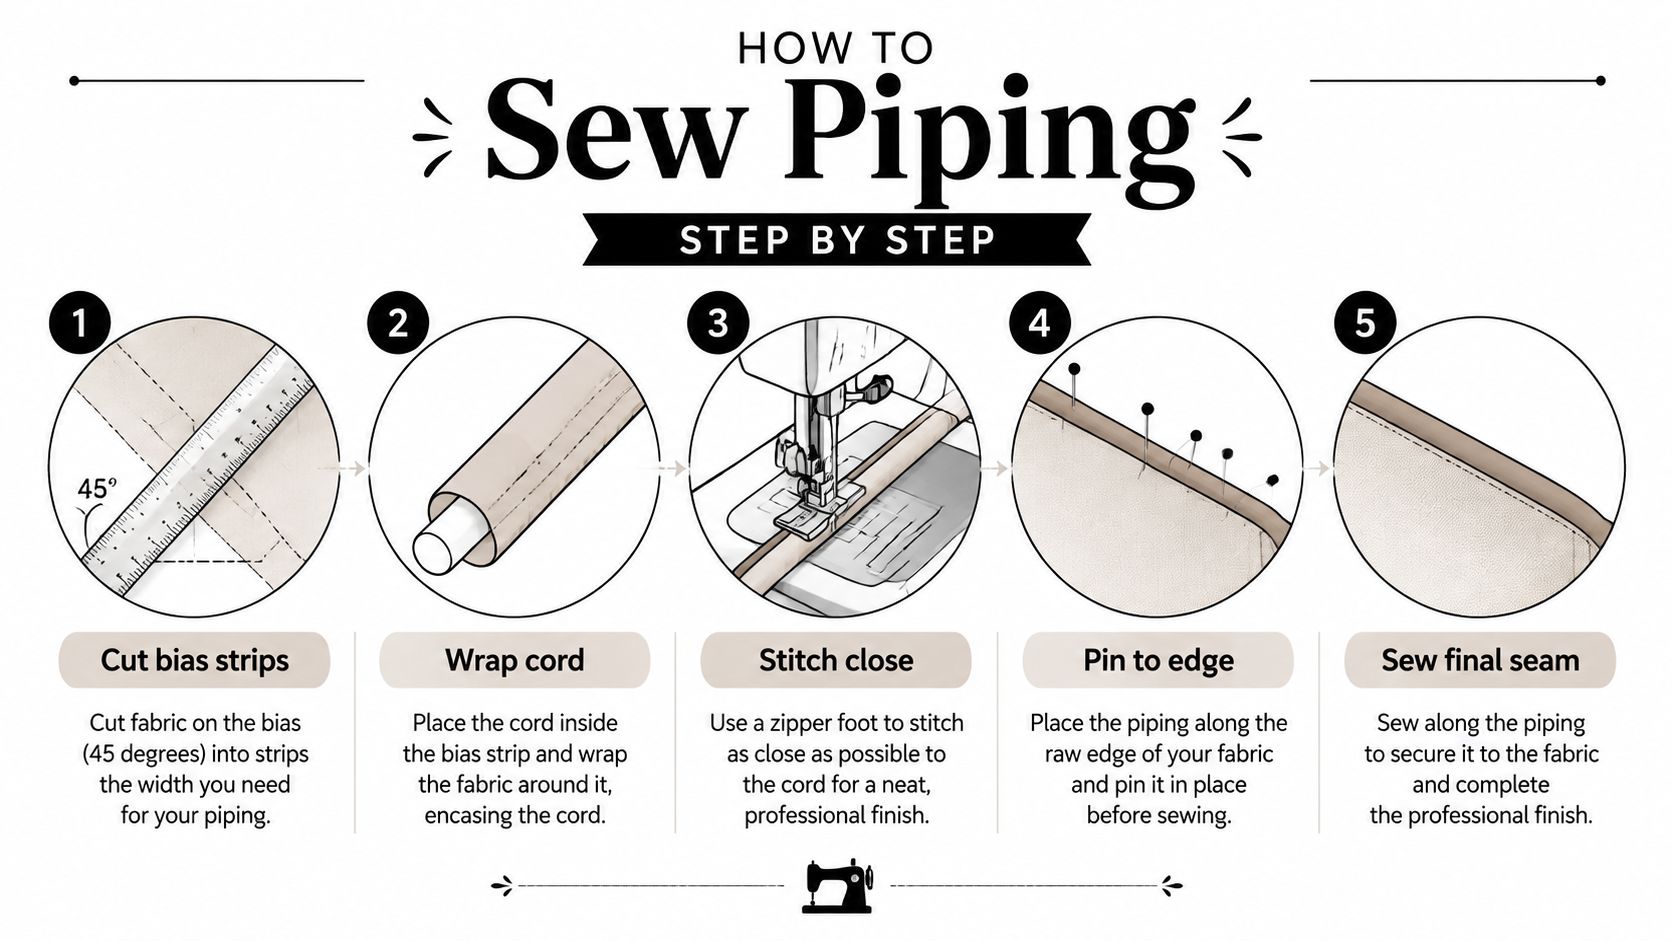
Cut the covering. Mark the true bias with a 45-degree line and cut strips across it for curved edges. For a square project with long straight sides, strip-cut tape on the straight grain can work. A UK tutorial gives a practical example using a 1½ in strip with 2 mm cord and a 5/8 in seam allowance. The example is shown in this piping technique guide.
Join the strips. Place the ends at a 45-degree angle, stitch the join, and press the seam open. Angled joins spread the bulk instead of creating one thick bump. Cut enough length for the project and leave extra so you aren't trying to join the final ends under pressure.
Wrap the cord. Put the cord down the centre of the strip, right side out, fold the fabric over it, and align the raw edges. Baste close to the cord with a zipper foot, piping foot, or a wide zigzag. Don't pull the strip tight, especially on bias. Little Black Duck's UK-made guide recommends joining the strip before inserting the cord and keeping the fabric relaxed during basting.
Attach and finish the seam
Pin the piping to the main piece. Place it on the right side of the fabric, matching the raw edges. Ease it around curves rather than stretching it into place. Clip the seam allowance, not the cord, so the strip can open slightly around the bend without weakening the ridge.
Stitch close to the cord. Use a zipper foot with its edge or flange against the covered cord. Sew an even line, keeping the needle close enough to the cord to prevent a gap. A 5 mm stitch line is one practical setting used in the specified construction sequence, but check it against your pattern's seam allowance and the actual thickness of your piping.
Sew the final seam. Place the second fabric layer over the piping, right sides together, and stitch the seam. Grade the seam allowances before turning if the layers feel bulky. At the ends, overlap the fabric neatly and trim the cord inside the allowance so the join doesn't form a hard lump.
Watch the bias: A piped curve becomes wavy when the sewer stretches the covering while attaching it. Let the fabric move naturally and use clips where pins distort the edge.
This video gives a useful visual reference for the order of wrapping, attaching, and sewing the final seam:
Skipped basting is another common source of uneven results. It lets the cord roll away from the needle, so the finished ridge may alternate between full and flat. Take the time to secure it first, then remove any visible basting stitches after the final seam is complete.
Self-Made Piping Versus Ready-Made Piping
Self-made piping takes longer, but it gives you control over the finish. You can cover the cord in the exact garment fabric, create a deliberate contrast, or choose a cord thickness that isn't available in a haberdashery pack. That makes it particularly useful when the piping must disappear into a seam or become a central design feature.
It also lets you control the fabric behaviour. A self-made strip from a soft cotton can blend into a blouse, while a strip from denim can support a structured bag. The trade-off is consistency. Cutting, joining, and wrapping a long length takes care, and a fabric with a bold print may need thoughtful placement at each join.
Ready-made piping is practical when the trim is mainly structural or the colour already works with the project. It can speed up cushion covers, bag linings, and straightforward home décor. Shop-bought versions may also offer predictable cord sizes and materials designed to handle routine use, although the colour and surface may look more generic than a carefully matched self-fabric trim.
A simple decision rule
- Choose self-made piping when you need an exact fabric match, a custom cord thickness, or a visible design detail.
- Choose ready-made piping when time matters, the trim will be covered or secondary, or an existing colour already complements the fabric.
- Combine both approaches by covering ready-made cord with self-fabric for a polished bag or jacket. The purchased cord supplies a consistent core, while your own fabric gives the finished edge a coordinated surface.
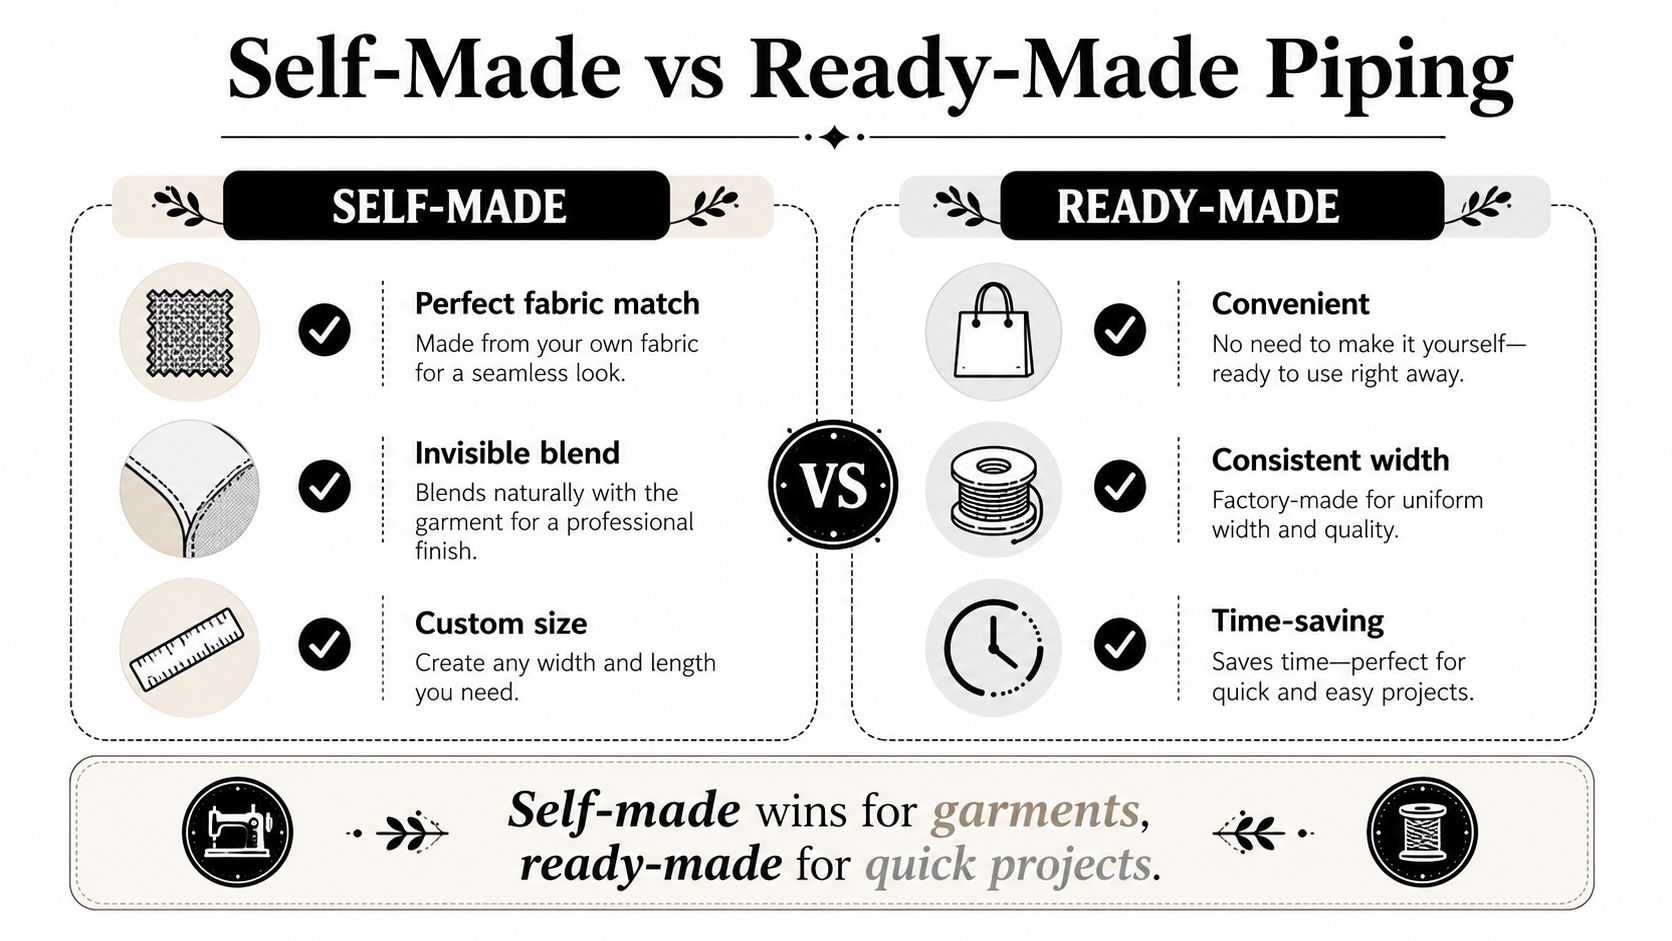
The choice isn't about which method is universally superior. It's about whether the project needs speed, an exact match, a particular level of durability, or a very specific shape.
Troubleshooting Wobbly, Bulky or Flat Piping
You finish the seam, turn the work right side out, and the piping has either vanished, bulged, or wandered. Read the shape before unpicking. The fabric usually shows which part of the sandwich went wrong.
A disappearing ridge often means the needle stitched too far from the cord. Fit a zipper foot or piping foot, move the needle closer, and keep the foot pressed against the cord. If the cord shows between the fabric layers, the first attachment seam may sit too far out, or the final seam may have missed its original stitching line.
Bulk needs a different remedy. At a corner, several seam allowances can stack like folded cards and stop the fabric turning neatly. Clip the allowances on curves, grade the layers to different widths, and trim the cord inside the seam allowance at joins. Keep the scissors away from the cord itself. Cutting it can weaken the shape and leave a thin section.
Read the evidence in the fabric
Puckering usually comes from a cord that is too thick for the fabric strip, or from stretching the covering while sewing. On a concave curve, the piping must compress rather than spread, so a slightly smaller cord may sit more smoothly. If the stitching is drawing the edge tight, reduce the top thread tension, but test that change on scrap fabric first.
A flat edge commonly means the needle missed the cord, or the strip could not follow the curve. A strip cut on the straight grain has less flexibility than one cut to suit the direction of the curve. Check the underside, measure the seam position, and look for twisting in the strip.
Unpick the final seam stitches first, then ease the piping free. Inspect both the cord and its covering for needle damage. Re-clip the seam allowance, re-baste without stretching the trim, and sew again with the foot positioned against the cord.
Before committing: Test the complete sandwich on a scrap that includes the same fabric layers, cord, thread, and seam allowance as the final project.
Piping has a long history beyond modern cushions and bags. It was used prominently in Regency clothing, including seams and collars, and historical sewing research traces its wider use across collars, cuffs, armholes, and princess seams.
More Sewing offers fabrics, haberdashery, sewing kits, and practical supplies for garments, bags, cushions, and piped trims. Visit More Sewing to choose a suitable fabric and cord, order sample swatches where useful, and practise on a small project.
