Guides
Sew On Trims: Pro Techniques for Flawless Projects
You’ve finished the dress, pressed the seams, tried it on, and something still feels missing. The fit is right. The fabric is lovely. But it needs that last line of detail at a neckline, cuff, hem, placket or pocket edge that makes it feel intentional rather than merely finished.
That’s what sew on trims do so well. They can sharpen a simple shape, soften a crisp fabric, echo a print colour, hide a seam line, reinforce a design idea, or give a handmade piece the sort of polish people usually assume came from a shop.
Elevating Your Sewing with Beautiful Trims
Sew on trims have always carried that power. Before the Industrial Revolution, trims in the UK such as braids and laces were made by hand and were closely tied to wealth and status. Machine innovations changed that, and by the mid-Victorian era even modest home sewers could use dense trimmings as part of everyday making, turning trims from luxury markers into standard haberdashery details, as noted in the history of trim in sewing).
That history still matters when you choose a trim today. A narrow cotton lace on a summer blouse doesn’t just decorate an edge. It changes the mood of the garment. Grosgrain can give a project a refined look. Velvet ribbon can add weight and richness. A line of piping can turn a plain cushion or simple yoke into the focal point.
Sometimes the best way to understand trim is to look at an object where material and edging work together beautifully. A well-made luxury ethical linen accessory is a good reminder that trim isn’t an afterthought. It’s often the detail that gives the piece its character.
What trims do best
Some trims are mainly decorative. Others are structural.
Ribbon adds colour definition, covers joins, and frames panels neatly.
Lace softens hems, sleeves and necklines, especially on cotton lawn, voile and viscose.
Braid suits jackets, bags, home furnishings and folk-inspired details.
Piping gives shape to seams and edges.
Fringe and pom-pom trims bring movement, which works particularly well on cushions, capes, festival wear and children’s makes.
Practical rule: If a project feels flat, don’t immediately add more fabric detail. Try one well-chosen trim first.
The difference between a trim that looks professional and one that looks awkward usually comes down to preparation, placement and stitch choice. That’s where most beginners come unstuck. They buy a lovely trim, attach it straight from the packet, and only later discover puckering, twisting, bubbling or colour transfer.
A good result isn’t about using the fanciest trim. It’s about matching the trim to the fabric, pre-treating both properly, and sewing with a method that respects how each one behaves.
Essential Preparation Before You Sew a Stitch
The neatest trim work starts before the machine is switched on. If you skip the prep, you’ll spend the sewing stage trying to correct problems that were avoidable.

Gather the right tools first
You don’t need a huge kit, but the basics matter.
A Microtex needle is my first choice for fine ribbon, delicate lace, lightweight cottons and closely woven viscose. It pierces cleanly and is less likely to snag a shiny or tightly woven trim. For sturdier cotton braids or medium-weight garment fabrics, a standard universal needle usually works well.
Presser feet make a bigger difference than many people realise. Keep these close by:
Zipper foot for piping, pom-poms, chunky braid and any trim with raised edges.
Edge-stitching foot when you want an even line along ribbon or braid.
Walking foot if the base fabric and trim feed at different speeds.
Open-toe foot for visibility when topstitching decorative trims precisely.
Useful extras include Wondertape, tailor’s chalk, fine glass-head pins, a seam gauge, and a press cloth. Wondertape is especially handy when pinning would distort a narrow trim or leave visible marks.
Pre-shrinking isn’t optional
This is the part many people rush, and it’s the part that saves projects.
A 2025 UK Sewing Guild survey found that 42% of hobby sewists reported project-ruining puckering from attaching unshrunk trims to pre-washed fabrics, and 28% of those projects were abandoned, according to Kovi Fabrics’ trim guide reference. That lines up with what I see at the cutting table all the time. The trim looked perfect before washing. Afterwards, the fabric relaxed one way, the trim another, and the whole area rippled.
Treat the trim and the fabric as one system. If they won’t behave together in the wash, they won’t behave in the garment.
How to test compatibility properly
Don’t just pre-wash the main fabric and hope for the best. Test them together.
Try this workflow:
Cut a decent scrap of your fabric
Use enough to mimic the actual project. A tiny offcut doesn’t tell you much.Prepare the trim the way you’ll care for the garment
Wash sturdy trims gently in lukewarm water. Put delicate lace or narrow decorative trim in a mesh bag, or slip it inside a sock if you’re worried about tangling.Dry both as they’ll be dried later
If the finished garment will be air-dried, air-dry the test. If you plan to press with steam, do that too.Sew a sample
Attach the trim to the scrap using your intended stitch, thread and needle.Wash the sample again
Then inspect for rippling, twisting, colour bleed, edge curl, or shrinkage mismatch.
What to look for on the sample
A test swatch tells you much more than whether the stitch looks pretty.
| Check | What it means |
|---|---|
| Puckering after drying | The trim and fabric are shrinking or relaxing differently |
| Wavy edge while sewing | You’re stretching one layer as it goes under the foot |
| Colour transfer | The trim dye may not be stable enough for the fabric |
| Stiff ridge | The trim is too heavy for the cloth |
| Collapsed drape | The trim is overwhelming a soft fabric |
If you’re sewing with deadstock, this step matters even more. Deadstock fabrics are often beautiful and unusual, but they can vary in finish, fibre blend and previous storage conditions. A trim that behaves nicely on quilting cotton may look completely wrong on washed viscose twill or a fluid Tencel blend.
Marking and pressing before attachment
Accurate placement prevents that homemade wobble. Mark both sides of centre fronts, cuffs, hems and seam lines before you attach anything. On symmetrical garments, check from several points rather than trusting one measurement.
Then press the fabric so it’s flat and stable. Don’t try to apply trim onto rumpled cloth. If the base fabric isn’t settled, your trim line won’t be either.
A trim should enhance the fabric, not fight it. Preparation is where you find out which one it wants to do.
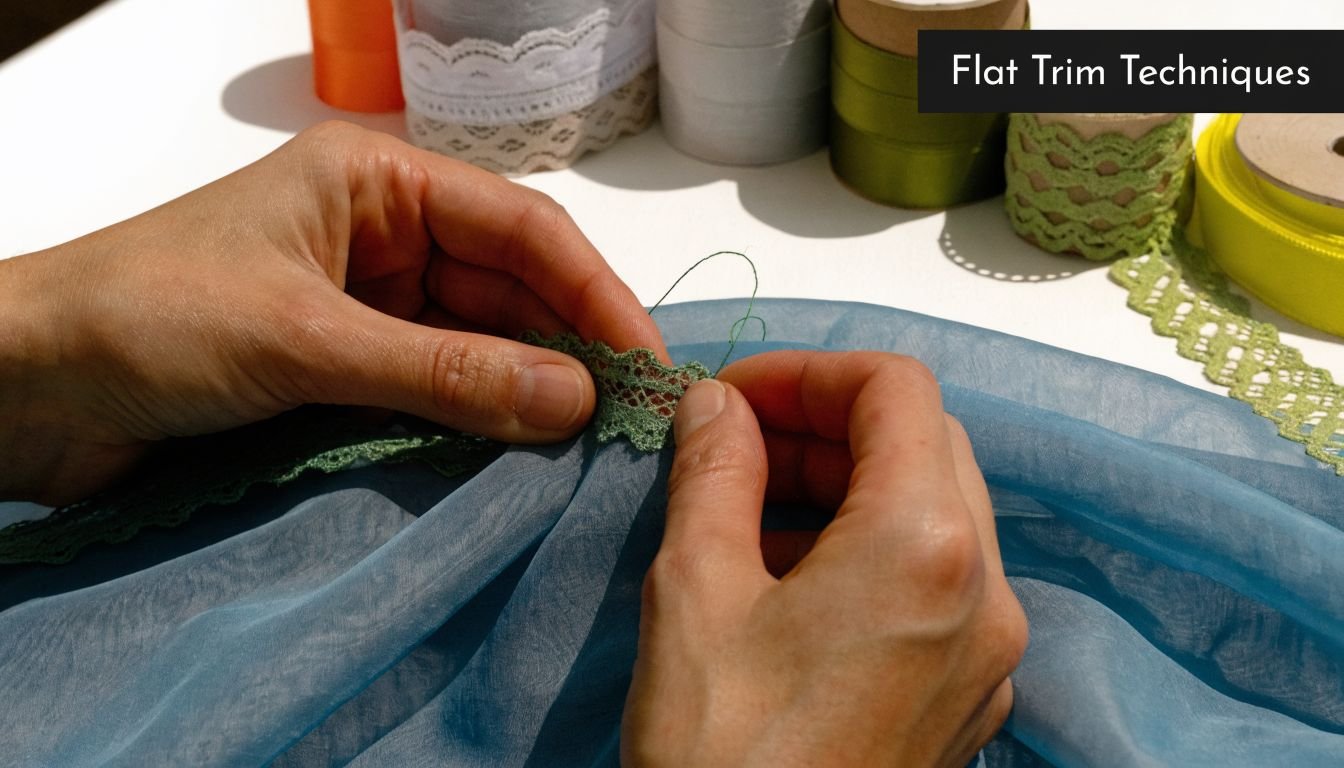
Mastering Flat Trims like Ribbons and Lace
Flat trims are the easiest place to build confidence because they’re visible, useful and forgiving once you understand how each type behaves.
Sewing ribbon cleanly
Ribbon looks simple, but shiny ribbon in particular shows every mistake. If the line wobbles, you’ll see it immediately.
For satin ribbon, use a sharp needle, fine thread and a slightly longer straight stitch than you’d use for regular seaming. The longer stitch helps the ribbon lie smoothly instead of perforating it too densely. I also like to reduce presser foot pressure if the machine allows it, especially on lightweight fabric.
Good uses for ribbon include:
Waist seam detail on dresses where a narrow ribbon frames the join
Pyjama piping substitute when you want contrast without making piping
Neckline edging on simple shell tops
Inside waist stays or hanging loops where a neat woven tape is practical as well as decorative
For the cleanest finish at the ends, fold the raw end under before stitching, or tuck it into a seam allowance if the pattern gives you the chance. Chopping ribbon and sewing across it often looks abrupt.
Cotton lace and insertion lace
Cotton lace is more forgiving because the texture hides stitches well. It suits summer garments, children’s wear, aprons, nightwear and heirloom-style details.
Use a narrow zigzag or a very careful edge stitch, depending on the lace structure. If the lace has a clear woven edge, edge stitch close to it. If the edge is scalloped or airy, a narrow zigzag can disappear into the texture better and lets the trim sit more naturally.
Here’s where beginners often make the wrong choice. They treat all lace the same. They don’t.
Flat edging lace works well at hems, sleeve edges and necklines.
Insertion lace is designed to sit between two fabric edges, so it looks best when the garment has a seam or slit to receive it.
Stretch lace belongs on knit garments or lingerie details, not on a stable woven unless you consciously let it rest with no tension.
If the lace already has visual delicacy, your stitching should stay quiet. Heavy topstitching usually spoils it.
For a blouse hem, I’d usually press the hem first, then apply the lace so the top edge covers the fold line neatly. For insertion lace on a yoke or sleeve panel, sew the lace between two narrow fabric edges, trim away excess seam allowance behind if needed, and press gently from the wrong side with a cloth.
Braid and decorative woven trims
Braid gives crisp definition. It’s excellent on jacket fronts, cuffs, bag flaps, skirt hems and folk-style details on plain linen or wool blends.
The trick with braid is straightness. If you eye-ball it, it will drift. Mark a guideline. Baste if needed. Then edge stitch with an edge-stitching foot or sew one line down each side for balance.
Mitred corners make braid look finished rather than forced. On a square cuff or pocket:
Sew towards the corner and stop short.
Fold the braid at an angle to form a neat mitre.
Finger-press the fold.
Continue stitching along the new direction.
Tack the mitre carefully if the braid is thick or springy.
That little extra handling is worth it. A folded, planned corner looks neat. A bent braid corner looks bulky.
A visual demonstration helps when you’re working through these methods on your own machine:
Best pairings for flat trims
Here’s a quick way to think about combinations:
| Trim | Best fabric matches | Watch out for |
|---|---|---|
| Satin ribbon | Lawn, poplin, smooth viscose, occasion fabrics | Needle snags, visible wobble |
| Cotton lace | Cotton voile, linen blends, chambray | Shrinkage, scallops flipping |
| Insertion lace | Fine cottons, heirloom projects, yokes | Uneven seam allowances |
| Braid | Denim, wool blends, jacket cloth, canvas | Bulk at corners, stiffness |
Flat trims reward patience. Sew slowly, keep your hands relaxed, and guide the trim without pulling. If you tug it into place, it may look fine on the table and crooked once worn.
Attaching Dimensional Trims like Piping and Fringes
Dimensional trims ask a bit more of your machine and your handling, but they give dramatic results. Through them, a plain project starts to look custom.
Piping for structure and definition
Piping works because it creates a raised boundary. You see it on collars, princess seams, pocket flaps, pyjama edges, cushions and bag panels. It’s one of the best trims for giving shape to a simple design.
If you’re making your own piping, cut bias strips from your fabric, wrap them around piping cord, and stitch close to the cord with a zipper foot. Bias matters because it lets the piping curve around necklines, armholes and corners more smoothly than a straight-cut strip.
When attaching piping into a seam:
Baste the piping to one fabric layer first so it can’t shift when you sew the full seam
Clip the seam allowance of the piping on curves so it spreads and lies flat
Start and stop carefully at seam intersections to reduce bulk
Use the previous stitching line as a guide when sewing the final seam, getting as close to the cord as possible
A common problem is a flat-looking result where the piping disappears into the seam. Usually that means the final seam line drifted too far from the cord. The zipper foot fixes much of that because it lets you sew close without riding up on the bulk.
Turning corners and managing bulk
Corners are where piping either looks sharp or homemade.
On a cushion or boxy bag flap, don’t force the piping around the turn in one stiff movement. Stop near the corner, clip into the piping seam allowance, pivot, then arrange the next side so the cord sits right at the edge. The clips let the seam allowance spread without creating a hard lump.
For thicker fabrics such as denim or furnishing cotton, trim away excess seam allowances at intersections. If several seam layers, piping tape and facing all meet in one spot, grade them. That means trimming each layer to a slightly different width so they don’t stack into one heavy ridge.
A bulky corner rarely needs more pins. It needs less fabric trapped inside it.
Fringe and pom-pom trims
Fringe and pom-poms add movement, which is lovely on cushions, craft projects, capes, children’s wear and playful home décor. They also tangle, catch and shift if you don’t secure the header tape properly.
The header tape is the part that does the work. Sew along that tape first, not through the decorative hanging section. I usually baste it to the right side of one layer, keeping the fringe or pom-poms facing inward if they’ll be caught in a seam. Then I add the second layer and stitch the main seam over the top.
That order matters because it gives you control. If you try to catch everything in one pass without basting, the trim often creeps, and the hanging part gets trapped unevenly.
Where these trims work best
Different dimensional trims suit different jobs.
Piping is ideal for collars, pyjama sets, cushion edges, yokes and pocket openings.
Fringe shines on cushions, shawls, costume details and soft furnishings.
Pom-pom trim works well on nursery items, casual summer accessories and playful hemlines.
Corded braid can sit between seam layers much like piping but with a more decorative surface.
If your machine struggles over the trim, don’t push harder. Hand-walk the needle over the thickest point if needed, or use a hump jumper or folded scrap behind the foot to keep it level as it climbs over the bulk.
The best dimensional trim work doesn’t just look decorative. It sits flat where it should, turns cleanly at corners, and hangs freely where movement is the point.
Troubleshooting Common Trim Application Problems
Most trim problems aren’t random. The stitch line tells you what went wrong if you know how to read it.

Puckering under the trim
You might assume the machine tension is always the culprit. Often it isn’t. More often, the trim was pulled during sewing, or it doesn’t behave like the base fabric.
Try these fixes:
Let the trim rest naturally as you sew. Don’t stretch it to match the fabric edge.
Use a walking foot if one layer feeds faster than the other.
Pin or baste more densely on slippery or shifting combinations.
Test on a scrap first if the fabric is soft and the trim is firm.
If the puckering appears only after washing, the problem was compatibility, not stitching.
Wavy or wonky stitch lines
This usually comes from trying to steer by eye on a narrow trim. On ribbon and braid, that’s risky because the straight edge highlights every little drift.
A better approach is to choose one reference and commit to it. Follow the trim edge with an edge-stitching foot, or mark a placement line on the fabric and stitch to that line consistently.
Trim stretching out of shape
Stretch lace and knitted trims can grow while you sew them. Then they bounce back unevenly and look rippled.
Use these habits:
Support the full length of the trim so it isn’t hanging and stretching under its own weight
Reduce presser foot pressure if your machine allows it
Baste by hand on especially delicate areas such as necklines
Press, don’t iron back and forth when finishing, especially on synthetic trims
If a trim has any give, your job is to guide it, not tension it.
Ends fraying or lifting
Trim ends often give away rushed work. If the middle looks lovely but the ends are raw, curling or thick, the whole finish suffers.
Depending on the trim, you can:
Turn the end under before stitching
Tuck it into a seam
Overlap and fold neatly on circular applications
Use a fray-preventing liquid on woven trims that unravel easily
Dye bleed and marking issues
Bright trims, dark trims, and novelty trims deserve caution. If you’re unsure about colour fastness, test first on a scrap of the actual fabric. Don’t rely on appearance. Plenty of trims feel dry and stable until they meet water and heat.
For visible marks left by chalk, tape or pins, always test on an offcut. Some delicate fabrics hold marks more stubbornly than expected, especially if they have a brushed or coated surface.
A good sewing habit is to diagnose before unpicking. Ask what the trim is doing physically. Is it shrinking, stretching, shifting, bleeding, fraying, or adding bulk? Once you identify the behaviour, the fix becomes much clearer.
Finishing Touches and Caring for Your Trimmed Garment
Trim work only looks professional if it lasts. A beautiful edge that frays after one wash or twists after one wear isn’t properly finished.
Start with the ends. On woven trims, turn under raw edges where possible or bury them in a seam. On bulky trims, reduce thickness before folding so the end doesn’t create a hard bump. If the trim frays quickly, a small amount of fray-preventing liquid can help, but use it sparingly and test first because it can darken some materials.
Care that protects the work
After sewing, press thoughtfully. Use a press cloth on delicate trims, and lower the heat for synthetics, sequins, velvet or anything with surface texture. Pressing sets the stitches and settles the trim into the garment, but excessive heat can flatten or distort it.
For laundering, gentler is usually better:
Turn the garment inside out to reduce abrasion
Use a mesh laundry bag for delicate trims
Choose a cool, gentle wash
Skip aggressive tumble drying
Air-dry flat or on a hanger, depending on the garment shape
If the trim is especially delicate, hand-washing may be the safer option. And when in doubt, care for the garment according to the most delicate component, not the strongest one.
A trimmed garment asks for a little more care, but it also gives more back. It keeps its shape, holds its detail, and still feels special when you pull it from the wardrobe months later.
If you’re planning your next project and want fabrics, haberdashery, trims, or a beginner-friendly kit from a UK sewing specialist, have a look at More Sewing. It’s a dependable place to find quality materials for everyday dressmaking and the finishing details that make handmade clothes feel considered.