Guides
Asymmetrical Dress Patterns: A How-To Guide for Sewists
You spot a dress with a dipping hem, one bare shoulder, or a panel that twists softly across the body, and the first reaction is often admiration followed by hesitation. The shape looks expensive. The pattern work looks mysterious. It can seem like the sort of garment that belongs on a studio stand in a fashion school, not on your cutting table at home.
That hesitation makes sense. Asymmetry asks more from a sewist than a standard shift or a straight skirt. You're not only thinking about fit, you're thinking about balance, hang, grain, and what the fabric will do once it leaves the table and meets a moving body. The good news is that asymmetrical dress patterns aren't magic. They're a set of workable methods, and once you understand which method suits which fabric, they become far more approachable.
Embracing Asymmetry in Your Sewing Projects
A lot of sewists come to asymmetry after falling for one dramatic detail. Sometimes it's a one-shoulder evening dress. Sometimes it's a hem that kicks longer at one side. Sometimes it's a soft drape that looks almost accidental, though it absolutely isn't.
The mistake is thinking the whole garment has to be complicated. In practice, one asymmetrical feature is often enough. A simple sheath with an uneven neckline can look sharper than a dress overloaded with ruffles, cut-outs and angled seams all at once. Good asymmetry has control behind it.
One frustration comes up again and again with asymmetrical dress patterns. Plenty of tutorials assume a fairly standard block and stop there. That leaves many sewists to work out their own bust shaping, hip balance, and dart placement, especially when the style line cuts across the body in an unusual way. A 2025 UK Sewing Guild survey of 1,200 members found that 62% of respondents, predominantly plus-size with an average UK 16-24, struggle with fit alterations for asymmetrical hems and necklines because instructions rarely include bust and hip dart guidance specific to UK measurements, according to the UK Sewing Guild survey summary.
What asymmetry actually asks you to manage
The work usually comes down to three things.
- Balance on the body. A hem can look elegant on paper and still pull strangely once worn.
- Fabric response. A crisp cotton behaves very differently from a Tencel twill or slinky jersey.
- Visual proportion. One angled line can lengthen the figure, widen the shoulder line, or draw attention to the waist depending on where it lands.
Practical rule: Start with one asymmetrical decision, not three. Change the hem, or the neckline, or the drape first. Then assess whether the garment needs anything else.
Where many home versions go wrong
The most common disappointment isn't that the garment looks “too homemade”. It's that the shape doesn't settle. The neckline gapes, the hem drops unevenly after hanging, or a draped panel collapses because the cloth is too stiff or too limp for the idea.
That's why the strongest results usually come from pairing a modest pattern change with a very deliberate fabric choice. A one-shoulder line needs support. A cowl needs fluidity. A high-low hem needs a cloth that either holds its edge with confidence or falls cleanly without wobble.
Asymmetry rewards a measured hand. Once you treat it as a problem of shape plus cloth, it becomes much easier to sew well.
Your Asymmetry Toolkit and Fabric Primer
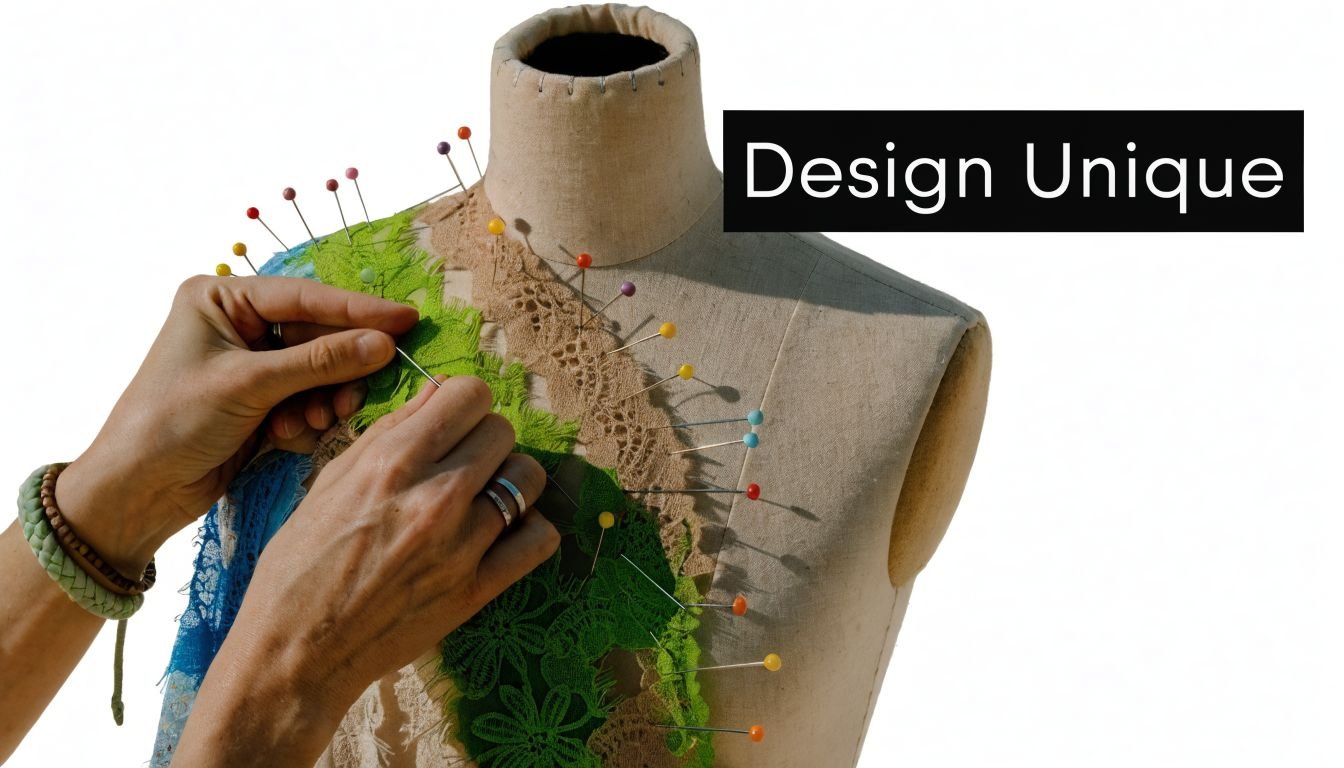
Before any pattern alteration begins, clear the table and gather tools that help you draw, smooth, and compare one side against the other. Asymmetry is less forgiving of casual marking. A wobbly line that would disappear in a gathered skirt can look glaring in a clean one-shoulder bodice.
The tools worth having beside you
I wouldn't draft asymmetrical dress patterns without these:
- Pattern paper with room to breathe. Large sheets matter because you need to see the whole sweep of a hem or neckline, not a cramped fragment taped together.
- A long ruler and a set square. These keep grainlines honest while you manipulate style lines.
- French curves. Essential for smoothing transitions where a shoulder, neckline or hem changes direction.
- Tracing wheel or pencil in more than one colour. Mark the original line, then the altered one. It saves confusion fast.
- Dressmaker's stand or mannequin. Particularly useful when checking whether an uneven line looks intentional from all angles.
- Calico for a toile. Paper can't tell you whether a shape twists, rides up or collapses.
The point isn't to own every gadget. It's to remove guesswork where asymmetry tends to go wrong.
Fabric first, pattern second
Fabric choice is where many asymmetrical projects are won or lost. The same pattern can look architectural in one cloth and defeated in another.
Use structure when you want the shape to read clearly. Cotton lawn, crisp poplin, light denim and stable jacquard all show an angle well. Use drape when you want movement. Viscose, Tencel blends, silk-look fabrics and supple jerseys create softer asymmetrical effects.
A useful way to decide is to ask one question: do you want the eye to notice the line, or the movement? If the line matters most, choose a fabric with body. If the movement matters most, choose a fabric that falls.
| Asymmetrical Style | Recommended Fabric | Key Property | Best For |
|---|---|---|---|
| Angled or high-low hem | Viscose challis or Tencel blend | Fluid drape | Soft movement and swing |
| One-shoulder bodice | Stable jersey or ponte | Recovery and support | Close fit without slipping |
| Sculptural neckline | Cotton lawn or poplin | Crisp shape retention | Clean edges and defined lines |
| Draped overskirt or wrap panel | Jacquard or soft twill | Body with movement | Folds that hold but don't stiffen |
| Casual asymmetric day dress | Light denim or chambray | Controlled structure | Everyday wear with sharper lines |
Why deadstock is worth the effort
Deadstock is especially useful for asymmetrical dress patterns because unusual designs often look better in fabrics with a bit more character than standard basics. That could mean a richer drape, a more interesting surface, or a designer-quality handle that helps the garment read as intentional.
Recent figures in the UK Fashion & Textile Association's 2025 Sustainability Report state that deadstock usage rose 41% in UK sewing projects over the last year, while 78% of home dressmakers still struggle to source it. That rings true in the workroom. Good deadstock can be brilliant for asymmetry, but only if you can get enough, and if you know how it behaves before cutting.
A beautiful asymmetrical dress in the wrong fabric doesn't look avant-garde. It looks unresolved.
When choosing cloth, test these things first: does it spring back when stretched, does it collapse when folded on the bias, and does the wrong side matter if the design flips or reveals it? Those answers matter as much as the pattern lines.
Drafting Asymmetrical Hems from a Basic Block
If you want the easiest route into asymmetrical dress patterns, start at the hem. It changes the silhouette quickly, it teaches you how fabric hangs, and it doesn't usually require the support engineering of an altered bodice.
The most reliable method is slash and spread. It's practical, visual, and easy to adjust after a toile. In UK dressmaking, the method has a 92% success rate among intermediate sewists, and experts also recommend 0.5cm ease asymmetry to prevent torque, especially in bias-cut viscose jerseys that are prone to 15% distortion, according to this guide to drafting an asymmetrical hem.
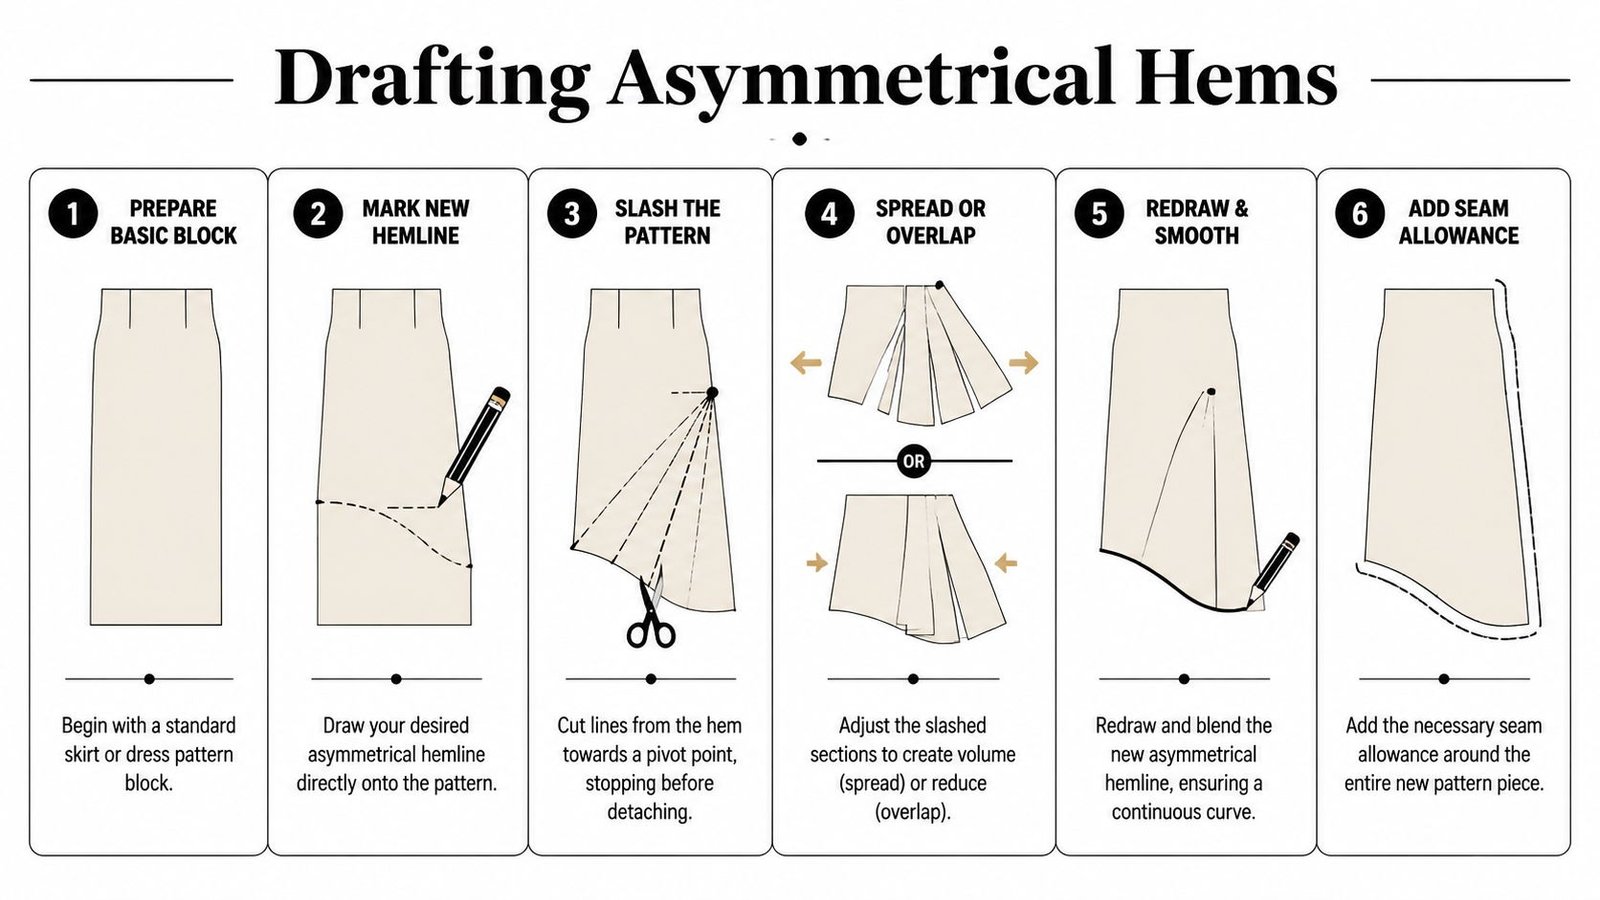
A dependable slash and spread sequence
Start with a basic A-line skirt or dress block. Trace it cleanly. Don't cut the original.
Mark the base hem level
Set your starting hem around knee length if you want a wearable test version. A moderate length makes it easier to judge proportion before committing to drama.Add vertical slash lines
Mark from hem to waist at centre front and at evenly spaced points across the width. Keep them straight so you can control the spread accurately.Cut and hinge
Slash from the hem upward, leaving a hinge at the waist. That hinge keeps the waistline stable while the lower portion opens.Spread where you want drop or flare
For an oval dip, spread more at the front and slightly less at the back. For a sharper angled hem, spread on one side and keep the opposite side quieter.Redraw the hemline
Use a French curve and draw one smooth line. Many home drafts often fail at this stage. If you connect points mechanically, the curve often develops awkward corners.True side seams and add allowances
Walk the seams, smooth joins, and add seam and hem allowances only after the shape is final.
What works and what doesn't
A gentle asymmetrical hem usually looks more expensive than an extreme one unless the fabric can support the drama. On a soft viscose, a small dip can look graceful. On a stiffer cloth, the same dip may stick away from the leg and feel fussy. Match the depth of the design to the weight and drape of the cloth.
These are the errors I'd watch for first:
- Unblended curves. These create little points or “dog-ears” instead of a clean sweep.
- Grainline neglect. If the panel swings too far off grain, the hem may drop after hanging.
- Too much spread too soon. Large additions can overwhelm a simple skirt block and distort side seams.
Smooth the line until it looks boring on paper. Once sewn, that “boring” line usually becomes elegant.
A practical fitting habit
Before cutting your final fabric, hang the toile overnight if any part of the altered hem drifts toward the bias. Then re-level it on the body, not just on a hanger. Asymmetry has to be judged in motion and from multiple viewpoints.
If you're sewing for fuller hips or thighs, check the side view carefully. A hem that looks balanced from the front can kick up at the fullest point. The fix is usually subtle. You add or remove a little depth where the body needs room, then re-smooth the curve.
That's the useful thing about hem asymmetry. It teaches precision without asking you to rebuild the whole dress.
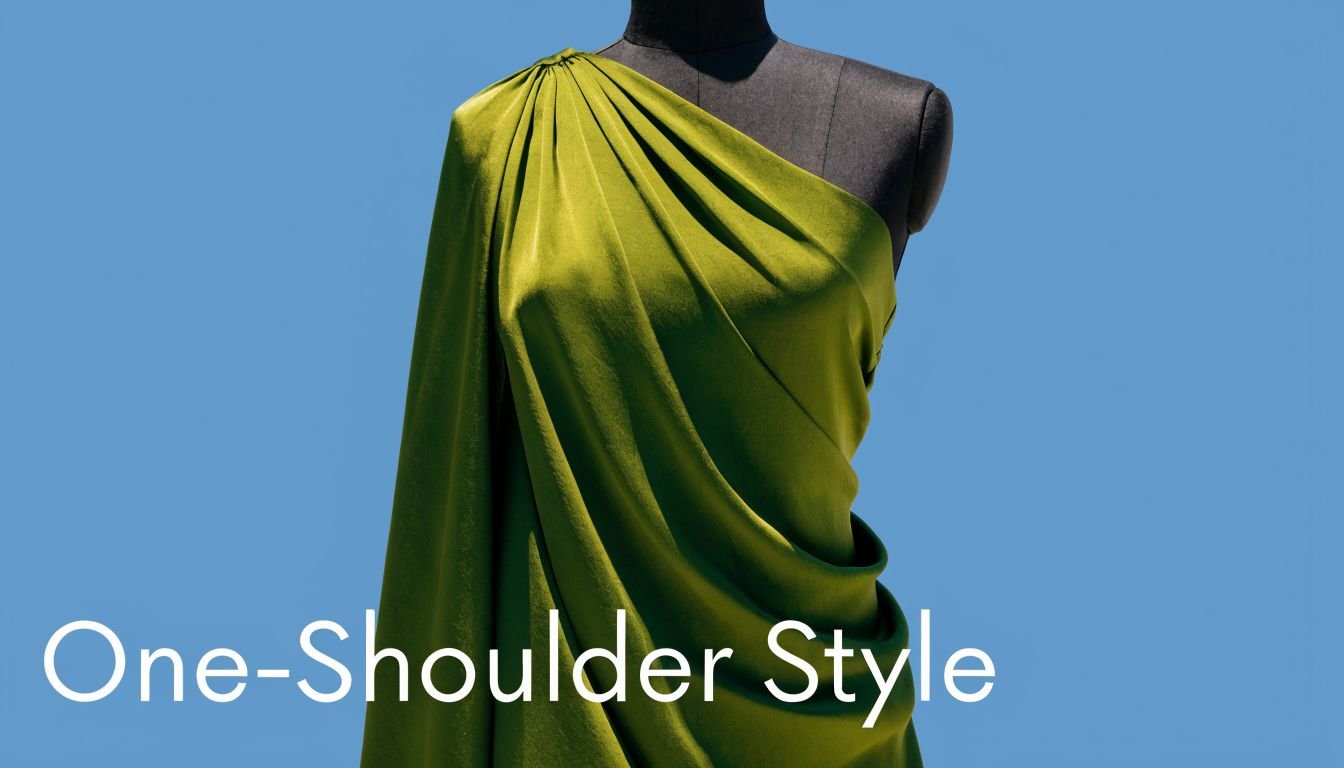
Creating Stunning One-Shoulder Necklines
One-shoulder styles look clean and confident, but they need more engineering than they appear to. The neckline must sit close, the unsupported side must stay in place, and the whole bodice must feel intentional rather than precarious.
For one-shoulder asymmetrical bodice patterns, UK fashion students report 87% success using pivot-and-slide manipulation, while 38% of manual drafters encounter gaping necks. The same source notes that 2cm stay-tape and correct negative ease are key fixes, as shown in this one-shoulder drafting demonstration.
Building the neckline from a bodice block
Begin with a fitted front and back bodice. Mark the shoulder point you'll use as the pivot. Then shift the neckline diagonally to create the one-sided effect.
The broad method looks like this:
- Trace the front and back separately so you can see exactly where the new line crosses the body.
- Slide the front shoulder inward to create the off-shoulder shape rather than chopping the strap away.
- Extend and rebalance the back shoulder so the garment still anchors properly.
- Redraw the armscye carefully. The curve has to support movement, not just look neat on paper.
- Mirror the lining correctly. One of the easiest mistakes is cutting the support layers as if the bodice were symmetrical.
This is one of those jobs where accuracy pays off immediately. A few millimetres matter at the top edge.
The support details that make it wearable
Most disappointing one-shoulder dresses fail for simple reasons. The neckline is too loose, the edge stretches while being sewn, or the fabric chosen has no recovery.
Use these finishing habits:
- Apply stay tape at the neckline edge before construction if the cloth is unstable.
- Choose a fabric with some return for close-fit versions. Stable jersey and ponte are especially forgiving.
- Add support inside the seam allowance with clear elastic if the dress is fitted and heavy.
- Test the motion. Lift the arm, sit down, twist at the waist. If the neckline shifts now, it will shift more later.
Workroom note: A one-shoulder neckline should feel slightly more secure at the toile stage than you think it needs to. Wear relaxes things.
After you've mapped the basic line, this visual walkthrough is helpful for seeing how the shape translates from flat pattern to body:
Fabric choices that help instead of fight
The sleekest one-shoulder bodices usually come from fabrics that either hold the edge or hug the body. Ponte, stable jersey, denim with a bit of give, and firm crepe-backed knits are easier than slippery satins for a first attempt.
Soft, unstable cloth can work, but it often needs extra internal support. If you use a drapier fabric, consider a lining with more authority than the outer layer. The outside can float. The inside has to do the work.
For fuller busts, don't rely on the neckline alone to solve fit. Keep bust shaping in the pattern where it belongs, then build the asymmetry over that structure. When sewists skip this, the top edge often strains or collapses because it's being asked to shape and support at the same time.
Mastering Drapes Wraps and Fabric Folds
Some of the most beautiful asymmetrical dress patterns don't begin with a sharp line at all. They begin with cloth being persuaded into movement. A wrap crossing slightly off-centre, a panel that falls from one shoulder, or a skirt that spirals around the legs all belong to that family.
There's a long dressmaking history behind that idea. Asymmetrical styles gained traction in the UK in the 1870s, and designs by Maison Cécile Laisne included spiral-draped overskirts in ivory silk jacquard. By 1877, asymmetrical skirt patterns made up 18% of total dressmaking pattern sales from Butterick's London agency, as noted in this history of late 1870s asymmetrical style.
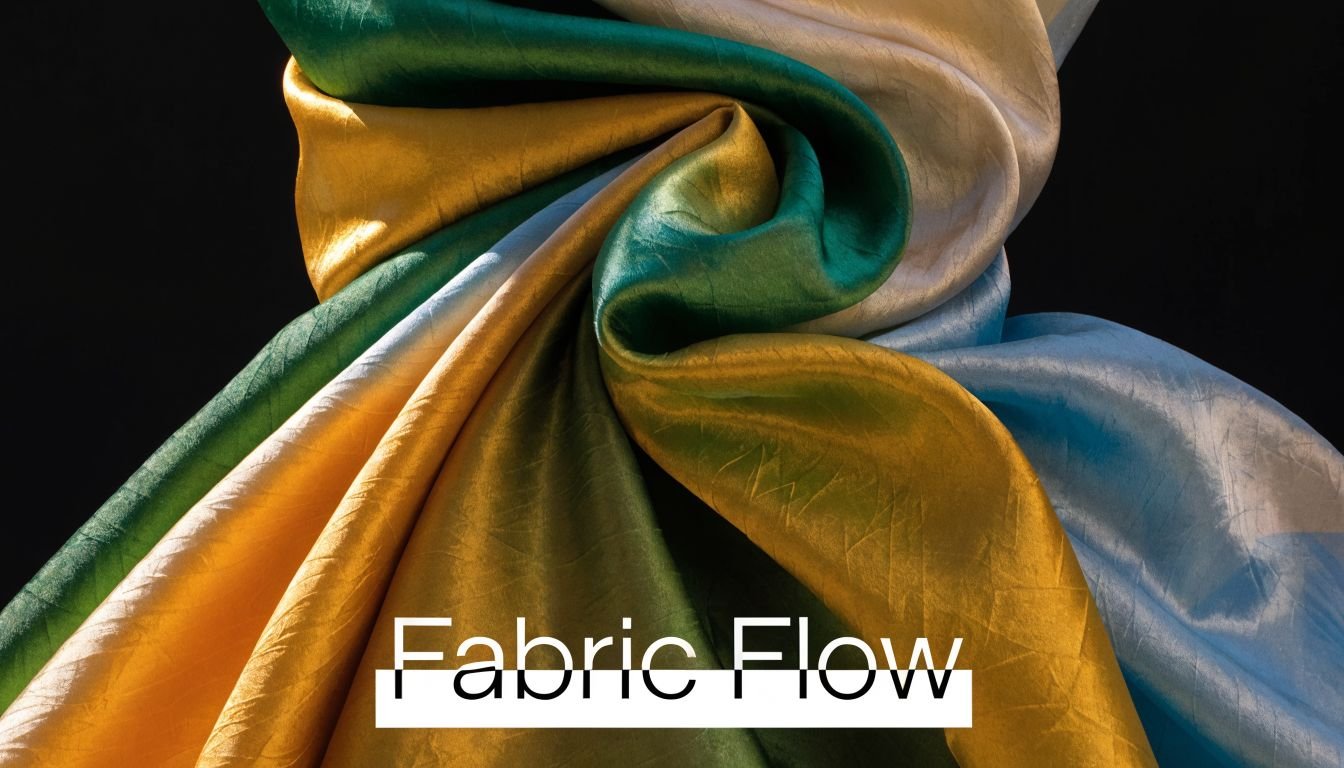
What drape demands from fabric
A draped style asks different questions than a drafted hem. It depends less on a clean ruled line and more on how the cloth bends, folds and falls.
Good candidates include:
- Tencel and viscose blends for soft wraps and waterfall effects
- Silk-look jacquards and supple twills for folds with a bit of body
- Fine jerseys for cowls and gathered one-sided details
- Light wool blends when you want drape without flimsiness
Bad candidates are fabrics that fight the intention. A rigid cloth won't form a graceful cowl. A fabric that's too limp may sink instead of drape, leaving the design looking tired.
Three draped effects worth trying
A practical way into draping is to add one manipulated area to a stable base.
The asymmetric cowl
Start with a simple bodice or knit top. Extend one side of the neckline and allow extra width so the cloth can collapse into folds. This works best in a fluid knit or soft woven cut with care. The cowl needs weight enough to hang, but not so much that it drags the neckline out of shape.
The wrap front
A true wrap can be drafted to cross slightly off-centre for a more interesting line. This is flattering because the diagonal breaks up the front of the body and lets you control where fullness sits. In a drapey fabric, the wrap softens the waist. In a firmer fabric, it reads sharper and more structured.
The spiral or cascade panel
Historical dressmaking is especially useful. A spiral-draped overskirt works because the panel is cut and mounted to encourage the eye to travel. In a modern dress, you can mimic that effect with a side panel, overskirt, or front extension that turns around the body instead of dropping straight down.
If you want better drape, stop flattening the fabric with the iron too early. Shape it first, then press only what needs control.
Use the stand, not just the table
Draped asymmetry is much easier to judge in three dimensions. If you're building folds directly on a mannequin, a good stand makes a real difference. Picjam's guide to professional mannequins is a useful reference for understanding what features are helpful when you're pinning, balancing and checking a garment from all sides.
One practical habit from the workroom is to pin the drape, walk away, and come back later. Fresh eyes catch whether a fold looks deliberate or merely accidental. Another is to photograph the stand from front, side and back. Asymmetry that flatters from one view but collapses from another usually needs redistributing rather than adding more fabric.
Finishing Touches for a Professional Look
The finish is where asymmetrical dress patterns either settle into elegance or betray every shortcut. Even a beautifully drafted garment can look unresolved if the hem ripples, the facing flips, or the draped section hasn't been stabilised where it needs it.
The first finishing decision is often the hem. Curved and bias-influenced edges rarely behave like a standard straight skirt hem. They stretch in handling, they grow while hanging, and they show every wobble.
Hemming uneven and curved edges cleanly
Different hems suit different fabrics.
- Narrow rolled hems work well on lightweight cloth with movement. They keep the edge light and don't interrupt the fall.
- Bias-faced hems are excellent on curves where you want a clean inside finish without forcing a deep turned hem to behave.
- Single turned hems can work on stable fabrics with modest asymmetry, especially if the edge isn't too sharply curved.
If the edge includes bias sections, let it hang before the final hem. Then mark it on the body or stand. Don't trust the cutting table to tell you where the dress ends.
Facings, linings and hidden support
Asymmetric necklines and wraps often need more internal discipline than they show on the outside. Understitch facings wherever possible. Tack them discreetly at seam allowances if the fabric is lively. If a draped section keeps trying to migrate, anchor it from inside at a strategic seam point rather than topstitching the life out of it.
This is also where hand finishing earns its keep. A few invisible stitches in the right place can hold a wrap, secure a facing, or tame a lining far more elegantly than another machine seam. For sewists who want to sharpen that side of their work, mastering finishing stitches for DIY kits is a handy refresher.
The best finishing on an asymmetrical garment is often the finishing you don't notice at all.
The toile is part of the design process
A toile isn't just a fit check here. It's a behaviour check. It tells you whether the hem swings, whether the neckline stays put, and whether the drape lands where you intended.
Use your toile to answer practical questions:
- Does the asymmetrical feature read clearly when worn?
- Does the garment stay balanced after sitting, walking and turning?
- Is the fabric choice helping the design, or merely surviving it?
A pattern can be correct and still not be right for the cloth. That's not failure. That's dressmaking.
Wearing the result well
Asymmetry doesn't need much styling. Usually it looks strongest when the rest stays simple. Let the line of the garment do the talking. Clean shoes, restrained jewellery, and a confident press often matter more than piling on extra detail.
If you're making your first asymmetrical dress, choose one feature that excites you and sew it with discipline. A well-made angled hem or a secure one-shoulder neckline teaches more than a wildly ambitious pattern that never leaves the workroom. Precision is what makes asymmetry look effortless.
If you're ready to turn these techniques into a finished project, More Sewing is a strong place to start for quality dressmaking fabrics, deadstock finds, haberdashery and practical sewing supplies. Their range makes it easier to match the right cloth to the right kind of asymmetry, whether you're after fluid drape, stable structure, or a kit that gets you sewing faster.