Guides
Sewing Patterns for Women: A Complete UK Guide
You've found a pattern you love. The illustration is perfect, the line drawing looks promising, and then the envelope turns round and starts speaking a language of its own. Bust sizes don't match what you buy in shops. The fabric suggestions seem oddly specific. There are notches, grainlines, finished measurements, ease, view A, view B, and enough tissue paper to test anyone's patience.
That feeling is normal.
Most home dressmakers don't struggle because they lack skill. They struggle because sewing patterns for women are often written from a block that doesn't match their body, their wardrobe, or the way they sew at home. In the UK, that's especially noticeable when the advice is built around US sizing and US pattern assumptions. You can absolutely make those patterns work, but it helps to know what you're looking at before you cut into your fabric.
At shop counter level, I see the same pattern aisle questions again and again. Which size do I buy? Why does this toile pull across the bust but hang loose at the shoulders? Is a PDF pattern easier than tissue? Why does a simple dress still feel complicated once the envelope is open? The good news is that all of this gets easier when you know how patterns are built and how to choose them with intent.
There's also something reassuring in knowing that home sewing in Britain has deep roots. The UK was making sewing more accessible as early as 1789, when publications such as Instructions for Cutting out Apparel for the Poor offered full-size patterns for women's garments, helping establish a long tradition of home dressmaking and practical making in British households (history of sewing patterns in Britain).
What follows is the guide I'd give a customer standing in front of the pattern rack with three envelopes in hand and a useful amount of uncertainty.
Your Journey Into Womens Sewing Patterns Starts Here
A sewing pattern isn't just a template. It's a set of decisions made in advance about shape, proportion, construction order, and fabric behaviour. Once you see that, the packet stops being intimidating and starts being useful.
Many beginners assume the hard part is sewing neatly. In practice, the hard part is often choosing well. A badly chosen easy pattern can be more frustrating than a thoughtfully chosen intermediate one. If the shape fights your fabric, or the sizing starts from the wrong place, even tidy stitching won't save the result.
What a good pattern does for you
A good pattern gives you structure without boxing you in. It helps you:
- Cut accurately so the garment pieces relate to each other properly
- Build in order so collars, sleeves, waistbands, and facings go together cleanly
- Fit with purpose because you can adjust from a known starting point
- Repeat success once you've found a pattern company or block that suits you
That last point matters more than many people realise. Once you know a particular brand runs broad in the shoulder, narrow through the hip, or long in the waist, you start sewing much faster and with fewer surprises.
Sewing gets easier when you stop asking, “Can I sew this?” and start asking, “Was this drafted for someone shaped roughly like me?”
Why pattern confidence changes everything
A true shift happens when you stop treating the envelope as a promise and start treating it as information. The model photo sells the mood. The line drawing shows the truth. The size chart tells you where to begin. The finished measurements tell you whether the garment will wear the way you want.
That's the difference between making clothes and building a handmade wardrobe.
Decoding Pattern Types and Terminology
If you've ever heard someone say a pattern was “well drafted” or “not very beginner friendly”, they're usually talking about two things. First, how clearly the pattern communicates. Second, whether the shape and construction choices make sense in real fabric.
Big 4 and indie patterns
Most sewists come across the Big 4 first. That usually means Simplicity, McCall's, Butterick, and Vogue. Their strengths are familiar formats, broad availability, and a huge archive of garment styles. They're often a good place to learn standard construction methods because many home dressmakers, teachers, and alteration guides already know them well.
Their weak spot for UK sewists is often fit. The style may be lovely, but the underlying block can still need a fair bit of reshaping depending on your proportions.
Indie patterns tend to feel different straight away. The instructions are often more visual, the design language can be more contemporary, and the product descriptions usually tell you more about the intended fit. Many include layered PDFs, cup options, or more explicit fitting notes. That doesn't automatically make them better. Some are excellent. Some are stylish but lightly tested. Some are beautifully branded and surprisingly vague at the sewing machine.
A practical way to choose between them:
- Pick Big 4 when you want classic drafting conventions, broad style range, or a pattern many sewists have already reviewed.
- Pick indie when you want a modern silhouette, clearer illustrated instructions, or more hand-holding through the process.
- Be cautious with either when the line drawing is missing, the finished garment measurements are unclear, or the fabric recommendations are too broad to mean much.
The terms that matter most
A few pattern terms do most of the heavy lifting.
Ease
Ease is the extra room built into a garment beyond your body measurement. Think of it as breathing room. Without it, woven clothes would be hard to move in. With too much of it, a fitted style becomes sack-like.
There are two main types:
- Wearing ease gives you room to sit, bend, lift your arms, and fasten the garment.
- Design ease creates the intended silhouette, such as an oversized shirt, a boxy jacket, or a close-fitting pencil skirt.
If you sew knits, you'll also meet negative ease, where the finished garment is smaller than the body because the fabric stretches. Leggings, fitted tops, and some jersey dresses rely on this.
Grainline
The grainline arrow on a pattern piece tells you how that piece should sit on the fabric. Ignore it, and the garment can twist, drop oddly, or hang crooked after washing. Skirts can swing to one side. Trouser legs can rotate. Bodices can feel strangely off even when the seams are accurate.
Selvedge and nap
The selvedge is the finished edge of the fabric. It helps you orient the fabric for cutting layouts.
Nap means the fabric has a directional surface or pattern. Velvet, corduroy, brushed cotton, and many prints need every piece cut in the same direction. If you don't do that, one piece may reflect light differently from another and the garment can look mismatched.
Markings you shouldn't skip
Most frustration comes from treating pattern markings as optional.
- Notches help seams join correctly
- Darts shape flat fabric over curves
- Pleat lines control fullness
- Lengthen or shorten lines show where to alter without distorting the shape
- Fold lines tell you when a piece is cut symmetrically
Practical rule: Transfer the markings that affect fit and assembly before you start sewing. It's much faster than unpicking a sleeve because one notch was ignored.
How to Choose The Right Pattern For Your Project
Most disappointing makes can be traced back to the selection stage. The pattern wasn't wrong. The sewist wasn't incapable. The match was off. The quickest way to avoid that is to choose with three filters in mind. skill, shape, and fabric.
Start with skill, but judge the techniques
“Beginner” on a pattern doesn't always mean easy. Some beginner patterns are simple because they have few pieces. Others are simple because the fit is forgiving. Those are not the same thing.
A loose pull-on skirt can be beginner friendly because the construction is straightforward and the fit is flexible. A fitted shift dress may look plain on the envelope, but if it has darts, a zip, facings, and close body shaping, it can be much less forgiving.
When choosing, look at the actual techniques involved:
- Beginner-friendly signs include elastic waistbands, grown-on sleeves, simple necklines, and looser silhouettes.
- Intermediate signs include set-in sleeves, collars, button plackets, invisible zips, and garments with more than one fitting point.
- Advanced signs often include structured shaping, precise pressing sequences, welt pockets, bound openings, and fabrics that fray, shift, or mark easily.
If you want a fast win, choose one new challenge only. For example, sew a shirt with a familiar cotton poplin before trying one in slippery viscose.
Then look at body shape and block compatibility
A common sticking point for many UK sewists is fit. A 2023 UK Craft Council survey found that 68% of home sewists struggle with fit, with many pointing to the difficulty of adapting US-based pattern sizing for average UK body shapes (UK fit survey summary). That aligns with what we see in practice. The packet size may be technically correct on one measurement, yet still be wrong for your proportions.
The issue isn't only centimetres versus inches. It's the drafting block. One company may draft for a longer torso. Another may assume a fuller upper bust, narrower shoulders, or a straighter hip. Two sewists with the same bust measurement can need very different starting sizes if one is fuller in the bust and the other is broader in the back.
A better approach is to choose patterns by your dominant fitting points:
- For dresses and tops, start with upper bust and shoulder fit if you often get neckline gaping or armhole issues.
- For trousers and skirts, start where you want the garment to sit on the body, not where your ready-to-wear size suggests.
- For fitted styles, read the finished measurements before buying into the envelope illustration.
If you run a handmade wardrobe board or sell finished samples, it also helps to study how garments are presented visually. Looking at ghost mannequin photography styles can sharpen your eye for silhouette, drape, and proportion without the distraction of styling. It's a useful way to compare shape on the hanger versus shape on the body.
Fabric should confirm the choice, not rescue it
A lot of pattern problems are really fabric problems. The draughting may be fine, but the fabric changes the whole character of the garment.
What works well
- Structured pattern plus stable fabric gives clean results. Shirt dresses, boiler suits, and A-line skirts often benefit from poplin, denim, twill, or linen with body.
- Soft pattern plus fluid fabric suits blouses, camisoles, and wide-leg trousers that rely on drape.
- Simple shape plus statement fabric is often more successful than a complicated design in a busy print.
What often disappoints
- A sharply structured pattern in a fabric with too much drape
- A gathered or voluminous design in cloth that's too stiff
- A first attempt at a fitted garment in fabric that slips, curls, or stretches unpredictably
If the pattern photo and the line drawing suggest two different garments, trust the line drawing and then ask whether your chosen fabric will produce that shape.
Understanding Pattern Sizing and Markings
A sewing pattern gives you information in three places. the envelope, the instruction sheet, and the pattern tissue or printout. Read all three before you cut, because each one answers a different question.
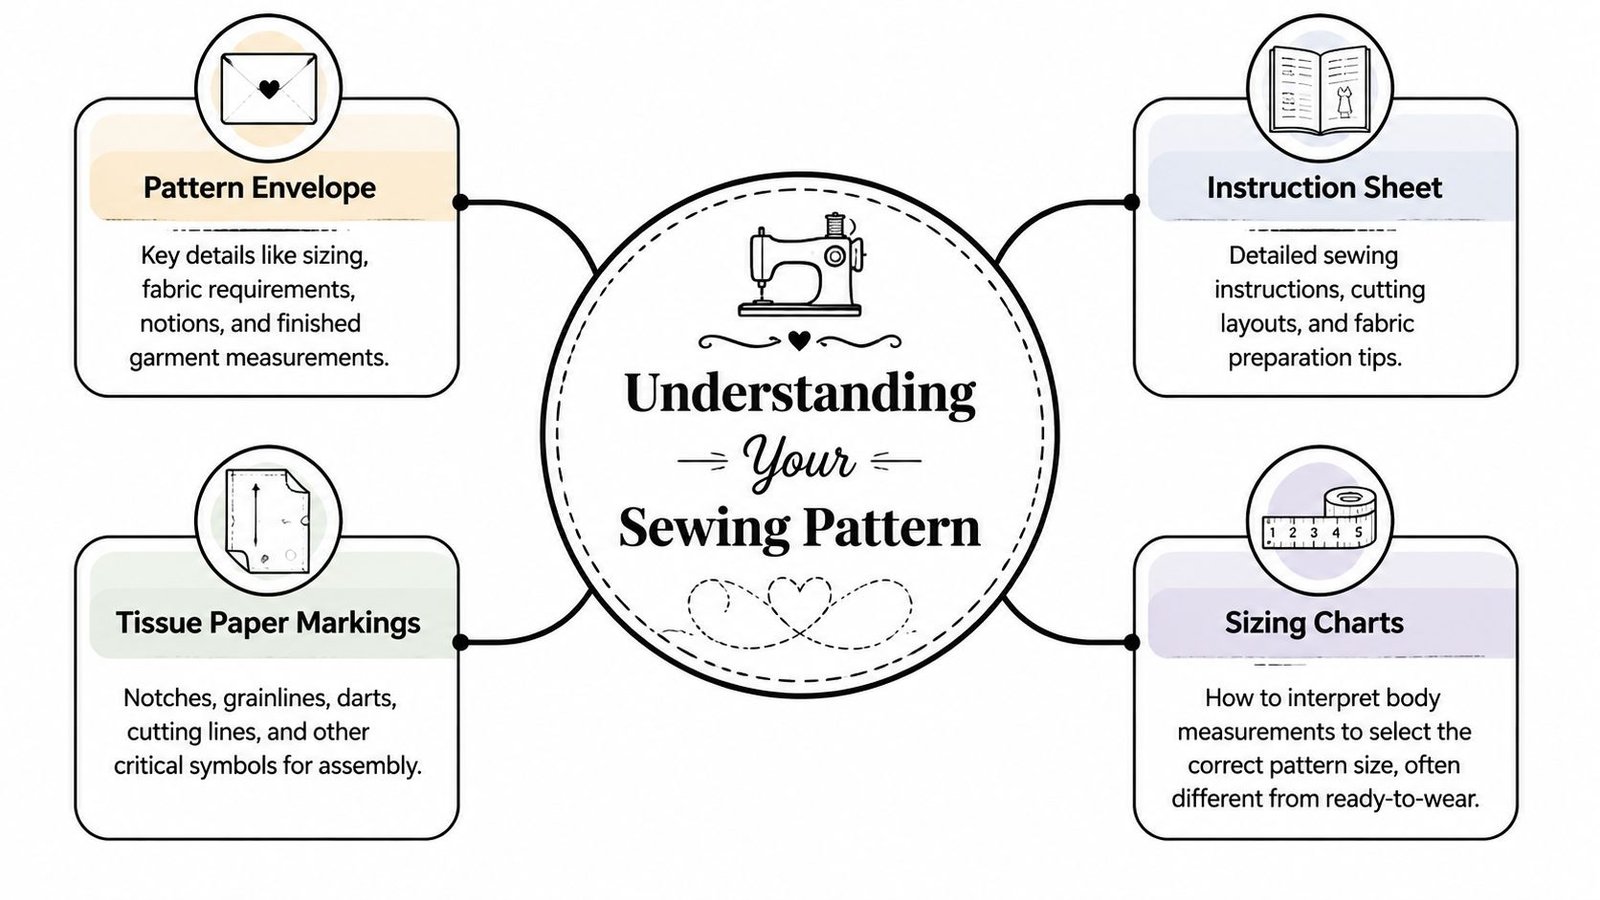
What to check on the envelope
The envelope tells you whether the pattern is worth your time.
Look first at the body measurement chart. This is not your ready-to-wear size, and it often shocks people the first time they use it. Sewing sizes are a fitting system, not a label for your ego. Start there calmly.
Then look for finished garment measurements. These tell you how much room the actual garment will have. If you prefer your clothes skimming rather than oversized, this line can stop you choosing a size that will drown you.
Also check:
- Fabric suggestions because they tell you what the draft expects
- Notions such as zip type, interfacing, buttons, or elastic
- Views so you know which version includes sleeves, collars, ties, or pockets
How to read the instruction sheet
The instruction sheet is your route map. Read it before the fabric comes out, not halfway through.
Pay attention to the cutting layouts. They show how the designer expects the pieces to sit on the fabric width and fold. If your fabric has a directional print, nap, or one-way design, you may need to ignore the most economical layout and cut single layer instead.
The sewing order matters too. Good construction is often about what gets done early. Staystitching, interfacing, and marking notches can feel boring, but they prevent distortion later. The instruction order isn't sacred, yet beginners usually get better results by following it before experimenting.
If you're still building confidence with measuring, a visual guide can help you visualize your perfect style by checking body measurements more methodically before selecting a size.
What the tissue markings are telling you
Pattern pieces look chaotic until you know which markings affect shape and which affect assembly.
Here's the short version.
| Marking | What it means | Why it matters |
|---|---|---|
| Grainline arrow | Direction to place on fabric | Keeps the garment hanging correctly |
| Notches | Matching points on seams | Stops pieces from shifting or easing wrongly |
| Dart legs and point | Shaping lines | Builds contour at bust, waist, shoulder, or hip |
| Fold line | Place on folded fabric | Creates a symmetrical full piece |
| Lengthen/shorten line | Safe alteration point | Lets you adjust without changing seam shape |
| Placement lines | Pocket, pleat, button, or trim position | Keeps features balanced and functional |
A good habit is to circle the size you're cutting on the instruction sheet first, then highlight the matching cutting line on the tissue or PDF. Multi-size patterns become much less confusing once you isolate your chosen line visually.
A Practical Comparison PDF vs Printed Patterns
This choice comes down to workflow more than ideology. Both formats can produce excellent garments. The best option is the one you'll use neatly, store sensibly, and sew without resentment.
Where PDF patterns shine
PDFs are immediate. If inspiration strikes in the evening, you can buy, print, and prep the same day. They're also easy to store digitally, and many now come with layered files, which let you print only the sizes you want.
That said, printing at home can become a project in itself. Accuracy matters.
A reliable PDF routine looks like this:
- Open in a proper PDF reader so print settings behave predictably.
- Print the test square first and measure it before printing the rest.
- Check scale settings carefully. You want actual size, not fit to page.
- Trim or overlap as directed. Different designers format pages differently.
- Tape in rows first, then join the rows. It keeps the sheet flatter.
A0 copy-shop files solve the assembly headache, but they do add cost and rely on the file being set up properly.
Where printed patterns still win
Printed patterns are easier on the eyes, easier on the dining table, and often easier for beginners. You unfold the sheet, identify the pieces, and get on with the job. No taping marathon required.
They're especially good when:
- You want to trace off a size and keep the original intact
- You're sewing a multi-view pattern repeatedly
- You prefer seeing the whole layout at once
- You dislike troubleshooting printers
The downside is storage. Tissue tears, envelopes split, and multi-size sheets can become a tangle if they're folded back in a hurry.
PDF vs Printed Patterns At a Glance
| Feature | PDF Patterns | Printed Patterns |
|---|---|---|
| Access | Instant download | Requires delivery or shop visit |
| Prep time | Printing and assembly needed | Ready to trace or cut |
| Storage | Digital files save space | Physical storage needed |
| Ease of reprinting | Simple if files are organised | Not possible if tissue is cut or damaged |
| Best for | Fast access, layered sizes, repeat printing | Simplicity, less setup, easier visual handling |
If you hate prep work, printed is often kinder. If you value speed and digital organisation, PDF is hard to beat.
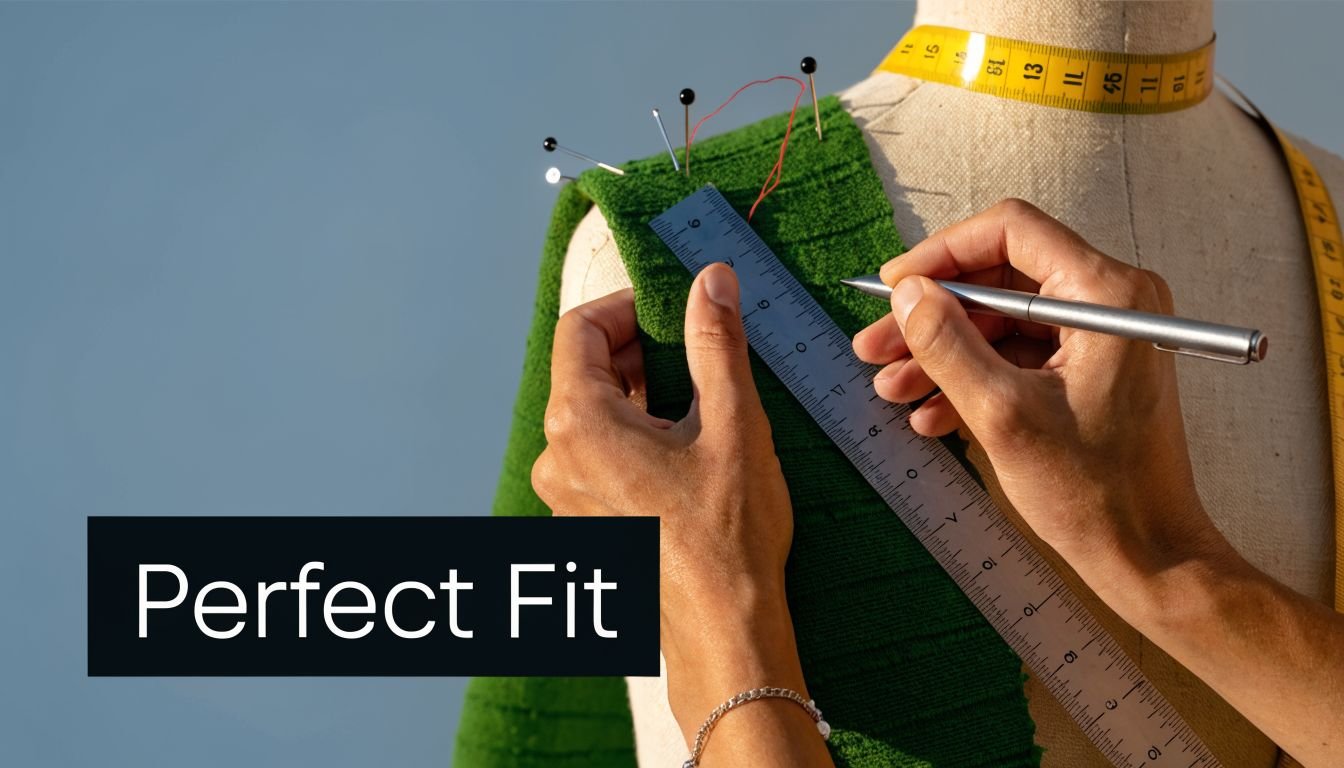
Achieving a Flawless Fit With Common Pattern Adjustments
Fit isn't a sign of talent. It's a process of identifying where fabric is being asked to do the wrong job. Once you can read the wrinkles, drag lines, and pooling, you stop guessing and start adjusting.
The biggest improvement most sewists can make is this. alter the pattern before blaming the body.
Blend sizes before you cut
Many women are one size at the bust, another at the waist, and another at the hip. That's normal. Patterns are drafted from a standard block, but real bodies rarely line up perfectly all the way down.
Blending between sizes is often the first alteration to try. Use a curved ruler or steady hand to draw a smooth line from one size to another across the seam line, not the cut line. This works especially well on side seams of skirts, dresses, and trousers.
Common examples include:
- Smaller bust, fuller hip on fit-and-flare dresses
- Broader shoulder, narrower waist on shirts and jackets
- Waist between sizes on trousers or skirts with a fixed waistband
What doesn't work is chopping straight from one size to another at a single point. That creates corners where the seam should flow.
Length adjustments fix more than hemlines
A lot of fitting issues are vertical, not horizontal. If the waist seam sits too low, or bust darts point below the bust apex, going up or down a size won't solve it.
Use the printed lengthen/shorten lines whenever possible. These are placed where the designer expects you to alter without wrecking the shape. Slash across the line, spread or overlap by the amount needed, then true the seam lines.
Good places to adjust length include:
- Bodice between shoulder and waist
- Sleeve between elbow and wrist
- Trouser leg between knee and hem
- Skirt between hip and hem
A hem adjustment changes the garment length. A torso adjustment changes where the garment fits. They're not interchangeable.
Bust adjustments that change the whole garment
If you've ever sized up to fit the bust and ended up with a baggy neckline and droopy shoulders, this is the reason. Bust fit and frame fit are different jobs.
A Full Bust Adjustment (FBA) adds room where the body needs it while keeping shoulder and neckline closer to their original size. A Small Bust Adjustment (SBA) does the opposite. Both are worth learning because they improve dart position, side seam balance, and the way the front hangs.
A practical FBA sequence on a darted bodice usually goes like this:
- Start with the size that fits your upper chest and shoulders.
- Mark the bust point.
- Slash through the bodice along the standard adjustment lines.
- Spread to add fullness.
- Let the side dart open.
- Redraw the dart legs and smooth the waist and side seam.
You'll usually need to make the matching front facing or lining alteration too.
Here's a helpful visual walkthrough before you try your own first bodice alteration:
Petite adjustments as a UK case study
This is one of the most useful examples because it affects so many sewists and gets mistaken for a size issue. For the 25% of UK women under 5ft 4", standard patterns often require vertical adjustments, and petite sizing is based on a shorter back-waist length. Making that adjustment can reduce alteration needs by up to 20% and improve fit by 30%, according to the guidance summarised by The Sewing Directory on petite pattern sizing.
In practical terms, a petite adjustment is about proportion, not just making everything shorter.
Signs you need a petite alteration
- Waist seam sitting below your natural waist
- Excess fabric pooling above the waist
- Bust point landing too low
- Shoulder straps or sleeve caps feeling long
- Hip shaping starting too low on dresses or trousers
The adjustment that works
Shorten the bodice above and below the bust area if needed, rather than taking all the length from the hem. That preserves the position of key shaping. On skirts and trousers, remove length at the marked shorten lines so the hip and knee still sit in the right place.
What often fails is taking a deep tuck only at the hem or folding out random length near the waistline without checking dart placement and pocket position.
Make a toile where it counts
You don't need a full dress rehearsal for every project, but for fitted bodices, trousers, and sleeves, a toile saves fabric and temper. Mark centre front, centre back, bust level, waistline, and grainline on the test garment. Those reference lines show you whether the issue is width, length, or balance.
Once you've corrected a pattern, keep the altered version. The smartest sewists I know don't refit from scratch every time. They build a set of trusted pattern changes and reuse them.
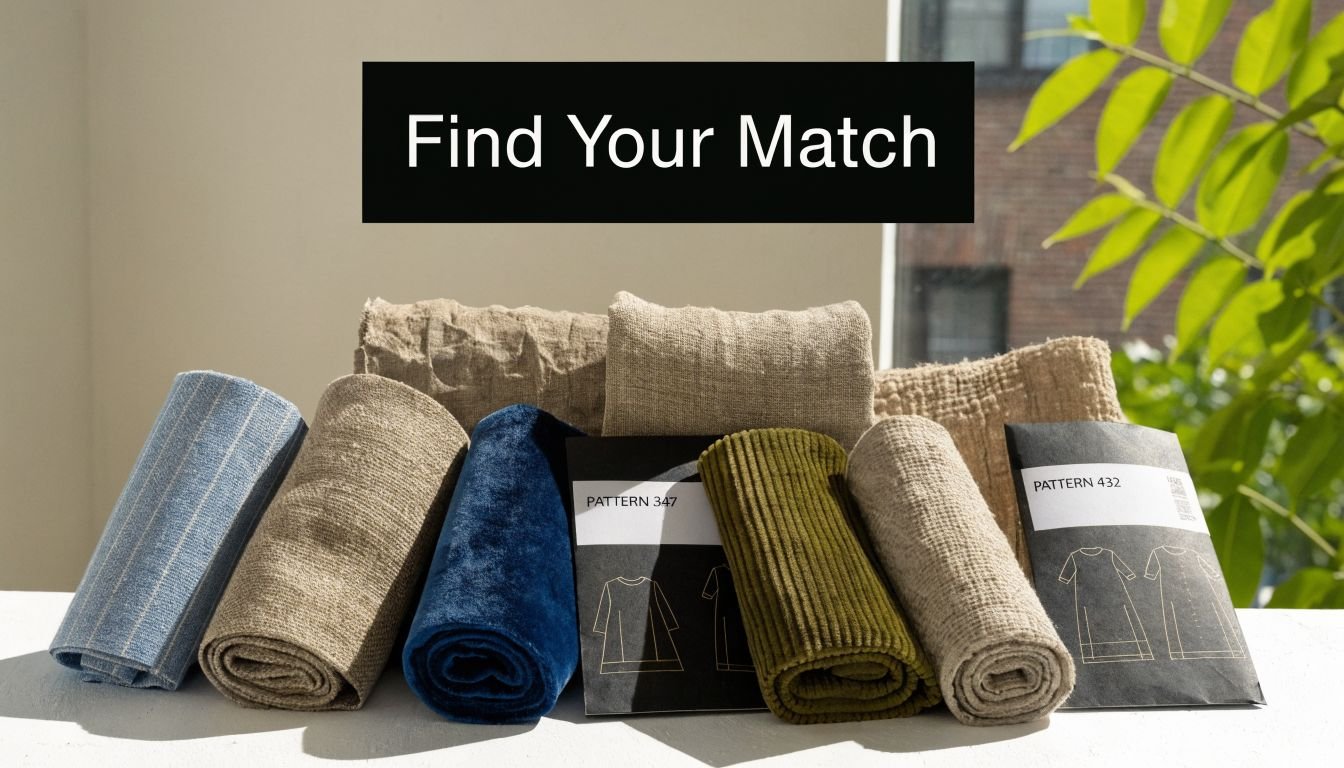
Sourcing Patterns and Finding Your Fabric Match
A good garment starts with a sensible pairing. Not the most expensive fabric. Not the trendiest pattern. The pairing. If shape and cloth support each other, the sewing gets smoother and the result looks more intentional.
Where to look for better pattern choices
For everyday dressmaking, cast your net wider than the default pattern cabinet. Big commercial brands are still useful, especially for classics, but they're not the only route to successful sewing patterns for women.
A balanced pattern shelf usually includes:
- Commercial staples for shirts, dresses, skirts, sleepwear, and occasion sewing
- Indie designers for contemporary shapes and often clearer illustrations
- Vintage patterns when you want period details or unusual drafting lines
- Reissued classics that keep older shapes but with more usable instructions
When buying online, don't rely on the cover image alone. Read the technical description, study the line drawing, and check whether the sample garment is shown in a fabric similar to what you plan to use.
Match fabric to behaviour, not just colour
New sewists often shop by print first. Experienced dressmakers usually shop by behaviour first. Ask what the fabric does when handled.
Does it hold a crease? Does it collapse softly? Does it stretch back after being pulled? Does it fray the second you look at it? Those answers tell you more than the colour ever will.
Here are pairings that usually behave well:
| Pattern type | Fabric match | Why it works |
|---|---|---|
| Shirt dress | Cotton poplin, chambray, linen blends | Enough body for collar, placket, and shape |
| Wide-leg trousers | Viscose twill, Tencel blends, lighter wool mixes | Fluid leg line without stiffness |
| Boiler suit or utility jacket | Denim, twill, canvas, heavier linen | Supports topstitching and structure |
| Simple blouse | Viscose, crepe, soft cotton lawn | Lets gathers and soft seams fall cleanly |
| A-line skirt | Needlecord, denim, stable linen | Keeps the silhouette crisp |
A common mistake is picking a fabric because it feels lovely in the hand but ignoring whether it suits the design. A very drapey cloth can make a structured pattern look tired. A rigid cloth can make a soft blouse stand away from the body.
Buy enough fabric to test one seam, one press, and one bit of topstitching before committing mentally to the project. The iron often tells the truth before the sewing machine does.
Don't overlook adaptive sewing
Adaptive sewing is one of the most important areas in dressmaking right now because it brings pattern choice back to real life. Closures, seam placement, dressing ease, and fabric handling all matter more when a garment has to work around dexterity limits, seated wear, recovery needs, or sensory comfort.
An emerging trend noted in adaptive sewing coverage is the need to serve the 24% of UK women with disabilities, with 35% of sewists over 50 seeking adaptive options such as magnetic closures or easier one-handed dressing (adaptive sewing ideas and market gap). In practice, that means many sewists are still adapting standard patterns themselves.
Useful adaptation ideas include:
- Swap fiddly buttons for magnetic closures, larger snaps, or easier fastenings
- Move openings from the back to the front or side seam
- Choose soft, stable fabrics over slippery bias-cut options when dressing needs to be simpler
- Reduce bulk at underarms, waistbands, or pressure points for seated comfort
Store your patterns like working tools
If you want to reuse patterns, store them properly. Folded tissue shoved back into a torn envelope becomes unreadable fast.
A better system is simple:
- Trace master copies for heavily used patterns
- Keep notes with the pattern about size used, alterations made, and fabric successes
- Store cut pieces flat or in labelled sleeves
- Add swatches so you remember what worked
That turns each finished project into a more reliable starting point for the next one.
If you're ready to turn inspiration into a project you'll enjoy sewing, browse More Sewing for fabrics, haberdashery, and beginner-friendly dressmaking kits. It's a practical place to start whether you're choosing your first pattern or planning your next handmade wardrobe piece.