Dressmaking, Guides
Draft Your Own Cargo Pocket Pattern: A Complete Guide
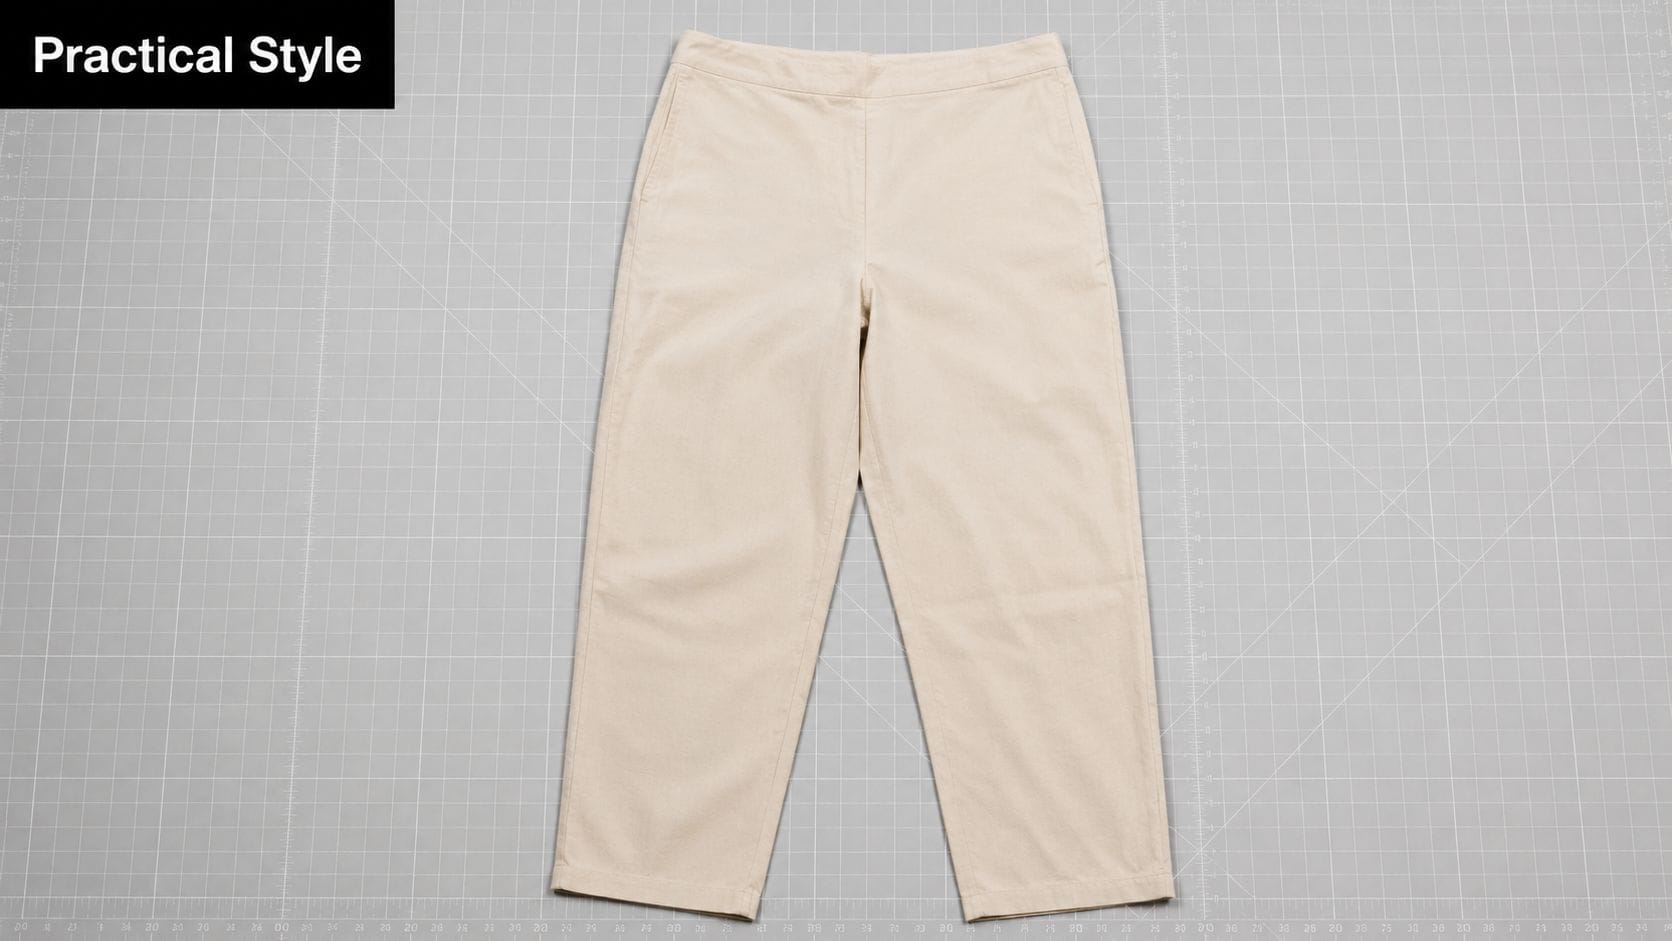
You've got a pair of trousers, a skirt, or even a workwear-style overshirt nearly finished, and the garment is fine. But it still feels a bit plain. What often changes it completely is one well-made cargo pocket. Not just for the look, either. A good cargo pocket adds proper storage, shape, and that practical utility feel that makes handmade clothes look thought through.
The trouble is that a shop-bought pattern piece often isn't quite right. The pocket may be too bulky for your fabric, too small for the scale of the garment, or drafted for a stiffer cloth than the one on your cutting table. That's why it's worth learning to draft your own cargo pocket pattern. Once you understand the base shape, seam allowances, flap, and volume, you can adjust it for almost anything.
A custom draft gives you more control over proportion, placement, and behaviour in wear. If you want a sharp bellows pocket on cotton drill, you can draft for that. If you want a softer pocket on deadstock or lightweight denim, you can build in support from the start instead of trying to rescue it later.
From Plain Trousers to Practical Style
A cargo pocket does two jobs at once. It changes the style of a garment, and it changes how that garment works. A plain leg becomes more utilitarian. A simple skirt gets structure. Even a basic pair of pull-on trousers can start to feel designed rather than merely sewn.
The beauty of drafting your own cargo pocket pattern is that you're no longer stuck with one standard shape. You can make a compact pocket for a child's trouser leg, a broad utility pocket for workwear, or a neater version for a skirt where too much depth would feel clumsy. You can also choose how the pocket expands. Some garments suit a full bellows construction, while others look better with a centre pleat or an inverted pleat.
Why a custom draft works better
Commercial patterns have to aim for general use. Your project doesn't. When you draft your own piece, you can match the pocket width to the leg width, adjust the flap to suit the scale of the garment, and decide how much volume you want.
That matters because cargo pockets can quickly tip from useful to awkward. Too narrow, and they look stingy. Too deep, and they pull. Too much volume on a soft fabric, and the whole thing droops.
Practical rule: Draft the pocket for the garment in front of you, not for an imaginary future project.
A good draft starts with three decisions:
- Finished size: Decide the width and height based on the garment, not just on habit.
- Pocket style: Choose flat, bellows, box pleat, or inverted pleat depending on how much expansion you need.
- Fabric behaviour: A pocket that works on canvas won't behave the same way on Tencel or deadstock denim.
Once those decisions are clear, the drawing itself becomes much easier. The lines on paper start to make sense because each one has a job.
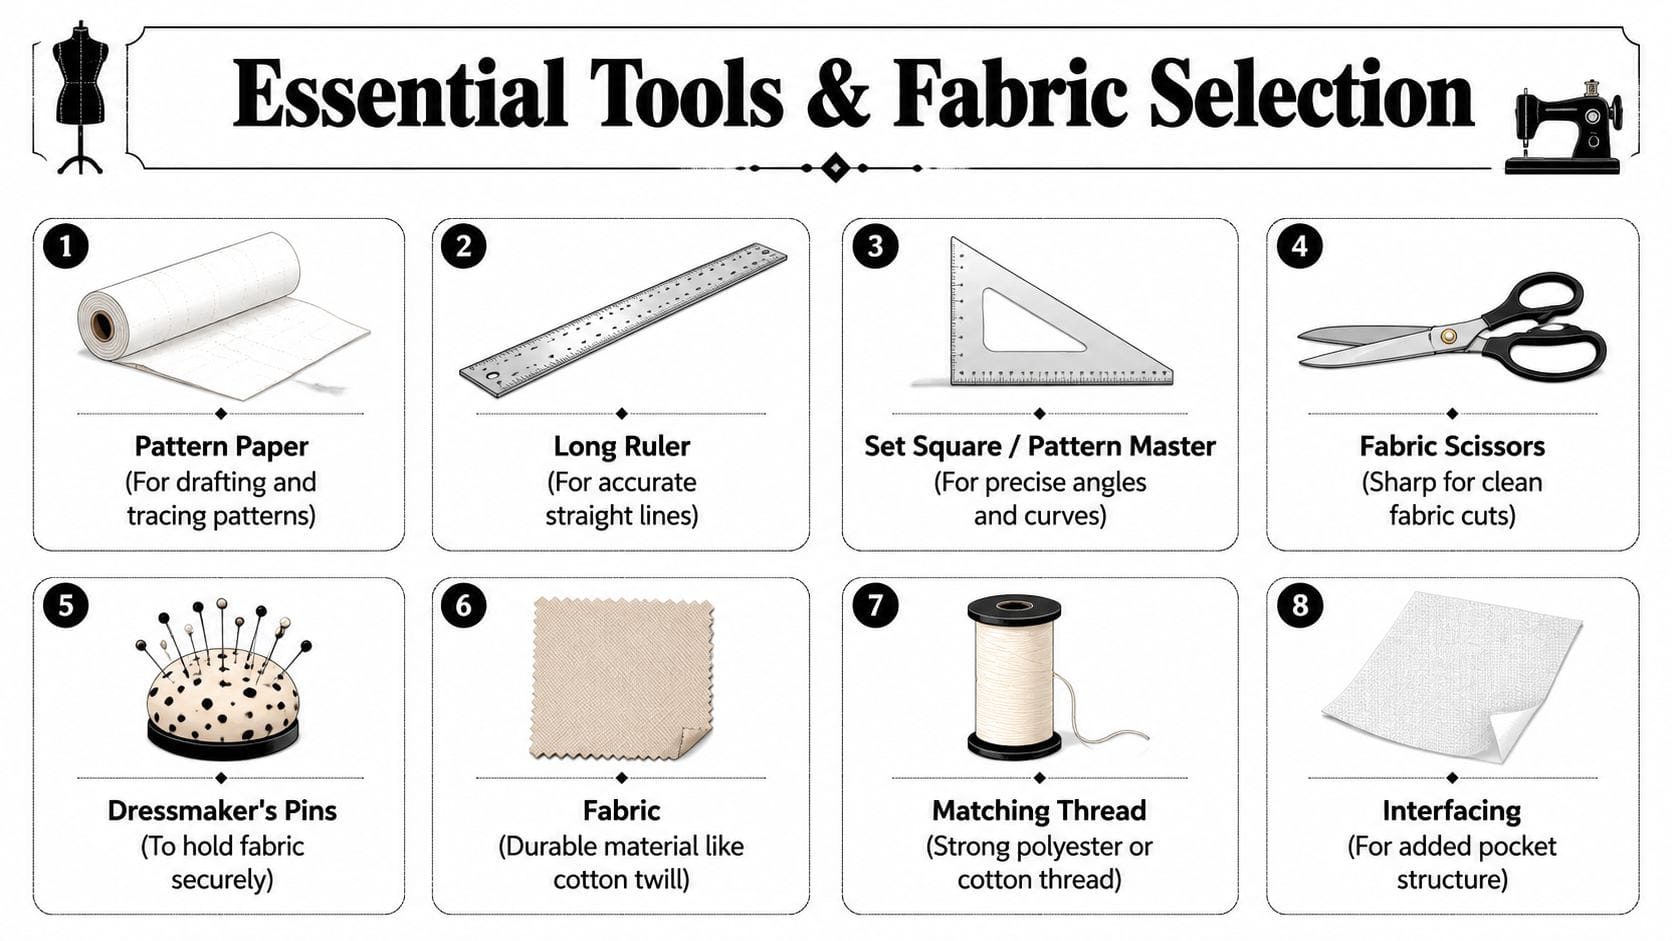
Essential Tools and Fabric Selection
Before you reach for the fabric shears, get the drafting tools together. Good pocket drafting doesn't require a huge studio setup, but it does reward accuracy. A cargo pocket has corners, folds, flap edges, and placement lines that all need to agree with each other.
Tools worth having on the table
A short list of tools will handle most cargo pocket pattern work well:
- Pattern paper: Use it for drafting the original and tracing revised versions once you refine the shape.
- Long ruler: Essential for straight pocket sides, flap edges, and grainlines.
- Set square or pattern master: Helps you keep corners square and shape flap curves cleanly.
- Sharp pencil and eraser: You'll probably redraw at least one fold or flap line.
- Fabric scissors: Keep these for cloth only, especially if you're cutting interfaced pieces.
- Dressmaker's pins or clips: Useful for testing the fold behaviour before sewing.
- Matching thread: Topstitching shows on a cargo pocket, so thread choice matters visually.
- Interfacing: Often the difference between a pocket that stands neatly and one that collapses.
If your machine hasn't been cleaned in a while, do that before topstitching utility details. Pockets involve a lot of visible stitching, and skipped stitches or tension drag show immediately. A practical guide on how to prolong machine life with maintenance is worth keeping handy.
Choosing fabric with the pocket in mind
Classic cargo pockets look right in fabrics with some body. Cotton drill, canvas, twill, and heavier denim all hold edges well and support topstitching nicely. They also press sharply, which helps when you're creating folds, pleats, or gusset walls.
Lighter fabrics can still work, but they need more planning. Tencel blends, washed denims, and deadstock suiting can produce a softer, more modern pocket, though they're less forgiving. A 2024 UK Craft Council report noted that 57% of British hobby sewists abandon complex pockets like cargos because of fabric instability with lightweight fabrics such as Tencel blends. That same source highlights an unresolved question around preventing pleat collapse in lightweight deadstock fabrics.
Lightweight cloth isn't a reason to avoid a cargo pocket. It's a reason to stabilise it properly and reduce unnecessary bulk.
What usually works in practice
Here's the trade-off I'd keep in mind:
| Fabric type | What works well | What to watch |
|---|---|---|
| Cotton drill or canvas | Crisp flaps, sharp corners, stable topstitching | Can become bulky if the pocket is oversized |
| Denim | Durable and classic-looking | Heavy seams at flap joins and corners |
| Tencel blends | Softer drape, more relaxed style | Pleats can soften and flaps may sag |
| Deadstock lightweight fabrics | Unique look and excellent for one-off makes | Often need interfacing and careful testing |
For thinner fabrics, apply fusible interfacing to the pocket and flap pieces before construction. I've found that even when the fabric feels acceptable in the hand, the pocket often behaves differently once it hangs vertically on a garment. A quick test square, pressed and folded like the actual pocket, will tell you far more than the fabric shop bolt ever can.
Drafting Your Custom Cargo Pocket Pattern
A custom cargo pocket starts on paper, not at the cutting table. Draft it to suit the garment, the pocket style, and the fabric you are using. That is the difference between a pocket that looks intentional and one that feels borrowed from another pattern.
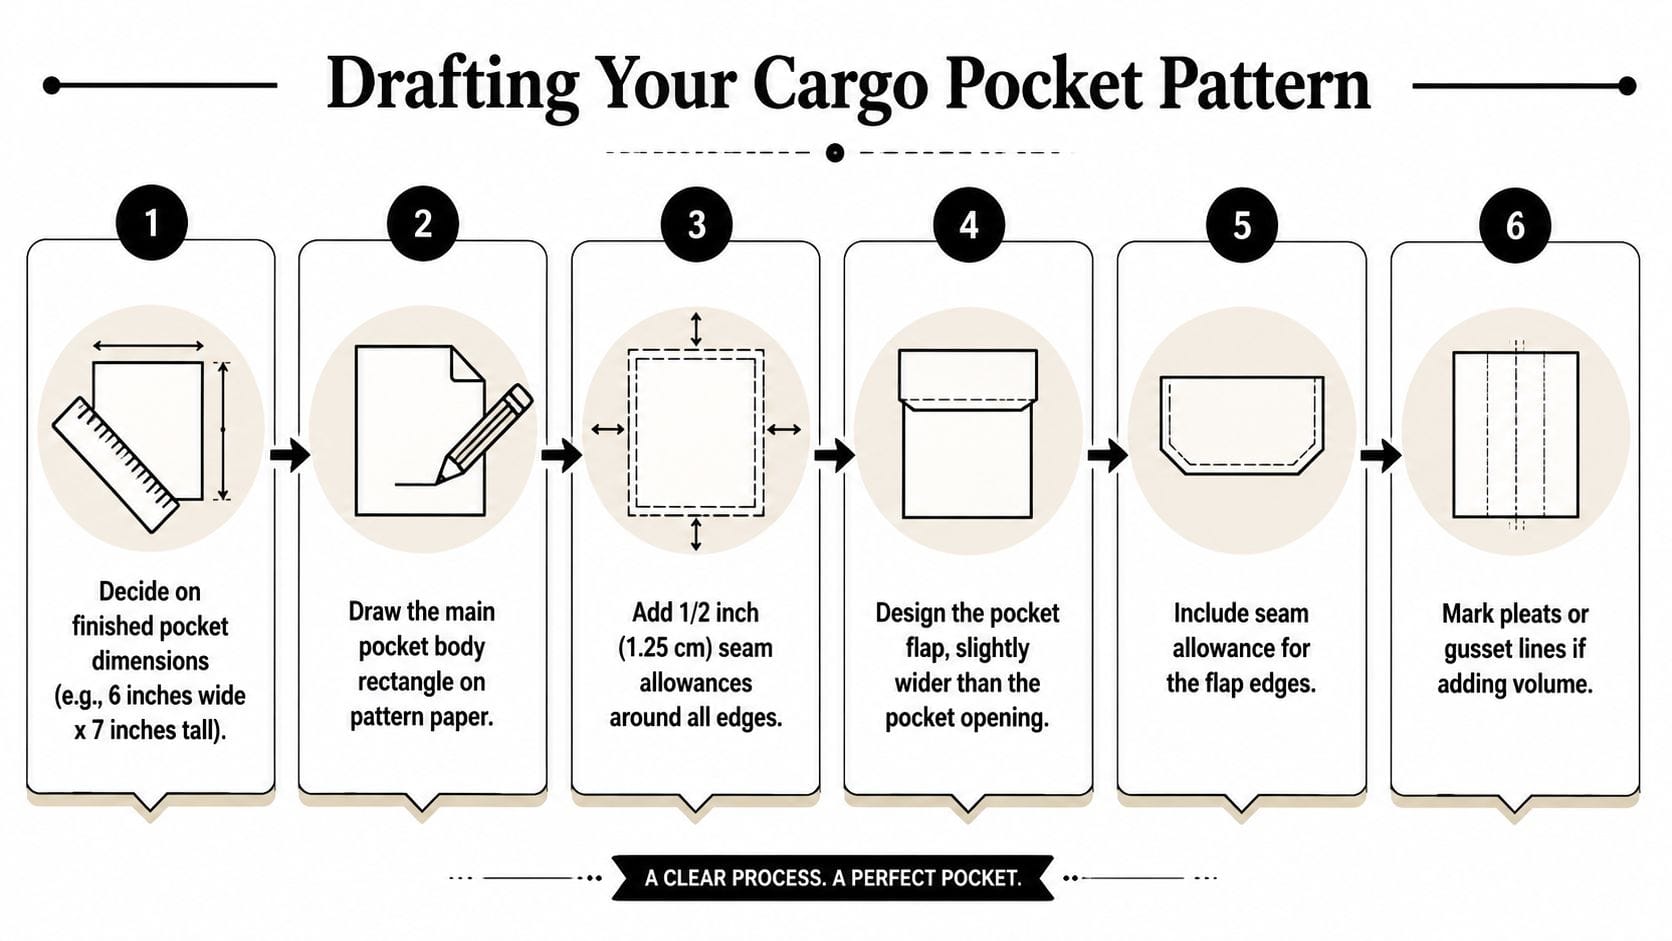
Draw the base pocket piece
Start with the finished size you want to see on the garment. On adult trousers, that usually means checking the pocket against the thigh area rather than choosing a standard size in isolation. A pocket that suits heavy workwear can swamp a slim trouser leg, while a small pocket can look lost on a wider leg or overshirt.
Draw the finished pocket body as a rectangle on pattern paper, keeping the side edges square to the top. Small inaccuracies show up quickly once you topstitch.
Then add your allowances. A practical starting point is a 2 cm hem at the top edge and a 1 cm seam allowance on the other three sides. That gives enough turn at the opening for a neat top edge without making the sides bulky, especially on firmer cottons and denims. On lighter or deadstock fabrics, I often keep the shape simple on the first draft and avoid very narrow corners until I have tested how the cloth presses.
If you like to map proportions on screen before making a paper template, it can help to sketch them in one of the available clothing design software options, then print and adjust by hand.
Mark the information you will need later
A usable pocket pattern includes the working notes, not just the outline. Add them now while the draft is fresh in front of you.
- Grainline: Draw it parallel to the pocket height.
- Piece name: Write “Pocket”.
- Cutting note: For example, “Cut 2”.
- Fold or pleat lines: Mark these if you already know the style.
- Top edge note: Label the hem allowance clearly so it does not get mistaken for a seam allowance.
- Corner shape: Note whether the lower corners stay square or are rounded.
Square corners suit workwear and hold their shape well in drill, canvas, and denim. Rounded corners are often easier on lightweight cloth because they turn more neatly and create less bulk.
Drafting habit: If you alter one measurement, update every related note on the pattern straight away. Many cutting errors come from old labels left on a revised piece.
Older printed pocket templates can also be misleading if they are not checked after printing or scaling. Exact measurement on the pattern piece saves a lot of unpicking later, especially if you are adapting one base pocket into several sizes.
Draft the flap to match the pocket
The flap needs to belong to the pocket. Draft it beside the pocket piece so you can judge the proportion at a glance.
Keep the flap width close to the pocket width for a tidy look. Make it slightly wider if you want more coverage at the sides. Keep it narrower only if you are aiming for a lighter, less utilitarian finish.
The lower edge changes the style more than many sewists expect:
- Straight lower edge: crisp, workwear-inspired, easy to topstitch evenly
- Rounded corners: softer appearance, easier to turn and press
- Pointed flap: decorative, but less forgiving to sew neatly
Add seam allowance all around the flap. If the flap will be lined or interfaced differently from the pocket, write that on the pattern piece now. I have found that once several similar pieces are on the cutting table, clear labelling is what stops the wrong fabric or interfacing being used.
A moving demonstration can help while you draft and mark your own version:
Build in flexibility from the first draft
A good cargo pocket pattern should be easy to adapt. Trace a clean master, then make separate traced versions for size changes, flap variations, or different volume treatments. That approach is especially useful if you are comparing a flat pocket with a bellows or pleated version, because you can keep the face size consistent and adjust only the sections that create depth.
Paper testing helps here. Hold the draft against the actual garment piece and check the scale from a normal viewing distance. Also fold the paper where pleats or side expansions will sit. That gives you a better sense of bulk than a flat drawing does.
This is particularly useful with lighter UK deadstock fabrics. On paper, a deep pocket can look balanced. In cloth, the same shape may sag, collapse, or pull away from the leg unless you reduce the depth, trim back the flap size, or stabilise selected areas. Drafting with those trade-offs in mind gives you a pattern you can use again, not just a one-off shape that happened to fit one fabric.
Adapting the Pattern for Bellows and Pleats
You notice the difference as soon as you handle the paper draft. A flat pocket sits flush against the garment. A cargo pocket needs controlled volume, and the way you add that volume decides how it will wear, press, and hold its shape.
For home sewing, the best choice is rarely about style alone. It is about fabric weight, how much bulk the seam can tolerate, and whether you want the pocket to stand away from the garment or collapse back against it.
Bellows pockets
A bellows pocket adds depth at the sides, and often at the bottom too. That gives you a more structured utility look than a centre pleat, and it also spreads the strain across the pocket edges instead of pushing all the fullness into one fold.
Start with your base pocket and add the expansion where you want the pocket to open. Many sewists use a standard bellows formula based on the finished pocket size, then add folding allowance for the side walls, hem allowance at the top, and seam allowance around the outside, as shown in this cargo pocket bellows tutorial. The exact amount is less important than matching both sides precisely.
Even side folds keep the pocket square. If one fold is deeper, the pocket will twist, the flap will miss the corners, and topstitching lines will look off even when the sewing itself is neat.
Bellows pockets suit firmer cloth best. On cotton drill, twill, canvas, or ripstop, the shape reads clearly. On lightweight deadstock shirting or washed linen, the same draft can turn limp unless you reduce the depth or support the upper edge and flap with light interfacing.
Box pleats and inverted pleats
Pleated versions give you volume with a flatter side profile. That makes them useful on garments where a full bellows pocket would feel too bulky, such as an overshirt, lighter jacket, or softer trousers.
To draft one, draw the pleat placement on your pocket front, cut up that line on paper, and spread the pattern by the amount you want to fold back into the pleat. A wider spread gives more storage, but it also creates more thickness at the base where the fold is secured.
The two main options behave differently.
- Box pleat: The fold structure stays visible on the front. It gives a sharper workwear look and holds its shape better in medium-weight cloth.
- Inverted pleat: The fullness is folded inward and looks quieter from the front. It often sits better in softer fabrics and on garments with a cleaner line.
- Bellows sides: These give the fullest capacity and the strongest cargo look, but they also add the most bulk at the side edges and corners.
I often steer undecided sewists toward an inverted pleat if they are using lightweight deadstock. It gives the cargo feel without asking a delicate fabric to support hard side walls.
Which version is best
Choose the style that matches both the garment and the cloth.
A bellows pocket works well on utility trousers, kidswear, and jackets where extra shape is part of the design. A box pleat gives a strong central detail and suits sturdier fabrics. An inverted pleat is easier to integrate into softer, lighter pieces where you want function without a heavy silhouette.
Paper testing settles most doubts quickly. Fold the pleat or bellows depth into the pattern, tape it closed, and hold it against the garment piece. You can judge bulk, width, and flap proportion before cutting fabric.
If the garment already has strong topstitching, patch seams, or a lot of panel lines, keep the pocket treatment simpler so the whole piece does not start to look crowded.
Cutting and Assembling Your Cargo Pocket
Once the pattern is settled, sewing is mostly about order and accuracy. Cargo pockets look impressive, but they're really a sequence of small operations. If you press at each stage and keep the topstitching deliberate, the finish improves quickly.
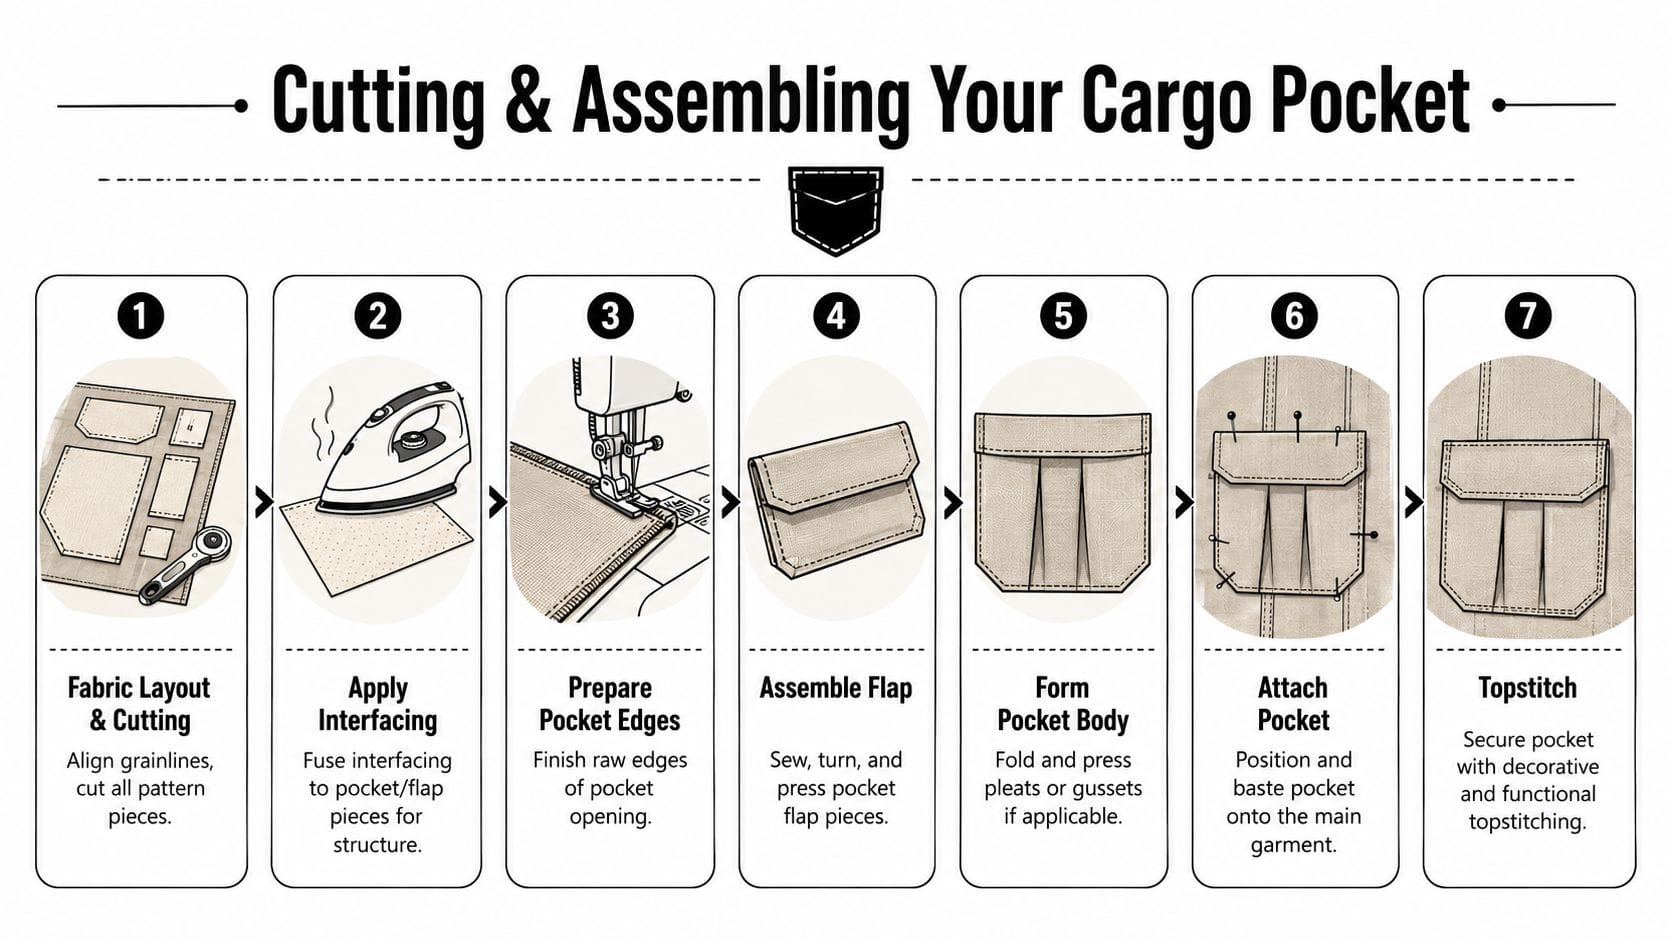
Cut carefully and prepare first
Lay the pattern pieces with the grainline parallel to the selvedge. This is especially important on pockets because any skew in the cut becomes obvious once the pocket is stitched to a straight garment seam. Cut the pocket body, flap pieces, and any interfacing before moving to the machine.
If you're interfacing, fuse it now. Apply it to the wrong side of the pocket and flap pieces, then let the pieces cool flat before handling. That cooling time helps the adhesive settle properly.
A clean assembly order usually goes like this:
- Prepare the pocket top: Fold and press the top hem allowance, then stitch it neatly.
- Form the volume: Fold pleats or bellows sections and baste them in place if needed.
- Press side and lower allowances: This gives you a clear edge to follow during attachment.
- Assemble the flap: Stitch, trim where needed, turn, and press before topstitching.
Sew the flap for a crisp finish
If your flap is lined, sew the two flap layers right sides together along the sides and lower edge, leaving the top open. Trim bulk carefully, particularly at corners or curves, then turn it through and press. Topstitch close to the edge if you want a sharper, more durable finish.
For a single-layer flap, finish the raw edges according to your fabric and style, then press the attachment edge clearly so it sits evenly above the pocket opening.
Workshop tip: Press the flap from the underside first, then from the right side. That helps avoid a soft rolled edge creeping onto the face.
Position the pocket on the garment
Placement changes how the whole garment reads. For trousers, one dependable method is to centre the pocket on the side seam and mark the top edge 1.25″ (3.2 cm) from the notches, then edgestitch ⅛″ from the perimeter and add a second topstitch line ¼″ outward, based on this trouser cargo pocket placement guide. The same source recommends securing the corners with horizontal bar tacks, and the technique showed 89% durability retention after 50 wash cycles in UK field tests.
That tells you two things. First, the placement method is practical, not decorative guesswork. Second, reinforcement matters.
When pinning or basting the pocket in place, check these before you sew:
| Check | Why it matters |
|---|---|
| Top edge level | A sloping pocket is obvious from a distance |
| Equal distance from seam reference points | Stops one pocket sitting higher than the other |
| Flap overlap | Ensures the opening is protected and looks balanced |
| Pleat direction | Keeps both pockets symmetrical on the finished garment |
Stitch in a stable order
Attach the pocket by stitching the sides and lower edge first. Keep the stitching line controlled and even. Then add the second row of topstitching if your design includes it. Finally, attach the flap above the opening and secure the upper corners of the pocket with bar tacks.
If your fabric is bulky, don't rush the corner pivots. Lift the presser foot with the needle down, smooth the layers, and continue. If your fabric is lightweight, support it with your fingers as it feeds so the pocket edge doesn't stretch out of shape.
A few practical examples help here. On stiff cotton drill, I'd usually topstitch the flap after turning because it helps it sit flat. On drapier deadstock, I'd test whether topstitching improves the edge or just makes the flap too rigid. On denim, I'd often reduce inner seam bulk before turning the flap because the corners can become lumpy very quickly.
Troubleshooting Common Issues and Pro Tips
Most cargo pocket problems aren't drafting disasters. They're small handling issues that show up in a very visible place. The fix is usually straightforward once you know what you're looking at.
What to do if the pocket won't sit properly
If the pocket looks twisted or one side sticks out more than the other, check the fold depth first. Uneven pleats and side folds are a common cause of a pocket that refuses to hang straight. Re-pressing with a ruler beside the fold line often sorts it before you unpick anything major.
If the flap looks bulky, the seam allowances inside may be uneven or insufficiently trimmed. Grade the layers so they don't all end at the same point. Curved flaps also need little clips or careful trimming to release the shape.
What to do if the fabric feels too soft
If the pocket collapses once attached, the fabric probably needed more support before sewing. This happens often with lightweight denim, deadstock shirting, and fluid blends. Next time, test interfacing on a scrap and fold it into the pocket shape before committing.
For messy topstitching, reduce speed and increase control. An edge-joining foot or topstitching foot can help if you have one, but slowing down matters more than fancy attachments. I also like using narrow basting tape for pocket placement because the fabric can't shift around the way it sometimes does with pins alone.
A well-made cargo pocket should look purposeful when empty, not only when it's filled.
One last detail is worth remembering. The cargo pocket pattern began in the 1930s for the British Army, designed for functional field trousers that could carry field dressings, maps, and other essentials during combat, as noted in this history of the cargo pocket's origin. That practical origin still gives the best clue for sewing them well. If the pocket is useful, balanced, and sturdy, you're on the right track.
If you're ready to turn your draft into a finished project, More Sewing is a good place to find suitable fabrics, interfacing, and haberdashery for cargo pockets, especially if you want to test different weights and finishes before cutting into your final garment.