Guides
Fastenings for Clothes: A Practical Sewing Guide
You've finished the bodice, pressed every seam, and tried the garment on in front of the mirror. It looks right. Then you reach for the fastening and hesitate. Should it be a row of neat buttons, an invisible zip, hidden snaps, or something easier to handle day to day?
That last choice matters more than many sewists expect. The fastening affects the line of the garment, how the fabric behaves at the edge, how comfortable it feels, and whether the finished piece gets worn often or left in the wardrobe. With modern fabrics like Tencel, viscose blends, stretch jersey, and ex-designer deadstock, the wrong fastening can also cause puckering, dragging, or outright damage.
Fastenings for clothes are where practicality and style meet. Get them right and a handmade garment feels polished, comfortable, and reliable. Get them wrong and even lovely sewing can look strained. A good haberdashery drawer gives you options. Knowing how to choose between them is what turns options into good judgement.
More Than a Closure The Art of Choosing a Fastening
A fastening often gets chosen at the very end, when patience is running thin and you just want the garment finished. That's exactly when expensive mistakes happen. A soft blouse in drapey viscose can be spoiled by a heavy button that pulls the placket forward. A structured skirt can lose its clean shape if the zip ripples. A child's pinafore might be beautifully sewn, yet awkward in real life if the fastening is too fiddly for small hands.
The fastening is the garment's first point of contact. It's what your fingers use, what the eye notices along the front, and what takes the strain every time the piece is worn. That's why I treat it as part of the pattern, not an afterthought.
Practical rule: Choose the fastening at the same time you choose interfacing and seam finish, not after the hemming is done.
There's also a design voice in fastenings. Tiny self-covered buttons read differently from metal jeans studs. A concealed snap keeps the focus on the fabric. A contrast zip can become the feature. Even a simple tie can soften a neckline in a way a rigid closure never will.
When sewists start thinking about fastenings for clothes this way, their projects improve quickly. The garment looks more intentional because it is.
The Haberdashery Drawer A Tour of Fastening Types
You pull out a length of Tencel twill for a dress, then reach into the notions tin and pause. A chunky metal zip will drag. Tiny buttons may strain. A fastening that behaves beautifully on crisp poplin can be the wrong choice on slippery deadstock or for a wearer who needs something easier to open one-handed.
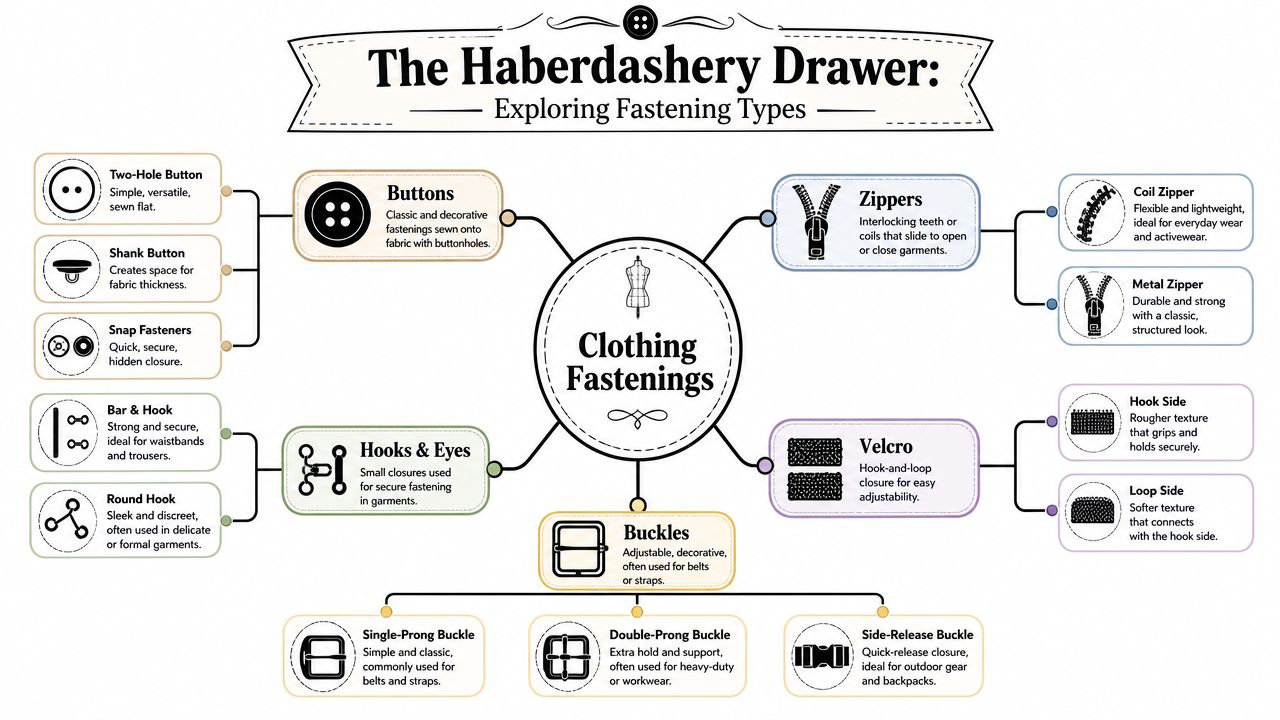
Buttons and button-based closures
Buttons are familiar, flexible, and full of character. They can disappear into a garment or become the feature, depending on size, finish, and spacing.
A few common examples:
- Flat two-hole and four-hole buttons: Good for shirts, shirt dresses, simple skirts, and children's wear.
- Shank buttons: Better for coating, boucle, brushed wool, or any fabric with loft, because they leave room for the cloth underneath.
- Jeans buttons and studs: Strong and neat on denim and heavy twill, but awkward to reposition once set.
On softer fabrics such as Tencel, viscose, or lightweight deadstock blends, button choice matters more than many sewists expect. Heavy buttons can tip a placket forward or create drag lines between buttonholes. Smaller buttons, lighter shell or corozo, or self-covered buttons usually sit better. For anyone with limited dexterity, traditional small shirt buttons can be frustrating, so it is often worth swapping to a larger size or using decorative buttons over hidden snaps.
Zips and where they shine
Zips give a clean, close fit with less visual interruption than a row of buttons. They suit skirts, dresses, trousers, jackets, and any style where the opening needs to stay flat.
Different zip types do different jobs. Invisible zips are neat on lighter garments, but they can look rippled if the fabric is unstable or loosely woven. A regular dress zip is often easier to insert well, especially in ex-designer fabrics with a bit of movement. Metal zips add weight and attitude, which is perfect for denim and some jackets, but they can overwhelm a fluid fabric. Moulded zips hold up well in outerwear and children's clothes.
I often advise home sewists to test the zip against a scrap held vertically before buying. If the fabric stretches, collapses, or shows every tooth line, that zip is too heavy or too stiff.
Snaps, press studs, hooks, and eyes
These are the quiet workers in a garment. You do not always see them, but you notice the result when a neckline sits flat or a waistband stays put.
Snaps and press studs are useful where you want a quick closure without a worked buttonhole. Sew-in snaps suit delicate fabrics because you can place them by hand and reinforce the area exactly where needed. Prym-style metal snaps are faster for utility sewing, but they need stable fabric and careful setting. On slippery Tencel or fine deadstock, I nearly always add a small square of interfacing or organza behind the snap.
Hooks and eyes, hook and bars, and lingerie closures are ideal for edges under strain. They finish the top of a zip neatly, secure a waistband, or support a decorative fastening that cannot manage the full load on its own.
Hook and loop, toggles, ties, buckles, and magnets
Hook-and-loop tape is practical, adjustable, and easy to handle. It is a common choice for children's wear and adaptive clothing, especially where speed matters more than a traditional refined finish. Softer sew-in versions are usually kinder on knitwear and lighter garments than the scratchy basic kind.
Other useful choices include:
- Toggles: Best on duffle coats, capes, and thick outerwear where small fastenings would get lost.
- Fabric ties: Good for wrap styles, lounge pieces, and soft openings where you want flexibility rather than structure.
- Buckles: Better for adjustment on straps and belts than for closing a garment by themselves.
- Magnetic closures: Helpful for adaptive sewing and for wearers with arthritis or reduced grip, but they need firm stabilising and thoughtful placement.
- Decorative clasps: Useful on occasionwear, tops, and layered garments where the fastening is meant to be seen. If you also make accessories or source components in batches, this guide on how to pick jewelry clasps for production gives a clear overview of clasp styles and practical trade-offs.
Accessibility is not a niche concern. It is part of good dressmaking. A back zip may look elegant, but a side zip, front snaps, magnets, or wider tabs can make the garment far easier to wear day after day. The best fastening is the one that suits the cloth, the design, and the hands using it.
How to Choose the Perfect Fastening for Your Project
You finish a lovely dress in fluid Tencel, put in the fastening you use on crisp cotton, and the whole opening starts to ripple. It happens all the time. The fastening was not wrong on its own. It was wrong for that fabric, that garment, and that wearer.
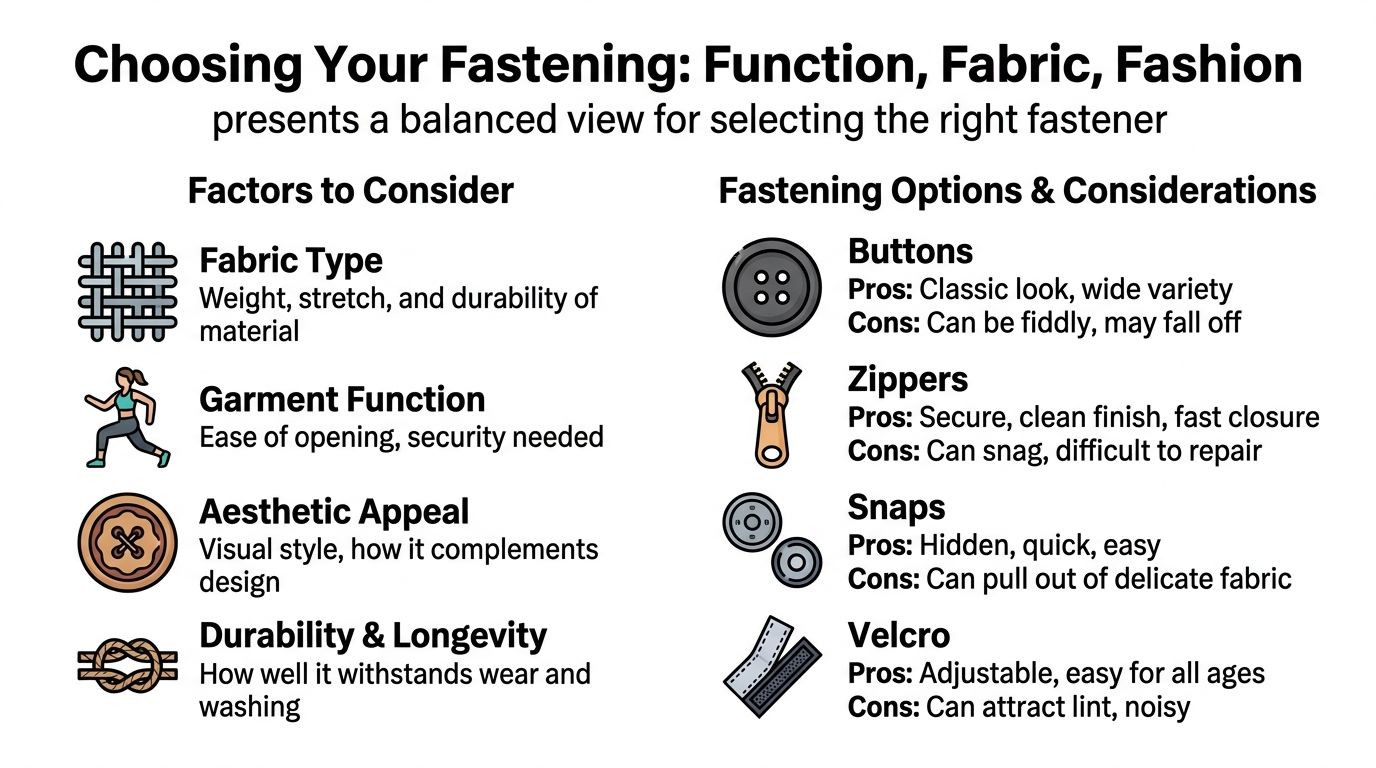
A good choice balances three things. The cloth has to support it, the garment has to function with it, and the finish has to suit the style. Miss one, and even a neatly sewn fastening can feel awkward in wear.
Start with the fabric
Fabric decides more than many dressmakers expect.
Heavy denim, firm twill, canvas, and coating can carry weight and strain without collapsing around the opening. They suit metal jeans buttons, chunkier zips, toggles, and larger worked buttonholes.
Soft viscose, Tencel, fine lawn, and slippery ex-designer deadstock need a lighter hand. These fabrics often drop beautifully, but they can also stretch, bruise under pressing, or show every lump from the wrong side. Smaller covered buttons, hand-picked zips, fine rouleau loops, concealed snaps backed with interfacing, or narrow ties usually sit better and keep the drape intact.
Texture matters too. Bouclé, brushed wool, quilted cloth, and lofty knits need a fastening that clears the surface rather than sinking into it. Shank buttons, larger snaps, and zips with a firm tape often behave better there than flat little closures that disappear into the pile.
Match the fastening to the job
A fastening has to survive real use, not just look good on the stand.
| Garment use | Usually works well | Often less successful |
|---|---|---|
| Tailored skirt or dress | Invisible or lapped zip, hook and bar | Bulky snaps on the seam line |
| Shirt or blouse | Flat buttons, rouleau loops for lighter styles | Heavy metal snaps on soft drape |
| Child's playwear | Press studs, hook-and-loop tape, sturdy zip | Tiny hooks, fiddly back neck buttons |
| Outerwear | Toggles, chunky zip, large buttons | Delicate loops under strain |
| Wrap or loungewear | Ties, internal buttons, soft belts | Rigid closures that fight the drape |
Accessories use the same logic. Weight, handling, and wear all matter. If you have ever looked at how to pick jewelry clasps for production, the trade-offs feel familiar.
Placement changes the result
The same fastening can feel tidy in one spot and annoying in another.
A back neck button may suit a delicate blouse, but it is no one's favourite on a rushed weekday morning. A side zip can disappear beautifully in a dress, though it can also be awkward if the wearer has limited shoulder movement. Centre front openings are easier to reach and easier to repair later. On wrap styles and soft jackets, a visible fastening can become part of the design rather than something to hide.
Garment conventions also play a part. If you are copying ready-to-wear, pay attention to which side overlaps and how the fastening is spaced. Home sewing gives you room to change that if a different arrangement works better for the wearer.
Accessibility belongs in the decision
Many patterns need adapting here.
Before committing, check the fastening against the hands and body that will use it. Small buttons can be frustrating for stiff fingers. Firm snaps can demand more grip than expected. Back openings can be difficult to reach. Tiny zip pulls are often easy to swap for a fabric tab or ring pull, and that simple change can make a garment far more wearable.
For adaptive sewing, front snaps, magnets with proper support, larger buttons with elastic loops, hook-and-loop tape in soft versions, or a side opening moved to the front often give a better result than the traditional choice. The best answer is the one the wearer can manage comfortably and confidently, while still giving the garment the look and hold it needs.
That is the standard I use in the shop. If the fastening suits the fabric but fights the wearer, it is not the right fastening yet.
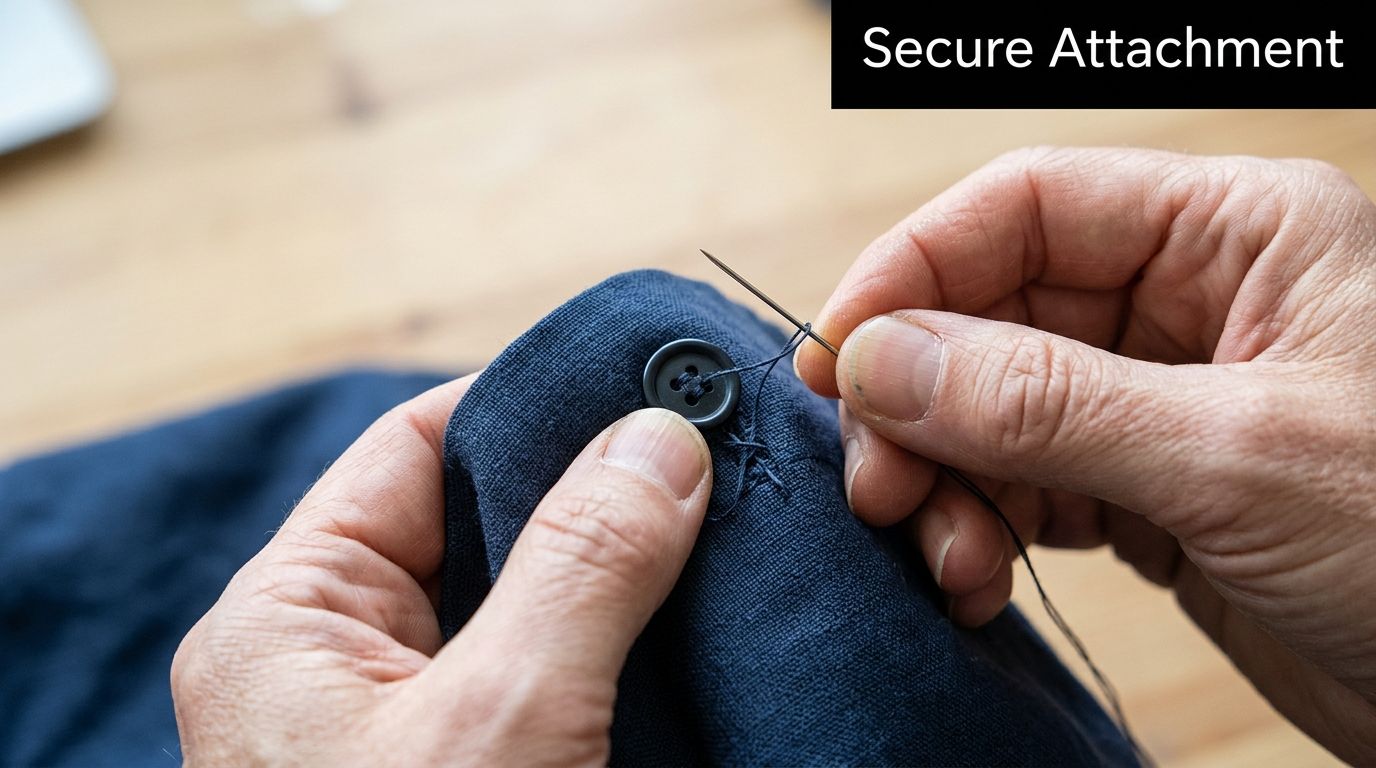
Tools and Techniques for Secure Attachment
A fastening can be the right choice on paper and still fail in the making. You see it after the first wash. The button droops, the snap twists, the zip buckles, and the fabric around it looks tired before the garment has had a fair chance. Good attachment prevents that.
The tool kit that helps
A small, sensible kit does the job well. I would rather have a few dependable tools than a drawer full of gimmicks.
- Sharps and betweens: Useful for buttons, hooks, bars, and sew-on snaps.
- A thimble: Helpful on denim, coating, bagged seams, and any fastening that needs firm hand stitching.
- Tailor's chalk or a fine marker: Accurate placement saves a lot of unpicking.
- Ruler or seam gauge: Keeps spacing even across a placket or waistband.
- Small sharp scissors: Better control for trimming threads and opening buttonholes.
- Interfacing scraps: Very handy behind stress points, especially on Tencel, viscose, lawn, and mystery deadstock with a loose weave.
- A glue stick or pins: Good for temporary positioning if clips would distort the edge.
- Buttonhole cutter or seam ripper: Helps you open cleanly without chewing the fabric.
- Pliers or a setting tool: Needed for hardware snaps and jeans buttons.
If you're adding labels at the same finishing stage, a practical Quote My Wall tag guide is handy for keeping that part neat too.
One habit matters as much as any tool. Test the fastening on a scrap layered and interfaced exactly as the garment will be. That extra five minutes tells you whether the cloth can take the stitches, the press, and the strain.
Sewing on a button with a thread shank
Buttons fail early when they are sewn hard against the cloth. A thread shank gives the layers room to sit properly, which matters even more on thicker plackets, soft Tencel twill, and anything with a facing underneath.
- Mark the placement and reinforce the wrong side if the fabric is soft or loosely woven.
- Bring the needle up from the back and stitch through the button holes several times.
- Before the last few passes, place a pin or spare needle across the top of the button.
- Remove the pin and lift the button slightly.
- Wind the thread around the stitches under the button to build a neat stem.
- Take the thread to the back and fasten off securely.
On coats and jackets, that little stem stops pulling. On drapier dress fabrics, it stops the button from dimpling the surface.
For accessibility, larger buttons with a clear shank often handle better than small flat ones stitched tightly to the garment. If the wearer uses one hand more than the other, check the button direction before you sew the whole set.
Attaching sew-on snaps accurately
Sew-on snaps need careful placement. If the two halves are even slightly off, the placket will torque and the fabric will wear around the stitches.
Close the opening first and mark the position with the garment lying flat. Transfer the mark to the second layer, then check the alignment before sewing. Use small, even stitches around the edge of the snap holes. Too few stitches and the snap wobbles. Too many packed into one spot and the area goes stiff.
For slippery cloth, add a small square of lightweight interfacing behind the snap area first. On ex-designer deadstock, I also check whether the surface marks easily, because some finishes show every pinprick. In that case, hand baste the support in place and keep the stitching tidy.
A visual demo can help if you like seeing the hand position and order of work.
For adaptive sewing, test the force needed to open the snap before you commit to a whole row. A snap that looks neat but takes too much grip is no use to the wearer. Softer sew-on snaps, wider spacing, or a mixed closure can solve that without changing the style too much.
A clean lapped zip
A lapped zip is forgiving, which is one reason dressmakers return to it for skirts and dresses. It also gives a little more control on fabrics that shift.
- Prepare the seam: Stitch the seam below the opening and press it accurately.
- Stabilise first: Interface the zip area if the fabric is soft, drapey, or loosely woven.
- Position one side fully: Stitch one tape side first, keeping the teeth where the lap will cover them cleanly.
- Form the lap: Fold the overlap carefully and topstitch the second side from the right side.
- Check before finishing: Zip it up and confirm the waist seam or any cross seam still matches.
If a zip waves, the cause is usually clear. The seam stretched while sewing, the area was not stabilised, or the tape was fed in unevenly.
On Tencel and viscose, a strip of fine interfacing or selvedge support along the opening can make the difference between a flat zip and a rippled one. On deadstock with an unknown fibre mix, test your iron temperature first and avoid overhandling the cut edge.
Working with Delicate and Demanding Fabrics
You cut a beautiful length of Tencel, sew the garment neatly, then the fastening area starts to crumple, stretch, or tear the moment you install it. That usually comes down to a poor match between fabric and closure, not bad sewing.
A lot of fastening advice is written with stable cotton in mind. Home dressmakers often work with drapey viscose, Tencel twill, stretch jerseys, satin, and ex-designer deadstock with an uncertain fibre mix or finish. Those fabrics need a lighter hand and a bit more preparation.
Tencel and viscose need support, not pressure
Tencel and viscose can behave beautifully in wear and awkwardly under the presser foot. They shift, grow along the grain, and show every pucker. If a fastening pulls in one spot, the cloth around it often gives way first.
The fix is usually local stabilising, not heavier hardware.
A few methods I return to again and again:
- Back up the fastening area: A small patch of lightweight interfacing, organza, or fine cotton behind a buttonhole, snap, or hook can stop strain from spreading.
- Keep the closure light: Fine zips, small buttons, covered buttons, and softer sew-on snaps usually sit better than bulky metal fastenings.
- Use hand sewing where it helps: Hand-picked zips and hand-worked loops give better tension control on fabrics that mark easily.
- Test pressing and marking first: Some deadstock fabrics glaze, shrink, or water-mark. Try your iron, marker, and interfacing on an offcut before committing.
For accessibility, this matters too. A delicate blouse in slippery viscose may look elegant with tiny buttons, but that can be frustrating for anyone with reduced dexterity. In that case, a concealed magnetic closure behind a mock placket, or larger buttons with elastic loops, can keep the look soft while making the garment easier to fasten.
Deadstock asks for testing, not assumptions
Ex-designer deadstock is exciting because it is unusual. It is also unpredictable. The label may be missing, the finish may have changed in storage, and the fabric can react very differently once heat, stitching, or hardware are introduced.
Treat the first sample as a trial, not a waste.
A viscose twill can feel weighty but still fray badly at a buttonhole. A stretch woven can seem firm until a snap setter distorts it. A polished cotton can take topstitching well but show every needle mark if you need to unpick. On unknown deadstock, I test three things before choosing the fastening: fray rate, press tolerance, and whether the cloth recovers after being pierced.
If the fabric feels precious, build the fastening area first, then attach the fastening.
Good pairings for tricky fabrics
Here are combinations that generally work well in dressmaking:
| Fabric type | Better fastening choices | Use caution with |
|---|---|---|
| Fine viscose | Small buttons, hand-picked zip, narrow ties | Heavy snaps, oversized buttonholes |
| Tencel twill | Lightweight zip, concealed snaps with backing | Rigid hardware without stabilising |
| Soft deadstock denim | Jeans button, metal zip, topstitched buttonholes | Tiny hooks under strain |
| Stretch jersey | Hook-and-loop tape, selected snaps with interfacing | Unsupported buttonholes |
| Satin or polished cloth | Hand-finished loops, concealed closures | Aggressive unpicking and resewing |
One extra point from the workroom. The best fastening on a demanding fabric is often the one that spreads stress over a wider area and asks less of the wearer. That is why wider hook-and-loop, larger buttons, soft loops, and covered plackets can be so useful in adaptive sewing. They reduce fiddling, lower strain on the cloth, and make the garment easier to use day after day.
Match the fastening's weight, tension, and method of attachment to the fabric's tolerance. Delicate cloth rewards patience and punishes force.
Repair Replacement and Adaptive Sewing
You put on a favourite dress, reach for the zip, and the pull comes away in your hand. Or a shirt button keeps loosening because the fabric underneath has thinned with wear. Fastening repairs often decide whether a garment goes back into use or stays at the back of the wardrobe.
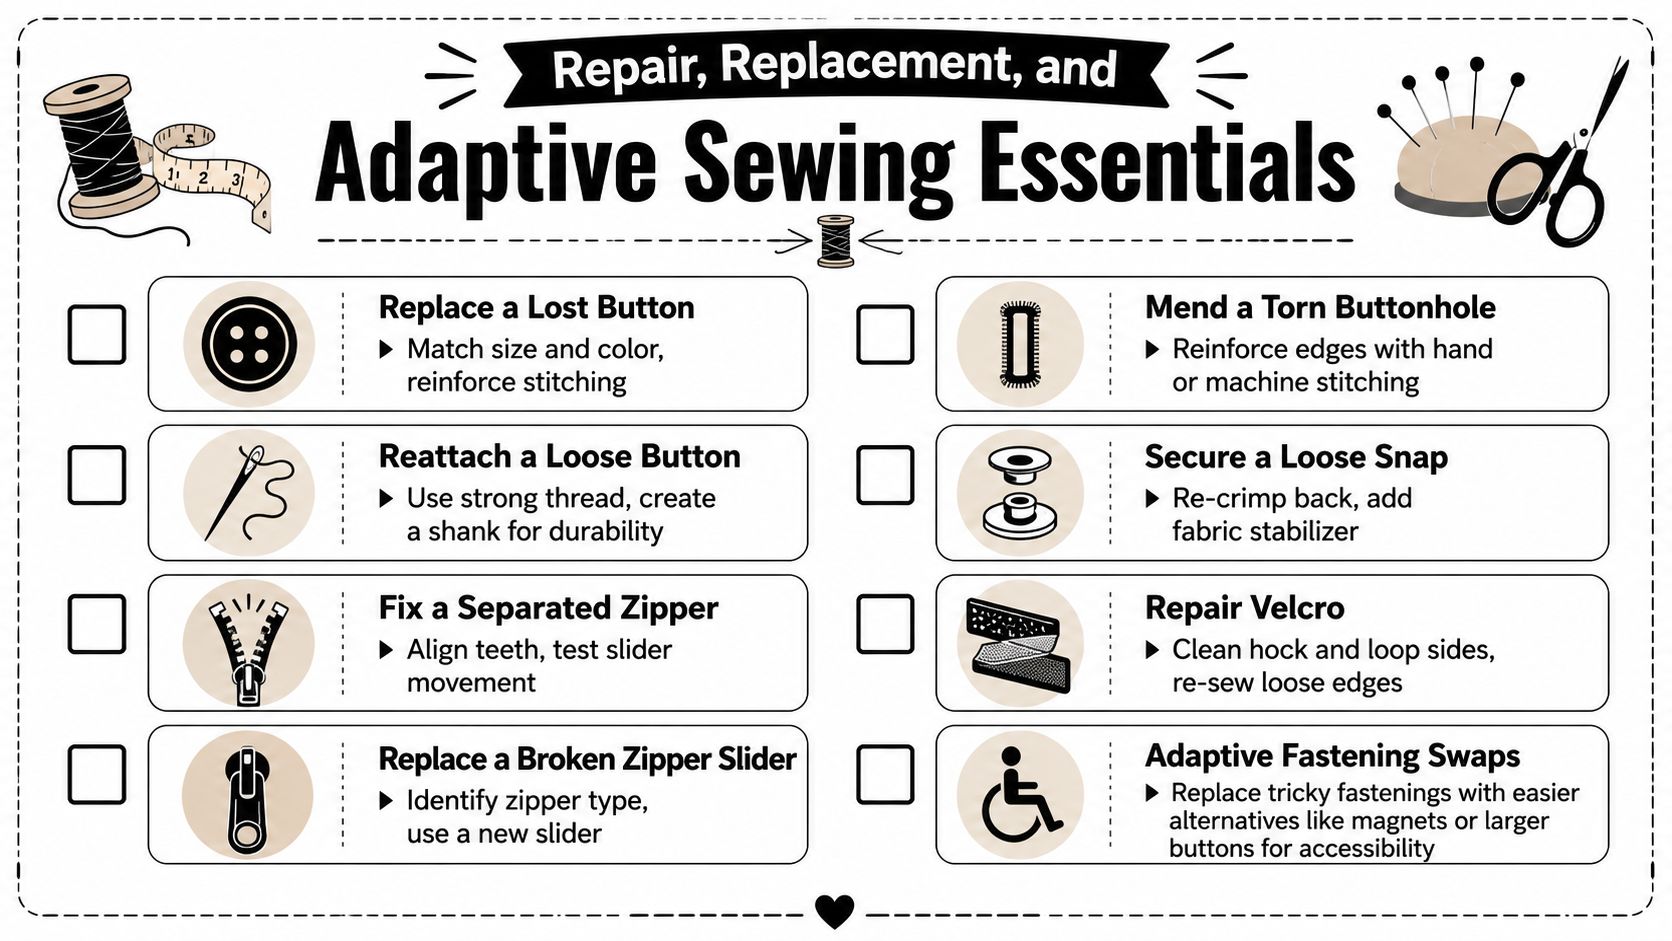
Straightforward fixes that are worth doing properly
Treat the area around the fastening, not just the fastening itself. A button sewn back through old, broken threads will loosen again. A new snap set into tired cloth will often tear free. Good repairs start with clearing away the failed stitching, checking for wear, and rebuilding the base before anything new goes on.
That matters even more on modern dressmaking fabrics. Tencel, soft viscose blends, washed linen, and mystery deadstock can all look sound from the right side while the fibres around the closure have already weakened. I usually fuse or stitch in a small support piece on the wrong side first, then replace the fastening onto something stable.
A few repairs come up again and again:
- Loose button: Remove the old threads, add a tiny backing patch or square of interfacing if needed, then resew with a shank if the fabric is thick.
- Bent hook or bar: Replace the worn part, and check the alignment before sewing permanently. A hook that sits slightly off will keep twisting under strain.
- Zip that splits open: Try a new slider if the teeth are intact and the tape still lies flat. Replace the full zip if the tape is rippled, stretched, or damaged.
- Lifting hook-and-loop tape: Resew it with a box or edge stitching, and add a backing layer if the fabric is soft or loosely woven.
- Pulled-out snap: Move slightly away from the damaged spot, or cover the weak area from the back before installing a replacement.
Small repairs hold far better when the stress is spread. That is often the difference between a quick mend and one that lasts through regular wear and washing.
Adaptive sewing deserves a place in everyday dressmaking
Adaptive changes belong in ordinary sewing because ordinary garments are worn by people with different grip strength, reach, dexterity, and energy. The best solution is not always the neatest-looking closure on the pattern envelope. It is the one the wearer can manage comfortably, repeatedly, and without strain.
That can mean changing both the type and the position of the fastening. Centre front openings are often easier to use than side zips. Larger buttons are usually easier to handle than tiny shirt buttons. A zip with a fabric pull tab can be much simpler to grip than a standard metal pull. Magnetic closures can help, but they need firm support and thoughtful placement, especially where laundering, medical devices, or sensitivity to bulk may be a concern.
I also find that adaptive sewing often improves the garment for everyone. A concealed snap placket behind decorative buttons looks polished and takes less finger work. A soft waistband closure is kinder on the body when sitting. A dressing gown with an internal tie stays put better and asks less of the outer fastening.
Simple adaptive modifications you can sew at home
These are practical changes that work well in home dressmaking:
- Shirt front conversion: Keep the buttoned look on the outside, but let hidden snaps or hook-and-loop tape do the closing behind the placket.
- Trouser waistband update: Replace a small inner button or stiff hook with a larger button, a soft tab, or another closure that is easier to open and close by feel.
- Zip grip improvement: Add a narrow fabric loop, ribbon tab, or soft cord pull that is easier to catch with the fingers.
- Wrap or robe support: Sew in internal ties so the garment stays secure even if the outer fastening is opened one-handed.
- Back or side opening redesign: Shift the closure to the front on a remake or pattern adaptation if the original placement is awkward to reach.
Test the change while standing and sitting. Then test it one-handed if accessibility is part of the brief. That quick check tells you more than the mirror does.
Clothing works best when the wearer can fasten it with confidence. Good repair work and thoughtful adaptation keep garments useful, comfortable, and in rotation for longer.
Your Finishing Touch Your Signature Style
A fastening can be quiet or decorative, traditional or modern, hidden or proudly visible. What matters is that it suits the fabric, supports the garment, and makes dressing easier rather than harder. That's why fastenings for clothes deserve the same care as fit, pressing, and finishing.
When you understand the trade-offs, you stop choosing by habit. You start asking better questions. Will this fabric support that snap? Does this button need a shank? Would a tie sit more softly here? Is this closure comfortable for the person who'll wear it most?
That's the difference between sewing something that closes and sewing something that feels complete. Mastering fastenings won't make your work fussy. It makes it thoughtful. And thoughtful garments are the ones that get worn, mended, loved, and kept.
If you're planning your next project and need quality fabric, reliable notions, or a ready-to-sew starting point, have a look at More Sewing. It's a useful UK source for dressmaking fabrics, haberdashery, and practical sewing essentials for beginners and experienced makers alike.