Guides
Best Childs Sewing Patterns: UK Guide 2026
You've seen the sort of childrens clothes that make you stop scrolling. A little pinafore in a Liberty print. Soft jersey leggings that fit. Pyjama bottoms in a print your child would choose for themselves. Then the thought lands. I could make that.
Then the second thought arrives just as fast. What pattern do I buy, what size do I cut, and what if I ruin the fabric before I even start?
That hesitation is normal. Sewing for children looks simple because the garments are small, but small doesn't always mean easy. Tiny cuffs can be fiddly. Necklines need to go over heads comfortably. Waistbands have to survive playground use, nursery naps, and repeated washing. And because children grow fast, the nicest-looking pattern isn't always the smartest one to sew first.
Still, this is one of the most satisfying kinds of sewing there is. You can finish a project in a realistic amount of time, practise key dressmaking skills without wrestling metres of fabric, and make something that gets worn straight away. Good childs sewing patterns don't just help you produce a cute outfit. They help you make something comfortable, washable, and worth the effort.
Your Guide to Sewing for Children
A customer in a sewing shop usually starts in one of two places. They either have a child in mind and a clear plan, such as “I need easy summer shorts”, or they've fallen in love with a fabric first and want to turn it into something useful. Both are fine starts. Trouble begins when they buy a pattern based only on the illustration on the front.
That glossy picture never tells you the full story. It won't tell you whether the neckline is easy to sew neatly, whether the sleeves are awkward to set in, or whether the sizing suits a tall slim child better than a sturdy one. It certainly won't tell you whether the instructions are written clearly enough for a first attempt.
The good news is that home dressmakers have more choice than ever because childrens sewing patterns sit inside a long sewing tradition. In the UK, paper patterns were established enough to appear in English-language sewing publications by the 18th century, and the first English book including patterns is dated to 1769, with women's and family sewing magazines in the early 1800s and tissue pattern sales in England by the mid-19th century helping create the market that children's patterns later relied on, as discussed in this history of sewing-pattern publishing.
That history matters because it explains why patterns exist to save you work. You're not expected to draft a child's dress from scratch unless you want to. You're buying a tested starting point.
Good sewing starts with choosing a pattern that matches your patience as much as your skill.
For a first project, keep your standards sensible. Aim for a garment that fits, feels nice, and can survive regular wear. A perfectly matched stripe, an invisible hem, or a hand-finished facing can wait for another day. The best early wins are practical ones. A waistband that sits comfortably. A sleeve that goes on without twisting. A dress that still fits after a growth spurt because you planned ahead.
Decoding Childs Sewing Pattern Formats
If you're buying childs sewing patterns for the first time, the format matters almost as much as the design. A frustrating format can turn a simple make into a chore before you even cut fabric.
Printed patterns and PDF patterns
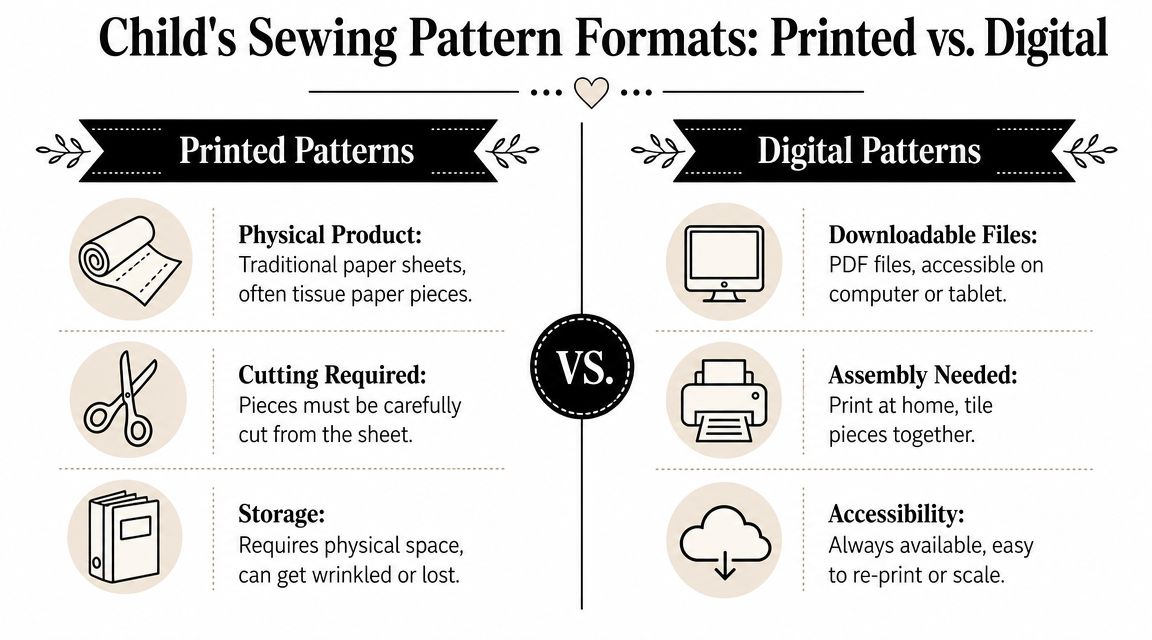
A printed pattern is the traditional option. You buy an envelope or folded packet containing tissue or paper pattern sheets plus instructions. Some sewists love printed patterns because there's no printing, no taping, and no screen time. You open the packet and get to work.
A PDF pattern is the digital version. You download the files, then either print them at home or send them to a copy shop. Think of a home-printed PDF as a small paper puzzle. An A0 copy shop file is the same pattern without the puzzle stage.
Each option has real trade-offs.
- Printed patterns suit sewists who like tactile planning. You can unfold the sheets, spot all the pieces at once, and pin them straight to tracing paper or fabric.
- PDF patterns suit repeat use. If a piece tears or you want to cut another size later, you print again.
- Home-printed PDFs cost less upfront in many cases. The price for that saving is assembly time.
- A0 PDFs save time. The trade-off is arranging large-format printing and storing a bigger sheet afterwards.
Print-at-home versus copy shop
With print-at-home files, accuracy matters. If your printer scales the pages incorrectly, the whole garment can end up wrong. That's why the test square matters every single time.
Copy shop files remove that assembly stage, which many beginners appreciate. If your dining table already feels crowded by fabric, rulers, and a machine, a pre-printed A0 sheet is often the calmer choice.
Single size and nested multi-size
Most modern childs sewing patterns are nested multi-size patterns. That means several sizes are printed on the same sheet in different lines. This is useful because children don't stay in one size for long, and many children need one size for width and another for length.
A single-size pattern is simpler to read because only one cutting line appears. It's tidy and beginner-friendly. The downside is obvious. Once the child outgrows it, you'll need another pattern or have to redraft adjustments.
Shop-floor advice: If you're sewing for siblings or planning to make the same style more than once, a nested multi-size pattern gives better long-term value.
Which format works best for a first project
For a true beginner, the easiest starting point is usually one of these:
| Format | Best when | Watch out for |
|---|---|---|
| Printed multi-size | You want a ready-made physical pattern with future size options | Tracing is usually smarter than cutting the original |
| PDF print-at-home | You want instant access and don't mind taping pages | Printer scaling and assembly accuracy |
| PDF A0 copy shop | You want digital convenience without home assembly | Extra planning for professional printing |
| Single-size printed | You want the cleanest possible cutting lines | Less flexibility for growth |
If you dislike prep work, don't choose a tiled PDF for your first make just because it's cheap. If you hate storing bulky packets, don't buy a stack of large printed patterns. The best format is the one you'll use without grumbling halfway through.
Choosing the Right Size for Growing Kids
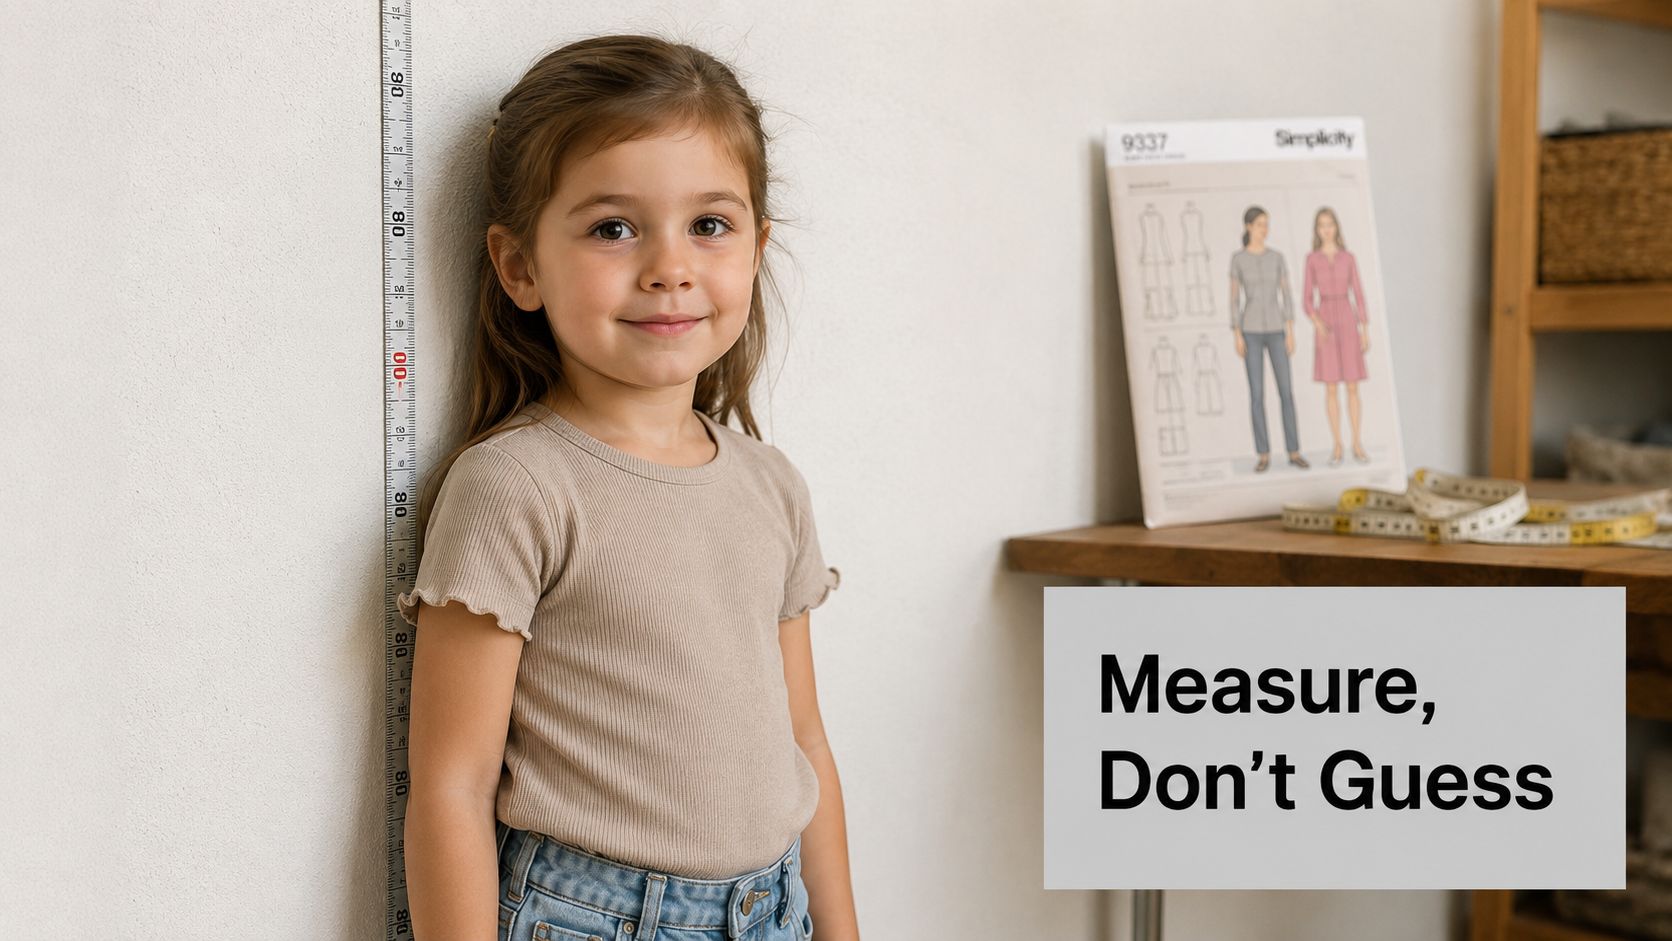
The most common mistake in childrens sewing is also the easiest to avoid. People buy by age.
That works just often enough to seem reasonable, and then fails on the project where fit matters most. One child may be narrow through the chest with long legs. Another may need extra room at the tummy but not at the shoulders. Age tells you almost nothing useful on its own.
For children's sewing patterns, size-grading is the key variable. A single pattern line has to preserve fit across rapid proportion changes, and designers have to account for changes in torso length, rise, and armhole depth, not just overall height. That's why size choice should be based on body measurements and finished-garment ease, not age alone, as explained in this discussion of children's pattern grading and fit.
What to measure before you cut
You don't need a long fitting session. You do need a soft tape measure, a child who's standing reasonably still, and a note of the measurements before you forget them.
Start with the basics:
- Chest or bust. Measure around the fullest part, keeping the tape level.
- Waist. Find the natural waist rather than where ready-made trousers sit.
- Hips. Important for skirts, trousers, leggings, and anything fitted below the waist.
- Height. Useful for judging length, especially in dresses, tops, and pyjamas.
If the pattern includes extra measurement points, such as back waist length or head circumference, use them. Children's clothes often fail at the openings first. A dress that looks roomy can still be miserable to get on if the neck opening is skimpy.
How to choose a size without guessing
Match the child's measurements to the pattern company's chart, not to the age printed on the envelope front. If the chest falls in one size and the height falls in another, that isn't a problem. It's normal.
Here's a practical consideration:
- Choose width from the most important body measurement. For tops and dresses, that's often chest. For trousers and skirts, waist and hips matter more.
- Choose length separately. A child can need more body length or leg length without needing more width.
- Check finished-garment ease if it's provided. That tells you whether the style is meant to be snug, relaxed, or oversized.
- Trace rather than cut when in doubt. It gives you room to adjust after a fitting.
If a child measures between sizes, blend the lines smoothly instead of jumping sharply from one size to another.
Blending sizes in real life
Often, beginners panic here, but it's only drawing a smooth line. Suppose the chest matches one size and the length you need is the next size up. Trace the narrower size at the underarm and side seam where width matters, then blend out or down to the longer length line.
The same applies to sleeves and trousers. A slim child may need a narrower leg with extra length. A sturdy child may need more width in the waist and hip with no added length at all.
Why age-based sizing keeps disappointing people
A lot of parents and beginners still start from age labels, even though children of the same age vary widely in height and weight. That gap is one reason fit feels so hit and miss in off-the-shelf and home-sewn childrens clothes alike, as noted in guidance discussing sizing beyond age bands.
When you measure first, several problems disappear at once. You waste less fabric. You avoid sewing a neckline that's too wide because you sized up only for length. And you stop blaming yourself for “doing it wrong” when the issue was the size choice from the start.
A measuring routine that saves time later
Keep a small notebook, or save measurements in your phone. Date them. Children's proportions change, and what fit beautifully last season may not be the right starting point now.
For repeat makes, compare old garments that fit well with the new pattern pieces. Measure the garment flat at chest, waist, and length. That little cross-check catches surprises before you cut into your favourite fabric.
Selecting Perfect Fabrics and Notions
The pattern drawing tells you what the garment looks like. The fabric choice decides how it behaves.
A sweet pinafore sewn in stiff cloth can feel awkward and boxy. Play trousers made in a flimsy lawn will wear through quickly. A knit top cut from a jersey with poor recovery can look tired after a short spell of wear. This is why experienced sewists spend time matching the fabric to the job, not just to the print.
Match the fabric to the garment's purpose
For summer dresses, blouses, and loose tops, lighter fabrics usually give the best result. Cotton lawn feels breathable and presses well. Double gauze has softness and ease, though it can shift while cutting. Viscose has lovely drape for fuller styles, but it's less forgiving at the cutting stage and needs patient pressing.
For trousers, dungarees, and hard-wearing skirts, choose a fabric with more backbone. Denim, corduroy, and canvas all stand up better to kneeling, climbing, and repeated washing. A medium-weight cloth usually gives enough structure without becoming stiff and uncomfortable.
For T-shirts, leggings, and soft everyday separates, use a knit with decent stretch and recovery. Cotton jersey is often the first choice because it's comfortable and familiar to wear. Before you buy, stretch a corner and watch how quickly it returns. If it stays rippled in your hand, it may not make the happiest leggings.
A practical fabric table
| Fabric Type | Best For | Sewing Tip |
|---|---|---|
| Cotton lawn | Dresses, blouses, pyjamas | Use a fine needle and press seams lightly but often |
| Poplin | Shirts, simple dresses, shorts | Good for crisp styles, but test whether it feels too firm for gathered designs |
| Double gauze | Soft tops, bloomers, relaxed dresses | Cut in a single layer if it shifts too much |
| Viscose | Drapey dresses and loose tops | Let the fabric rest before hemming because it can drop |
| Denim | Trousers, pinafores, jackets | Grade bulky seams and use a sturdier needle |
| Corduroy | Dungarees, skirts, jackets | Watch the nap so every piece runs the same way |
| Canvas | Aprons, robust trousers, utility styles | Avoid very bulky seam intersections on tiny garments |
| Cotton jersey | T-shirts, leggings, pyjamas | Use a ballpoint or stretch needle and don't pull while sewing |
| French terry | Sweatshirts, joggers | Great for casual wear, but check cuff and ribbing compatibility |
Notions that make a difference
Notions are where comfort often lives. A beautiful garment can still be annoying if the waistband twists, the button scratches, or the interfacing turns a collar into cardboard.
A few reliable habits help:
- Choose soft elastic for waistbands. Waist elastic sits against the skin all day. If it feels rough in your hand, it won't improve after washing.
- Use interfacing sparingly on child garments. Light to medium support is usually enough for collars, plackets, and facings. Heavy interfacing can make small pieces look rigid.
- Think about fastening speed. Poppers, snaps, or simple elastic waists often suit everyday children's clothes better than lots of tiny buttons.
- Buy matching thread with the fabric in hand. Close enough under shop lighting can look wrong at home.
A child's garment has to earn its place in the drawer. If it's hard to get on, stiff to wear, or fussy to wash, it won't be reached for often.
Fabric choices that usually disappoint
Some combinations look appealing but create more work than they're worth.
Very slippery viscose for a first gathered dress can test your patience. Thick coating wool for a tiny jacket can become bulky at every seam. Very open knits can stretch out while you sew and leave wavy hems. Sequins, scratchy trims, and stiff glitter fabrics may please for a moment and then sit unworn.
When in doubt, choose comfort first and save the dramatic fabric for a simpler shape.
Preparing Your Pattern and Fabric Correctly
Most disappointing sewing results begin before the machine is threaded. The pattern is printed at the wrong scale. The fabric wasn't pre-washed. The grainline was ignored because it looked close enough. Those little shortcuts cost far more time than they save.
The whole reason commercial paper patterns became so useful is that they removed the need for home dressmakers to draft every garment from scratch. That shift took hold in the late 19th century, helped by Ebenezer Butterick's graded-size innovation in the 1860s, which made patterns easier to use for ordinary home sewing, as described in this brief history of the sewing paper pattern.
Getting a PDF pattern ready
If you're using a PDF, print the page with the test square first. Check it with a ruler before printing the rest. If that square is wrong, stop there and fix the printer settings.
Then assemble carefully. Trim only where the pattern instructions tell you to trim. Match the page guides exactly, tape in manageable sections, and smooth the sheet flat before tracing. Don't try to assemble while distracted. It's the sewing equivalent of measuring wood before cutting. Accuracy at this stage pays you back later.
Why tracing is worth the extra few minutes
With nested childrens sewing patterns, tracing is the smarter habit. Children grow, and you may want another size later. You may also need to blend between sizes or adjust length without losing the original lines.
Tracing paper, medical exam paper, or pattern paper all work. Mark every notch, grainline, fold line, and label. Beginners often trace only the outside shape and then wonder why assembly feels confusing.
A good traced piece should include:
- Pattern name and piece name
- Cutting instructions, such as cut 1 on fold or cut 2 mirrored
- Grainline arrow
- Notches and dots
- Lengthen or shorten lines
- Any pocket placement or button marks
Pattern markings that aren't optional
Some markings really can't be skipped.
| Marking | What it tells you | Why it matters |
|---|---|---|
| Grainline arrow | Direction to place piece on fabric | Affects hang, twist, and fit |
| Notches | Matching points between pieces | Keeps seams aligned |
| Dots or circles | Placement for pockets, darts, openings | Prevents guesswork |
| Fold line | Edge goes on fabric fold | Creates symmetrical pieces |
| Lengthen/shorten lines | Safe alteration zone | Lets you adjust without distorting shape |
If a sleeve twists after sewing, check whether the notches were matched properly. If trouser legs hang oddly, look at the grainline before blaming the pattern.
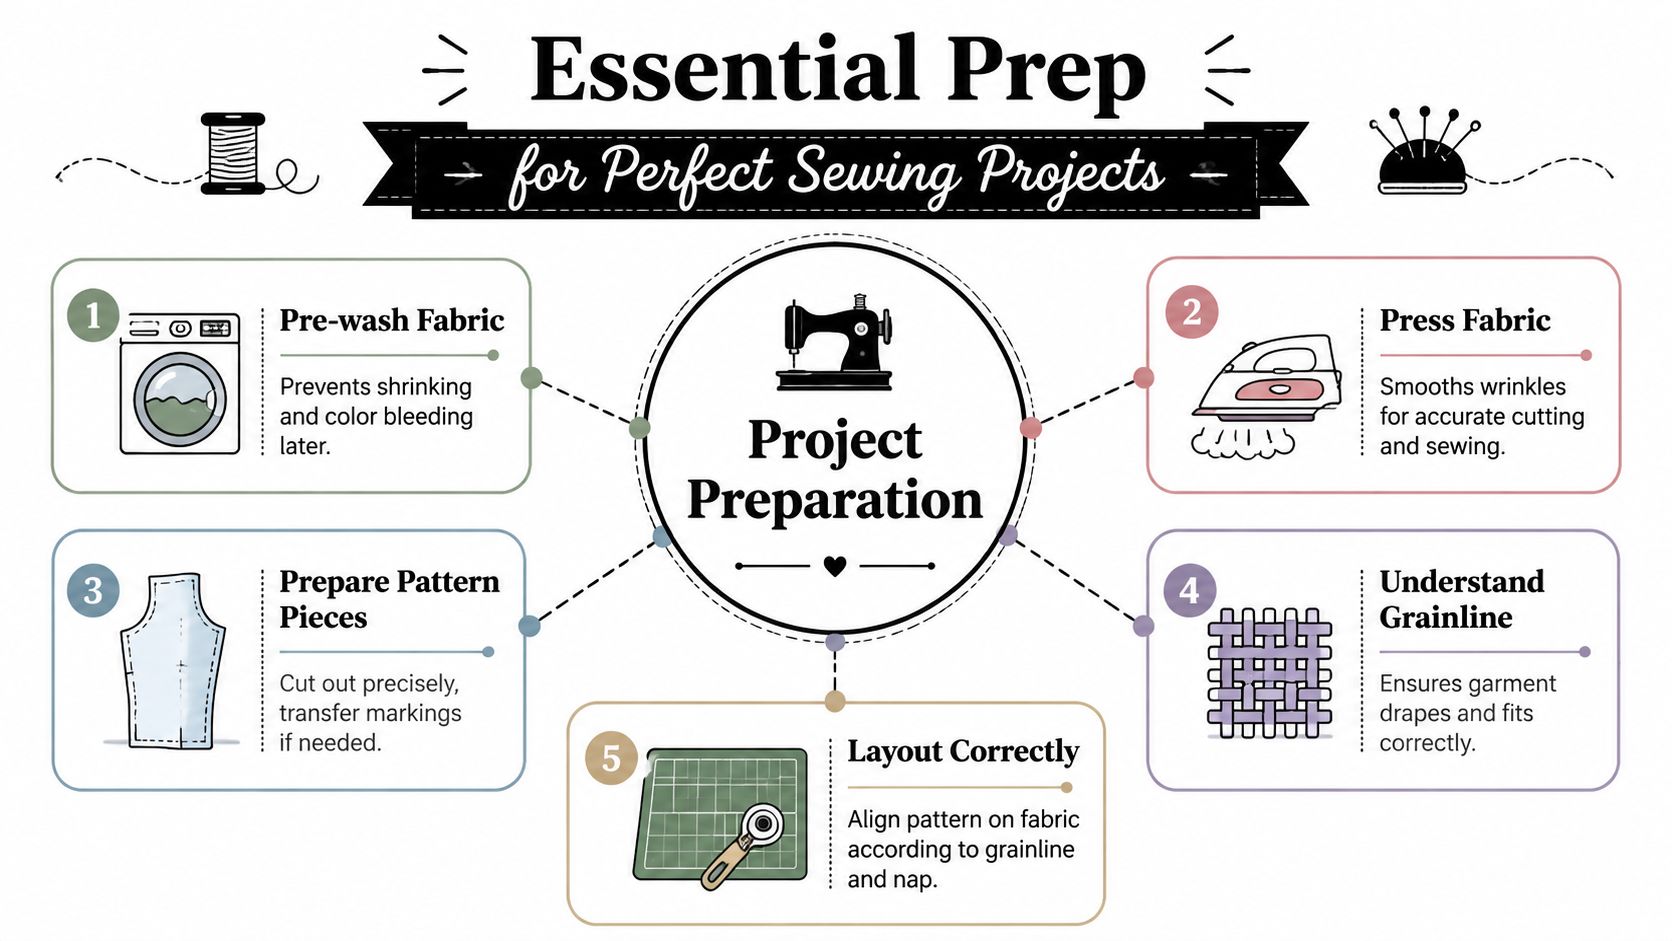
Practical rule: Press the fabric before cutting, even if it came off the line looking smooth. A crease can shift a cutting line enough to spoil a tiny collar or facing.
Preparing the fabric itself
Pre-wash fabric in the way you intend to wash the finished garment. If the child's clothes will go through an ordinary family wash, prepare the fabric for that reality. Then press it flat.
Lay the fabric on a stable surface. Check whether it has a nap, one-way print, or directional motif. Corduroy, velvet, and brushed fabrics must all run the same direction. Novelty prints with upside-down animals or vehicles need extra attention before cutting.
Pinning is fine, but weights and a rotary cutter can help with fabrics that distort easily. Whichever method you use, cut cleanly and don't lift the fabric off the table while cutting around curved pieces. Let the surface support the shape.
How to Add Growing Room and Adjust for Fit
Children's clothes don't need to be baggy to last longer. They need planned flexibility.
That's a better mindset than cutting a larger size and hoping for the best. Oversizing often creates the wrong sort of extra room. The neckline gets sloppy, the shoulders drop, and the garment looks uncomfortable long before it becomes useful. A few deliberate adjustments work much better.
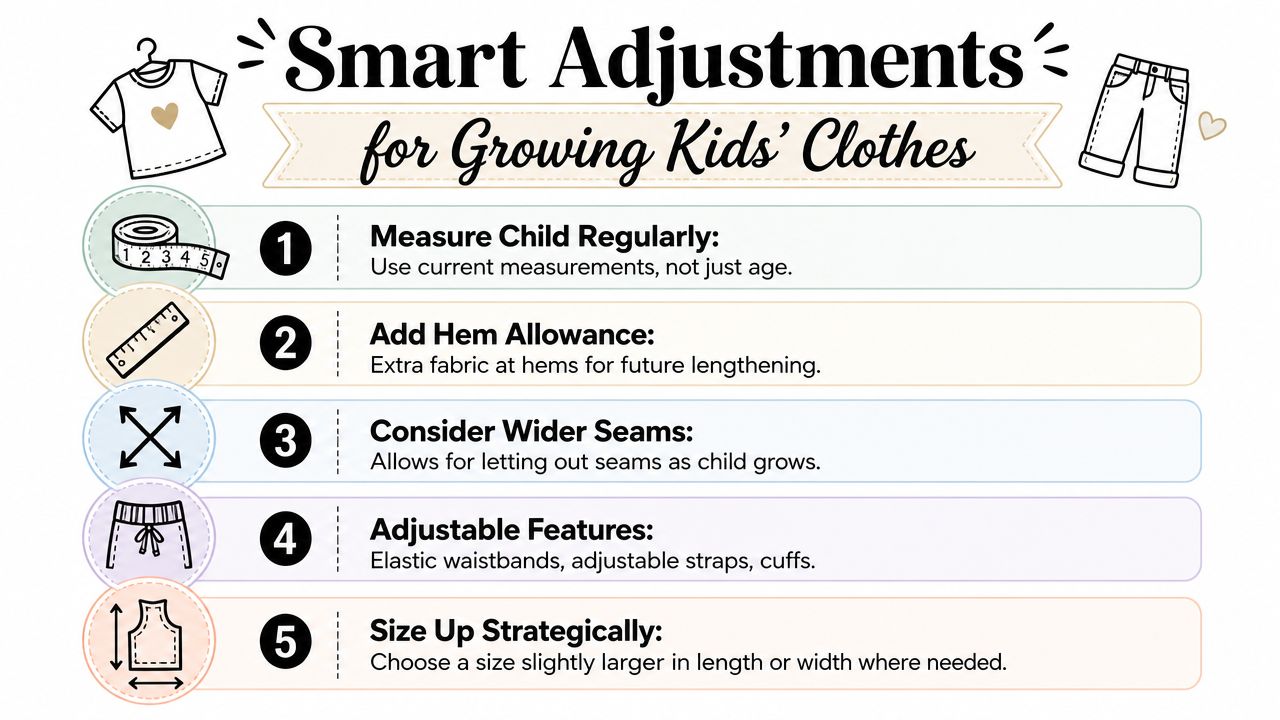
Simple ways to build in wear time
Some of the best tricks are old-fashioned because they work.
- Deeper hems on dresses, skirts, and trousers give you fabric to let down later.
- Adjustable straps with more than one button position are excellent on pinafores, rompers, and overalls.
- Elastic casings allow a waistband to be tightened or relaxed without remaking the garment.
- Turn-up cuffs can look intentional now and become extra length later.
- Room at side seams can help on some woven garments, though you need to keep proportions sensible.
These choices preserve comfort while extending the useful life of the garment. That matters when you're putting real time into sewing.
A clear demonstration can help when you're planning alterations or growth-friendly tweaks:
Fit adjustments that are low risk
Length changes are usually the easiest first alteration. If a top needs extra torso length, use the pattern's shorten or lengthen line if provided. If there isn't one, adjust in a spot that won't distort the armhole or hem shape.
For sleeves, add length at the designated line or between the elbow and wrist area rather than just extending the cuff edge blindly. For trouser legs, keep the side seam and inseam balanced so the leg still hangs properly.
Width changes need more care. If you widen a sleeve for fuller arms, add evenly and make sure the sleeve still fits the armhole. If you add at the waist on a woven dress, consider whether the bodice and skirt seam still match cleanly.
Why good instructions matter more on children's garments
Small pieces magnify small errors. A slightly off-facing on an adult blouse may disappear in the overall garment. On a child's dress, it can throw the whole neckline out.
That's why instruction clarity matters so much. Sewists consistently value child patterns with strong guidance because clear construction order reduces ambiguity in steps like facings, elastic insertion, and seam finishing, improving first-time results, as discussed in this review of tried and true children's sewing patterns.
If a pattern tells you exactly when to press, clip, understitch, and topstitch, you're far more likely to finish with a garment that looks crisp and sits properly.
When you're choosing a pattern for growth-friendly sewing, look for one that gives you enough technical guidance to make those changes confidently. A cute line drawing is not enough. You want instructions that tell you what order to work in and where accuracy really matters.
Project Ideas and Beginner Troubleshooting
The easiest first childrens sewing projects are the ones that tolerate a little imperfection and still get worn. That usually means simple shapes, easy openings, and fabrics that behave well.
Good first projects and what they teach
Pyjama trousers are a classic starting point. You'll learn straight seams, an elastic casing, and hemming without wrestling collars or set-in sleeves.
Elastic-waist skirts are another forgiving option in woven fabric. They teach gathering or waistband application and help you practise clean pressing.
For an advancing beginner, try simple dresses, pull-on shorts, or a basic sweatshirt in stable knit fabric. Those projects build confidence without loading too many new techniques into one garment.
Big commercial brands or indie patterns
The large commercial pattern brands often give you broad availability and familiar envelope formats. Some sewists like them because they're easy to find and cover a wide range of styles.
Indie patterns often shine in instruction style. They may include clearer diagrams, better photo support, and more modern sewist-friendly language. The trade-off is that some assume you're comfortable printing PDFs or tracing nested lines.
Neither route is automatically better. For a first child's garment, choose the pattern with the clearest construction sequence, not the fanciest line drawing.
Common sewing snags and quick fixes
- Wavy knit hems usually come from stretching the fabric while sewing. Support the fabric, reduce pressure if your machine allows it, and let the machine feed rather than pulling.
- Tiny sleeves that won't ease in neatly often improve if you sew a row or two of gentle easing stitches first and press the cap before insertion.
- Bulky seams at cuffs or waistbands need trimming and grading. Don't stack every allowance at full width and hope for the best.
- Messy topstitching often means you sewed too fast. Mark the line, lengthen the stitch slightly if appropriate, and practise on scraps first.
Don't skip the safety questions
Safety matters as much as style. In the UK, some children's clothing, especially sleepwear, falls under product safety expectations linked to flammability, and home sewists should think carefully about fabric choice, fastening placement, and features such as long drawstrings, which can pose a risk for young children, as outlined in this guidance on children's clothing safety and flammability.
If you're sewing for babies, toddlers, or nightwear, pause before adding decorative cords, oversized loose ties, or awkward fastenings near the neck. The safest detail is often the simplest one.
If you're ready to turn an idea into a wearable project, More Sewing is a practical place to start. You'll find quality dressmaking fabrics, haberdashery, sewing kits, and the tools that make childrens sewing patterns easier to handle from the first tracing line to the final press.