Guides
Your Ultimate Dressing Robe Pattern Sewing Guide
You've probably got one of two jobs in front of you. Either you want a proper dressing gown that feels better than anything on the high street, or you need a reliable handmade gift and don't want to gamble on a fussy fitted garment. That's where a good dressing robe pattern earns its keep.
Robes are forgiving, but they're not thoughtless. Fabric choice changes everything. Collar styles can make a project feel simple or surprisingly technical. And if you sew for a body that doesn't sit neatly into one size column, a few calm adjustments at the start save a lot of muttering later.
The good news is that robe sewing is one of the most satisfying things to make at home. You get long seams, visible progress, and a finished garment you'll use. If you choose the right pattern, prep it properly, and match it to a fabric that suits your climate and habits, you'll end up with something that feels custom rather than homemade.
Choosing Your Perfect Dressing Robe Pattern
A customer comes in on a damp January morning asking for a robe pattern, and my first question is never about skill level. It is how the robe will be used. A quick throw-on after the shower needs different drafting from a wrap you plan to wear over pyjamas while the kettle boils, and both are different again from a smarter house robe you might keep on for half the morning.

Start with the robe style
For a first robe, I usually point people toward a kimono-style robe. The shape is simpler, the shoulder is often dropped, and the front bands are easier to attach cleanly than a full collar. It also adapts well if you need to add width through the waist or hip without disturbing the whole design.
A shawl collar robe suits cooler UK homes particularly well, especially if you already have your eye on waffle knit, brushed cotton, or a stable ex-designer deadstock woven with some body. The trade-off is construction. The collar has to sit smoothly around the back neck and front edge, so pressing, clipping, and bulk control matter more.
A notched collar robe gives a sharper, pyjama-inspired look. I like it best for confident sewists who enjoy precision. If the fabric is too thick, or the collar points are slightly off, every little wobble shows.
Check the pattern, not just the sketch
A pretty line drawing can hide a lot. The useful information is usually in the sizing chart, finished measurements, and technical details.
Check these before you buy:
- Body measurements for your starting size
- Finished garment measurements so you can judge the ease properly
- Front overlap so the robe stays closed comfortably
- Sleeve type because set-in sleeves sew and fit differently from dropped shoulders
- Collar, cuff, pocket, and facing details which affect both difficulty and fabric choice
Front overlap is a big one, especially for fuller busts, rounder tummies, or anyone who dislikes a robe that swings open the second they sit down. I would rather see a slightly roomier robe than one that needs constant tugging closed.
Choose for your body, then adjust with purpose
Robe patterns are forgiving, but they still benefit from smart fitting choices. If your measurements span sizes, use the bust, waist, and hip independently instead of forcing yourself into one column. On a robe, grading between sizes is usually straightforward through the side seam, and it gives a better result than sizing up everywhere.
For fuller busts, look at the finished cross-front width and overlap, not just the bust size on the envelope. For broader shoulders or a fuller upper arm, a dropped-shoulder robe is often easier to fit than a set-in sleeve. For petite frames, shortening above the waist and above the pocket placement often works better than chopping length off the hem, because the belt loops and pockets stay in the right place.
This matters in the shop all the time. The robe someone thought was “too advanced” is often the better choice if the shape matches their body and the fabric they want to wear.
PDF or paper pattern
This comes down to working style.
PDF patterns are handy if you want to start straight away, reprint a size, or preserve the original while you trace alterations. They suit anyone who regularly blends sizes or sews for more than one person. The weak point is printing accuracy, so always measure the test square before you tape anything together.
Paper patterns are calmer to use on a big cutting table and easier on the eyes if you dislike assembling sheets. They also make it simpler to see the whole garment at once. The downside is replacement. If a piece tears or goes missing, you cannot just print another copy.
My usual advice is simple:
- Pick PDF if you are comfortable taping pages and expect to alter or reuse the pattern.
- Pick paper if you want full-size sheets from the start and have room to store them.
- Trace either version if you are sewing for changing body measurements, multiple sizes, or repeated makes.
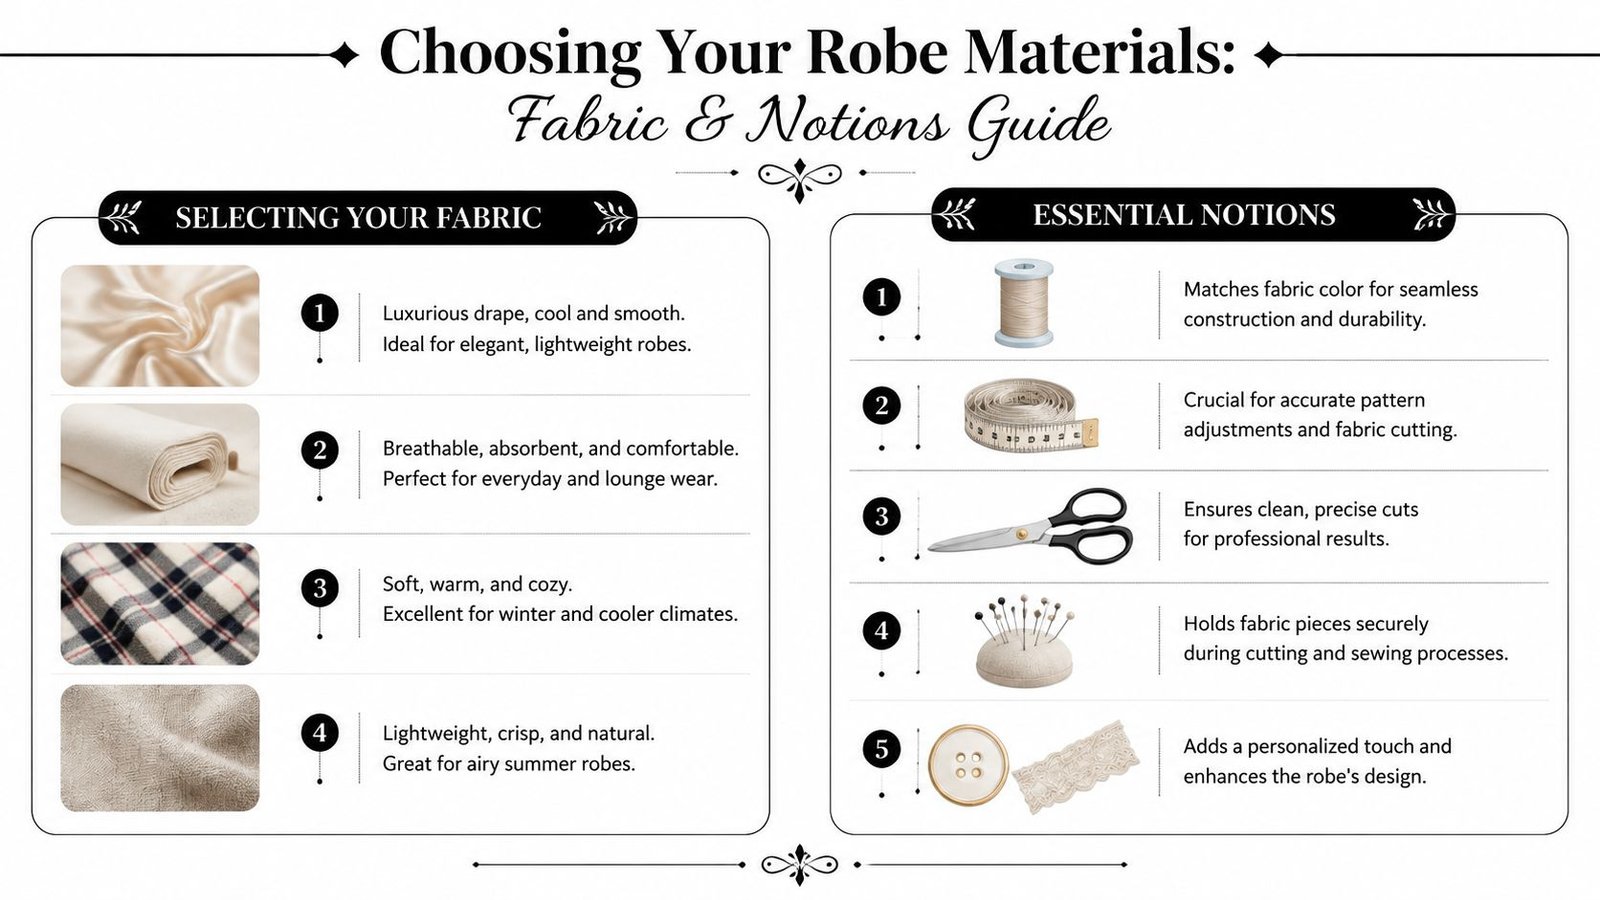
Selecting the Ideal Fabric and Notions
A customer comes in wanting a robe for chilly mornings in a draughty UK house. They pick up a lovely fluid viscose first, then realise their true desire is warmth, easy washing, and a fabric that will not cling to pyjamas. That is the decision that matters here. The right robe fabric is the one that suits how the garment will be worn, not just how it looks on the bolt.
What works in a UK wardrobe
In a UK fabric shop, robe choices usually fall into three useful groups.
Soft, drapey wovens such as viscose challis, Tencel twill, and lighter ex-designer deadstock work well for wrap robes with a fluid belt and a relaxed collar. They feel lovely over nightwear and suit anyone who wants the robe to skim rather than stand away from the body. The trade-off is handling. These fabrics shift while cutting and can stretch out at the edges if they are not stabilised.
Crisp, breathable wovens such as linen, linen-viscose blends, and better-quality cotton poplin give a robe shape without making it heavy. I often recommend these for patch-pocket styles, shorter robes, and anyone who wants the belt to sit cleanly at the waist. They are also practical for fuller busts and fuller hips because the fabric holds its line instead of collapsing into every curve.
Cosier cloths such as cotton waffle, waffle knit, ponte, stable jersey, and sweatshirt fleece make sense for cooler weather and post-bath wear. In British homes, that matters more than many patterns admit. A stable waffle knit is especially useful if you want softness without the bulk of towelling, and it adapts well for different body types because a little stretch gives you more ease through the back, upper arm, and hip.
A simple rule helps. Match a fluid pattern to a fabric with movement. Match a straighter, roomier robe to a fabric with more body.
Dressing Robe Fabric Comparison
| Fabric Type | Best For… | Sewing Level | More Sewing Recommendation |
|---|---|---|---|
| Tencel blend | Soft drape, elegant lounging, wrap styles with fluid belts | Confident beginner to intermediate | Best when you want a robe that falls close to the body without stiffness |
| Viscose | Lightweight robes with movement and a dressier feel | Intermediate | Good for long robes if you're willing to cut carefully and stabilise edges |
| Linen or linen deadstock | Structured everyday robes, layering pieces, breathable year-round wear | Beginner to intermediate | A strong choice for sewists who want a sustainable option with a crisp finish |
| Cotton waffle | Cosy post-bath robes and cooler mornings | Beginner with careful finishing | Great for practical dressing gowns with texture and absorbency |
| Stable jersey | Softer wrap robes with stretch and easy wear | Intermediate | Useful if you want comfort and flexibility without a close-fitting, structured finish |
Notions that make a visible difference
The best notions depend on the cloth.
- Thread: A decent all-purpose polyester thread is the safe choice for most robes. Gutermann Sew-all is reliable and easy to find in the UK.
- Interfacing: Lightweight fusible works for collars, front bands, pocket edges, and belt loops. Test it first on deadstock, because coatings and fibre mixes can react differently under the iron.
- Needles: Use a universal 80/12 for most woven robe fabrics, a microtex for slippery viscose or Tencel, and a ballpoint or stretch needle for jersey and waffle knits.
- Pins or clips: Fine glasshead pins suit lightweight wovens. Clips are better for thick waffle, fleece, or layered front bands.
- Pressing tools: A press cloth, sleeve board, and clapper make a noticeable difference, especially on collars, hems, and belt pieces.
If you are sewing for a body that does not match standard proportions, fabric choice can make fitting easier before you alter a single pattern piece. A robe in stable jersey or waffle knit is often more forgiving across the upper arm, bust, and seat. A crisp linen robe gives cleaner lines, but it shows fit problems faster.
If you are new to robe sewing, start with a fabric that behaves well on the table and under the presser foot. Good linen blends, cotton waffle, and stable knits are usually kinder than slippery viscose. You will get a better finish, and you are far more likely to wear the robe once it is done.
Essential Pattern Preparation and Alterations
A customer buys beautiful robe fabric, cuts the pattern straight from the envelope, and comes back a week later wondering why the belt sits under the bust and the sleeves feel heavy. That usually comes down to preparation, not sewing skill. A dressing robe is forgiving, but only if the main proportions are right.
The three fit points I check first are shoulder width, front overlap, and tie placement. Get those right and even a simple robe feels balanced on the body. Get them wrong and the whole thing can feel twisted, skimpy at centre front, or awkward every time you wrap it closed.
Standard sizing rarely reflects real bodies. UK body size data published by the Office for National Statistics shows a high proportion of adults living in larger bodies, so grading between sizes and adjusting length is part of normal dressmaking, not a specialist extra. For direct figures, use the Office for National Statistics health and body mass data.
Start with fresh measurements
Take measurements over close-fitting clothes, or over the underwear you would normally wear with nightwear. Old measurements catch people out more often than they expect, especially if they are sewing from a pattern brand they have used before.
For robes, these measurements matter most:
- High bust
- Full bust
- Waist
- Full hip
- Back waist length
- Shoulder width
- Finished robe length
- Sleeve length
Then compare them with both the body measurement chart and the finished garment measurements, if the pattern includes them. I always pay close attention to finished ease at the hip and upper arm. That is where many robe patterns feel generous on paper but tight in wear, particularly in stable woven waffle or heavier cottons sold for cooler UK homes.
Choose your base size with intention
For a woven robe, pick the size that matches the high bust first if your upper chest is narrower than your full bust. That gives a cleaner shoulder and neckline, then you can add room where you need it. If you are sewing with a knit robe pattern, the bust choice is usually a little more forgiving, but shoulder width still matters.
For fuller hips or a prominent tummy, protect the front overlap before trimming any width. I see this mistake often with customers adapting oversized robe patterns. The robe may look wide on the tissue, but once it wraps over a fuller body, that overlap disappears quickly.
If you are between sizes, blend out rather than jumping up a full size everywhere. Robes are one of the easiest garments to grade at the side seam and waist without disturbing the rest of the pattern.
Alter the pattern where the body changes, not only at the hem
Length adjustments are usually the first job. Commercial patterns are drafted to a standard height, and that standard is not much help if you are petite, tall, long-waisted, or short through the torso.
Use the printed lengthen and shorten lines if they are there. If not, alter the pattern in a level section between key landmarks. On sleeves, adjust above the elbow or between notches. On the body, adjust between bust and waist or between waist and hip. Chopping length off the hem alone can throw off pocket position, tie loops, and the overall balance of the robe.
This is especially noticeable on longer lounge robes and spa-style dressing gowns.
Alterations that make the biggest difference
A few adjustments give the best return for the time spent.
- Full bust adjustment: Useful when the robe pulls open at the bust, the belt rides up at centre front, or the side seam swings forward.
- Broad back adjustment: Helps if reaching forward feels tight across the shoulder blades.
- Full bicep adjustment: Worth doing for robe sleeves in waffle knit, sweatshirt fleece, or thick brushed cotton, where bulk steals movement.
- Forward shoulder adjustment: Good for anyone whose shoulder seam tends to slip backwards in ready-to-wear.
- Petite or tall adjustment: Better than shortening or lengthening the hem, because it keeps pockets, belt position, and sleeve balance in the right place.
For curvier bodies, I also check where the tie will sit once the robe is wrapped. A waist marking on the pattern does not always land at the wearer's natural waist. Shifting belt loops up or down by even 2 cm can make the robe feel much better in use.
Adapt for fabric and body type together
Pattern alterations do not happen in isolation. Fabric changes the fit.
A stable cotton waffle from a UK supplier has body and warmth, but it does not collapse around curves the way a viscose blend does. That means you may need more hip room, a little extra bicep ease, or a deeper overlap at centre front. Ex-designer deadstock can vary even more. Some batches behave like crisp shirting, others soften after pressing and wear, so I always judge the adjustment plan with the actual cloth in hand.
For straighter figures, adding or preserving waist shaping can stop the robe looking boxy. For fuller busts, fuller hips, or a rounded middle, I usually prioritise coverage and movement over a sharply nipped waist. A dressing robe has to work when sitting, reaching for a kettle, or padding about on a cold morning.
Test before cutting the real fabric
I do not mean a full toile every time. For a robe, a partial test often tells you enough.
Check these areas first:
- shoulder and neckline
- bust and front overlap
- waist and belt position
- sleeve width and length
A quick tissue fit or a cut-down calico test is often enough to spot whether the robe will stay closed and whether the sleeve hangs properly. On expensive deadstock, that small test is worth the extra half hour.
Prepare the machine for thick joins
Robe patterns often look simple, but the fabric layers add up fast at the front band, collar, pocket corners, and belt loops. Before sewing the actual garment, stitch a sample using the actual layers you will sew in the robe. Test the seam, press it, and topstitch it.
If the stitches skip, the presser foot drags, or the layers shift, fix that now with the right needle, foot pressure, or tension setting. Thick waffle, ponte-backed knits, and some deadstock jacquards show machine problems immediately. That is not a personal failing. It is a sign to tune the setup before you commit to the final pieces.
Fabric Prep Layout and Cutting Techniques
A robe can fit beautifully in the pattern stage and still disappoint after the first wash if the fabric was rushed through prep. I see this most often with cotton waffle, linen blends, and viscose deadstock bought for a bargain and cut straight from the parcel.
Pre-wash first
Prepare the fabric exactly as you expect to care for the finished robe. If it is heading for a standard 40 degree wash with the rest of the household laundry, do that now. If it is a softer Tencel, brushed cotton, or drapey ex-designer viscose that will get a gentler cycle and line dry, treat it that way from the start.
In the UK, this matters even more with deadstock because fibre content is not always labelled perfectly. I usually tell customers to wash a small corner first if the fabric feels at all uncertain. Better to lose a test square than a full robe front.
For waffle knits and other textured fabrics, avoid rough tumble drying unless you know the cloth can take it. Texture can tighten up, and that changes both length and sleeve feel.
Press and square before cutting
Press the cloth flat before you lay out a single piece. Steam out fold lines, then let the fabric cool on the table so it settles back into shape.
Check the grain next. If the shop cut is off, and that does happen on long lengths, square one end before you start. On linen, cotton, and some stable deadstock shirtings, pulling a thread works well. On looser weaves or waffle, I prefer to use a large quilting ruler and the grain line itself rather than forcing the edge.
A few quiet minutes here saves a lot of muttering later.
Layout choices that make cutting more accurate
Long robe pieces are awkward more than difficult. The main choice is whether to cut on the fold or cut flat in a single layer. I cut single layer whenever the fabric is slippery, directional, thick, or expensive. It takes longer, but the control is better and you waste less cloth.
That is especially useful for UK dressmaking fabrics such as viscose challis, brushed cotton, ponte-backed knits, and ex-designer remnants where every centimetre counts. If you are working with a narrow cut or an odd end-of-roll piece, single-layer cutting often makes the pattern fit where folded layout will not.
A few tools make the job easier:
- pattern weights for viscose, silkier deadstock, and fine lawn
- a rotary cutter and mat if shears keep lifting the fabric
- sharp dressmaking shears for thicker waffle, towelling, and fleece-backed cloth
- chalk, washable pen, or tailor's tacks chosen to suit the fabric surface
- plenty of table space, or at least a clean floor where the fabric can lie fully supported
If you are cutting for a fuller body or making size adjustments that changed the front overlap, keep the paired pieces together and label them clearly. Left front, right front, collar, belt, loops. It sounds obvious, but once similar robe shapes are stacked in a pile, it is easy to flip one piece and lose track.
Handle slippery and bulky fabrics differently
Viscose and lightweight deadstock can shift off grain while you cut. Fine pins, pattern weights, and a layer of tissue paper underneath help keep the edge steady. Cut in sections if you need to. There is no prize for wrestling the full robe length at once.
Bulky fabrics need a different approach. With cotton waffle, towelling, or quilted robe fabric, keep the cutting table clear and avoid hanging any part of the length off the edge. The weight drags the grain out of line. I also trim notches outward instead of clipping far inward on thick fabric, because those clipped points can weaken a seam allowance that already has plenty of bulk.
Mark every notch, pocket placement, belt loop point, and any circle or match point before moving the pieces. Accurate sewing starts here, not at the machine.
How to Sew Your Robe Step-by-Step
You cut everything accurately, the kettle is on, and this is the point where a robe starts to look like a real garment instead of a stack of fabric pieces. Robes are forgiving in many ways, but the order still matters. A good sewing sequence saves pressing time, reduces twisting, and gives cleaner corners at the front band and hem.
For most woven dressing robe patterns with a dropped shoulder, I sew the shoulders first, attach the sleeves flat, then stitch the side seams and underarm seams in one continuous pass. It is a reliable order for cotton lawn, washed linen, ex-designer shirting, and stable waffle weaves that turn up so often in UK fabric shops. On curvier figures or fuller bust adjustments, that flatter construction also makes it easier to check the front overlap before the robe is fully closed up.
Start with the parts that are easier flat
Sew patch pockets, hang loops, or belt carriers before full assembly if your pattern includes them. You get better topstitching on a flat piece than on a bulky robe body, and pocket placement is easier to measure accurately from the centre front and waist marking.
If the robe has a front band, shawl collar, or any curved neckline edge, staystitch early. For soft viscose blends and drapey deadstock, I often add a narrow strip of lightweight fusible to the wrong side of the front edge as well. It keeps the robe from growing while you handle it. On stable cotton waffle or brushed cotton, staystitching is usually enough.
Sew the robe body in a sensible order
This sequence works well for a classic woven robe:
- Join the shoulder seams and press them open or toward the back.
- Attach the sleeves flat to the armholes, matching notches carefully.
- Sew the underarm and side seams in one line from sleeve hem to robe hem.
- Finish the raw edges with an overlocker, zigzag, or French seam if the fabric is light enough.
- Attach the front band, facing, or collar and clip curves where needed.
- Hem the sleeves and robe hem once the robe has had time to drop, especially if the fabric is soft or loosely woven.
Pinning every few inches is not always necessary. Pin the points that can drift: underarm seam, waist level, pocket level, and hem. Then sew between them.
For knit robes, the same broad order still works, but the handling changes. Use a ballpoint or stretch needle, test the stitch on a scrap first, and avoid pulling the fabric through the machine. Waffle knits are popular for cooler UK weather, but they can stretch surprisingly fast along the front edge if you rush that stage.
Press as you go
Press each seam after sewing it. Then press it again in the direction you want it to sit.
That habit makes a bigger difference than expensive equipment. A basic steam iron, a sleeve board, and a press cloth will give a cleaner result than fancy topstitching over unpressed seams. On linen and cotton, use steam freely. On viscose, press lightly and lift the iron rather than sliding it, because that movement can distort the edge.
A visual walkthrough can help if you like seeing the sequence in motion:
Handle hems and front edges with care
A standard turned hem works well on most woven robes. I usually favour a medium-depth hem rather than an overly deep one, because it hangs better across a range of body shapes and adds less bulk where the front band meets the lower edge. If you are sewing in thick waffle, towelling, or quilted fabric, grade the seam allowances at corners and trim away excess before turning. That one step stops the hem from feeling hard and lumpy.
For lighter fabrics, accuracy matters more than force. Measure the hem allowance, press it in sections, and use plenty of steam. If the robe is cut longer for a tall wearer or adapted for more front coverage, let it hang overnight before hemming. Soft fabrics can drop unevenly, especially at the front edges.
If you are making a gift robe, this is also the point to plan embroidery placement, monograms, or other finishing touches. It is much easier to add those details before the final hem and belt loops are in place, particularly if you are aiming for the polished look people want from personalised dressing gowns.
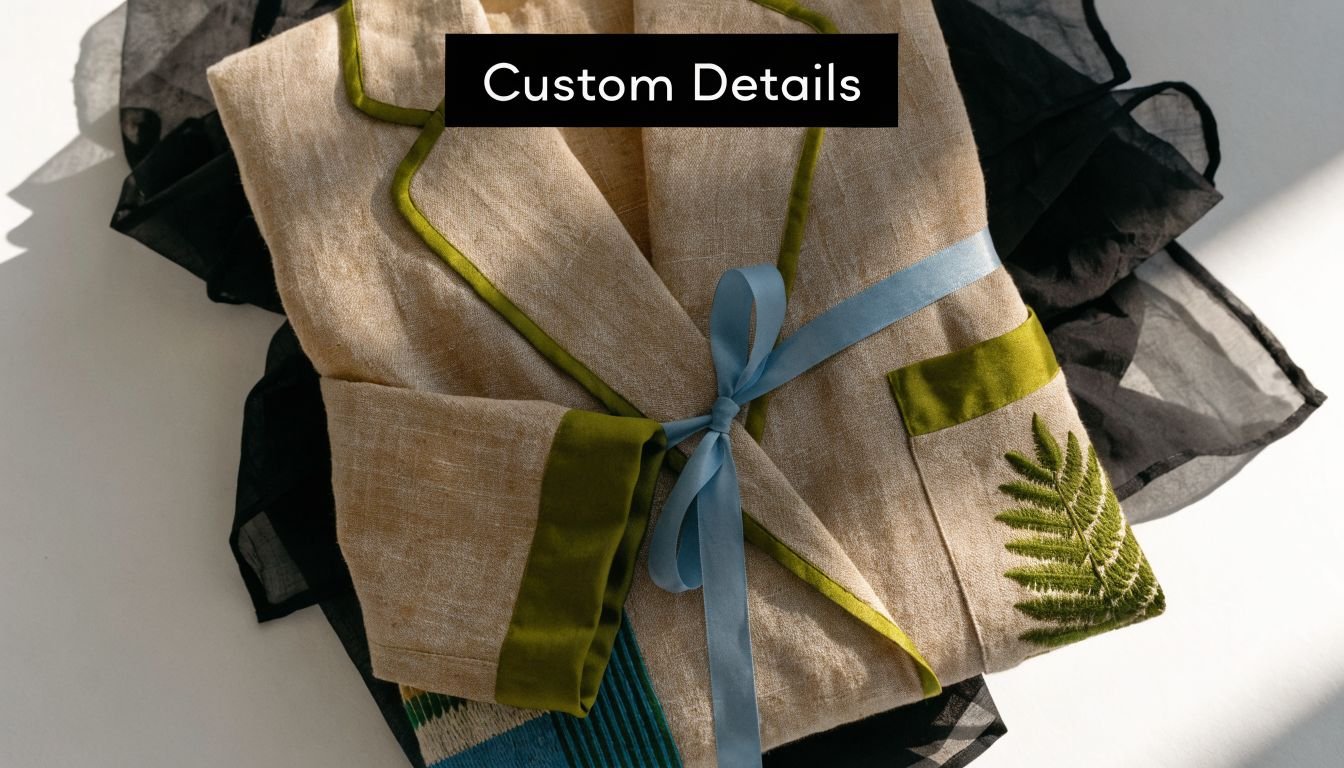
Adding Professional Finishes and Custom Details
A robe can fit well and still look homemade if the finishing is rushed. The pieces that make it look polished are usually small. Pocket placement, stable belt loops, a collar that sits flat, and a final press done in the right order.
Pockets belts and loops
Patch pockets need to suit the wearer, not just the pattern marking. On fuller busts, I often set them a little lower or slightly closer to the side seam so they do not sit awkwardly on the curve of the chest. On a shorter robe, pockets that are too deep can pull the front down, especially in heavy waffle or brushed cotton.
Interface the pocket top if the cloth is soft or loosely woven. A strip of lightweight woven fusible is usually enough. For ex-designer deadstock, I always test first because some coatings and finishes do not like too much heat.
Belt loops take strain every time the robe is tied. Self-fabric loops work well in lawn, poplin, and stable cotton jersey. In bulky fabrics, thread chains are often the cleaner choice because they do not create a hard lump at the side seam.
Collars and polished edges
Shawl collars and front bands show every wobble, so accuracy matters here more than speed. For the Sylvia Robe, using 45-degree bias binding on the collar band helps it sit very flat, and a 2cm fusible stay tape at the neckline helps prevent stretching. If you are sewing a knit version, switch to a ballpoint needle so the fabric feeds cleanly and does not ladder, as noted in the Sew Over It Sylvia Robe pattern details.
For cooler UK weather, I like a collar with a bit of body. Cotton waffle, ponte-backed jersey, and stable sweatshirt fleece all benefit from understitching where possible, plus careful grading inside the curve. If the fabric is thick, trim one seam allowance narrower than the other before turning. That reduces ridges and helps the collar roll neatly.
Custom details work best when they are intentional and limited. One or two are enough. Piping along the collar, a hanging loop in contrast cotton, initials on the chest, or a facing cut from a special deadstock print will usually give more impact than adding every idea at once.
Repeat details if you want the robe to look coherent. If the belt underside is in a contrast print, use the same print for the hanging loop or pocket facing. That kind of consistency reads as thought through.
There's also good inspiration to borrow from the world of personalised dressing gowns. Not for copying every embellishment, but for judging monogram scale, placement, and which details still look tasteful after years of wear.
Before calling it finished, put the robe on properly. Tie the belt, sit down, reach forward, and check that the front overlap still covers where it should. That final try-on usually shows whether the loops are in the right spot, the collar is balanced, and the robe feels good enough to wear every day.