
Uncategorized
How to Cut Fabric on the Bias: A Practical Guide
You've pressed your fabric, laid out the pattern, and then stopped because the words cut on the bias make the whole job feel riskier than it should. That hesitation is normal. Bias cutting can give a dress that soft skim over the body or turn a flat woven into something with movement, but it can also leave you with stretched edges, twisting seams, and pieces that seem to change shape while you look at them.
The trick isn't just finding the bias. It's keeping control from the first mark to the final hem. If you understand what the fabric is doing, use a stable cutting setup, and handle the pieces properly after cutting, bias work becomes much less mysterious. It's still a technique that asks for care, especially with viscose, silk, cotton lawn, and other drapey woven fabrics, but it's absolutely manageable at home.
Understanding Fabric Grain and the Magic of the Bias
You smooth out a length of viscose on the table, turn it slightly, and suddenly it behaves like a different fabric. Along one direction it stays fairly obedient. On the diagonal it loosens, stretches, and starts to shift under your hands. That change is the whole reason bias cut garments feel so fluid, and it is also why accuracy matters from the first mark.
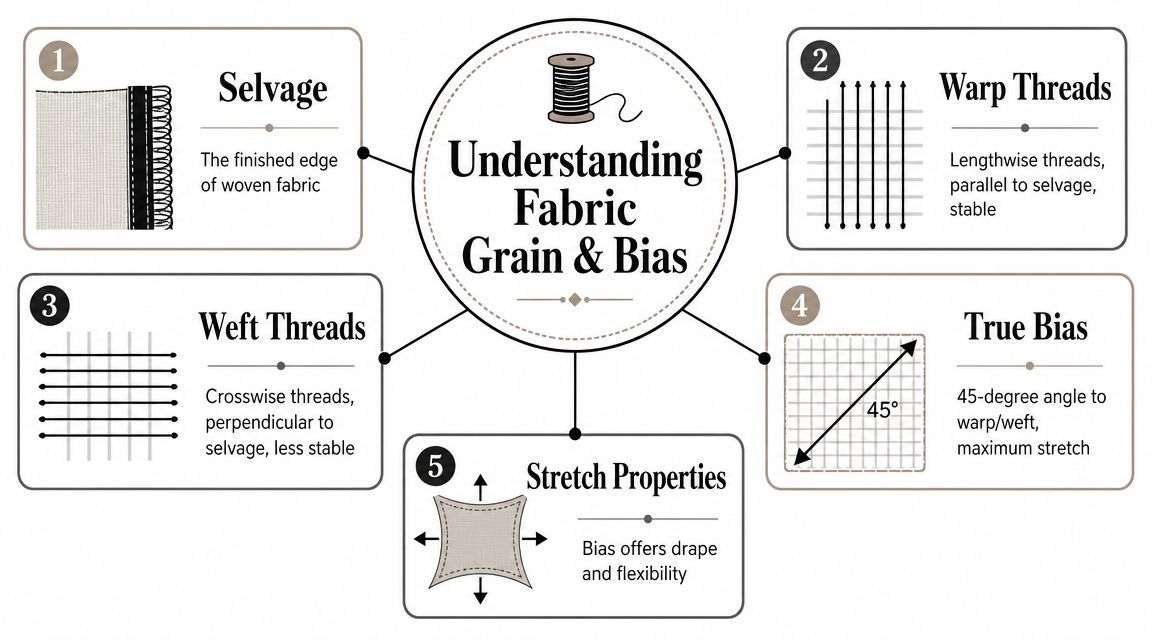
Fabric grain is the direction of the threads in a woven cloth. Once you can spot those directions quickly, bias cutting stops feeling mysterious and starts feeling manageable.
Reading the grain properly
Start with the selvage. It gives you your most reliable reference because it runs alongside the lengthwise threads.
From there, the fabric breaks down into three directions:
- Straight grain. Parallel to the selvage, and usually the firmest, most stable direction.
- Cross grain. Perpendicular to the selvage, often with a little more give.
- True bias. The diagonal line that sits at 45 degrees to both.
That 45-degree line matters. Cut close to it and the fabric gains flexibility and drape. Drift away from it and you get a piece that stretches unevenly, hangs poorly, or twists once sewn.
Practical rule: If the grainline on your pattern is not sitting accurately on that diagonal, you are not getting the true effect of a bias cut. You are introducing distortion before the garment is even assembled.
Why the bias feels different
On straight grain, the woven threads support each other in a fairly fixed way. On the bias, those threads can slide against each other more easily. That is why a crisp woven can suddenly feel softer in the hand, and why silk, viscose, and fine cottons can become beautifully fluid or maddeningly unstable depending on how you handle them.
Many sewists commonly get caught out. The same movement that gives a bias skirt its swing also lets necklines stretch, side seams lengthen, and hems drop after cutting. With slippery fabrics, the distortion can start on the cutting table, long before you get near the machine.
Bias has give, but it does not have much forgiveness.
A quick fabric check at the table
Before laying on a pattern, test the cloth with your hands.
- Hold the fabric on the straight grain and pull gently.
- Test the cross grain the same way.
- Then test the diagonal.
You will feel the difference at once. The diagonal has more stretch and more recovery, but it also has less control. That is useful information. It tells you how carefully the fabric will need to be marked, supported, and moved after cutting.
I always recommend doing this with drapey fabrics before anything else. Viscose challis, silk satin, and lightweight crepe can look calm when lying flat, then shift the moment they are handled on the bias. If you feel that instability early, you can plan for it instead of fighting it halfway through the project.
Understanding grain is what keeps bias cutting from becoming guesswork. Once you know where the fabric is stable and where it wants to move, you can keep that movement under control rather than letting it spoil the shape of the garment.
Why and When to Use a Bias Cut
You see it the moment someone lifts a finished slip dress from the rail. The fabric settles against the body instead of sitting away from it, and the skirt moves without looking bulky or stiff. That effect often comes from the bias.
Bias cut suits garments that need fluidity, shape, and movement from a woven fabric. It lets cloth bend around curves, skim the body, and fall in softer folds than the same fabric cut on the straight grain. On silk, viscose, rayon blends, and fine cotton lawn, that can be beautiful. It can also become unstable very quickly if the garment design asks for more control than the fabric can hold.
Where bias cut earns its place
Some styles are worth the extra care because the diagonal grain changes how the whole garment behaves.
- Slip dresses that need to fall close to the body without heavy shaping
- Cowl necks that rely on soft drape
- Skirts with swing that should move freely as you walk
- Simple camisoles where a woven fabric needs a little give
- Bindings and facings on curves where flexibility helps the edge sit flat
Bias is especially useful when a woven fabric needs to do a job that would otherwise call for stretch. A neckline binding is a good example. Cut on the straight grain, it can fight every curve. Cut on the bias, it wraps the shape much more willingly.
What you gain, and what it costs
The appeal is easy to see. The trade-off is less obvious until you start cutting.
Bias usually needs more fabric because pattern pieces are turned diagonally, and many fabrics behave better when cut in a single layer. That layout uses space less efficiently than a standard folded layout. If you are working with deadstock, expensive silk, or a limited remnant, that matters.
It also asks for better handling from the first cut onward. A straight-grain skirt panel can tolerate a bit of rough movement on the table. A bias-cut panel cannot. On viscose or silk satin, a small shift while laying out can change the hang of the finished garment. By the time you sew the seams, one side may already have stretched longer than the other.
That is the primary question to ask before choosing bias. Not only, “Will this look lovely?” but also, “Can I keep this fabric stable enough to get that result?”
When bias is the right choice
Use bias cut when the design benefits from softness and controlled stretch.
| Garment need | Better choice |
|---|---|
| Fluid drape and body-skimming movement | Bias cut |
| Stability and sharp structure | Straight grain |
| Curved edge finishing | Bias strip or binding |
| Exact shape retention | Straight grain |
A bias cut works well when the garment is meant to move with the wearer. It is often the right choice for eveningwear, slips, soft skirts, cowls, and lightweight summer pieces.
When to leave it alone
Bias is a poor choice for garments that depend on crisp lines, firm support, or staying square. Shirts with sharp collars, custom-fit trousers, structured bodices, and jackets usually behave better on the straight grain unless only one detail is being cut on the bias.
Some fabrics also make the decision for you. Very loose weaves can grow too much. Very heavy cloth can pull itself out of shape. Slippery satin can be cut on the bias beautifully, but only if you have the space and patience to control it properly. If your table is cramped or the fabric keeps creeping, save bias for a smaller detail such as a facing or binding.
Bias cut works best when the garment, the fabric, and your setup all agree. When they do, the result feels effortless. When they do not, the stretching starts before the sewing does.
Essential Tools and Fabric Preparation
A clean bias cut starts long before the fabric touches the blade. Most cutting problems blamed on “difficult fabric” are really setup problems. The cloth shifts because the table is cramped, the ruler slides, the blade drags, or the fabric wasn't pressed flat in the first place.
Bias work rewards a calm, organised cutting station. If your fabric is drapey, this matters even more.
What to keep within reach
A useful bias-cutting setup usually includes:
- A self-healing cutting mat with a visible grid, because you need to check the diagonal line accurately
- A long quilting ruler or acrylic ruler so you can hold a straight line to cut along without shifting the cloth
- A sharp rotary cutter for smooth, controlled cuts on a single layer
- Fabric weights instead of over-pinning, especially on viscose or silk
- Tailor's chalk or a removable marker if you need to mark your line before cutting
- A steam iron and ironing board because pressing is part of preparation, not an optional extra
Scissors can work, but on the bias they often lift the fabric as you cut. That's enough to throw a narrow strip off line. A rotary cutter usually gives better control, especially for bindings and long edges.
Prep work that saves trouble later
Press the fabric properly before you start. Don't skim over this. A soft crease, a twisted selvage, or a rumpled fold line can shift your grain reference and affect the whole cut.
For slippery fabrics, many sewists like to add temporary support with a light stabilising spray or starch. That can make viscose or silk feel less lively on the table and easier to measure accurately. The fabric should still drape after pressing, but it won't slither away from the ruler quite so fast.
A drapey fabric doesn't have to be floppy in your hands. Temporary stability often makes the difference between accurate cutting and avoidable frustration.
Planning strip yield before you cut
If you're cutting bias strips for binding, facings, or curved finishing, estimate your yield first. Experienced sewists use the formula starting square size × 2 ÷ strip width to estimate how many strip lengths a square of fabric will produce, which is a practical planning method described in Create Whimsy's bias-strip guide.
That formula is handy when you're using a leftover square and trying to decide whether it's enough for armhole binding, a neckline finish, or a long curved seam. It won't replace careful measuring, but it stops the common mistake of undercutting and then trying to piece together too many short lengths.
Fabric preparation checklist
Before cutting, make sure you've done these jobs:
- Pre-wash if appropriate so any shrinkage happens before sewing.
- Press flat with grain as straight as you can get it.
- Clear the full cutting area so the fabric doesn't hang and drag.
- Work on a single layer when precision matters.
- Test a small diagonal pull so you understand how lively the fabric feels.
This stage can seem slow. It's still faster than recutting a twisted front or remaking stretched binding.
Precise Marking and Cutting Techniques
This is the part where precision matters most. If the first cut is right, the rest of the job gets easier. If the first cut drifts off grain, every strip or pattern piece that follows inherits that mistake.
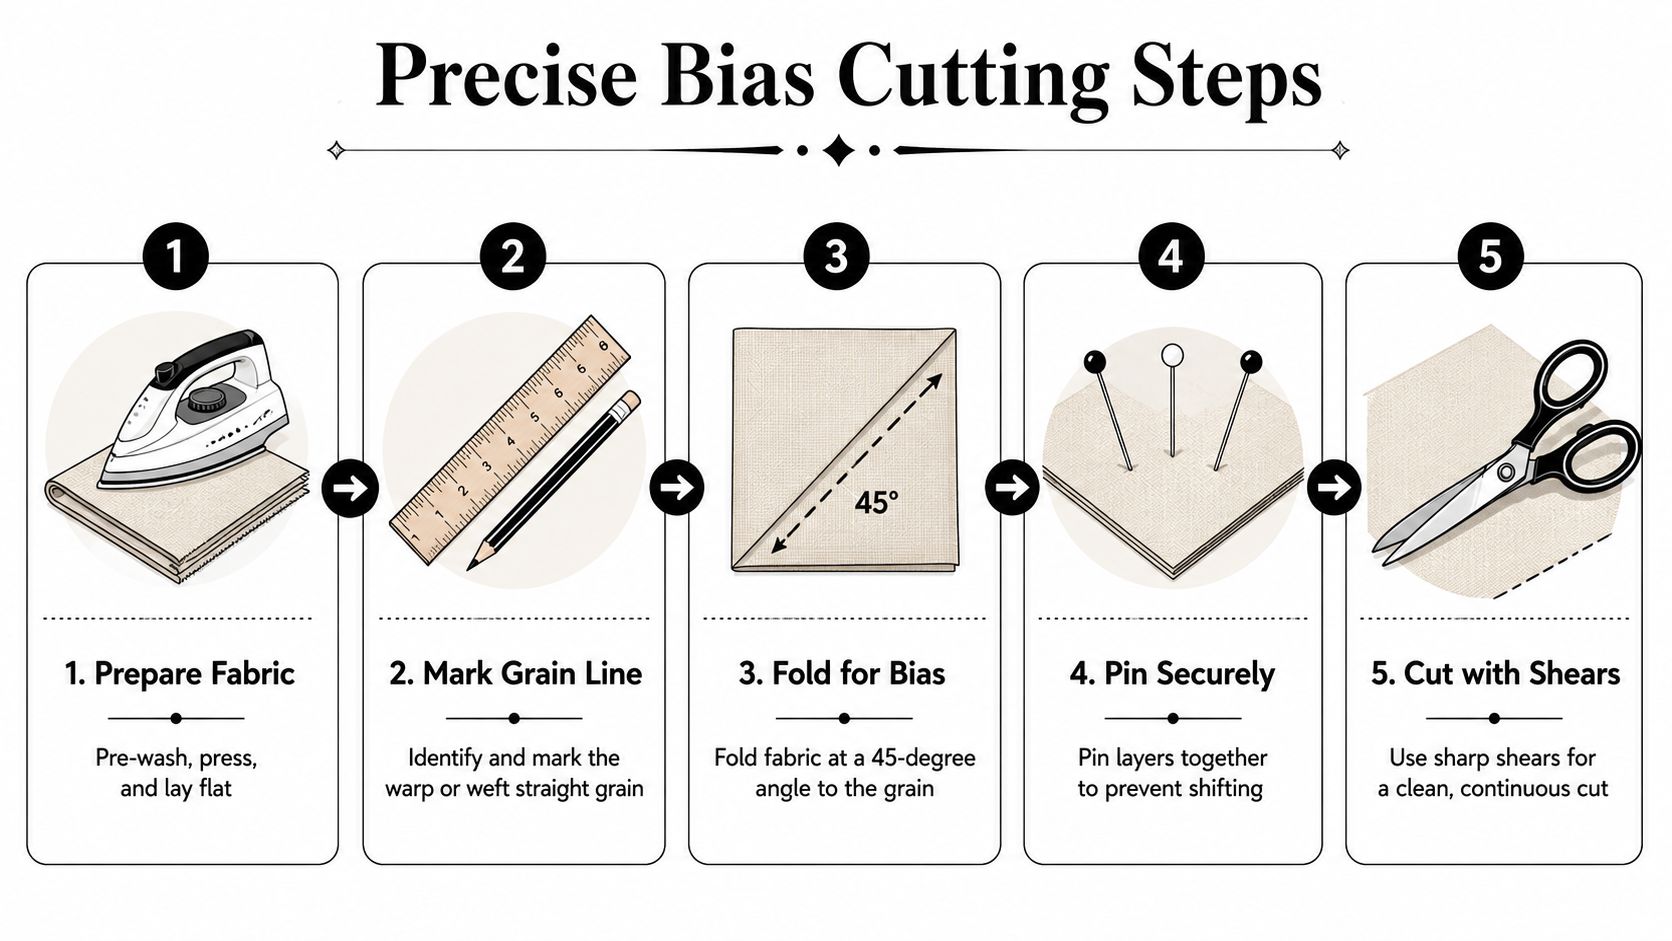
The most reliable method is simple. Unfold the fabric fully, align your ruler to the 45° bias line on a cutting mat or grid, and make the first diagonal cut from corner to edge. That avoids the common mistake of cutting while the fabric is still folded, which can give you V-shaped strips instead of true bias strips, as shown in this step-by-step bias cutting method.
Cutting a true bias strip
Use this sequence when accuracy matters:
- Lay the fabric as a single layer on the mat, fully supported.
- Find your diagonal reference using the mat's grid.
- Line up the ruler carefully so it sits on the true bias.
- Make the first cut cleanly with a rotary cutter.
- Use that cut edge as your new guide for parallel strips.
Re-check the ruler before every pass. Small angle drift compounds quickly, especially on long strips.
If you also sew for the home, the measuring mindset is very similar to the care needed when you prepare for Tampa Bay custom drapery. Soft goods look forgiving, but the finished result shows every small measuring error.
A visual walkthrough can help if you learn best by seeing the movement of the fabric and ruler in real time.
Cutting garment pieces on the bias
For garment sections rather than narrow strips, the same principle applies. Keep the fabric on a single layer, rotate the pattern piece so its grainline follows the bias direction, and weight it thoroughly before cutting.
What works well:
- Weights around curves and points so the pattern doesn't creep
- A fine chalk mark on the grainline if you need a visual check
- Slow cutting without lifting the cloth
What usually goes wrong:
- Cutting on the fold and assuming the diagonal is correct
- Letting part of the fabric hang off the table
- Sliding scissors underneath delicate cloth
Continuous bias binding without wasteful piecing
If you need one long strip, the continuous method is tidier than cutting many separate strips. Start from a square, cut it diagonally, sew the triangles into a tube with a 1/4-inch seam allowance, press that seam open to reduce bulk, then offset the tube ends by the strip width before cutting a continuous spiral strip. That method is especially useful when you want long binding from a relatively small piece of fabric.
Keep your eye on the line, not the blade. The blade follows the ruler. The ruler follows the grain.
That one habit prevents a surprising number of wonky cuts.
Handling and Stabilising Your Bias Cut Pieces
Freshly cut bias pieces can look perfect on the mat and then change shape as soon as they're lifted, stacked, or moved across the room. This is the stage that catches people out. They've cut accurately, but the fabric keeps stretching during handling, so the final garment still ends up warped.
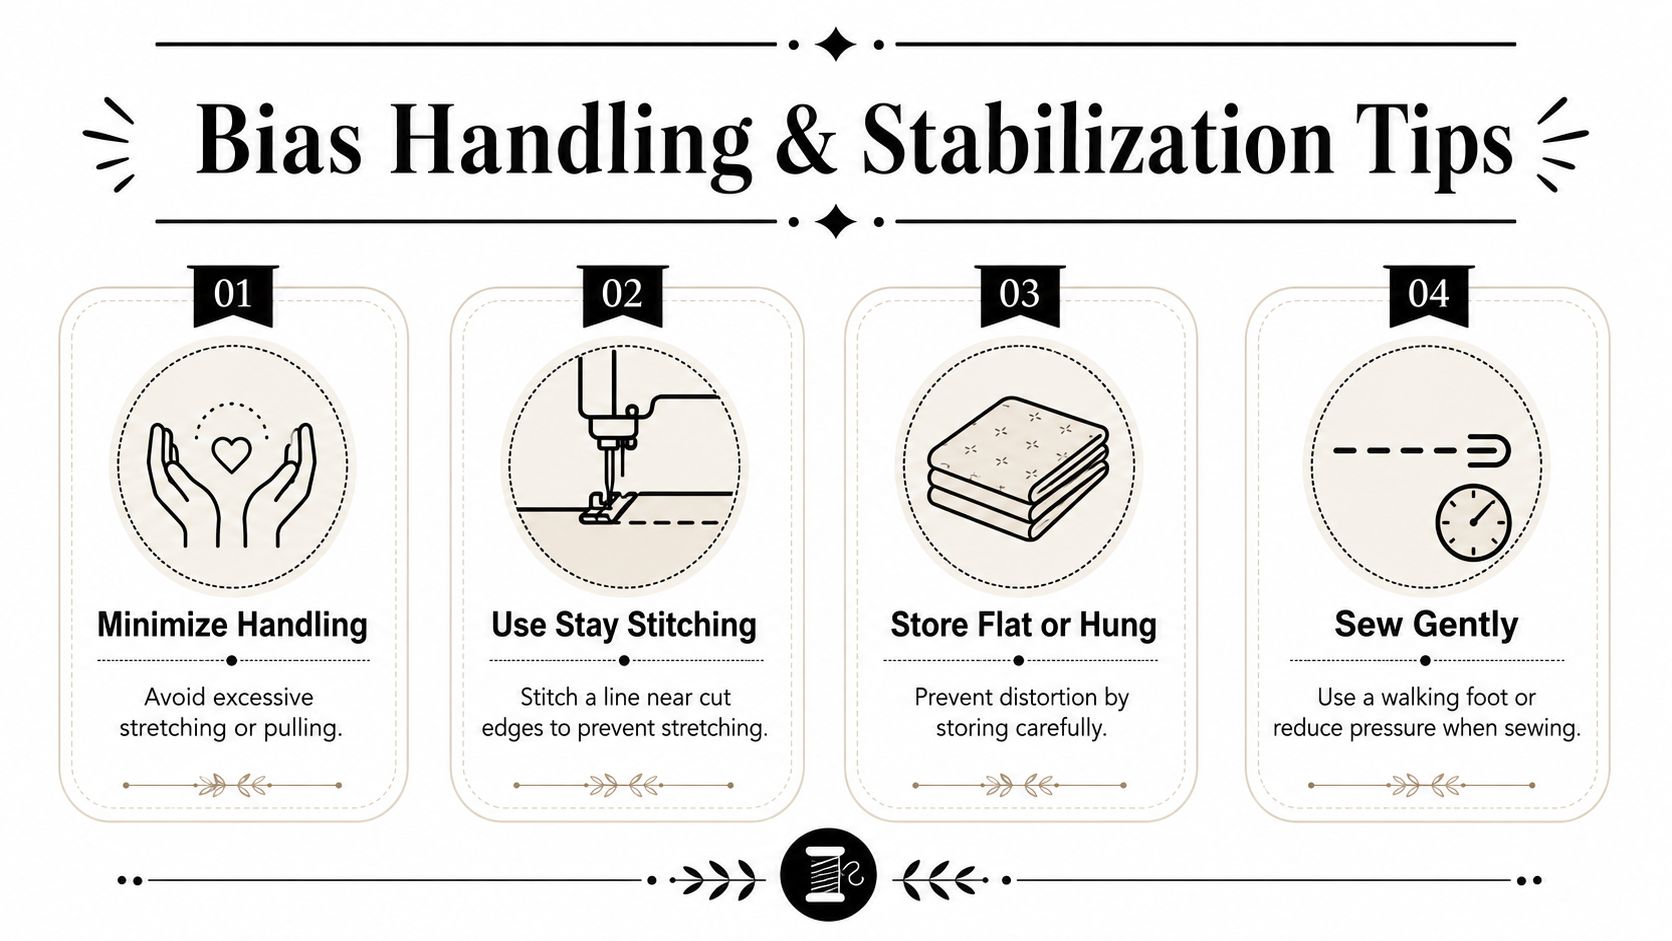
A bias edge is active. It wants to lengthen if you pull it, droop if it hangs unsupported, and ripple if you press it roughly. Control comes from doing less, not more.
What to do immediately after cutting
Once the pieces are cut, handle them as little as possible. Lift them with both hands. Don't let one corner dangle while the rest stays on the table. Don't pin them together in a heavy bundle and expect them to stay true.
These habits help:
- Staystitch necklines and armholes early so they don't grow before assembly
- Store pieces flat if you're not sewing straight away
- Keep left and right pieces paired carefully so one doesn't stretch more than the other
This is especially important with viscose and silk. They don't need much encouragement to move off shape.
Pressing and sewing without stretching
Press bias gently. Lower the iron and lift it again. Dragging the iron along the edge can stretch the fabric before you even notice it happening.
Expert guidance notes that even slightly off-grain cutting can distort a garment, and recommends narrow zigzag seams, hanging the garment before hemming, and using specialist hemming methods to reduce ripples, especially with drapey fashion fabrics common in UK indie stores, as explained in this bias sewing guidance.
The bias doesn't need force. It needs support.
At the machine, feed the fabric steadily and avoid pulling it from front or back. If a seam starts wavering, stop and check whether the fabric is stretching under your hands.
Let the garment settle before hemming
A bias skirt or dress often changes after assembly because the weight of the garment pulls on each section differently. One area may drop more than another, especially where the grain direction shifts around the body.
That's why experienced dressmakers hang the finished garment before hemming. Letting it settle first means you trim and finish the hemline after the stretching has happened, not before.
A good bias hem usually comes from patience:
| Stage | Better approach |
|---|---|
| After cutting | Handle lightly and staystitch key edges |
| During pressing | Press up and down, don't drag |
| During sewing | Guide gently, don't stretch |
| Before hemming | Hang the garment and let it drop |
Bias garments often look effortless when they're finished. They rarely are during construction.
Troubleshooting Common Bias Cutting Problems
Bias problems often get blamed on fabric quality, but the cause is usually more ordinary. The angle drifted. The fabric wasn't supported. The piece was handled too much after cutting. The good news is that most of these issues are fixable, or at least preventable next time.
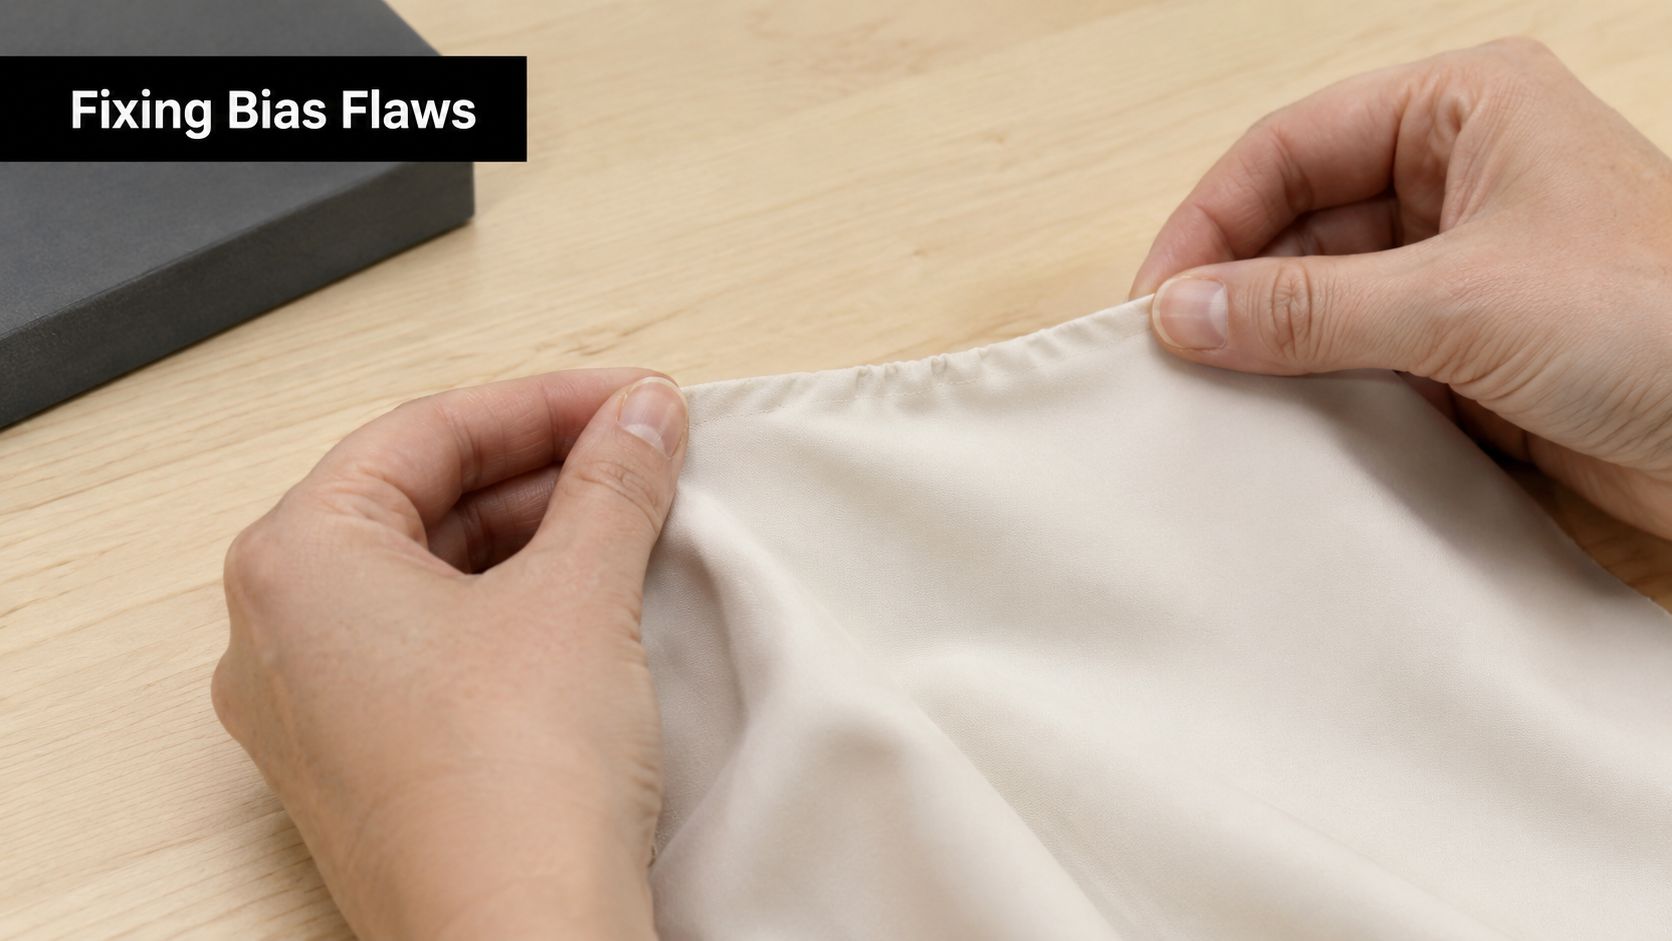
Why are my bias strips twisting
If the strips curl or twist more than expected, they're often slightly off the true bias. Even a small deviation changes how the threads release at the cut edge.
Try this next time:
- Check the mat's diagonal line before every cut
- Use a single layer instead of folded fabric
- Cut one test strip first before committing to the full set
If you're already working with cut strips, press them gently without stretching and use the straightest sections first.
Why has my garment grown after sewing
Bias garments can feel larger after construction because the fabric stretches during handling, stitching, or hanging. This happens most often at side seams, necklines, and hems.
A few practical fixes:
- Staystitch early on vulnerable edges
- Let the garment rest or hang before judging the fit
- Trim and level the hem only after the fabric has settled
If the fit has changed badly, check whether the seams were fed evenly or whether one layer stretched more than the other as you stitched.
Why do the edges fray and misbehave so quickly
Bias edges expose the weave differently, so some fabrics fray faster when cut on the diagonal. Loose weaves, soft lawns, and some deadstock dress fabrics can become untidy very quickly.
You can reduce the mess by:
- Finishing raw edges sooner rather than leaving them exposed
- Using a zigzag or overlocker where suitable
- Keeping the pieces flat and undisturbed until they're sewn
Why does the hem ripple
A rippled hem often comes from one of three things: the garment wasn't allowed to drop before hemming, the edge stretched during sewing, or the finishing method was too heavy for the fabric.
Use a lighter touch. Narrow finishes usually behave better on delicate bias garments than bulky turned hems.
If a bias project goes wrong, don't assume you're bad at bias. Check the angle, then check the handling. Those two things cause most of the trouble.
Learning how to cut fabric on the bias is really learning how to stay accurate and calm while the fabric tries to move. Once you understand that, the technique becomes far more approachable, and far more enjoyable.
If you're ready to put this into practice, More Sewing is a useful place to find dressmaking fabrics, haberdashery, and sewing supplies suited to both first bias-cut projects and more ambitious makes.
