
Dressmaking, Guides
Ultimate Guide: How to Sew Elastic Waistband Skirt in 2026
You've probably done this before. You spot a skirt in a shop, like the shape, dislike the fabric, and wish it sat a little higher or fell a little longer. That's exactly where an elastic waist skirt earns its place in a sewing room. It's simple enough to make in an afternoon, comfortable enough to wear constantly, and flexible enough to suit everything from soft florals to crisp everyday cottons.
It's also one of the best projects for learning clean dressmaking habits without getting buried in fitting problems. No zip. No buttonhole. No dart correction spiral. Just a straightforward skirt body, a neatly made casing, and an elastic waist that does the hard work for you. If you want to learn how to sew elastic waistband skirt styles that look homemade in the best sense, this is a very good place to start.
Your Quick and Stylish Sewing Project
A gathered elastic waist skirt solves a very common sewing problem. You want something wearable now, not a project that sits half-finished because the fitting became annoying. This style is forgiving, practical, and easy to personalise, which is why so many beginners start here and keep returning to it even after they've made far more advanced garments.
The reason it works so well is simple. The skirt body can be cut as a rectangle or gathered tube, and the waistband adjusts with you rather than demanding exact tailoring. UK dressmaking practice has long treated the waist as a core fitting reference, and elastic finishes became popular because they allow comfort without giving up shape altogether.
Practical rule: A simple skirt doesn't have to look basic. Good pressing, balanced gathers, and the right fabric choice make the difference.
I often recommend this project to customers who want a quick success but still want to learn proper technique. A cotton lawn version feels fresh and easy for everyday wear. A viscose version moves beautifully and looks more dressy straight away. A poplin gives more body and can look slightly more structured.
What doesn't work as well? Very stiff fabric if you want soft gathers. Very bulky fabric if you want a slim waistband. Slippery fabric without careful pressing if you're still building confidence. The easiest route is to choose a cloth that behaves well under the iron and feeds evenly through the machine.
If your goal is one skirt that you'll wear, this is a strong contender. You get comfort, speed, and plenty of room to add your own style once the basics are in place.
Gathering Your Fabric and Notions
A good elastic waist skirt starts on the cutting table, not at the sewing machine. Fabric choice decides how the gathers will sit, how bulky the waistband feels, and whether the finished skirt looks crisp, soft, or heavy. Beginners usually get the best result from cloth that presses well, feeds evenly, and does not shift all over the place.
If you want an easy first make, choose a woven fabric with some give in the hand but no stretch across the grain.
Fabrics that behave well
These are the fabrics I most often suggest for this style:
- Cotton lawn for a light skirt with tidy gathers and a clean waistband casing. It presses beautifully, which helps you sew straighter folds and get a neater finish.
- Cotton poplin if you prefer a bit more shape. It gives the skirt more body, so it works well if you like a fuller outline rather than a soft drape.
- Viscose challis for fluid movement. It falls closer to the body and makes a more swishy skirt, but it needs calmer handling because it can shift while cutting.
- Lightweight Tencel or Tencel blends for soft drape with a slightly more modern, matte look.
The reason this matters is simple. A soft fabric gives graceful gathers but can be trickier to control. A crisper cotton is easier to sew and press, but the waist will look fuller because the gathers hold more volume. Neither is wrong. It depends on the finish you want.
Print choice matters too. Small florals and ditsy prints are forgiving because they disguise slight unevenness in gathering. Bold prints need more planning, especially if you do not want a large motif chopped at the side seam or hem. If you are still learning how fabric base affects print clarity, this guide to understanding fabric print quality is a useful reference.
Notions that make the job easier
You only need a short list of supplies, but each one affects the result.
- Waistband elastic in a width that suits your casing. A softer narrow elastic gives a gentler finish. A wider elastic feels more supportive and is less likely to twist.
- Good quality thread to match your fabric. Cheap thread sheds lint, snaps more easily, and can spoil an otherwise neat seam.
- Fabric scissors or a rotary cutter for accurate, clean edges on long straight cuts.
- Pins or clips depending on the fabric. I use pins for lawn and poplin, and clips for thicker fabrics that mark easily.
- Tape measure for body measurements, casing depth, and elastic length.
- A safety pin or bodkin for threading the elastic through the waistband channel.
Cheap elastic is often the weak point. If it feels limp, twists with almost no resistance, or does not spring back after you stretch it, leave it on the shelf. A better elastic costs a little more and wears far better.
For a polished result, match the elastic width to the fabric weight. Lightweight lawn and viscose usually suit narrower elastic because the waist stays supple. Poplin and other slightly firmer fabrics can carry a wider elastic more comfortably without looking clumsy.
Fabric and Elastic Requirements
| UK Size (approx.) | Fabric Length | Fabric Panels Needed |
|---|---|---|
| Smaller to medium sizes | Desired skirt length plus roughly 6 to 7 cm for waistband and hem | Often one full-width panel can work |
| Larger sizes or fuller gathers | Desired skirt length plus roughly 6 to 7 cm for waistband and hem, cut twice if needed | Two panels are often more comfortable and balanced |
| Longer skirts in narrower fabric layouts | Depends on skirt length and whether full width gives enough fullness | One or two panels, based on width and preferred gather |
Use the table as a starting point, not a rule carved in stone. Fabric width, how full you like your skirts, and how bulky the cloth becomes when gathered all affect the final cut. If a customer is unsure, I usually suggest checking the fabric width against a skirt already in their wardrobe that feels right through the hips and hem.
Measuring and Cutting for a Perfect Fit
This is the stage where the skirt is won or lost. Elastic waists are forgiving, but careless measuring still shows up later as a waistband that feels awkward or a hem that lands in the wrong place. Take a few extra minutes here and the rest of the project becomes much easier.
Start with the right measurements
Measure your natural waist first. Don't guess, and don't measure where you usually wear low-rise clothes unless that's exactly where you want this skirt to sit. Then measure the finished skirt length from that waist point down to where you want the hem.
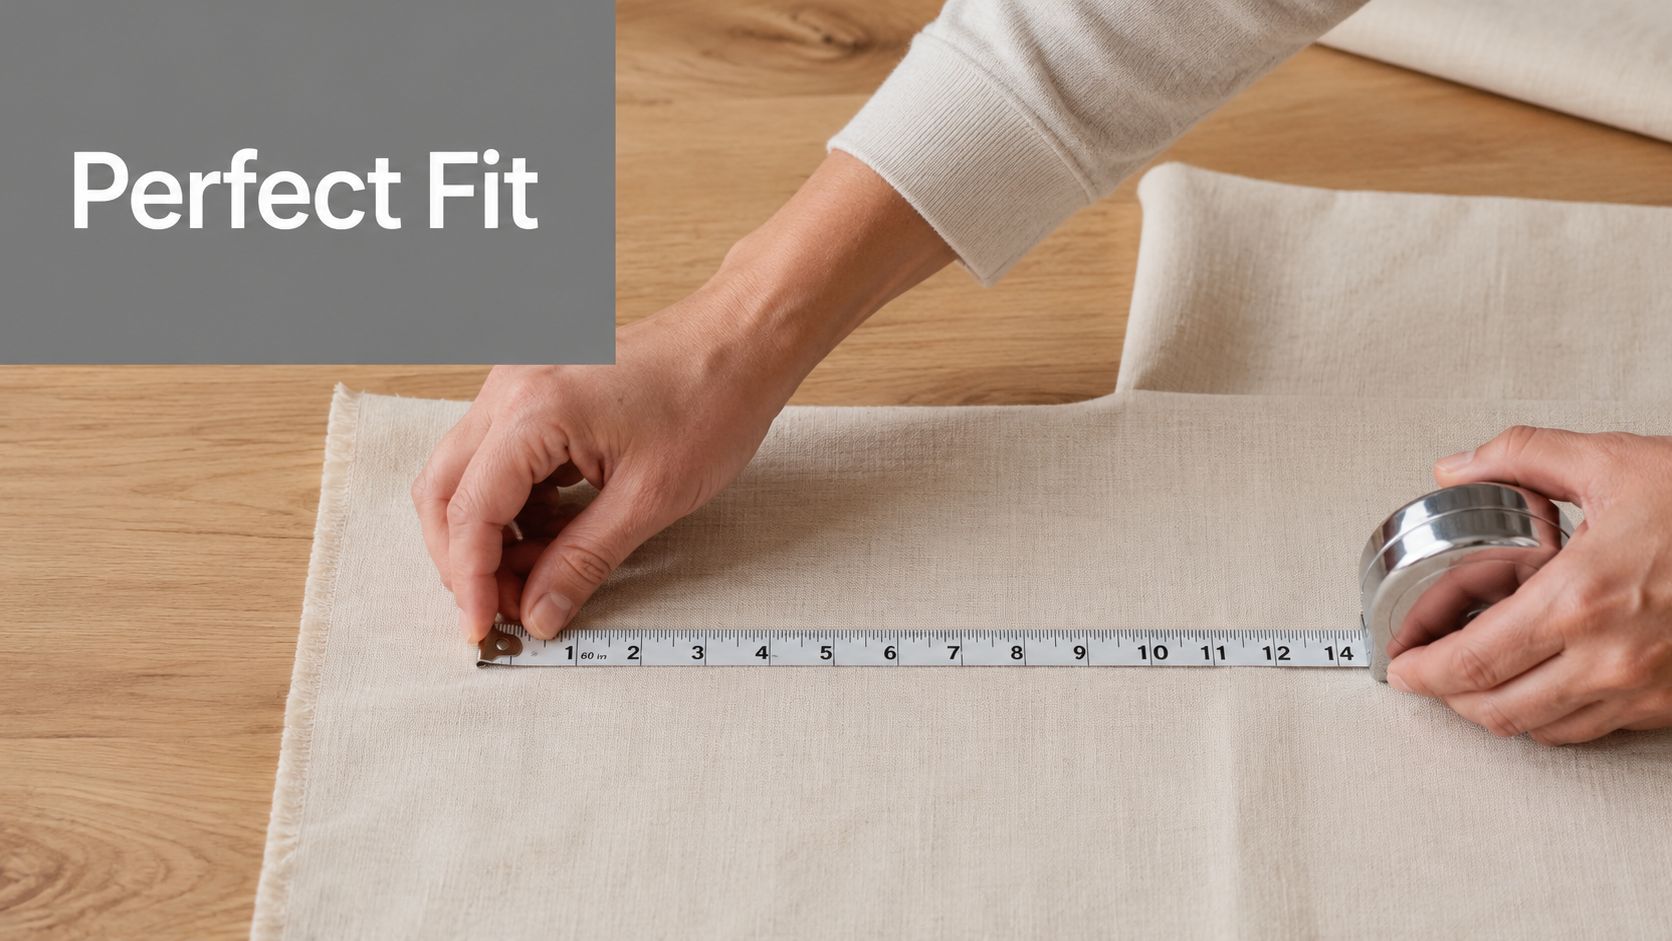
For the width of the skirt, you have two practical choices. You can use the full width of the fabric for an easy gathered shape, or cut two rectangles if you want more room or if your fabric isn't wide enough to give a comfortable amount of fullness. For a first skirt, full-width fabric is often the least fussy option.
Many elastic waist skirt methods in UK dressmaking rely on the natural waist, then subtract about 5 to 8 cm from the elastic length so the waistband grips and recovers properly. That's a common rule of thumb in skirt construction and one reason this style is so beginner-friendly, as noted in this elastic waistband skirt tutorial.
Cut the fabric with the finish in mind
Your skirt piece is usually a rectangle. The width is whatever fullness you've chosen. The length is your desired finished length plus allowance for the waistband casing and hem. A lot of beginners cut only for the visible skirt and forget the turnings, which leaves them short at the end.
A practical way to think about it is this:
- Waist measurement tells you where the skirt will sit
- Skirt length tells you where the hem will finish
- Fabric width affects how full or flat the gathers look
- Elastic length controls comfort and hold
Pre-wash the fabric before cutting. That matters most with cottons, viscose, and anything likely to shift once laundered. Press it flat afterwards. Fabric that hasn't been washed and pressed often leads to a skirt that changes shape after the first clean, and that's an irritating way to finish an otherwise easy project.
If the fabric won't lie flat on the table, it usually won't behave under the presser foot either. Press before you cut, not after you regret it.
A simple cutting example
Say you want a skirt that sits at the natural waist and falls to a comfortable everyday length. You'd measure that finished length, then add your waistband and hem allowance before cutting the rectangle. If one fabric width gives enough fullness, cut one long panel and join the short ends. If not, cut two panels and seam the sides.
That approach keeps the maths manageable and avoids overcomplicating what should be a satisfying project.
Constructing the Skirt and Waistband Casing
A skirt starts to feel real at this stage. One good seam, a properly pressed waist edge, and the whole project stops looking like a rectangle of fabric and starts behaving like clothing.
Sew the skirt body first
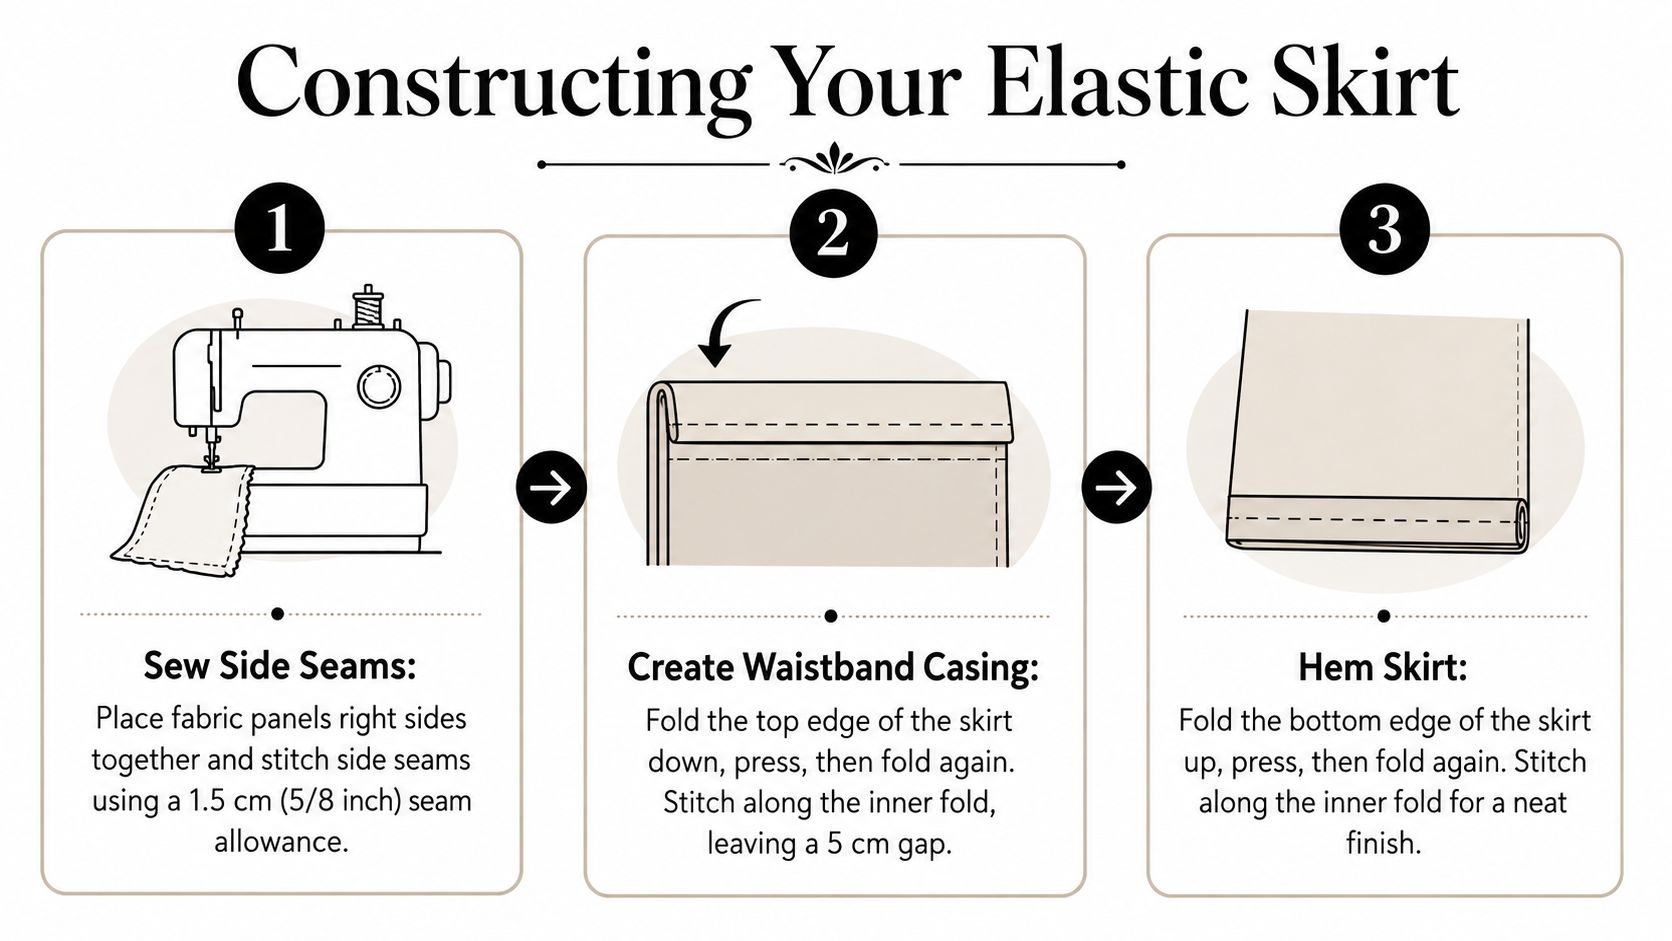
Join your skirt panels with right sides together, or if you cut one long rectangle, sew the short ends together to make a tube. Use a seam allowance you can keep consistent all the way down. That matters more than speed, because uneven side seams can throw off the hang and make the waistband look slightly skewed once the elastic gathers the top.
Press the seam allowances after sewing. Then finish them in a way that suits the fabric. A zigzag stitch is usually enough for stable cottons. A 3-thread overlock is neater for fabrics that fray more aggressively, such as lightweight linen blends or viscose challis. If I am helping a beginner choose fabric for this style, I usually steer them towards cotton poplin or a soft chambray from the More Sewing catalogue, because both press well and are much easier to keep straight under the machine.
Build the casing cleanly
A good casing is a folded channel at the top edge, but it needs enough depth for the elastic to move without twisting or fighting the fabric. Start by pressing the raw top edge to the wrong side by about 1 cm. Then fold it down again by the width of your elastic plus a little extra ease. For 25 mm elastic, that usually means a finished casing a touch wider than 25 mm, not exactly the same size.
That extra room is the difference between a waistband that gathers softly and one that feels stiff and lumpy. If the casing is too snug, the elastic catches inside it, twists more easily, and refuses to spread the fullness evenly.
Pin or clip the fold in place, then stitch close to the lower folded edge, leaving a gap for the elastic to go through later. Keep that stitching line as even as you can. Wobbly topstitching is far more noticeable on a waistband than on a side seam, especially on plain fabrics.
Small choices that improve the finish
A few habits make this stage much easier:
- Press both folds before you sew. Pressing fixes the shape of the casing, so you are guiding the fabric rather than wrestling it.
- Match the casing to the elastic you bought. Soft knitted elastic works well in a simple woven skirt because it stretches comfortably and sits flatter than very springy braided elastic.
- Use matching thread for visible topstitching. The waistband sits at eye level, so this is one place where thread choice shows.
- Test your needle on the fabric first. A universal 80/12 suits many cottons, while a finer needle is often better for lightweight viscose to avoid puckering.
Fabric choice changes the best approach. In lawn or viscose, keep the casing modest so the waist still looks light and fluid. In poplin, seersucker, or a slightly crisp linen blend, a deeper casing gives the top of the skirt more structure and helps it hold its shape through wear and washing.
If the fabric is bulky, grade the seam allowance at the waist seam join before folding the casing over it. That removes excess thickness and prevents a hard ridge where the elastic will sit. It is a small dressmaking habit, but it gives a cleaner result and makes the skirt more comfortable against the body.
Inserting Elastic and Finishing Your Hem
The skirt takes shape at this stage. Before this point, it can still look like a tube with ambitions. Once the elastic goes in, the waist gathers up and you can finally judge the proportion of the whole piece.
Thread the elastic without twisting it
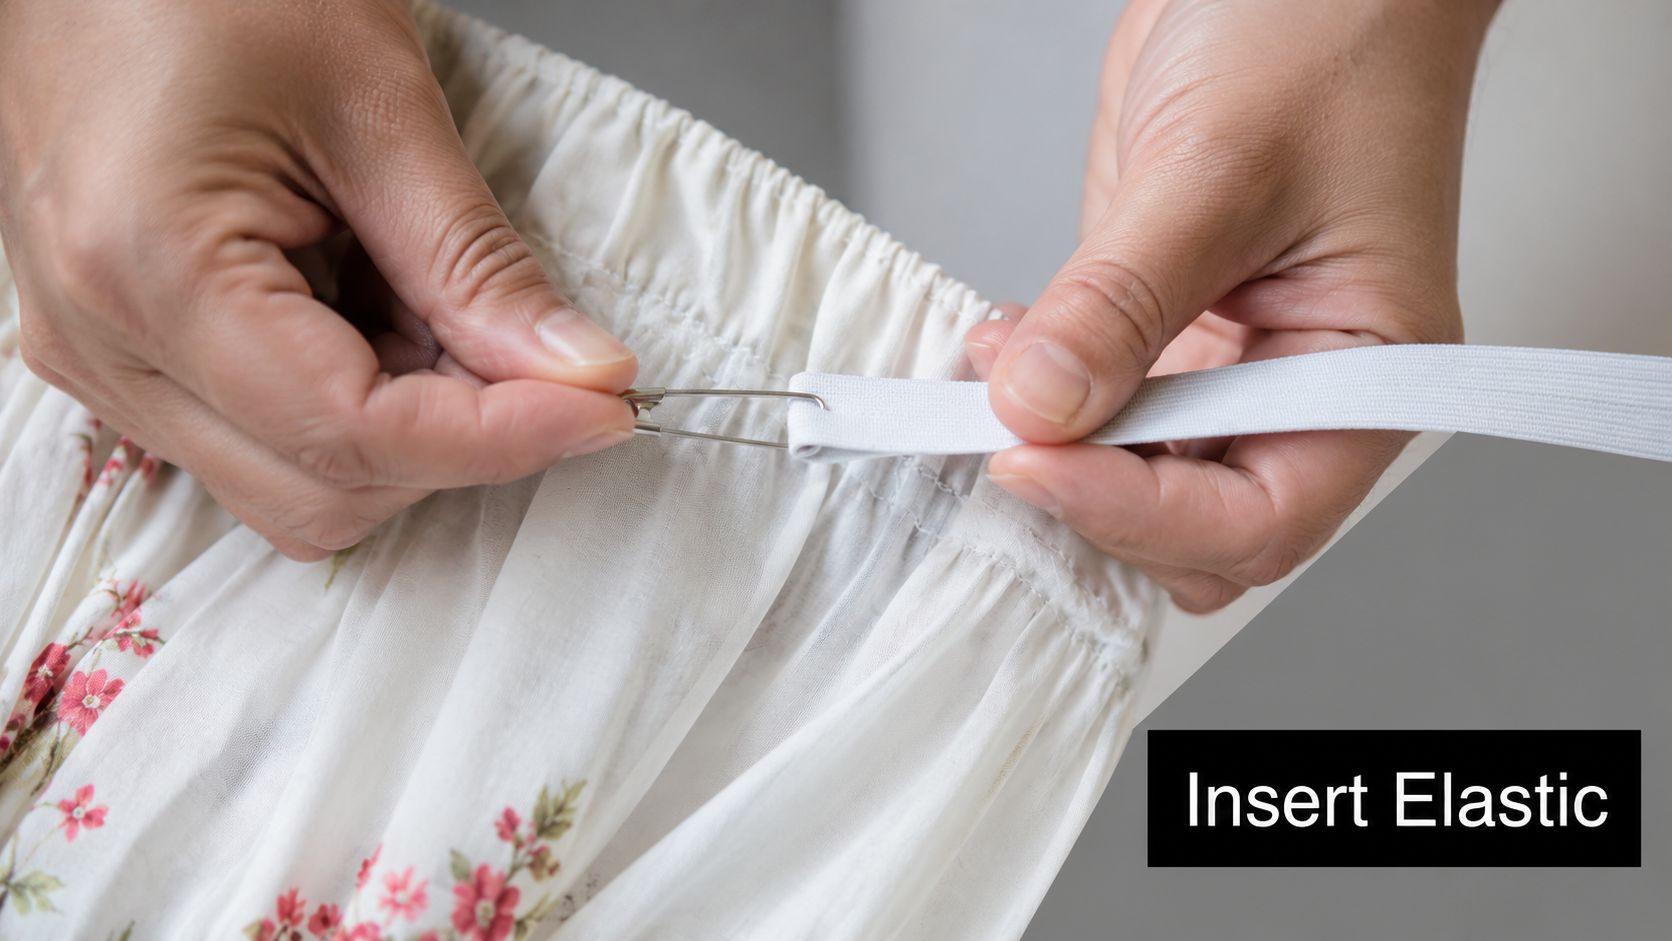
Attach a safety pin or bodkin to one end of the elastic and feed it through the casing opening. Keep hold of the other end so it doesn't disappear into the waistband. Work it through steadily rather than bunching too much fabric at once.
When both ends emerge, check that the elastic lies flat inside the casing. This is the moment to fix twists, not after the join has been sewn.
A dependable construction workflow is to finish the waist edge, form the casing, leave a gap, thread the elastic, overlap the ends, and close the opening while making sure stitches don't catch the elastic. UK sewing guidance also recommends cutting the elastic to the wearer's waist plus about 3 cm for the join, then dividing both the elastic and skirt into four equal sections to help distribute fullness evenly, as described in this guide to elastic waistbands.
Use the quartering method for even gathers
This is one of the most useful habits you can learn. Mark the elastic in four equal sections. Mark the skirt waist in four equal sections as well. Match those points together before you secure the waistband area.
Why does this help? Because gathers tend to migrate. Without reference points, you often end up with a dense cluster at the back and a flatter area at the front. Quartering keeps the distribution under control and gives the finished skirt a much more balanced look.
Even gathers don't happen by luck. They happen because you mark them before you sew.
If you prefer to watch the movement before trying it yourself, this short video shows the process clearly:
Join the elastic and close the casing
Overlap the elastic ends by about 2.5 cm and stitch them securely. A zigzag stitch is a common choice because it holds well and keeps some flexibility. Before you close the casing opening, stretch the waistband slightly to make sure the elastic is sitting smoothly and hasn't folded in on itself.
Then stitch the gap closed. If you sew across the elastic by mistake here, the waistband won't gather properly in that area, so take a second to move the elastic clear before stitching.
Hem for the fabric you chose
The hem should suit the fabric, not just follow habit.
- Light cotton lawn benefits from a neat, pressed double fold that doesn't weigh the skirt down.
- Poplin can take a slightly more defined hem and still hang well.
- Viscose needs careful handling. Let the skirt hang before hemming if the fabric seems likely to drop unevenly.
Press before the final line of topstitching. Then give the whole skirt one final press when finished. That last press is what makes a quick project look considered rather than rushed.
Custom Variations and Common Problem Fixes
Once you've sewn one basic version, it's easy to adapt. In-seam pockets are the most practical addition. Sew the pocket pieces into the side seam area before closing the skirt body, and the skirt instantly becomes more useful without changing the overall method much.
You can also change the look through fabric and finish. A deeper hem gives more weight. A softer viscose makes the gathers fall in folds rather than puffing outward. A decorative exposed elastic creates a more casual, modern waistband, though it does ask for neater handling because the stitching is visible.
Common fixes that actually help
- Elastic twisting in the casing often means the channel is too roomy or the elastic wasn't anchored well. Stitching through the side seam area can help hold it in place.
- Uneven gathers usually need redistributing by hand before the waistband is fully secured.
- Bulky waistline is often a fabric issue rather than a sewing issue. Lighter fabric reduces bulk immediately.
- Wavy hem can come from stretching the fabric while sewing. Press first, pin evenly, and guide rather than pull.
The useful thing about this project is that small changes teach you a lot. Add pockets and you learn seam planning. Change to viscose and you learn drape control. Try a crisper cotton and you'll see how fabric affects silhouette. That's why this skirt stays valuable well beyond beginner level.
If you're ready to make your own version, More Sewing is a reliable place to find quality dressmaking fabrics, elastic, thread, and the practical haberdashery that makes a simple skirt come together neatly. It's especially handy if you want to compare drapey viscose with crisp cottons before you cut, or pick up the tools and notions in one order.
