Dressmaking, Guides
How to Sew a Simple Top: A UK Beginner’s Guide
You're probably here because you've looked at ready-made tops, liked the idea of sewing your own, and then immediately wondered where to start without making a mess of good fabric. That's a sensible instinct. A first garment can feel like a big jump from cushion covers, tote bags, or hemming trousers.
A simple top is the project I return to again and again for beginners because it teaches the habits that matter. You learn how fabric behaves, how seams come together in order, and how pressing changes everything. Better still, you can make choices that are forgiving, which is what turns a first attempt from stressful into wearable.
Not every beginner project should be a challenge. Some should be a win.
Your First Step into a Handmade Wardrobe
The appeal of making your own clothes is easy to understand. You want something that fits your body, suits your taste, and doesn't feel identical to everything on the rail. Sewing gives you that control, but the trick is choosing a first garment that teaches useful skills without demanding advanced fitting.
That's why learning how to sew a simple top makes so much sense. The UK clothing market is huge, with the apparel market estimated at US$82.9 billion in 2024 according to The Craft Sessions reference in this overview, yet a simple top still stands out as one of the most accessible ways into dressmaking because it often comes down to a few repeatable stages: two main pieces, shoulder seams, neckline finishing, side seams, and a hem.
Why a simple top works so well
A beginner top gives you enough technique to feel proud, but not so much that you spend the whole project firefighting. You're usually working with a front and back, sometimes with cut-on sleeves or a loose shape, and that keeps fitting pressure low.
The most confidence-building version has these qualities:
- A relaxed fit so tiny inaccuracies don't affect wearability.
- Minimal shaping which means less chance of puckers around curves.
- Simple finishing such as a clean bias-bound neckline or turned hem.
- Stable fabric that stays where you put it while cutting and sewing.
Practical rule: Your first top should forgive small mistakes. It doesn't need to prove your skill. It needs to help you build it.
Start with the right kit, not the biggest kit
Beginners often buy too much, then feel overwhelmed by all the unfamiliar tools on the table. You only need the basics sorted properly: fabric shears, pins or clips, matching thread, a seam ripper, a tape measure, chalk or a washable marker, an iron, and a machine in working order. If you want a plain-language refresher on what each item does, Fabric Company notions explained is a useful starting point.
One thing experience teaches quickly is that confidence doesn't come from sewing fast. It comes from recognising what each step is meant to do. Shoulder seams stabilise the top. Neck finishing controls the most visible edge. Side seams set the shape. The hem makes it look finished.
If you understand that order, the whole process feels less mysterious and much more manageable.
Choosing Your Pattern and Fabric Wisely
The biggest beginner mistake isn't bad sewing. It's a bad combination of pattern and fabric. A straightforward pattern can become awkward in slippery cloth, and a lovely fabric can turn frustrating if the pattern asks too much of it.
Choose the pairing first. Everything else gets easier.
Patterns that hide small imperfections
A boxy top, simple shell top, or loose pull-on blouse is far kinder than anything with fitted darts, facings everywhere, or a set-in sleeve that needs careful easing. If a pattern says “relaxed”, “easy fit”, “beginner”, or shows only a few pieces, that's usually a good sign.
These pattern features are especially forgiving:
| Pattern choice | Why it helps |
|---|---|
| Boxy or straight silhouette | Doesn't cling, so slight seam wobble is less obvious |
| Cut-on sleeve or sleeveless shape | Avoids the trickier sleeve insertion stage |
| Simple neckline finish | Easier to sew neatly than a complex collar |
| Pull-on design | No zip, button placket, or precise closure to manage |
A top with lots of design details can wait. For now, plain is your friend.
Fabrics that cooperate
For a first top, I'd advise choosing stable woven fabrics. They don't curl at the edges, they press crisply, and they don't shift under the presser foot the way slinkier cloth can.
The kindest options are usually:
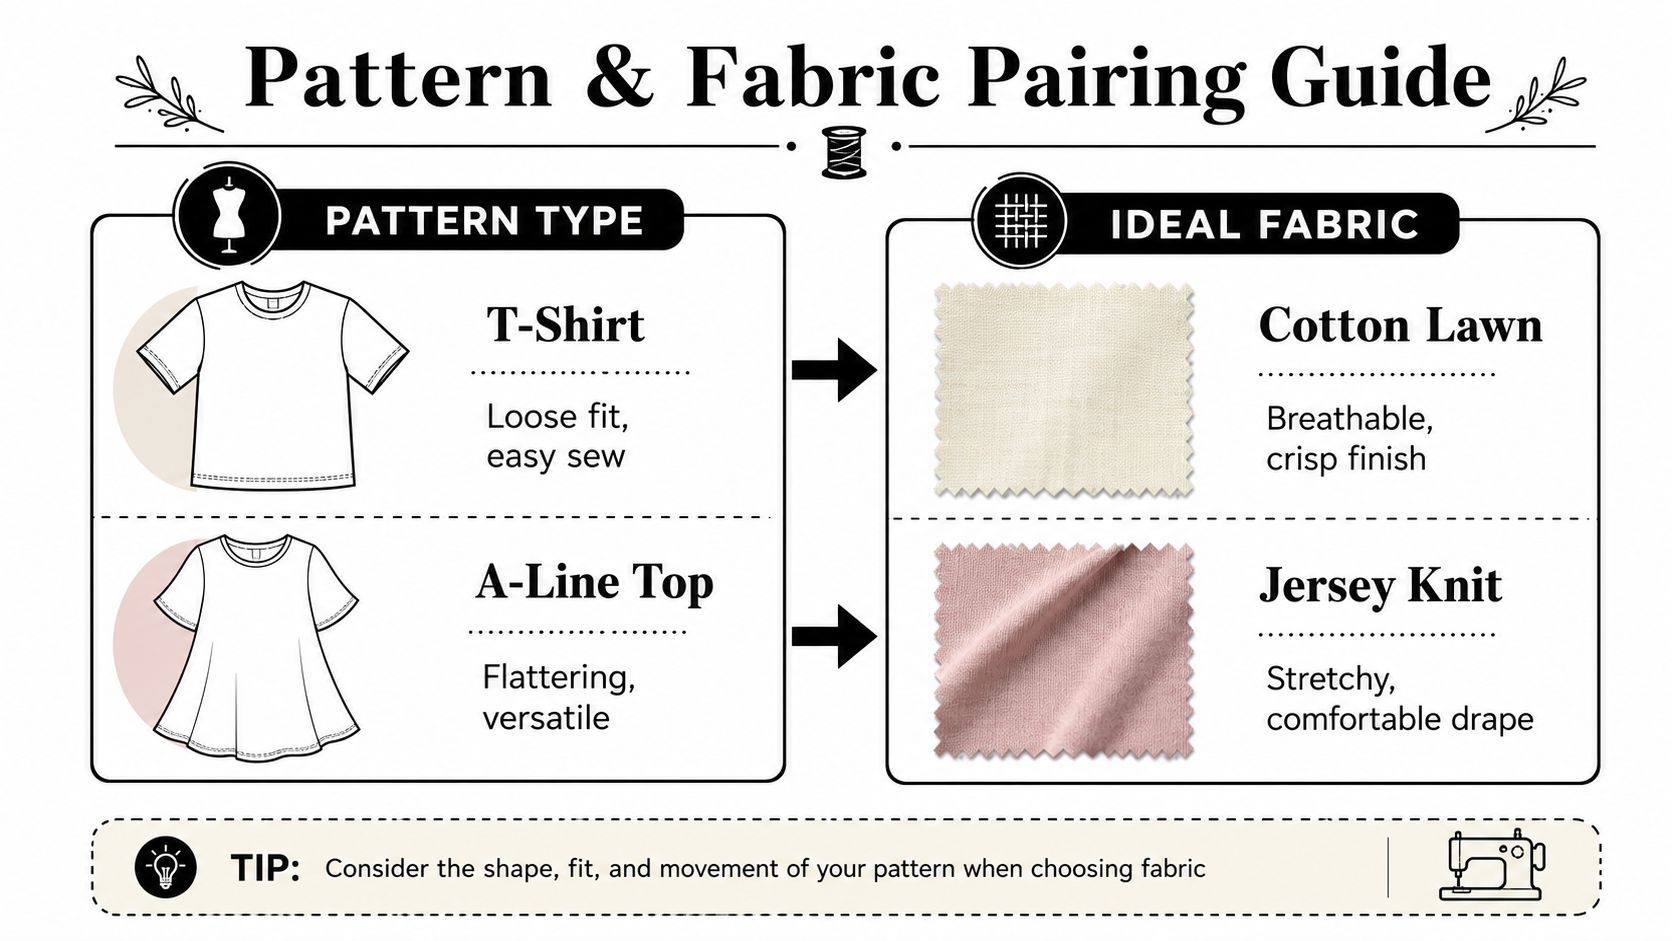
- Cotton lawn for a neat, light finish that presses beautifully.
- Cotton poplin if you want a bit more structure.
- Chambray for an everyday top with body but not too much stiffness.
- Double gauze if you don't mind a softer, slightly lived-in finish.
- Viscose blends only if they feel stable rather than slippery.
What I'd leave for later are jersey knits, very drapey viscose, satin, silk, and anything that slides off the cutting table if you look at it wrong. Jersey can be lovely to wear, but it asks more from your machine handling and finishing. A first project should stay put.
A forgiving fabric doesn't fight your hands. That matters more than choosing the most fashionable cloth on the shelf.
The best first-project combinations
If someone asks me for low-stress combinations, these are the ones I suggest most often:
- Boxy sleeveless top plus cotton lawn. Crisp, easy to cut, easy to press.
- Loose shell top plus chambray. A little structure helps the shape hold.
- Simple A-line top plus soft poplin. Good drape without being unruly.
If you like prints, choose a small all-over pattern. Tiny floral, scattered spots, or subtle checks do a wonderful job of disguising slightly uneven topstitching. Plain solid fabrics show every wobble, especially in dark colours with contrasting thread.
That doesn't mean avoid solids forever. It just means your first make should give you the best chance of saying, “I'd wear that.”
Preparing Your Fabric and Pattern for Success
Preparation is where experienced sewists wisely save themselves from misery later. If the fabric isn't prepped, the pattern isn't checked, or the grainline is ignored, you can sew perfectly and still end up with a top that twists, shrinks, or hangs oddly.
Slow preparation beats rushed enthusiasm every time.
Prep the fabric before you cut
Wash the fabric the way you expect to wash the finished top. Then dry it in the same way too. If the fabric is going to shrink, crumple, or soften, better now than after you've spent an afternoon sewing it.
Press it well before laying out the pattern. Not a quick pass. A proper press so the grain sits flat and the folds disappear.
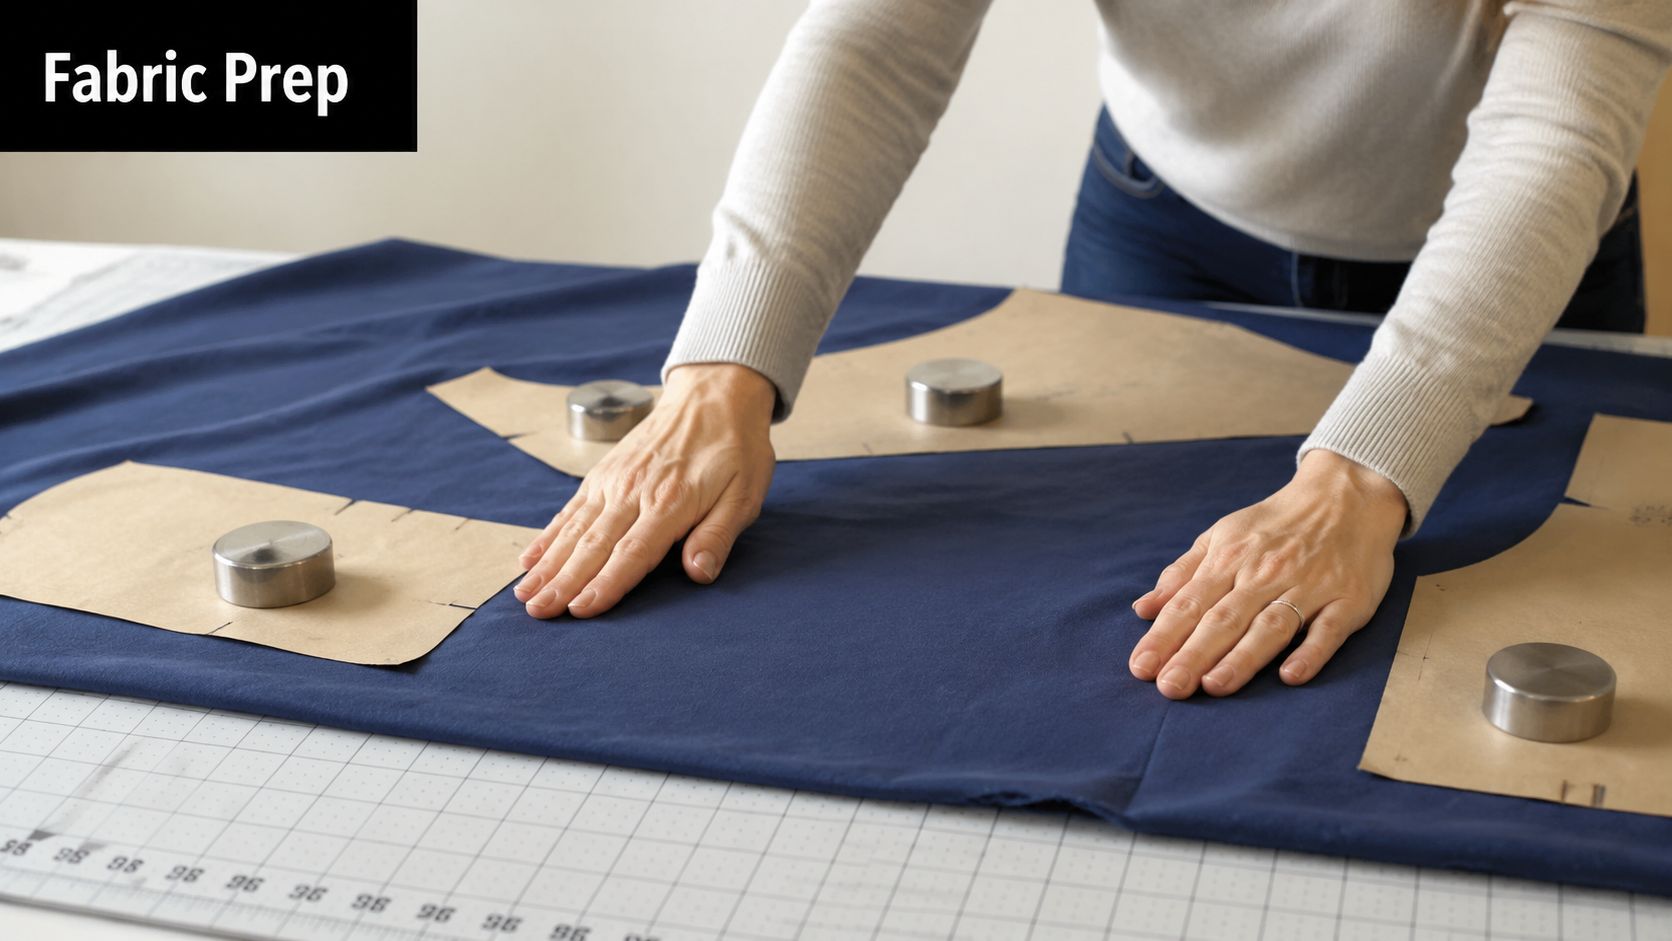
A few habits make cutting much calmer:
- Use a big, flat surface so the fabric isn't hanging off the edge.
- Match the selvedges before folding, if the pattern calls for cutting on the fold.
- Smooth, don't stretch. Your hands should flatten the cloth, not pull it.
- Use weights if the fabric shifts. Pins can distort very light cloth.
Read the pattern markings properly
A lot of beginner frustration comes from skipping the boring-looking symbols. Grainline arrows, notches, fold lines, and seam allowance notes aren't decoration. They tell you how the garment is meant to behave.
Some beginner patterns use 3/8-inch seam allowance for bindings and 1/4-inch for neckline attachments, and pinning curves at four equal sections helps keep them even, as shown in this beginner pattern reference. That's exactly why it's worth tracing and marking everything before cutting. You don't want to discover halfway through that the neckline finish uses a different allowance from the side seam.
Check grainline and cutting accuracy
If the grainline is off, the top may twist after washing or sit oddly on the body. This matters even on the simplest shape. Align the grainline marking with the straight grain of the fabric before cutting, and check it twice if the cloth has shifted.
A rotary cutter can give a very clean edge on stable cottons, but good dressmaking shears work just as well if you lift the fabric as little as possible. The goal is accuracy, not speed.
Cut once the fabric is still and the pattern is flat. Most cutting mistakes happen when one of those isn't true.
A calm pre-sewing checklist
Before the machine goes on, make sure you've done these:
- Pre-washed and pressed the fabric
- Chosen the size from your measurements, not shop sizing
- Transferred key markings
- Checked every grainline
- Cut both main pieces cleanly
- Set aside any binding or facing pieces clearly labelled
That kind of order may not feel exciting, but it gives you a smoother sew and a noticeably better result.
Assembling Your Top with Confidence
The first time a top starts looking like an actual top, confidence rises fast. You join two shoulders, press them flat, and suddenly the project stops feeling like loose fabric pieces. That early win matters, so it helps to follow an order that keeps the shape stable and gives you the easiest edges first.
For a simple woven top, a reliable sequence is shoulders first, then neckline control, then neckline and armhole finishing, and side seams after that. Sewguide's beginner tutorial follows that same general order. I recommend it for beginners because it gives you the most control over the parts that tend to stretch or shift.
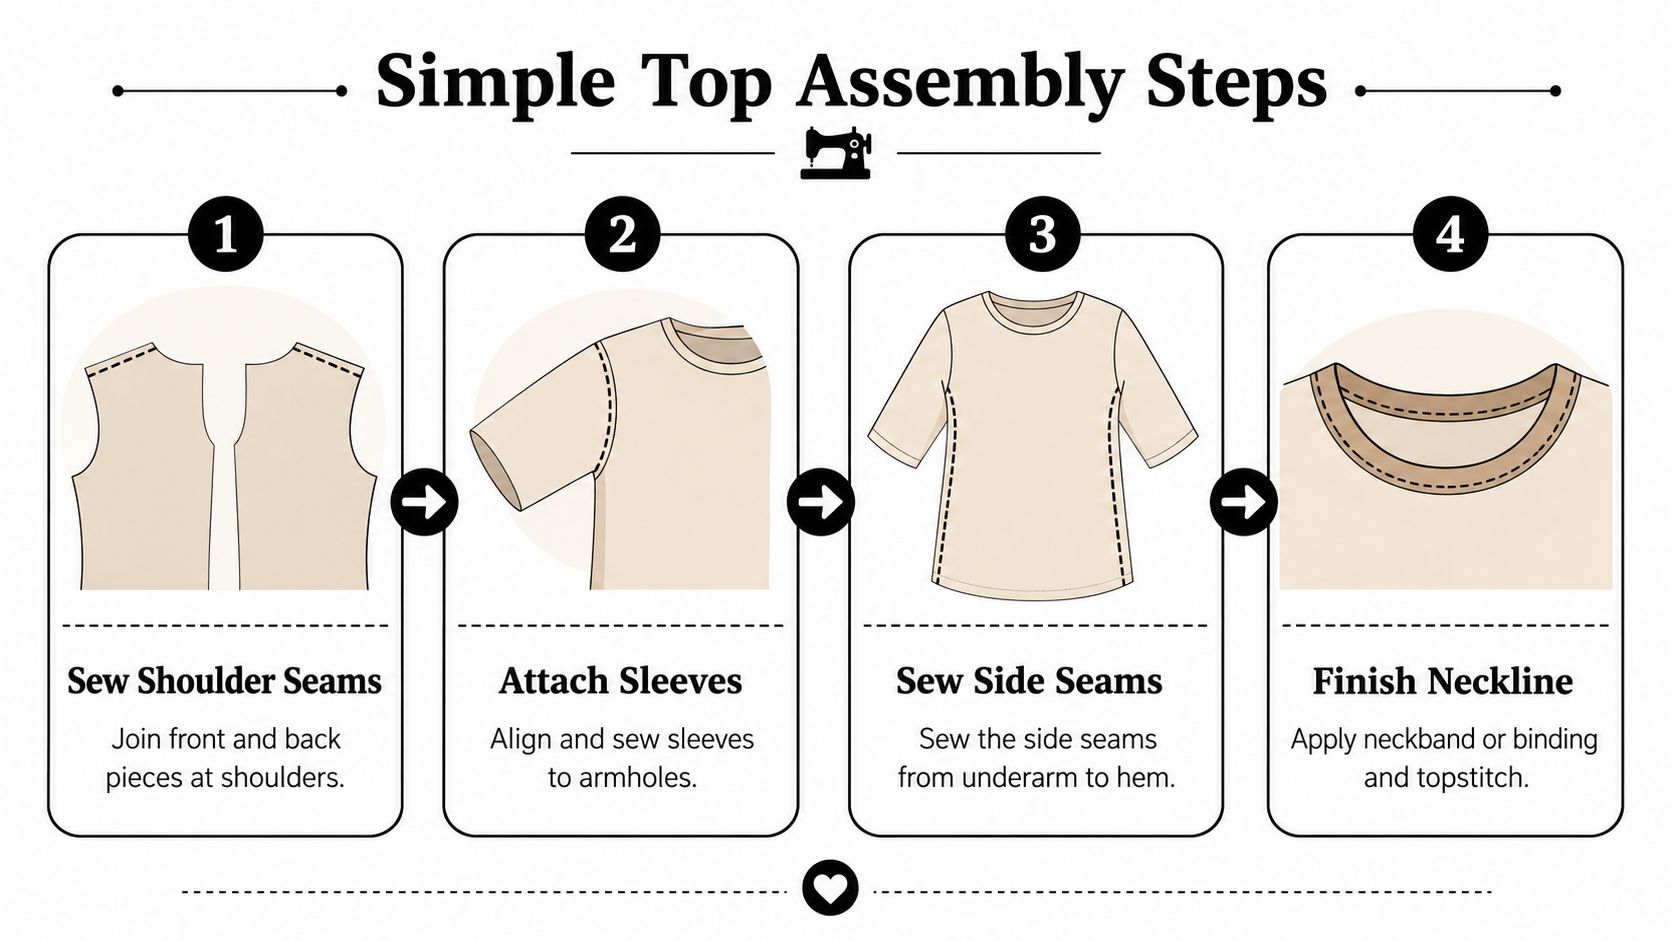
Start with the shoulder seams
Place the front and back right sides together and sew the shoulder seams first. Keep the fabric edge aligned rather than watching the needle. That one habit does more for a straight seam than sewing slowly with tense hands.
Press those seams as soon as they are sewn. A pressed seam lies flatter, feeds better at the next step, and makes the top look cleaner straight away.
If you are sewing your first top in a forgiving cotton poplin, double gauze, or lightweight linen blend, the shoulders are usually straightforward. Slippery viscose and very drapey rayon can wait for a later project. They feel lovely to wear, but they slide while you sew and show every small wobble.
A shoulder seam looks small, but it sets up the whole top.
Stabilise the neckline early
Necklines stretch easily from handling alone, especially if you pick the piece up several times while checking placement. A line of stay-stitching just inside the seam allowance keeps that curve from growing before you finish it.
Sew each side of the neckline in the direction your pattern suggests, or work from shoulder toward centre on each half if the pattern is silent. That usually helps the curve stay balanced. If the fabric starts to ripple a little, stop and press it flat before assuming anything has gone wrong.
Here's a visual walkthrough if you like seeing the process in motion before sewing your own:
Finish the neckline neatly
For a first top, bias binding is often the kinder choice. It bends around curves well, adds less bulk than many facings, and hides minor stitching wobbles once it is turned to the inside. A shaped facing can look very polished, but it asks for more accurate cutting, clipping, and edge control.
A good method looks like this:
- Join the binding first if the pattern uses a continuous loop.
- Mark quarters on both pieces so the binding goes on evenly.
- Pin more closely on tighter curves and fewer pins on straighter areas.
- Stitch without pulling the neckline or the binding.
- Trim and clip only where needed, then press before turning.
- Fold the binding fully to the inside and topstitch or understitch, depending on the finish you want.
If the seam goes a bit wavy, do not rush to unpick the whole neckline. Press it first. A surprising number of uneven-looking seams settle down with steam and a good press. If one short area still refuses to sit flat, unpick only that section and resew it with the fabric supported on the machine bed, not hanging off the edge.
A tidy neckline usually comes from steady handling and pressing, not perfect stitching on the first pass.
Sew the side seams last
Once the neckline and armholes are finished, fold the top right sides together and match the underarm points first. Pin there, then pin the hem, then fill in the middle. That order helps prevent one side from creeping longer than the other.
This step is forgiving, which is one reason simple tops make such good first garments. If the seam line wobbles slightly, it rarely shows when worn. If the raw edges are uneven at the hem after sewing, trim them level before hemming. That is routine sewing, not a mistake.
Try the top on before finishing the seam allowances if you are unsure about fit. You can sew a slightly wider side seam for more shape, or let it out a little if the top feels snug. That flexibility is another confidence builder, especially on boxy beginner patterns that do not rely on precise fitting to look good.
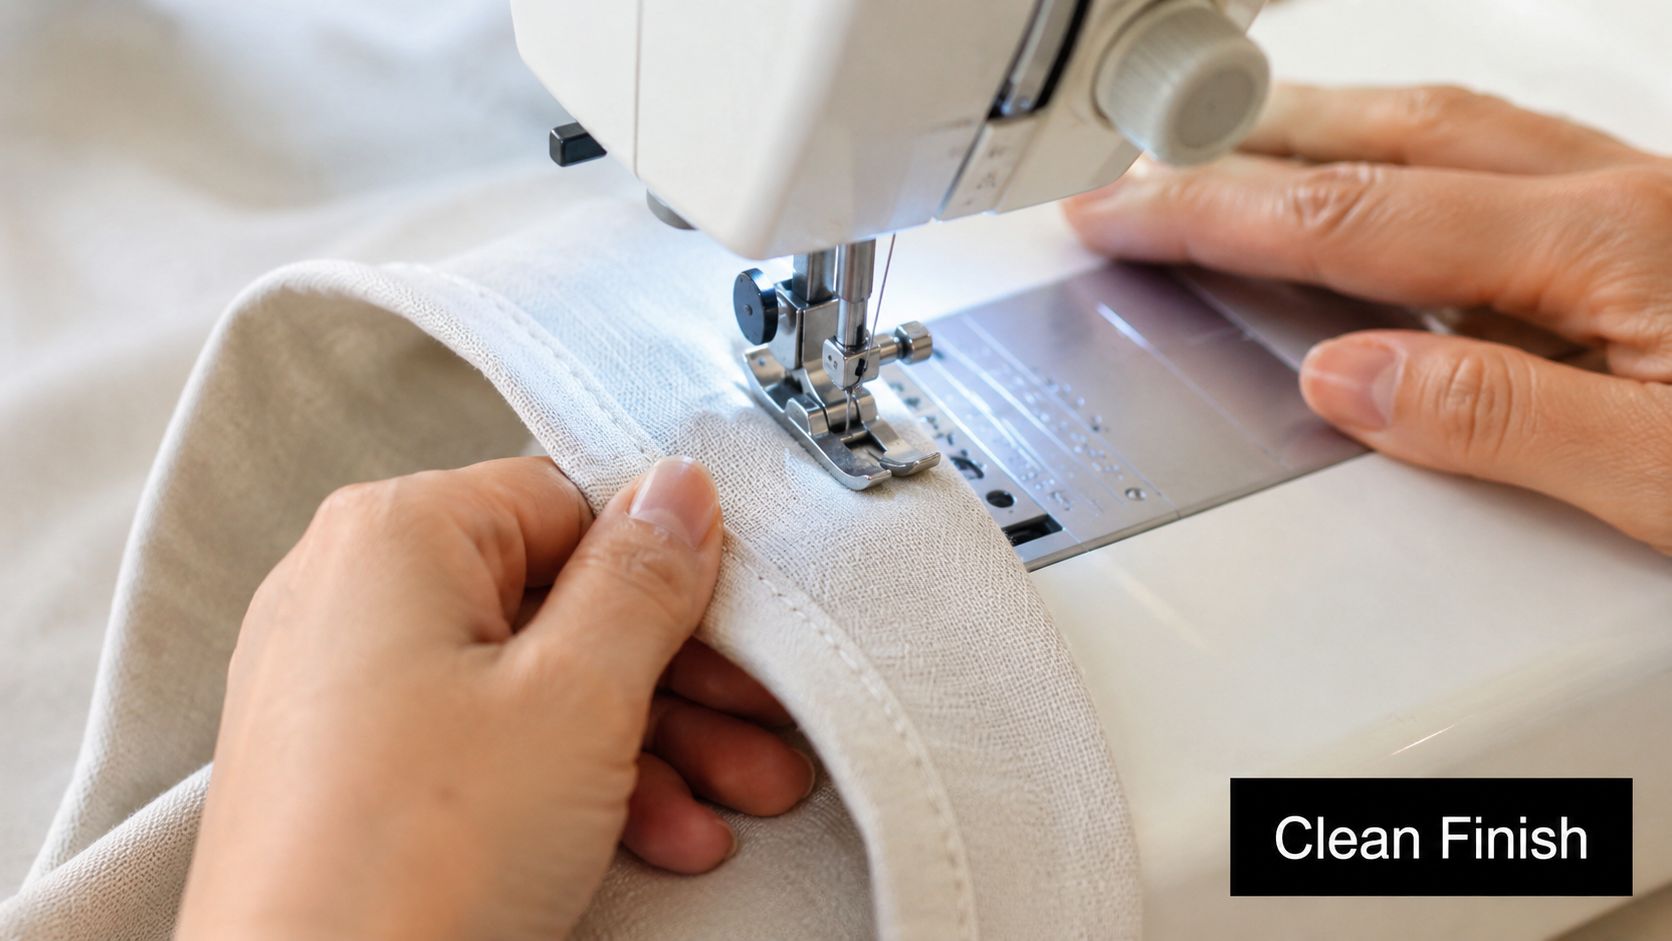
Creating Clean Hems and Armholes
Finishing is where a top goes from “I made something” to “I'd happily wear that out”. A beautiful hem doesn't need fancy equipment. It needs accurate folding, pressing, and patience.
If your machine sewing is still developing, choose a hem style that gives you control rather than speed.
A hem that behaves
For many beginner tops, a narrow double-fold hem works well. Press the first turn to the wrong side, then press a second turn to hide the raw edge. Pin or clip it, then stitch close to the inner folded edge.
A seam gauge earns its place. If the fold depth changes as you go, the finished hem will look slightly homemade even if the stitching line is straight. Marking the hem allowance with chalk first helps a lot on curved hems.
How to keep the stitching line tidy
A few practical tricks make hemming easier:
- Press before stitching. Don't try to fold as you sew.
- Start at a side seam so the overlap feels less visible.
- Keep your eye on the guide, not the needle. Follow the same distance from the fold.
- Stop with the needle down when you need to adjust the fabric.
If you notice the hem drifting wider in one spot, don't panic. Often you can remove just a short section and resew that part instead of unpicking the whole circumference.
Finishing sleeveless armholes
Armholes need the same calm handling as necklines. If your top is sleeveless, using the same bias binding method at the armhole creates a tidy, consistent finish. The key is not to stretch the curve while attaching and pressing.
For very cooperative woven fabrics, some sewists prefer turning and stitching a narrow clean finish instead. That can work well on simple shapes, but bias binding is usually more beginner-friendly because it supports the curve.
A useful mindset here is to aim for clean and even, not factory-perfect. If both armholes match and sit smoothly when worn, that's a success.
Troubleshooting Common Sewing Hiccups
Every beginner thinks their first problem means they've done something wrong in a dramatic, irreversible way. Usually, it's a small issue with a simple fix.
If the neckline looks stretched
You might see a neckline that feels a bit rippley or stands away from the chest. That usually happens when the curve has been handled too much or pulled while sewing. A careful press with steam can help it settle, and next time stay-stitching early makes a huge difference.
If the hem goes wavy
This often comes from stretching the fabric as it passes through the machine, or from trying to sew without pressing the fold first. One effective approach is to overlock or zigzag all raw edges first, then turn under about 12 mm for a single-fold hem, as shown in this sewing tutorial example. That's especially helpful on a standard home machine if you don't have a serger.
If the side seams don't quite match
That's common. Match the underarm first, then pin the hem, then sew. If one side ends up a little longer, trim it level before finishing. If the mismatch is higher up, unpick only the section that needs correcting.
Every sewist uses a seam ripper. The difference is that experienced ones don't take it personally.
A wobbly seam also doesn't always need unpicking. If it's inside the garment and structurally sound, press it well and move on. Save your energy for the visible edges.
If you're ready to turn this into a real project, More Sewing is a practical place to look for dressmaking fabric, haberdashery, and beginner-friendly kits that remove some of the guesswork from your first top.